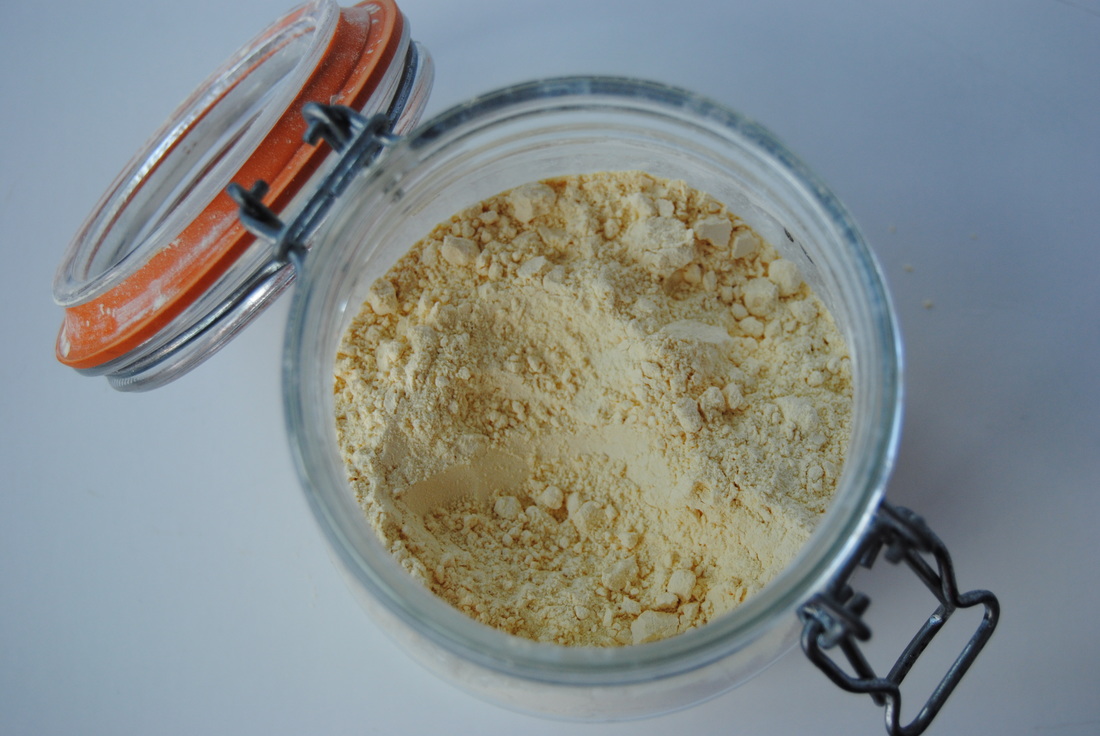
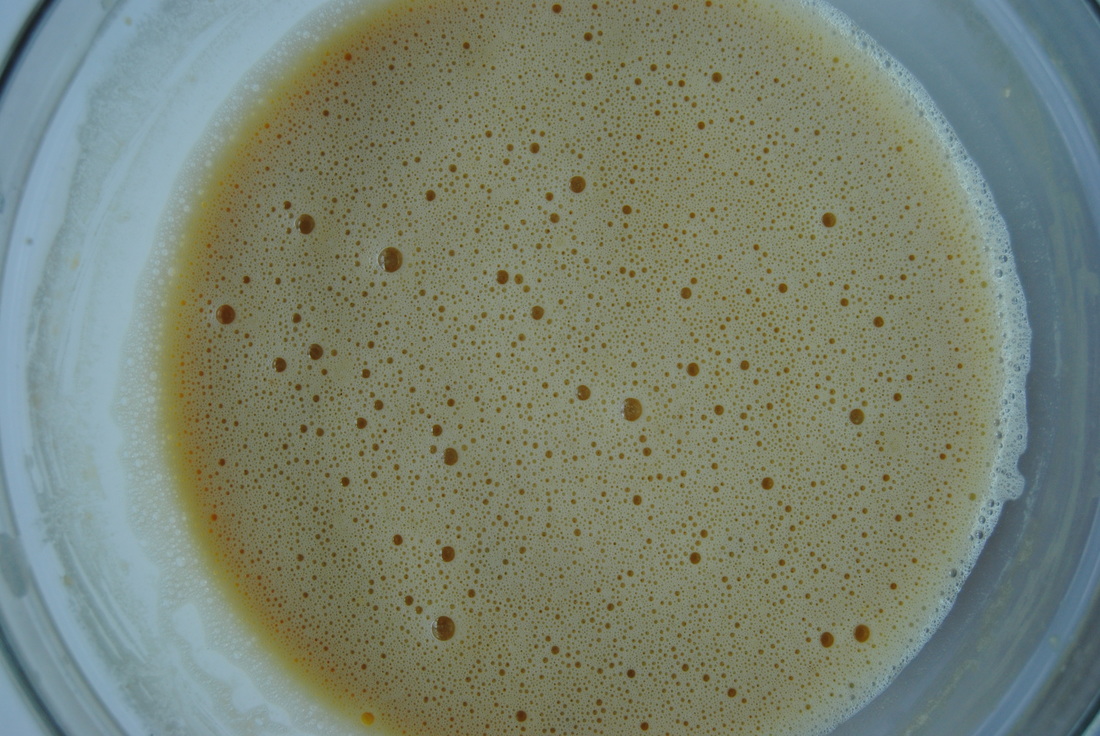
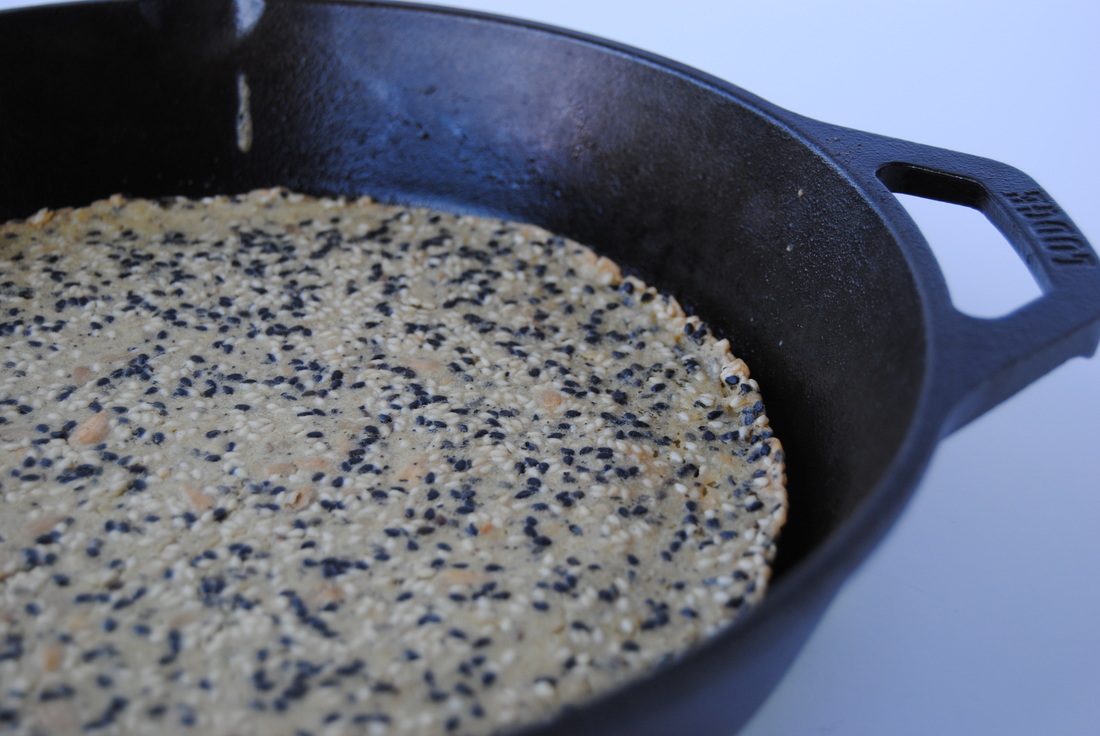
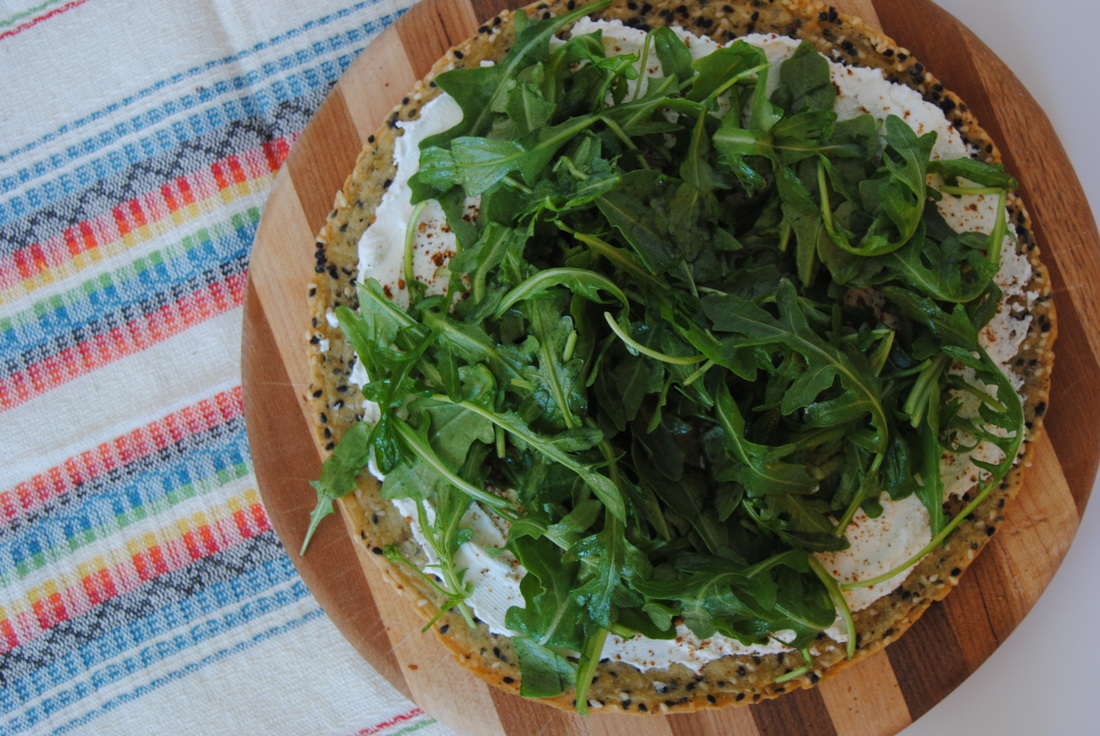
 As the days get warmer and longer our food cravings naturally tend to get cooler and lighter. But there are some favorite comfort foods that we are still going to want day in and day out, take pizza for example. This pizza recipe made with the amazing socca bread (you'll learn all about socca next!) is so light, fresh and perfect for your culinary transition into the warmer months. And even though relatively easy to make, there is just something about socca that seems so unique and impressive. Ready to learn more? 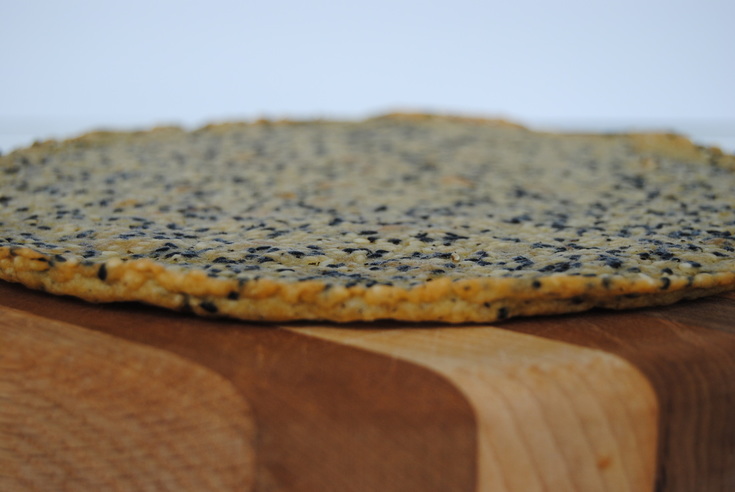 Socca is a thin pancake or crepe made from chickpea flour, water, olive oil, and salt. Socca bread is a typical street food in the Mediterranean and may go by a different name based on where it is made; socca in France, farinata in Italy, and faina in Argentina. This pancake can be as simple as flour, water, oil, and salt or completely dressed up with herbs, spices, nuts, and seeds. We prefer to toss in pretty much every seed we have in our pantry! Socca is really easy to make and the batter comes together in a matter of minutes. Keep in mind we do prefer to make the batter and let it rest for at least 2 hours covered at room temperature prior to cooking. This will not only improve the taste and texture of the finished product but will also make it easier for your body to digest because of the "pre-soak" for the chickpea flour (more on that topic here). Chickpea flour goes by many names including garbanzo flour, gram flour, or besan and is the main ingredient in socca bread. This flour is gluten free and high in protein and fiber. One cup of chickpea flour contains 21 grams of plant protein and 10 grams of fiber making this is a must have in your baking cabinet! And once you taste how good socca is, you'll being needing to stock-up often. So let's get to it! Super Seeded Socca Pizza PREP TIME: 10 mins + 2 hours soaking time TOTAL TIME: 2 hours 30 mins (with soaking) Servings: 2, 8" pizzas Ingredients Socca Dough 1 cup + 2 Tbsp chickpea flour 1 1/4 cup warm water 2 Tbsp olive oil 2 Tbsp chopped sunflower seeds 1 Tbsp shelled hemp seeds 1 Tbsp white sesame seeds 1 Tbsp black sesame seeds 1/2 tsp sea salt 1/4 tsp black pepper 2 Tbsp ghee added to the bottom of a cast iron skillet (we recommend a 8-9" skillet) Toppings 1/2 pound feta cheese (we used Bulgarian sheep's milk feta) 4 cups arugula 2 Tbsp olive oil 2 Tbsp fresh lemon juice Sprinkle of sea salt to taste 1 Tbsp + 1 tsp red zaatar (Mediterranean herb blend) In a large mixing bowl, whisk together the chickpea flour and water. Add the olive oil, salt, and pepper and continue to whisk until a smooth, thin batter is formed. Cover batter and allow to sit at room temperature for at least 2 hours. Once the batter has rested, add in the sunflower seeds, hemp seeds, and sesame seeds then stir to combine. Generously oil the bottom and sides of a cast iron skillet and place in the oven. Preheat the oven to 450 degrees with the skillet inside. Carefully remove hot skillet from oven and pour in half of the batter making sure to evenly coat the bottom of the pan. Place skillet back in the oven and cook for 10-12 minutes or until the socca pulls away from the sides of the pan. For the last 2 minutes, turn the broiler on and lightly toast the top of the socca bread. Remove from the oven and allow to cool for ~10 minutes. Using a thin metal spatula or butter knife, carefully loosen the socca from the pan. You could also invert the pan onto a large cutting board and allow the socca to release from the pan. Oil the cast iron skillet with 1 Tbsp ghee and cook the second socca bread.* Next, using a standing or a handheld mixer, whip feta cheese on high until light and fluffy. Evenly spread half the feta on each socca bread then sprinkle each with 2 tsp zaatar. Toss arugula in olive oil, lemon juice, and a pinch of sea salt and place evenly on top of both socca breads. Slice into wedges, serve, and enjoy! *If you do not plan to eat the second socca dough right away, it does freeze nicely in an airtight container. When reheating socca, preheat oven to 450 degrees and place frozen bread directly on the rack for 4-5 minutes. 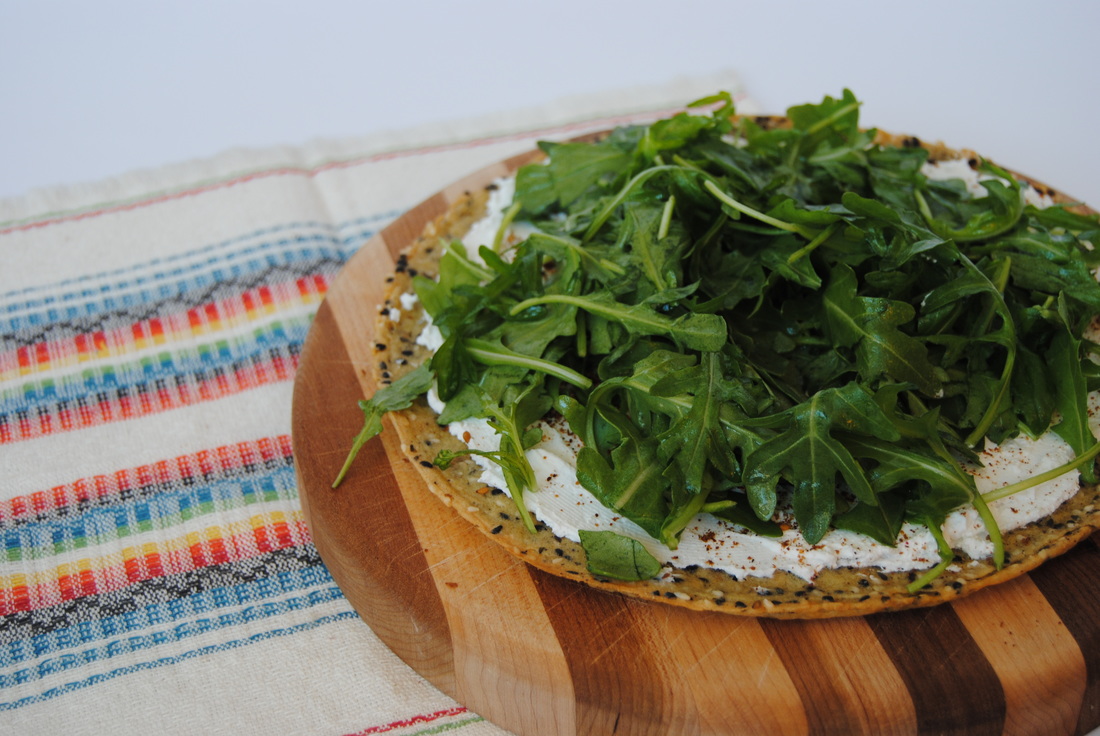 Like we said, there is just something about socca bread. It's both soft and crispy at the same time and has a rich, savory taste that really just can't be described. These pizza toppings compliment socca perfectly but it's uses are many. Think socca as a wrap or crepe base, sliced for dipping, cut and toasted into crackers, or even a sweet dessert "pizza" with soft cheese, jam, and fresh fruits. Remember the added seeds are optional in the socca base depending on what you're making. We can't wait to hear how you use socca in your kitchen. Happy eating, Jess and Cecelia 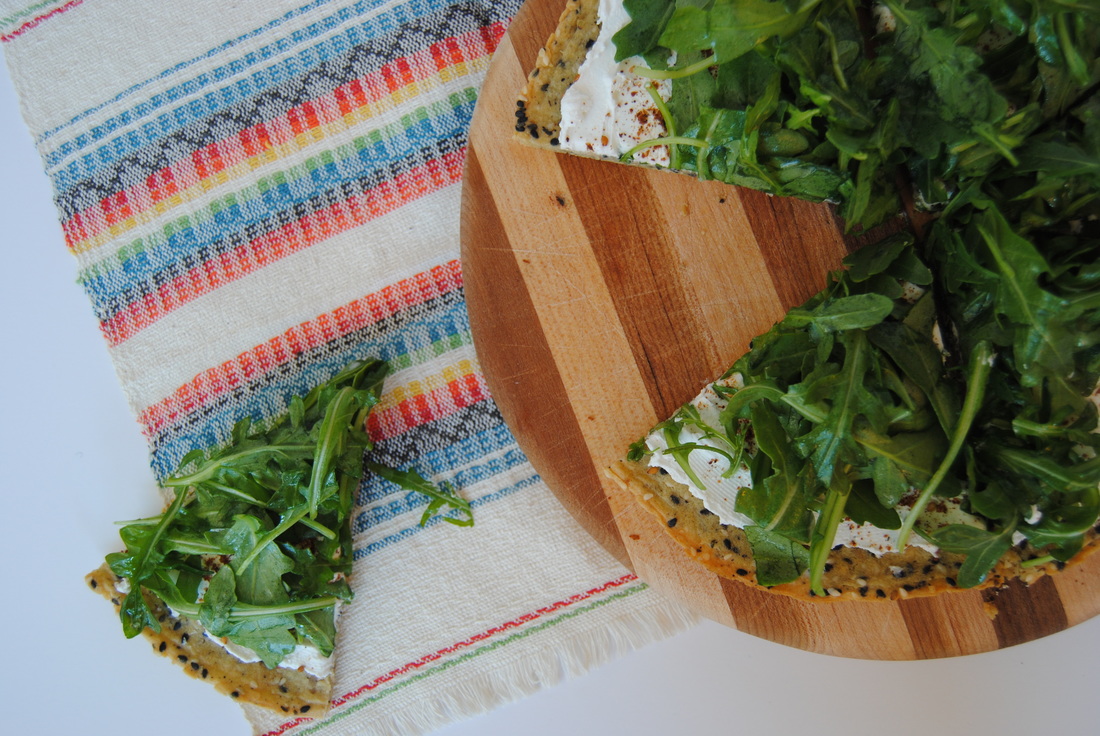
0 Comments
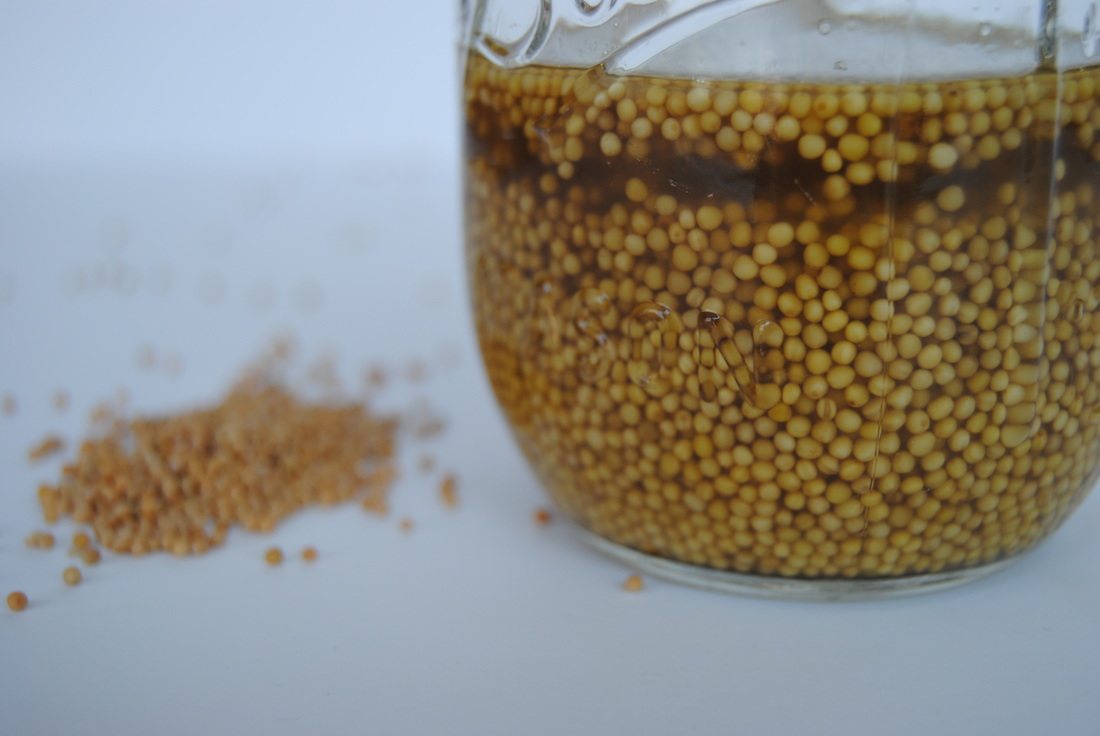
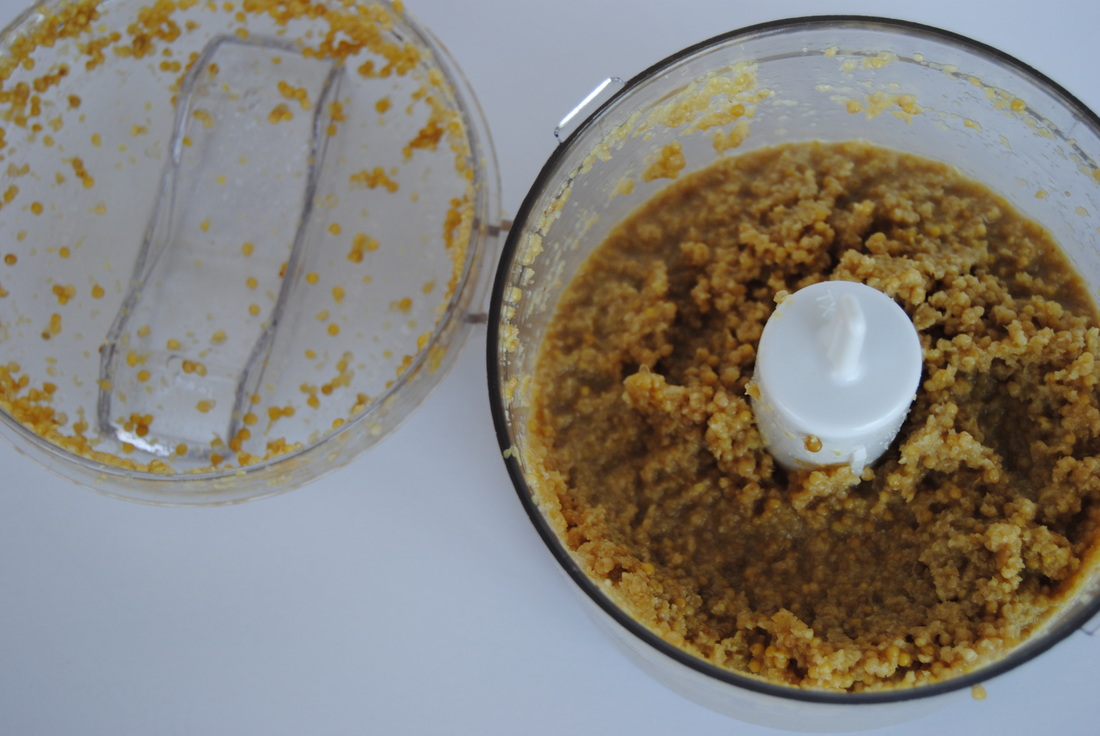
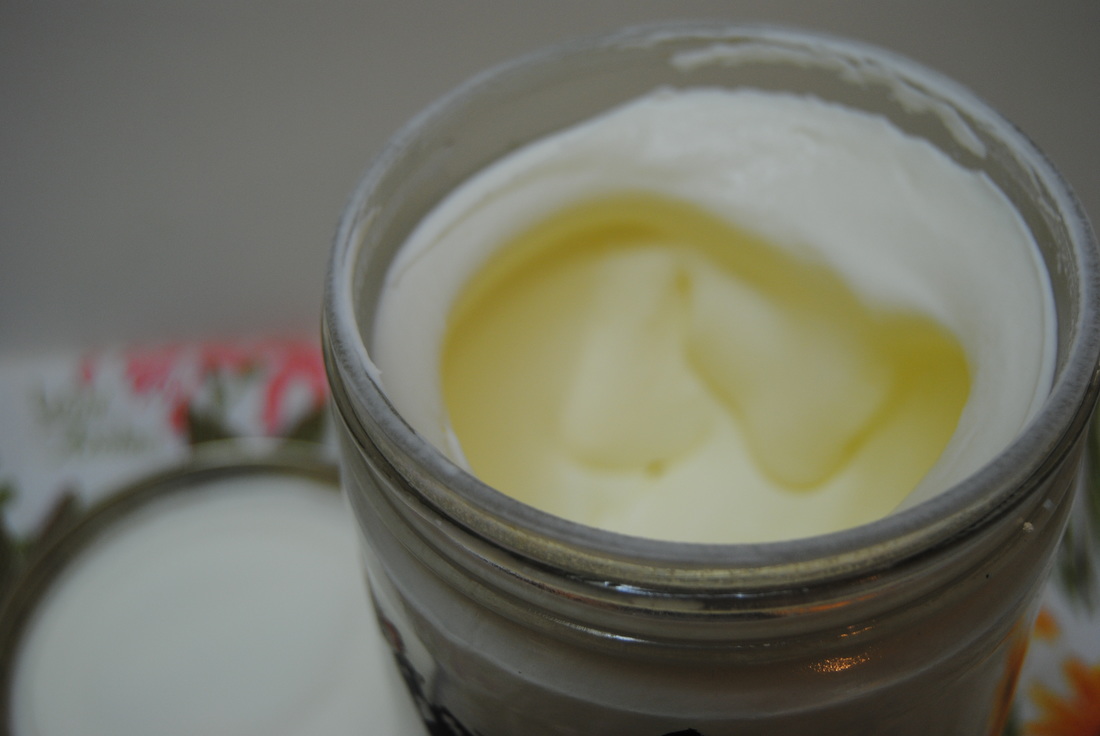
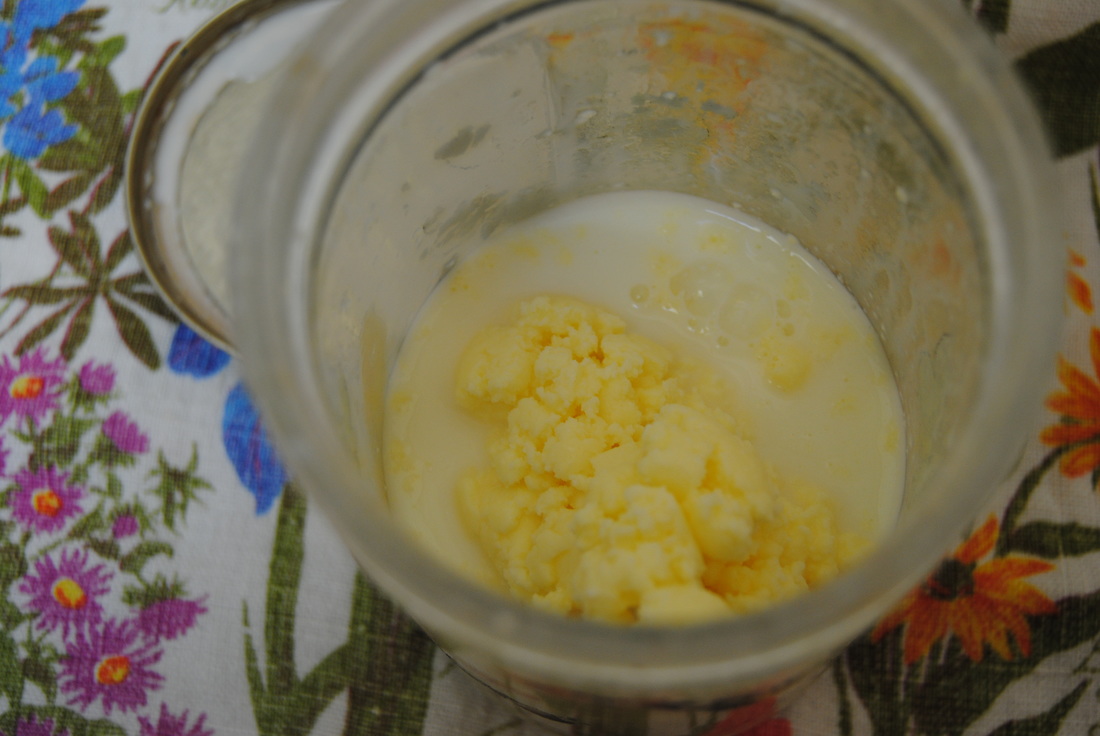
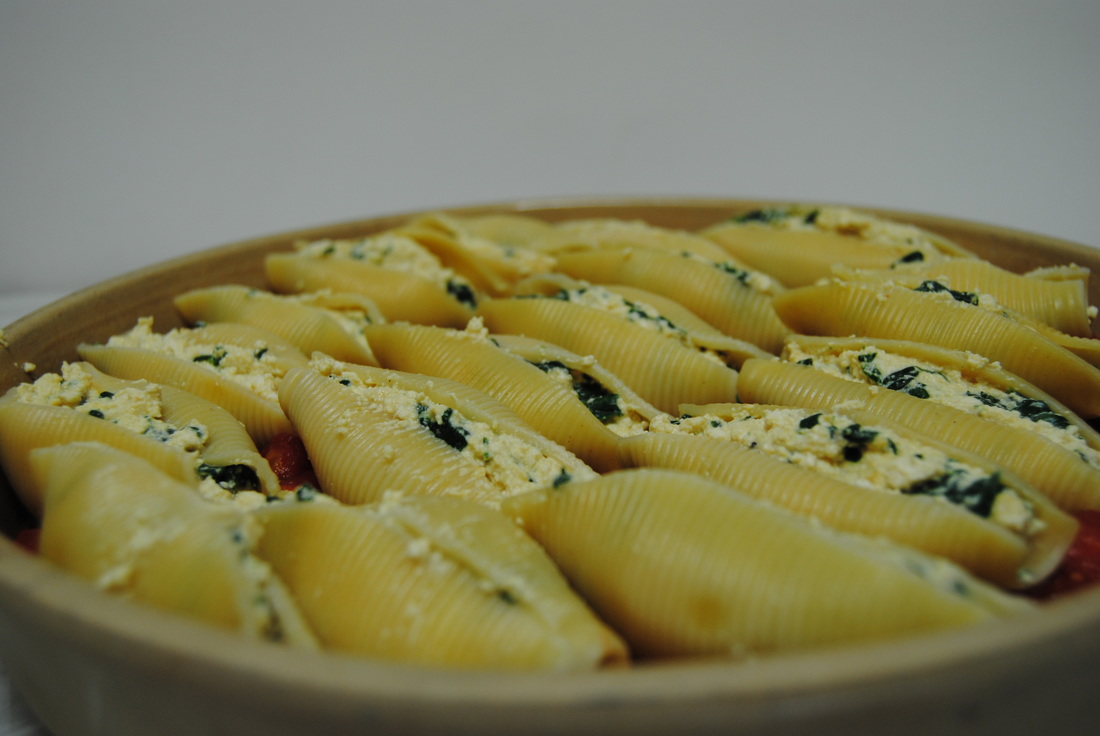
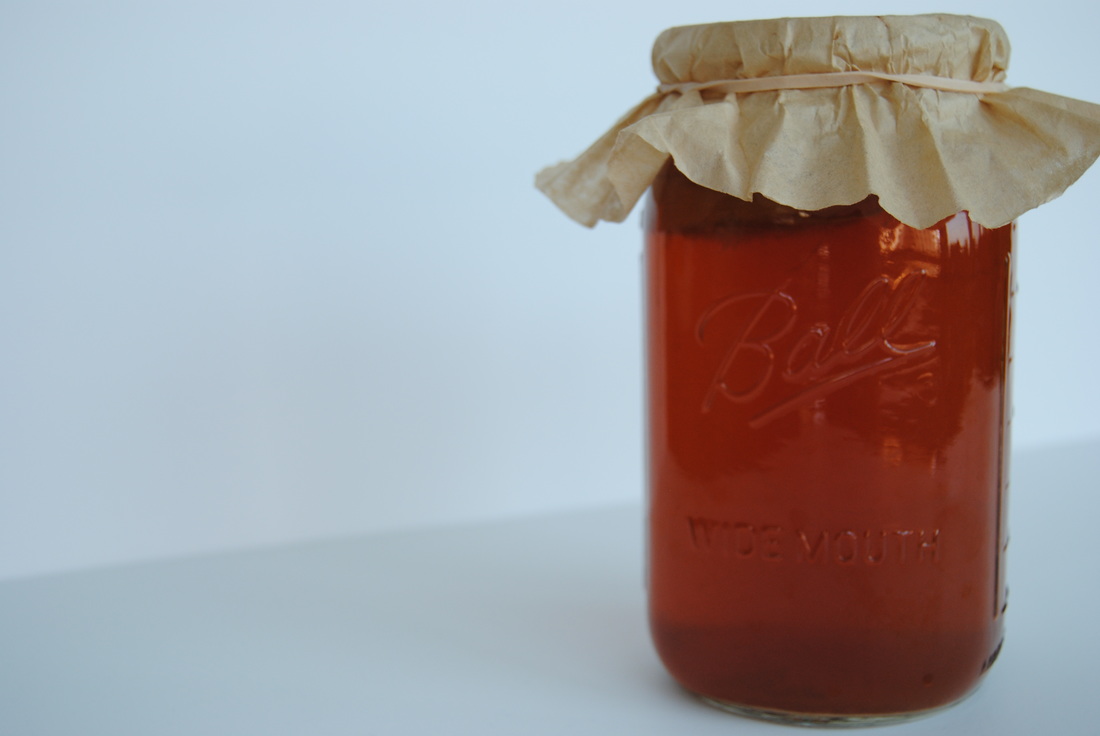 Oh boy do we have a treat for you this week friends! Two new recipes hot from our kitchen and featuring one of our most favorite topics, fermentation. We've surely discussed the benefits of fermentation before (here and here and here) but just can't get enough. And if you're serious about packing your diet with fermented foods and especially home fermentation, kombucha is a quick and easy item you can whip up week to week (once you get the hang of it of course). So we've got basic kombucha brewing instructions for you as well as a must have mustard recipe using kombucha as an ingredient. Let's get started! 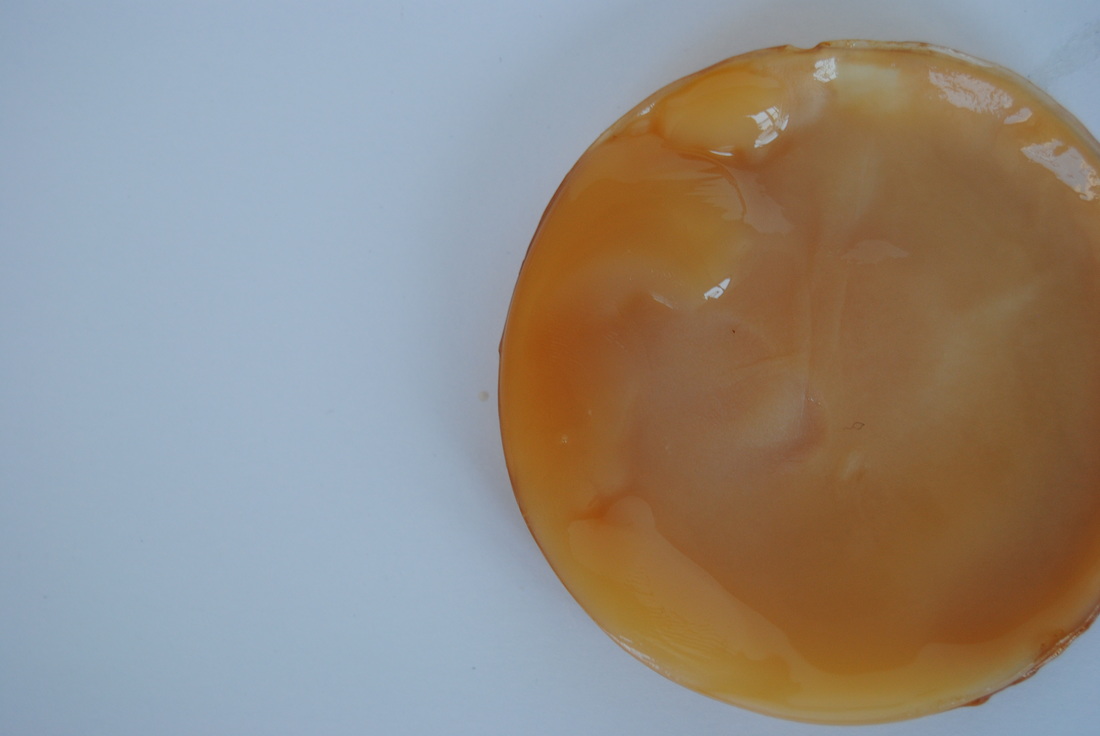 You've probably heard of, tried, or been completely weirded out by kombucha by now as this fermented tea drink has hugely grown in popularity in recent years. Kombucha is believed to have originated thousands of years ago in Asia and was regarded as medicine to treat a variety of ailments. It's health benefits come from the fact that kombucha is a fermented food which provides a healthy dose of good bacteria and yeast into the digestive tract of the consumer. And as you may know from previous posts, creating a healthy gut environment can impact the health of the rest of the body through improved digestion and immunity. Surprising to many, the health of the gut environment plays a huge role in overall immune function because the intestines contain more immune cells then the entire rest of the body (wow!). Though certain sources may cite specific diseases that kombucha may treat, we believe that as a fermented food kombucha promotes overall health and wellness but should not be considered a medical treatment. Instead, we highly recommend regular use of fermented foods in the diet (superior to probiotic supplements) to promote balance and health maintenance. So if we've finally convinced you to give home fermentation a try, great! For kombucha you'll need to get started with a SCOBY, or a symbiotic culture of bacteria and yeast, which is pictured above. And though this may look strange, it's basically magic! If you have a friend making kombucha they can share a SCOBY with you because a new one is created with each batch (basically every week). Or you can purchase starter cultures, other brewing tools, and learn tons more on the Cultures for Health website here. 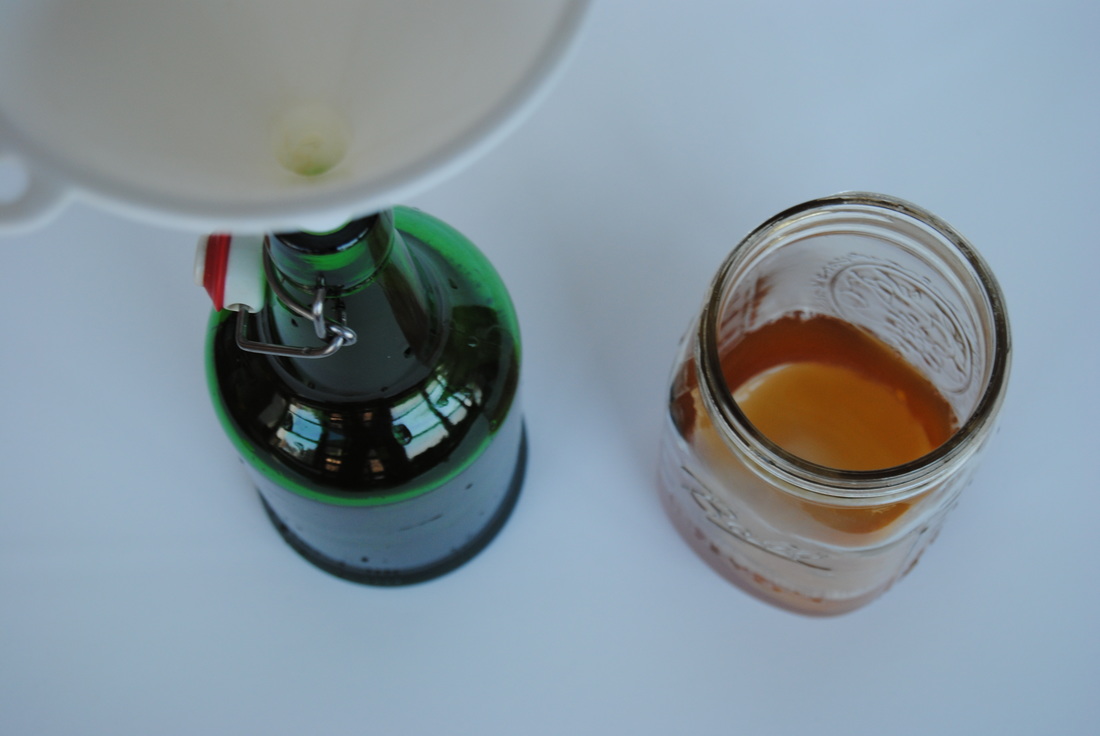 Basic Kombucha PREP TIME: 30 mins TOTAL TIME: 1 week (for fermentation) Yield: 32 ounces Ingredients 1/4 cup organic sugar 1/2 cup starter liquid (plain kombucha, from previous batch or store bought) 4 cups filtered water 4 organic black tea bags (plain, unflavored tea) Additional Items SCOBY (symbiotic culture of bacteria and yeast) Large wide mouth glass jar Coffee filter or cheese cloth Rubber band or cloth string Plastic or wooden spoon Plastic funnel Bring water to a boil, remove from heat, and add tea bags. Allow to steep for 5 minutes then remove the tea bags. Add 1/4 cup cane sugar to hot tea, stir to dissolve (using a plastic or wooden spoon instead of metal to protect the SCOBY) and allow to come to room temperature. Combine cooled tea, 1/2 cup kombucha starter, and SCOBY in a large, sterilized glass jar. Place coffee filter over the top of the jar, secure with a rubber band or tie, and allow kombucha to sit out at room temperate for a minimum of 7 days. If you prefer a longer ferment (more sour and vinegary tasting kombucha) continue to ferment past 7 days and taste the kombucha daily until it is to your liking. With clean hands, carefully remove the SCOBY and place on a clean surface. Reserve 1/2 cup kombucha in a small cup and set aside as this will be your starter for your next batch. Pour the remaining kombucha into a sterilized glass bottle (or bottles) with tight fitting seals making sure to leave enough "head space" (~2-3" between liquid and top of the bottle) for desired effervescence. Keep in the fridge for up 2 weeks. Note that the first time you open the bottle of kombucha you should hear a nice pop from the top and see a good amount of carbonation. But the more you open the bottle, the less carbonation your kombucha will have. For this reason, we prefer to use smaller, individual size bottles (10-12 oz) if available. *If you need tools, tips, or more kombucha brewing instruction visit the Cultures for Health website mentioned above for all your kombucha brewing needs! Kombucha Mustard PREP TIME: 5 mins TOTAL TIME: 1+ weeks (for fermentation) Yield: 8 ounces Ingredients 5-6 oz kombucha 1/2 cup mustard seeds 2 Tbsp honey 2 Tbsp raw apple cider vinegar 1/4 tsp salt In a glass, sterile jar combine mustard seeds and kombucha. The kombucha should fully submerge the seeds with ~ 1/2" of liquid on top (see photo below). The seeds will expand as they sit, so make sure your jar is large enough. Cover with an air tight lid and allow to sit at room temperature for a minimum of 7 day or up to 3 weeks. The longer you let it sit the more vinegary taste the end product will have. Make sure to "burp" or open the lid at least once daily. Once the mustard seeds are to your desired taste, strain from the kombucha brine (reserving the brine in a separate bowl) and combine soaked mustard seeds and ~3/4 of kombucha brine to start in a blender or food processor. Add honey, salt, and apple cider vinegar to the blender and process until desired texture. Feel free to add additional kombucha brine to blender as needed if you prefer a thinner mustard. We like ours with some texture and went with a "stone ground like" mustard. Place finished mustard in a jar with a tight fitting lid and keep in the refrigerator. Use this probiotic rich mustard just as you would with any other mustard. Plain kombucha has a sour, mildly sweet, slightly vinegary taste that we've come to love but can definitely be flavored in a variety of ways (recipes in posts to come!). And this mustard just has something about it incomparable to it's regular, unfermented counterpart. Tangy, tart, spicy, and sweet, this mustard will add a punch of flavor to your summer recipes (think sandwiches, veggie burgers, wraps, and more). We'd love to stay and chat friends but we have a few more batches of kombucha that need our attention (we told you we can't get enough!). Happy fermenting, Jess and Cecelia 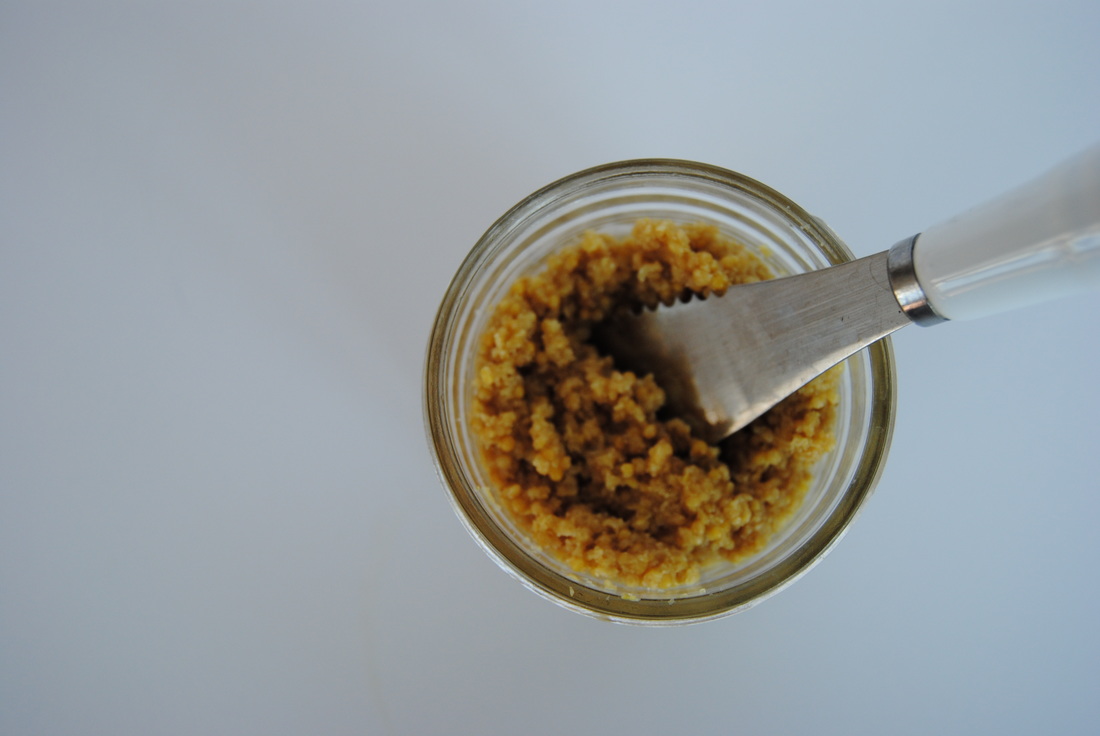 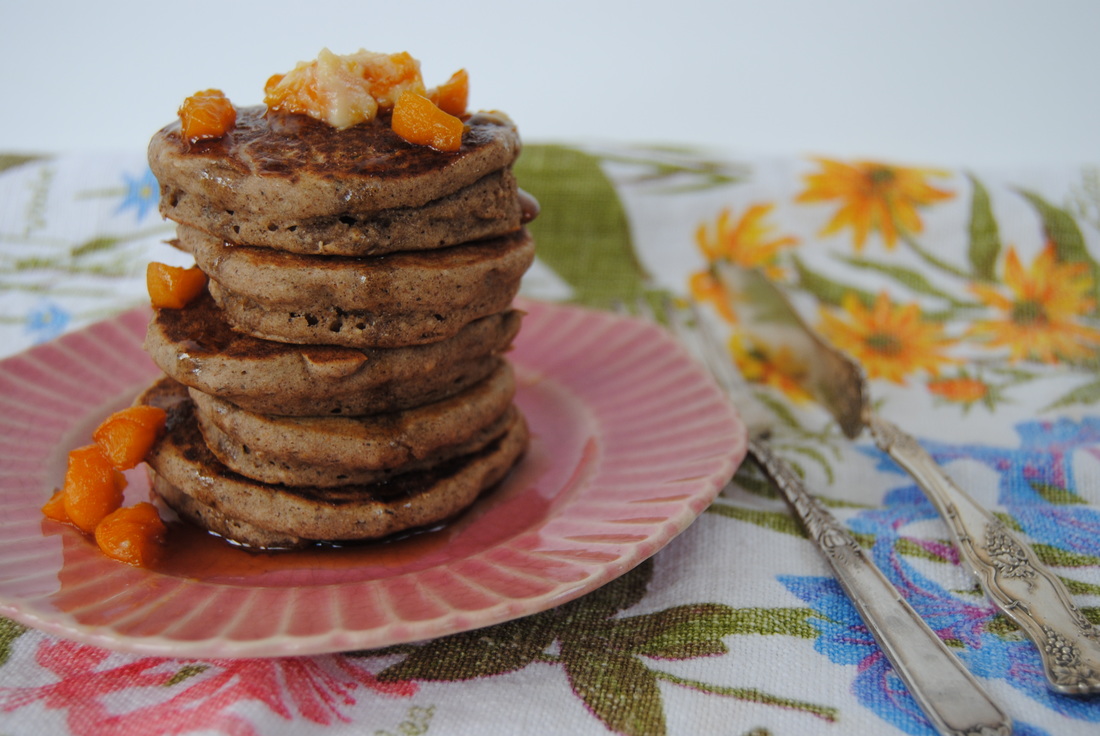 We decided to get ambitious this week and made our own homemade butter, yes butter! And it's not as difficult as you may think, besides the intense arm work-out that comes with it, but more on that later. The final product was amazing though and we had the additional satisfaction of knowing that we truly earned this decadent breakfast. But first, how do you make butter? 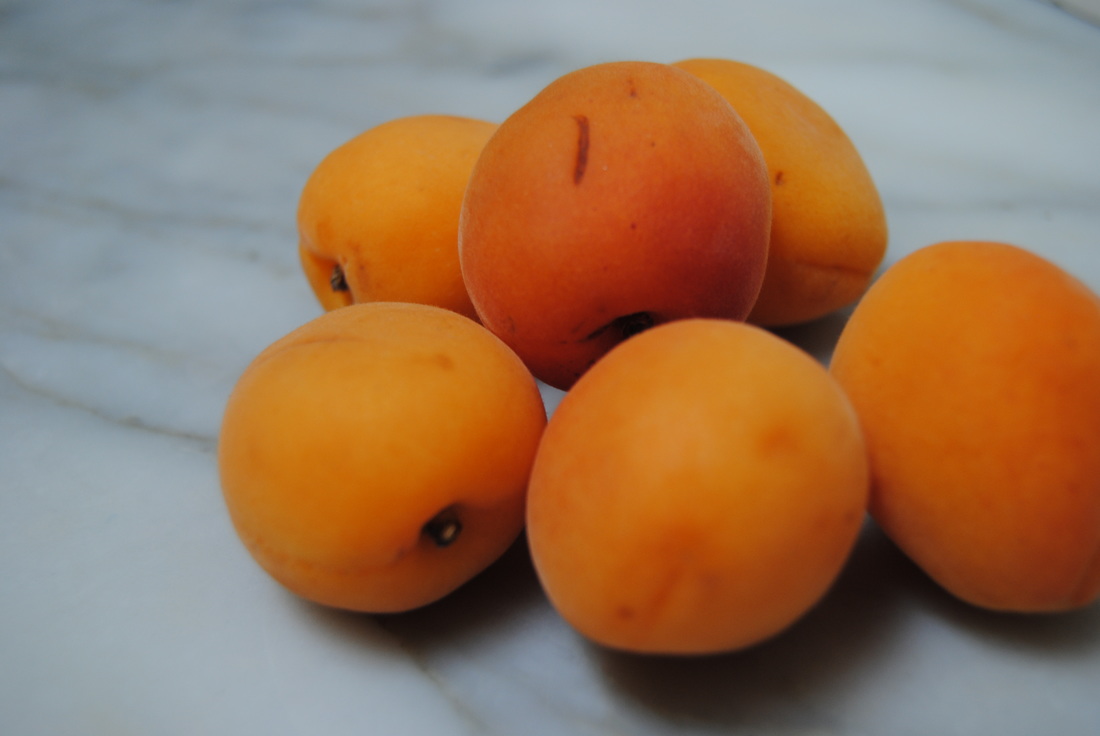 Butter is made with heavy cream because the properties of fat molecules allow an amazing transformation to take place when the cream is agitated. The cream can be agitated by hand (as we did) or in a food processor or blender, but we decided to stick to tradition and also get our work-out in for the day this time around. During the agitation process, the cream first becomes whipped cream. With continued agitation the whipped cream will become butter and buttermilk as the fat solids separate from the other contents of the original cream (water, sugar, proteins, and minerals). What you are left with is delicious, fresh, and well earned butter and buttermilk. So you are probably quite familiar with butter (aren't we all!) but what is buttermilk really? Well, traditional buttermilk is the liquid left behind after making butter as we just discussed. Though buttermilk may also refer to a fermented drink which is called cultured buttermilk. Cultured buttermilk is made from raw cream that has been left out at room temperature to curdle, or ferment, thanks to lactococcus lactis or lactobacillus bulgaricus bacterias. The increased acid in the buttermilk , primarily from acid produced during fermentation, is what gives it the classic tart flavor and curdled appearance . If you cannot get your hands on raw cream straight from the cow, and you end up using pasteurized cream from the grocery store (as we did being Chicagoans!), you will need to inoculate the cream with a starter culture to mimic the old-fashion cultured butter and buttermilk. But if you find yourself just wanting to whip up a simple batch of sweet cream butter and buttermilk without the fermentation process, remember to make sure that the cream you use is high quality, organic, and from pastured raised (grass-fed) cows. For one, because butter that is made from grass-fed cows is rich in healthy fats such as omega-3's and CLA (conjugated linolenic acid) - it's good stuff, trust us! And for two, well that's enough learning for one post. On to the recipe! Homemade Sweet Cream Butter & Buttermilk PREP TIME: 15 mins TOTAL TIME: 15 mins Servings: 1/2 pound butter, 1 cup buttermilk Ingredients 1 pint organic heavy whipping cream In a large glass jar fitted with a tight lid, add 1 pint of heavy whipping cream. Tightly close jar with a lid and vigorously shake for about 15 minutes. You will notice about 5 minutes into shaking that the cream will start to thicken, this is the start of making whipped cream! Continue to shake jar for another 3-5 minutes or so. You will notice the cream is more dense and does not make as much sloshing noise when shaken. The cream will also appear a light yellow color, this is good as you are now starting to separate the fat from the liquid...yes you are now making butter! Continue to shake for an additional 3-5 minutes or until you can see that the fat "butter" has separated from the liquid. See pictures above of the different stages and final products. Carefully strain the liquid "buttermilk" away form the solids "butter". You may now add salt if desired or any additional flavorings to your butter. Apricot Maple Cinnamon Butter PREP TIME: 30 mins TOTAL TIME: 35 mins Servings: 1/4 pound butter Ingredients 5 ripe apricots 1 Tbsp pure maple syrup Dash of cinnamon Dash of sea salt 1/4 pound freshly made butter Cut apricots in half and remove pits then chop into small cubes and add to a sauté pan. Add 1 Tbsp maple syrup to the pan and cook on low heat stirring occasionally until fruit is soft and starting to break down (~30 minutes). Remove from heat and allow to come to room temperature. Add 1/3 of the cooled apricots to butter then stir in salt and cinnamon. *Reserve the rest of the cooked apricots for topping your pancakes. Using a piece of wax paper, carefully mold butter into desired shape. Buttermilk Buckwheat Tea Cakes PREP TIME: 15 minutes TOTAL TIME: 30 minutes Servings: 20 silver dollar pancakes, serves 4 Ingredients 1 1/2 cups buckwheat flour 1/2 cup oatmeal flour 2 Tbsp cane sugar 1/2 tsp sea salt 1/2 tsp baking powder 1/2 tsp baking soda 1 cup buttermilk 1/2 cup brewed strong black tea (we used 2 earl grey tea bags with 4 oz of water) 1 Tbsp fresh squeezed lemon juice 1 tsp pure vanilla extract 1 Tbsp ground flax seed + 3 Tbsp warm water 3 Tbsp butter, melted Toppings Pure maple syrup Cooked apricots reserved from Apricot Butter recipe In a large bowl, combine buckwheat flour, oat flour, sugar, salt, baking powder, and baking soda then stir to combine. In a separate bowl combine butter milk and lemon juice. Allow mixture to sit for ~10 minutes to thicken. In another separate, small bowl combine the ground flax seed with warm water. Whisk with a fork until combined then allow mixture to sit for ~5 mins to thicken. Mix together the buttermilk, cooled black tea, vanilla, and flax seed mixture and add wet ingredients to the dry ingredients. Stir in the melted butter and continue to stir mixture until combined, making sure to avoid over mixing. Using a well seasoned cast iron skillet or a ceramic based non-stick skillet (free of carcinogenic properties in the non-stick coating) ladle batter into preheated pan in the shape of silver dollars. When the batter begins to bubble, flip pancakes over and continue to cook until golden brown. Repeat until all the batter is used. Stack 5 or so tea cakes on your plate, smear a generous portion of apricot butter between cakes, and top with maple syrup and reserved cooked apricots.  You deserve this meal! The buckwheat pancakes are hearty and fluffy in a way that only pancakes can be, and slathered with the rich, sweet, tangy, and so fresh apricot butter it's almost too good to be true. So skip the arm work-outs at the gym this week and get to making this homemade butter instead. When you're done you'll understand why we say, you earned it. Have fun, Jess and Cecelia 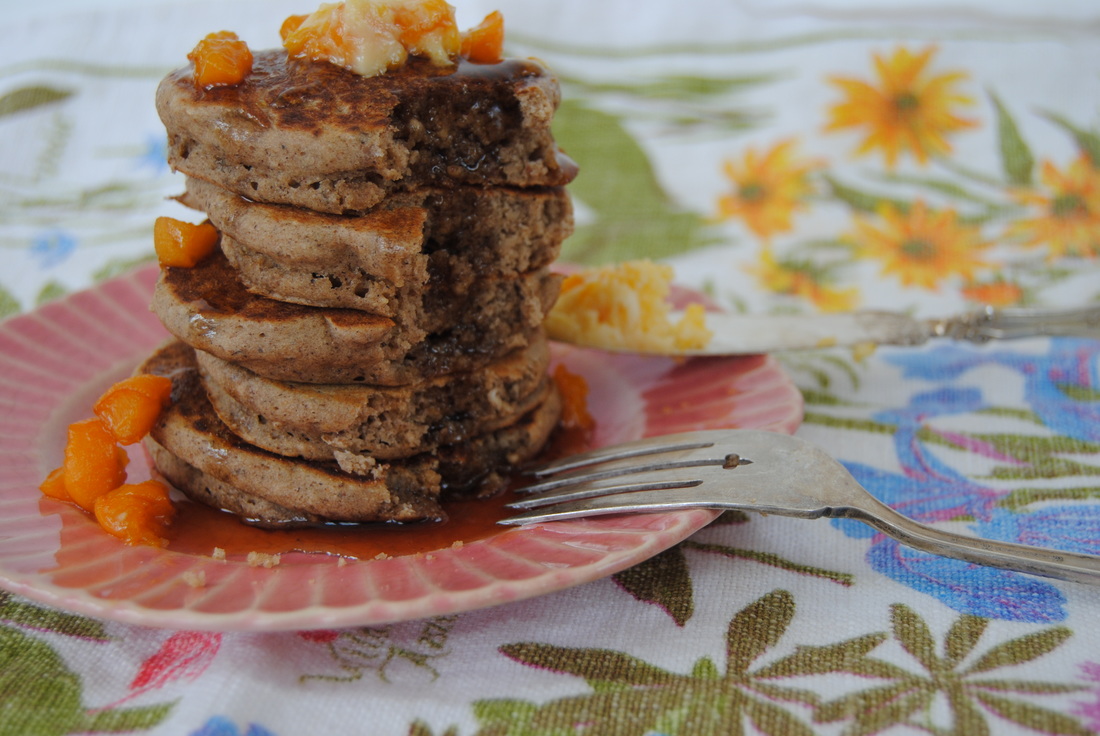  Mangia is an Italian word for eat which is just what you'll want to do with this recipe; invite over all your closest friends and family and have a huge vegan feast. Yes that's right, vegan! These stuffed shells are SO good and completely dairy free. How is that even possible? Read on to learn more about a vegan superfood, nutritional yeast, that makes this recipe possible.  Nutritional yeast is a product you just have to have in your vegan/vegetarian pantry. Pictured above, you can see that nutritional yeast is crisp, light. golden flakes that have a cheese reminiscent flavor (well you can't see the flavor but will have to try it!). Nutritional yeast is made from a pure culture strain of Saccharomyces Cerevisiae grown on cane and/or beet molasses. This yeast is harvested, fermented, and then heated to a temperature high enough to pasteurize and make the yeast inactive which means nutritional yeast does not have the power to leaven foods such as bread and pastry. Nutritional yeast is utilized more for flavor and nutritional quality including it's unexpected protein content of four grams complete protein per tablespoon (wowza!) and as an excellent source of B vitamins including B12 which is rare to find in plant based foods. In terms of uses in the kitchen, nutritional yeast's cheesy flavor lends itself well to vegan recipes such as "cheese" popcorn, cashew based "cheese" sauce, and vegan tofu stuffed shells like we've made for you this week. Find it at specialty grocers and let's get started! Vegan Stuffed Shells PREP TIME: 35 mins TOTAL TIME: 1 hour Servings: 6 Ingredients Shells 1 large box of jumbo pasta shells (containing 30+ shells) 16 oz package organic firm or extra firm tofu, ~8 oz tofu once drained 16 oz organic raw spinach 3 Tbsp nutritional yeast 1 Tbsp lemon juice 3/4 tsp sea salt black pepper and crushed red pepper to taste Sauce 28 oz can organic crushed tomatoes 28 oz can organic chopped tomatoes 2 medium onions 2 large cloves garlic 1 Tbsp olive oil 1 Tbsp sugar 1 Tbsp + 1 tsp dried oregano 1 tsp sea salt 4-6 large basil leaves, chopped *reserve for when the shells come out of the oven Begin by cooking the pasta shells according to directions for al dente. Drain and set side. To make the sauce, dice both onions, finely chop garlic, and set both aside. In a large pan, warm olive oil over medium heat. Place onions in hot pan and sauté for 5-7 minutes until lightly golden and fragrant. Add chopped garlic and cook for an additional 2 minutes. Add crushed and chopped tomatoes (*do not drain the tomatoes), sugar, dried oregano, and salt to the pan. Turn the heat down to low and simmer the sauce for ~25 minutes stirring occasionally. While the sauce is simmering, start the filling. Sauté spinach until wilted and then press through a sieve to remove excess liquid. Rough chop and set aside. Drain liquid from tofu container though note that it is ok if some liquid remains in the tofu as this will help give the texture of a "ricotta like cheese". In a large bowl, combine the tofu, nutritional yeast, lemon juice, salt, and pepper and mash with a fork until thoroughly combined. Make sure there are no large pieces of tofu in the mix, if there is keep mixing until the entire mixture has the appearance of ricotta cheese. Add chopped spinach and again stir to combine. In a large baking dish, add 2 cups of sauce to fully cover the bottom of the pan. Carefully fill each shell with ~3 Tbsp filling and place in prepared pan. Continue the process until all the filling is used. Cover shells with an additional 2 cups sauce, cover with tinfoil, and bake for 20 minutes. Once removed from oven, sprinkle shells with fresh chopped basil and serve warm. These stuffed shells store perfectly in the fridge up to 5 days and are great to pop back into a 350 degrees oven for 10 minutes for a quick mid-week meal. They also freeze well in an air tight container, just make sure to thaw in the fridge about 24 hours prior to reheating.  By now we hope you're ready to eat! Because these stuffed shells are so rich and packed with flavor that you won't even miss the standard cheese variation. Even those persistent tofu dislikers (we all have those friends/family) may just change their minds with recipe. Or maybe they don't even have to know your little secret, we won't tell... Mangia! Jess and Cecelia   The weather was beautiful here in Chicago this past weekend! And though it may not be time for a dip in Lake Michigan yet, it is the perfect time for a delicious dip recipe. Because what is better than a good dip? Not much in our opinion. And we even made a gluten free, homemade cracker for the ultimate dipping experience. But first let's learn about a new ingredient that you'll be needing and wanting in your pantry, pomegranate molasses.  Pomegranate molasses is a version of molasses made from pomegranate juice rather than sugarcane or sugar beets. Molasses from sugarcane or sugar beets is more common in North America because it is created as a by-product from the sugar refining process. In the Middle East where pomegranate is a native fruit, pomegranate molasses is traditional and used frequently in cooking. It is used to add a depth of flavor to sweet or savory dishes and has a unique tartness different than standard molasses that yields itself to a variety of different uses. Pomegranate molasses can be used in many ways including in dips, dressing and marinades, stirred into drinks like iced tea or sparkling water, or drizzled over dips, plated dishes or even dessert for a touch of flavor. In terms of nutritional profile, pomegranate molasses is pretty much a sugary sweetener but does contain antioxidants and B vitamins. But one of the largest benefits in our opinion is the variety this product adds to your pantry, because most foods can fit in a balanced diet if that balance truly exists. So swap out that sugarcane based sweetener next time for pomegranate molasses and you won't be sorry! Oh and look for this product in ethic sections or ethnic grocers and you'll be ready to create a delectable dip featuring this ingredient.  Savory Gluten Free Crackers PREP TIME: 15 mins TOTAL TIME: 1 hour Servings: ~2 dozen crackers Ingredients 1 cup raw almonds (we used sprouted) 1 cup raw walnuts 1/3 cup ground flax seed 1/2 cup room temperature water 1 Tbsp za'atar seasoning (Middle Eastern spice blend) 1 tsp garlic powder Coarse sea salt to sprinkle over the top Preheat oven to 300 degrees. In a food processor or blender, pulse almonds and walnuts into a coarse flour. In a large bowl, combine the ground nuts, ground flax, za'atar, garlic powder, and water. Mix with a spoon until batter comes together. Place a sheet of parchment paper down on a large baking sheet. Drop dough onto the parchment paper and place another sheet of parchment paper on top. Using a rolling pin, evenly spread dough out into a large rectangle. Note it is important to make the cracker thickness as even as possible for proper cooking. We spread our crackers out to ~1/3" thick (the thinner the cracker the less time it will take to cook). Using a sharp knife, score dough into 2" by 2" squares and poke the middle of each cracker with fork prongs 2-3 times (see picture above). Sprinkle the top with coarse sea salt. Place in a pre-heated oven and cook for 35-45 minutes. Check and rotate the baking sheet half way through cooking. Remember the thinner the cracker, the less cooking time required. Once crispy, remove from the oven, carefully separate crackers, and allow to cool. Serve with favorite dip or store in an air tight container for up to 7 days. Muhammara (Red Pepper Dip) PREP TIME: 30 mins TOTAL TIME : 35 mins Servings: ~2 cups Ingredients 3/4 cup walnuts, toasted 1/4 cup whole wheat bread crumbs 1/4 cup extra virgin olive oil 2 Tbsp pomegranate molasses 1/4 cup tomato paste 1 large or 2 small red bell peppers*, roasted 1 tsp red pepper flakes 1/2 tsp sea salt 1/2 tsp ground cumin Preheat oven to 500 degrees. Roast red pepper for ~30 minutes making sure to turn frequently until the outer skin is wrinkled and charred. Remove pepper from the oven and place in a brown paper bag. Allow the pepper to sit for ~5-10 minutes or until cool enough to handle. Carefully remove the skin and seeds from the pepper. By allowing the pepper to sit in a covered bag to cool, the skin should be rather easy to remove. In a shallow pan on medium heat, lightly toast walnuts for 3-5 minutes or until golden and fragrant. In a blender or food processor add roasted red pepper, toasted walnuts, bread crumbs, olive oil, pomegranate molasses, tomato paste, red pepper flakes, sea salt, and cumin. Blend on high until creamy. Serve immediately or place in an air tight container in the fridge for up to 5 days. We served our muhammara with a combo of nut crackers and raw veggies. It is also delicious as a spread for veggie and cheese sandwiches or wraps. *If you prefer to buy store bought roasted red peppers make sure there is no added spices or marinades on the peppers as this will change the flavor of the dip  These crackers are amazing warm from the oven and have a rich, nutty flavor with a great zing from the za'atar. Not only gluten free but 100% homemade and sure to impress. And this dip, wow! So. Much. Flavor. The flavor profile is just too complex to begin to explain so you might as well whip this up soon and try it for yourself. And keep that pomegranate molasses handy, we guarantee you'll be using it again and again. Happy dipping, Jess and Cecelia   Though we love the change of the seasons when it means warmer weather on the horizon, this time of year can be hard to adjust to when there are large changes in temperature and weather from day to day. Here in Chicago it was snowing yesterday and in the seventies today! More than the problem of not knowing what to wear, change of season colds can occur while our bodies adjust to the shifts in weather. If this is happening to you right now we've got just the right recipe for you this week. It features seasonal citrus and the amazing ginger root, so let's find out more.  We are considering this recipe a tonic which is defined as "a medicinal substance taken to give a feeling of vigor or well-being". It is so because of the blood orange juice packed with vitamin C, well known to support immunity, and the ginger root which has been studied for many medicinal uses. In terms of cold easing properties and it's use in this recipe, ginger can act as an antihistamine and decongestant. But that's not all, ginger actually has so many medicinal uses that in Ayurvedic medicine it is is known as the "universal medicine". Ginger contains the compound gingerol which acts as an anti-emetic and can help settle an upset stomach and treat nausea and vomiting. This can be a great natural option for pregnant women battling morning sickness or for anyone trying to avoid drug based treatments. All of the active ingredients in ginger are considered antioxidants which can help to reduce inflammation in the body. Ginger even has the ability to increase saliva production which may aid in digestion. Finally, we should note that ginger has the ability to thin the blood and should be taken with some caution in people using blood thinning medication. The form of ginger we are using in this recipe is ginger juice which is convenient to store and easy to use in so many ways! You can add a splash to sparkling water or hot tea, use in sauces and stir fry dishes, add in place of ground ginger in baked goods, or freeze in ice cub trays to save for use at a later date. The short time it will take to make will pay off in convenience and taste. So let's start our recipe with simple instructions for ginger juice. Ginger Juice PREP TIME: 5 mins TOTAL TIME: 7 mins Servings: ~4 cups of juice Ingredients 3 lb fresh ginger root (5-6 cups chopped ginger) Water Using a hand held vegetable peeler, carefully peal the ginger root. Roughly chop the ginger and place in a high speed blender (we used a Vitamix). Add enough water to cover the ginger and blend on high for 3-5 minutes until fully processed. Place a double layered cheese cloth over a colander and carefully strain the ginger juice mixture into a jar or pitcher. It is best to do this in a few batches to make sure to catch all the ginger fibers within the cloth. To get the maximum amount of juice we recommend to lightly squeeze the cheese cloth until there is nothing left but dry ginger fiber. Continue this process until all the blender contents have been fully strained. If you have a nut milk bag, use it instead of the cheese cloth method. As you can see above, this recipe makes a lot of fresh ginger juice. We love to freeze the ginger juice in ice cube trays to extend the juice's expiration date and always have ginger easily available. Once frozen, store cubes in an airtight container for 3-6 months. Otherwise, fresh juice can be refrigerated for 1-2 weeks. Ginger Blood Orange Tonic PREP TIME: 5 mins TOTAL TIME: 7 mins Servings: 4 Ingredients 6 blood oranges (will make ~8 oz of juice) 2 oz fresh ginger juice 1 Tbsp honey 1/4 tsp cayenne pepper powder 2 oz plain sparkling water plus more to taste Using a high speed juicer (or a hand held citrus juicer), juice the blood oranges. Mix in the ginger juice, honey, and cayenne pepper and stir well. Evenly pour the tonic into four glasses and top with a splash of sparkling water. Serve the tonic at room temperature or over ice. If you prefer to drink your tonic warm, add a splash of boiling water and omit the sparkle.  This tonic is a perfect balance of sweetness and spice and just what you need to invigorate your spirits if you do happen to be feeling under the weather. And once you start making ginger juice we swear you'll never stop! With ginger ice cubes on hand in the freezer you will always have that extra kick to add to hot or cold beverages or a ready to go ingredient (once thawed) for many recipes. We'd love to hear about the ways you find to enjoy ginger! Be well, Jess & Cecelia   Oh spring! How we've waited for you! And what a great way to welcome the season this first Spring weekend with Easter celebrations. This cake is just perfect for any gathering you may be attending this (or any!) Spring weekend. It has a delicate blend of sweetness and spice just right for this in between time as the days get longer and warmer. And this cake contains an extra special ingredient adding to it's sweetness, lucuma. Sound interesting? Find out more...  Lucuma is a fruit native to Peru and grown in the Andes. It has a natural sweet maple flavor but a low glycemic index, meaning that it does not cause a dramatic spike in blood sugar levels like other sweet foods can. Lucuma is a good source of vitamins, minerals, antioxidants, and fiber. A two teaspoon serving packs two grams of fiber, which means our crumb cake contains twelve grams of fiber from the lucuma alone! Not surprising, lucuma is a popular ice cream flavor in South America and often favored over chocolate or vanilla. The most common form of lucuma found in North America is a powder made from the dried fruit that can be used in many ways. Some of our favorite uses are adding to hot cereals, smoothies, yogurt, home made baby food, and baked goods such as our crumb cake this week. Remember that along with additional nutrients and fiber lucuma will provide a mild sweetness without spiking blood sugar. Lucuma powder can be found at specialty grocers and healthy food stores or online. A brand that we like is Navitas Naturals and more info can be found on their site. But if you don't have lucuma in your pantry yet don't worry! This cake will work without if you substitute another 1/4 cup flour for the lucuma powder. Just this once though because lucuma is worth a try!  Lucuma Cinnamon Crumb Cake PREP TIME: 20 mins TOTAL TIME: 1 hour, 5 mins (includes baking time) Servings: 8-10 slices Ingredients Crumb Topping 1/4 cup + 3 Tbsp cane sugar 2 Tbsp black strap molasses 4 Tbsp coconut oil, softened but not fully melted 1 tsp ground cinnamon 1/3 cup oats, lightly processed in a food processor 1/3 cup oat bran 1/2 cup walnuts, chopped Cake 6 Tbsp coconut oil, softened but not fully melted 1/2 cup cane sugar 2 Tbsp ground flax + 6 Tbsp warm water 1 tsp pure vanilla extract 2/3 cup plain soy yogurt (or plain yogurt of choice) 1 cup white whole wheat flour 1/4 cup lucuma powder 1 tsp baking powder 1/4 tsp baking soda 1/2 tsp sea salt Middle Swirl 2 tsp ground cinnamon 2 tsp cane sugar In a small bowl, combine the crumb topping ingredients; coconut oil, cane sugar, molasses, oat flour, oat bran, cinnamon, and chopped walnuts. Lightly mix with a fork until a crumbly texture is formed then set aside. Preheat oven to 350 degrees. Lightly oil a 8" spring form pan* with coconut oil and set aside. To prepare the cake ingredients start by combining the ground flax seed and warm water in a small cup. Mix with a fork until gelatinous and set aside. In a large mixing bowl, sift together the whole wheat flour, lucuma, baking powder, baking soda, and sea salt and set aside. In a standing mixer combine the softened coconut oil and cane sugar and beat on high until light and fluffy. Add the flax/water mixture, vanilla, and yogurt and continue to mix until fully combined. Make sure to scrape down the sides of the bowl as you mix. Slowly add the dry ingredients to the mixer and beat until just combined. Make sure to avoid over mixing. Combine 2 tsp of cinnamon with 2 tsp of cane sugar in a small cup for the middle of the cake. Spread half of the cake batter in the prepared pan using a spatula - this may take some patience as the batter is sticky. Sprinkle the cinnamon sugar mixture evenly over the first layer of batter and then evenly spread the remaining batter over the top. Generously crumble the topping evenly over the cake. Bake in a preheated oven for 45-50 minutes or until a toothpick comes out clean. Allow cake to slightly cool then run a butter knife around the sides of the pan to loosen before releasing the spring form side. Serve with a cup of tea or coffee and enjoy with loved ones! *A regular cake pan will work but make sure it is well greased with coconut oil.  Cinnamon. Sweet. Heaven. Basically the only way to describe this cake. This one will go fast so feel free to make an extra, one for your gathering and one all for you! Did we really just say that? You'll get it once you've given it a try... Happy Easter, Jess and Cecelia   If you know us here at TGBK by now you'll know that we love any reason to celebrate if that celebrating means good food and drinks. And here in Chicago there is a lot of celebrating done this week for St. Patrick's Day. Historically, we haven't partaken in the food and drink festivities given that we are vegetarian (no corned beef) and shy away from food additives (no green beer for us), but this year was different. We decided to use the traditional foods and colors of the festivities as inspiration for a vegan, green dye free meal and the results were fabulous! Seriously a meal that we will be making again and again. We will get to the recipe after a little more about our star foods this week.  The two foods we want to highlight this week are both fermented foods, surprise, surprise! And as you know from many other posts, fermented foods are just amazing. Some of the healthiest foods you can consume for your gut and body in general. The first fermented food (pictured above) is tempeh which is a cake made out of fermented soy beans. Tempeh originated in Indonesia and is a vegan, high protein food source. Because the whole soybean is utilized to make tempeh there is more protein, fiber, and micronutrients than standard tofu. The process of making tempeh is actually quite interesting. Whole soybeans are first soaked in water, de-hulled, and partially cooked to soften. The soft beans may then be mixed with whole grains and seeds such as brown rice and flax seed and a starter culture (spores of fungus). The mixture is then spread out into a thin layer to ferment at 86 degrees for 24-36 hours. Because tempeh is fermented, the carbohydrates that may cause abdominal bloating and gas are easier to digest, which means a happy and quiet gut! Tempeh has a chewy texture and a somewhat earthy taste. We love it soaked in a salty/sweet marinade and pan fried just like in this recipe. Sauerkraut (pictured below) is our other star fermented food this week. Traditional sauerkraut is thinly sliced green cabbage mixed with salt and left to ferment at room temperate for several days/weeks. Sauerkraut is naturally sour in taste from the lactic acid produced during the fermentation process. Lactic acid may sound scary but is basically a helpful bacteria that ferments the sugar in the cabbage creating the beloved sauerkraut. This form of fermentation is raw, which preserves AND increases the bio-availability of vitamins and minerals in the cabbage (so cool!) and creates live active cultures of probiotics, specifically lactobacilli, in the final sauerkraut. So hopefully these star foods now have you ready to make this fabulous recipe.  Crunchy Sauerkraut PREP TIME: 10 mins TOTAL TIME: 10 mins (+ 7 days fermentation time) Servings: 1 quart (4 cups) Ingredients 5 lbs organic green cabbage (~1.5 cabbages) 3 Tbsp salt Remove the outer layer of the cabbages, reserving 3-4 full, large leaves and set aside. Thinly slice the cabbage and add to a bowl. Generously sprinkle 3 Tbsp salt over the sliced cabbage and lightly massage. Using a clean and sterile large crock or jar, gradually add the cabbage making sure to pack down for a tight "seal" to keep the kraut fresh. Continue this process until all the salted cabbage is in the crock. Make sure you leave at least a 4" space from the top of the crock and the cabbage. Place reserved full cabbage leaves over the top and layer each leaf making sure to press the edges tightly down to create a seal over your kraut, also to keep your kraut fresh. Place a fermentation weight or a clean jar filled with water over the top of the cabbage leaves and let sit at room temperature on the counter. Within the first 24 hours, press down with on the weight every 4-6 hours - you should begin to see a brine. This brine naturally forms as the salt helps to release water from the cabbage. Continue to press down on the weight daily and allow the natural process of fermentation to take over! We let ours ferment for 7 days, which gave the final product a salty and sour taste with the perfect crunch. Once complete plate about 1/2 cup cabbage for this dish. Salty-Sweet Tempeh PREP TIME: 35-60 mins (includes marinade time) TOTAL TIME: 40-65 mins Servings: 4 Ingredients 8 oz organic tempeh 3 Tbsp low sodium soy sauce 3 Tbsp pure maple syrup 1/2 tsp garlic powder 1/2 tsp onion powder 1/8 tsp black pepper powder In a shallow bowl combine the soy sauce, maple syrup, garlic, onion, and pepper powder and whisk with a fork until fully combined. Cut the block of tempeh in half then add to a zip lock bag with the marinade and allow the tempeh to sit and soak up the flavors for at least 30 minutes. Place tempeh in a pre-heated non-stick or oiled pan and sear both sides until caramelized (this takes about 3-4 minutes on each side). Carefully slice tempeh as thin as possible and fan 1/4 over each plated sauerkraut. Super Green Sauce PREP TIME: 5 mins TOTAL TIME: 10 mins Servings: 1 cup Ingredients 1/2 cup white vinegar 1/4 cup olive oil 1/4 cup chopped fresh parsley 1 small garlic clove, smashed 1 crushed bay leaf Salt and pepper to taste Add all ingredients to a small sauce pan. Turn heat on to a simmer and allow to cook for 5-10 minutes. Remove from the heat, add to a blender, and blend until smooth. Finish plates with a drizzle of super green sauce.  So it's going to take a few bites to taste and appreciate all of the amazing flavors in this dish, and once you do it will rock your St. Paddy's day world. The sauerkraut is just the right amount of crunchy and sour, the tempeh has a sweet saltiness and incredible texture, and the green sauce is so vinegar forward but also rich that it just doesn't seem possible. But it is. And it's our gift to you this week. So enjoy with or without a green beer (we won't judge!) and let us know what you think. We can't wait to hear from you! Have fun, Jess and Cecelia   It's story time here at TGBK and what better way to enjoy a good story than with a delicious cup of tea? When asked how this recipe blog, and our friendship, came to be we easily answer over tea! Soon after meeting through our shared work as dietitians we decided to have a bake night making some of our favorite desserts. And of course this event was not complete without a full blown tea party with beautiful teapots, mugs, and of course great tea. So this post holds a special place in our hearts as we share a deliciously spicy chai latte recipe this week with an extra special ingredient, saffron.  Saffron is the world's most expensive spice by weight, aka fancy! It comes from the the saffron crocus flower which is native to Southwest Asia and Greece. Saffron is expensive because the harvesting is labor intensive during flowering season each fall. Every flower has three threadlike stigmas in the center which are removed by hand and dried to become the familiar spice. Saffron contains carotenoids giving it a rich golden color when added to cooked food or beverages. When using saffron in recipes, remember that a little goes a long way! Saffron has a very pungent taste needing only a thread or two to add a bold, warm, and somewhat exotic flavor to your recipes. We think it is perfectly different and exciting to our taste buds in our chai latte recipe. Saffron Chai Latte PREP TIME: 5 mins TOTAL TIME: 10 mins Servings: 4, 16 ounce drinks Ingredients 16 peppercorns 4 allspice 4 cloves, crushed 3 star anise, crushed 1 cinnamon stick, crushed 1 Tbsp fresh chopped ginger 2 tsp fennel seeds 1/2 tsp fresh shaved nutmeg 5 cardamom pods, crushed 10 black tea bags or 5 Tbsp loose black tea 3 Tbsp cane sugar Almond milk (homemade recipe here), soy milk, or milk of your choice Saffron springs and sprinkle of cinnamon to garnish Using a mortar and pestle gently crush the cloves, star anise, cinnamon stick, and cardamom pods until broken and fragrant and place in a tea strainer. Add peppercorn, all spice, ginger, fennel seeds, black tea, and sugar to the tea strainer. Gently pour hot water (~3-4 cups) into the tea pot until full. Allow tea infusion to steep for 3-5 minutes. Remove the tea strainer from the tea pot and place to the side. In a medium size pot, warm milk over medium heat. Feel free to use a milk frother if you have one! Fill half of a large mug with chai tea and top the remainder with warm milk. Add a sprig or two of saffron and sprinkle of cinnamon if desired and enjoy1 *Note that if you don't have a tea pot with a tea strainer spices can be bundled in cheese cloth tied with string for steeping.  Well, we hope you've enjoyed learning more about our beginnings here at TGBK and love the recipe we've shared this week. This chai has a gentle spice, delicate sweetness, and special flavor imparted from the saffron that just can't quite be explained. Looks like you'll have to try this one, friends, for the full flavor story. We love you a latte, Jess and Cecelia   As you can probably tell from following our recipes, we just love beautiful looking and delicious tasting foods. But almost more important than that we just adore foods that keep our gastrointestinal tracts (guts - the internal kind!) happy and healthy. Because good digestion is just one of those things that can really change your life if you've ever struggled with any sort of digestive issues. And it completely makes sense that what we put into our bodies day in and day out will create our internal environment and affect the happiness or unhappiness of our guts and digestion as a whole. With that being said, we have another fermented foods recipe for you this week, kimchi!  Kimchi is a classic Korean fermented side dish made from vegetables and a combination of spices. Kimchi has long been known as one of the healthiest foods to consume because it is fermented. If you remember from these previous posts (learn more here and here), fermented foods are great for our guts because they contain live, active probiotic cultures, specifically lactobacilli. And even better that kimchi not only contains probiotics (good bacteria) but also contains prebiotics found in the green onion and garlic. Prebiotics are non-digestible carbohydrates found in certain foods and are necessary in the gut to feed the probiotics, which in turn creates that healthy gut environment we've been talking about! So we hope that by this post we've convinced you that fermented foods need to be in your diet ASAP, starting with this recipe...  Basic Kimchi PREP TIME: 1.5 hours TOTAL TIME: 1.5 hours (+ 1 week fermentation time) Servings: 1 quart (4 cups) Ingredients 4 Tbsp sea salt dissolved in 4 cups water 1/2 pound Napa cabbage 1/2 pound green cabbage 4-6 red radishes 2 -3 large carrots 3 green onions 3 garlic cloves 4 dried red chili peppers 2 Tbsp fresh ginger root, grated 3 Tbsp rice flour Remove the outer layer of both the Napa and green cabbage and set aside. Roughly chop both cabbages and place in a very large bowl. Using a mandolin, or if you are able to do this by hand, thinly slice the radishes and carrots and place into the same bowl as the cabbage. Chop white and light green parts of the green onion and add to the bowl. Next make a brine using sea salt and warm water. Stir brine until salt has fully dissolved. Pour brine over prepared vegetables. Using your hands, gently massage the vegetable to help draw water out of the vegetables and completely coat in brine. Using a plate that fits nicely inside the bowl, place on top of the massaged vegetables and then add a weight on top of the plate (we used a jar filled with water). You basically want something heavy enough to fully submerge the vegetable under the brine. Allow to sit at room temperature for at least 1 hour. Now begin to make your flavor paste. In a high speed blender or a food processor, combine garlic, ginger, and chili peppers and add just a splash of water to allow mixture to come together in the blender. You should end up with a semi-chunky paste. Add 1 Tbsp rice flour to the paste at a time until a thick mixture has formed. The rice flour helps to thicken the paste so that it adheres to the vegetables. Once vegetables have soaked in the brine for at least 1 hour, taste test for desired level of salt. If you feel the vegetable are too salty, rinse them off. We thought the level of salt was perfect and therefore did not rinse. Drain off brine making sure to save the liquid in a separate bowl. Add drained vegetables to a new, large bowl and gently massage the vegetables with the chili-ginger-garlic paste until vegetables are completely coated. Now gradually add prepared vegetables to a large, sanitized glass jar or a crock. It is important to make sure you pack the vegetables down to allow for a tight "seal" which will prevent your kimchi from molding. Continue this process until all the vegetables are tightly packed into the jar. There should be at least a 4" space from the top of the jar and the vegetables. Pour enough reserved brine over vegetables until the top is fully submerged. Hint- you do not want to add too much brine to the jar because as the vegetables ferment they will release more liquid which could lead to a brine overflow! Place reserved full cabbage leaves over the top of the prepared vegetables pressing the edges tightly down the sides of the jar making a top seal over your vegetables. Place a clean jar filled with water or a fermentation weight on top of the cabbage leaves to apply pressure (pictured above). Remember, it is very important to make sure you have a tight seal to make sure your kimchi ferments properly. Place in a warm spot in your kitchen and let the fermentation begin! After about seven days, taste your kimchi. If desired flavor (tang, spice, and sourness) is to your liking then it's time to chill the kimchi. Remove top cabbage leaves and discard. Tightly pack kimchi and enough brine to submerge vegetables into air tight containers, cover with a lid, and place in the fridge. Note that large mason jars work well for fermentation jars and kimchi storage once fermentation is complete.  If you've never had kimchi the flavor might surprise you at first - quite salty, tangy, spicy, and sour all at the same time in a special way that just well, works. And we can't say enough about how happy your gut will be if you get this (or other) fermented foods into your diet on a daily basis. We suggest enjoying kimchi over rice, in miso soup, diced up and mixed into cream cheese for toast or bagels, hidden in grilled cheese, or on top of Korean BBQ tofu tacos. Get creative with it and remember to tell us your favorite way to enjoy your kimchi! Stay happy, Jess and Cecelia  |