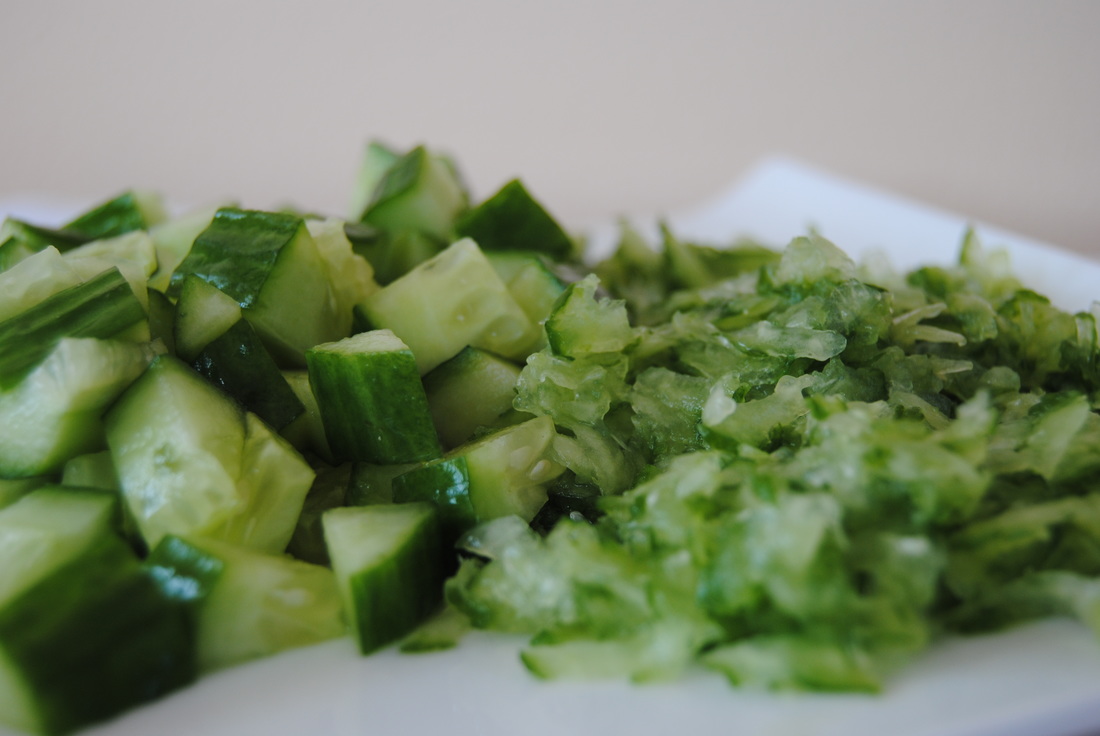
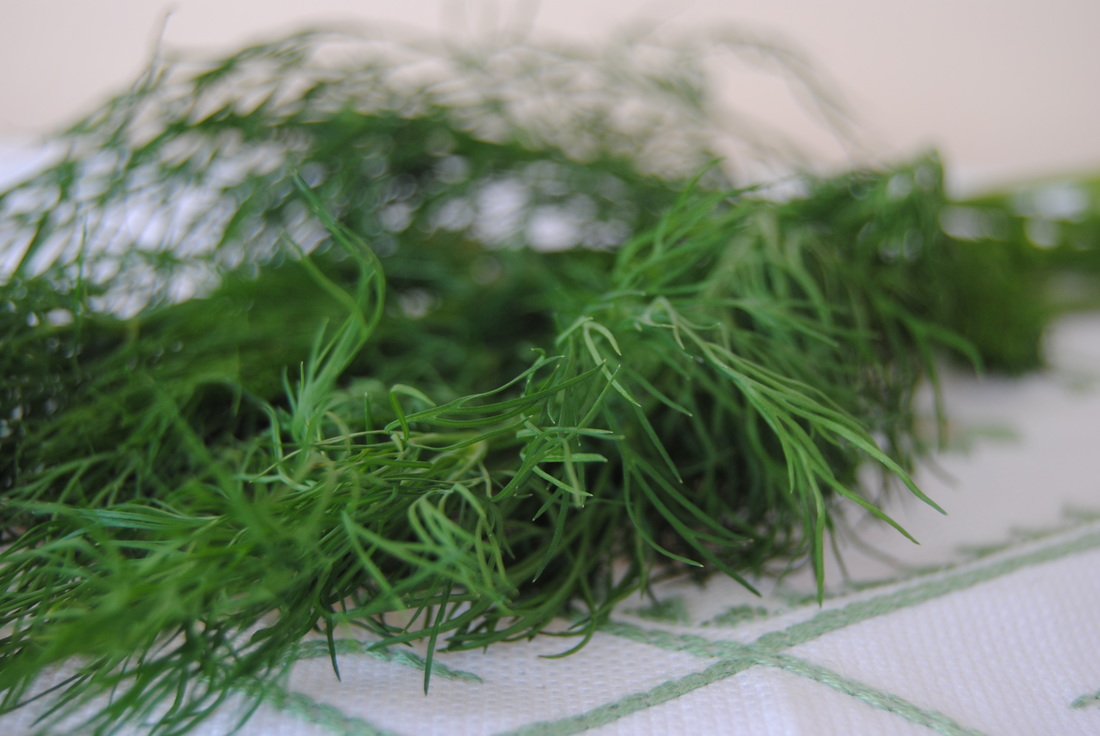
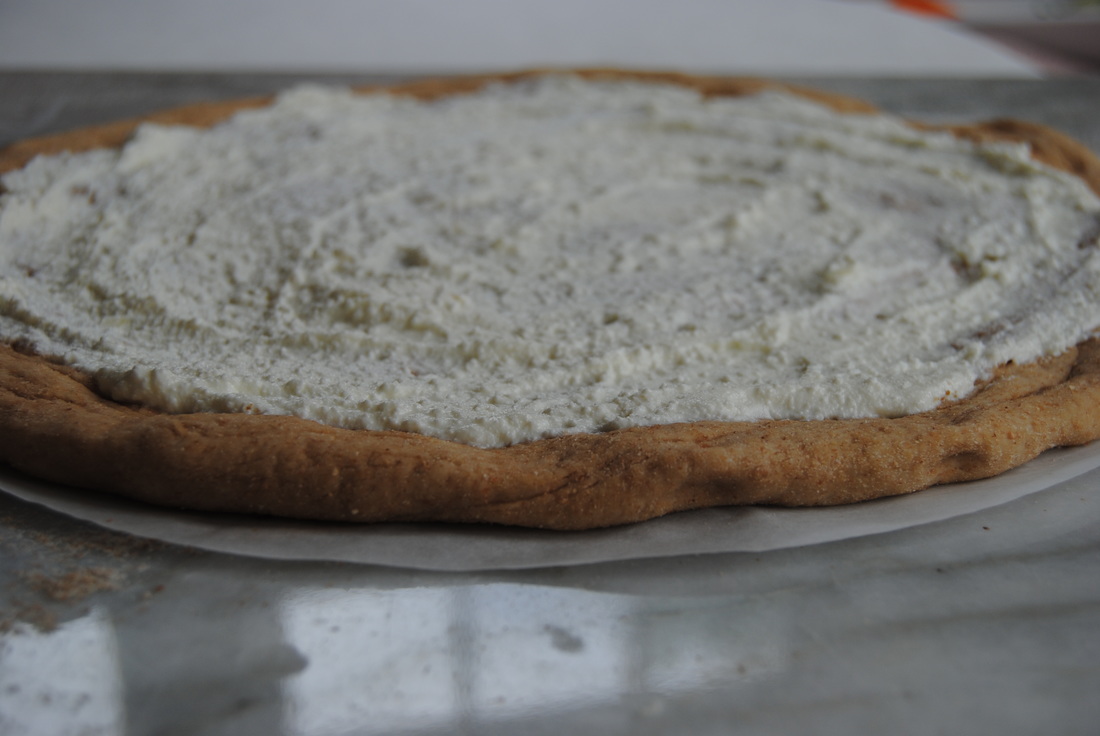
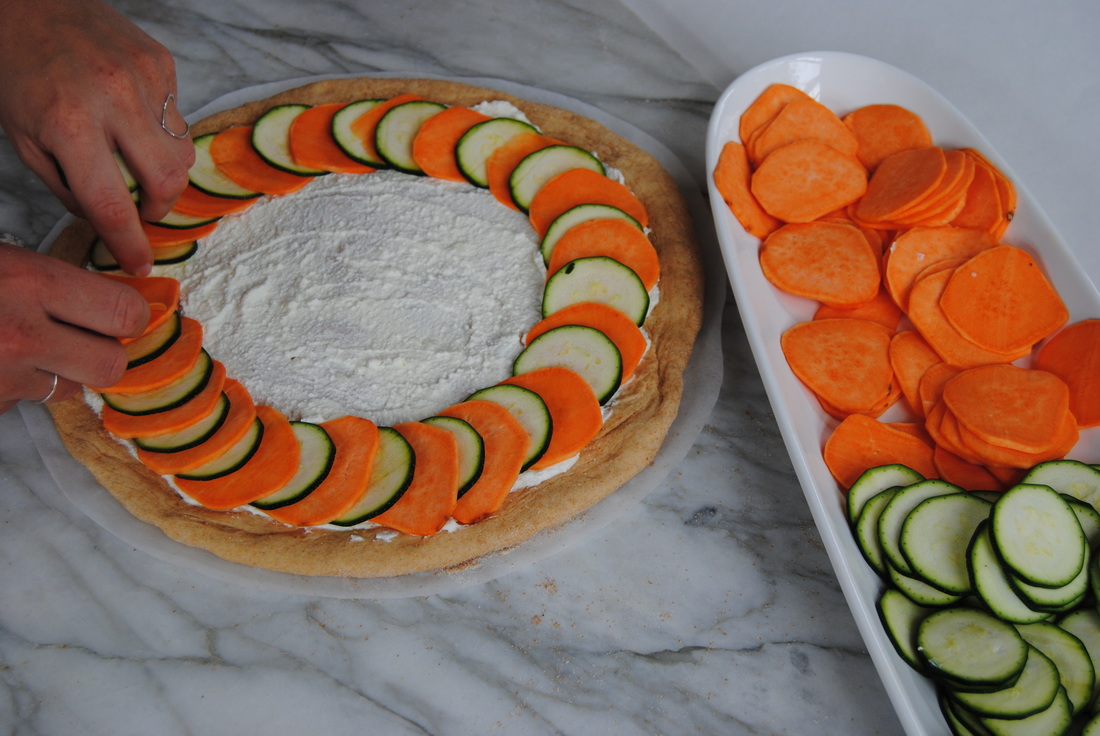
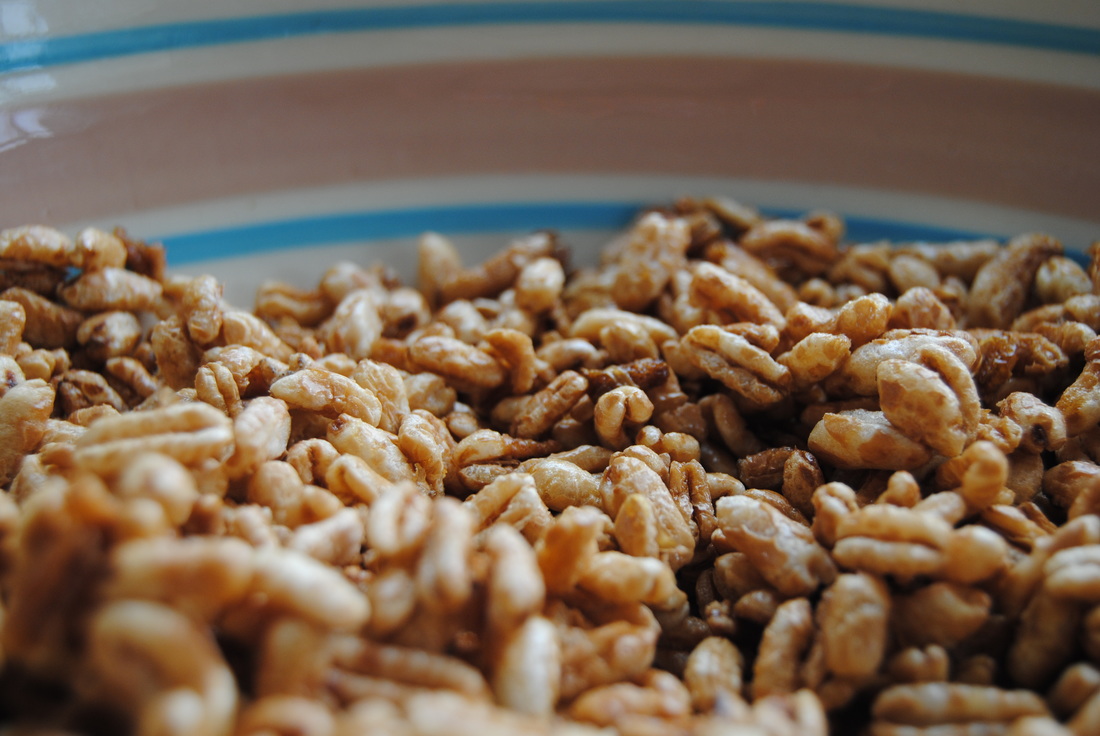
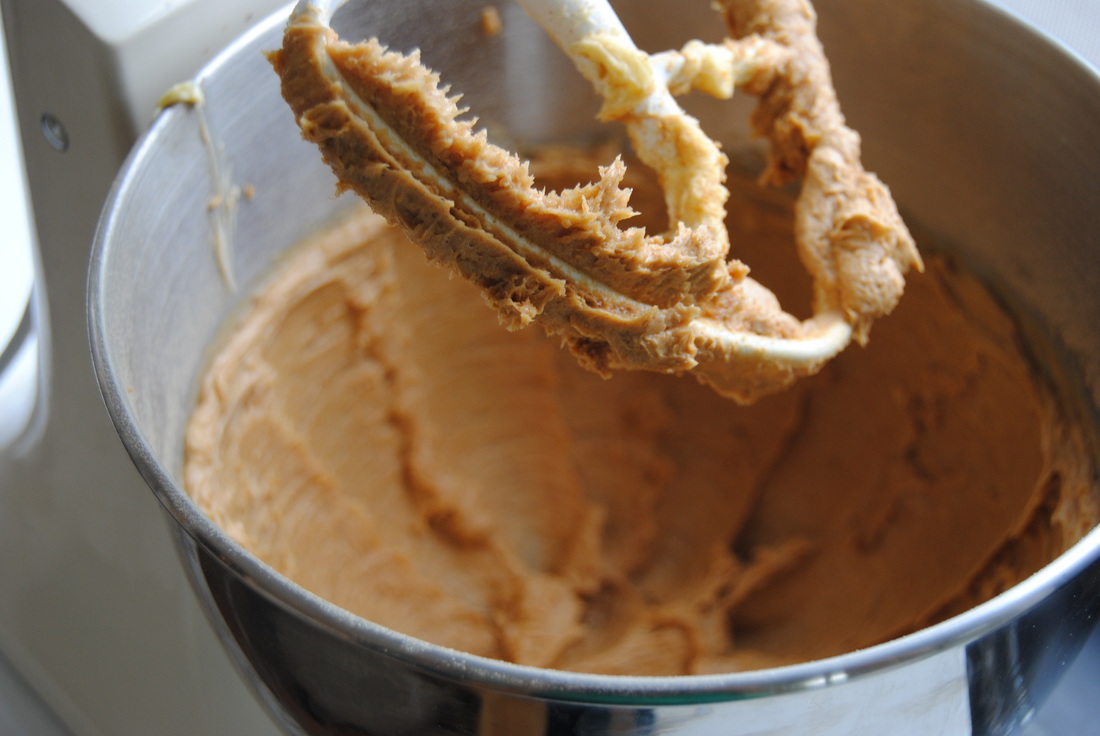
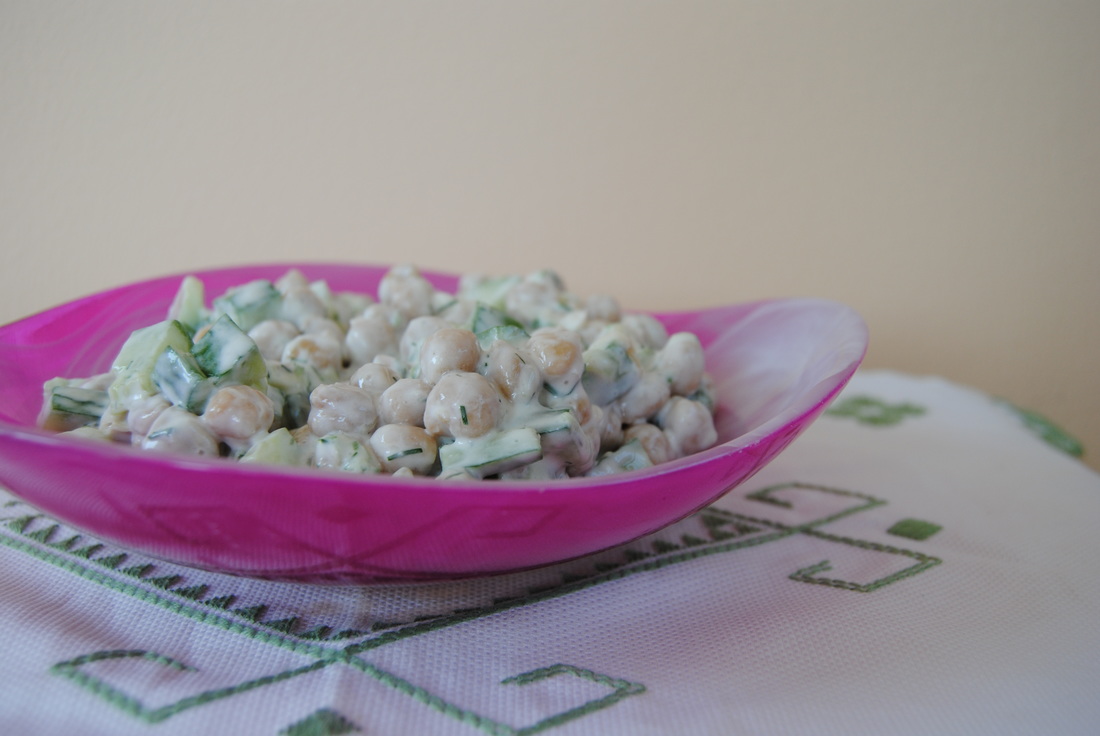
 From The Green Blossom Kitchen we really hope that you're making the most of this beautiful summer. But as you're soaking in the pool this August remember that there may be something else that needs a little soaking. Your dried beans are also begging to be soaked! Now we're not here to hate on the convenience of canned beans, but to remind you that when possible cooking from dried beans is more economical, fresher and can increase the variety of beans you have to choose from. Though if you are going to cook your beans at home let's first find out why a pre-soak is a must! 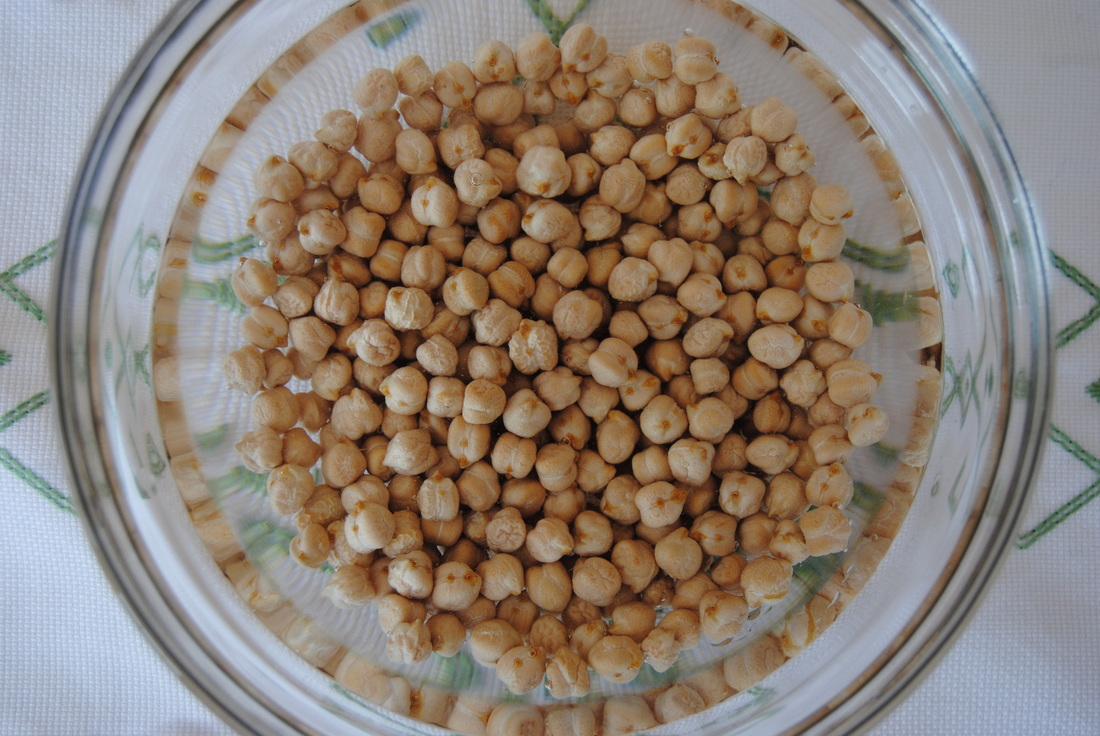 The major reason why soaking your beans is a must is for better absorption of nutrients, which is pretty important to us as foodies/dietitians. Dried beans are one of many plant foods which contain phytic acid, the primary storage form of phosphorus in plant seeds. Though it sounds harmless, phytic acid actually blocks our bodies ability to properly absorb minerals (calcium, magnesium, iron and zinc) within certain plant foods. By soaking beans in warm water (~140 degrees) for at least 12 hours prior to preparing, you are able to greatly reduce the amount of phytic acid within the bean meaning more nutrients for you! Pre-soaking can also reduce cooking time making preparation easier. For this recipe we chose to use chickpeas (of course soaked overnight!). Chickpeas are a vegan source of protein and full of fiber - one cup of cooked chickpeas contains a whopping 15 grams with 65-75% of the fiber being insoluble. So throw some chickpeas in water for a little dip while you explore this recipe further... 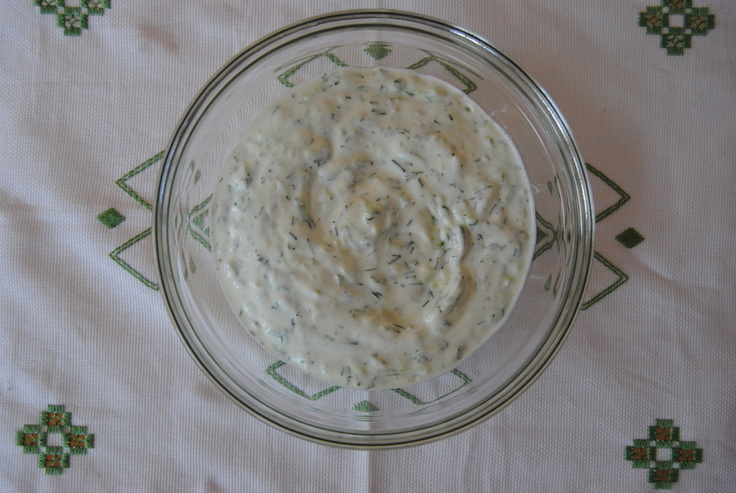 Tzatziki Chickpea Cucumber Salad PREP TIME: 10 mins (plus 12 hour soaking and 1 hour cooking) TOTAL TIME: 15 mins Servings: 4 Ingredients Salad 1 large English cucumber, or 3 small English cucmbers 1 cup dried chickpeas, soaked over night for at least 12 hrs (makes about three cups once cooked) Tzatziki Sauce 1 cup full fat plain Greek yogurt 1 Tbsp chopped fresh dill 1 large or 2 small cloves garlic, minced 1/2 Tbsp lemon juice 1 tsp honey (we used a light clover honey) 1/4 tsp sea salt + additional to taste Sprinkle of pepper to taste Once beans are done soaking, drain, rinse, and add to a pot. Cover with twice the amount of water and bring chickpeas to a boil. Once at a rapid boil cover with a lid, lower the heat, and simmer for about one hour. After an hour of cooking feel free to do a taste test; if the chickpeas are too firm continue cooking until soft and to your liking. Once chickpeas are fully cooked, drain, rinse, and set in the fridge to cool. Chop cucumber into bite sized pieces (about the same size as the cooked chickpeas) and add to the bowl with the cooled chickpeas. To make the sauce, finely chop the dill and mince the garlic. Add the Greek yourt, chopped dill, garlic, lemon juice, honey, salt, and pepper to a mixing bowl. Stir until all ingredients are fully combined. It's now time to mix up your salad! If you plan to eat all of this salad right away add all of the tzatziki sauce to the bowl and mix until fully combined. Sprinkle with additional sea salt to taste. Serve and enjoy! *TIP: If you do not plan to eat all of this salad right away we suggest adding the tzatziki sauce and additional salt just before eating. We found that the longer it sits on the salad the more water is drawn out from the cucumbers being exposed to salt creating a more "soupy" final salad than we would like. 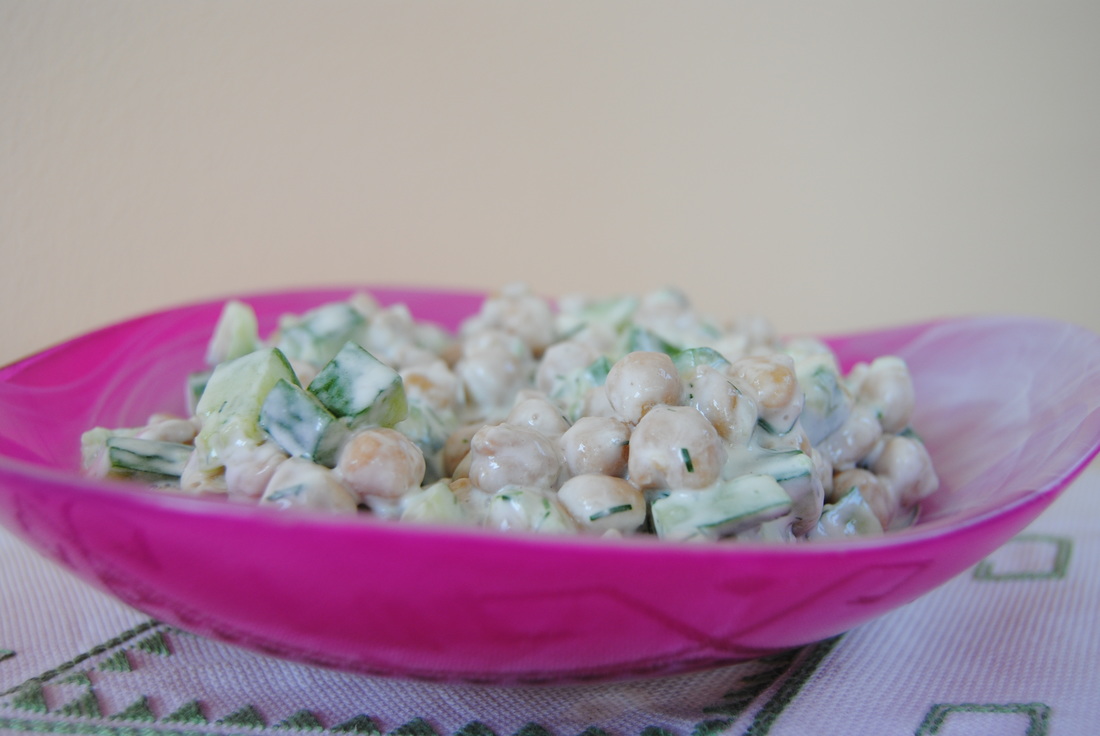 We hope you love the freshness of this salad and find a use for all those garden cucumbers lying around this time of year. We think that this one is great on it's own, a perfect topping for a spinach salad, or yummily (yes yummily) paired with warm pita. Though you may find another use so please share! Also that tzatziki sauce, you're going to want to use it on everything so go ahead! Just remember to soak your beans, they deserve a dip too. Okay, now it's time get back to the pool! Soak it up, Jess & Cecelia 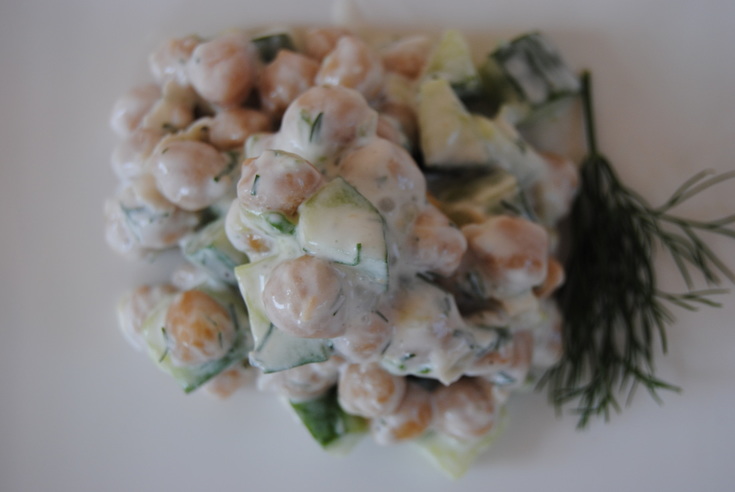
1 Comment
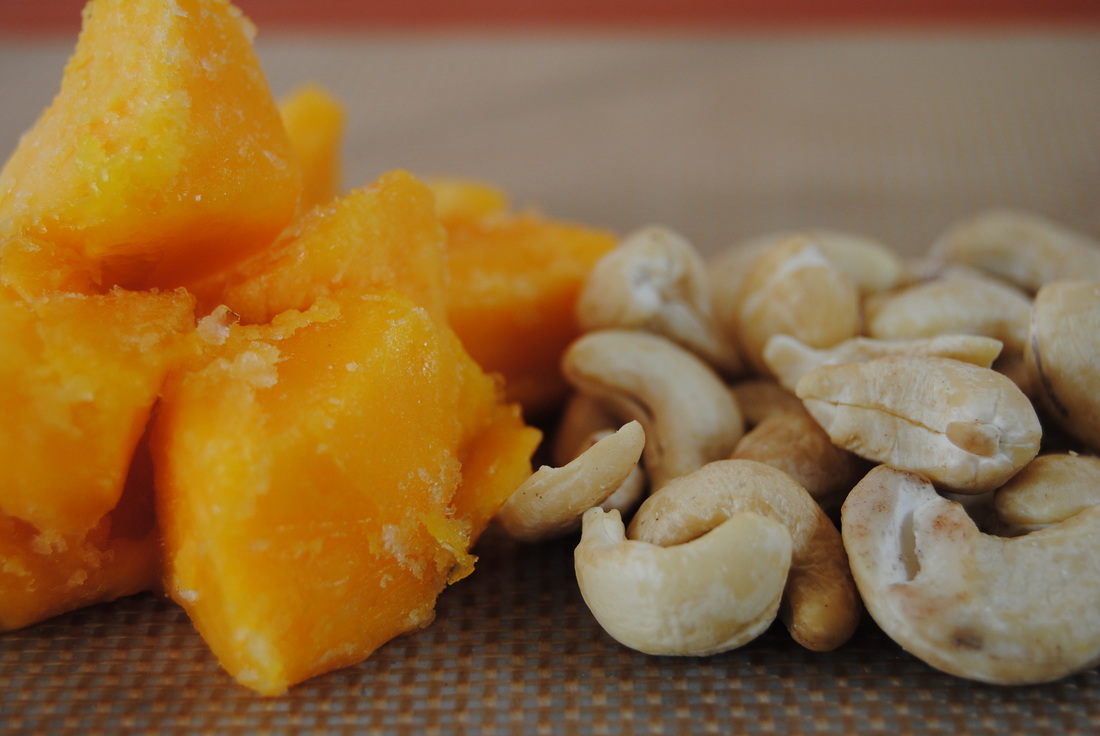
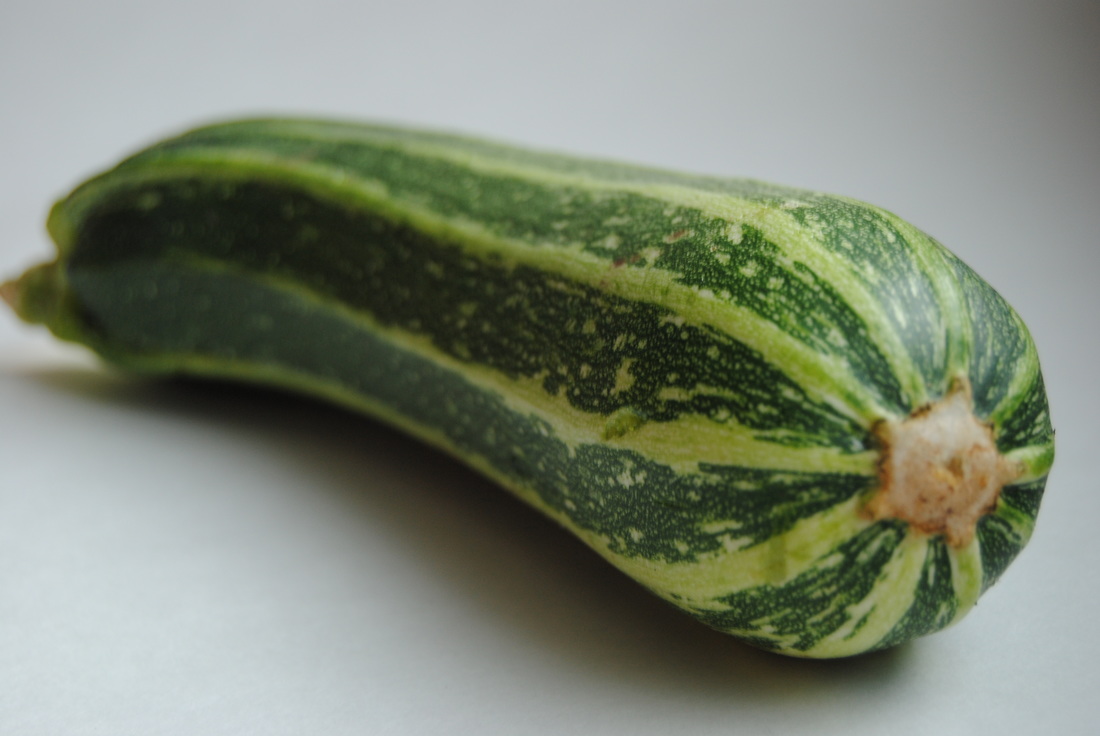
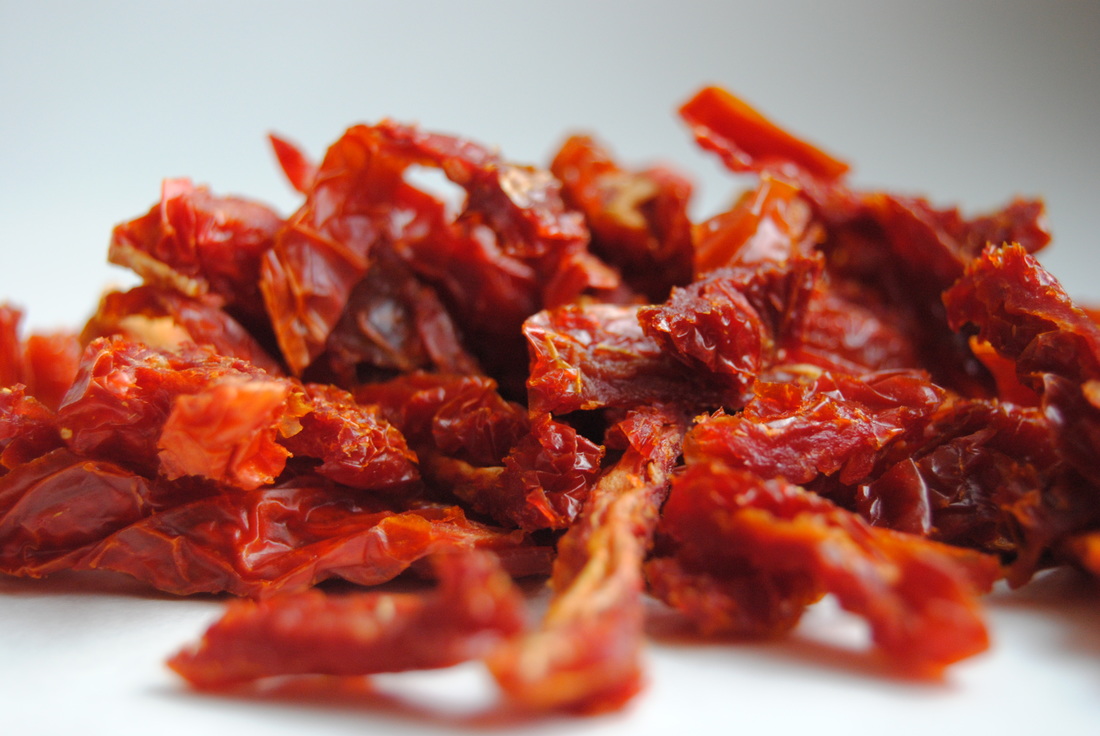
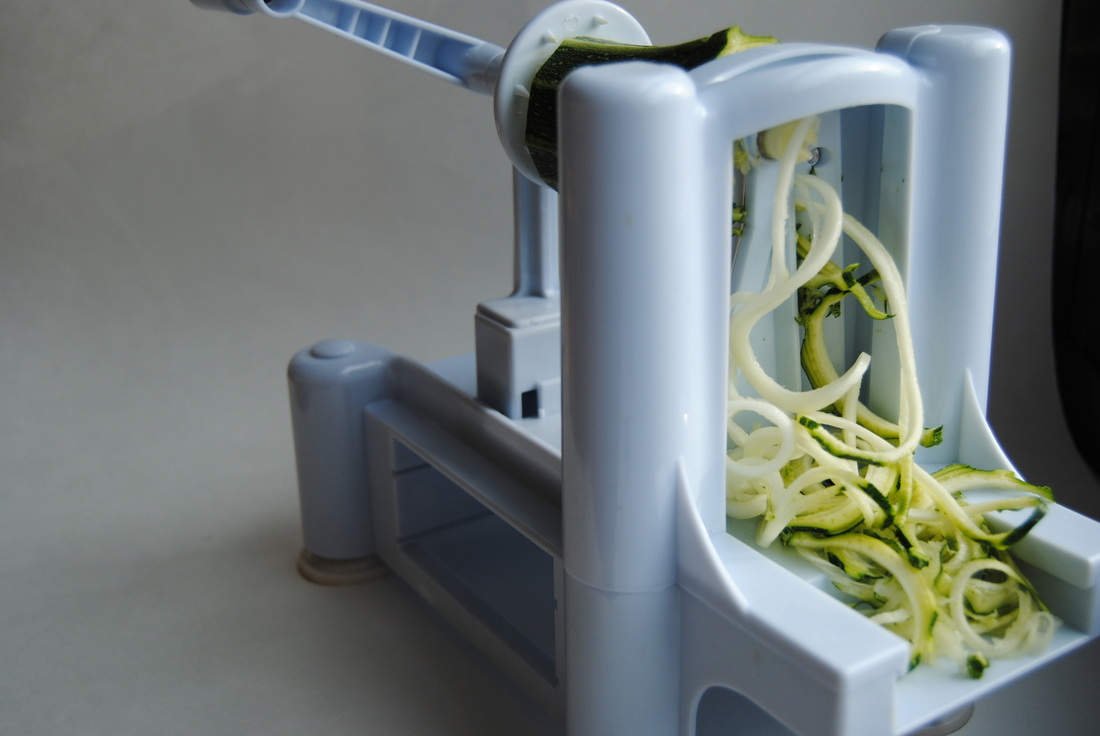
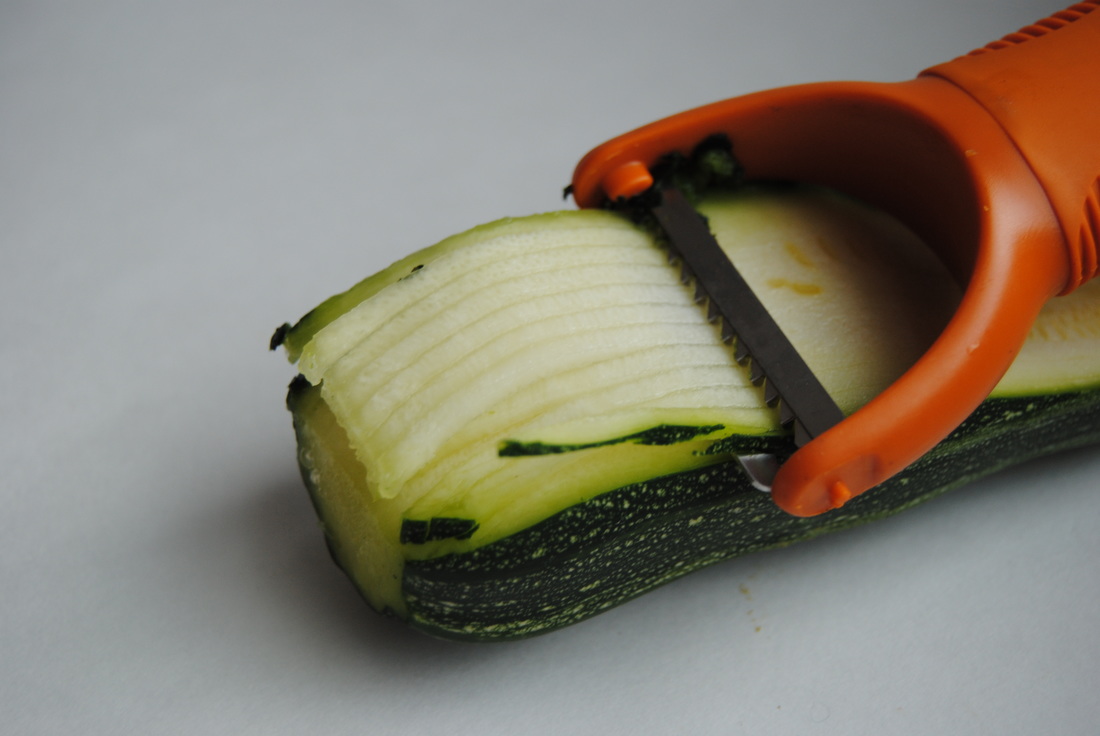
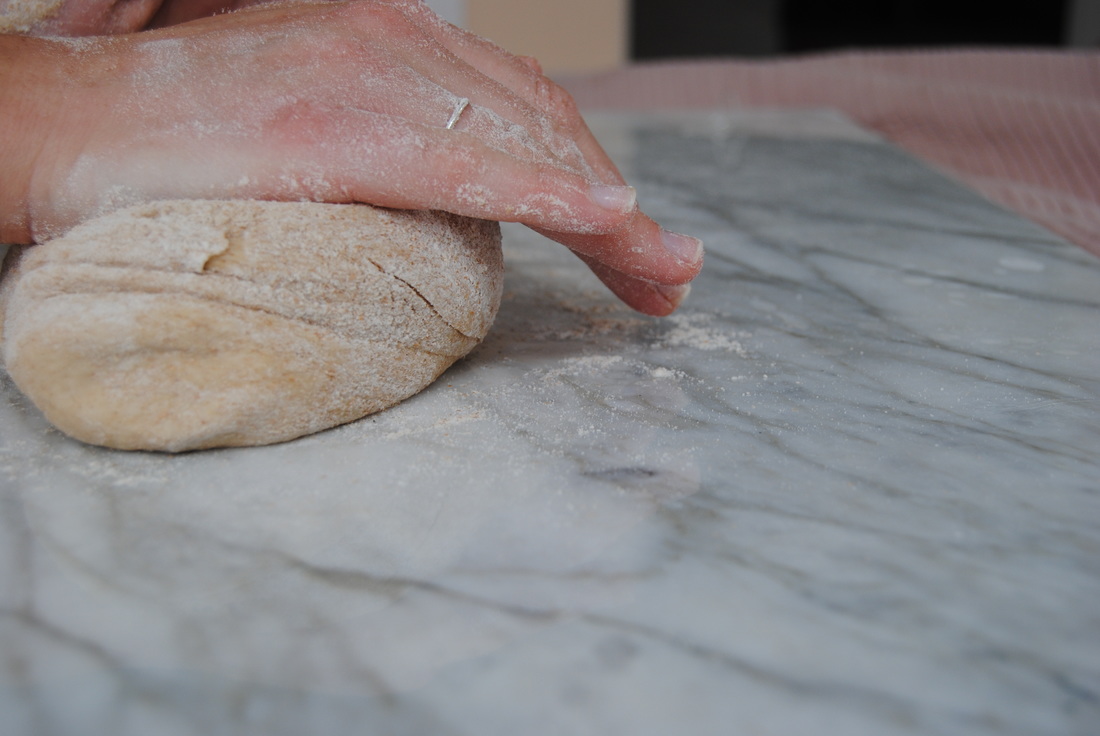
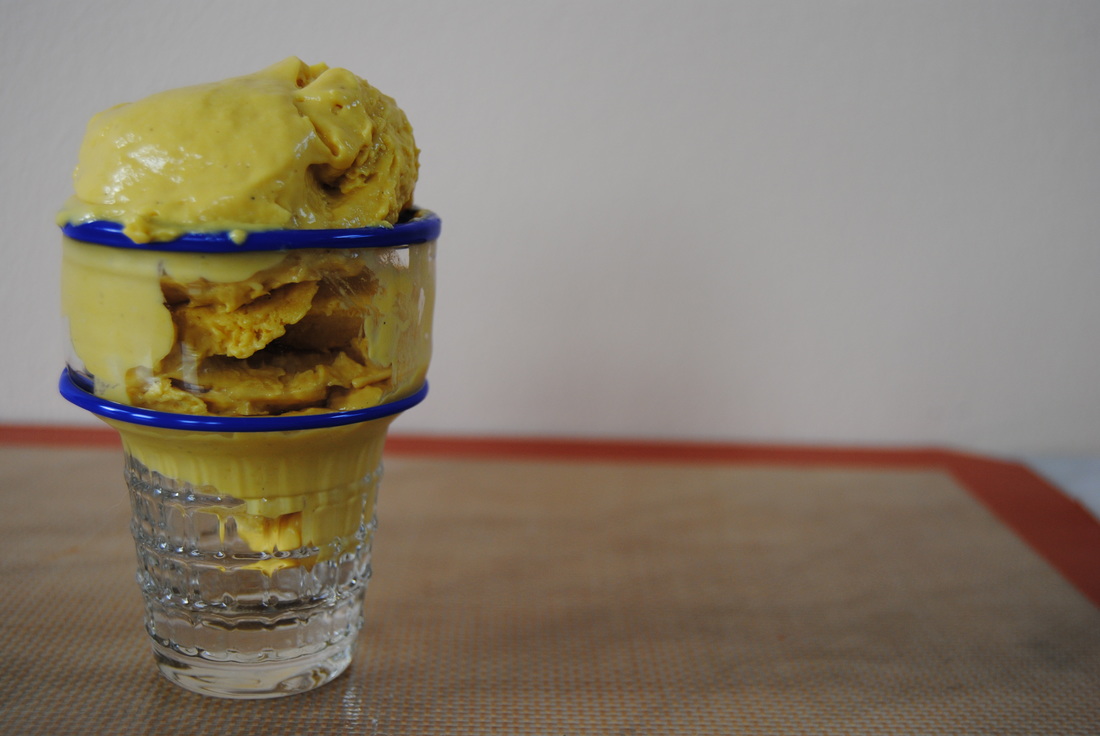 Ok, we know - the saying is "cool as a cucumber" but we think cashews are pretty cool too. Especially in the form of raw, dairy free cashew ice cream. What better way to stay cool on these hot days and feel okay about an everyday ice cream fix. But let's first explore how cashews can do so much more in the kitchen then you ever thought! 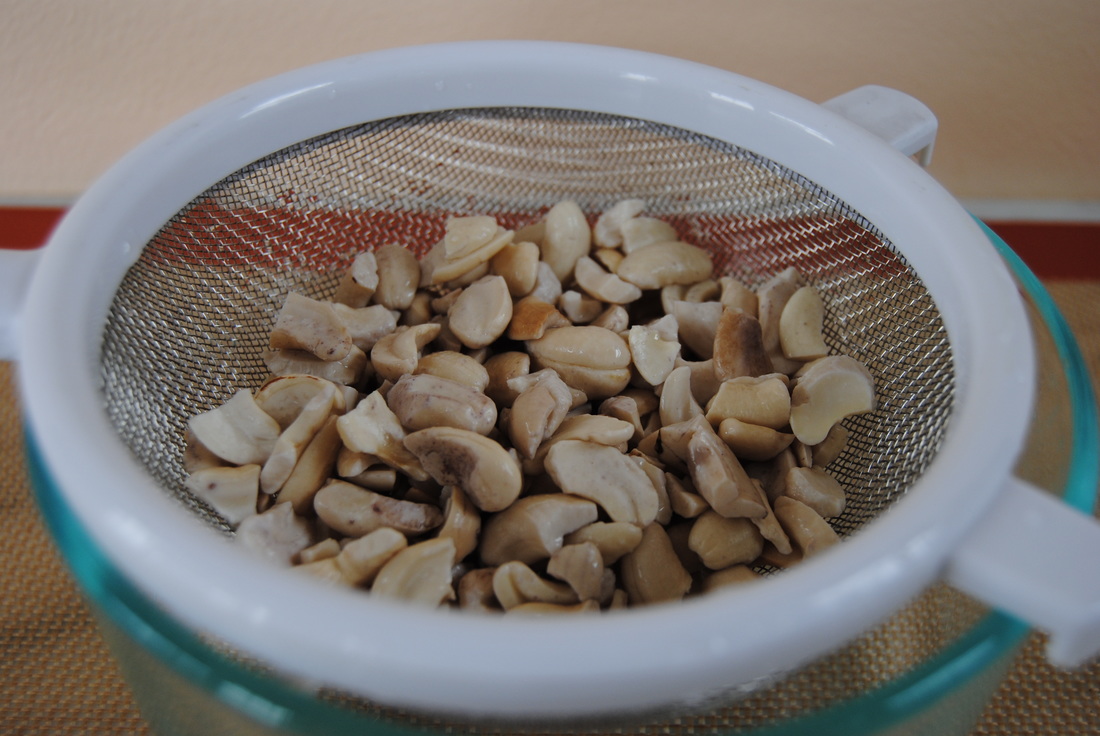 So what we are using for this fabulous ice cream is known as cashew cream - basically a vegan, dairy free alternative to heavy cream that can be used in very similar ways. Like heavy cream, cashew cream has a mild taste and high fat content perfect for creamy soups, alternative cheese spreads/fillings/sauces, and of course ice cream. You just need to remember to give yourself adequate soaking time for the cashews, so a little planning ahead, and a good high speed blender for best results. Cashew cream can be stored in the fridge in an airtight container and is best used within 3-5 days. Even if you are a little skeptical about the idea of a nut replacing your heavy cream, cashew cream is at least worth a try - it's only two ingredients and very simple to prepare. Also, since we are using raw cashews and fruit for this ice cream this is another raw post! Once you taste it we swear you won't know that this ice cream is dairy free, vegan and raw! Mango Tango Raw Cashew Ice Cream PREP TIME: 5 mins (plus 8 hour or overnight soak) TOTAL TIME: 10 mins (plus 30 min-3 hour freeze) Servings: ~ 1 pint Ingredients 2 Cups frozen mango 1 Cup raw, unsalted cashews 1/4 Cup fresh orange juice 2 Tbsp pure, dark maple syrup 1/2 vanilla bean, inside scraped out or 1/2 tsp pure vanilla extract Optional topping: chili lime salt for a kick! (we used Tajin brand) Place 1 cup cashews in a bowl and cover with room temperature water. Allow cashews to sit for at least 8 hours or overnight to soften up. Drain and rinse soaked cashews and set aside. We prefer to use a good quality, high speed blender such as Vitamix or Blendtec to achieve the perfect texture for this ice cream. Add frozen mango, soaked cashews, orange juice, maple syrup, and vanilla bean to the blender and blend on high for 3 minutes or until a thick, creamy mixture forms. Store mixture in an air tight container in the freezer for a minimum of 30 minutes for soft serve like texture or 3 hours for a firmer, scoopable ice cream. If storing in the freezer for a later date, allow ice cream to thaw out a bit prior to serving, about 15-30 minutes on the counter. Cashew Cream PREP TIME: 2 mins (plus 8 hour or overnight soak) TOTAL TIME: 5 mins Servings: ~1 cup Ingredients 1 cup raw, unsalted cashews Water Place cashews in a bowl, submerge with water, cover with a lid and let sit on the counter for at least 8 hours or overnight. Drain and rinse cashews and add to a high speed blender with 1/2-3/4 cup filtered water. Blend on high for 3 minutes or until a smooth, luscious texture is formed. Vary the amount of water added to the blender based on the consistency of cream you like. Flavor sweet or savory or leave as is. 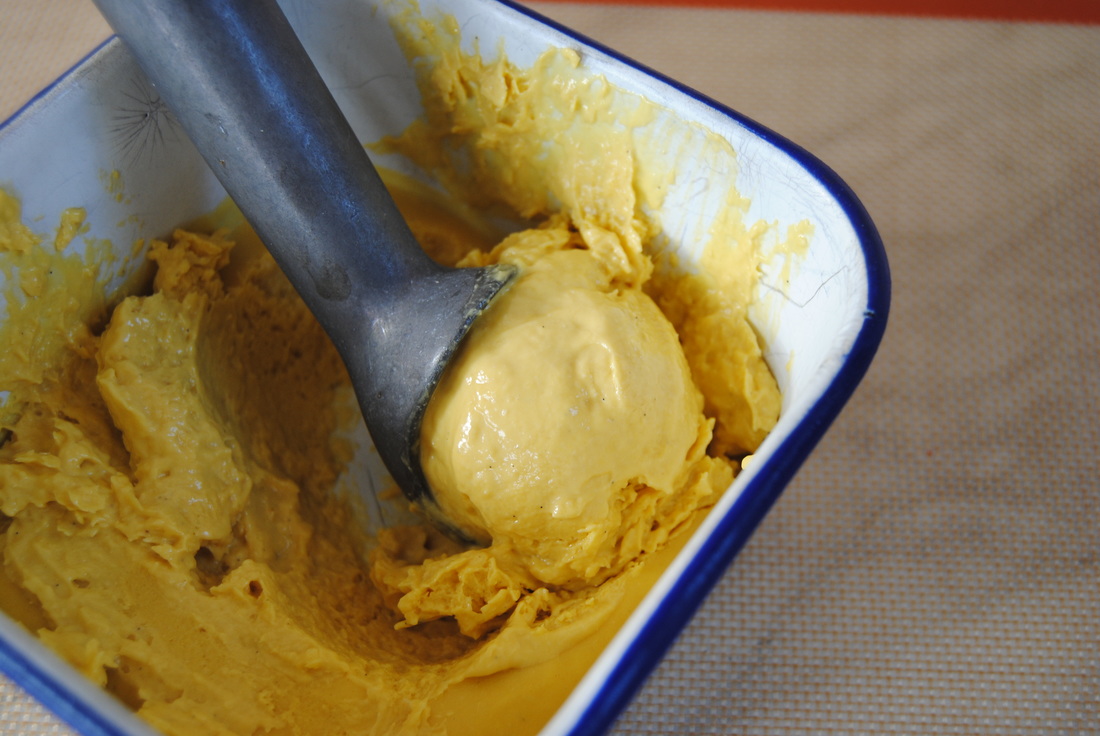 Now isn't cashew just so cool!? Save this recipe for cashew cream and start testing it out in the kitchen. Though ice cream is an August favorite we bet you will find many more uses for cashew cream throughout the year. You can bet we will be using it in recipes to come. Stay cool, Jess and Cecelia 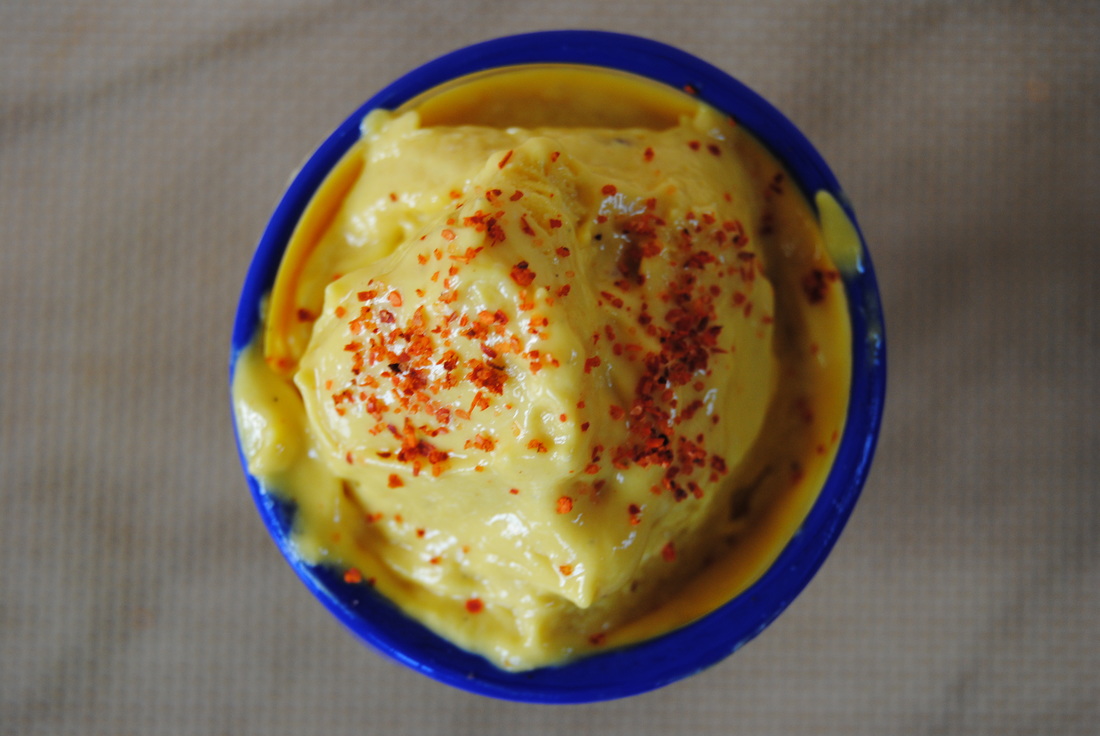 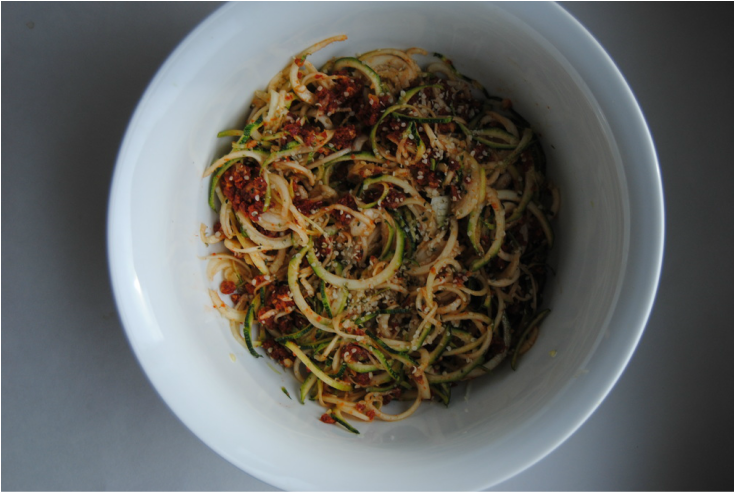 This week we are gong to blow your mind with zucchini pasta aka zoodles (zucchini + noodles)! Now we definitely love a good traditional pasta meal too, but it just doesn't have the same glamour on a hot day during bathing suit season if you catch our drift. To keep things fresh and lighter for the summer this is our go to and know it will be yours too once you try it. So lets find out how a zucchini becomes pasta, and raw pasta at that! 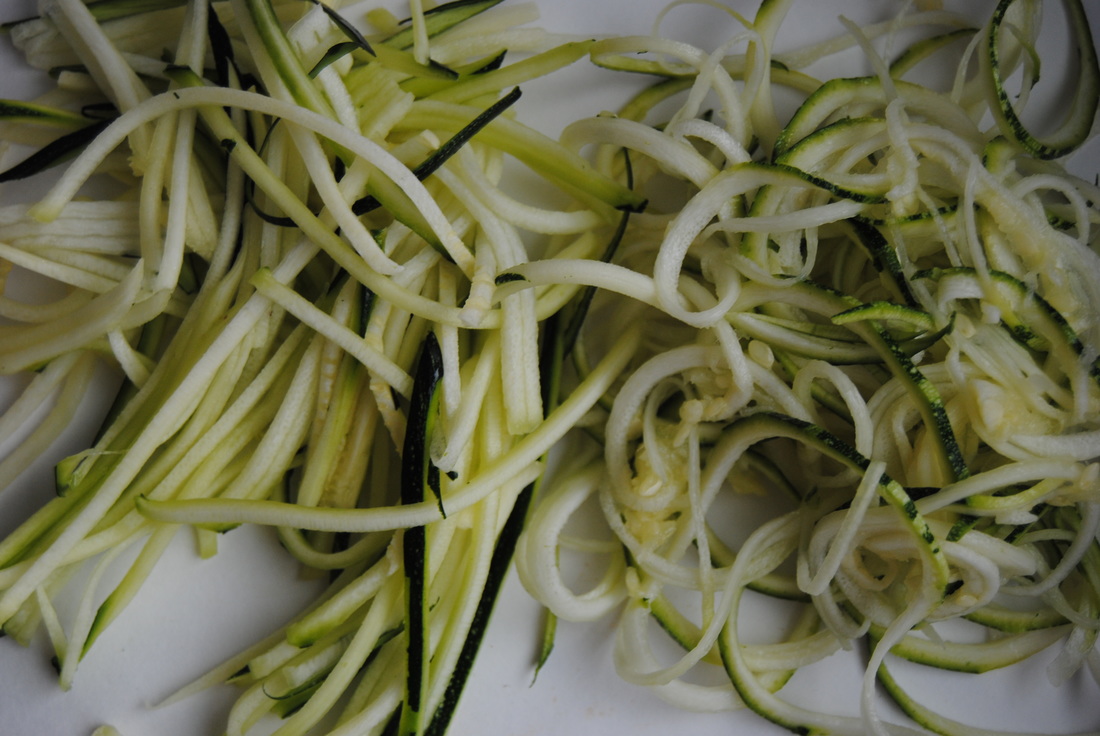 There are two ways to make your zoodles with slightly different final products (both pictured above). Using raw zucchini, grating with a juilieene vegetable peeler will create a liguiine shape (pictured left) and a vegetable spiralizer will create a spiraled capellini shape (pictured right). Both work great but we highly recommend a vegeatble spiralizer because the small investment is well worth it (for purchase here). Many vegetables can be spiralized and eaten raw or cooked, the possibilities are really endless and this tool can help you get more creative in the kitchen. And not the mention how beautiful spiralized vegetables look! After creating your zoodle shapes the zucchini is eaten raw which is very palatable because of the small size - it has a nice texture similar to al dente pasta and perfect for holding onto your favorite sauce topping. The whole meal is raw actually because the pesto is made with sun dried tomatoes (dried and not cooked, hence the name). Raw foods and whole raw meals are fabulous because raw food is wholesome and has not been refined, chemically processed, denatured, or heated above 118°F which means the nutritional value of the food is preserved. When we eat food in its natural state (raw) our bodies receive all the vitamins, minerals, phytonutrients, and enzymes which are naturally found in the plant. For this reason alone, why not eat raw especially this time of the year when the harvest is bounty!! Raw Sun Dried Tomato Pesto Pasta PREP TIME: 15 mins TOTAL TIME: 20 mins Servings: 2 Ingredients Pasta 3 medium zucchini (~5 cups finished noodles) 1 Tbsp raw hemp hearts (optional) Sauce 6 oz sun dried tomatoes 3 Tbsp extra virgin olive oil 3 Tbsp raw walnuts 1.5 Tbsp lemon juice 1 clove garlic 1/2 tsp salt A sprinkle of cracked black pepper Using a spiralizer, create your raw zucchini noodles (zoodles). If you do not have this handy kitchen tool you may also make your noodles with a handheld vegetable julienne tool, as shown above. Set noodles aside and begin making the raw tomato pesto. For the pesto, combine the sun dried tomatoes, olive oil, walnuts, lemon juice, garlic, salt, and pepper in a food processor (may also use a blender). Pulse on high until all ingreident are fully combined and a semi smooth sauce is formed. Lightly toss pesto over raw noodles/zoodles. Mix until fully incorported. Top with a sprinkle of raw shelled hemp seeds. 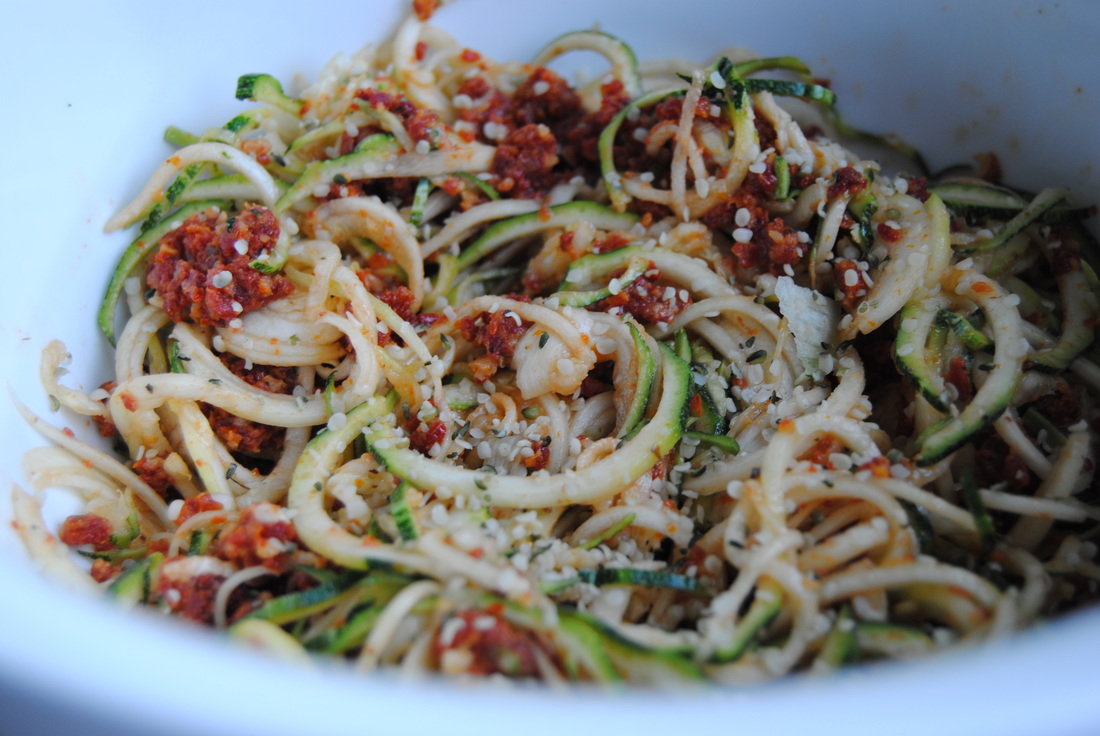 So make sure you don't pass up the zucchini at markets and offered from friends' gardens this summer. The uniqueness of textures and flavores in this recipe will make it a weekly favorite and guest pleaser this summer. Also get creative with your spiralizing to really make your veggies shine. We want to see what you come up with! Spiral away, Jess and Cecelia 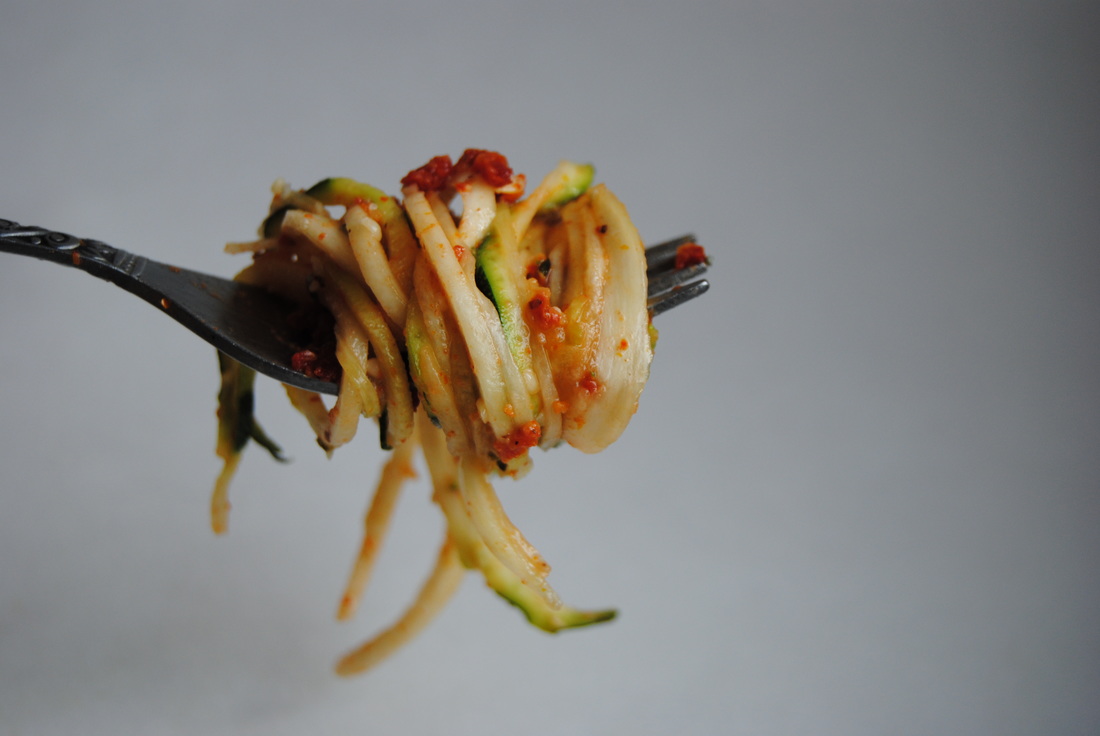 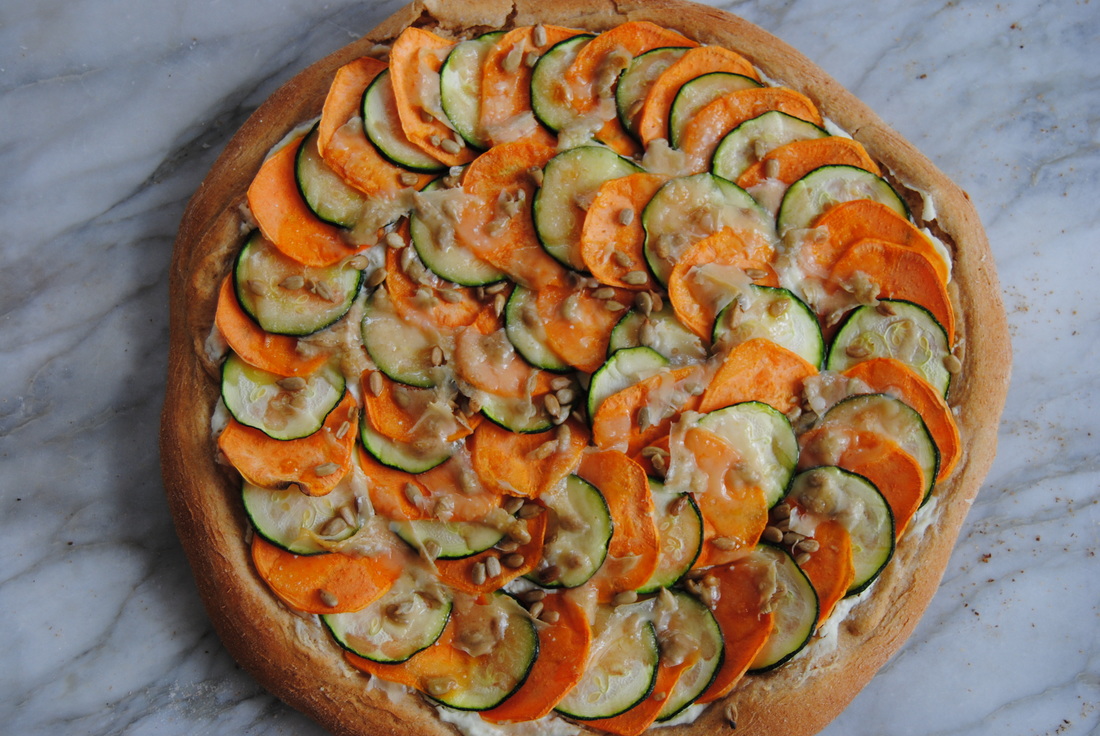 From TGBK we want to wish you a happy summer solstice! It is the longest day of the year today, meaning the sun rises the earliest and sets the latest than any other day this year, do don't waste the daylight sleeping in. Well what to do with all the extra time today then? How about experimenting with something else that rises...you got it, yeast bread! This pizza crust recipe was adapted from a favorite bun recipe of ours and we have to say it is quite the showstopper. If you haven't experimented with yeast baking yet today is the day, but let's explain the process a little more first. 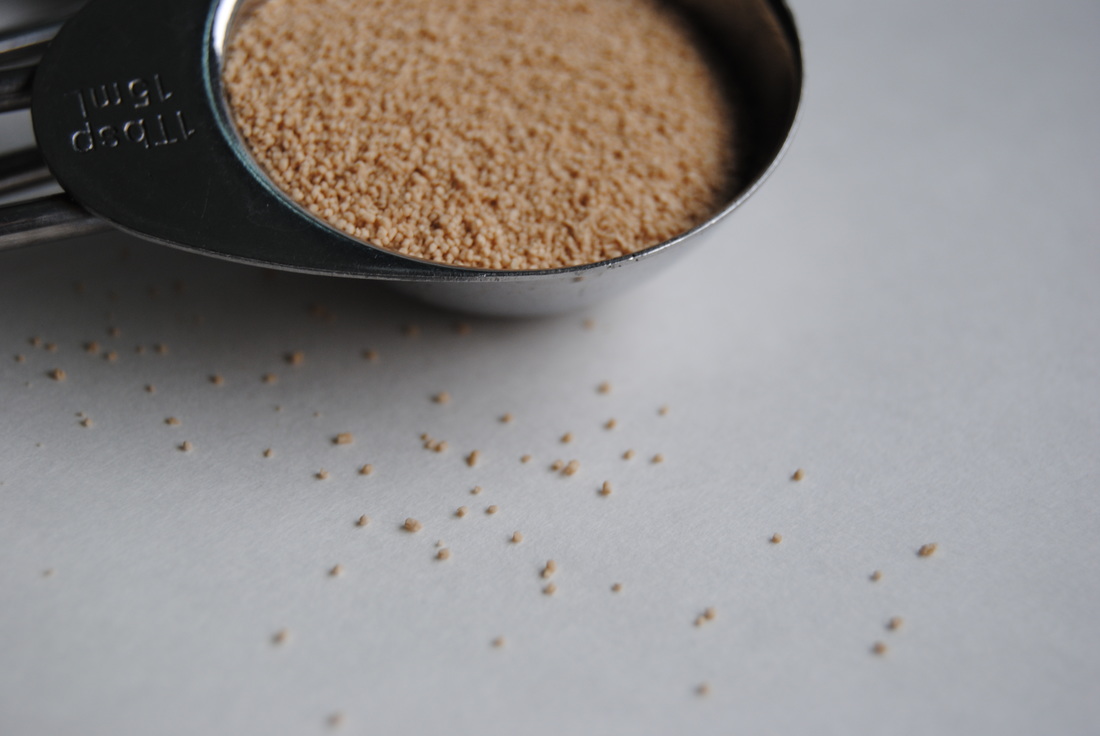 Yeast is a live, single-celled fungus of which there are about 160 species. The yeast we are most familiar with and most commonly used in baking is saccharomyces cerevisiae, or bakers yeast. This yeast lies dormant until it comes into contact with warm water. Once activated, yeast begins feeding on sugars (either added to the recipe or from the starch in the flour) and releases carbon dioxide. The carbon dioxide becomes trapped in the dough's elastic web of gluten (created through the kneading process) and makes the bread rise. Be careful though, since yeast are living they can be killed by overly hot water. Yeast prefer temperatures between 70-100 degrees Fahrenheit and liquids hotter than 139 degrees will kill yeast. So if your precious dough does not rise, this may be what happened. Though there are other reasons why you may not get the rise you were hoping for- we like this website for some more yeast bread tips and troubleshooting. So grab some yeast from the local store (active, dry yeast for this recipe) and lets get started! 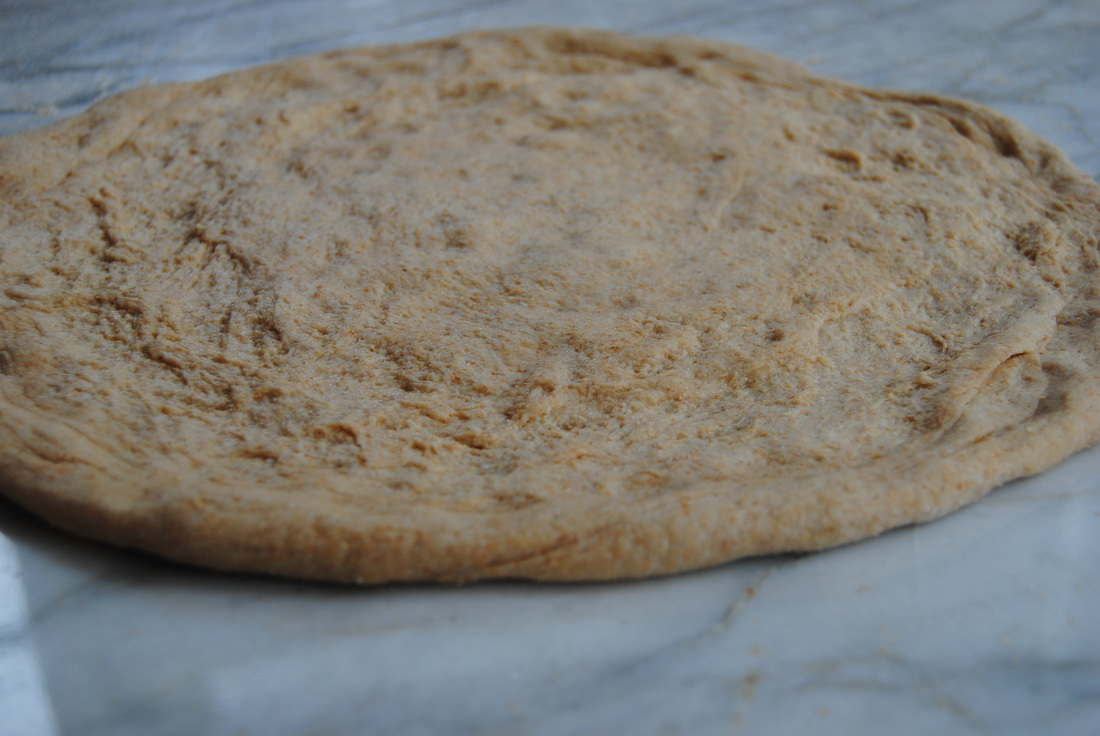 The Perfect Crust PREP TIME: 30 mins TOTAL TIME: 45 mins Servings: 2 pizza crusts Ingredients 3 1/2 cups flour of choice (we used 2 cups whole wheat flour and 1.5 cups spelt flour) 3 Tbs sugar 1 tsp salt 2 packages active dry yeast 1 cup milk of choice (we used unflavored hemp milk) 1/2 cup water 4 Tbsp extra virgin olive oil + additional for greasing dough 1-2 Tbsp ground flax In a large bowl thoroughly mix 1.5 cups flower, sugar, salt, and yeast. Combine milk, water and oil in a small saucepan. Heat over low heat until liquids are warm but not too hot. Gradually add to dry ingredients and beat for two minutes with an electric mixer, scraping bowl occasionally. Add 1/2 cup flour and beat at high speed another two minutes. Stir in enough additional flour to make a soft dough (approximately 1-1.5 cups). Turn onto a lightly floured surface and kneed until smooth and elastic, about 5 minutes. Place dough in a bowl sprinkled with olive oil, turning to grease the top of the dough. Cover the bowl with a wet dishcloth, place in a warm location and allow dough to rise for 15 minutes. Turn the dough out onto a floured table, divide in half, and roll each half into a 9x10 inch circle. Sprinkle ground flax seed onto two circular baking sheets to prevent dough from sticking. Lay dough onto baking sheets and create your preferred pizza. Once pizza is prepared bake at 425 for at least 10-12 minutes to allow dough to fully cook. Dough can also be saved in the fridge for 3-5 days. Summer Spiral Pizza PREP TIME: 15 mins TOTAL TIME: 35 mins Servings: 1 pizza Ingredients Sauce 1/2 cup full fat ricotta cheese 2-3 cloves crushed garlic, depending on how much garlic you like 1 Tbsp extra virgin olive oil Toppings 1/2 medium raw sweet potato 1 medium zucchini 3 oz sharp cheese, shaved (we chose Parmesan) 1/8 cup roasted and salted sunflower seeds Sprinkle of crushed red pepper flakes, optional Drizzle of reduced balsamic glaze, optional Using a mandolin or a large chef knife, slice sweet potato and zucchini into 1/8" slices. Mix together olive oil and crushed garlic with ricotta cheese. Evenly spread ricotta mixture on top of pizza crust. As pictured, layer sliced sweet potato and zucchini one after another starting from the outside of the crust working your way to the center. Sprinkle sunflower seeds on top of vegetables and spread shaved cheese evenly over the top. Place pizza in preheated 425 degree oven and cook for 16-18 minutes until golden brown. Once out of the oven, sprinkle with desired toppings- crushed red peppers and reduced balsamic glaze are delicious!  Okay, so how great was the crust? We promise you won't find that in the freezer aisle! This crust will be just as good with any variety of toppings so feel free to mix it up and create your own favorite. We loved showcasing zucchini topping for the summer but can imagine hundreds of other amazing combinations. Please experiment and let us know what you come up with, we love hearing from you! Rise and shine friends, Jess and Cecelia 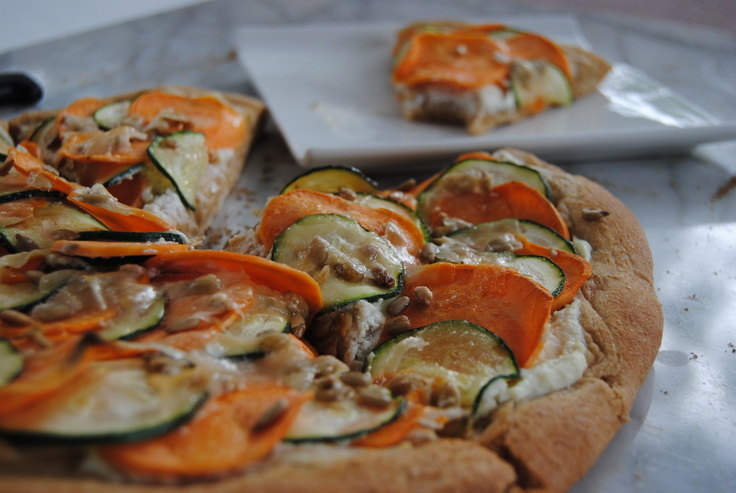 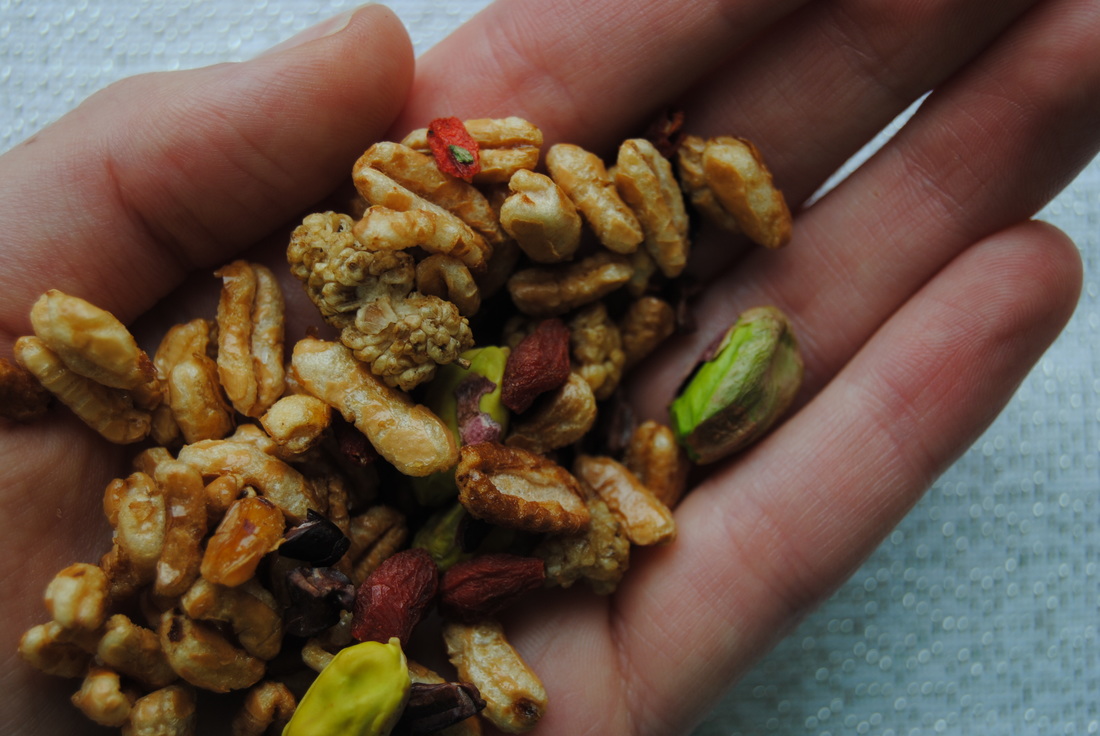 Here at TGBK we love a lot of foods but we have to say that one holds a special place in our hearts, yes you guessed it, chocolate. Now if you're into chocolate as much as we are and don't want to feel guilty about an everyday chocolate fix then this post is for you! And we're here to remind you that certain forms of chocolate are actually superfoods and a great addition to your diet. Now don't get crazy, we aren't suggesting you head down the nearest candy aisle- we are referring to cacao and raw chocolate recipes. Confused? Read on! 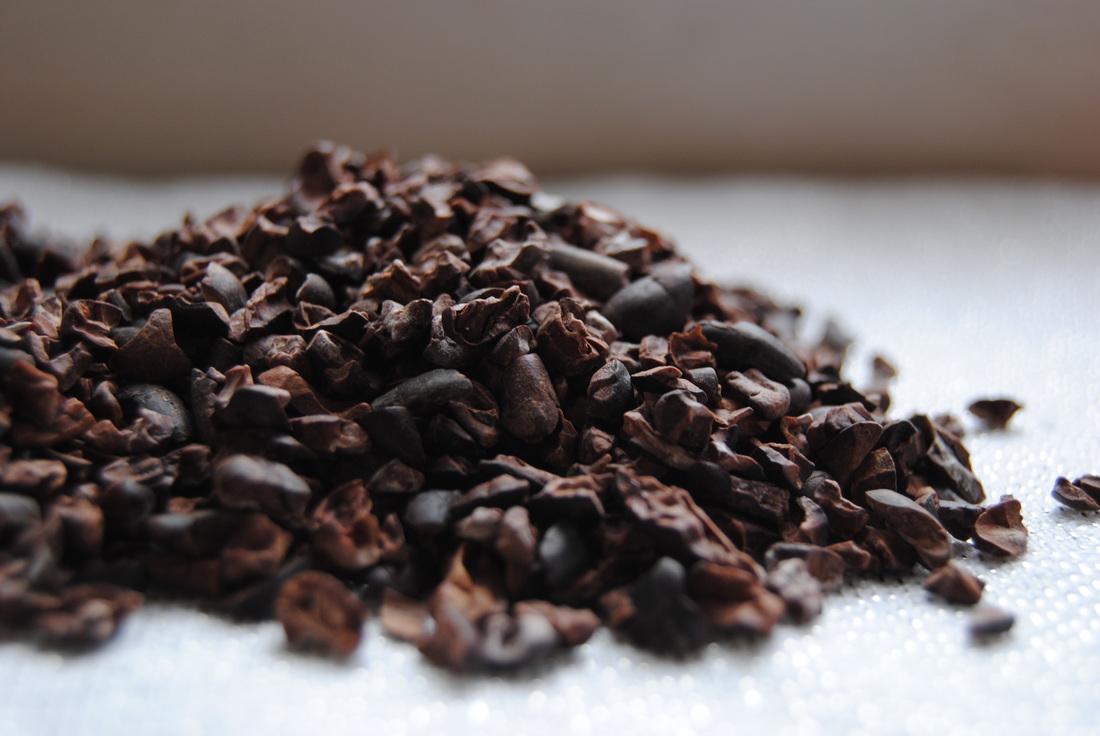 So the wonderful (and to us, holy) cacao bean is what provides the world with chocolate (hallelujah!). Cacao beans are seeds found in the fruit pods of the cacao tree which are harvested and fermented and then processed into the various chocolate products we know and love. However, this processing is what can make all the difference in final product and nutritional benefit. Many beans go through a roasting process to dry the beans and develop flavor and aroma, but this high temperature treatment can destroy the antioxidants that cacao contains which make it a superfood in the first place (refresher about superfoods here). Raw cacao products are alternatively dried at low temperatures to preserve these beneficial nutrients. The low temperature dried cacao beans can then be made into cacao nibs, cacao powder or cacao butter, all raw, antioxidant packed products that we love! This recipe features raw cacao nibs which are essentially crumbled cacao beans. They have a bold chocolate flavor that may be more tangy and bitter than you would initially expect, but remember this is 100% pure cacao with no added sugar or other ingredients. This recipe features not only cacao as a superfood but also mulberry and goji berry which have their own super qualities. Our favorite supplier of these super foods is Navitas Naturals - their website can provide you more superfood information and ways to find their products. You will notice that these products may be pricey but remember that you are paying for a high quality product. If you are budgeting look for these items in bulk bins at local co-op or specialty markets or search for bulk deals online. Once you get your raw cacao get going on this recipe! 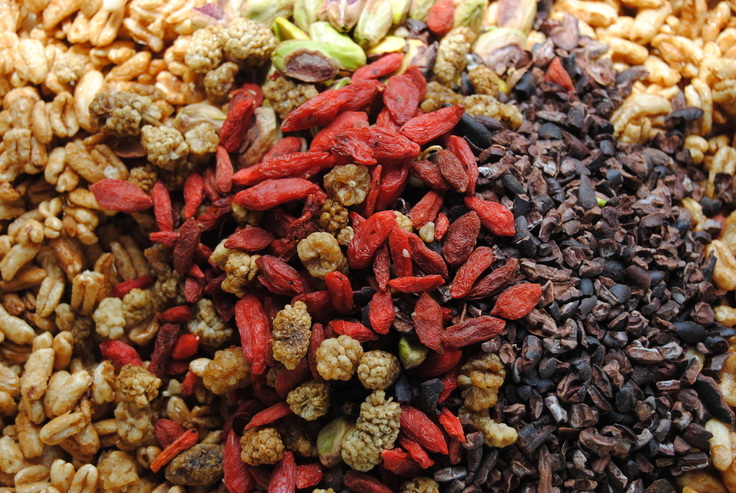 Holy Cacao Superfood Power Mix PREP TIME: 5 mins TOTAL TIME: 15 mins Servings: 7.5 cups Ingredients Toasted Cereal 6 cups unsweetened puffed kamut or puffed wheat 1/3 cup pure maple syrup 1 Tbsp coconut oil, melted 1/8 tsp sea salt Superfood Power Mix 6 cups unsweetened puffed kamut 1/2 cup raw cacao nibs 1/4 cup raw goji berries 1/4 cup raw mulberries 1/2 cup raw pistachios 1/4 tsp sea salt Preheat oven to 350 degrees. Line a large baking sheet with parchment paper and set aside. Measure out 6 cups of puffed kamut and place into a large bowl. Combine 1/3 cup pure maple syrup, 1 Tbsp melted coconut oil, and 1/8 tsp sea salt in a small bowl, stir to combine. Pour liquid mixture over puffed kamut and stir until evenly coated. Spread mixture onto parchment lined baking sheet and toast in the oven for 10 minutes. Remove from oven and allow to cool. Combine all ingredients (cooled kamut, cacao nibs, goji berries, mulberries, pistachios, and sea salt) in a large bowl. Portion out into individual 1/2 cup servings if desired. Store mix in air tight containers, we prefer a small jar we can throw in our purse or backpack for an on-the-go healthy snack! 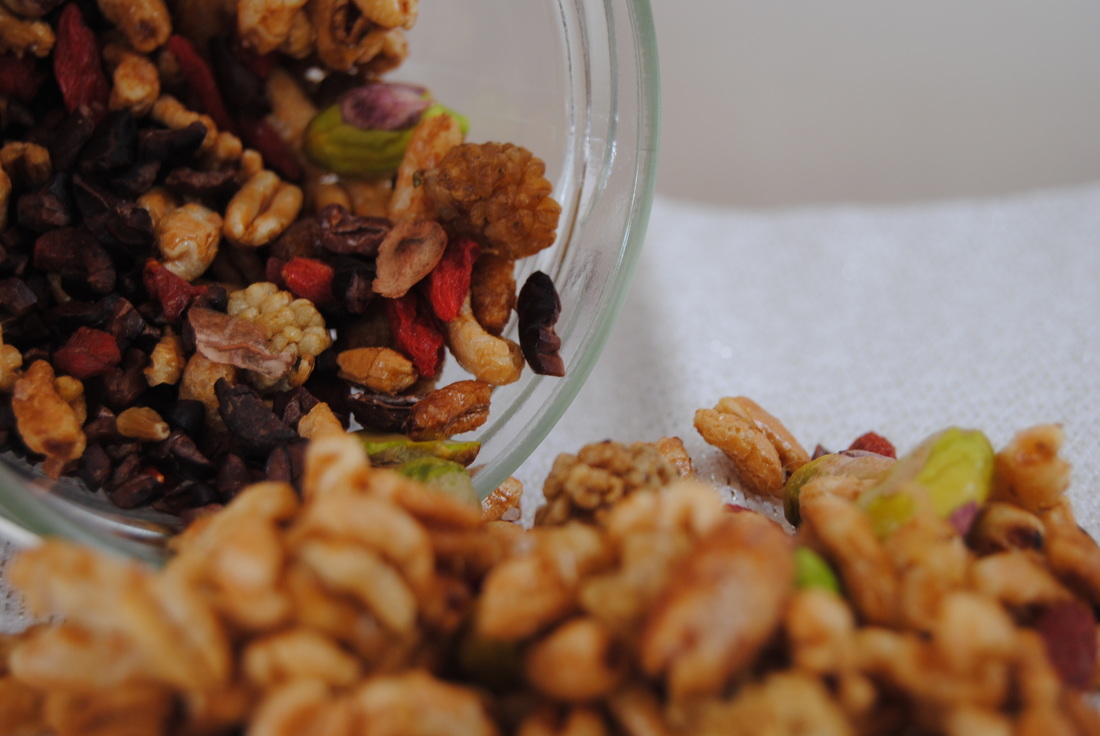 Have your prayers been answered with this power mix? We sure hope so! We love the toasty, sweet cereal mixed with the bold cacao nibs and chewy, slightly sour berries. You can feel good snacking on this anytime of the day or even as a delicious superfood cereal with homemade almond milk. Hey, we could all use a little more raw chocolate in our lives. Have a rawesome week! Jess and Cecelia 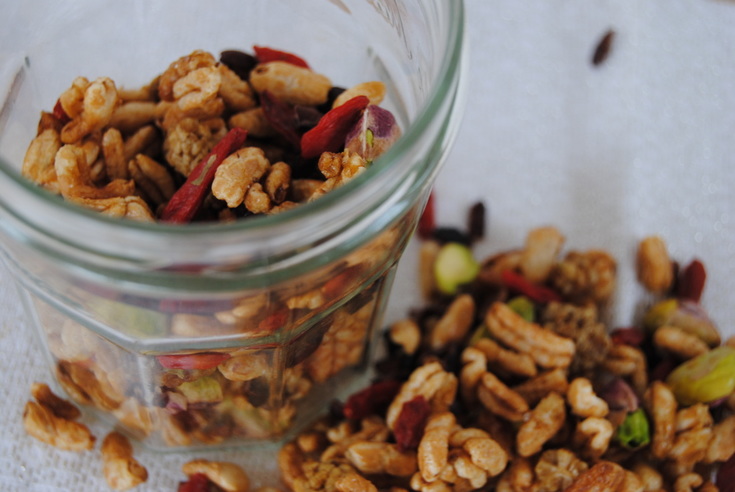  Guess who's getting married at The Green Blossom Kitchen, Cecelia! She is marrying her high-school sweetheart, Travis, next weekend so of course we had to celebrate with Italian wedding cookies and her favorite flower, lilacs. As usual we gave the standard recipe a little make-over which includes the use of alternative flours. Remember the almond flour you saved from our matcha latte and homemade almond milk post a few months ago? Oh yeah! Get that out and let's get started! 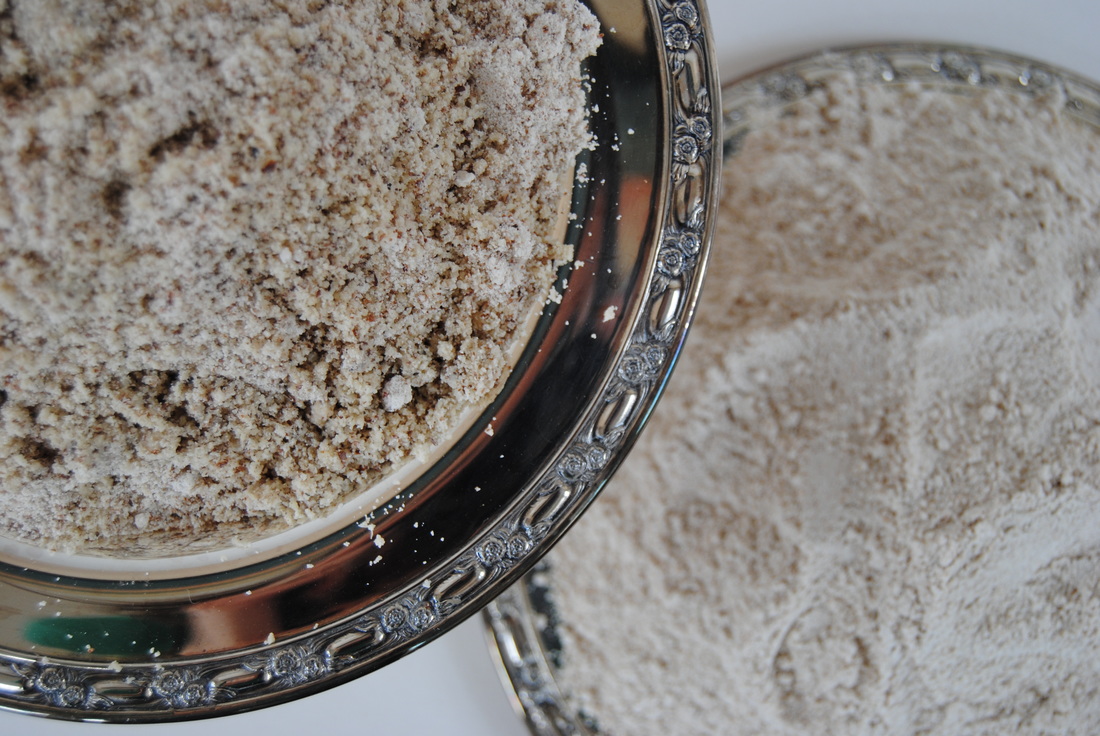 We love using alternative flours in baking, not only for the nutritional benefit but also for the varying depth of flavor they can provide to baked goods. We chose sprouted spelt flour and almond flour for this recipe. Spelt is considered an ancient grain dating back over 9,000 years. It is more water soluble than wheat making the key nutrients in spelt easier for the body to digest, and even more so in the sprouted version we chose. Whole grains are actually dormant seeds which can be sprouted by soaking the seeds in water. Once soaked you could say that the grain "wakes up" and creates a small sprout or living plant. The sprouted grain is then dried (using low heat methods to avoid killing the live nutrients) and ground to create the various sprouted flours. This process makes the grains slightly higher in nutrients and makes the nutrients more available to your body because they are easier to digest. Sounds pretty good right? Spelt flour has a slightly nutty flavor and can easily replace whole wheat flour in most recipes. The other flour we used in this recipe is almond flour which is made from ground almonds and is a byproduct of almond milk, homemade or otherwise. Almond flour is naturally gluten free and has a richness that you will not find in grain flours because of the healthy fat content of almonds. We suggest replacing 1/4 cup of flour in a recipe with almond flour, any more may create a crumbly finished product due to the lack of gluten which acts as a binder in recipes, especially ones that are egg-free. Alternative flours are readily available at specialty grocers though are becoming more available at many grocery stores. So keep your eye out in the baking aisle for a grain other than your standard whole wheat (no offense!). If you find something sprouted, even better! One brand that we like for alternative flours is Rob's Red Mill though we are not aware of any sprouted options currently. So who's ready to get floured? 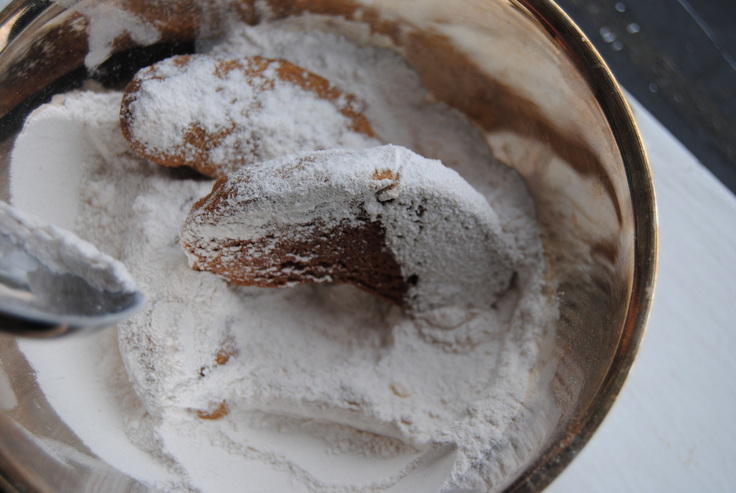 Cecelia's Wedding Cookies PREP TIME: 20 mins (+ 1 hr to chill dough) TOTAL TIME: 40 mins Servings: ~24-30 cookies Ingredients 2 cups sprouted spelt flour 1 cup almond flour (store bought or saved from our almond milk recipe) 1 cup organic, grass fed butter (room temp) 3/4 cup powdered coconut sugar 1 1/2 tsp powdered star anise 1/2 vanilla bean 1/2 cup powdered cane sugar (reserved for tossing warm cookies in) You likely will not be able to find powdered coconut sugar but can create your own as we did if you have a high speed blender such as a vitamix (dry blade). Add granulated coconut sugar to dry blade blender and blend on high for 3-5 mins until sugar becomes a powder. If you do not have a high speed dry blender then look for vegan and/or organic powdered sugar to purchase. The same goes for the powdered sugar coating, this can be made from cane sugar in your dry blender or purchased. In an electric mixer, cream the butter and powdered coconut sugar on medium high speed until light and fluffy. Scrape out the inside of 1/2 vanilla bean and add to the mixer along with the powdered star anise. Add 1 cup almond flour, and slowly add 1/2 cup of spelt flour at a time to mixer until full 2 cups have been added. Wrap finished dough in plastic wrap and store in the fridge until completely chilled ~1 hour. Once dough is chilled turn oven on to 350 degrees, prepare a baking pan with a fitted sheet of parchment paper, and begin shaping your cookies. These cookies can be shaped as crescents (shown in the picture above) or simply roll them into a small ball. Bake cookies on parchment lined baking sheet for 16-18 mins or until golden brown around the edges. Take the cookies out if the oven, allow to slightly cool for ~5 minutes and toss in powdered cane sugar until completely coated with sweetness!  Yummmmmmm. We hope you like the flavor of star anise as much as we do because it really shines in this recipe highlighted by the richness of the butter and powdered coconut sugar. Though Cecelia is 50% Italian and what would an Italian wedding cookie really be without it? Enjoy these with a cup of your favorite tea and send some well wishes our way. Since Jess will be traveling to attend the wedding and Cecelia will be busy (saying I do!) we will not be posting a recipe next week (gasp!). Maybe take this opportunity to look back a try something you may have missed over the last several months. We will be back soon! Much love, Jess and Cecelia   In the midst of a long week there are a few certain things (of course all food related) that help keep us going until the weekend. One of those being a lazy, late morning, carb loaded breakfast; I mean hey we've earned it right? But on the topic of carbs we have to remind you that not all are created equal especially when it comes to bread. If it's not baked at home then you have to remember to check ingredients lists, you won't believe what can be hiding in there! So lets talk about an optimal bread to keep this delicious breakfast nutritionally on track because delicious doesn't have to mean guilty, but you already knew that.  So it seems like a pretty easy concept - whole wheat bread is healthier than white - but as you may be learning, food choices are not always that staright forward. That's because of efforts in the processed food industry to keep production prices low while still appealing to health concious consumers. Ideally a whole wheat or whole grain bread should contain, surprise, whole wheat, grains and maybe nuts and seeds. But what you'll find when looking at ingredient labels is a whole lot more, including high fructose corn syrup, refined oils (soybean and canola), a variety of difficult to pronounce chemicals, and even coloring agents to create that deep brown color associated with whole grains. Question though - if you're using real, whole grain ingredients then why would the bread need to be colored? Our point exactly. We invite you to start looking at those ingredient lists in the store or around your home and see what you find. You may be shocked but don't be scared because there are plenty of better options and we will help you find them. To start, a quality bread should be 100% organic and free of artificial ingredients. The main and first ingredients on the ingredient list should be unrefined grains, nuts and seeds and if possible these ingredients be sprouted for optimal nutrient absorption and digestion. Also remember that in general, the shorter the ingredient list the better. Per slice, look for a bread that contains at least 5 grams of protein and 3 grams of fiber. Silver Hills Hemptation bread is the bread we featured in this recipe. As you already know we are obsessed with anything containing the miraculous hemp seed! Silver Hills Bakery is based out of Canada and their line of delicious bread can be purchased at Whole Foods and Target. You can also use their handy store locator to find other stores near you carrying their products. We love this bread because of the simple and wholesome ingredients we found on the ingredient list; including non- GMO and vegan certified whole sprouted wheat, hulled hemp seeds, water, cane sugar, vital wheat gluten, yeast, sea salt, cultured wheat, and citric acid. Per slice, hemptation contains 7 grams of protein and 4 grams of fiber, making this a superior choice to most of the breads you'll find down the standard bread aisle. Okay, so now it's time to find your favorite bread using these tips and get to into the kitchen!  Egg-less French Toast PREP TIME: 15 mins TOTAL TIME: 30 mins Servings: 2 Ingredients Egg-less French Toast 4 slices of high quality, nutrient rich bread 1 cup almond milk 1 cup chopped walnuts 1/4 cup oatmeal flour 3 Tbsp ground flax seed 1 Tbsp coconut sugar 1-2 Tbsp organic grass fed butter 1 tsp ground cinnamon 1/2 vanilla bean (scrap out the insides of the pod) OR 1 tsp pure vanilla extract A drizzle of pure maple syrup over the top Filling 3/4 cup full fat Greek style yogurt 1/4 cup full fat ricotta cheese 1/2 cup raspberries or berries of your choice In a medium wide bottomed bowl, combine the almond milk, oatmeal flour, ground flax seed, coconut sugar, cinnamon, and vanilla. Stir all ingredients until fully combined. Allowed the mixture to sit until the batter becomes thick, about five minutes. Place chopped walnut on to a large plate and set aside. Combine Greek yogurt and ricotta cheese in a bowl. Mix until fully combined then set aside. Turn a large skillet or large saute pan to medium heat, add 1 Tbsp butter and allow to melt coating the entire bottom of the skillet. Careful dip bread in wet mixture one slice at a time, working fast so the bread does not become too soggy and break. Coat each side of bread in chopped walnuts then place in the hot pan/skillet with melted butter. Cook for 3-5 minutes on each side. TIP: watch the bread closely, if the temperature on your stove top is too high the bread will burn quickly! We have a smaller pan which only cooks 2 slices at a time. If this is the case for you as well, make sure to clean your pan in between batches to remove burnt butter and walnuts for best results with the next two slices. Once you have all four slices cooked cut the bread in half (triangle style) add 1/4 cup of yogurt & ricotta mixture to the top of one triangle. Arrange berries on top of filling and place the other triangle on top to make a sandwich. Continue to do this until you have made four, half sandwiches, 2 per plate. Lightly drizzle pure maple syrup over the top and dig in!  Okay so is there anything better than perfectly cooked french toast slathered with real maple syrup? Simply, no way! So next time you're in need of a decadent weekend breakfast please remember this recipe. And we hope you'll be thinking about your choices next time you find yourself in the bread aisle because nourishing your body with good ingredients is the right choice any day of the week. Wishing you a lazy Sunday, Jess and Cecelia   The temperatures are finally bearable in Chicago and a holiday weekend is upon us! Though while you're busy hiding Easter baskets this year maybe take a second to think about what might be hiding in those Easter candies. We know, we know - those treats are only (mostly) for special occasions but that doesn't mean they can't be nutritious and contain good ingredients now does it? We swear these peanut butter eggs are better than anything you'll find in a package and only contain five simple ingredients. Maybe buy some yellow paper to wrap them in and no one will ever know the difference! What the heck is in the classic peanut butter egg anyway and have you ever even looked at the ingredients list? It starts decent with milk chocolate, peanuts, sugar, corn syrup and cornstarch, all pretty familiar. However, there are a few unsettling ingredients hidden in those eggs we just had to tell you about. PGPR is the first; used as an emulsifer and short for ployglycerol polyricinoleate, it is a yellowish, viscous liquid (ew!) composed of ingredients commonly found in caster oil. PGPR is used in a few big name candy companies in place of cocoa butter due to the lower cost. The next is partially hydrogenated vegetable oil (palm kernel and palm oil), aka trans fat. Trans fat is a man made fat that goes through processing to change the chemical structure causing the oil to unnaturally become solid at room temperature. Partially hydrogenated oil has a long shelf life which is why you see it in many processed foods. So what's wrong with that? Trans fat is like a "rotten egg" for your heart; it increases your LDL (bad cholesterol) and deceases your HDL (good cholesterol). For this reason trans fat, in our opinion, is one of the worst "foods" to ingest. Please do your body a favor and avoid any food containing partially hydrogenated oils! So now let's compare these ingredients to our five wholesome ingredient recipe and let your taste buds decide. Dark Chocolate Peanut Butter Eggs PREP TIME: 5 mins TOTAL TIME: 40-50 mins (includes chilling) Servings: 8-10 peanut butter eggs Ingredients Filling 1/2 cup natural peanut butter 1/4 cup pure maple syrup 2 tsp coconut flour 1/8 tsp sea salt Chocolate Coating 6 oz dark chocolate (we prefer 72% or greater) 1 tsp coconut oil Combine the filling ingredients-peanut butter, maple syrup, coconut flour, and sea salt in a bowl. Stir until all ingredients are fully incorporated. Place mixture in the freezer to chill for 10 minutes. Once chilled, measure out 1 Tbsp peanut butter mixture and organically form into an egg shape, rolling lightly between your palms. Repeat with all peanut butter mixture. Place the "naked" peanut butter eggs onto wax paper and place back into the freezer for 20-30 minutes to set while you prepare the chocolate coating. Finely chop dark chocolate and melt with coconut oil in a double boiler stirring frequently. Once fully melted remove chocolate from heat. Remove eggs from freezer, making sure they are firm enough to hold their shape when handled. Using a large fork dip "naked" peanut butter eggs into chocolate (working rather fast as to not melt your filling into the warm chocolate), and use a spoon to completely cover eggs with chocolate. Allow excess chocolate to drip off the fork before placing coated eggs onto wax paper. Place eggs in the fridge to allow the chocolate to set. Once chocolate coating is set you can wrap your candies in beautifully colored foil wrappers as we did. Store in the fridge for up to five days. Not only will you feel guilt free while eating a homemade dark chocolate peanut butter egg, but your friends and family will be begging you for the recipe of this classic favorite!  We hope we've convinced you to replace that classic favorite this holiday. And maybe start a new tradition of making these homemade candies together as a family. Looks like you're the lucky one finding this recipe, aka the golden egg. Enjoy it, treasure it, and share it for generations to come. Hoppy Easter, Jess and Cecelia   So whats the deal with "super foods" you ask? We think that's a great question! With so many foods or food products being marketed as the newest, best super food it can definitely be confusing. Now we are not saying that all food claims and marketing can be believed (consumer always beware!) but there are some foods that have been shown to have added benefits to the body beyond the calories or flavor provided. Turmeric is definitely one of these "super foods" and this recipe will give you a delicious way to boost this fabulous spice in your diet.  Turmeric is beautifully colored (as you can see!) and is used widely as a culinary spice and coloring, especially in Indian curry. It has a warm, peppery flavor that lends itself to savory foods but can also provide a kick to sweeter dishes. Besides it's striking taste and color, what makes turmeric super? The active "super-powered" substance in turmeric is curcumin, a powerful antioxidant that has been studied extensively and found to have various health benefits. Antioxidants are essentially "super-heroes" in our bodies because they scavenge, fight, and neutralize free radicals. Free radical is a term for a damaged molecule in the body but you can think of free radicals as "evil villains" because they can damage or even kill healthy cells in our bodies, which unstopped may eventually cause disease. Antioxidants work to counteract the effects of free radicals (yay!) essentially preventing or even reducing some of the damage they cause. Curcumin research has shown benefits for multiple diseases and specifically inflammatory conditions, but it's important to note that curcumin is typically studied in higher doses than would be found in turmeric used in foods. But we still believe that the addition of turmeric can benefit the body through its anti-inflammatory and free radical fighting properties.  The Super Golden Curry Bowl PREP TIME: 45 mins TOTAL TIME: 90 mins Servings: 4 Ingredients 1 cup plus 2 Tbsp vegetable stock (we make our own from leftover vegetable scraps, store bought is also good) 1 can full fat coconut milk 1 cup dry ivory white lentils, or lentil of your choice 1/2 cup uncooked brown rice 1 cup cauliflower 1 cup purple snow peas (you could also use green) 1 bell pepper, color of your choice 1 small zucchini 2 small, or 1 medium yellow onion 1 heaping Tbsp red curry paste (our favorite is Thai Kitchen) 1 stalk lemongrass 1 inch fresh turmeric root, peeled and diced 1 inch fresh ginger root, peeled diced 2 Tbsp coconut oil sea salt to taste Toppings 1-2 limes, cut into wedges A few sprigs cilantro Rinse lentils under running water until water runs clear. Combine 1 cup rinsed lentils with 4 cups water in a deep pan over medium to high heat. Bring lentils to a boil, then reduce heat to a simmer, cover with a lid and cook for 25-30 minutes. Once lentils are fully cooked, drain remaining water and set lentils aside. Begin the rice. Rinse rice well. Bring 1 cup of water to a boil in a pan. Add 1/2 cup rice. Return to a boil, then turn down the heat to a simmer, cover with a lid and allow to cook for 35-40 minutes. Turn off the heat, remove lid and let sit. Add 1 Tbsp coconut oil to a deep sauté pan or dutch oven over medium heat. Dice onion and add to sauté pan with sprinkle of sea salt. Cook onion until translucent, about 5 minutes. Lower the heat to medium-low and add curry paste, diced turmeric and ginger to pan, continue cooking for 5 minutes. Add 1 can coconut milk and 1 cup vegetable stock to the pan. Slice lemongrass in half lengthwise and add to pan. Lower the heat to a simmer and cover with a lid. Allow to simmer for 30 minutes. Begin preparing your vegetables. Cut zucchini into half circles, roughly chop cauliflower, and slice bell pepper into long strips. Add 1 Tbsp coconut oil to a large wok or sauté pan over medium-high heat, add the chopped cauliflower and sprinkle of sea salt and cook for 5 minutes stirring often. Next add peppers and snow peas to the hot pan and continue cooking for 12-15 minutes stirring every few minutes. Last add zucchini and cook for an additional 5 minutes until all vegetables are soft with golden edges. Turn heat off and set pan aside. Now it's time to assemble your bowls! Add 1/4 cup brown rice, 1/2 cup lentils, and 1/4 of the cooked vegetables to each bowl (recipe serves 4) and carefully ladle 3/4 cup golden coconut curry broth over the top. Add a few springs of cilantro and the juice of a fresh squeezed lime wedge. Grab a spoon, sit back, and enjoy the beautiful and oh-so-flavorful masterpiece you have just created!!  With this inviting bowl we hope that you will enjoy the warmth, flavor, and "super-powers" of turmeric as much as we do. Not to mention the color; should something this beautiful really be eaten? Definitely. Yes. Stay super, Jess and Cecelia 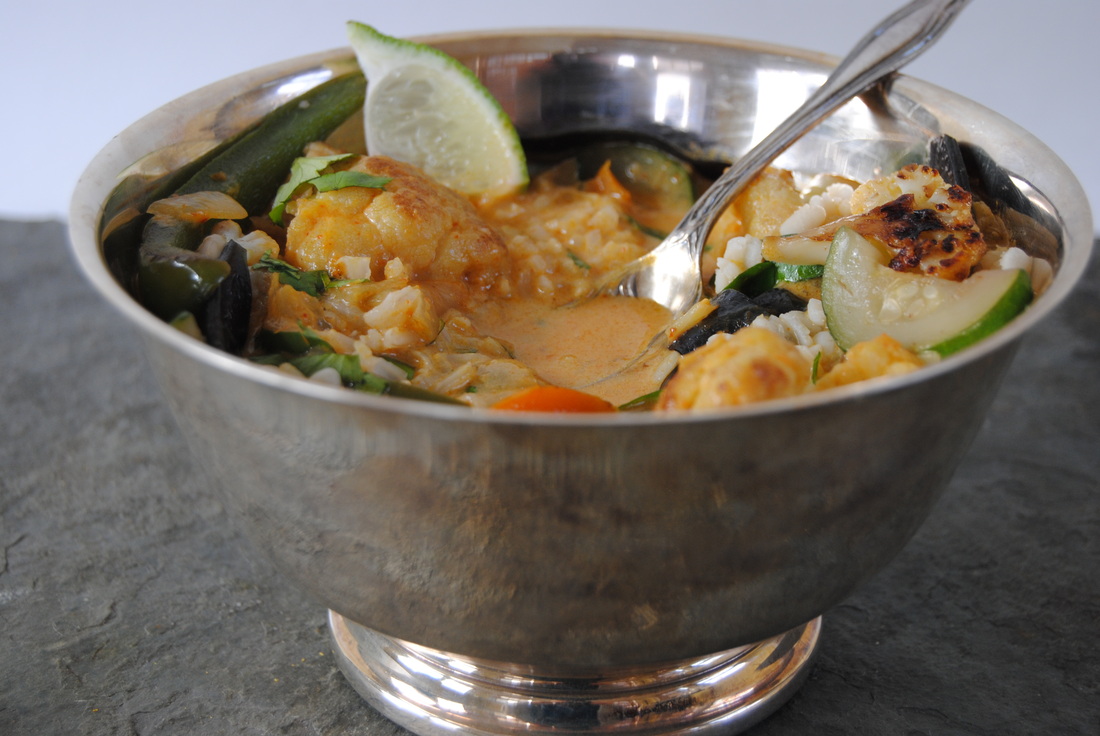 |