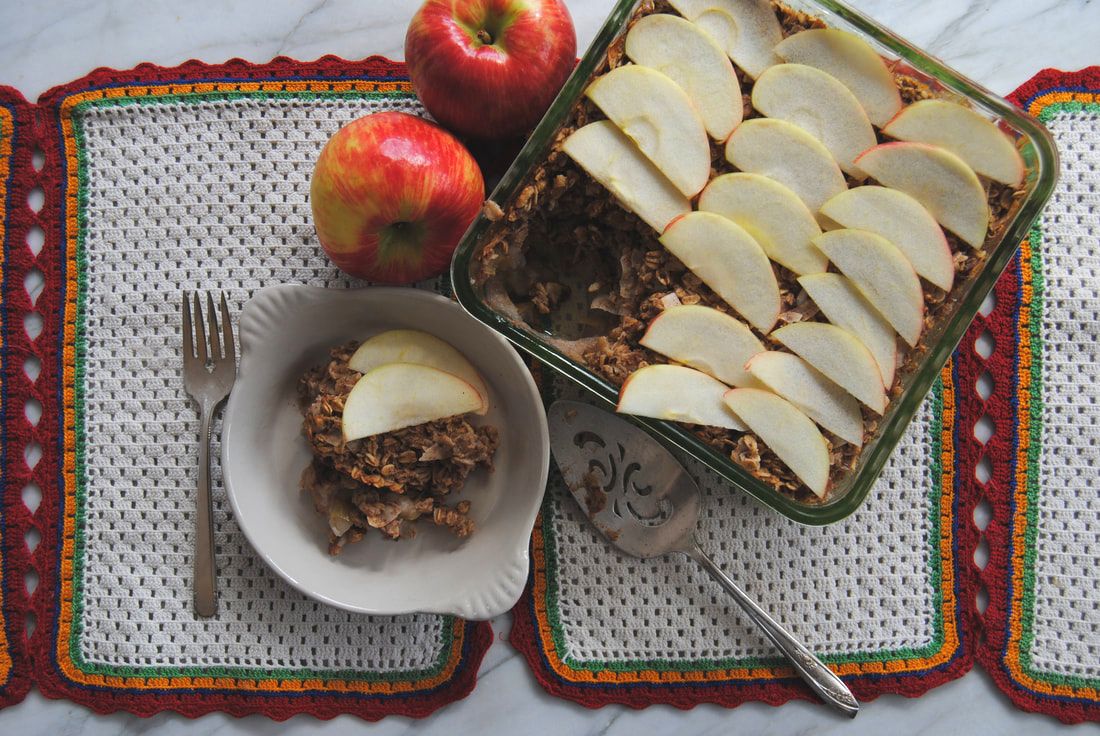
It is apple picking season and you know what that means, an abundance of apples! If you're like us there is no such thing as self control when there are so many varieties of fresh from the tree, local apples to choose from. With that being said, we have to get creative in ways to use all these apples. Apple slices with nut butter will always be a favorite but we love finding new and exciting ways to enjoy this fabulous fall fruit. It's also interesting how different varieties lend themselves to different types of recipes depending on their flavor profile. For this recipe (which is also a unique use of oatmeal might we add), a tart apple variety worked perfect for the bottom of the bake and a sweeter apple for the raw slices on top. So pick your favorites and let's get to it!
Baked Apple Oatmeal
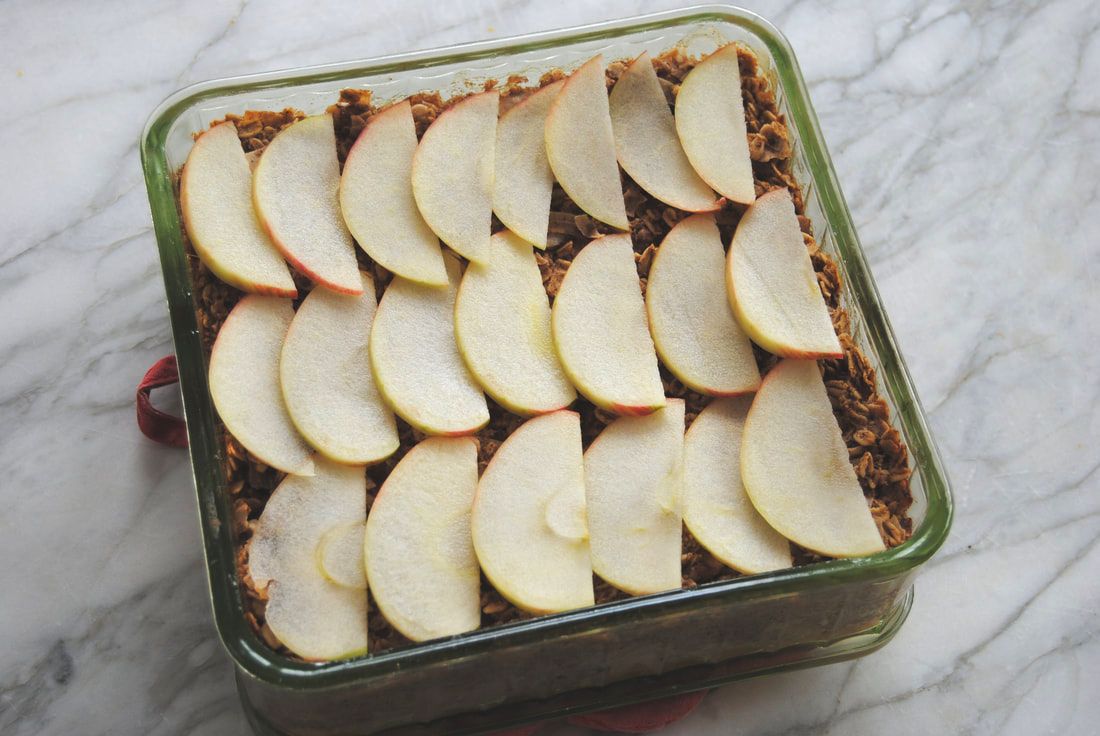
PREP TIME: 30 minutes TOTAL TIME: 90 minutes Servings: 9 Ingredients 2 1/2 cup rolled oats 1 cup unsweetened toasted shaved coconut 1 cup chopped walnuts 2 tsp ground cinnamon 1 tsp baking powder 2 flax eggs (2 Tbsp ground flax seeds mixed with 4 Tbsp water + 2 Tbsp ginger juice) 1 1/2 cup unsweetened vanilla soy milk (or milk alternative of your choice) 1/2 cup no sugar added apple sauce 1/4 cup pure maple syrup 2 Tbsp melted coconut oil + 1 tsp to oil the pan 1 tsp vanilla extract 2 large tart apples, chopped into 1"x 1" pieces (~3 cups) 1 small sweet apple, sliced thin (optional topping) Preheat oven to 325 degrees. Lightly grease a 9"X9" glass pan with coconut oil. Wash and chop apples into 1"x1" squares and place in the bottom of the prepared pan. In a large bowl combine oats, toasted coconut, chopped walnuts, ground cinnamon, and baking powder then mix well until combined. In a separate bowl whisk flax seeds with water and ginger juice and let sit for about 5 minutes or until gelatinous. Add soy milk, apple sauce, maple syrup, melted coconut oil, and vanilla extract to the flax seed eggs and whisk until combined. Add dry ingredients to wet ingredients and stir until combined. Spread oatmeal mixture over the chopped apples making sure they are fully covered. Place pan in preheated oven and bake for 60 minutes. Remove oatmeal from the oven, allow to set and slightly cool for ~5 minutes. Layer top with apple slices if desired and enjoy! Oatmeal is great by itself, on top of yogurt or ice cream, or in a bowl with additional milk. Leftover oatmeal can be stored in an air tight container in the fridge and reheated in the microwave for 60 seconds or placed back in a preheated oven at 325 degrees for 10-12 minutes. Oatmeal will keep in the fridge for up to 5 days. 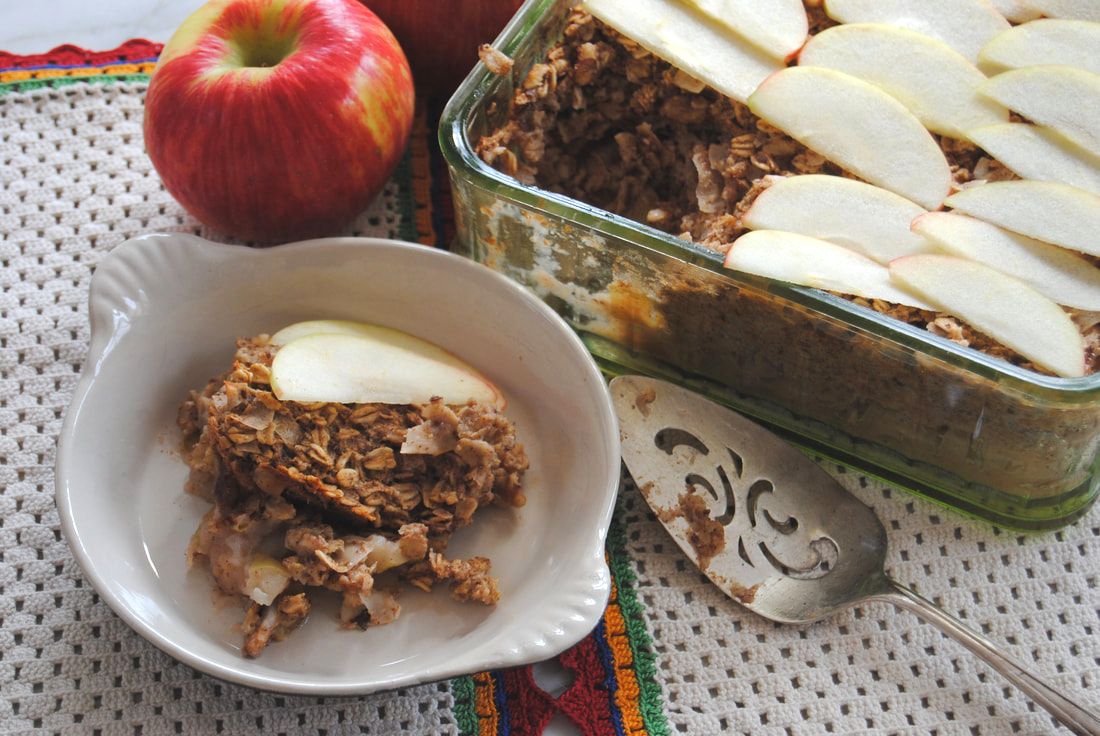
Though this recipe may look unassuming, it tastes SO good. The warm baked apples meld perfectly with the hearty oatmeal and finish with a fresh crunch of sweet apple topping. Can be enjoyed for breakfast/brunch though may be best enjoyed over vanilla ice cream for dessert (wink, wink).
Any way you choose - enjoy, Jess and Cecelia 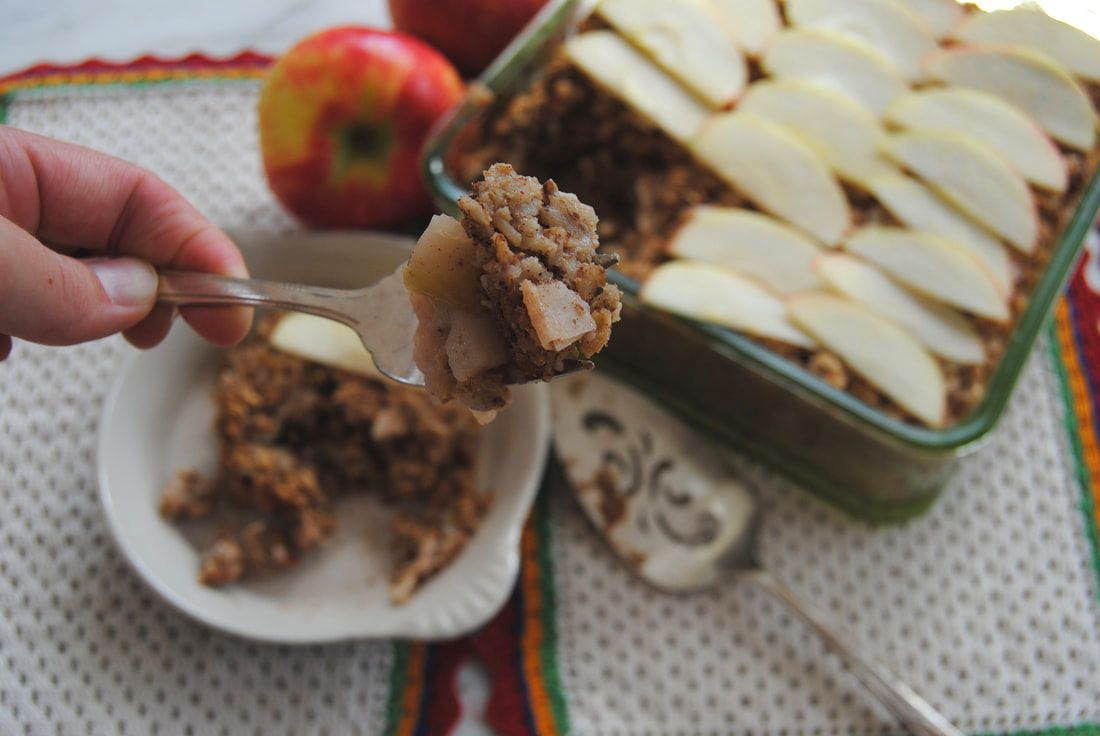
0 Comments
A whole new season of recipes is upon us here in Chicago and we can barely contain our excitement. And why should we!? The abundance of fall produce has sparked our creativity as we dream up hearty and festive ways to utilize the new ingredients. One of our ultimate fall favorites, squash. With so many varieties to choose from the recipe ideas are almost endless. We decided to start with something simple and familiar. A recipe that lends itself to your favorite squash variety. We used butternut for our hummus but know that the recipe would be just as great with acorn squash or pumpkin. We look forward to a fun filled fall with you!
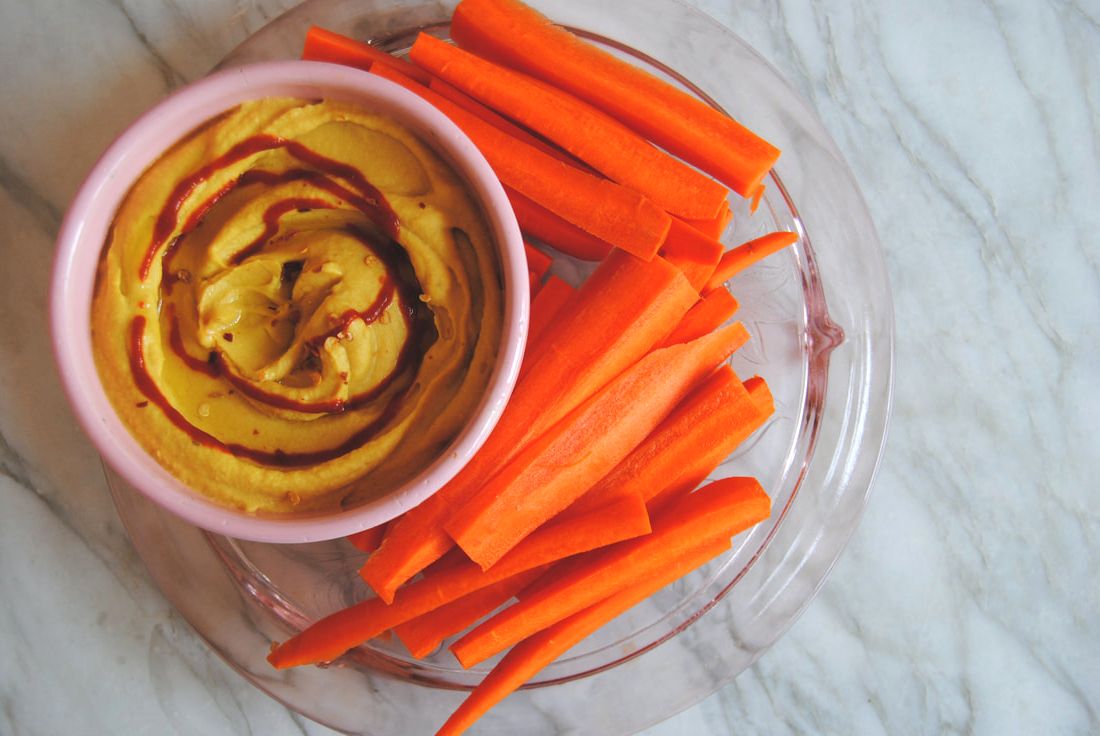
Spicy Squash Hummus
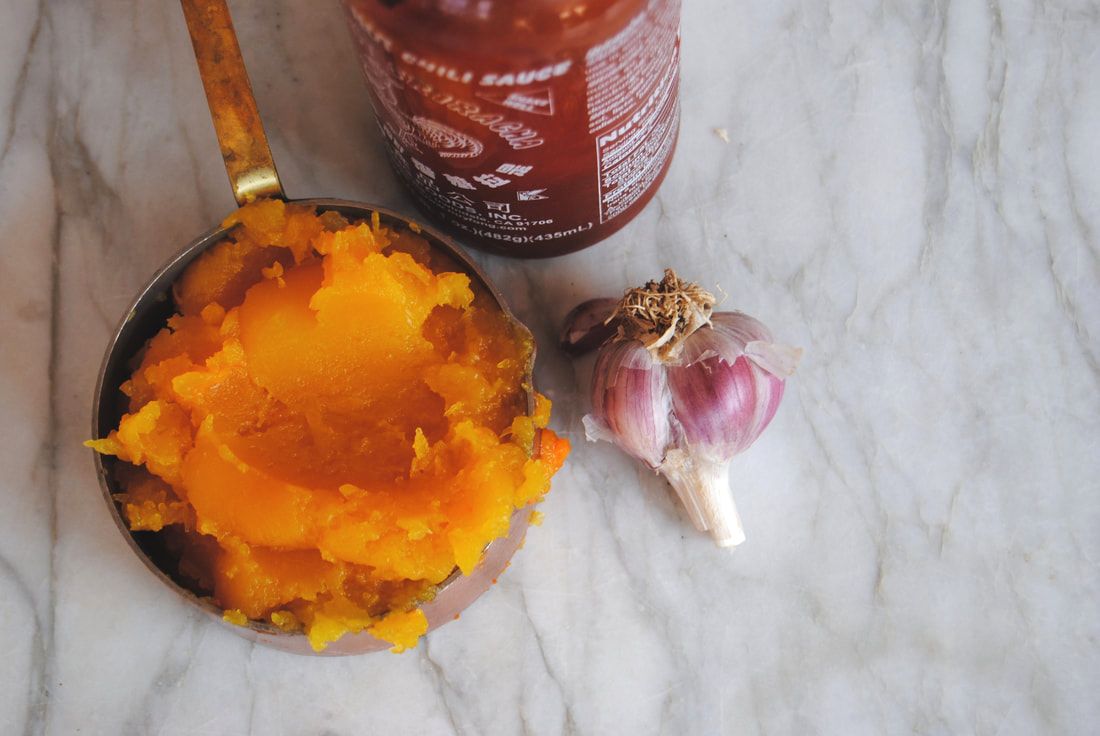
PREP TIME: 35-40 mins TOTAL TIME: 45 mins Servings: 4-6 Ingredients 1 can organic chick peas 1 cup cooked squash (we used butternut squash) 1/4 cup tahini paste 2 Tbsp extra virgin olive oil + 1 tsp drizzled on top 1 Tbsp sriracha sauce + 1 tsp drizzled on top 2 cloves garlic, chopped 1/2 tsp ground cumin 1/4 tsp salt Preheat oven to 350 degrees. Cut butternut squash in half, lengthwise then place on a parchment lined baking sheet and roast for 35-40 minutes or until inside is soft. Scoop out the inside of the squash and place in a bowl to the side to cool to room temperature. Combine chick peas, 1 cup cooled squash, tahini, olive oil, sriracha, garlic, cumin, and salt in a blender and process on high until a smooth hummus is formed. Scoop out hummus into a bowl or platter and drizzle with additional olive oil and sriracha. Hummus can be made a day ahead and stored in the fridge in an air tight container. Any left overs can be stored in an air tight container in the fridge for up to 5 days. 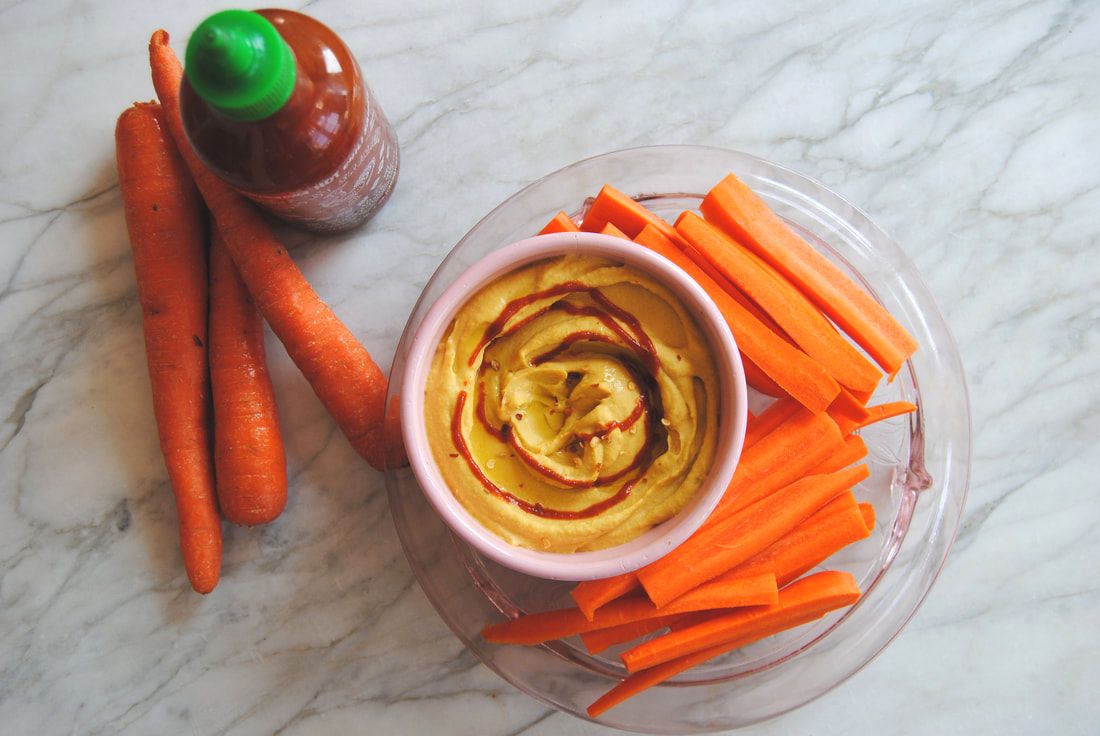
The squash addition makes this hummus SO creamy and provides a stunning pop of color. Though the flavor is mild and similar to traditional hummus, exactly why we decided to mix it up with a spicy ingredient. And don't forget about the extra nutrients (specifically vitamin A - more on that coming in another post this season) that you'll get by adding this simple, seasonal ingredient.
Enjoy, Jess and Cecelia 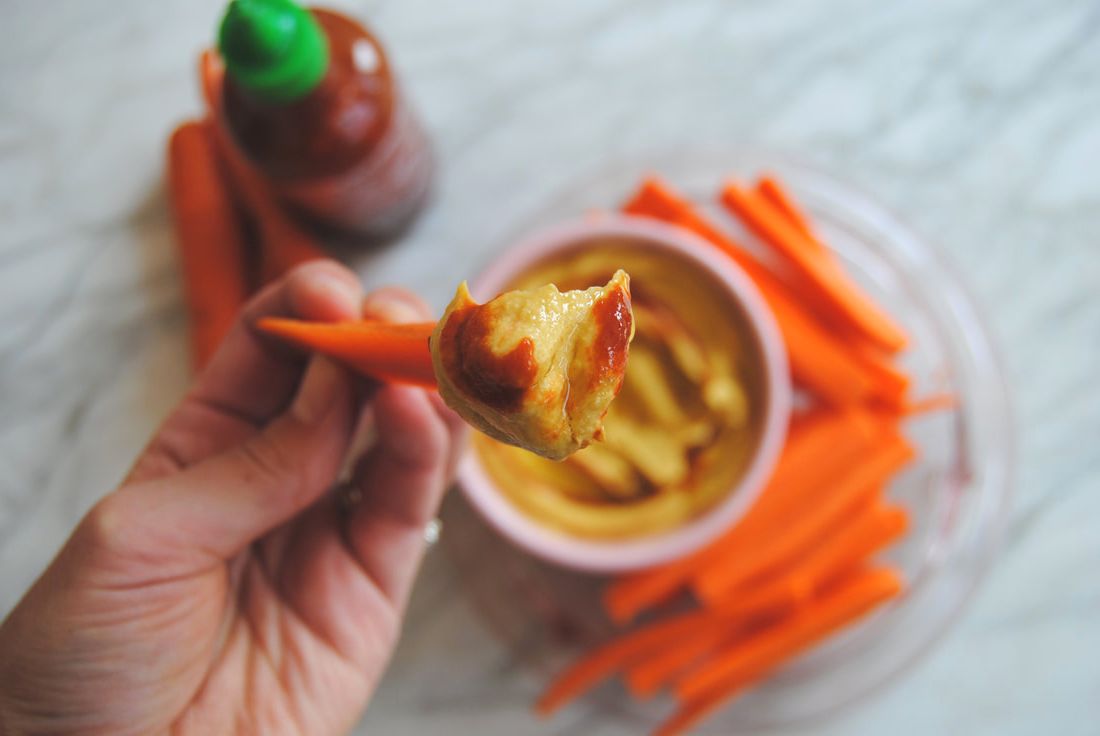

The school year is back in full swing which means, for many, a change in schedules very different from the lazy days of summer. For those of you finding the adjustment difficult - this recipe is for you! A delicious breakfast drink combining protein, natural sugar, and your morning dose of caffeine. Perfect for the hectic days where time is too precious to be making separate breakfast and coffee (we get it).
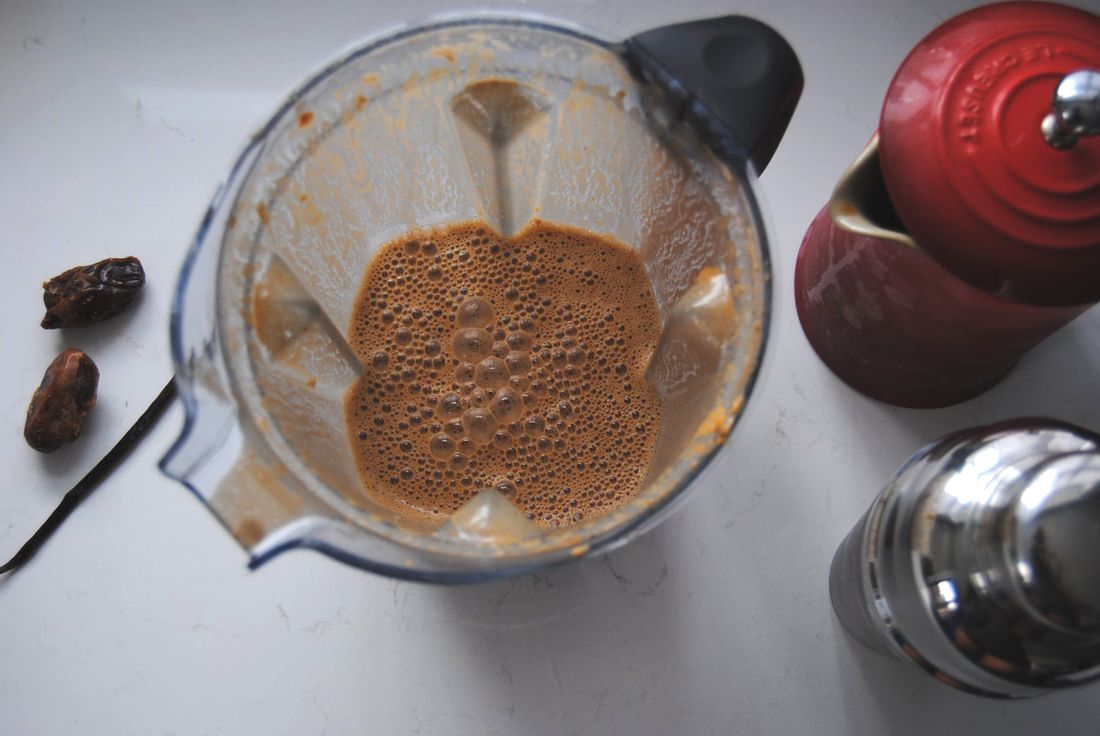
Sweet and Creamy Cold Brew Smoothie
PREP TIME: 5 minutes TOTAL TIME: 5 minutes Servings: one 8 oz smoothie Ingredients: 6 oz unflavored cold brew coffee, homemade or store bought 1 Tbsp cashew butter 2 medjool dates 1/4 vanilla bean or 1/4 tsp pure vanilla extract In a high speed blender combine cold brew, cashew butter, dates, and vanilla and blend on high speed for 30-60 seconds. Add blender contents to a drink shaker filled with ice and shake vigorously to chill the smoothie then pour through a strainer into a glass. Sip chilled smoothie and enjoy! 
We hope this recipe makes your busy days just a little bit easier. The creamy texture combined with sweet coffee flavor may make this a recipe you enjoy on more that just your busy days - it's that good.
Enjoy, Jess and Cecelia 
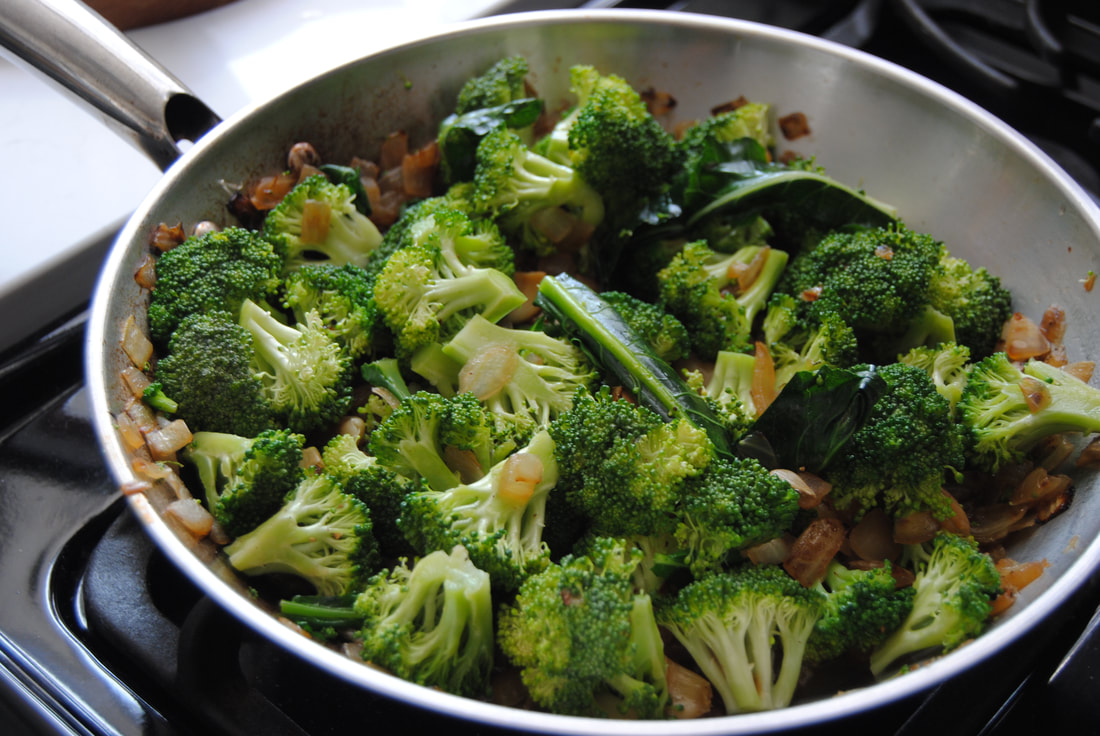
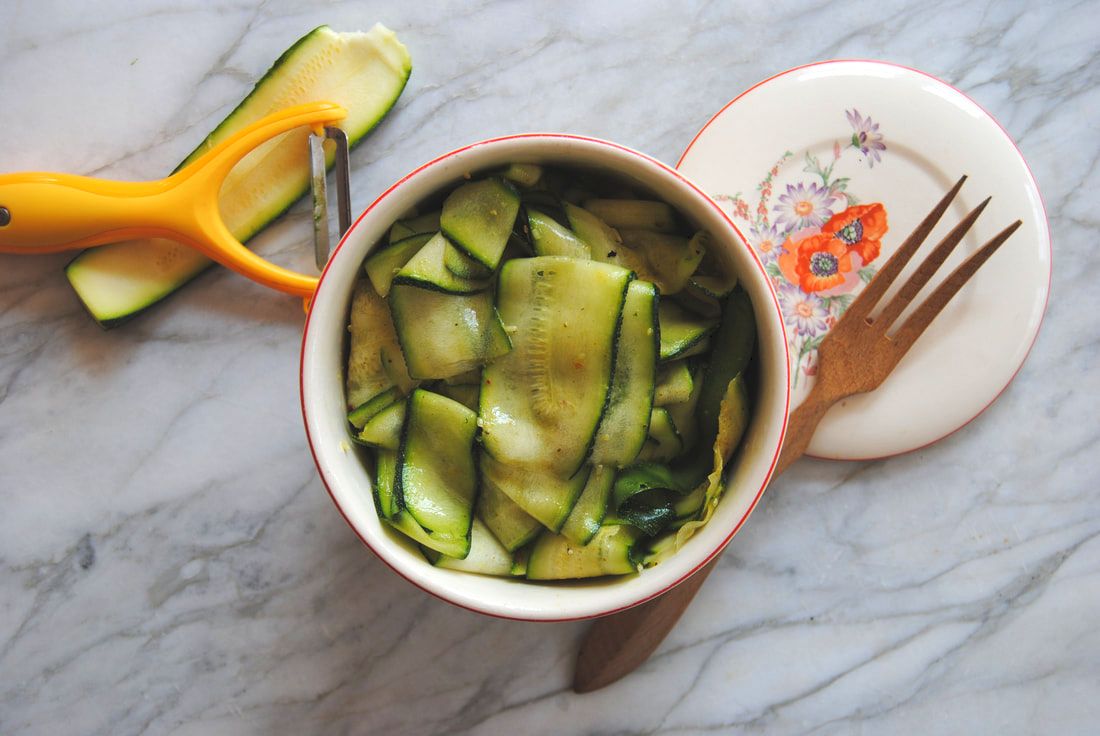 We got to counting the other day and realized that TGBK now features almost 150 recipes on our site! Not to boast (well maybe a little), but we've got tons of great recipe options of all different varieties and skill levels. Some of our recipe preparations are complex and call for lesser known ingredients though we love the simplicity of one step, few ingredient recipes too. Sometimes the simplest recipes are the best because they allow the featured ingredient to really shine - this week, zucchini. Their abundance in home gardens or at farmers markets this time of year can lead to the inevitable question, what to do with all this zucchini? This recipe was born of just that question and with simplicity in mind. Similar but a unique alternative to the popular zucchini noodles. 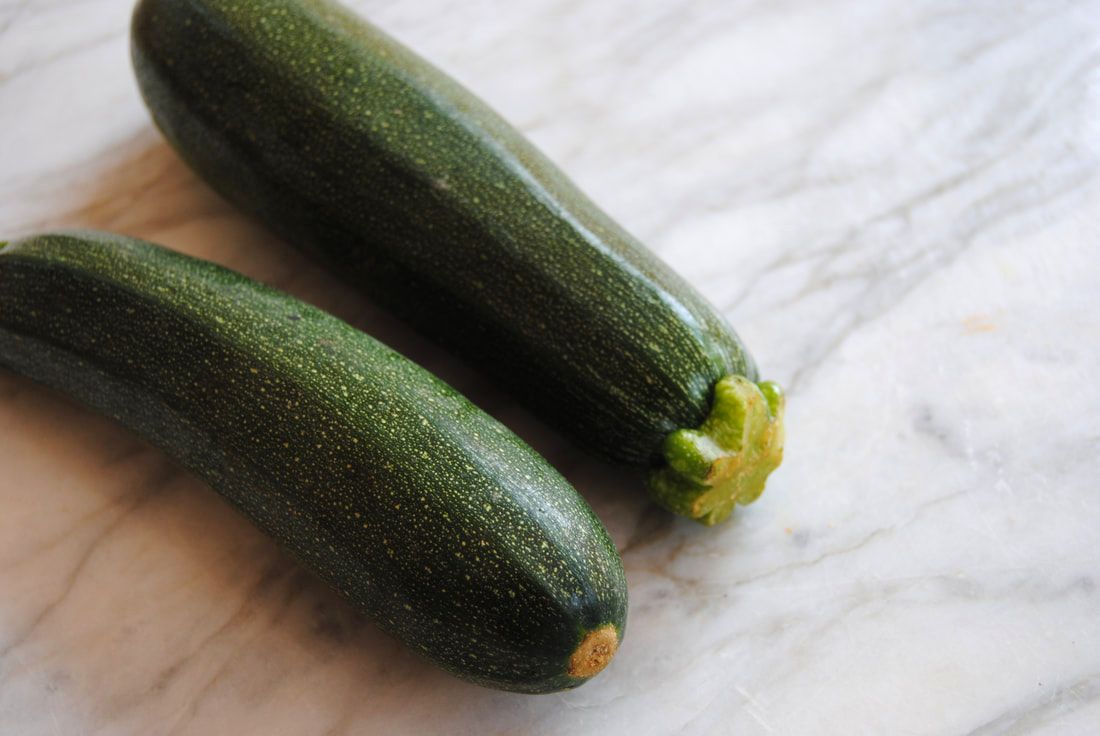 Zucchini Ribbon Salad Prep Time: 5 minutes Total Time: 5 minutes Servings: 2-4 servings Ingredients 4 medium zucchini Juice of 1/4 of a lemon, ~2 tsp 1 tsp green curry powder (red curry powder will also work) Sprinkle of salt and pepper Use a vegetable peeler or mandolin set on 1/8" setting to peel or slice zucchini into ribbons. Combine zucchini ribbons in a bowl with lemon juice, curry powder, and salt and pepper. Enjoy immediately at room temperature or this salad can be saved in the fridge for up to one day. 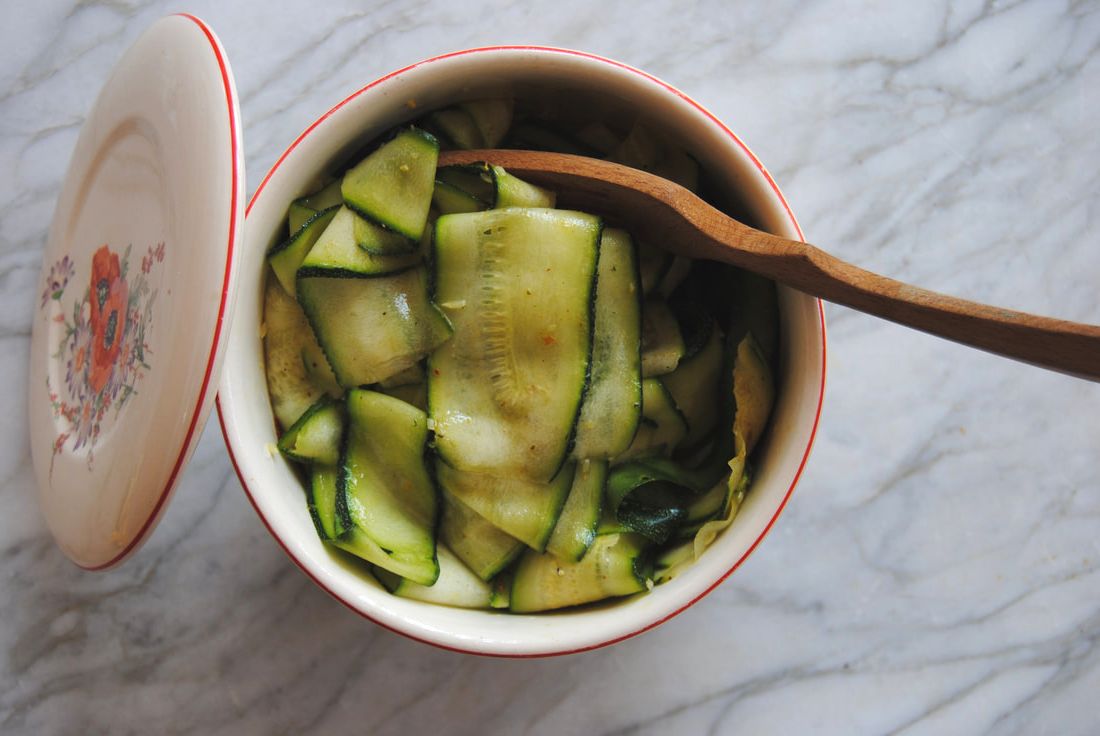 Zucchini prepared this way is just so good! The texture is soft but with a fresh crunch, the flavor light and bright, and the presentation is well, gorgeous. The seasoning can be adjusted to whatever you have or like as zucchini is mild and takes to flavor well. Swap out the curry powder for basil and oregano and you've got an Italian take on this zucchini salad. Zucchini is the perfect late summer food "canvas" for your flavor creations and the possibilities are endless. Enjoy, Jess and Cecelia 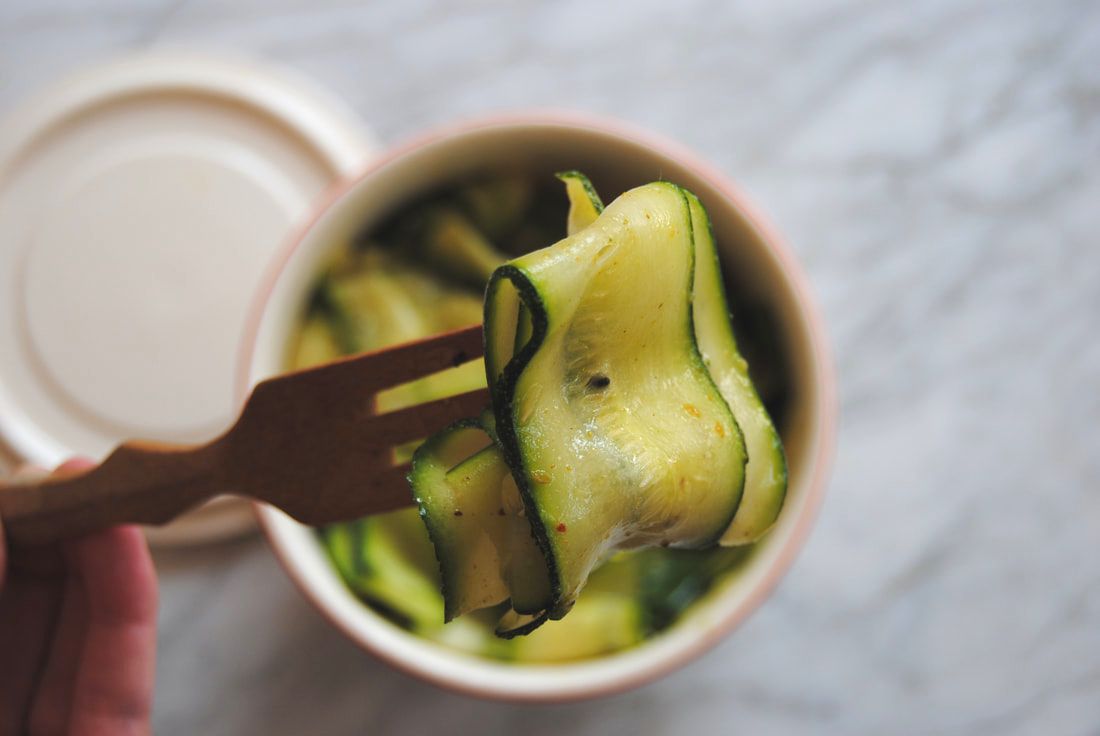 What are you eating this holiday weekend? In our opinion, more important than the typical questions regarding holiday weekend plans. So when asked, lead with your food plans first, like us! And no need to think too hard about them - we've got you covered... 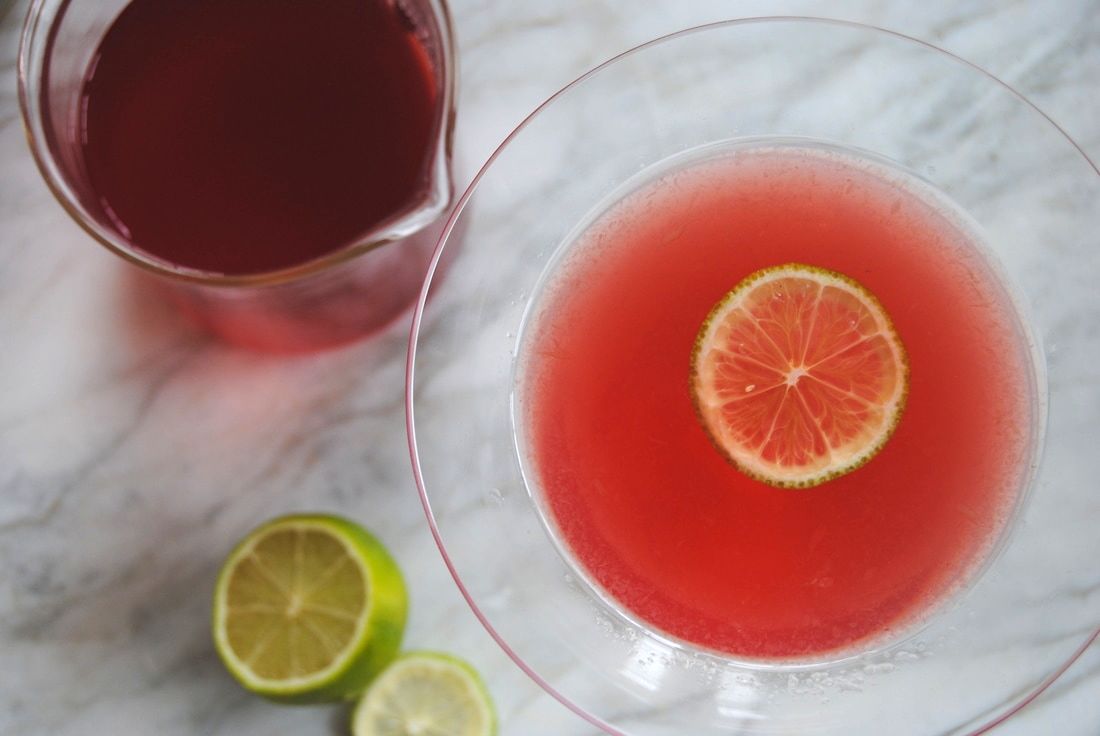 Cheers to Friday and cheers to those of us in the workforce. I'm sure we've all been working hard to deserve the day off Monday and this adult beverage of course. Recipe for our Kombucha Cocktail or Mocktail - add it to your food plans. 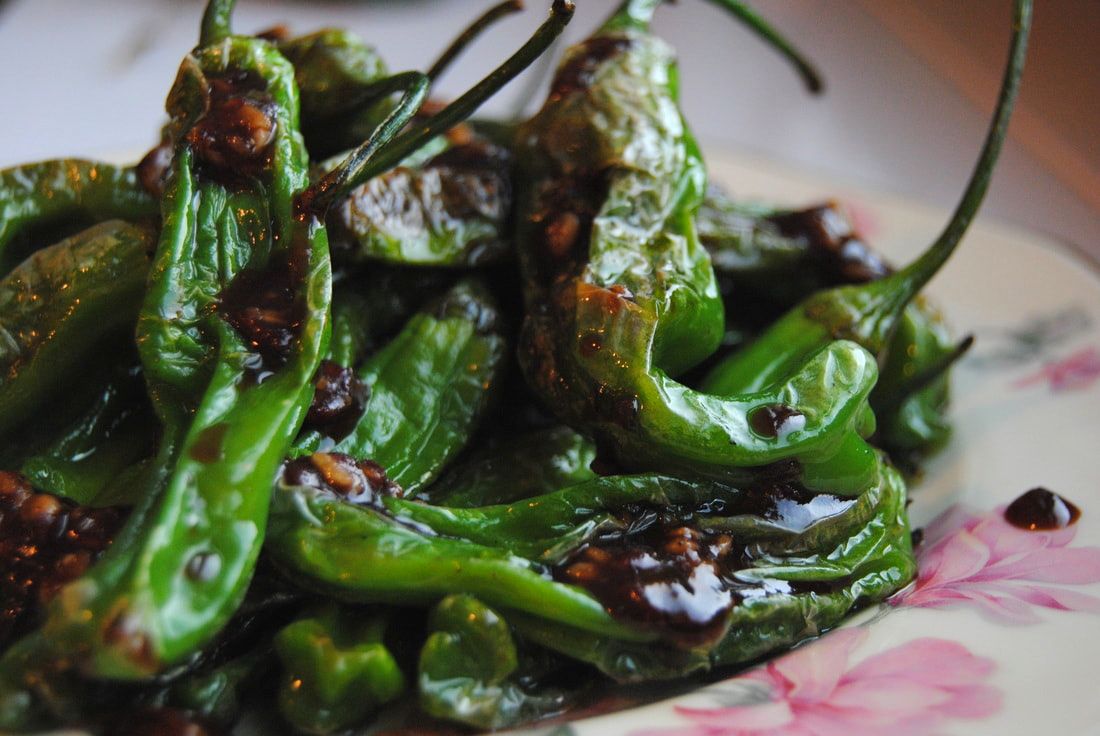 An original but still favorite TGBK recipe for our Sweet and Salty Shishito Bites is a perfect appetizer for a gathering or a simple snack dinner if you're just completely done with all forms of work right now (including cooking). Second must on your list of food plans. 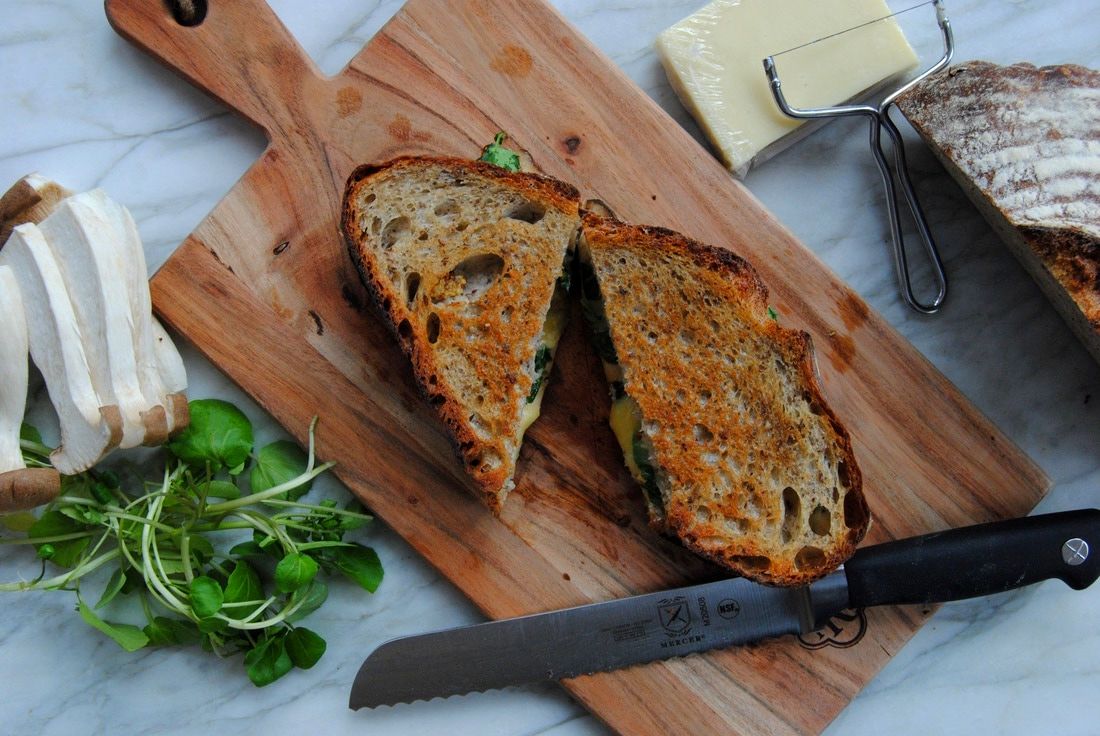 Food plans finale - we saved this for last because we just can't think of a better way to treat yourself this holiday weekend than with a gourmet and perfectly cooked grilled cheese. Our Trumpet Mushroom Grilled Cheese recipe is just that. Feel free to sub with other mushroom varieties you find available. Happy Labor Day, Jess and Cecelia 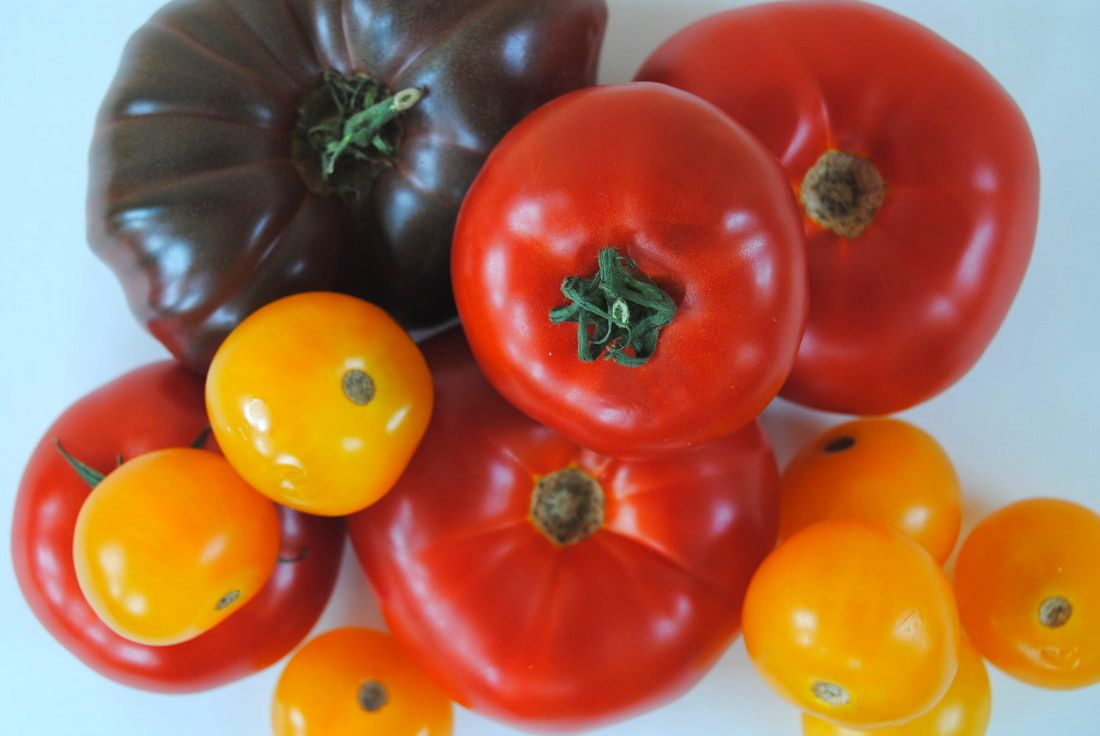 If you know us (and we think you do by now!), you know that August is all about tomatoes for us. There is just no better time of year than mid-August to enjoy a local tomato fresh off the vine. Unfortunately, winter tomatoes that have traveled across continents to get to us in Chicago just don't compare. We have a fabulously creative new tomato recipe for you this summer and thought a look back at tomato recipes from summers past would be fun and delicious! Take your pick of any of these three, or all, you just can't go wrong.  Roasted Tomato Cobbler PREP TIME: 55 minutes (includes roasting time) TOTAL TIME: 1 hour 20 minutes (includes roasting and baking time) Servings: 6 Ingredients Roasted Tomatoes 5 large tomatoes, any variety will work 2 cups cherry tomatoes 2 Tbsp extra virgin olive oil 1-2 Tbsp reduced balsamic vinegar Salt and pepper to taste Cobbler Dough 1/2 cup whole wheat flour* 1/2 cup semolina flour* 1/4 cup buckwheat flour* 1/4 cup chickpea flour * *Note that 1 1/2 cups whole wheat flour will work to substitute if you don't have a variety of flours on hand 2 Tbsp cane sugar 1 Tbsp chopped fresh basil 1 Tbsp chopped fresh parsley 2 tsp baking powder 1/4 tsp sea salt 1/2 cup chopped pine nuts (or nut of your choice) 1 flax egg (1 Tbsp ground flax + 3 Tbsp warm water) 3 Tbsp butter, melted and cooled + 1 tsp to butter the dish 1/2 cup plain kefir To make the roasted tomatoes, begin by preheating your oven to 350 degrees. Line a large baking pan with a non-stick silicon mat or a piece of parchment paper. Wash and slice tomatoes about 1/4 inch thick and place in a single layer on the prepared pan. Drizzle with olive oil, reduced balsamic, and sprinkle of salt and pepper then place in the oven to roast for 45-50 minutes. While the tomatoes are roasting, begin the cobbler dough. Place all flours in a large mixing bowl then add cane sugar, chopped herbs, baking powder, sea salt, and chopped pine nuts and stir to combine. In a separate bowl whisk together ground flax seed and water and allow to sit until it becomes gelatinous, ~3-5 minutes. Add melted butter and plain kefir to the flax egg and stir mixture well. Add wet ingredients to dry ingredients and stir until a dough is formed, but avoid over stirring. Place dough in the fridge to chill while the tomatoes continue to roast. Once the tomatoes are fully roasted, remove from the oven and spoon into a buttered 9"x9" pan. Remove cobbler dough from the fridge. Use a tablespoon to portion and drop dollops of dough over the tomatoes one at a time until you have covered the entire top of the tomatoes. Keep in mind that there can be tiny holes between the dollops of dough so that the tomato juice will peep through and bubble up while baking. Bake in a 350 degrees preheated oven for 25 minutes with the last 2 minutes under the broiler or until golden brown. Remove cobbler from the oven and allow to sit out at room temperature for at least 10 minutes before cutting. Divide cobbler into 6 servings. Can be served on top of a pro-biotic containing cheese (such as Lifeway Farmers Cheese as we did), cottage cheese, sliced fresh mozzarella, cooked beans of choice, or enjoyed on its own. Leftovers can be stored in the fridge for up to 3 days. Reheat cobbler in a 350 degree oven for 7-10 minutes, in the microwave for a minute, or just eat cold right out of the refrigerator. Enjoy! 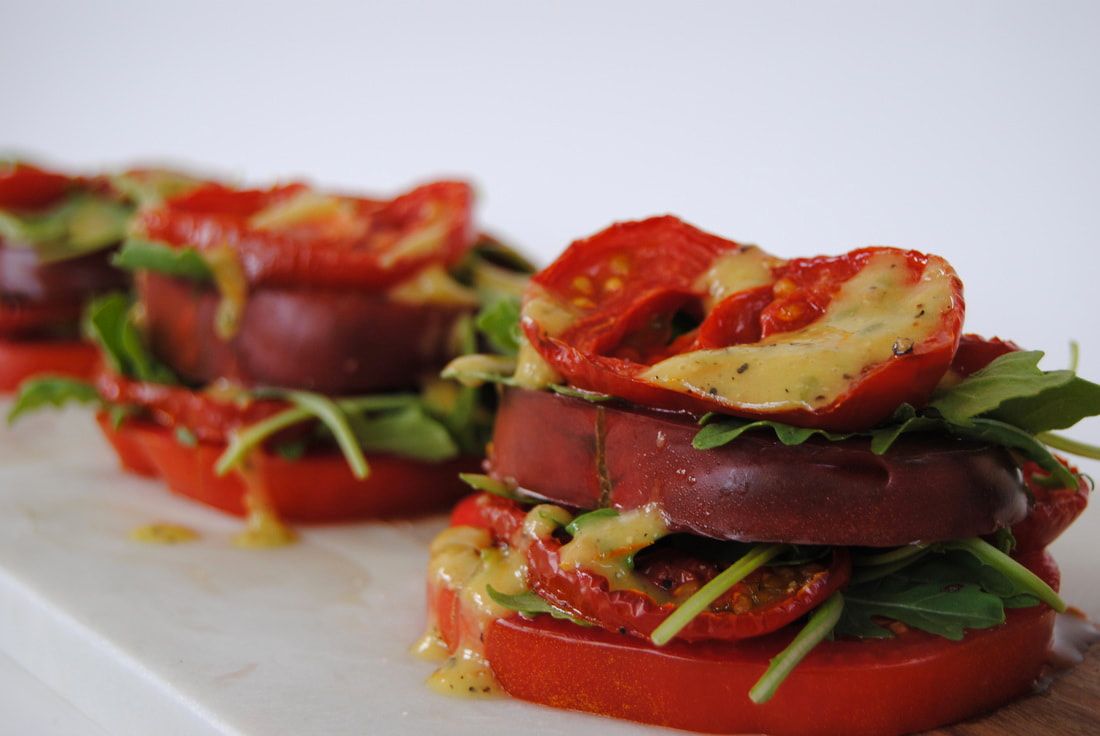 Stacked Tomato Salad PREP TIME: 30 minutes TOTAL TIME: 35 minutes Servings: 2 Ingredients Salad 1 large Black Krim tomato (or any heirloom) 1 large Beefsteak tomato (or any large, red variety) 2 medium-large Better Boy tomatoes (or any medium, red variety) 1/2 cup baby arugula 1 Tbsp extra virgin olive oil Sprinkle of salt and pepper Vinaigrette 1/2 pint yellow cherry tomatoes (~5 ping-pong sized tomatoes, can be any variety) 1/4 cup extra virgin olive oil 1.5 tsp raw apple cider vinegar 1.5 tsp fresh lemon juice 1 tsp stone ground mustard 1 Tbsp chopped fresh basil salt and pepper to taste Preheat oven to 350 degrees. Slice Better Boy tomatoes into half inch thick slices and place on a parchment lined baking sheet. Drizzle with 1 Tbsp olive oil and sprinkle with salt and pepper. Roast in the oven for ~25 minutes or until candied. Remove tomatoes from the oven and allow to cool. Turn oven to broil and place cherry tomatoes on a baking pan under the broiler for 10-12 minutes or until well charred with a generous amount of blacked skin. Note that while broiling the cherry tomatoes they will begin to pop open - this is expected given the high heat. Removed charred cherry tomatoes from the oven and place tomatoes and their juices in a blender or food processor along with the olive oil, vinegar, lemon juice, mustard, basil, salt and pepper to make the vinaigrette. Blend ingredients on high until a smooth consistency is formed and set aside. To assemble the salad, slice the Black Krim and Beefsteak tomatoes into 1/2 inch slices. Layer 1 slice of Beefsteak tomato, 2 slices of roasted Better Boy, and 1 slice of Black Krim tomato on top of each other. Place baby arugula in between each tomato layer. Repeat with the remaining tomato slices and arugula. This should make 3-4 stacks about 3-4 layers thick. Sprinkle the top with salt and pepper to taste and drizzle charred tomato vinaigrette over the top of each stack. Serve as is or enjoy with thick sliced bread. We chose a seeded fennel anise bread from our local farmers market. Extra dressing can be stored in an air tight container in the fridge for ~1 week. 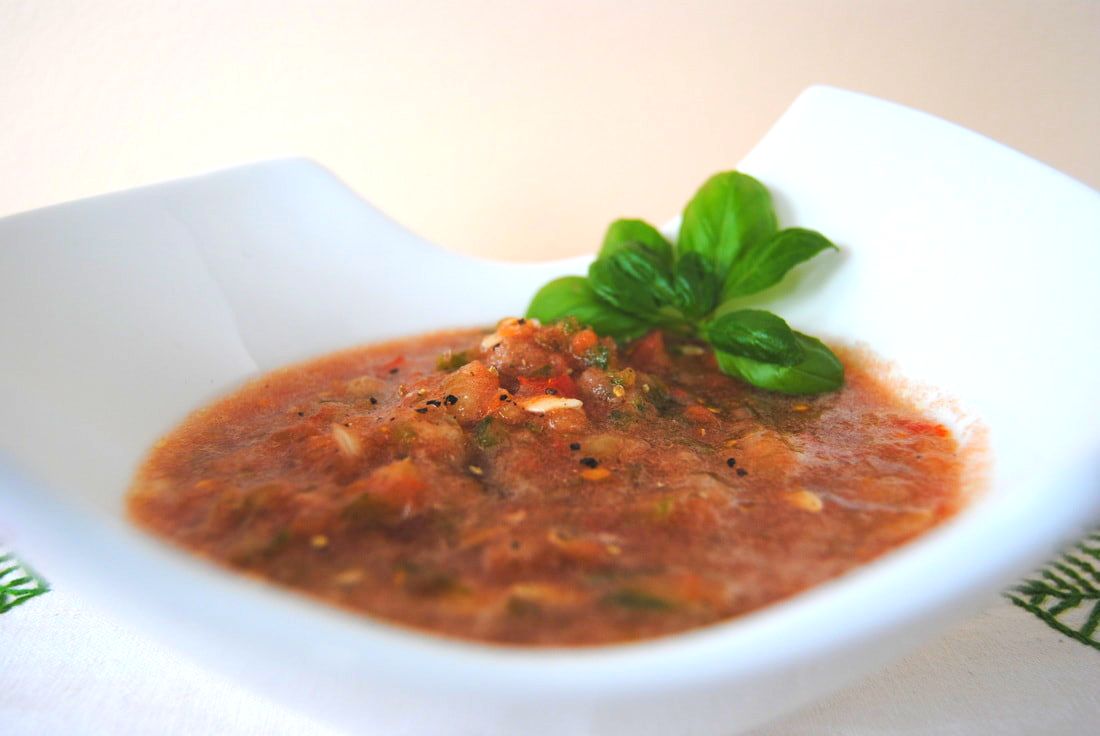 August Harvest Gazpacho PREP TIME: 10 mins TOTAL TIME: 15 mins Servings: 4 Ingredients 4 cups diced tomatoes (any variety) 1 large bell pepper (we used green) 1/4 sweet onion 1 large or 2 small cucumbers 2 cloves garlic 1 inch jalapeño pepper 1 Tbsp extra virgin olive oil 2 tsp balsamic vinegar 1/2 tsp sea salt 1/3 tsp cracked black pepper Optional garnish: fresh basil Rough chop onion, garlic, bell pepper, tomatoes, cucumber, and jalapeño pepper. Start by adding the onion, garlic, and jalapeño to a food processor. Pulse until minced. Add the bell pepper and pulse until finely chopped. Next add cucumber and tomatoes and do the same. By adding each component of the soup one at a time to the food processor you are able to create a variety of textures in your finished product - if you were to add all the ingredients to the food processor at the same time you would end up with a pureed vegetable soup. For this recipe, we prefer a textured gazpacho. Once all vegetables are chopped to preferred texture mix in olive oil, balsamic vinegar, sea salt and cracked black pepper. Garnish as you like and serve finished gazpacho at room temperature. It can also be stored in the fridge for up to five days but make sure to bring gazpacho to room temperature prior to serving. Also note that leftover gazpacho may thicken in the fridge, you can add a little water and extra sprinkle of salt prior to serving. So get those local August tomatoes wherever you can, while you can. Cherish these recipes and fresh tomato memories to help get you through until next tomato season.
Enjoy, Jess and Cecelia 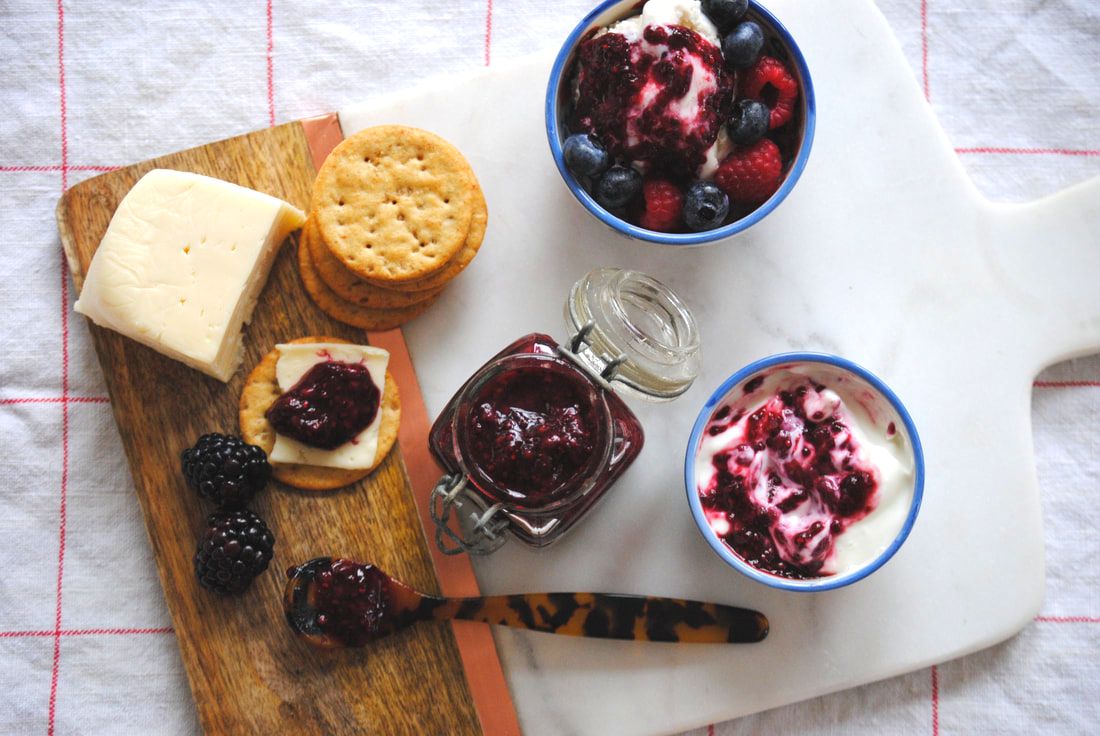 Summer produce is so inspiring. This week we had an abundance of berries that we just couldn't let go to waste. The decision to make a compote was a berry (get it?) good idea! The flavor and freshness of the mixed summer berries was maintained but the compote will last much longer than raw berries will. The compote pairs well with a variety of foods and is a great compliment to your summer picnics (cheese, crackers, and compote anyone?). The best part about this recipe, it's SO simple. Find out for yourself! 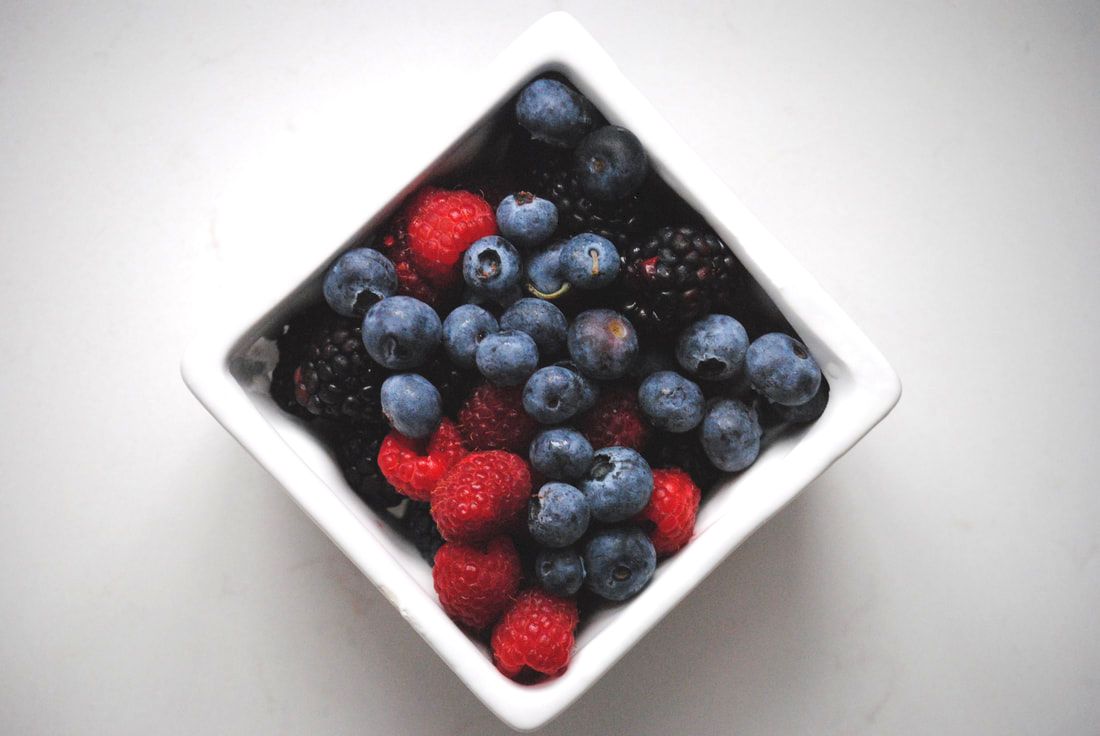 Mixed Berry Compote Prep Time: 5 minutes Total Time: 30 minutes (includes cooking and cooling time) Yield: ~1.5 cups compote Ingredients 3 cups fresh or frozen mixed berries (we used blueberries, blackberries, raspberries, and strawberries) Juice of 1/2 medium lemon, ~2 Tbsp 2 Tbsp pure maple syrup (honey would also work) 1/8 tsp sea salt 2 Tbsp chia seeds To make the compote combine all berries in a medium sauce pan set to medium heat and cook until the berries start to burst. Lower heat to a simmer and continue cooking for 5-10 minutes stirring often. Remove compote from the heat, stir in the lemon juice, salt, and maple syrup and allow to cool to room temperature. Once compote is cooled add in 2 Tbsp chia seeds and whisk well until the chia seeds are well dispersed in the compote. Place in an air tight jar and store in the fridge for 1-2 weeks. 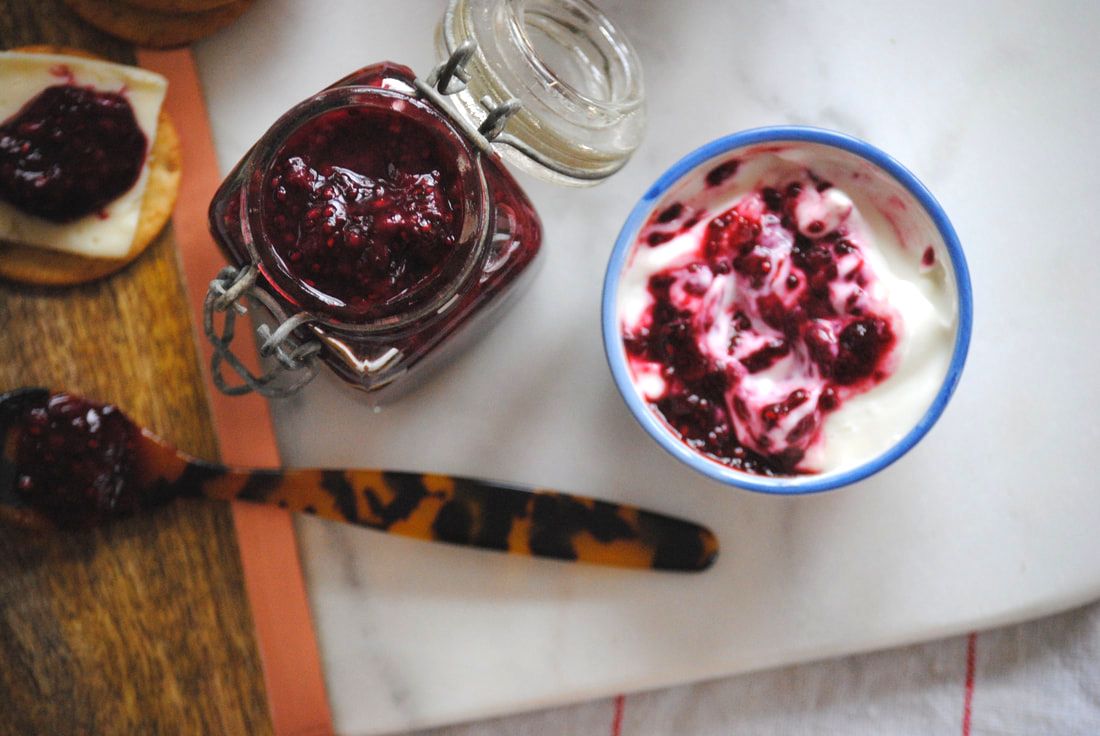 Well, that's it friends. A fresh and delicious compote that pairs amazingly with cheese and crackers, toast, yogurt, ice cream, or anything else you can dream up. We'd love to hear what you slather and spread this berry compote on - please share! Enjoy, Jess and Cecelia 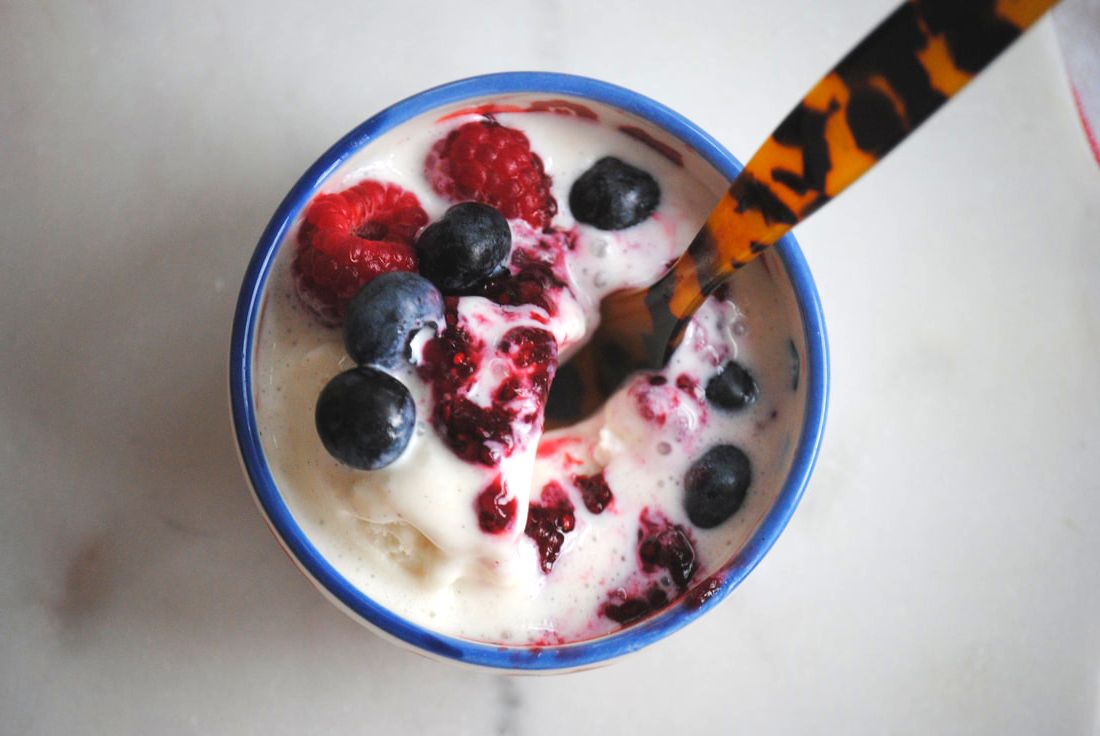  One of the many things we love about summer is the abundant sunshine giving us that natural vitamin D and feel good vibes. So we thought what better way to enjoy the sunshine than to use it in a recipe this week - sound crazy? Though you can't actually consume sunshine (imagine!) you can use it for brewing tea without turning on your stove burners, a definite plus on a hot summer day. Sun tea is a simple and fun favorite of ours but we obviously had to give it a special twist in our recipe this week. 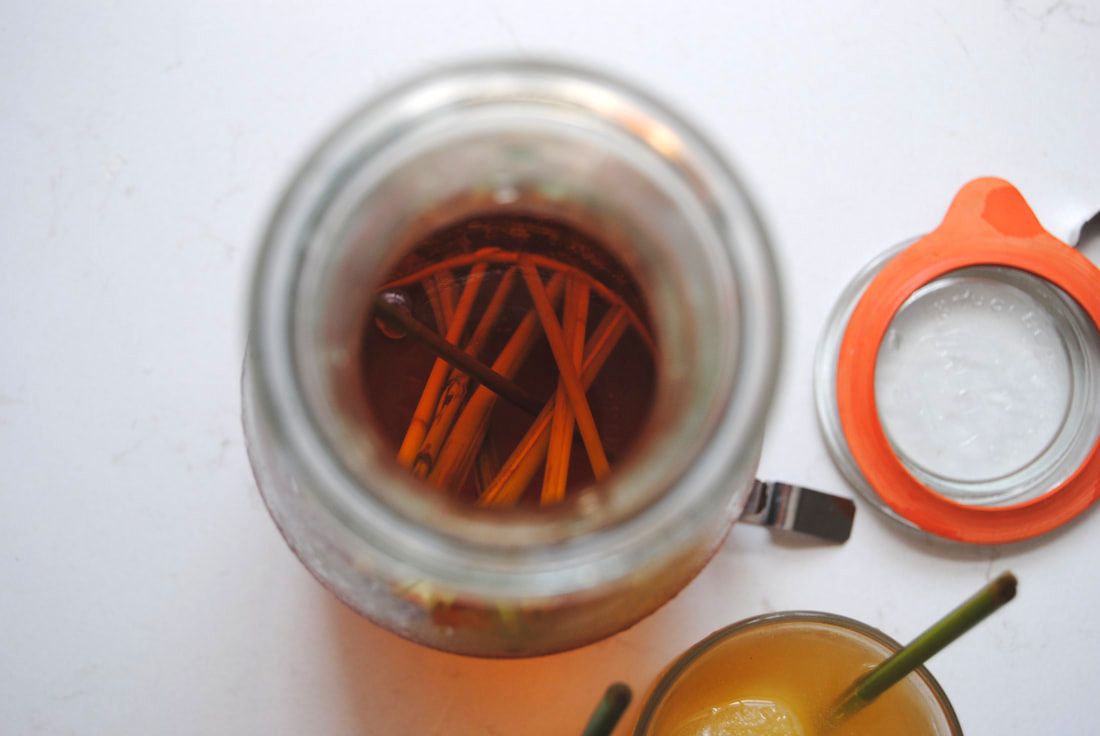 Fresh lemongrass from our garden added an extra pop of flavor and excitement to this simple recipe. The lemongrass plant turned out to be surprisingly hearty and grow well in our Chicago summer climate. From our abundant crop we used a few stalks in this sun tea with great results. Lemongrass, as the name suggests, has a lemon flavor though is slightly spicier than the lemon citrus fruit. Lemongrass is considered a tropical herb and used commonly in Asian cuisine. In addition to culinary uses, lemongrass leaves and oil are used medicinally for a variety of ailments including digestive issues, pain (headache, abdominal and muscle pain), and fever/colds. It is believed that lemongrass may prevent the growth of certain bacteria and yeast and contain substances that help to relieve pain contributing to its medicinal benefits. We most enjoy lemongrass as a unique citrus/spicy flavor option in recipes and for its decorative uses - both qualities highlighted by this recipe! 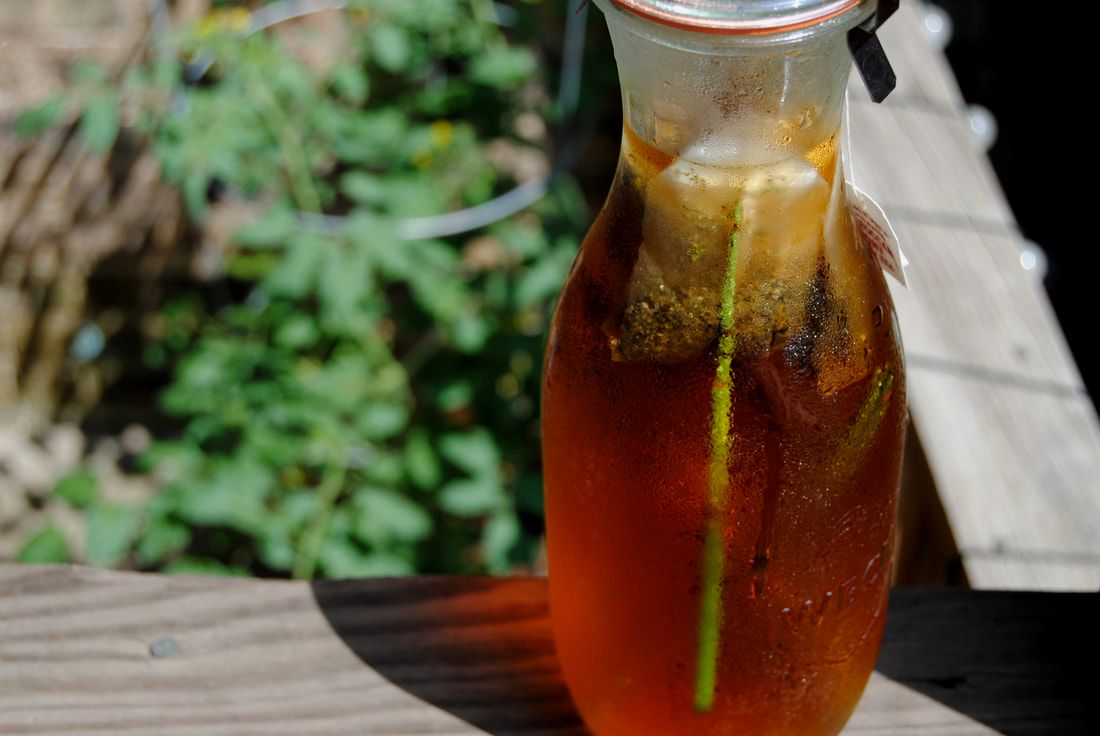 Minty Green and Lemongrass Sun Tea with Ginger Prep Time: 3 minutes + 8-12 hours brewing time Total Time: 8-12 hours Servings: 4 Ingredients 4 mint green tea bags or 4 Tbsp loose mint green tea 4 cups room temperature water 4 stalks fresh lemongrass (base of the stalks crushed) 4 ginger ice cubes or 4 oz fresh ginger juice (recipe here) Juice of 1 large or 2 small lemons Abundant sunshine In a large glass pitcher place tea bags, crushed lemongrass stalks, and cover with 4 cups room temperature water. Place a clean towel or cheese cloth over the top of the jar and allow the tea to steep in a sunny window for at least 8-12 hours. Remove the tea bags and lemongrass stalks from the jar after brewing. Pour tea over ice and add one ginger ice cube, a squeeze of fresh lemon juice, and a lemongrass stir stick!  That's it friends, super simple but so refreshing. And fun to imagine that you're actually bottling that gorgeous sunshine - hey we can dream right? Sun tea is easily adaptable to any tea and fresh ingredients you have on hand as long as you have a sunny spot for brewing! This batch tastes bright and slightly tart from the green tea and ginger which are balanced perfectly by the fresh and spicy lemongrass. Enjoy it, Jess and Cecelia  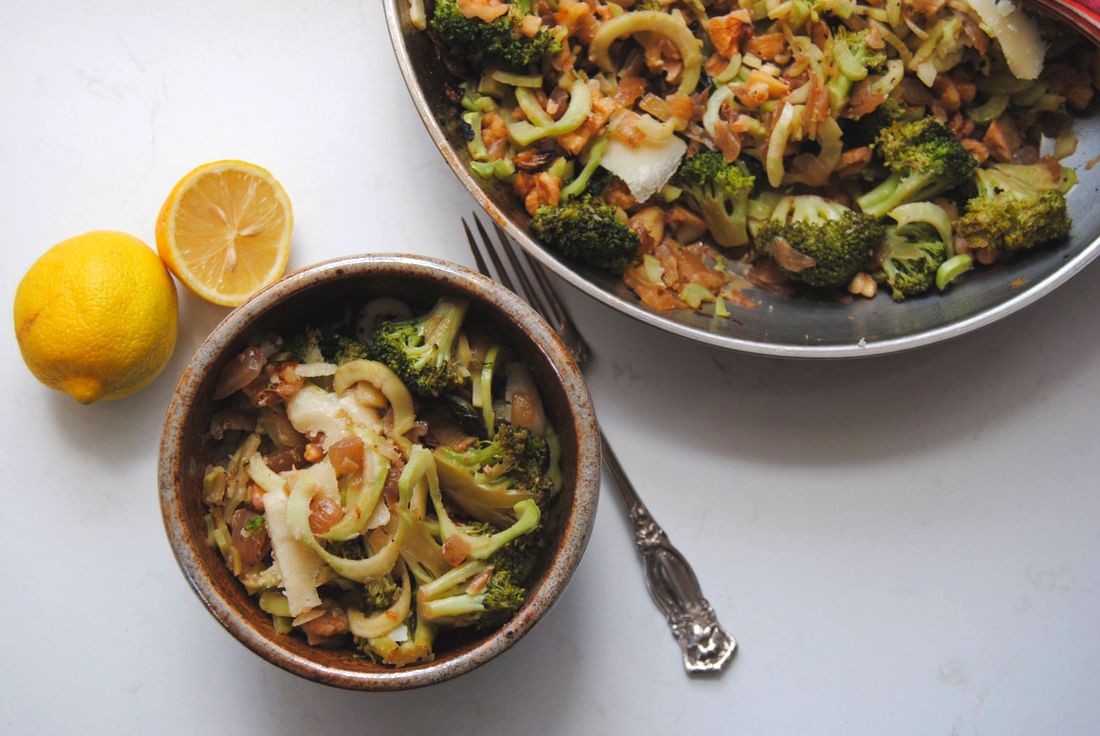 Hey there friends! You know we couldn't let a summer season pass us by without pulling out our spiralizer. The summer is the perfect time to experiment with alternate and lighter "noodle" options. We were inspired by broccoli this summer and the idea of using the entire plant - and boy we did! A little less common than the famous zucchini noodle (previous post here) though just as good. So get out your spiralizer that may or may not have been hiding away in your cupboard and join us! 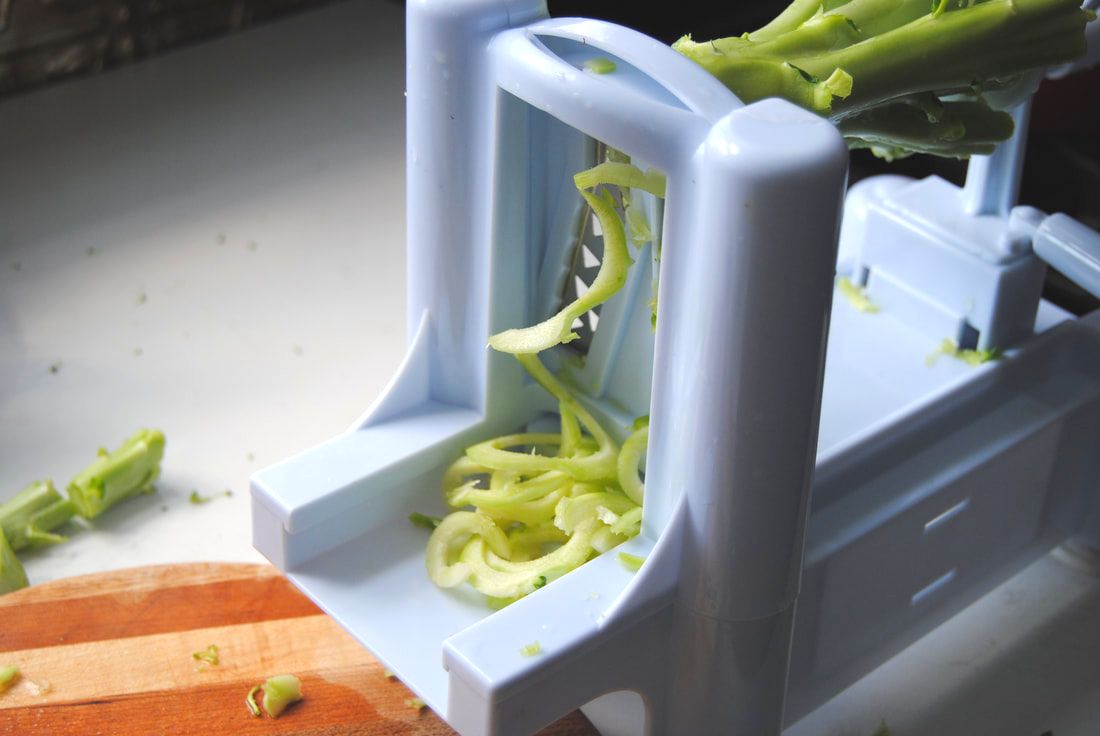 For this recipe we used ALL of the fresh, organic broccoli that we purchased at our local farmers market. Even more of a plus if you are purchasing broccoli by the pound - you are paying for that stalk so use it! The stalks we spiralized into broccoli noodles (boodles?) with success, though it was slightly trickier than spiralizing zucchini. We looked for broccoli with large, wide stalks to maximize the boodle outcome. If you have a spiralizer with multiple settings, we found the boodles to be good at any thickness though we used the larger noddle setting. The boodles did tend to break into smaller pieces unlike zucchini noodles which can get very long without breaking. This was due to variations in shape of the broccoli stalk that is different than a zucchini. The broccoli florets we chopped and cooked as usual though we also used the small leaves that can be found nestled between the florets. The leaves are small and tender, cook down well, and taste very similar to dark leafy greens. So no need to create broccoli waste again! The whole plant can be eaten and enjoyed with this recipe. Broccoli Florets, Leaves, and Noodles with Walnuts and Roasted Garlic PREP TIME: 45 minutes TOTAL TIME: 50 minutes Servings: 4 Ingredients Roasted garlic 1 head garlic 1 Tbsp olive oil Pasta 2 stalks of broccoli with florets and leaves 1 medium yellow onion, diced 1 head roasted garlic cloves 1 cup roasted walnut pieces 2 Tbsp olive oil 1/4 cup dry white wine 1/4-1/2 cup water 1-2 oz Parmesan cheese, shaved (or other salty hard cheese) Juice of 1 lemon Salt and pepper to taste To roast garlic, preheat oven to 350 degrees. Slice garlic in half and drizzle with 1-2 tsp olive oil then place in a garlic roaster (or loosely wrapped in tinfoil) and roast for 45 minutes. Wash broccoli and cut florets and leaves from the stalks and set aside. Try to cut high on the stalk to preserve as much stalk as possible for spiralizing. Use a spiralizer with the medium noodle attachment to make broccoli "noodles" with the broccoli stalks then set aside. In a medium-large sauté pan add 2 Tbsp olive oil and diced onion and sauté for 20-25 minutes or until the onion is golden. Add broccoli florets, broccoli leaves, and peeled roasted garlic cloves to the pan along with 1/4 cup dry white wine and 1/4 cup water. Place a lid over the pan, reduced to a simmer, and cook for 5-7 minutes or until broccoli is tender. Remove from heat and add broccoli "noodles", roasted walnuts, shaved Parmesan cheese, and lemon juice and sprinkle with salt and pepper to taste. Stir to combine all flavors then serve immediately. *This dish does change color as it sits (lemon juice reacting with chlorophyll in the broccoli - food science!), so for the best texture and presentation we recommend eating this noodle dish right away! 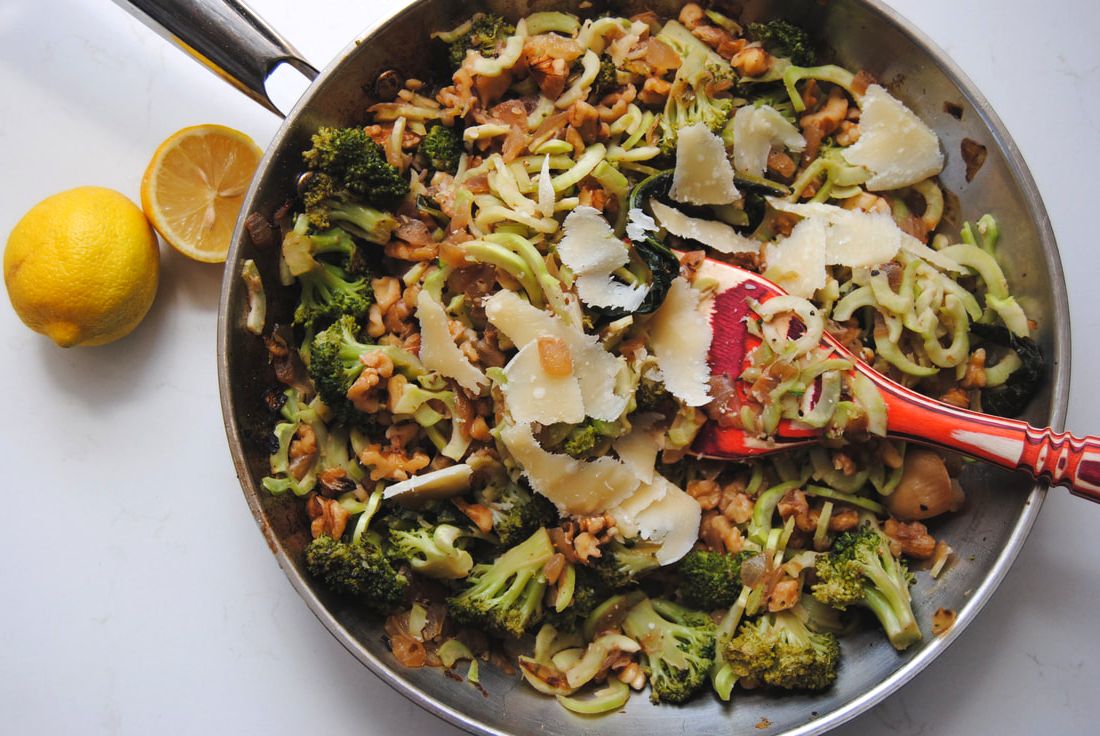 That's all there is to it. Grab a couple stalks of broccoli and a few simple ingredients and you have a whole dish! This recipe has a great mix of texture from the different forms of broccoli - crunchy boodles and softer florets - and a unique array of flavors from earthy broccoli leaves to sweet caramelized onions and roasted garlic. Your summer dinner solution is here. Enjoy, Jess and Cecelia 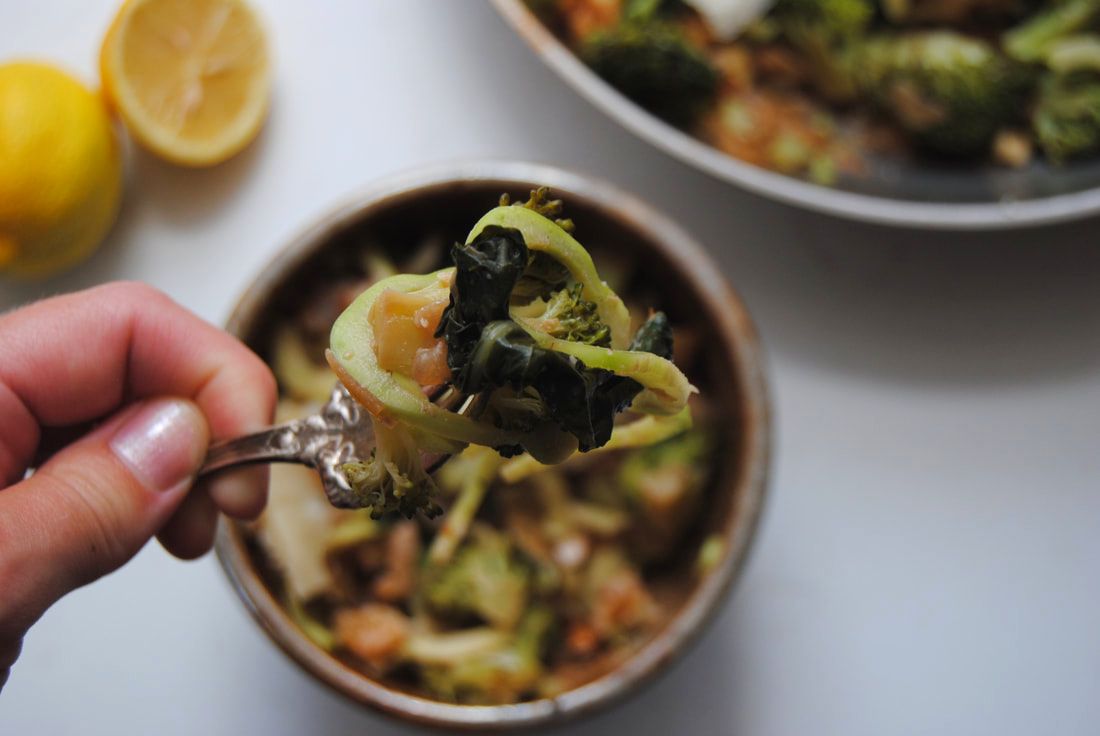 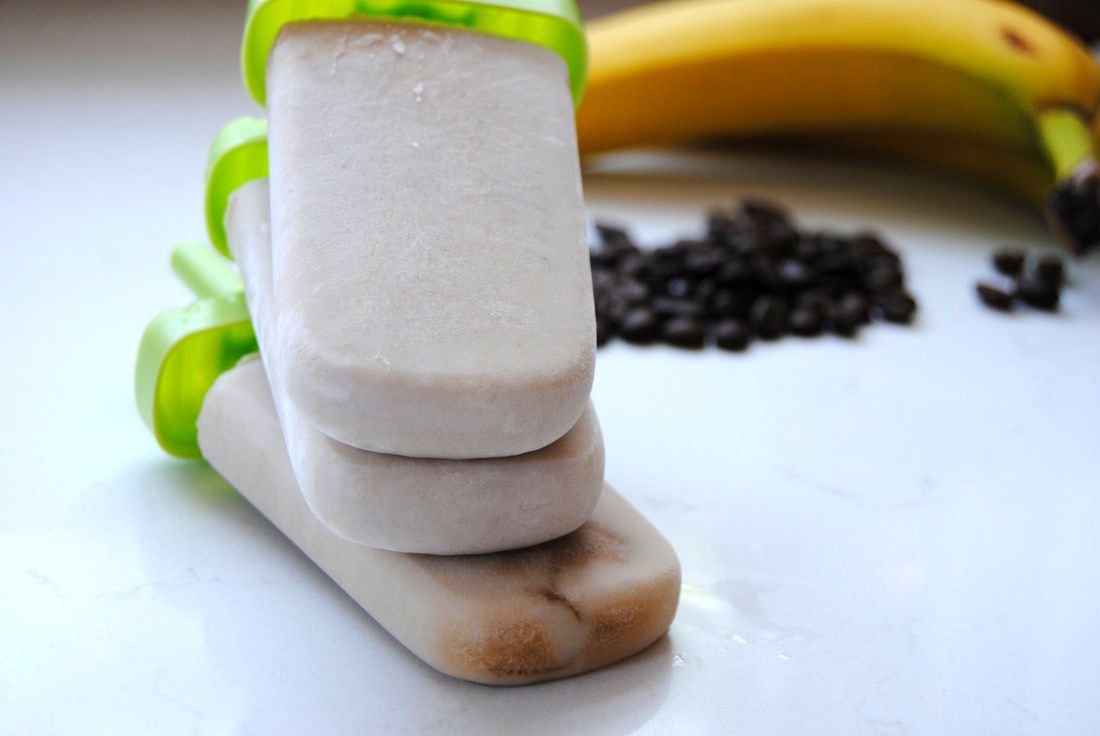 Okay, okay, we know - bananas aren't technically a seasonal summer fruit - but we've just had such a craving lately! Maybe it's the warm breezes and lazy summer days reminding us of vacations to tropical places where bananas actually are seasonal. But either way, this recipe is amazing! We did some experimenting with a new cooking method and have some lessons learned to share. Because hey, not every experiment goes 100% accordingly to plan, are we right? 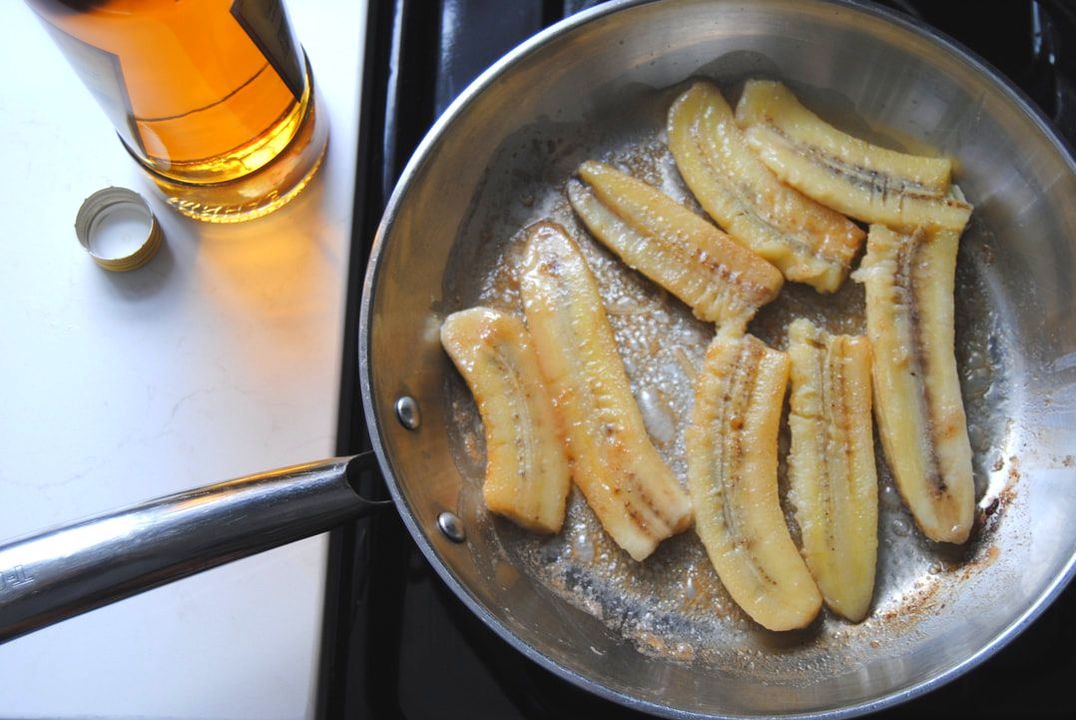 This week we attempted to flambe to create a version of bananas foster. Bananas foster is a dessert created in the mid 1900's in New Orleans containing caramelized banana in a sugary butter sauce and topped with vanilla ice cream. To develop flavor, and for some extra flair, the flambe technique is used. Flambe is French for "flaming" or "flamed" and is essentially the process of lighting alcohol on fire during the cooking process. This technique imparts the flavor of the liquor to the food and allows the alcohol to burn off quickly. And of course it looks super impressive. We unfortunately did not achieve a true flambe and got the alcohol to ignite only very briefly. The alcohol from the rum still simmered off after a few minutes and the bananas tasted great, though we just had to search ways to troubleshoot the flambe method for next time. Here's what we found: -Use a hard alcohol higher than 80 proof (no beer, wine, etc.) -Liquor should be warmed slowly but not boiling prior to adding to the pan to flambe -Cooking pan and contents should be very hot -Pour warmed liquor slowly into the hot pan and attempt to light immediately -Attempt to light the fumes at the edge of the pan and not the liquid itself -Use a long match or barbecue lighter and have a pan lid handy to extinguish the flame if needed As we attempt again and learn more we will update these flambe tips and tricks but hopefully this is enough to get you started. Though flambe or not, this recipe still works - time to get to it! 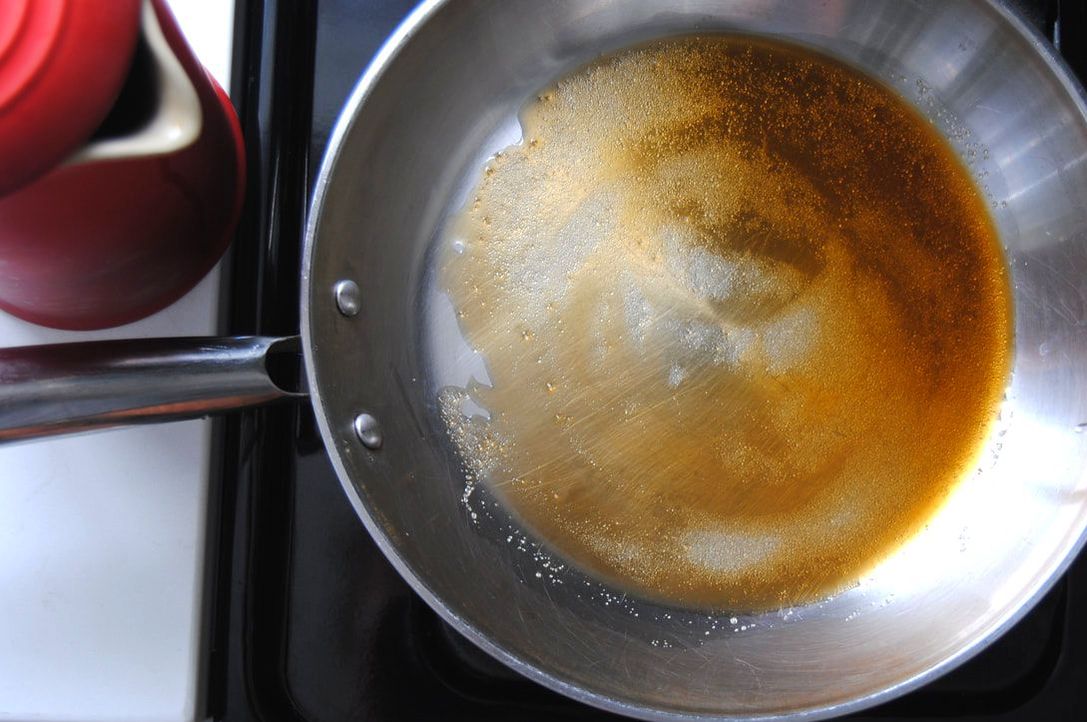 Coconut Bananas Foster Coffee Popsicles PREP TIME: 15 minutes + 4-6 hour chill time TOTAL TIME: 15 minutes + 4-6 hours chill time Servings: 6 popsicles Ingredients Popsicle 2 very ripe bananas 1 Tbsp salted butter 1 1/2 tsp pure maple syrup Sprinkle of cinnamon 1/4 cup dark rum 1 1/4 cup canned full fat coconut milk Coffee Simple Syrup 4 Tbsp strong brewed coffee 4 Tbsp cane sugar In a medium sauté pan set to medium/low heat melt the butter then mix in the maple syrup and cinnamon and stir to combine. Peel and cut the bananas in half lengthwise and place flat side down in the pan with the melted butter mixture. Cook bananas for 2-3 minutes on each side then add the dark rum to the pan. Use a long match or lighter to carefully light the fumes of the alcohol at the edge of the pan, not the liquor itself, to flambe. Be prepared for a whoosh and a bright flame to appear in the pan. If you do not see a flame, this could be due to the food/pan not being hot enough but don't worry! Instead allow the mixture to simmer for 2-3 more minutes until the alcohol (and most of the liquid) evaporates off. Remove the pan from heat and allow bananas to cool slightly before adding to a blender. Pour any remaining liquid and scrape any caramelized pieces from the bottom of the pan into the blender. Add coconut milk and puree on high speed for 1-2 minutes. To make the coffee simple syrup, add brewed coffee and cane sugar to a small sauce pan over medium heat. Stir continuously until the mixture is simmering and the sugar has dissolved. Continue stirring until the mixture thickens (about 2-3 minutes) and will stick to the back of a spoon. Remove pan from heat. Next pour banana coconut puree into popsicle molds to halfway full. Spoon one teaspoon of coffee simple syrup into each popsicle mold and swirl with a long, thin utensil (we used a skewer) to incorporate the coffee simple syrup throughout the banana coconut puree. Fill popsicle molds the rest of the way with the banana coconut puree and again add one teaspoon of coffee simple syrup to each pop and swirl to combine. Insert popsicle sticks and allow popsicles to freeze for at least 4-6 hours. Run popsicle molds under warm water for 30-60 seconds to remove popsicles from molds. 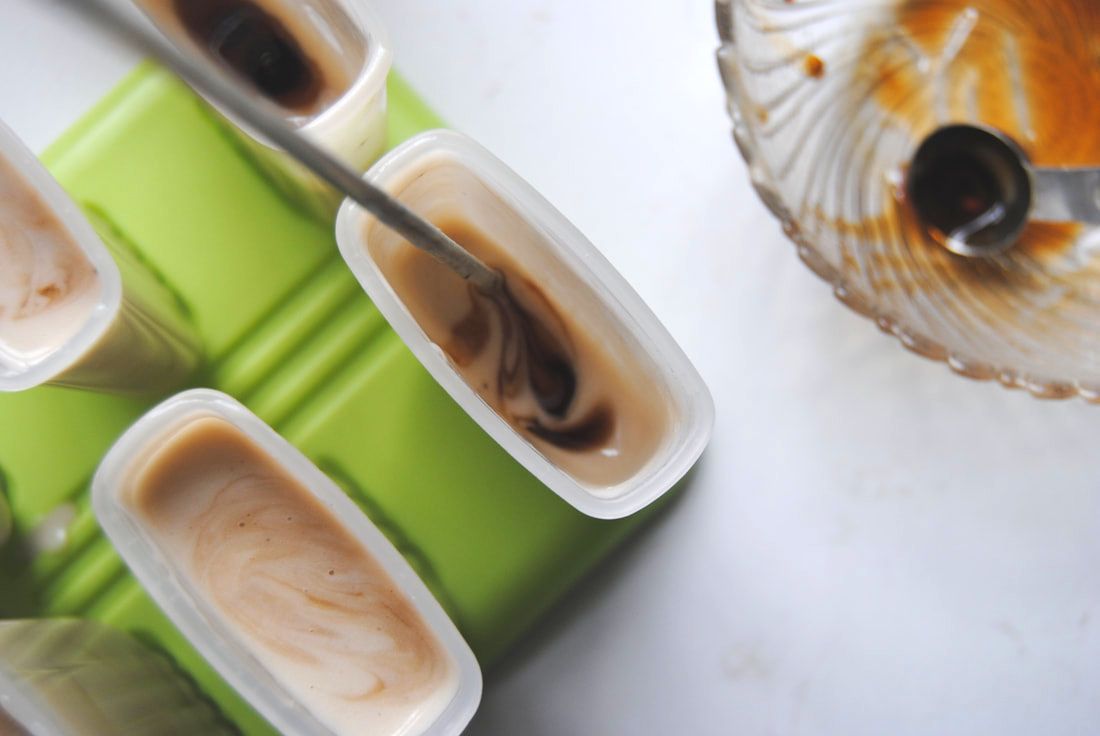 Every moment of preparation that goes into these pops is completely worth it. The taste of the final outcome is unexpected and yet completely familiar. A rich sweetness from the caramelized banana balanced by a creamy richness from the coconut milk and finished with a hint of coffee flavor. This might truly be the answer to our summertime "ice cream" cravings. Enjoy, Jess and Cecelia 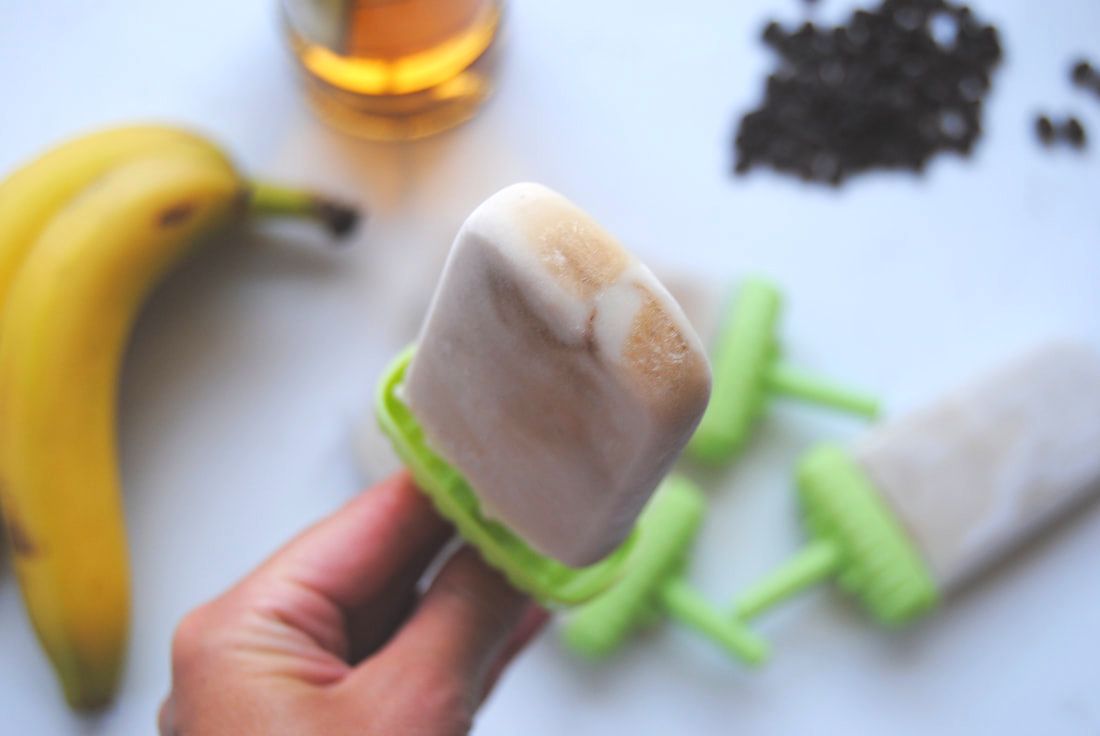 |