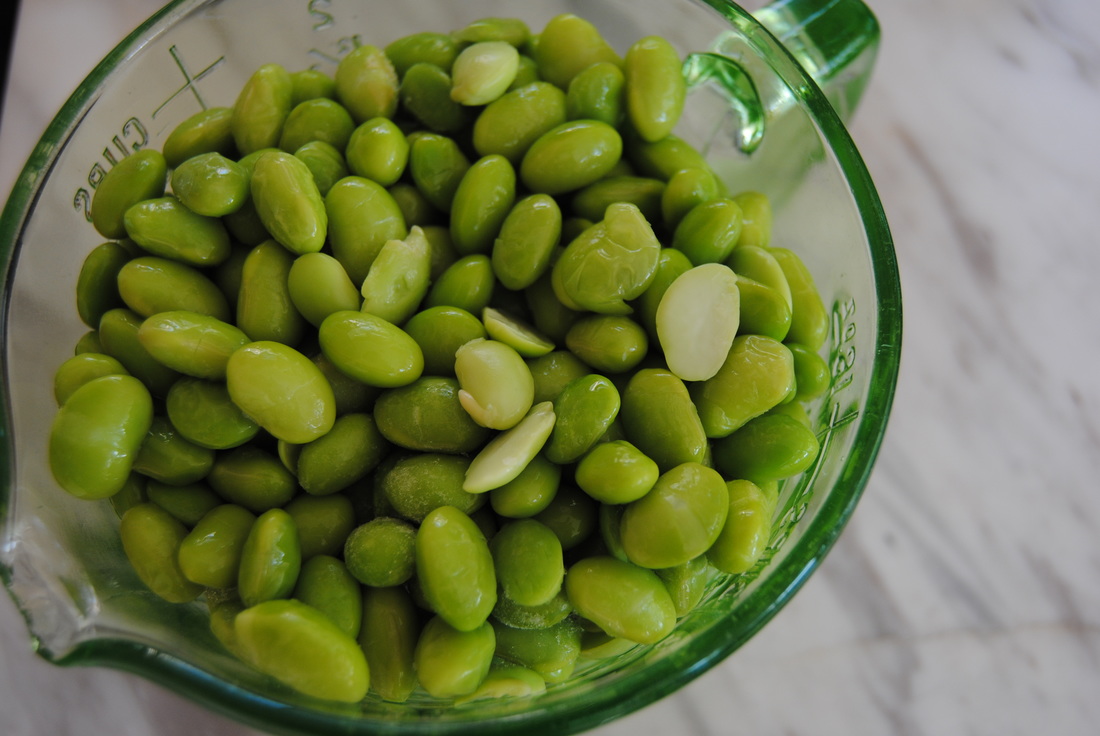
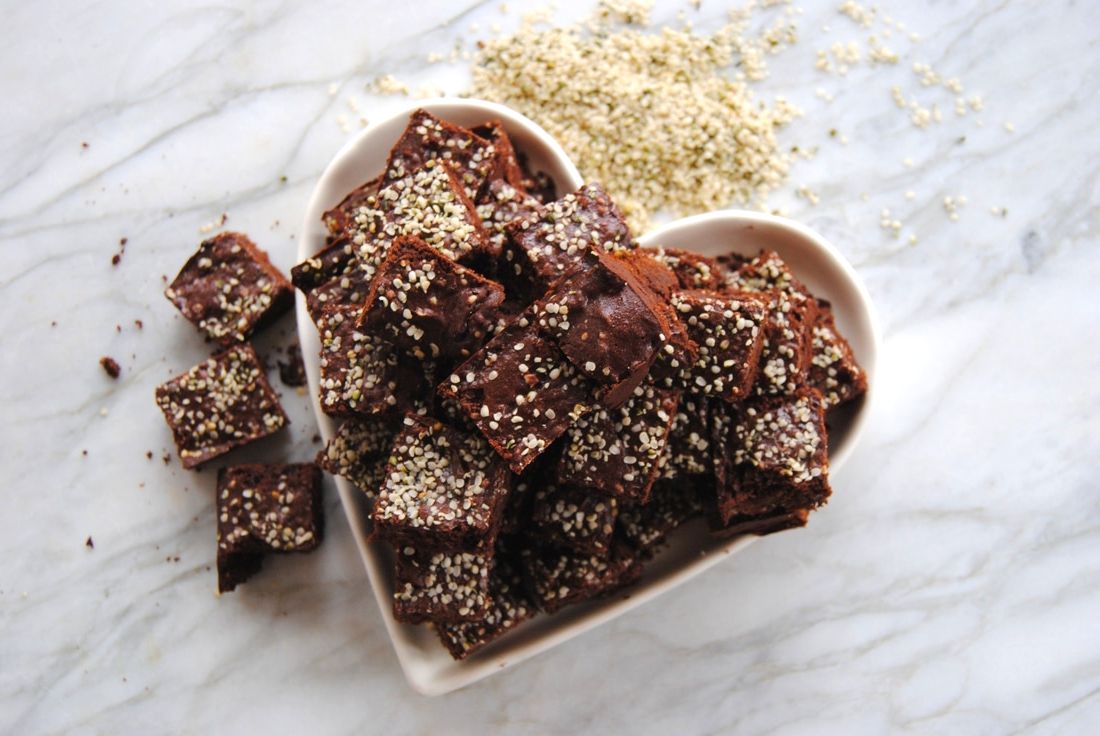
 We've been SO busy and have packing on the brain as Cecelia is in the process of moving into her new home in Chicago. Besides the busyness, packing and moving require energy and strength (she's already starting to question the decision of a second floor walk up, ha!). But jokes and moving grumbles aside we decided to focus on protein this week and found a way to pack tons of protein into a beloved dessert - brownies! These bites are chocolatey and delicious and contain a good dose of protein from a variety of sources - one being hemp butter. Yes, hemp butter!  So now you're probably thinking "what is hemp butter and why have I never heard about it?" Well, hemp butter is just like any other nut/seed butters in that it is a blended version of hemp seeds. However, it is different than other nut/seed butters because the color, taste, and texture change significantly, in our opinion, once the hemp seeds are blended. As you can see from the picture above, hemp seed butter is a dull green which may not look all that appetizing. The hemp seed flavor is also enhanced in the butter which has a stronger flavor than the plain hemp seeds and the texture becomes quite thick. These changes may make hemp seed butter less appealing and underutilized in the kitchen - probably why you've never heard about it! We found that adding hemp butter to recipes for additional protein and nutrient value was a great use of this underused product. But if you find that you love hemp butter plain on toast - go for it! 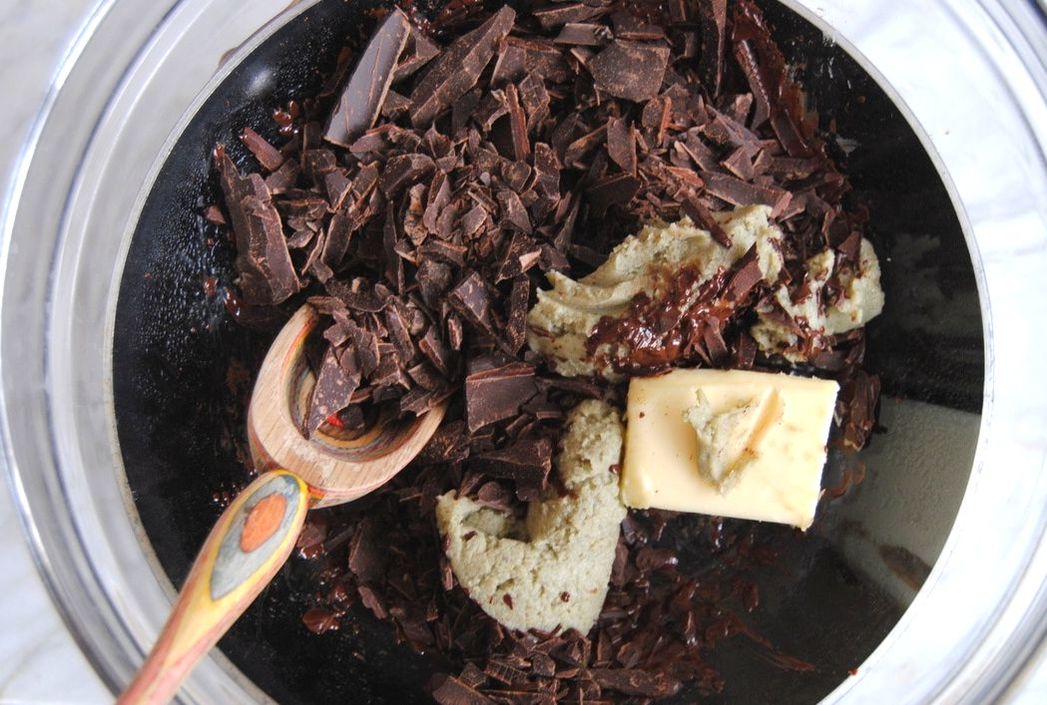 Hemp Protein Brownie Bites PREP TIME: 20 minutes TOTAL TIME: 55 minutes Servings: 26-30 bites Each bite contains ~2.8 grams protein Ingredients 3/4 cup + 1 Tbsp whole wheat flour 3/4 cup + 1 Tbsp coconut sugar 3 Tbsp hemp seed butter (make by blending hemp seeds in a high speed blender or purchase at your local specialty grocer, also available online, here) 3 Tbsp unsalted butter 1/4 cup cacao powder 6 oz coarsely chopped semisweet chocolate + 1/3 cup 60% cacao chocolate shavings 1/4 cup hemp seeds + 1 Tbsp reserved for top 2 eggs 2 tsp pure vanilla extract 1/4 tsp baking powder 1/4 tsp sea salt Preheat oven to 350 degrees. Line an 8"X 8" pan with parchment paper allowing 2 sides to hang over the edges for easy removal. Lightly butter the bottom and sides of the prepared pan with a dab of unsalted butter then set aside. Place 3 Tbsp butter, 3 Tbsp hemp seed butter, 6 oz chopped chocolate, and 1/4 cup cacao powder in a double boiler or a heat proof bowl placed over a pan with an inch or two of simmering water. Allow the butters and chocolate to fully melt, stirring often then set aside to slightly cool. Combine the flour, baking soda and sea salt in a separate bowl and whisk to combine. Combine the coconut sugar, eggs, and vanilla in the bowl of stand mixer fitted with the whisk attachment and mix on medium until light in color, about 3-4 minutes. Add the cooled melted butter and chocolate mixture then continue to whisk. Add in the flour mixture and mix until fully incorporated, avoid over mixing the batter. Stir in 1/3 cup chocolate shavings and 1/4 cup hemp seeds into the batter. Pour batter into the prepared pan, sprinkle 1 Tbsp hemp seeds over the top of the batter and place in the oven for 30-35 minutes or until a toothpick comes out clean. Allow brownies to cool for 15 minutes before cutting. Cut into 1" X 1" bites. Store leftover brownie bites in an air tight container at room temperature for 2 days or in the fridge for up to 5 days. 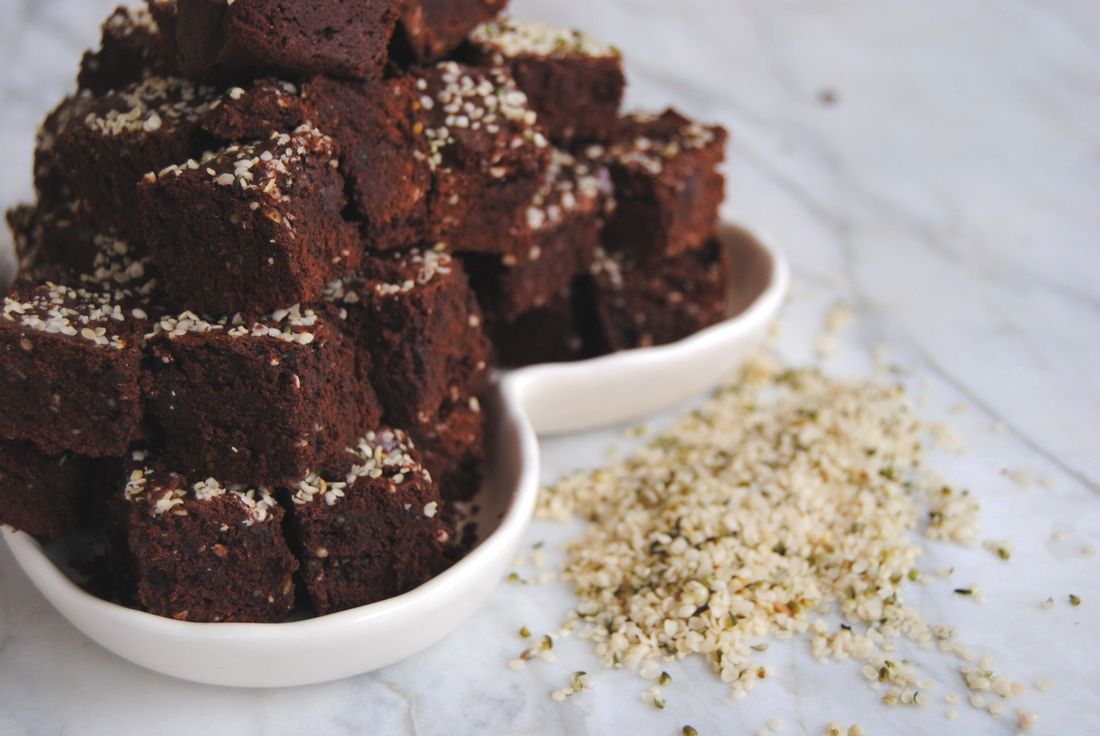 Thoughts? Is your mind blown that there is such a thing as hemp seed butter? Are you excited that you can now make "hemp brownies" that would be appropriate to eat at work (unlike another type of hemp brownie that may come to mind)? We are most excited that we can now ditch processed protein bars and make our own high protein goodies to keep us fueled during Cecelia's move and beyond. Enjoy, Jess and Cecelia 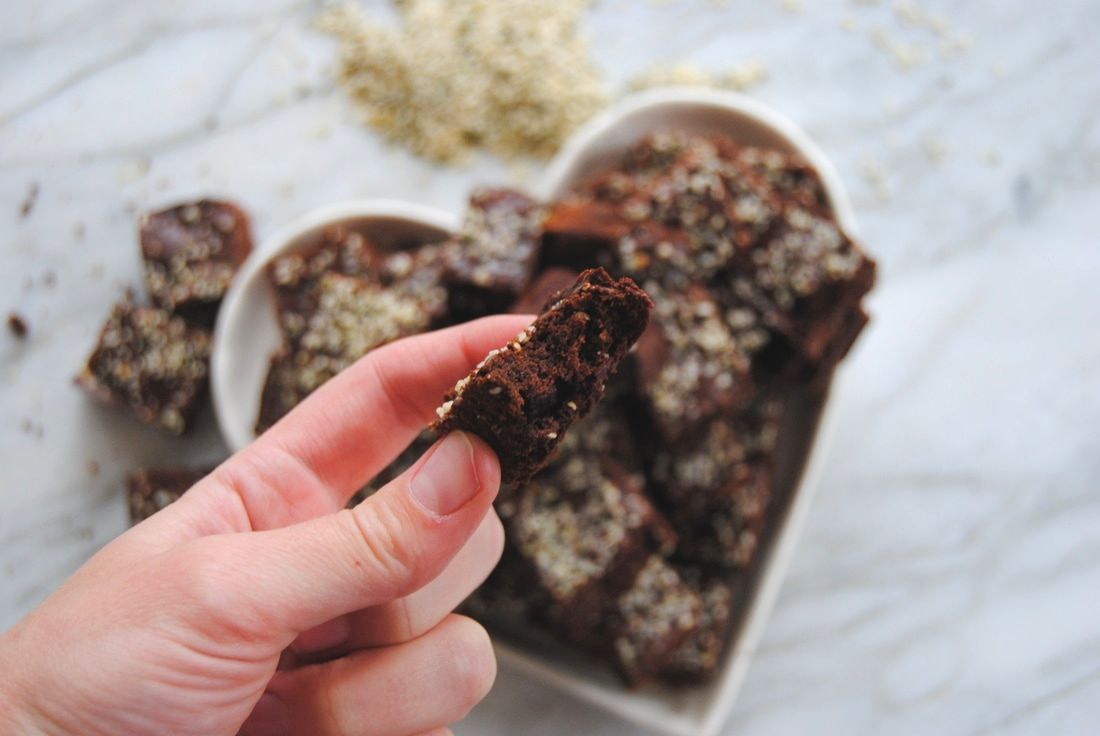
0 Comments
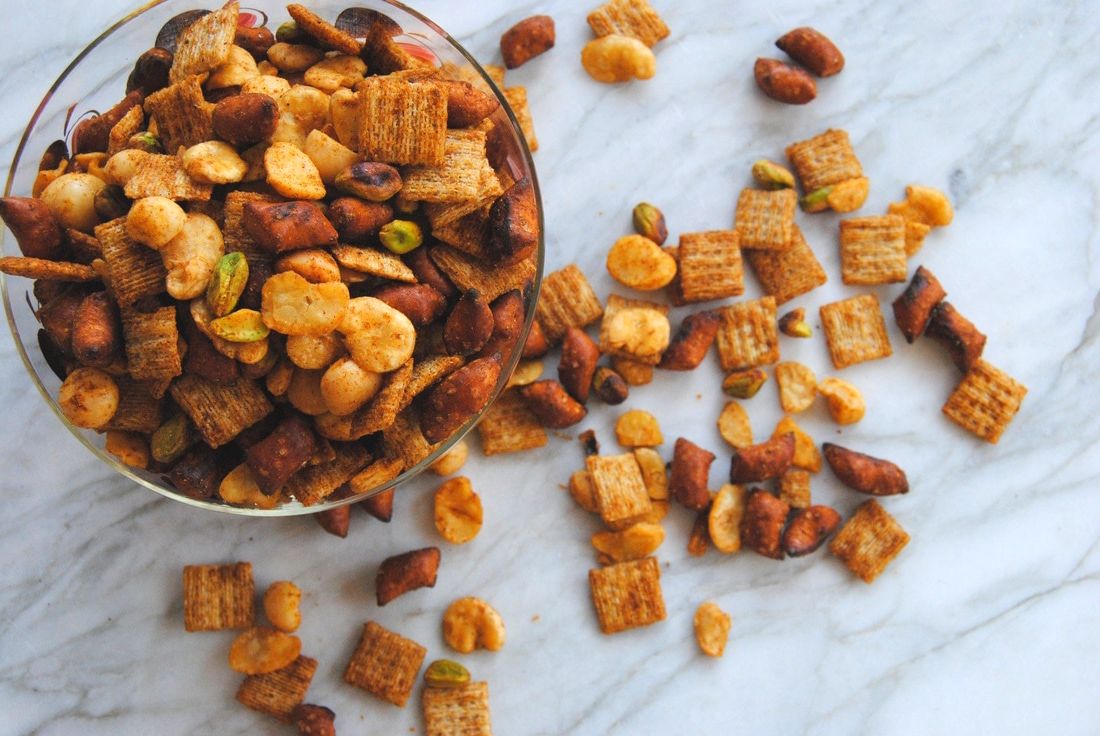 Super Bowl shenanigans yesterday got us in a snacking mood and thinking about better, homemade snacks. Often prepackaged snack mixes have undesirable ingredients and leave no room for creativity. If you love our oldie but goodie recipe for Snack Attack Bars than you'll be glad that we're back with round two - Snack Attack Berbere Mix. But what is berbere you ask, let's find out! 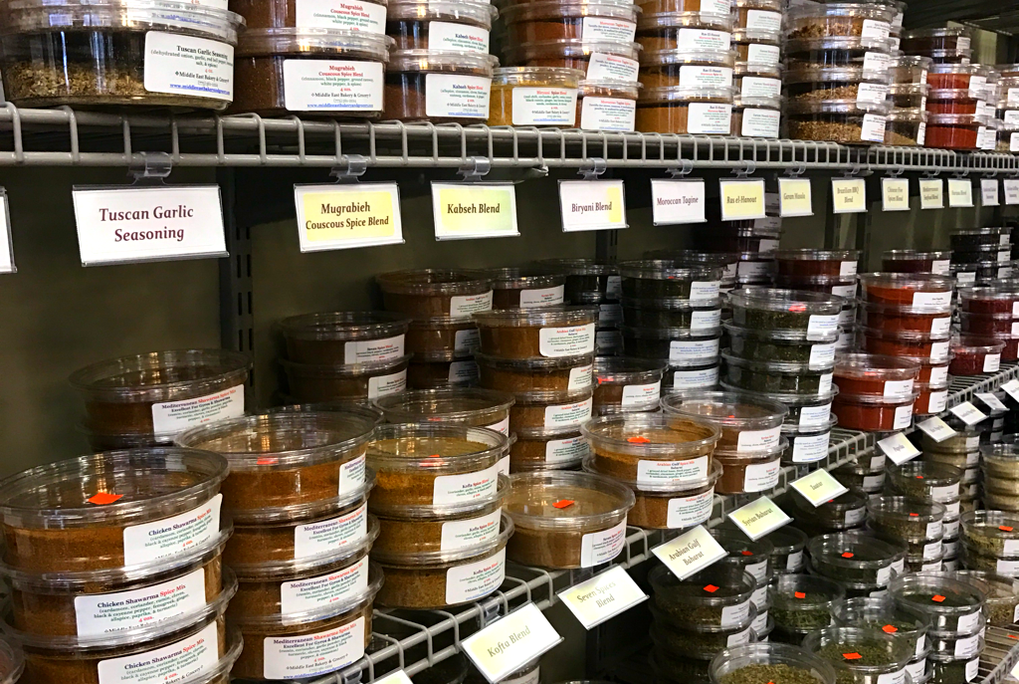 We had some fun at one of our favorite specialty grocers in Chicago this weekend - Middle East Bakery and Grocery in Andersonville. They have a delicious eat in cafe and an amazing selection of hard to find Mediterranean ingredients. What really wows us about this grocer, however, is their colorful selection of spices and unique spice blends without strange additives. It's here that we discovered berbere and are sure glad we did. Berbere is a traditional Ethiopian spice blend with a delectable balance of spice, savoriness, and a touch of sweetness. Our blend contains paprika, ginger, cumin, gram masala, anise seeds, cinnamon, allspice, cardamom, curry, onion, and garlic powder. From what we've found there can be a variety of spices in different berbere blends or recipes but we love the one that Middle East Bakery and Grocery carries. Check them out soon for this gem or find a local specialty grocer that carries unique spices. If you have a great spice cabinet already and want to experiment with a mixture of these ingredients that would be fun too! Though this snack mix would be amazing with any of your favorite spices/spice blends. 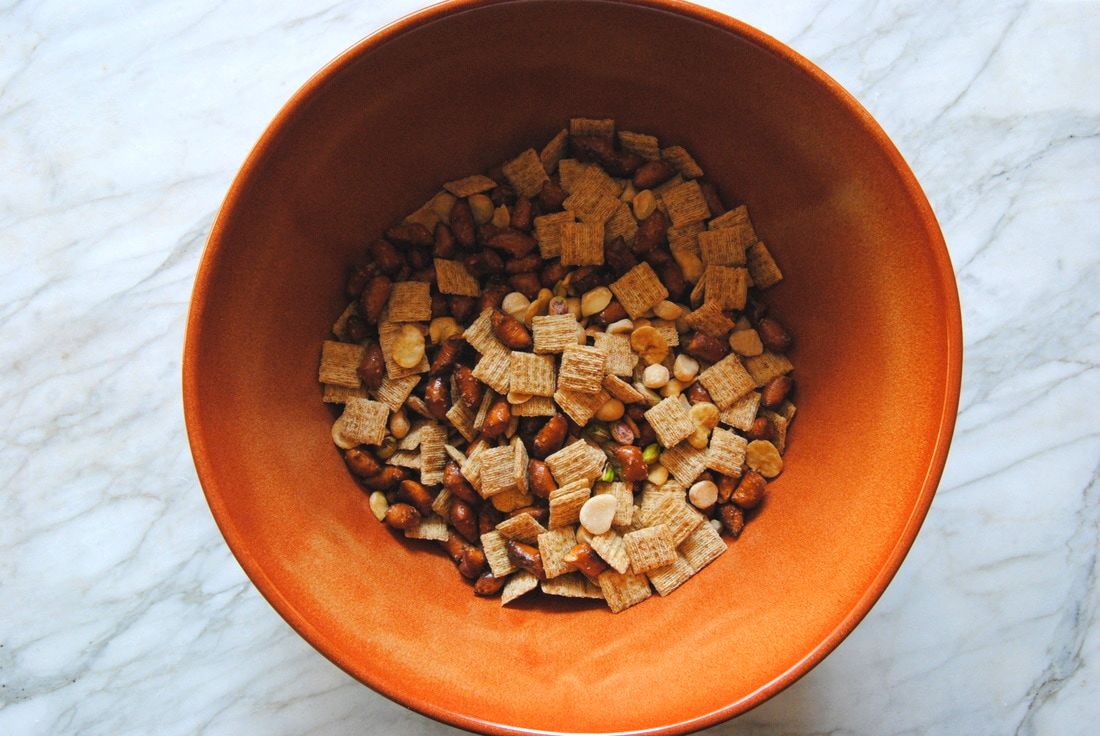 Snack Attack Berbere Mix PREP TIME: 10 minutes TOTAL TIME: 40 minutes Servings: ~7 cups Ingredients 3 cups mini woven wheat crackers (rice, corn, or wheat woven unsweetened plain cereal would also work) 2 cups pretzels (any shape will work, we used whole wheat pretzel bites) 1 1/4 cup roasted broad bean crisps (we used Enlightened brand, roasted chickpeas would also be great) 1/2 cup unsalted macadamia nuts 1/2 cup unsalted, shelled pistachios 4 Tbsp melted, unsalted butter 2 Tbsp + 2 tsp low sodium soy sauce 2 tsp apple cider vinegar 1 tsp honey 1 Tbsp + 1 tsp berbere seasoning powder (paprika, ginger, cumin, gram masala, anise seeds, cinnamon, allspice, cardamom, curry, onion, & garlic powder) OR spice mix of your choice Pre-heat oven to 250 degrees. In a large bowl, mix together the mini woven wheat crackers, pretzels, roasted broad beans, macadamia nuts, and pistachios then set aside. In another small bowl, combine the melted butter, soy sauce, apple cider vinegar, and honey then pour over the dry ingredients. Gently stir the mix until well coated. Sprinkle berbere seasoning powder over the mix and stir again to evenly coat. Spread mix in an even layer on a large parchment lined sheet pan then bake for 30 minutes, stirring every 10 minutes. Remove from the oven, allow mix to fully cool for ~15 minutes, then store in an air tight container for up to 10 days. 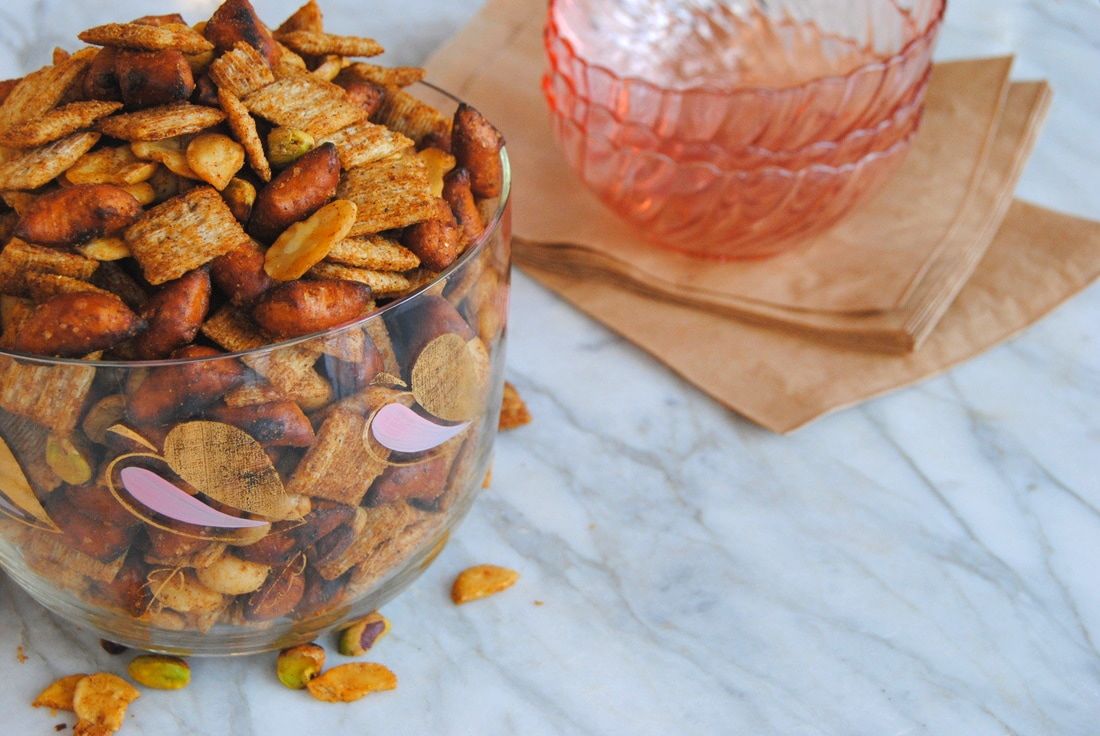 This mix is a snack that won't quit. It's perfectly crunchy but also rich and buttery, the mixture of nut and bean protein will keep you full and satisfied, and the unique tang of the berbere will keep you coming back for more. This can be shared with a group and will easily travel for an on the go snack. And don't forget to support your local businesses and specialty ethnic grocers - finds like this mix may not be possible without them! Thank you Middle East Bakery and Grocery, see you soon. Snack on, Jess and Cecelia 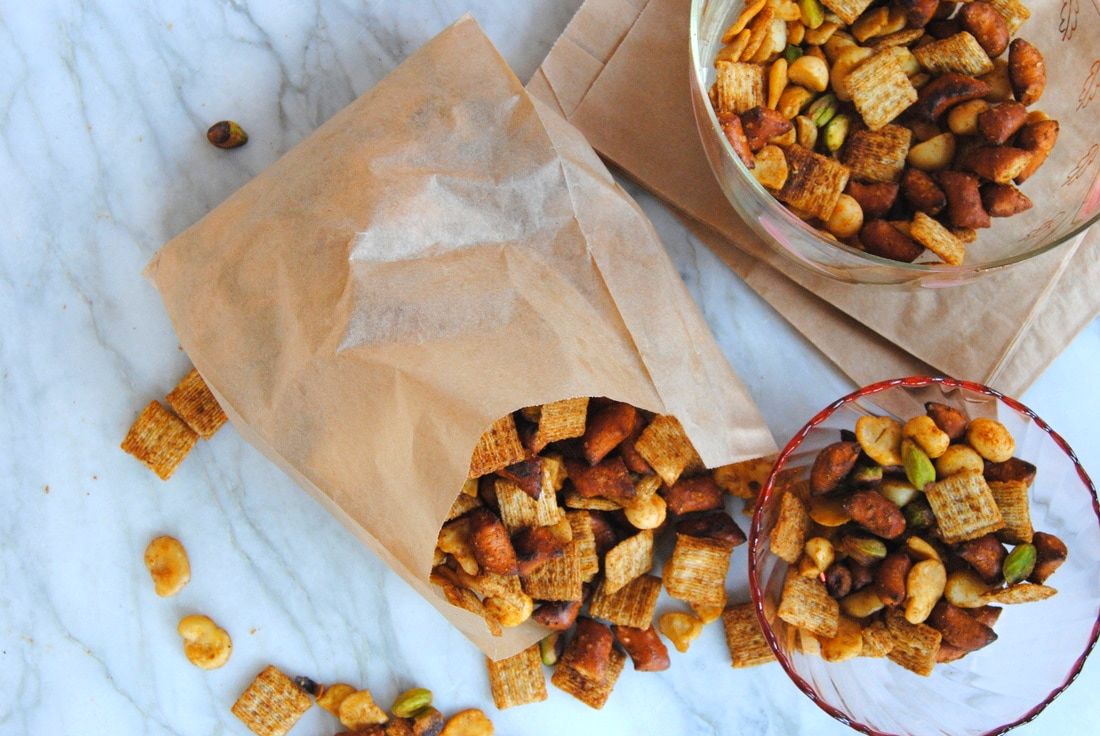 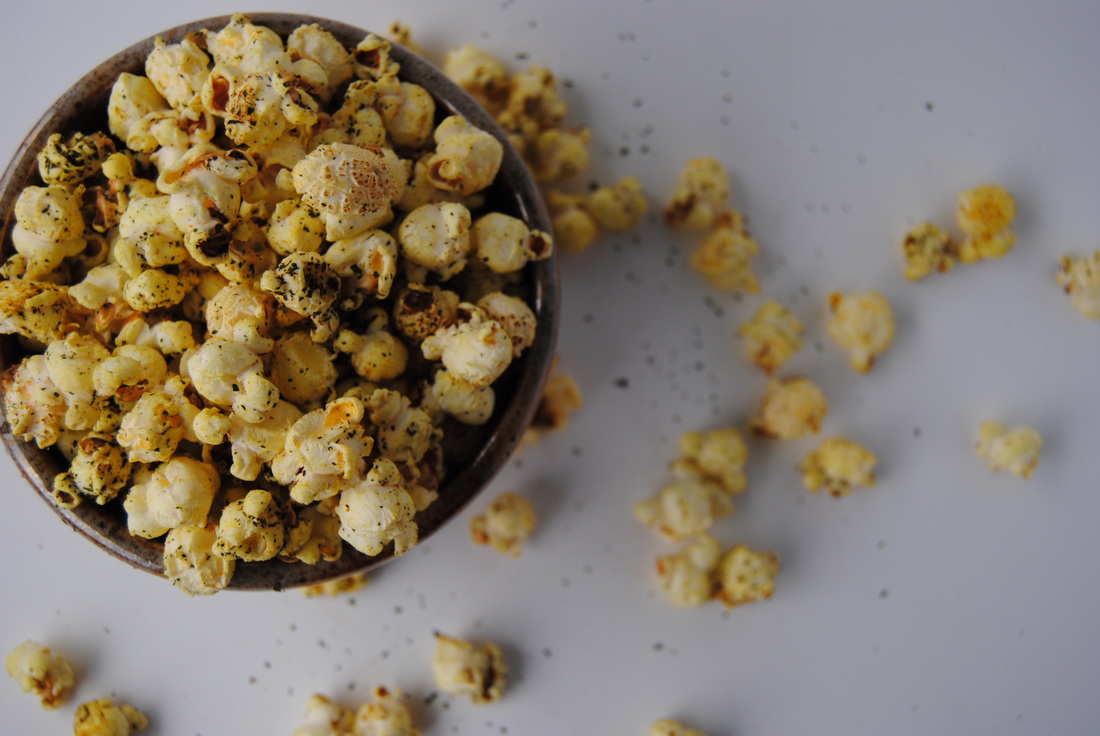 Round two, we love a good bowl of popcorn as you may remember from this post. Though this isn't just any bowl of popcorn as you may have already guessed. We're making this bowl interesting and nutritious with the use of a favorite power green, kale of course, and a famous antioxidant, turmeric, in the curry powder. And just look at that beautiful color created from the turmeric - no artificial butter coloring here! Actually this recipe is butter-free using coconut oil for an extra depth of flavor. But first, more on the unique form of kale we used for this recipe.  When you think of kale you most likely think of a big healthy salad...right? But we have found so many other ways to add this power house green into almost every meal and snack! Powdered kale can be used much like a dehydrated herb. Add this nutritious dark green powder to popcorn, soups, sauces, guacamole, hummus, smoothies, homemade crackers, to the cooking liquid of grains, or believe it or not this can actually be snuck into chocolate chip cookies (we've done it!). Once kale leaves are dried and turned into a powder the possibilities are truly endless. And what a great use for all that end of the season kale in your garden or at the local farmers market. Powdered kale will not only add a nutritional boost but also an earthy flavor to your recipes. Try it out soon and tell us what you think! If in need of ideas, we've got the perfect popcorn recipe waiting for you. 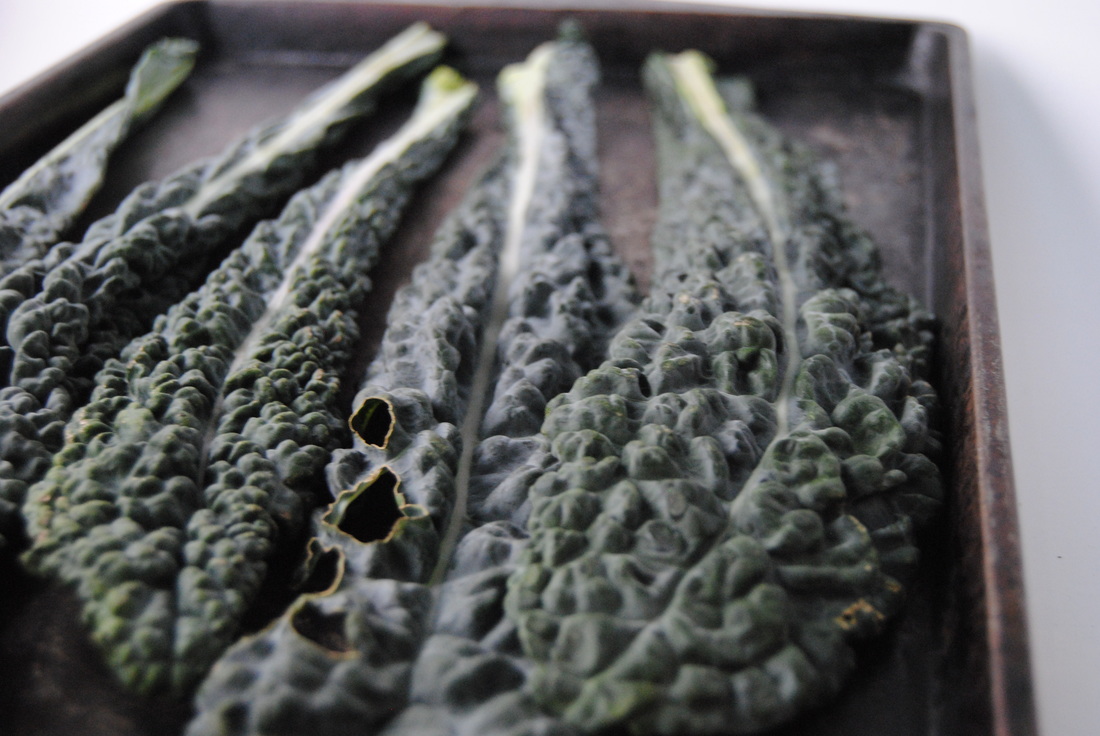 Dehydrated Kale Powder PREP TIME: 5 minutes TOTAL TIME: 20 minutes Servings: Varies Preheat oven to 300 degrees. Rinse then dry kale leaves and use a sharp knife to remove the stems. Evenly place kale leaves on a parchment lined baking sheet making sure to not overlap. Cook kale in the oven for 10-12 minutes (flipping mid way through) or until kale is dried and crunchy. Watch kale leaves carefully as they burn quickly. Allow kale to cool completely then place in a resealable bag, release all the air, and crunch leaves until they form a powder. Store dehydrated kale powder in a cool and dry place. Kale powder will last for up to 3 months if stored in an air tight container. Sweet and Savory Curry Popcorn PREP TIME: 5 minutes TOTAL TIME: 15 minutes Servings: 12 cups Ingredients Popcorn 3 oz organic popcorn kernels (about 1/2 cup) 3 Tbsp coconut oil 1/2 tsp sea salt Topping 2 Tbsp dehydrated kale powder 2 tsp yellow curry powder 2 tsp sugar In a dutch oven or deep cast iron skillet add 3 Tbsp coconut oil and sea salt. Turn stove top on to medium-high heat and allow oil to melt. Add one popcorn kernel to melted oil and wait a few minutes until the kernel pops (this is how you know the oil is ready). Add 3 oz of kernels to the pan and cover with a lid. Bring the temperature down to medium heat. While wearing oven mits, gently shake the pan back and forth to allow kernels to evenly pop. Continue doing this until you no longer hear popping. You may also lift the lid to take a peak, just be careful! While the popcorn is still hot, add the curry powder, sugar, and kale powder over the top and stir to combine. Use a large spoon (or your hands) to evenly disperse the flavors. Pour prepared popcorn into a large bowl and snack on! 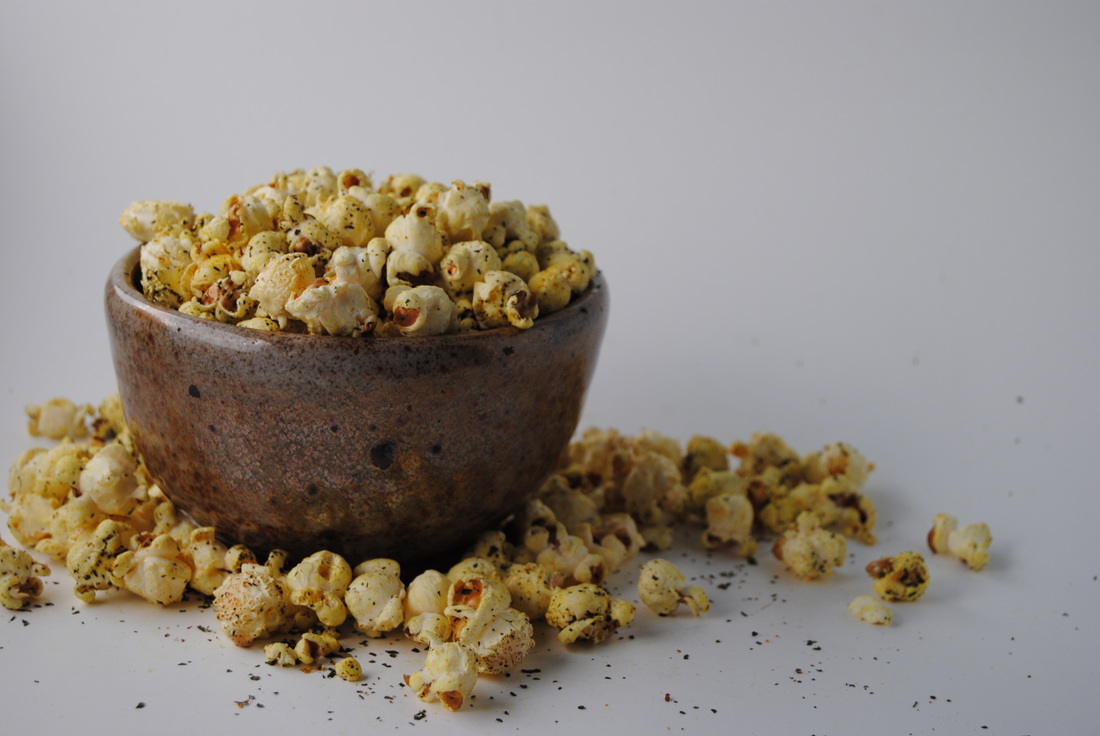 We've really done it this time. This popcorn is changing the popcorn game. Sweet, spicy, salty, bright, and earthy all at the same time. And again, that color! We suggest making this recipe now while you're inspired, you won't be sorry. Enjoy, Jess and Cecelia 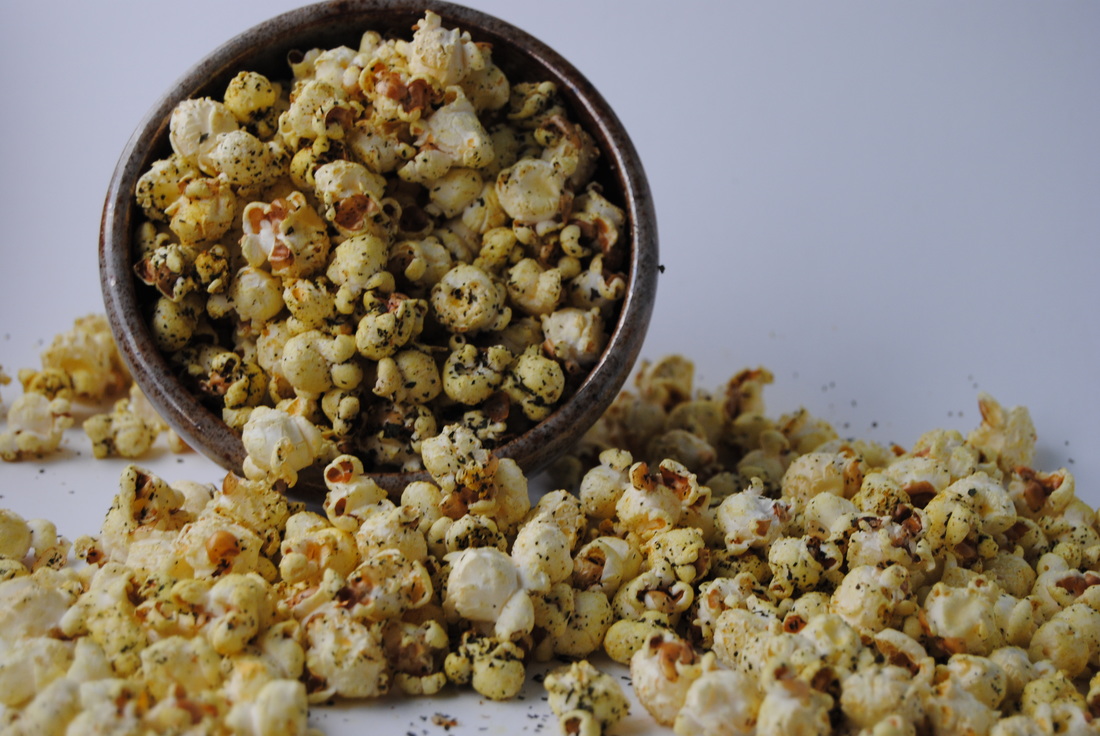 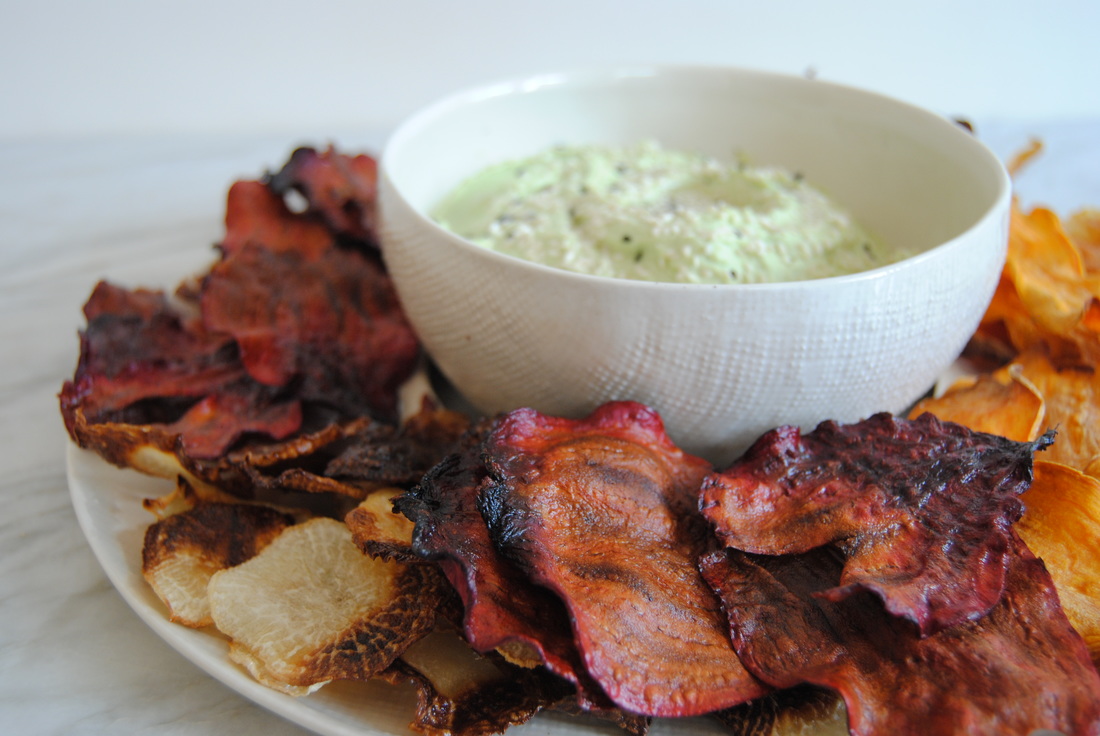 With the coming of fall we can't help but get excited about the beautiful fall colors we know are ahead. Viewing bold, multi-color leaves on a drive through a forested country road is a quintessential fall experience we hope to enjoy every year. Though being city dwellers we find ourselves spending more time at the fall farmers markets (still going strong!) and finding a similar beautiful color palette there. Root vegetables are coming into season and are the hearty addition to meals we all start to crave as the weather begins to cool. So let's enjoy their lovely colors this week as we learn more about root vegetables. 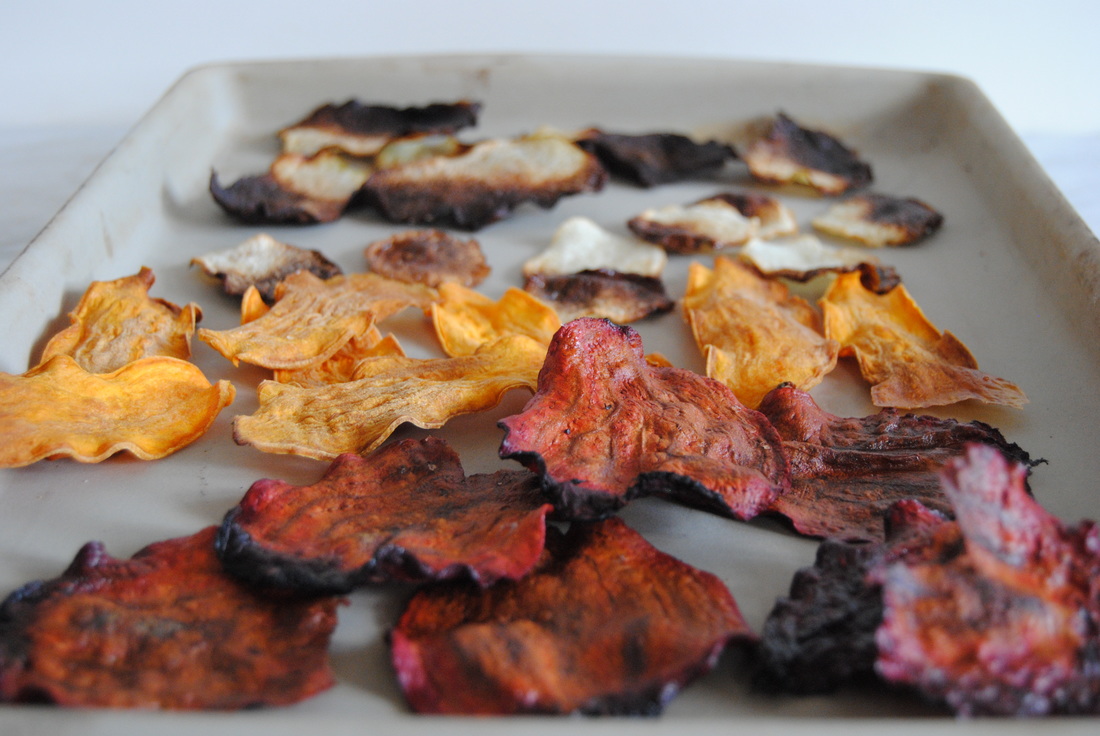 Root vegetables are exactly as named, the edible root of a plant. Some common root vegetables are carrot, potato varieties, beet, ginger, onion and garlic though others include radish, parsnip, turnip, rutabaga and kohlrabi. They grow best in cool weather so can be planted in early spring and left to harvest until late fall making their season for fresh produce last into the winter. Understandably, root vegetables can be intimidating in the kitchen and less common varieties don't always get the attention they deserve. Root vegetables are packed with a variety of vitamins and minerals as they absorb nutrients from surrounding soil while growing and can provide a lower carbohydrate substitute at meals if used in place of grain products. And oh, the colors! Some of the simpler preparations include roasting, boiling and mashing though we just love a good root vegetable chip. We will forewarn you that these are time consuming and require attention and patience though we swear it pays off! But no judgement if you decide to make this dip and purchase root vegetable chips to go with. Look for brands with minimal ingredients including the root vegetables themselves, a simple vegetable oil (preferably coconut or olive oil but hard to find) , and salt. Spicy Wasabi Edamame Hummus PREP TIME: 5 minutes TOTAL TIME: 10 minutes Servings: ~2 cups hummus Ingredients 2 cups organic, shelled & cooked edamame 1/4 cup tahini 1/4 cup fresh lemon juice 1/4 cup untoasted sesame oil + 1 tsp to drizzle over the top of hummus before serving 1 Tbsp water 1 clove of fresh garlic, diced 2 tsp wasabi powder, or fresh wasabi if available 1/4 tsp sea salt 1 Tbsp sesame seeds reserved to sprinkle over the top of hummus before serving In a high speed blender or food processor combine edamame, tahini, lemon juice, sesame oil, water, garlic, wasabi powder, and salt and mix on high until a smooth texture is formed. Pour contents into a bowl and top with 1 tsp of untoasted sesame oil and a sprinkle of sesame seeds. Set aside while your chips are cooking. Roasted Root Vegetable Chips PREP TIME: 10 minutes TOTAL TIME: 35-45 minutes Servings: 4 Ingredients 1 medium-large* sweet potato 1 medium-large red beet 1 medium-large turnip 1 medium-large kohlrabi 4-5 Tbsp coconut oil (olive oil will also work) 1/2-3/4 tsp sea salt, more if you prefer a salter chip Preheat oven to 300 degrees and line 2 sheet pans with parchment paper. Peel each root vegetable and set aside. Using a mandolin set to 1/8" thickness, slice vegetables making sure to cut as evenly as possible - this will help each chip to cook evenly. Brush each side of the vegetable slices with oil and sprinkle with sea salt. Bake in preheated oven for 25-35 minutes or until chips are crispy. Make sure to watch closely as the chips can burn very quickly. Note that the thinner the chip, the faster it will cook. Allow chips to come to room temperature before serving. These chips are best eaten the same day, however, can be stored in an air tight container for up to 3 days. *Choose medium to large root vegetables as vegetable slices will shrink during the cooking process 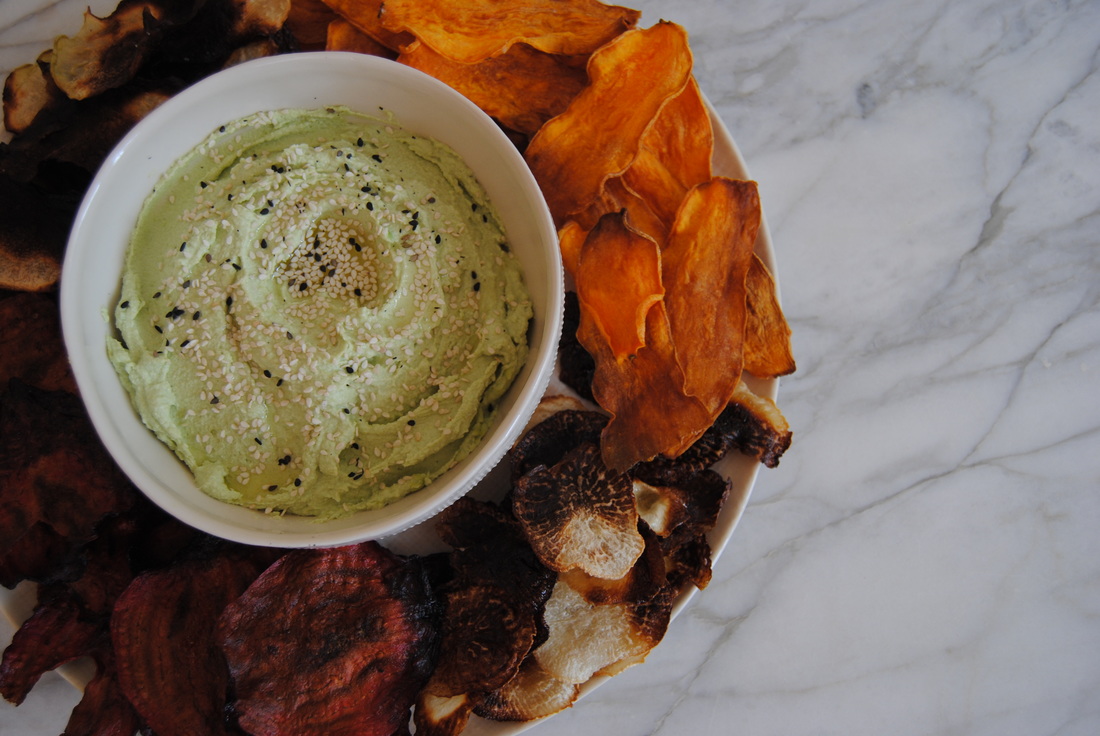 So...this dip...and those chips - a match made in fall heaven! The spicy and creamy wasabi hummus packs a punch of flavor perfectly mellowed by the warm, rich, and roasty veggie chips. Despite the effort, if you have the time we think these chips are definitely worth it. And such a great use for the abundance of root vegetables you'll find at farmers markets this fall. Enjoy, Jess and Cecelia 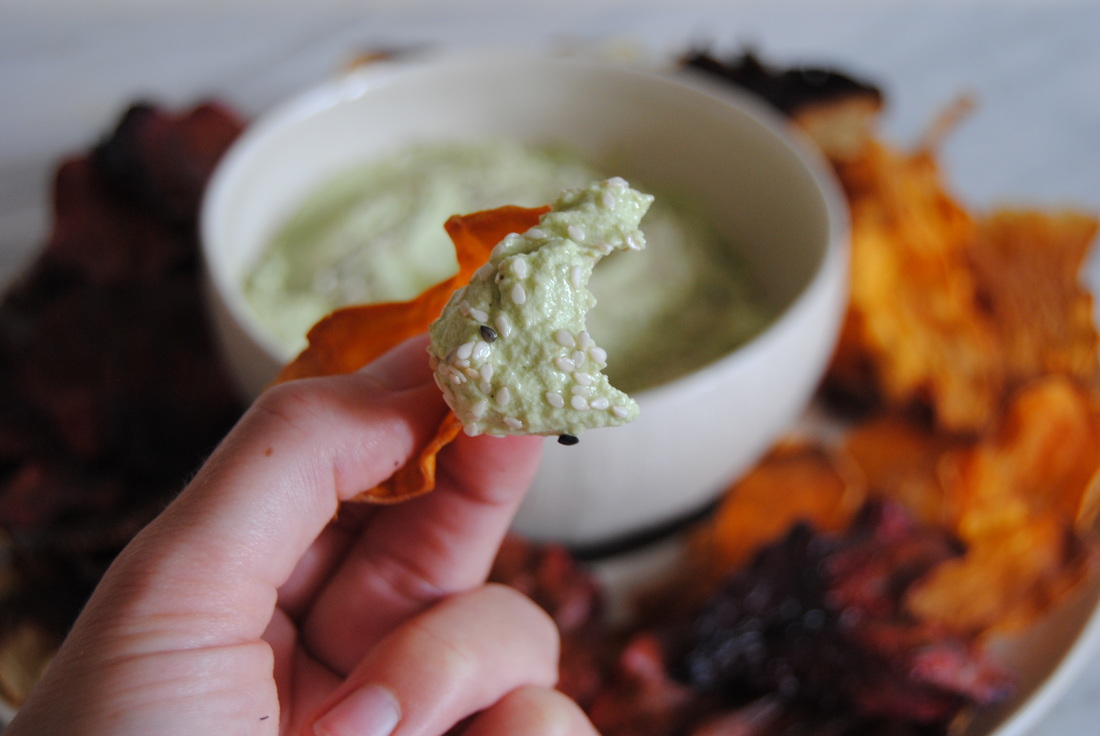  Real talk, being hangry (hungry + angry) is just no fun. We make an effort to always have satiating snacks on hand but watch out if we forget and go a little too long without food, just ask our significant others! If you can relate, or if you just love a satisfying snack, this post is for you. In a bite these bars will eliminate hangry from your vocabulary, if it is even a word to begin with?  Nuts and seeds can be thanked for the satiating quality of these bars. Nuts and seeds not only contain heart healthy fats but are also are a good source of protein and fiber, all of which are necessary to keep you feeling full and satisfied until your next meal. About 50% of the fat content in cashews comes from monounsaturated fat, a healthy fat that can help lower LDL (or bad cholesterol) in your blood. While we are on the topic of healthy fats, sesame seeds are known to help reduce cholesterol levels given their high content of cholesterol lowering phytosterols. All nuts and seeds contain protein, however, hemp seeds are in a class of their own. Hemp seeds are one of the very few plant proteins containing all the essential amino acids. A 3 tablespoon serving of hemp seeds contains a whopping 10 grams of plant based protein! The fiber found in seeds, specifically chia and flax seeds, is high in soluble fiber which also aids in hunger control. In the recipe listed below, if cut into 12 equal sized bars, each contains ~4 grams of fiber and 5 grams of protein to keep you full and satisfied. As you can probably tell, we could go on and on about the endless benefits of nuts and seeds but would rather get to the recipe now!  Seeduction Apple Bars PREP TIME: 20 minutes TOTAL TIME: 55-60 minutes (includes cooking time) Servings: 10-12 bars Recipe inspired by Half Baked Harvest Blog Ingredients Bars 1 cup raw cashews 1/2 cup sweetened coconut flakes 1/2 cup dried unsweetened apple slices, diced 4 Tbsp sesame seeds (we used 2 Tbsp white and 2 Tbsp black sesame seeds) 2 Tbsp chia seeds 3 Tbsp flax seeds 2 Tbsp hemp seeds 1/4 cup cooked quinoa (could also use cooked steel cut oats) 1/2 cup pure maple syrup (could also use honey) 1 Tbsp coconut oil, melted 1 tsp sea salt 1/4 tsp cinnamon White Chocolate Dip 8 oz white chocolate chips (We used Ghirardelli white chocolate chips. Look for white chocolate without any artificial flavorings) 1 vanilla bean (inside scraped out) 1/4 tsp cinnamon Preheat oven to 350 degrees then lightly oil an 8x8" pan with coconut oil and line with pre-fitted parchment paper. Make sure to let the parchment paper hang over on two of the four sides to easily remove bars from pan once cooked and cooled. Using a separate large baking sheet place cashews, coconut flakes, sesame, chia, flax, and hemp seeds in a thin layer making sure to keep them separated. Lightly toast for 10 minutes stirring once for even toasting. Remove from the oven to cool. Cook quinoa according to package directions and set 1/4 cup aside. Set aside 1 Tbsp sesame seeds, 1 Tbsp chia seeds, 1 Tbsp flax seeds, and 1 Tbsp hemp seeds for later use. In a food processor or a blender, add toasted cashews, coconut flakes, dried apples, remainder of seeds and cooked quinoa. Process until a small pebble sand-like texture is formed. Add in the maple syrup, coconut oil, salt, and cinnamon. Process just until the mixture comes together, making sure to avoid over processing. Press dough into prepared pan, sprinkle reserved seeds over the top of the dough and lightly press down using a piece of wax paper to prevent the dough from sticking to your hands. Bake in a preheated oven for 35-40 minutes or until a toothpick comes out clean. Allow bars to cool before removing from the pan then carefully cut into 10-12 evenly shaped bars (shape of your choice). Place bars on a wax paper lined baking sheet and set in the fridge to chill. Meanwhile, melt the white chocolate in a double boiler or in a microwave safe glass bowl in increments of 10 seconds stirring between each to prevent the chocolate from burning. Stir the cinnamon and the inside of vanilla bean into the melted chocolate. Carefully dip the bottom of chilled bars in melted chocolate then place on prepared wax paper lined baking sheet. Repeat until all bars are dipped in chocolate. Place back in the fridge to set. Bars can be eaten at room temperature or chilled right from the fridge. Store in an air thight container for 3-5 days in the fridge.....if they last that long!  So, are we right or what? No more hangry here. These bars keep us satisfied for a good 4 hours as a quick breakfast or yummy snack. Their texture is soft and chewy and the flavor rich and sweet with hints of apple and cinnamon. And such a perfect use for white chocolate with the hearty nuts and seeds balancing white chocolate's almost extreme sweetness. Feel free to pass this recipe along to anyone else you know that may get hangry now and again, they and you will be glad you did! Goodbye Hangry, Jess and Cecelia   We have a very special post for you this week friends because it was inspired by two loyal TGBK followers. One requested unique cucumber recipes to utilize all those garden spoils, and of course we couldn't disappoint! The other shared a family secret when she introduced us to the simple deliciousness of honeydew melon dressed in fresh lime juice. The two combined and inspired this fresh summer recipe that we just know you are going to love. And in the spirit of enjoying summer we will skip on the food education this week and get straight to the eats.  Cucumber Honeydew Salsa with Lime and Sea Salt Pita Chips PREP TIME: 25 minutes TOTAL TIME: 40-45 minutes with cooking time Servings: 8-12 (makes ~8 cups salsa) Ingredients Salsa 2-3 large cucumbers, ~4 cups chopped 1 small honeydew melon, ~4 cups chopped 1 small jalapeño pepper, ~1/4 cup diced 1/2 medium red onion, ~1/2 cup diced 1/2 cup fresh, chopped cilantro 1/4 cup fresh, chopped mint 2 organic limes (reserve peels for pita chips) 3/4 tsp salt Pita Chips 4 whole wheat pitas 2 Tbsp coconut oil 1 Tbsp lime juice Zest of 1-2 limes Sea salt to taste Begin by preparing the pita chips. Preheat oven to 350 degrees and cut each pita into 8 triangle shaped pieces using a pizza cutter. Place in a single layer on un-greased baking sheets. Combine liquid coconut oil and lime juice in a small bowl and brush onto both sides of each pita chip. Bake in preheated oven for 15-20 minutes until golden brown. Flip chips halfway through cooking. Remove from oven and sprinkle with sea salt and lime zest. While pita chips are cooking prepare salsa ingredients. Peel and chop cucumber into small squares. Discard honeydew seeds, remove melon from rind, and chop into small cubes. Finely dice jalapeño and red onion and chop cilantro and mint. Combine prepared ingredients in a large bowl. Add the juice of two limes and 3/4 tsp salt and stir well to combine. Allow to sit at room temperature 5-10 minutes prior to serving. Uneaten salsa can be stored in an airtight container in the fridge for 2-3 days though is best day of. Pita chips will keep well in an airtight bag or container for up to a week. Salsa can also be enjoyed as garnish for veggie burgers or sandwiches, on top of salad, or combined with garbanzo beans and feta cheese for a more complete meal.  This salsa is a fresh flavor explosion and we think a perfect use for both cucumbers and honeydew. Being the same color they are difficult to tell apart in the recipe until you take a bite - the cucumber provides the fresh summer crunch we all crave and the honeydew with lime is a perfect sweet and sour flavor combination that can't quite be explained. Not to mention the lime and salt covered, perfectly toasted pita chips for dipping. And remember, this recipe is inspired by YOU. We'd love to hear more about what you like, love, and want more of from TGBK. Comment or contact us, we'll be waiting. Enjoy, Jess and Cecelia   Of the many ways to stay cool during hot and humid August days, one of our all time favorites is enjoying frozen treats. Though often frozen treats are dessert (ice cream!) and provide mostly calories and added sugar without much nutritional benefit. Sometimes frozen yogurt is chosen as a healthier alternative but we are usually less than impressed with this lower fat (and lower taste!) option. But this doesn't have to be the case! With full fat yogurt products and the right flavorings, homemade frozen yogurt popsicles can and will be delicious. We are making frozen yogurt cool again with this recipe, join us!  Our secret ingredient for this popsicle recipe is Kefir - a probiotic beverage made from milk and kefir grains. So you are now probably wondering, what are kefir grains? Kefir "grains" are not actual grains such as wheat, rye, or barley but are referred to as grains because of their similar appearance and size. Kefir grains contain bacteria and yeast that work together to culture dairy milk or coconut milk creating a finished fermented product loaded with gut friendly probiotics. Dairy kefir is also a great source of protein with eight ounces containing eleven grams of protein to help keep you satisfied until your next meal. Dairy kefir is also a great source of calcium with an eight ounce serving containing 30% of your daily calcium needs and is very low in lactose making it a better dairy option for people who are lactose sensitive. Plain dairy kefir has a slightly sour/tangy flavor similar to yogurt and can be used in a variety of ways. We love kefir to drink plain, in smoothies, chilled soups, and frozen into popsicles as we did in this recipe. And not to worry, those amazing probiotics will survive freezing! They will become dormant when frozen but re-activate after consuming to provide the many benefits of probiotics to your gut. Also, a note that we chose full fat kefir for this recipe. We find the full fat option to be the richest and tastiest, so perfect for a frozen treat. Full fat dairy in general provides a balanced dose of both diary protein and fat in its natural state, meaning less processing (yay!) and more satisfying. And despite historical nutrition recommendations to chose skim and low-fat dairy, current research has not shown improved outcomes to support this recommendation. This makes sense to us - the less you mess with the natural form of a food the better. Except of course when you ferment something and make it a probiotic containing superfood like kefir! So let's get to making those kefir popsicles shall we?  Sour Raspberry Kefir Popsicles PREP TIME: 10 minutes (+ 4 hours freezing time) TOTAL TIME: 15 minutes Servings: 6 popsicles Ingredients Flavored kefir 8 oz plain whole milk kefir 4 oz plain whole milk Greek or Icelandic yogurt 3 Tbsp raw honey (regular honey or light maple syrup will also work) 1 oz fresh ginger juice Zest of 1 medium organic lemon, ~2 tsp Sprinkle of sea salt Raspberry swirl 1/4 cup fresh or frozen raspberries, thawed 1 Tbsp raw honey (regular honey or light maple syrup will also work) 2 tsp bee pollen (optional) In a medium bowl, mix together kefir and yogurt. Stir in honey, ginger juice, lemon zest, and salt then set aside. To make the raspberry swirl, add the raspberries, honey and bee pollen to a small food processor and whip to combine. If you do not have a small food processor mix by hand using a whisk. Please note, you may need to add 1-2 tsp of water to thin the raspberry puree slightly. Evenly pour ~2 tsp raspberry puree into each popsicle mold and top with kefir mixture. As you pour the kefir you should notice the raspberry sauce begin to swirl throughout the popsicle, if not you can swirl by hand with a thin utensil (knife, chopstick etc.). Place popsicle stick into each pop and freeze according to popsicle mold directions. Run molds under hot water to easily remove popsicles once frozen.  Frozen yogurt is making a comeback with these popsicles! So rich and filling from the kefir and with an amazing balance of sweetness and tang from the lemon, ginger and fresh raspberry swirl. You can bet that our freezers will be stocked with these for the rest of the summer season. And as you enjoy this recipe make sure to share the good news about full fat dairy - it's cool again too. Stay cool, Jess and Cecelia   The weather was beautiful here in Chicago this past weekend! And though it may not be time for a dip in Lake Michigan yet, it is the perfect time for a delicious dip recipe. Because what is better than a good dip? Not much in our opinion. And we even made a gluten free, homemade cracker for the ultimate dipping experience. But first let's learn about a new ingredient that you'll be needing and wanting in your pantry, pomegranate molasses.  Pomegranate molasses is a version of molasses made from pomegranate juice rather than sugarcane or sugar beets. Molasses from sugarcane or sugar beets is more common in North America because it is created as a by-product from the sugar refining process. In the Middle East where pomegranate is a native fruit, pomegranate molasses is traditional and used frequently in cooking. It is used to add a depth of flavor to sweet or savory dishes and has a unique tartness different than standard molasses that yields itself to a variety of different uses. Pomegranate molasses can be used in many ways including in dips, dressing and marinades, stirred into drinks like iced tea or sparkling water, or drizzled over dips, plated dishes or even dessert for a touch of flavor. In terms of nutritional profile, pomegranate molasses is pretty much a sugary sweetener but does contain antioxidants and B vitamins. But one of the largest benefits in our opinion is the variety this product adds to your pantry, because most foods can fit in a balanced diet if that balance truly exists. So swap out that sugarcane based sweetener next time for pomegranate molasses and you won't be sorry! Oh and look for this product in ethic sections or ethnic grocers and you'll be ready to create a delectable dip featuring this ingredient.  Savory Gluten Free Crackers PREP TIME: 15 mins TOTAL TIME: 1 hour Servings: ~2 dozen crackers Ingredients 1 cup raw almonds (we used sprouted) 1 cup raw walnuts 1/3 cup ground flax seed 1/2 cup room temperature water 1 Tbsp za'atar seasoning (Middle Eastern spice blend) 1 tsp garlic powder Coarse sea salt to sprinkle over the top Preheat oven to 300 degrees. In a food processor or blender, pulse almonds and walnuts into a coarse flour. In a large bowl, combine the ground nuts, ground flax, za'atar, garlic powder, and water. Mix with a spoon until batter comes together. Place a sheet of parchment paper down on a large baking sheet. Drop dough onto the parchment paper and place another sheet of parchment paper on top. Using a rolling pin, evenly spread dough out into a large rectangle. Note it is important to make the cracker thickness as even as possible for proper cooking. We spread our crackers out to ~1/3" thick (the thinner the cracker the less time it will take to cook). Using a sharp knife, score dough into 2" by 2" squares and poke the middle of each cracker with fork prongs 2-3 times (see picture above). Sprinkle the top with coarse sea salt. Place in a pre-heated oven and cook for 35-45 minutes. Check and rotate the baking sheet half way through cooking. Remember the thinner the cracker, the less cooking time required. Once crispy, remove from the oven, carefully separate crackers, and allow to cool. Serve with favorite dip or store in an air tight container for up to 7 days. Muhammara (Red Pepper Dip) PREP TIME: 30 mins TOTAL TIME : 35 mins Servings: ~2 cups Ingredients 3/4 cup walnuts, toasted 1/4 cup whole wheat bread crumbs 1/4 cup extra virgin olive oil 2 Tbsp pomegranate molasses 1/4 cup tomato paste 1 large or 2 small red bell peppers*, roasted 1 tsp red pepper flakes 1/2 tsp sea salt 1/2 tsp ground cumin Preheat oven to 500 degrees. Roast red pepper for ~30 minutes making sure to turn frequently until the outer skin is wrinkled and charred. Remove pepper from the oven and place in a brown paper bag. Allow the pepper to sit for ~5-10 minutes or until cool enough to handle. Carefully remove the skin and seeds from the pepper. By allowing the pepper to sit in a covered bag to cool, the skin should be rather easy to remove. In a shallow pan on medium heat, lightly toast walnuts for 3-5 minutes or until golden and fragrant. In a blender or food processor add roasted red pepper, toasted walnuts, bread crumbs, olive oil, pomegranate molasses, tomato paste, red pepper flakes, sea salt, and cumin. Blend on high until creamy. Serve immediately or place in an air tight container in the fridge for up to 5 days. We served our muhammara with a combo of nut crackers and raw veggies. It is also delicious as a spread for veggie and cheese sandwiches or wraps. *If you prefer to buy store bought roasted red peppers make sure there is no added spices or marinades on the peppers as this will change the flavor of the dip  These crackers are amazing warm from the oven and have a rich, nutty flavor with a great zing from the za'atar. Not only gluten free but 100% homemade and sure to impress. And this dip, wow! So. Much. Flavor. The flavor profile is just too complex to begin to explain so you might as well whip this up soon and try it for yourself. And keep that pomegranate molasses handy, we guarantee you'll be using it again and again. Happy dipping, Jess and Cecelia   Do things ever get so busy that you just can't find the energy to keep up? Trust us, we feel you. And that's exactly why we created these Sunshine Energy Bites. Also, of course, to acknowledge the longer days with the clocks turning ahead this weekend. Right, just when we can't keep up we lose an hour! So whip these up quick to keep you energized this week.  Sunshine Energy Bites PREP TIME: 10 mins TOTAL TIME: 15 mins Servings: 18 bites Ingredients 6 oz dried unsweetened mango 1/2 cup shelled raw pistachios 1/2 cup raw sunflower seeds 10 soaked pitted dates + 2 Tbsp reserved date water 1/3 cup thick rolled oats 2 Tbsp ground flax seed 2 Tbsp whole fax seed 2 Tbsp sunflower seed butter (we used salted) 1/8 tsp sea salt Pre-soak dates in warm water for about 10 minutes to soften. Chop the mango into half inch pieces and set aside. Using a food processor pulse the oats until a thick flour like texture is formed then place in a separate bowl. Avoid over processing as you want to be able to see some whole oats. Add the ground and whole flax seed to the oat bowl. Combine the chopped mango, pistachios, sunflower seeds, soaked dates, and 2 Tbsp reserved date water to the food processor. Pulse until mixture comes together then pour contents into the oat/flax bowl. Add sunflower seed butter and salt and stir to fully combine. Form into bites about the size of ping pong balls. If your mixture is too dry (the balls crumble and easily fall apart) add a few teaspoons of additional date water as needed. Continue to form until you have about 18 energy bites. Keep in an air tight jar in the fridge for freshness.  They are sweet, salty, and sunflower buttery - basically everything you need to keep you going through all your endeavors. Trust us, we've been busy in the kitchen and have tons of great recipes coming your way, thanks to these bites of course. Jess & Cecelia   Our post this week is inspired by many things including hard work, honeybees, and honeymoons. Now this may seem like a random assortment of unrelated items but we can explain! First, Cecelia has just returned from a relaxing, belated honeymoon getaway in Belize where she enjoyed an endless supply of tropical fruits. Second, relaxing on vacation always reminds us of how hard we work from day to day and how important it is to take a break now and again. And finally, hard work reminds us of the amazing honeybee who epitomizes hard work and provides us with a very special food that we are highlighting this week as a smoothie bowl topping, bee pollen!  The name bee pollen is a little misleading because the source is actually flower pollen. When small grains of flower pollen are collected by worker bees they are packed into semi-hard pellets for transport back to the beehive, thus creating what we consume as bee pollen. Bee pollen is considered one of nature's most perfect foods because of it's unique nutrient profile including a variety of vitamins, minerals, all essential amino acids making it a complete protein, and digestive enzymes. It even contains vitamin B12 making it one of very few plant sources of this vitamin! Bee pollen is so nutritious that even the worker bees use it as their primary fuel (once it is slightly fermented back at the hive). As a plant food, bee pollen contains more amino acids and vitamins than animal proteins when compared by weight, though bee pollen is not typically consumed in the same quantities. If you are new to bee pollen, it is best to gradually increase your intake starting with 1/4 tsp per day and increasing by a few pellets per day until you reach a 2 Tbsp daily intake. It is important that bee pollen be consumed in it's natural, raw form to preserve the nutrient qualities. Bee pollen can be found at specialty grocers, health food stores, or online. When purchasing, look for organic brands from companies who follow good farming practices. To preserve freshness it should be stored in the refrigerator once opened. And remember, when enjoying your bee pollen, to be thankful for the hardworking honeybees that make this superfood possible!  Caribbean Smoothie Bowl PREP TIME: 10 mins TOTAL TIME: 15 mins Servings: 2 bowls Ingredients Smoothie 1 papaya, peeled, seeds removed and cubed 1 pineapple, peeled (recipe will use ~1/2 of the pineapple) 1 frozen banana 1 Tbsp fresh mint leaves, chopped 1 cup ice cubes Toppings 2 Tbsp unsweetened coconut flakes, toasted 4 tsp chia seeds 4 tsp bee pollen 2 tsp honey 2 slices of pineapple Over low-medium heat, lightly toast coconut flakes in a small pan. Once toasted, remove from heat and set aside. Peel the pineapple and cut in half. Core and cut two rings from one half of the pineapple and chop the other half into cubes. Carefully place two pineapple rings in a hot pan on the stove top over medium heat. Sear pineapple until golden then place in the fridge to cool. Meanwhile, combine papaya, about half of the pineapple cubes, frozen banana, mint, and ice in a high speed blender. Blend on high into a thick smoothie texture. Pour smoothie into bowls and creatively top with toasted coconut, chia seeds, bee pollen, cooled seared pineapple and drizzle of honey over the top. Feel free to add additional ingredients on top of your bowl (fruit, nuts, granola). Now grab a spoon and a friend and dive in!  If you're new to smoothie bowls and are thinking that this looks amazing then you're right! There is something about eating, instead of drinking, a smoothie that makes it much more satisfying. Plus, the bowl presentation allows for tons of fun toppings! This smoothie is so crisp and fresh utilizing tropical fruits and fresh mint. Feel free to mix up the toppings any way you like. But remember to give bee pollen a try one of these days and send a huge thank you to the hard working honeybees as you enjoy it! Relax and enjoy, Jess and Cecelia  |