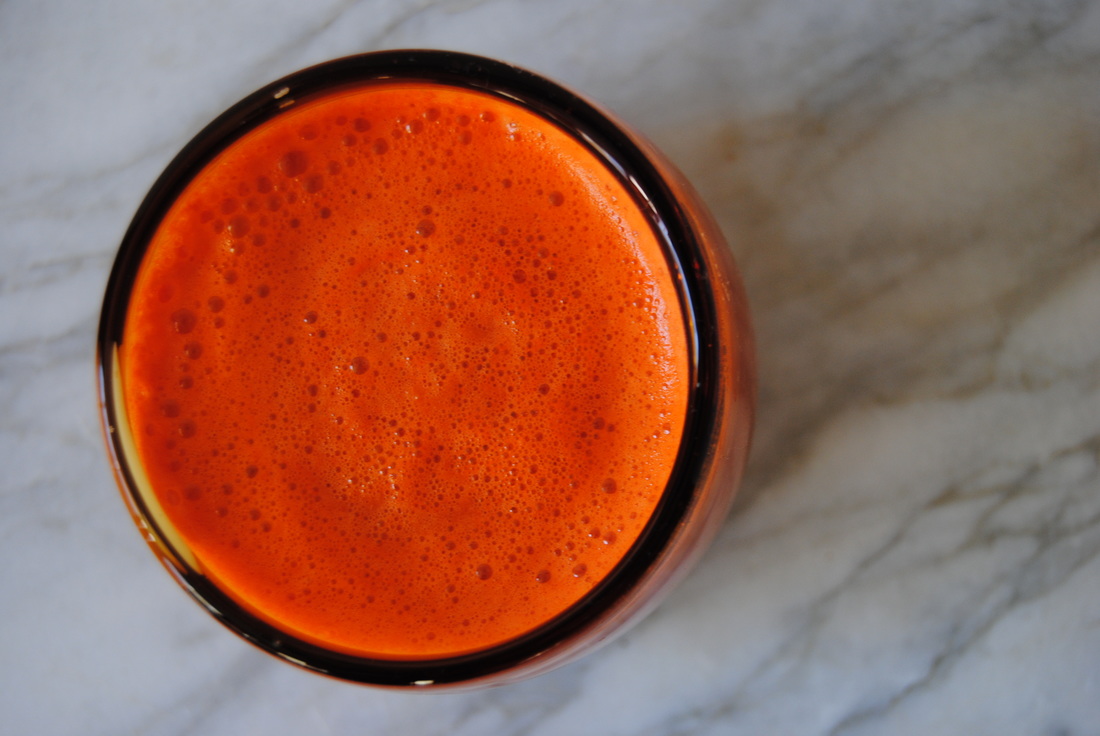
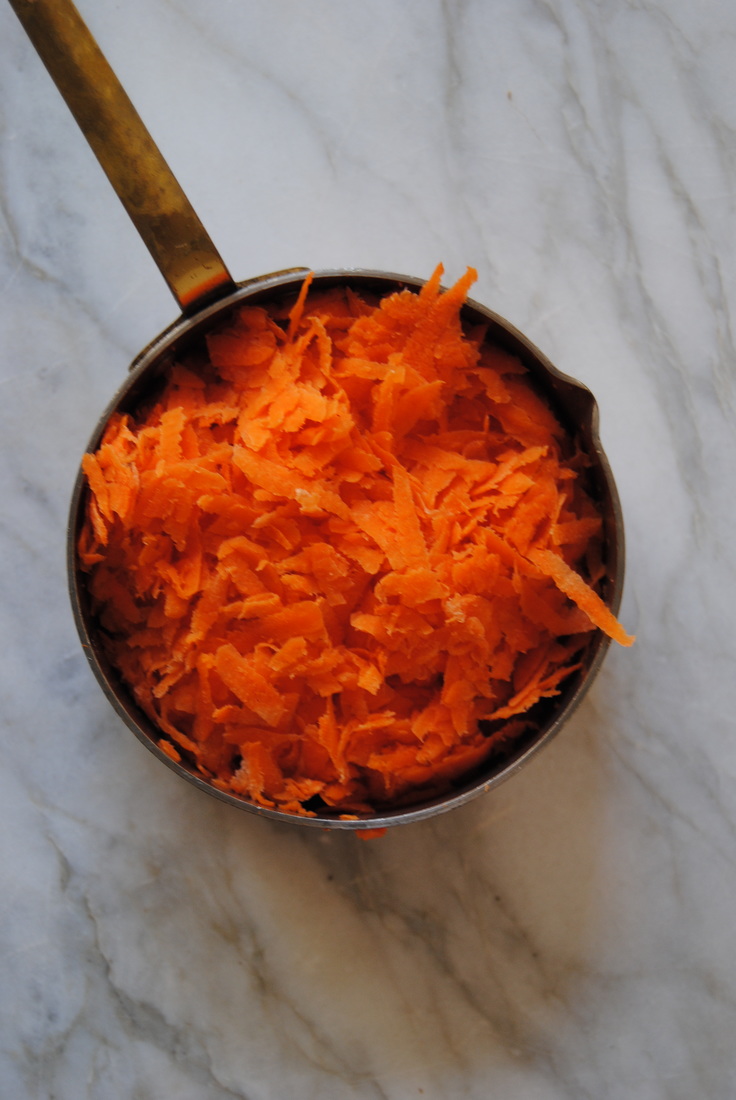
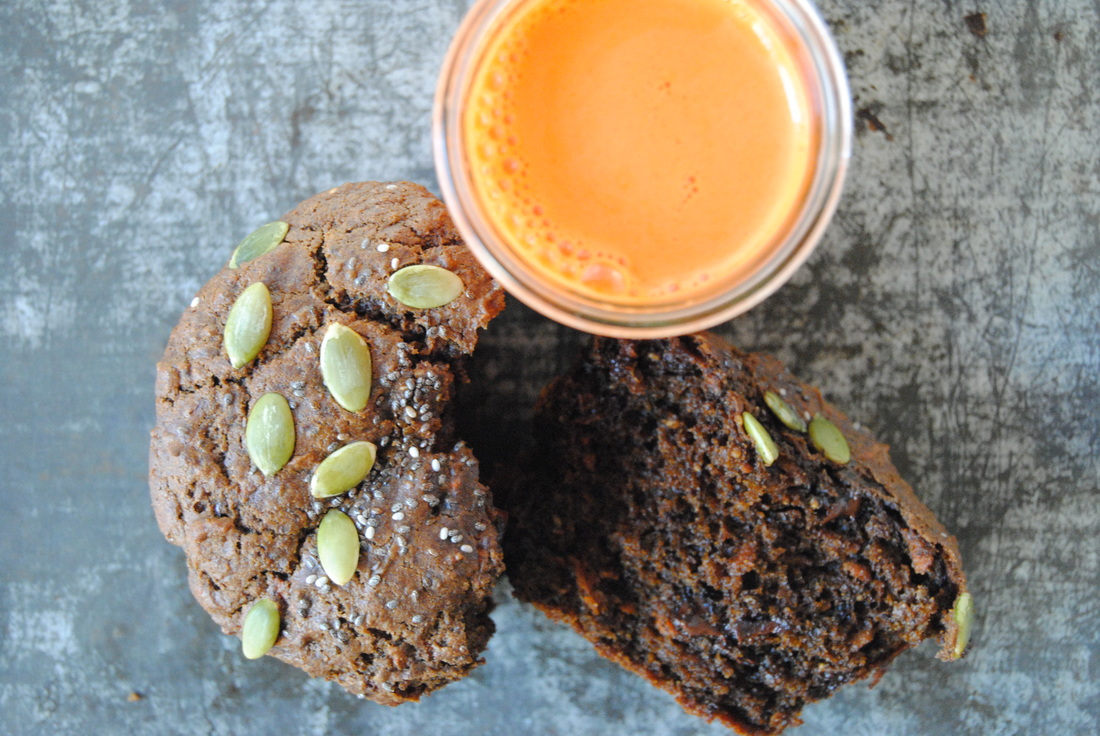
 With the silly and spooky holiday of Halloween upon us we got to thinking about the trick or treat tradition. Why does it have to be one or the other? Why can't we enjoy both a trick and a treat? So what the heck are we talking about? Foods that seem like treats can provide more than just sugar, fat, and a treat for our taste buds - they can be nourishing too! And we've got a few tricks up our sleeve. Let's find out more. These muffins are not just chocolatey goodness but a whole lot more. We've packed in shredded vegetables (carrots) and vegetable juice (again carrot) in a subtle way that definitely doesn't make you feel like you're eating a vegetable muffin. Not just that, these muffins also contain omega 3 from flax seeds for healthy fat, chick pea flour for additional protein, chia seeds for added fiber, carrots for beta-carotene, and dark chocolate (100% cocoa) for antioxidants. WOW! What a muffin. Each jumbo muffin contains ~6 grams of fiber and 7 grams of protein. Now that's a breakfast muffin that will keep you going, and going, and going!  Triple Chocolate Carrot Muffins PREP TIME: 15 minutes TOTAL TIME: 30-35 minutes Servings: 6 jumbo muffins, or 12 standard muffins Ingredients 1 cup shredded carrots, about 2 medium carrots 3/4 cup whole wheat flour 1/2 cup gram flour (chickpea flour) 1/3 cup cacao powder 1 tsp baking soda 1 tsp baking powder 1/4 tsp sea salt 1/3 cup dark honey (pure maple syrup would also work) 1/3 cup coconut oil, melted 2 tsp pure vanilla extract (inside of 1 vanilla bean would also work) 2 Tbsp ground flax seeds 1/4 cup carrot juice + 6 Tbsp to mix with ground flax seed (fresh or store bought juice will both work) 1/2 cup labneh (a Middle Eastern strained yogurt though full fat Greek or Icelandic yogurt would also work) 3 oz 100% cocoa, shaved 1/2 cup dark chocolate chips 2 Tbsp chia seeds + 1 Tbsp reserved to sprinkle on the top of each muffin 1/4 cup pepitas to sprinkle on the top of each muffin Preheat oven to 350 degrees. Line a muffin tin with 6 jumbo, or 12 regular muffin liners or lightly grease with coconut oil and set pan aside. Finely grate carrots into a clean dish towel or a double lined piece of cheese cloth. Carefully pick up cloth with grated carrots inside and squeeze until carrots are noticeably dry and juice has separated. You should end up with at least 3-4 Tbsp carrot juice. Make sure to reserve this carrot juice for use later in the recipe. Note, you will need additional carrot juice which can be freshly juiced or store bought. Combine 2 Tbsp ground flax seeds with 6 Tbsp carrot juice and mix with a fork until combined. Sift together the whole wheat flour, gram flour, cacao powder, baking soda, baking powder, and salt and set aside. In another bowl, combine the honey, coconut oil, vanilla extract, flax seed carrot mixture, labneh, and remaining carrot juice and whisk until fully combined. Add the shredded carrots and the wet ingredients into the to the dry ingredients and stir until combined. Avoid over mixing the batter. Add the shaved cocoa, chocolate chips, and 2 Tbsp chia seeds to the batter and again stir to combine and avoid over mixing. Divide the batter evenly into each prepared muffin tin. Top each muffin with additional chia seeds and pepitas. Bake for 20-25 minutes or until a toothpick inserted comes out clean. Serve warm or allow to cool then place in an air tight container for up to 3 days. 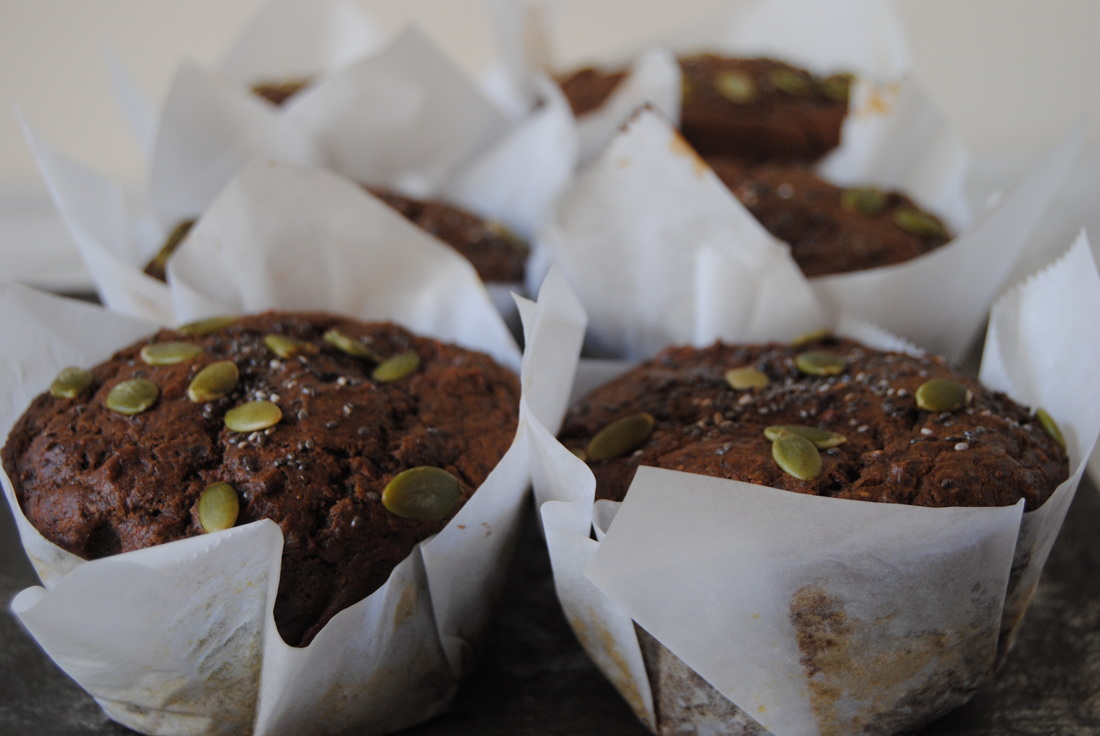 Aren't we right? It should be trick AND treat! These muffins are light and fluffy but densely chocolatey. They are the perfect amount of sweet and have a subtle sense of wholesomeness about them that we just know you'll enjoy. Share one of these with a friend with a side of carrot juice for a festive Halloween treat. You may even see us handing these out to trick and treaters, just maybe! Happy Halloween, Jess and Cecelia 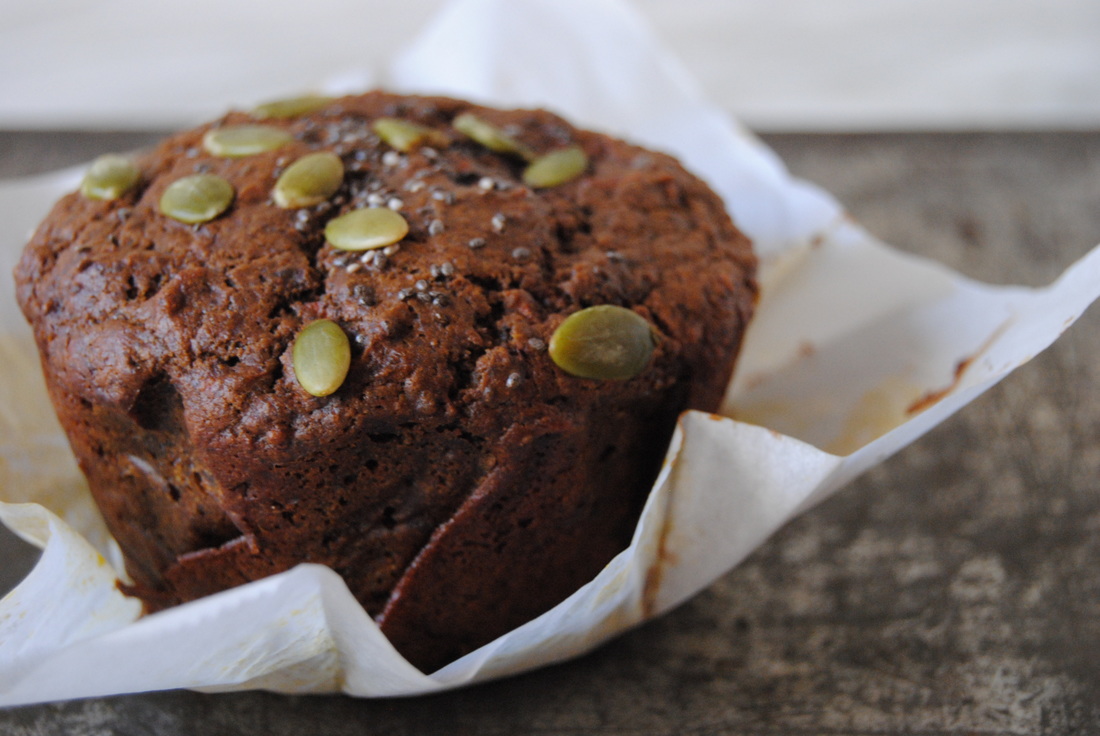
0 Comments
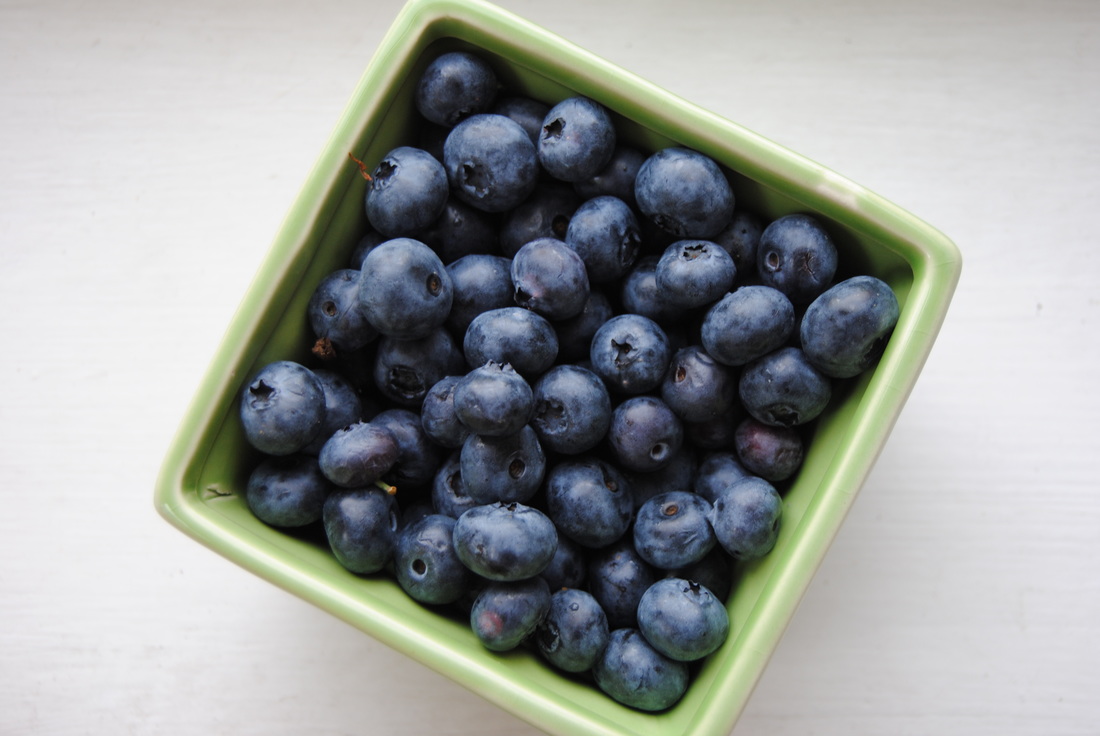
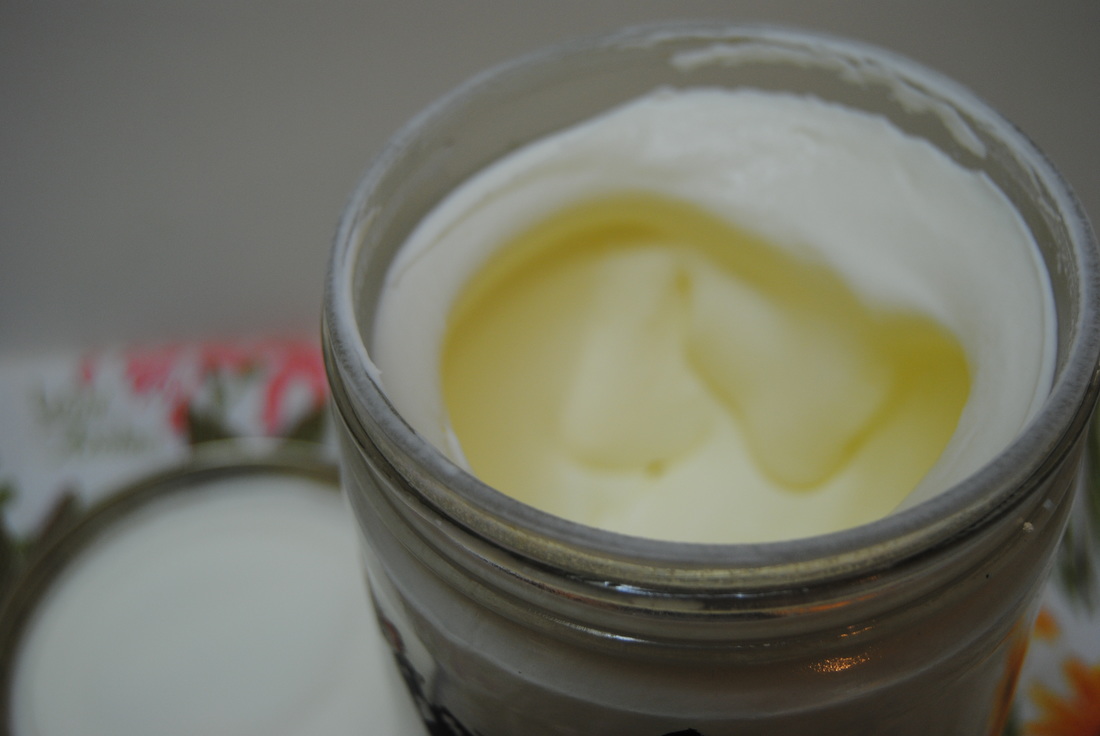
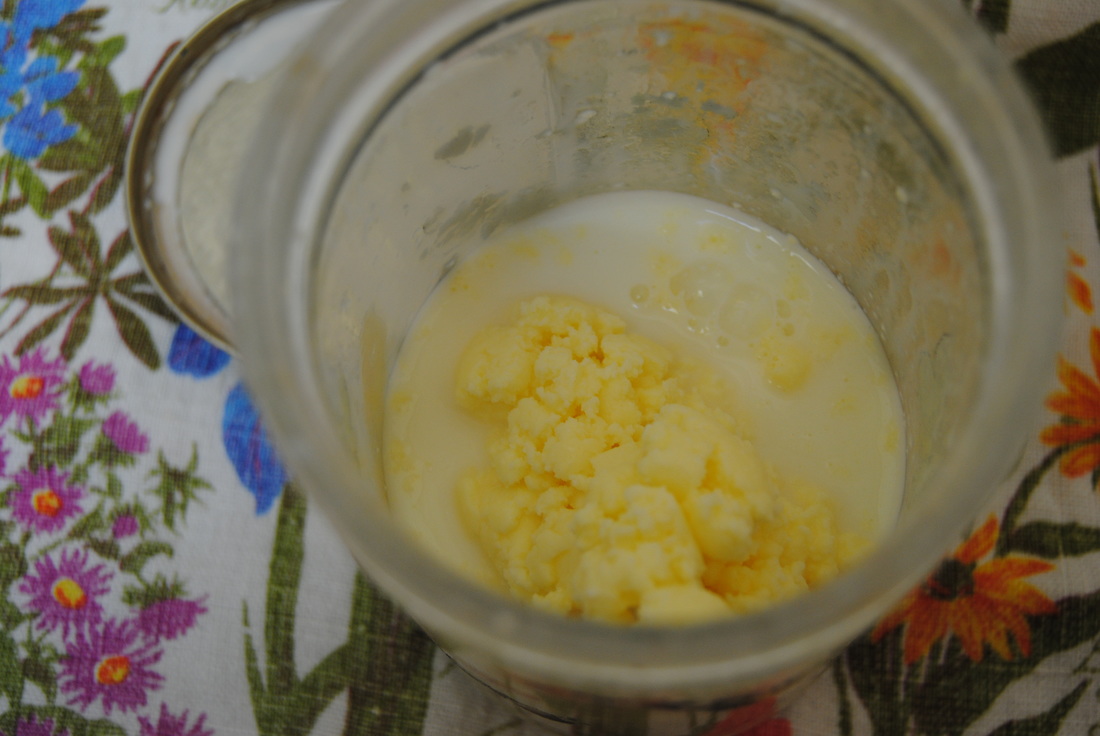
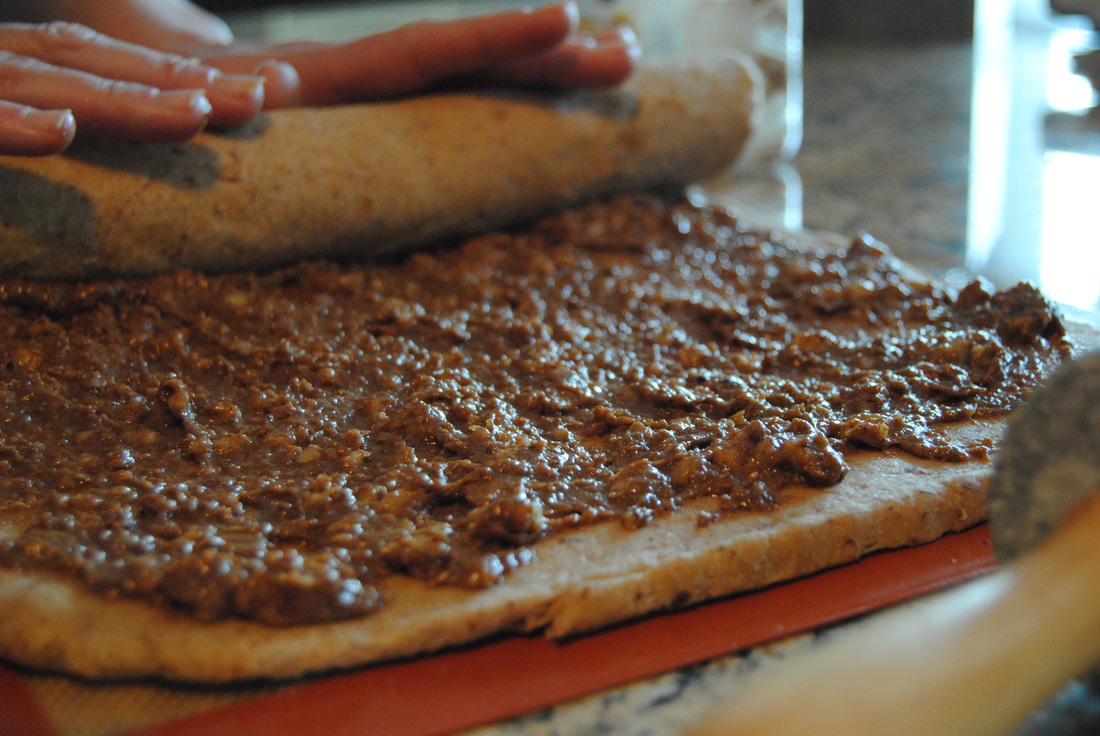
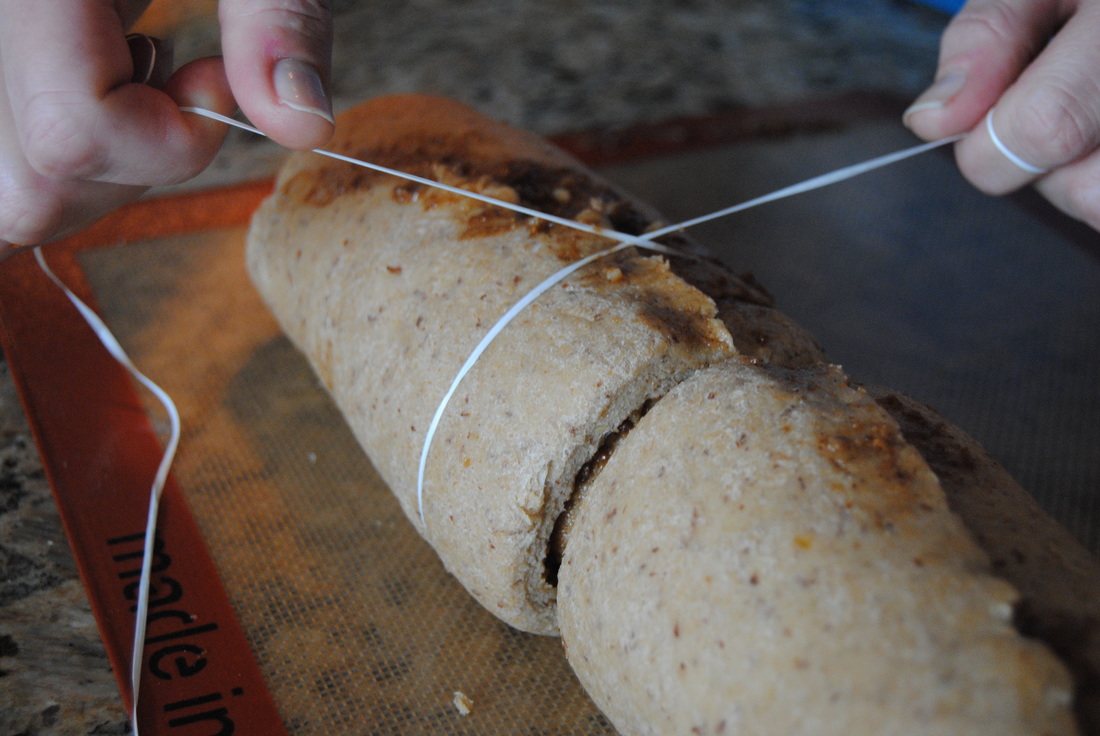
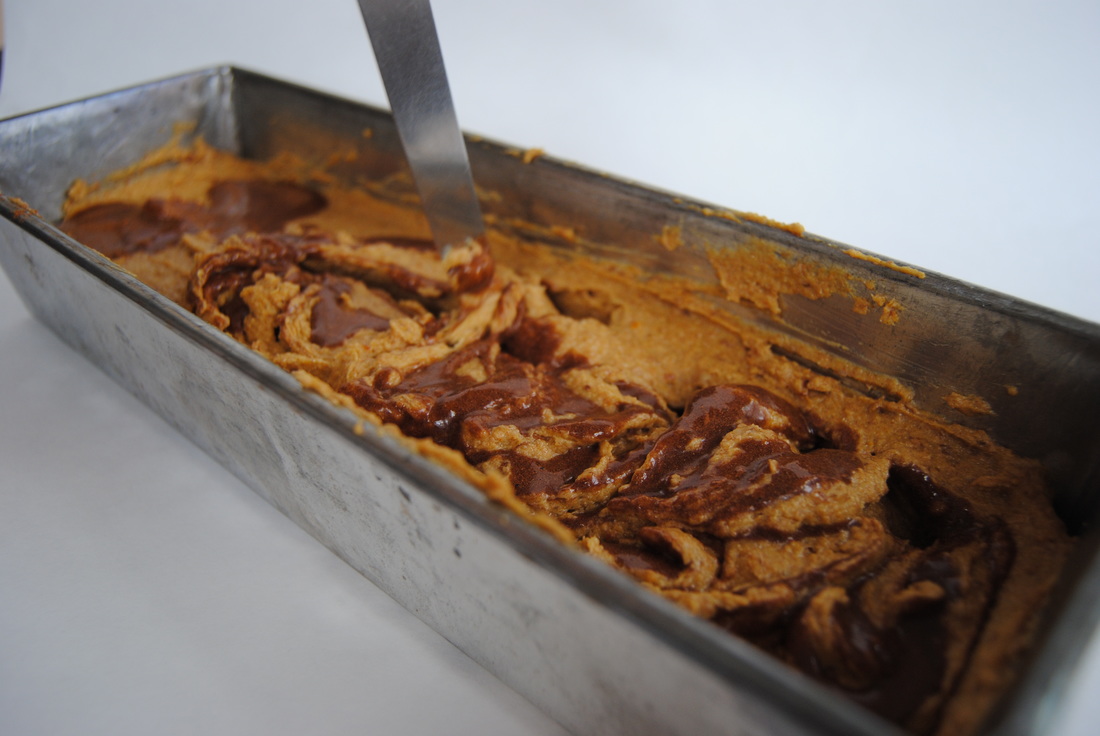
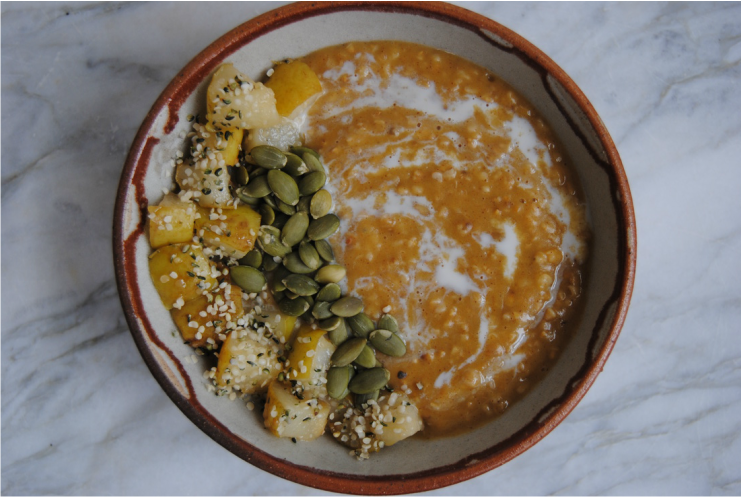 With the coming of October it is truly starting to feel like fall. We are known to boycott all things fall (and pumpkin flavored) until summer is truly over, but now the season is here! The time for pumpkin is in full swing - from festive home decor to pumpkin flavored foods and beverages, there are just so many ways to enjoy this gorgeous bright orange squash. Our recipe this week is a great example of how pumpkin can spice up your fall cuisine. But first, more on pumpkin! 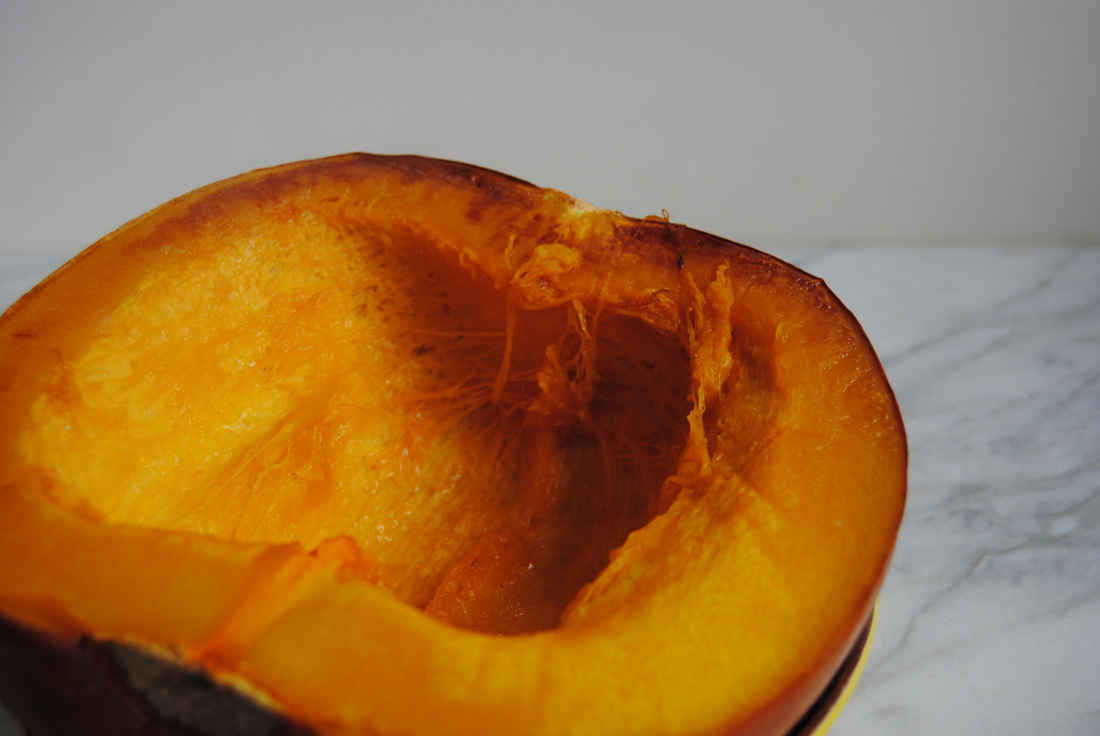 Pumpkin is a variety of squash though has more non-edible uses than any other squash we know (jack-o-lanterns anyone!). When being used in the kitchen smaller pumpkins, named "sugar" or "pie pumpkins", should be chosen because of their firm sweet flesh instead of the large pumpkins better suited for carving. Canned pumpkin puree is easy and readily available this time of year but making from scratch is pretty simple and more festive. Simply cut, roast, scoop and puree the pumpkin flesh until smooth. As far as taste, pumpkin alone is pretty mild and lightly sweet. When people crave the classic pumpkin "taste" they are likely thinking of pumpkin pie spice which is a mixture of cinnamon, ginger, nutmeg, allspice and sometimes lemon peel. So if you are making something with pumpkin puree and the taste isn't the way you want it, we suggest adding these spices (or a pre-made spice blend) to your liking. As far as nutritional value, pumpkin is high in fiber, low in carbohydrate and total calories, and loaded with vitamin A. Oh and don't forget the seeds! Packed with fiber, protein, healthy fats, minerals, and of course great taste. Seeds can be separated from the flesh and roasted to enjoy as a festive snack during pumpkin season. Our recipes below will guide you in detail through pumpkin preparation! 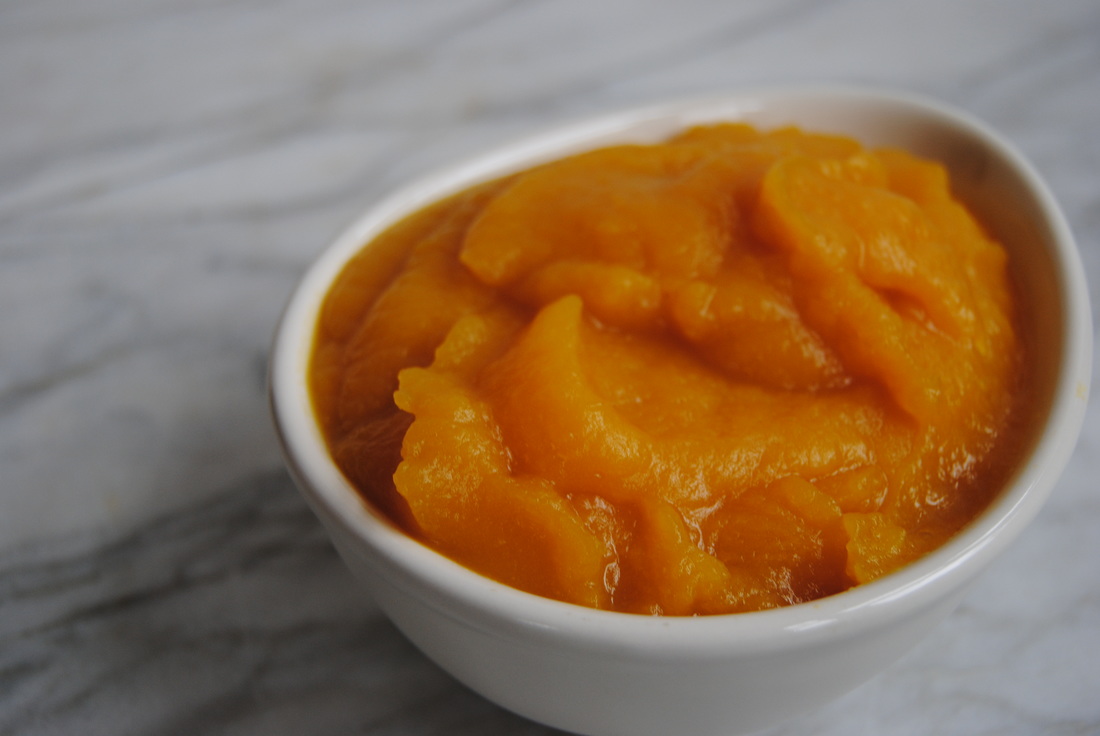 Pumpkin Steel Cut Oats PREP TIME: 1 hour 5 minutes TOTAL TIME: 1 hour 10 minutes Servings: 4 Ingredients Pumpkin Oatmeal 2 cups pureed pumpkin (homemade or canned pumpkin would also work) 2 cups water 1 cup steel cut oats 1 tsp pumpkin pie spice or cinnamon 1 cup unsweetened soy milk or other milk of your choice + 2 Tbsp maple syrup ¼ cup pepitas or homemade roasted seeds (1 Tbsp per bowl) Caramelized Maple Pears with Hemp Seeds 2 cups diced pears 2 Tbsp maple syrup 2 Tbsp hemp seeds Pinch of sea salt To make pumpkin puree first preheat oven to 350 degrees. Carefully cut pie pumpkin in half, scoop out the seeds and set aside. Place pumpkin flat side down on a baking sheet lined with parchment paper and roast for 35-45 minutes or until soft. Allow pumpkin to cool prior to scooping out the “meat”. To make simple pumpkin puree, blend in a blender or food processor until smooth. For pumpkin oatmeal recipe add 2 cups cooked pumpkin, 2 cups water, and 1 tsp pumpkin pie spice or cinnamon to a blender and blend on high until smooth. This is your pumpkin water used to cook the oatmeal. To prepare oatmeal, add spiced pumpkin water to a large pot and bring to a boil. Add 1 cup steel cup oats to the boiling pumpkin water, leave uncovered, and reduced to a simmer. Continue cooking for 30-35 minutes or until liquid is absorbed and oats are soft. While the oatmeal is cooking, dice pears and add to a small sauté pan over medium heat. Add 2 Tbsp maple syrup, 2 Tbsp hemp seed, and a pinch of sea salt then stir to combine. Continue cooking pears making sure to stir often until soft and edges are lightly golden, ~5-7 minutes. Ladle oatmeal into a bowl, add a swirl of sweetened milk, caramelized pears, pepitas, and an optional drizzle of maple syrup if desired. Serve warm. Leftover oatmeal can be kept in an air tight container in the fridge for up to 5 days. When ready to eat add milk, pears, and pepitas and either warm in the microwave or on the stove top. Roasted Pumpkin Seeds PREP TIME: 10 minutes TOTAL TIME: 25 minutes Serving: Depends on how many seeds your pumpkin had! A small pie pumpkin will generally have ¼- ½ cup seeds Ingredients Pumpkin seeds 1 Tbsp oil for every 1/2 cup seeds 1/4 tsp sea salt for every 1/2 cup seeds To make roasted pumpkin seeds first rinse seeds and allow to fully dry. Tossing seeds in a clean kitchen towel or paper towel can speed up the drying process. Add 1-2 Tbsp oil (we choose ghee) and sea salt or other flavorings of your choice. Mix with hands to make sure seeds are evenly covered in oil and seasoning. Roast in preheated oven at 350 degrees for 12-15 minutes or until golden and crunchy. Make sure to stir the seeds mid-way through cooking time and watch the seeds the last couple of minutes as they can burn fast. Allow seeds to cool to room temperature then store in an air tight container. Seeds will keep for 1-2 weeks or longer if kept in the fridge. 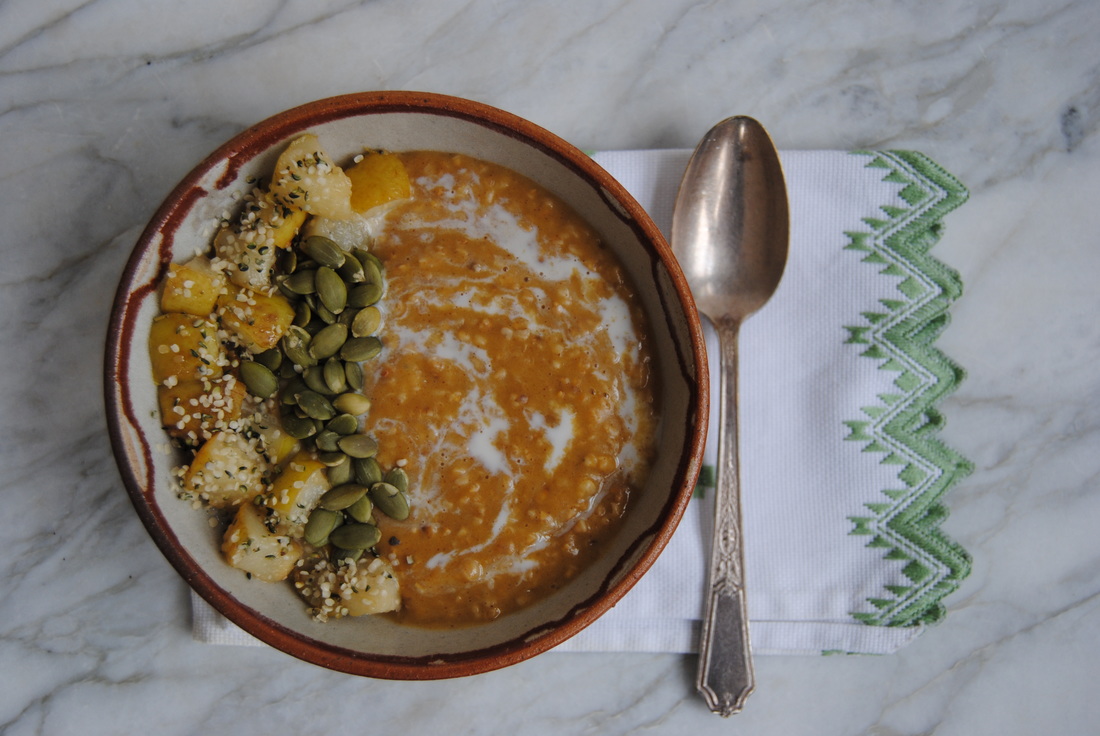 Welcome pumpkin into our hearts and bellies. This oatmeal is so comforting and satisfying on a crisp fall morning. The spiced pumpkin with maple syrup, soft candied pears, and crunchy seeds combine wonderfully to showcase pumpkin for this fall dish. We hope we've inspired you to get creative with pumpkin in the kitchen this month and can't wait to see what you create. Please share! Enjoy, Jess and Cecelia  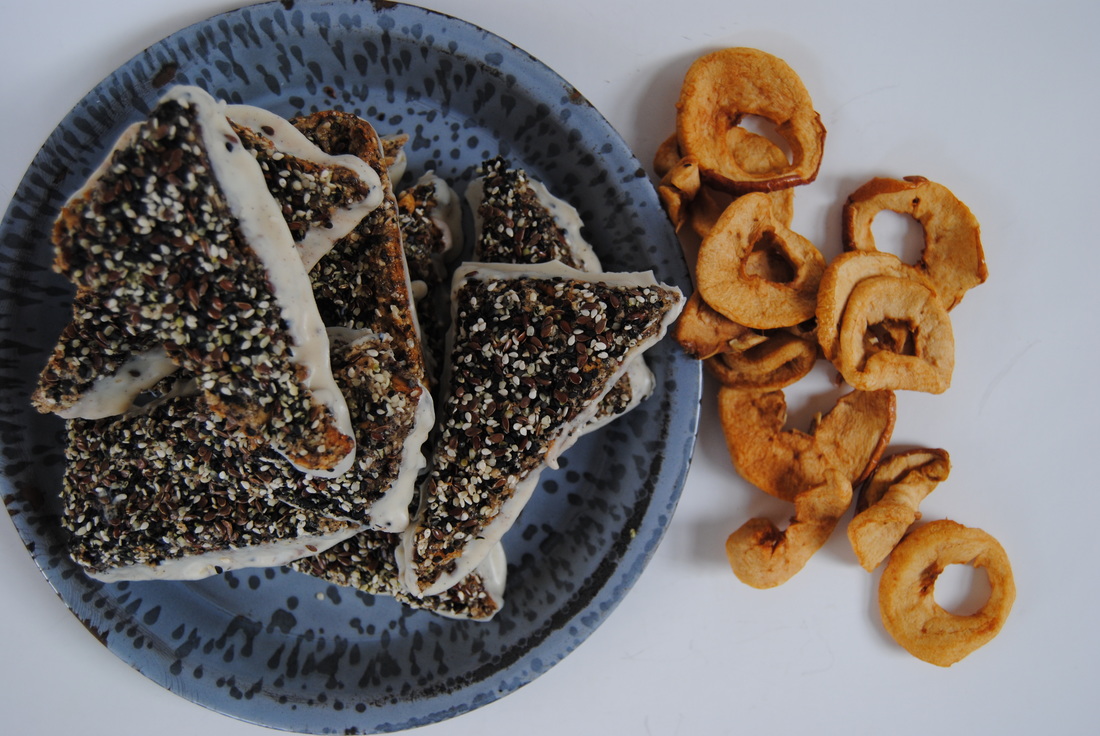 Real talk, being hangry (hungry + angry) is just no fun. We make an effort to always have satiating snacks on hand but watch out if we forget and go a little too long without food, just ask our significant others! If you can relate, or if you just love a satisfying snack, this post is for you. In a bite these bars will eliminate hangry from your vocabulary, if it is even a word to begin with? 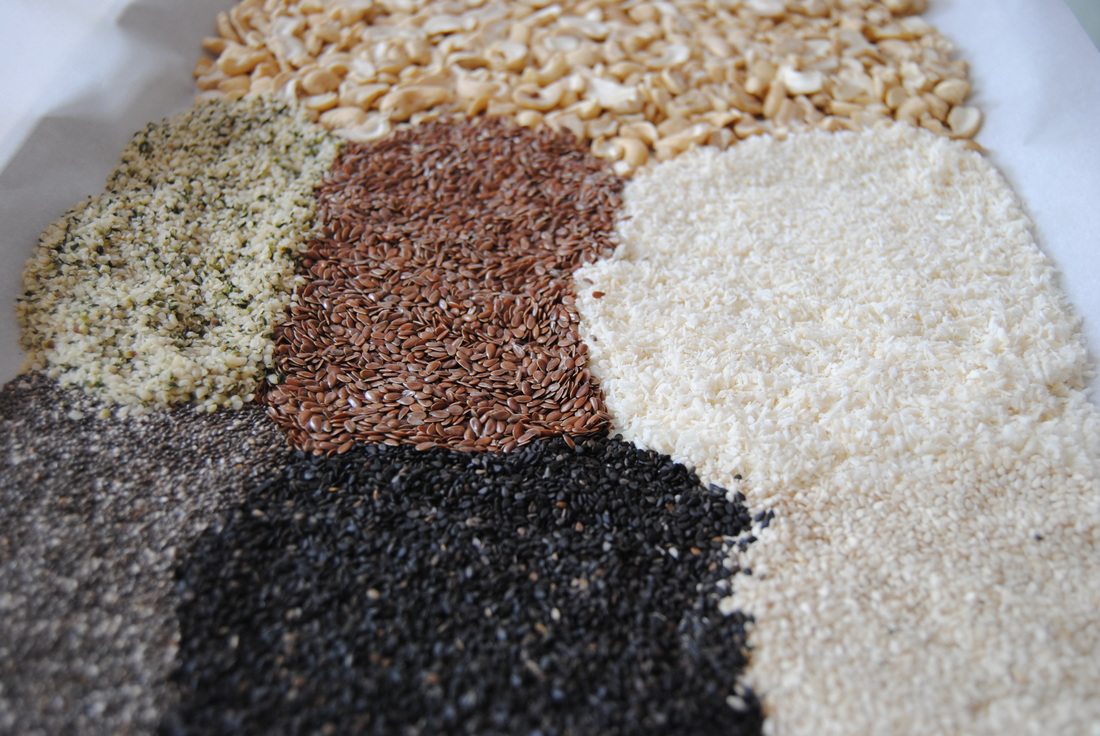 Nuts and seeds can be thanked for the satiating quality of these bars. Nuts and seeds not only contain heart healthy fats but are also are a good source of protein and fiber, all of which are necessary to keep you feeling full and satisfied until your next meal. About 50% of the fat content in cashews comes from monounsaturated fat, a healthy fat that can help lower LDL (or bad cholesterol) in your blood. While we are on the topic of healthy fats, sesame seeds are known to help reduce cholesterol levels given their high content of cholesterol lowering phytosterols. All nuts and seeds contain protein, however, hemp seeds are in a class of their own. Hemp seeds are one of the very few plant proteins containing all the essential amino acids. A 3 tablespoon serving of hemp seeds contains a whopping 10 grams of plant based protein! The fiber found in seeds, specifically chia and flax seeds, is high in soluble fiber which also aids in hunger control. In the recipe listed below, if cut into 12 equal sized bars, each contains ~4 grams of fiber and 5 grams of protein to keep you full and satisfied. As you can probably tell, we could go on and on about the endless benefits of nuts and seeds but would rather get to the recipe now! 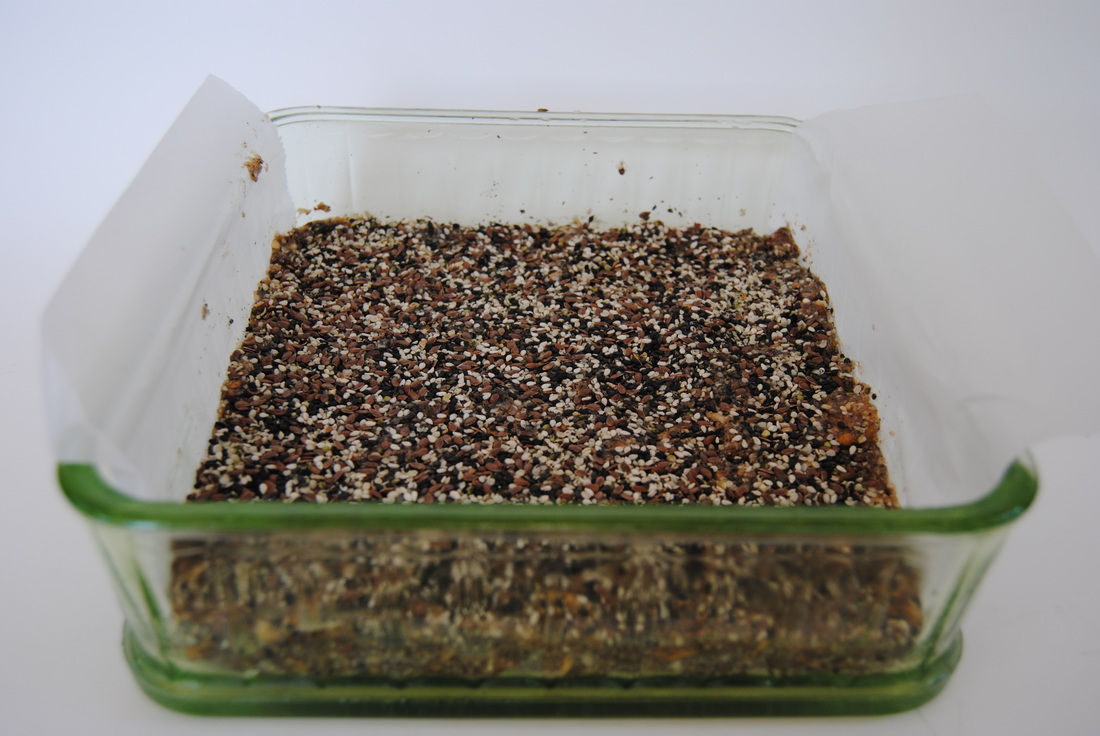 Seeduction Apple Bars PREP TIME: 20 minutes TOTAL TIME: 55-60 minutes (includes cooking time) Servings: 10-12 bars Recipe inspired by Half Baked Harvest Blog Ingredients Bars 1 cup raw cashews 1/2 cup sweetened coconut flakes 1/2 cup dried unsweetened apple slices, diced 4 Tbsp sesame seeds (we used 2 Tbsp white and 2 Tbsp black sesame seeds) 2 Tbsp chia seeds 3 Tbsp flax seeds 2 Tbsp hemp seeds 1/4 cup cooked quinoa (could also use cooked steel cut oats) 1/2 cup pure maple syrup (could also use honey) 1 Tbsp coconut oil, melted 1 tsp sea salt 1/4 tsp cinnamon White Chocolate Dip 8 oz white chocolate chips (We used Ghirardelli white chocolate chips. Look for white chocolate without any artificial flavorings) 1 vanilla bean (inside scraped out) 1/4 tsp cinnamon Preheat oven to 350 degrees then lightly oil an 8x8" pan with coconut oil and line with pre-fitted parchment paper. Make sure to let the parchment paper hang over on two of the four sides to easily remove bars from pan once cooked and cooled. Using a separate large baking sheet place cashews, coconut flakes, sesame, chia, flax, and hemp seeds in a thin layer making sure to keep them separated. Lightly toast for 10 minutes stirring once for even toasting. Remove from the oven to cool. Cook quinoa according to package directions and set 1/4 cup aside. Set aside 1 Tbsp sesame seeds, 1 Tbsp chia seeds, 1 Tbsp flax seeds, and 1 Tbsp hemp seeds for later use. In a food processor or a blender, add toasted cashews, coconut flakes, dried apples, remainder of seeds and cooked quinoa. Process until a small pebble sand-like texture is formed. Add in the maple syrup, coconut oil, salt, and cinnamon. Process just until the mixture comes together, making sure to avoid over processing. Press dough into prepared pan, sprinkle reserved seeds over the top of the dough and lightly press down using a piece of wax paper to prevent the dough from sticking to your hands. Bake in a preheated oven for 35-40 minutes or until a toothpick comes out clean. Allow bars to cool before removing from the pan then carefully cut into 10-12 evenly shaped bars (shape of your choice). Place bars on a wax paper lined baking sheet and set in the fridge to chill. Meanwhile, melt the white chocolate in a double boiler or in a microwave safe glass bowl in increments of 10 seconds stirring between each to prevent the chocolate from burning. Stir the cinnamon and the inside of vanilla bean into the melted chocolate. Carefully dip the bottom of chilled bars in melted chocolate then place on prepared wax paper lined baking sheet. Repeat until all bars are dipped in chocolate. Place back in the fridge to set. Bars can be eaten at room temperature or chilled right from the fridge. Store in an air thight container for 3-5 days in the fridge.....if they last that long!  So, are we right or what? No more hangry here. These bars keep us satisfied for a good 4 hours as a quick breakfast or yummy snack. Their texture is soft and chewy and the flavor rich and sweet with hints of apple and cinnamon. And such a perfect use for white chocolate with the hearty nuts and seeds balancing white chocolate's almost extreme sweetness. Feel free to pass this recipe along to anyone else you know that may get hangry now and again, they and you will be glad you did! Goodbye Hangry, Jess and Cecelia  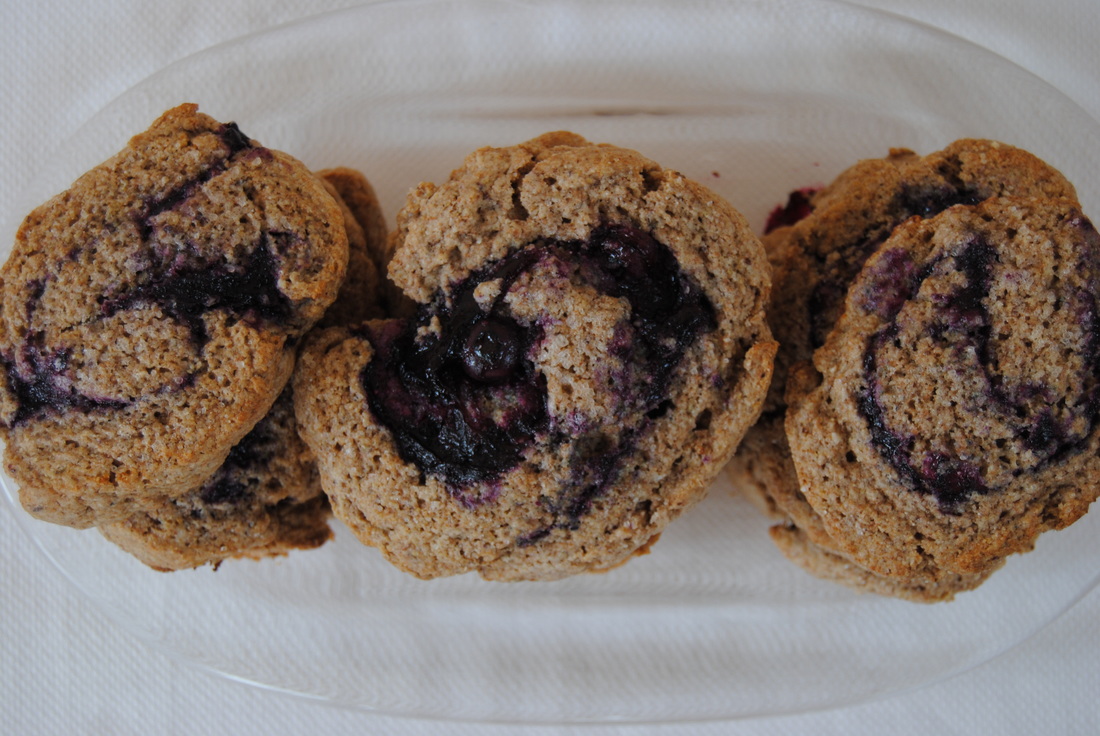 Let's face it, sometimes mornings can be hard. One thing that helps us get up and going is knowing that delicious foods await us (such dietitians!), and what could be a better treat on a tough morning than a fresh blueberry scone? If you're wondering, yes, these scones do qualify as a nutritious breakfast. Made with a blend of whole grain flours, fresh berries, and two type of goat milk products these treats are enjoyable and dietitian approved. But why did we choose goat milk for this recipe? Let's find out! 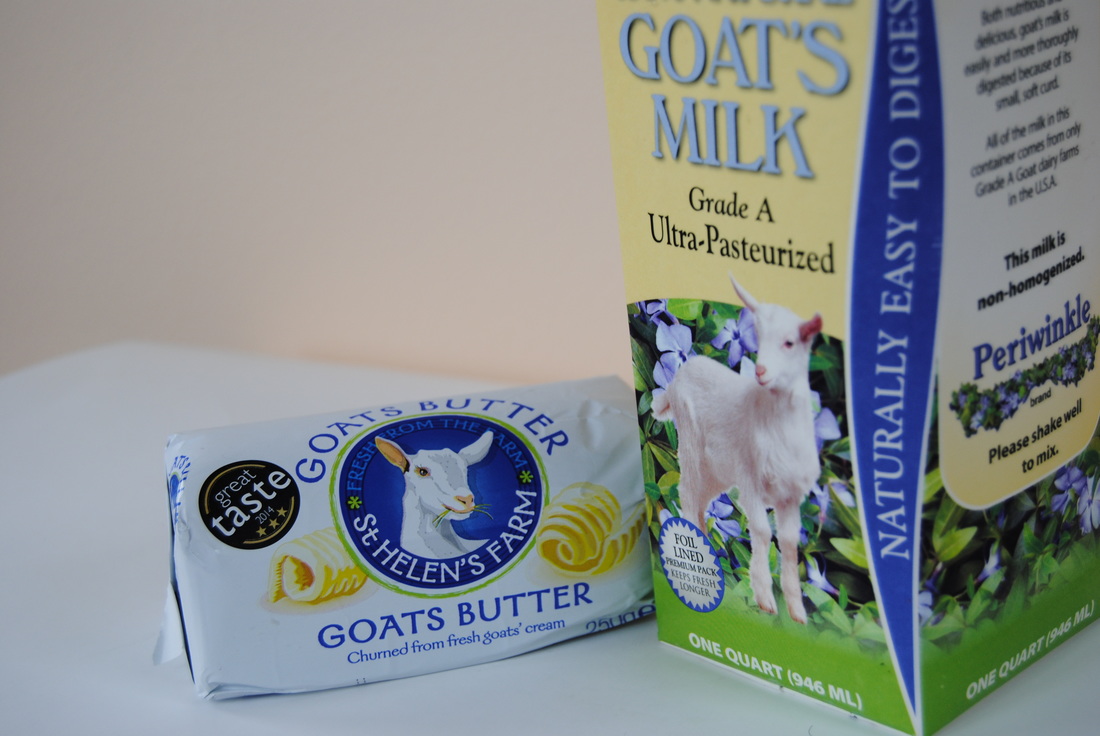 So what is the deal with goat milk and goat milk products anyway? Is goat milk really different from cow's milk? Though similar in many ways, goat milk does have some significant nutritional differences and we believe, benefits. For starters, goat milk is easier to digest, with digestion being a common concern with dairy products. The fat globules in goat milk are smaller than cow's milk allowing for easier digestion. Also for this reason, goat milk does not require homogenization as cow's milk does. Homogenization is the process of breaking down fat molecules so that the mixture will will resist separation, and is basically one more step in processing that goat milk does not require. But back to digestion, goat milk also contains slightly less lactose than cow's milk making it a better alternative for those sensitive to lactose. Additionally, goat milk contains a higher percentage of fat from medium chain triglycerides which compared to long and short chain triglycerides are absorbed faster, used more effectively for energy, and are less likely to be stored in the body. As if all this wasn't enough, goat milk may even be more tolerable then cow's milk for people with milk protein sensitivity or intolerance. This is because goat milk only contains a trace amount of an allergic casein protein, alpha-S1, found in cow's milk. However, goat milk does contain similar levels to cow's milk of other allergenic proteins and should still be used with caution in the case of severe dairy allergies. Finally, goat milk contains more oligosaccharides (short chain carbohydrates) which are prebiotics needed in a healthy gut for probiotics to feed on. If we have to find a negative about goat milk we will note that because the fat globules are smaller than in cow's milk, it is more difficult and more time consuming to obtain the rich cream from goat milk required to produce goat buttermilk and butter. Though in terms of diary production goats may truly be a more sustainable future. Goats thrive on less, lower quality pasture and in areas that cows could not be kept such as hilly, rocky terrain. Wow, a whole lot of reasons to get your hands on some goat milk products and get started on this recipe! Blueberry Swirl Scones PREP TIME: 30 mins TOTAL TIME: 45 mins Servings: 8-10 scones Ingredients Blueberry Sauce 1 pint organic blueberries 1/8 cup cane sugar 1 tsp fresh lemon juice 1 tsp pure vanilla extract Scones 1 1/2 cups whole wheat pastry flour 1/2 cup oatmeal flour 1/2 cup buckwheat flour 1 Tbsp ground flax seed 3 Tbsp warm water 1/3 cup cane sugar 4 tsp baking powder 1/2 tsp sea salt 3/4 cup goat butter (cow's milk butter will also work), cold 1/2 cup full fat goat milk (cow's milk or other alternative milk will also work) Additional 2-3 Tbsp goat milk (or milk of choice) for brushing the top of the scones 1-2 Tbsp cane sugar for sprinkling To make the blueberry sauce, combine 3/4 pint fresh blueberries (reserve 1/4 of the blueberries for later) and 1/8 cup cane sugar in a small sauce pan on medium heat. Cook for 3-5 minutes until the blueberries begin to pop, making sure to stir frequently to dissolve the sugar. Reduce heat to a simmer and continue to cook for an additional 5 minutes until mixture becomes syrup like and will stick to the back of a spoon. Remove from heat and add in fresh lemon juice and vanilla bean. Set blueberry syrup in the fridge to cool while you start the dough. Preheat oven to 425 degrees and line a baking sheet with parchment paper. Using a fork , whip together the ground flax seed and water in a small bowl until combined and set aside. To make the dough sift together the flours, baking powder, and sea salt. Using a pastry cutter or two knives, cut cold goat butter into dry ingredients until the butter is about the size of peas. These small butter pieces within the dough will help create a flaky scone. Add the goat milk and flax/water mixture to the batter and mix to fully combine. Avoid over mixing the dough as this will cause the scones to become tough from over-development of the gluten. Roll the dough into a ball, cover with plastic wrap, and place in the fridge to cool for at least 15 minutes. Once the dough has cooled, roll the dough out into an 8" by 12" rectangle on a lightly floured surface. Evenly spread the cooled blueberry sauce on top of the dough and add the reserved fresh blueberries on top. With well floured hands and starting with the short end, carefully roll the dough into a log. Our trick for cutting the dough without smashing it down is using unscented dental floss - slide floss under the log and make a crisscross on top of the dough. Carefully pull floss through the dough to make your scones (technique pictured in this post). Repeat until you have 8-10 equal sized scones. Space scones evenly on parchment lined baking sheet and brush each scone with goat milk and sprinkle with 1/2 tsp cane sugar. Place in pre-heated oven and cook for 12-15 minutes or until the edges are golden. Allow to cool for 5 minutes. Serve warm or keep out at room temperature for 2-3 days. We found that if stored in an air tight container scones will lose some of their crunch. Scones may also be saved in the freezer, just make sure to fully thaw and bake at 350 degrees for about 5 minutes prior to serving. 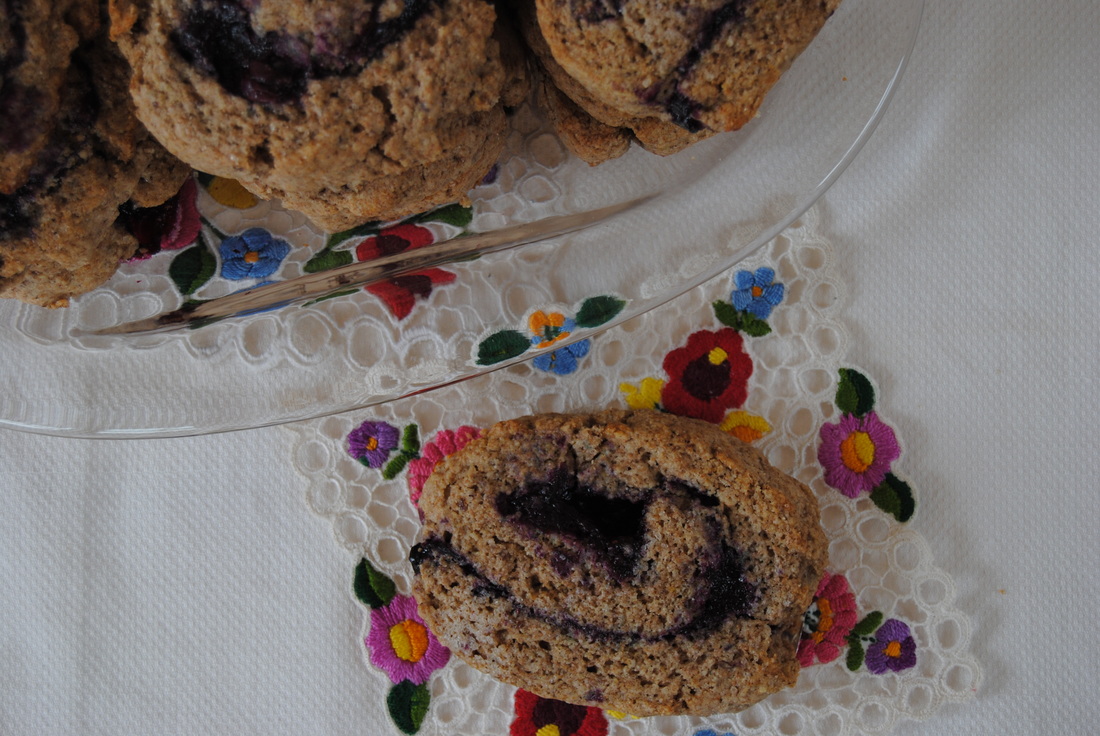 Picture this morning- hot coffee or cold brew (our recipe here!) with a crumbly scone full of ripe blueberries bursting with flavor, packed with the richness of whole goat milk and goat butter, and swirled into a picture perfect work of art. Now this will get you out of bed and keep you satisfied until your next meal. Also highly recommended as a summer dessert or tea party treat. Really any way that you want to enjoy this scone will totally rock. Oh, and share the news about goat milk and maybe add goat milk products into your rotation a little more often now that you know how great it really is. Have a good morning, Jess and Cecelia 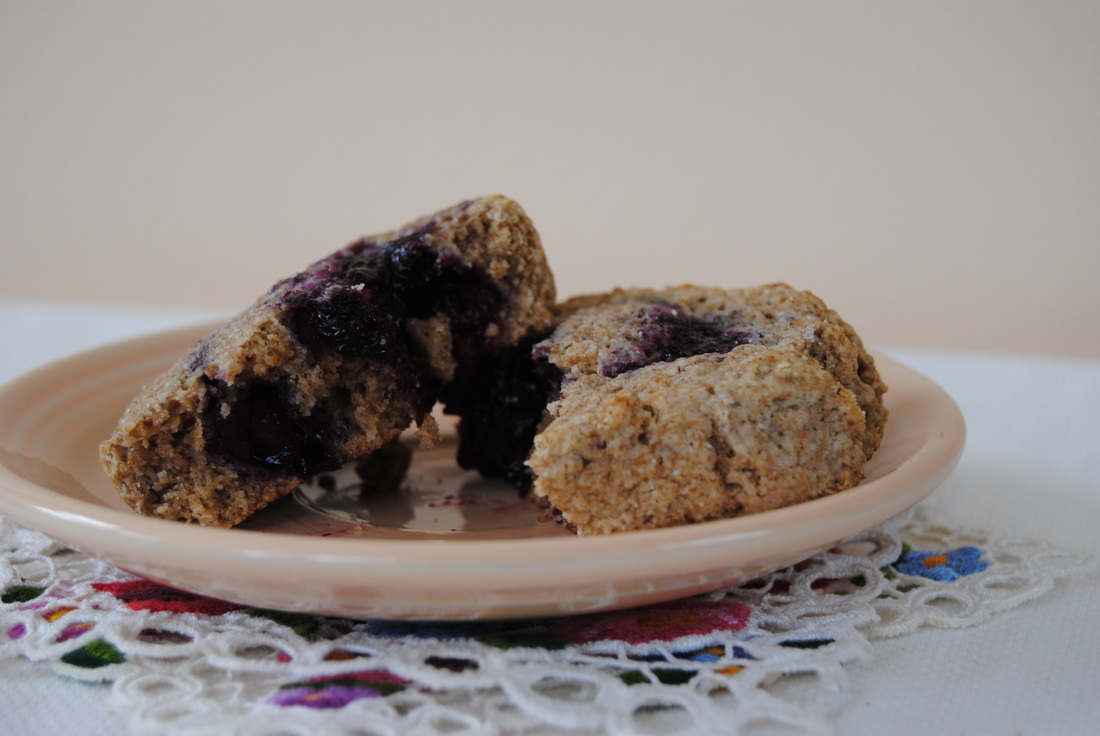 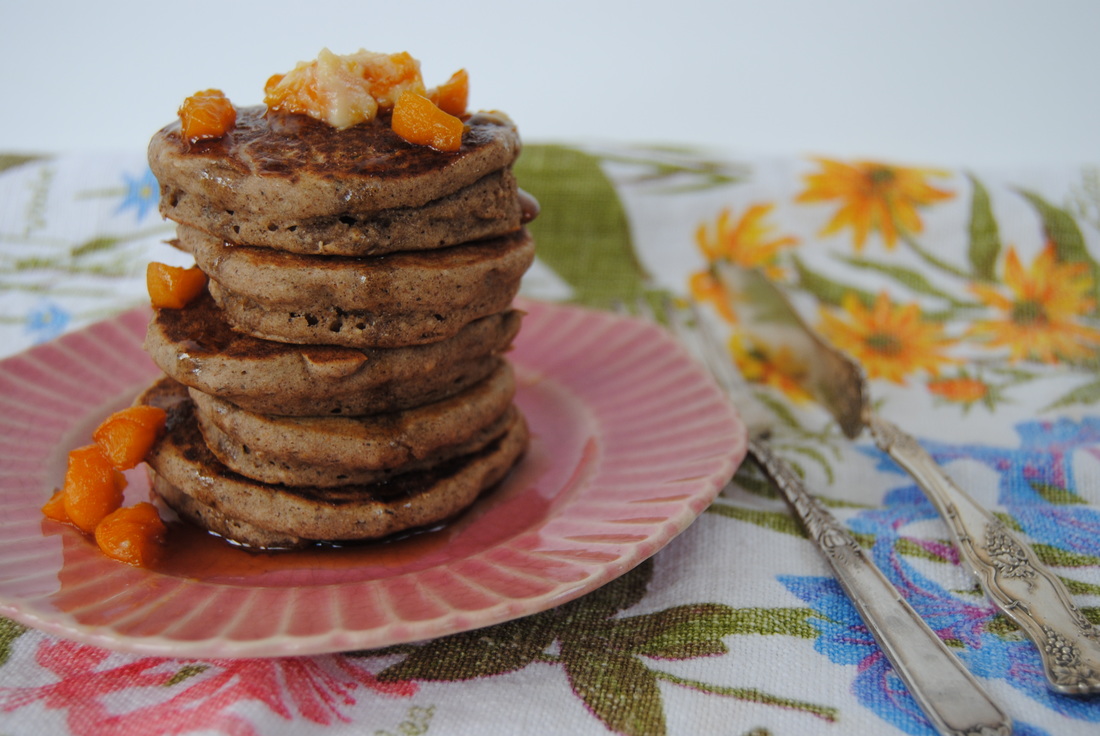 We decided to get ambitious this week and made our own homemade butter, yes butter! And it's not as difficult as you may think, besides the intense arm work-out that comes with it, but more on that later. The final product was amazing though and we had the additional satisfaction of knowing that we truly earned this decadent breakfast. But first, how do you make butter? 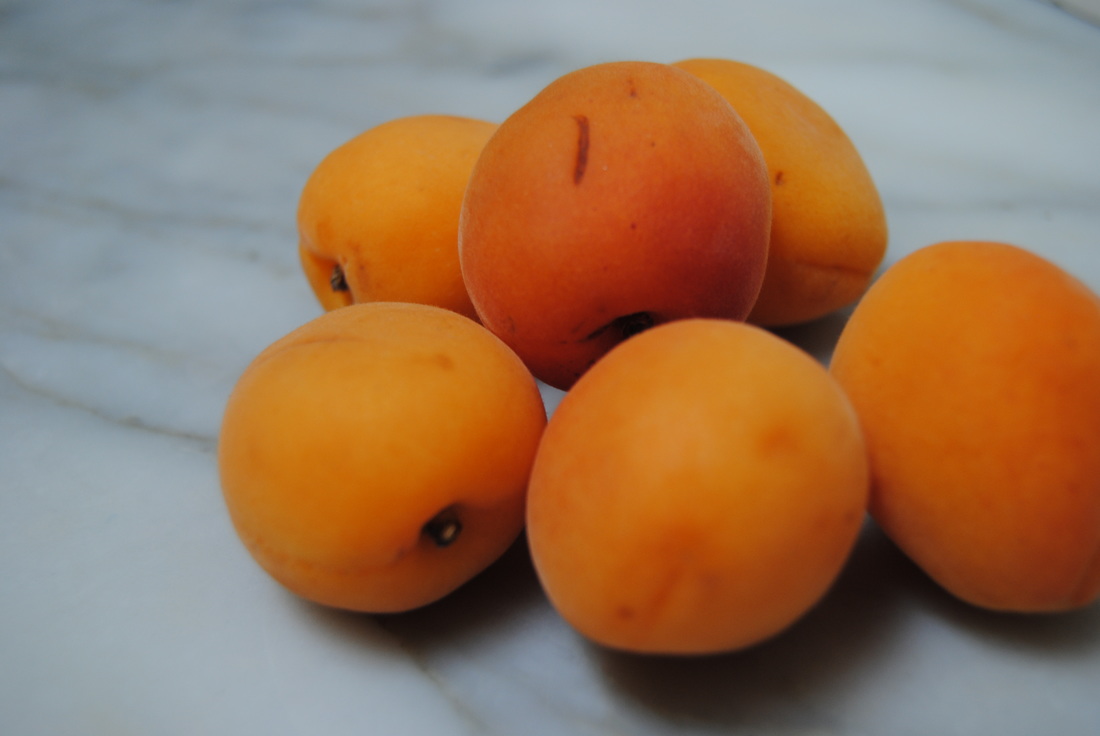 Butter is made with heavy cream because the properties of fat molecules allow an amazing transformation to take place when the cream is agitated. The cream can be agitated by hand (as we did) or in a food processor or blender, but we decided to stick to tradition and also get our work-out in for the day this time around. During the agitation process, the cream first becomes whipped cream. With continued agitation the whipped cream will become butter and buttermilk as the fat solids separate from the other contents of the original cream (water, sugar, proteins, and minerals). What you are left with is delicious, fresh, and well earned butter and buttermilk. So you are probably quite familiar with butter (aren't we all!) but what is buttermilk really? Well, traditional buttermilk is the liquid left behind after making butter as we just discussed. Though buttermilk may also refer to a fermented drink which is called cultured buttermilk. Cultured buttermilk is made from raw cream that has been left out at room temperature to curdle, or ferment, thanks to lactococcus lactis or lactobacillus bulgaricus bacterias. The increased acid in the buttermilk , primarily from acid produced during fermentation, is what gives it the classic tart flavor and curdled appearance . If you cannot get your hands on raw cream straight from the cow, and you end up using pasteurized cream from the grocery store (as we did being Chicagoans!), you will need to inoculate the cream with a starter culture to mimic the old-fashion cultured butter and buttermilk. But if you find yourself just wanting to whip up a simple batch of sweet cream butter and buttermilk without the fermentation process, remember to make sure that the cream you use is high quality, organic, and from pastured raised (grass-fed) cows. For one, because butter that is made from grass-fed cows is rich in healthy fats such as omega-3's and CLA (conjugated linolenic acid) - it's good stuff, trust us! And for two, well that's enough learning for one post. On to the recipe! Homemade Sweet Cream Butter & Buttermilk PREP TIME: 15 mins TOTAL TIME: 15 mins Servings: 1/2 pound butter, 1 cup buttermilk Ingredients 1 pint organic heavy whipping cream In a large glass jar fitted with a tight lid, add 1 pint of heavy whipping cream. Tightly close jar with a lid and vigorously shake for about 15 minutes. You will notice about 5 minutes into shaking that the cream will start to thicken, this is the start of making whipped cream! Continue to shake jar for another 3-5 minutes or so. You will notice the cream is more dense and does not make as much sloshing noise when shaken. The cream will also appear a light yellow color, this is good as you are now starting to separate the fat from the liquid...yes you are now making butter! Continue to shake for an additional 3-5 minutes or until you can see that the fat "butter" has separated from the liquid. See pictures above of the different stages and final products. Carefully strain the liquid "buttermilk" away form the solids "butter". You may now add salt if desired or any additional flavorings to your butter. Apricot Maple Cinnamon Butter PREP TIME: 30 mins TOTAL TIME: 35 mins Servings: 1/4 pound butter Ingredients 5 ripe apricots 1 Tbsp pure maple syrup Dash of cinnamon Dash of sea salt 1/4 pound freshly made butter Cut apricots in half and remove pits then chop into small cubes and add to a sauté pan. Add 1 Tbsp maple syrup to the pan and cook on low heat stirring occasionally until fruit is soft and starting to break down (~30 minutes). Remove from heat and allow to come to room temperature. Add 1/3 of the cooled apricots to butter then stir in salt and cinnamon. *Reserve the rest of the cooked apricots for topping your pancakes. Using a piece of wax paper, carefully mold butter into desired shape. Buttermilk Buckwheat Tea Cakes PREP TIME: 15 minutes TOTAL TIME: 30 minutes Servings: 20 silver dollar pancakes, serves 4 Ingredients 1 1/2 cups buckwheat flour 1/2 cup oatmeal flour 2 Tbsp cane sugar 1/2 tsp sea salt 1/2 tsp baking powder 1/2 tsp baking soda 1 cup buttermilk 1/2 cup brewed strong black tea (we used 2 earl grey tea bags with 4 oz of water) 1 Tbsp fresh squeezed lemon juice 1 tsp pure vanilla extract 1 Tbsp ground flax seed + 3 Tbsp warm water 3 Tbsp butter, melted Toppings Pure maple syrup Cooked apricots reserved from Apricot Butter recipe In a large bowl, combine buckwheat flour, oat flour, sugar, salt, baking powder, and baking soda then stir to combine. In a separate bowl combine butter milk and lemon juice. Allow mixture to sit for ~10 minutes to thicken. In another separate, small bowl combine the ground flax seed with warm water. Whisk with a fork until combined then allow mixture to sit for ~5 mins to thicken. Mix together the buttermilk, cooled black tea, vanilla, and flax seed mixture and add wet ingredients to the dry ingredients. Stir in the melted butter and continue to stir mixture until combined, making sure to avoid over mixing. Using a well seasoned cast iron skillet or a ceramic based non-stick skillet (free of carcinogenic properties in the non-stick coating) ladle batter into preheated pan in the shape of silver dollars. When the batter begins to bubble, flip pancakes over and continue to cook until golden brown. Repeat until all the batter is used. Stack 5 or so tea cakes on your plate, smear a generous portion of apricot butter between cakes, and top with maple syrup and reserved cooked apricots. 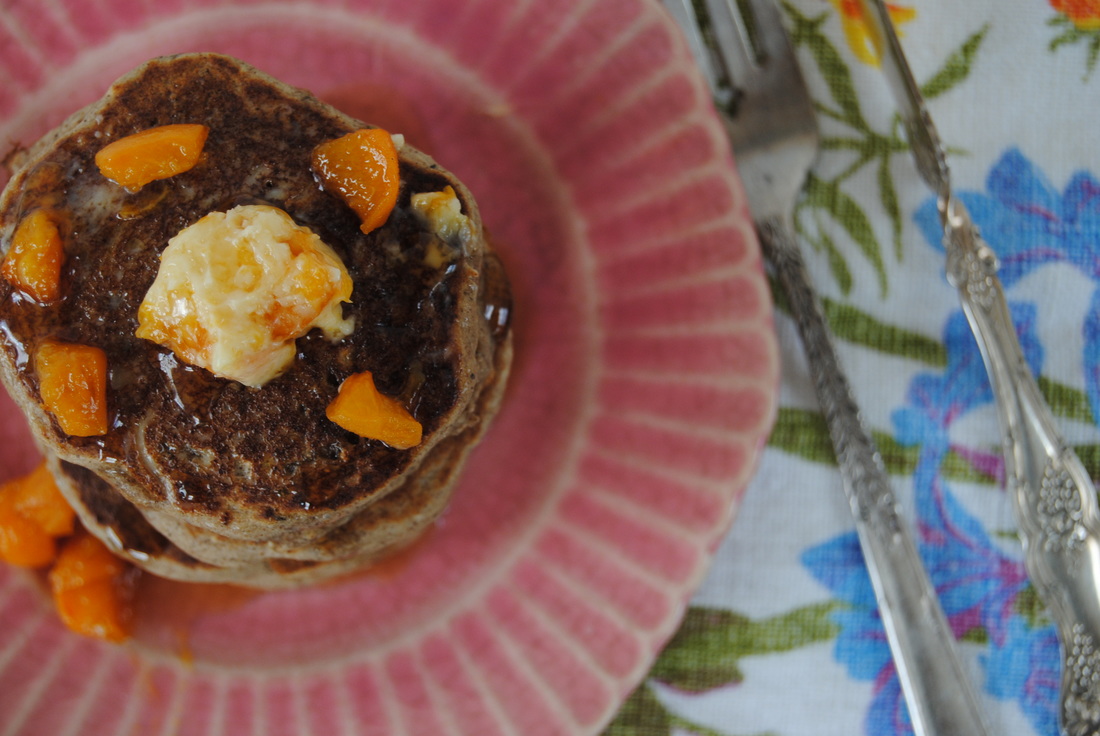 You deserve this meal! The buckwheat pancakes are hearty and fluffy in a way that only pancakes can be, and slathered with the rich, sweet, tangy, and so fresh apricot butter it's almost too good to be true. So skip the arm work-outs at the gym this week and get to making this homemade butter instead. When you're done you'll understand why we say, you earned it. Have fun, Jess and Cecelia 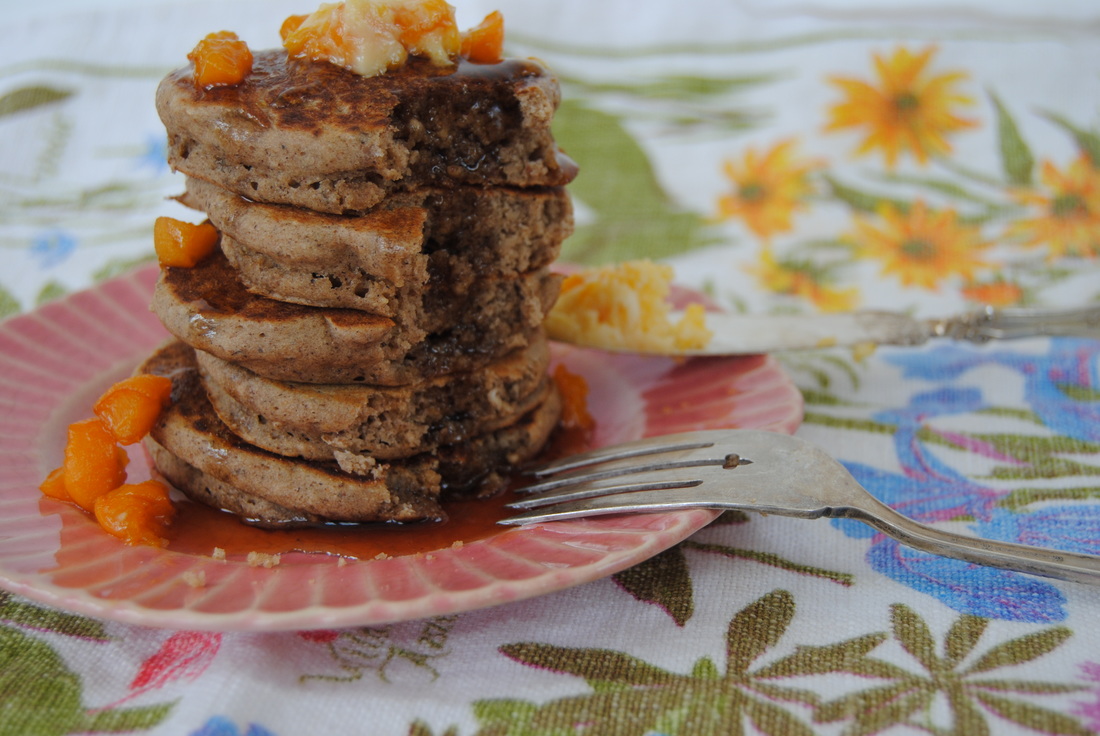 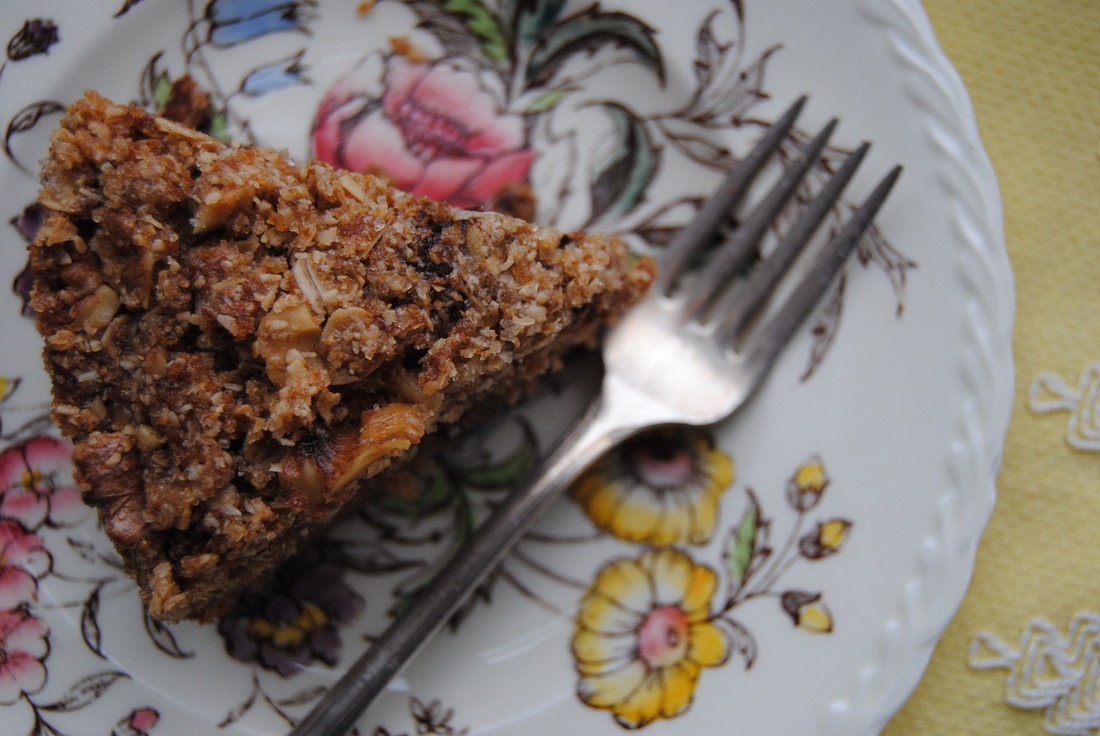 Oh spring! How we've waited for you! And what a great way to welcome the season this first Spring weekend with Easter celebrations. This cake is just perfect for any gathering you may be attending this (or any!) Spring weekend. It has a delicate blend of sweetness and spice just right for this in between time as the days get longer and warmer. And this cake contains an extra special ingredient adding to it's sweetness, lucuma. Sound interesting? Find out more... 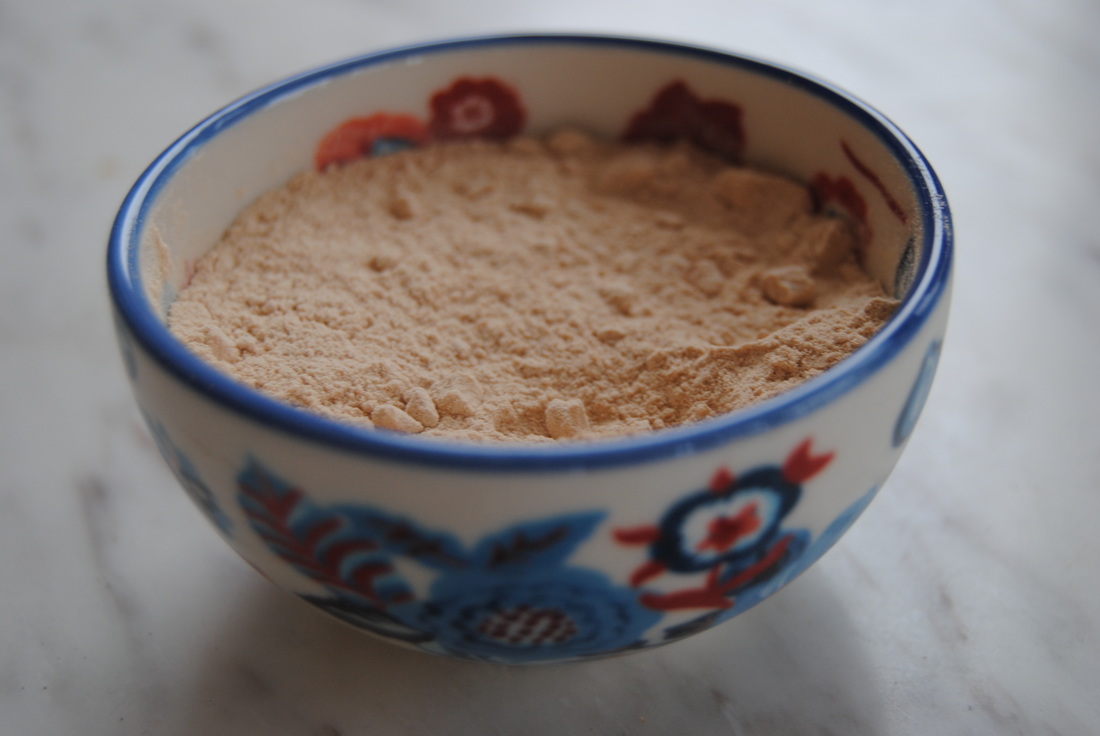 Lucuma is a fruit native to Peru and grown in the Andes. It has a natural sweet maple flavor but a low glycemic index, meaning that it does not cause a dramatic spike in blood sugar levels like other sweet foods can. Lucuma is a good source of vitamins, minerals, antioxidants, and fiber. A two teaspoon serving packs two grams of fiber, which means our crumb cake contains twelve grams of fiber from the lucuma alone! Not surprising, lucuma is a popular ice cream flavor in South America and often favored over chocolate or vanilla. The most common form of lucuma found in North America is a powder made from the dried fruit that can be used in many ways. Some of our favorite uses are adding to hot cereals, smoothies, yogurt, home made baby food, and baked goods such as our crumb cake this week. Remember that along with additional nutrients and fiber lucuma will provide a mild sweetness without spiking blood sugar. Lucuma powder can be found at specialty grocers and healthy food stores or online. A brand that we like is Navitas Naturals and more info can be found on their site. But if you don't have lucuma in your pantry yet don't worry! This cake will work without if you substitute another 1/4 cup flour for the lucuma powder. Just this once though because lucuma is worth a try! 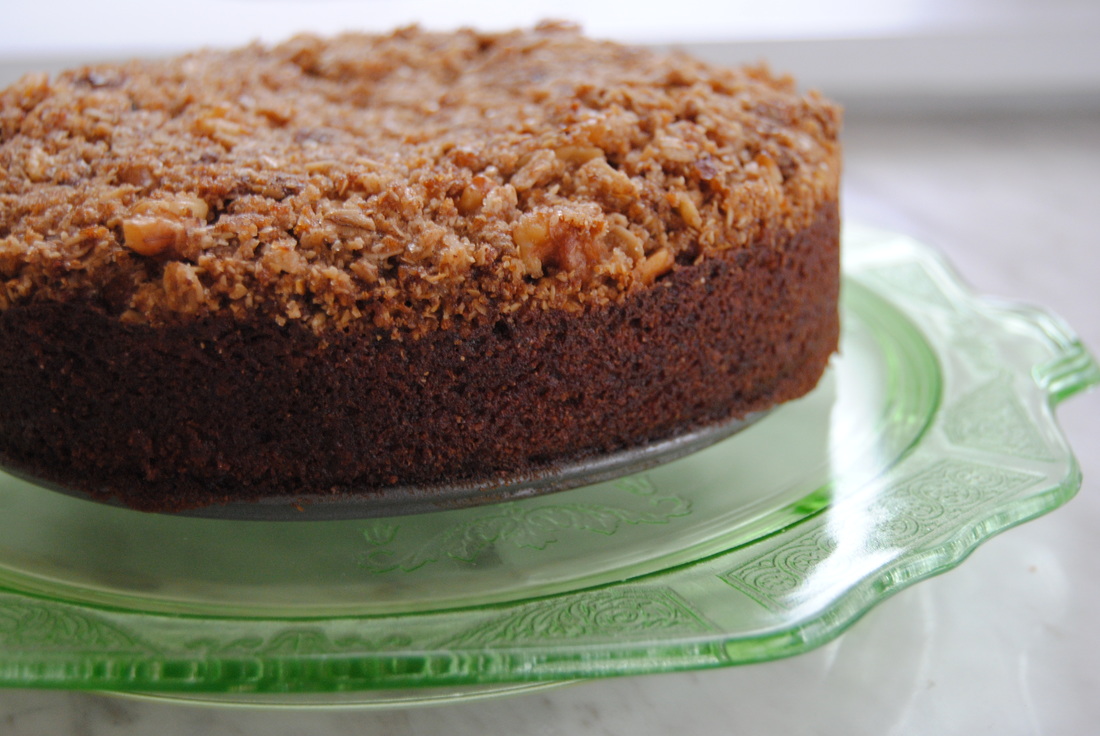 Lucuma Cinnamon Crumb Cake PREP TIME: 20 mins TOTAL TIME: 1 hour, 5 mins (includes baking time) Servings: 8-10 slices Ingredients Crumb Topping 1/4 cup + 3 Tbsp cane sugar 2 Tbsp black strap molasses 4 Tbsp coconut oil, softened but not fully melted 1 tsp ground cinnamon 1/3 cup oats, lightly processed in a food processor 1/3 cup oat bran 1/2 cup walnuts, chopped Cake 6 Tbsp coconut oil, softened but not fully melted 1/2 cup cane sugar 2 Tbsp ground flax + 6 Tbsp warm water 1 tsp pure vanilla extract 2/3 cup plain soy yogurt (or plain yogurt of choice) 1 cup white whole wheat flour 1/4 cup lucuma powder 1 tsp baking powder 1/4 tsp baking soda 1/2 tsp sea salt Middle Swirl 2 tsp ground cinnamon 2 tsp cane sugar In a small bowl, combine the crumb topping ingredients; coconut oil, cane sugar, molasses, oat flour, oat bran, cinnamon, and chopped walnuts. Lightly mix with a fork until a crumbly texture is formed then set aside. Preheat oven to 350 degrees. Lightly oil a 8" spring form pan* with coconut oil and set aside. To prepare the cake ingredients start by combining the ground flax seed and warm water in a small cup. Mix with a fork until gelatinous and set aside. In a large mixing bowl, sift together the whole wheat flour, lucuma, baking powder, baking soda, and sea salt and set aside. In a standing mixer combine the softened coconut oil and cane sugar and beat on high until light and fluffy. Add the flax/water mixture, vanilla, and yogurt and continue to mix until fully combined. Make sure to scrape down the sides of the bowl as you mix. Slowly add the dry ingredients to the mixer and beat until just combined. Make sure to avoid over mixing. Combine 2 tsp of cinnamon with 2 tsp of cane sugar in a small cup for the middle of the cake. Spread half of the cake batter in the prepared pan using a spatula - this may take some patience as the batter is sticky. Sprinkle the cinnamon sugar mixture evenly over the first layer of batter and then evenly spread the remaining batter over the top. Generously crumble the topping evenly over the cake. Bake in a preheated oven for 45-50 minutes or until a toothpick comes out clean. Allow cake to slightly cool then run a butter knife around the sides of the pan to loosen before releasing the spring form side. Serve with a cup of tea or coffee and enjoy with loved ones! *A regular cake pan will work but make sure it is well greased with coconut oil.  Cinnamon. Sweet. Heaven. Basically the only way to describe this cake. This one will go fast so feel free to make an extra, one for your gathering and one all for you! Did we really just say that? You'll get it once you've given it a try... Happy Easter, Jess and Cecelia   Our post this week is inspired by many things including hard work, honeybees, and honeymoons. Now this may seem like a random assortment of unrelated items but we can explain! First, Cecelia has just returned from a relaxing, belated honeymoon getaway in Belize where she enjoyed an endless supply of tropical fruits. Second, relaxing on vacation always reminds us of how hard we work from day to day and how important it is to take a break now and again. And finally, hard work reminds us of the amazing honeybee who epitomizes hard work and provides us with a very special food that we are highlighting this week as a smoothie bowl topping, bee pollen!  The name bee pollen is a little misleading because the source is actually flower pollen. When small grains of flower pollen are collected by worker bees they are packed into semi-hard pellets for transport back to the beehive, thus creating what we consume as bee pollen. Bee pollen is considered one of nature's most perfect foods because of it's unique nutrient profile including a variety of vitamins, minerals, all essential amino acids making it a complete protein, and digestive enzymes. It even contains vitamin B12 making it one of very few plant sources of this vitamin! Bee pollen is so nutritious that even the worker bees use it as their primary fuel (once it is slightly fermented back at the hive). As a plant food, bee pollen contains more amino acids and vitamins than animal proteins when compared by weight, though bee pollen is not typically consumed in the same quantities. If you are new to bee pollen, it is best to gradually increase your intake starting with 1/4 tsp per day and increasing by a few pellets per day until you reach a 2 Tbsp daily intake. It is important that bee pollen be consumed in it's natural, raw form to preserve the nutrient qualities. Bee pollen can be found at specialty grocers, health food stores, or online. When purchasing, look for organic brands from companies who follow good farming practices. To preserve freshness it should be stored in the refrigerator once opened. And remember, when enjoying your bee pollen, to be thankful for the hardworking honeybees that make this superfood possible!  Caribbean Smoothie Bowl PREP TIME: 10 mins TOTAL TIME: 15 mins Servings: 2 bowls Ingredients Smoothie 1 papaya, peeled, seeds removed and cubed 1 pineapple, peeled (recipe will use ~1/2 of the pineapple) 1 frozen banana 1 Tbsp fresh mint leaves, chopped 1 cup ice cubes Toppings 2 Tbsp unsweetened coconut flakes, toasted 4 tsp chia seeds 4 tsp bee pollen 2 tsp honey 2 slices of pineapple Over low-medium heat, lightly toast coconut flakes in a small pan. Once toasted, remove from heat and set aside. Peel the pineapple and cut in half. Core and cut two rings from one half of the pineapple and chop the other half into cubes. Carefully place two pineapple rings in a hot pan on the stove top over medium heat. Sear pineapple until golden then place in the fridge to cool. Meanwhile, combine papaya, about half of the pineapple cubes, frozen banana, mint, and ice in a high speed blender. Blend on high into a thick smoothie texture. Pour smoothie into bowls and creatively top with toasted coconut, chia seeds, bee pollen, cooled seared pineapple and drizzle of honey over the top. Feel free to add additional ingredients on top of your bowl (fruit, nuts, granola). Now grab a spoon and a friend and dive in!  If you're new to smoothie bowls and are thinking that this looks amazing then you're right! There is something about eating, instead of drinking, a smoothie that makes it much more satisfying. Plus, the bowl presentation allows for tons of fun toppings! This smoothie is so crisp and fresh utilizing tropical fruits and fresh mint. Feel free to mix up the toppings any way you like. But remember to give bee pollen a try one of these days and send a huge thank you to the hard working honeybees as you enjoy it! Relax and enjoy, Jess and Cecelia   We've been busy preparing for the holidays and are sure that you are too! So much to do between decorating, shopping, baking, cooking, and spending time with friends and family. But we hope that you're also finding time to relax this holiday season and cherish all the special moments. And if you are in need of good food to share for any of the many gatherings you attend, we hope that you might take a peek around our kitchen for that perfect recipe. Maybe even this recipe will be the one! But first some more on holiday traditions before we get to our last recipe of the year.  We all have our favorite traditions around the holidays, and for many of us these traditions focus on delicious foods. Whether it be a favorite dinner, dessert, beverage, or breakfast these recipes and meals can remind us of holidays past and time spent with loved ones. Many traditions will stay the same throughout the years but some will change with our ever changing lives. If you're looking for a new tradition this year, these cinnamon buns may be just the thing. A perfect treat for Christmas (or any!) morning. Now we aren't trying to pretend that these buns are healthy by any means, but they are homemade with whole food ingredients and superior to any buns you might find pre-made or ready to bake. So put aside a little extra time for this recipe this year and we promise it will stick around for years to come! Now on to the recipe and back to the holiday festivities... Traditional Cinnamon Buns Adapted from The Joy of Vegan Baking Cookbook PREP TIME: 2 hours 30 mins (includes rising time) TOTAL TIME: 3 hours (includes rising time and cooking time) Servings: 8-10 buns Ingredients Dough 3 Tbsp ground flax seed + 6 tablespoons water 4 1/2 to 5 cups white whole wheat flour (any gluten containing flour will work) 1 packet active dry yeast 1 cup organic soy milk (or milk/milk substitute of your choice) 1/3 cup organic unsalted butter 1/3 cup granulated cane sugar 1/2 teaspoon salt Organic soy milk to brush on the top of each bun Filling 3/4 cup coconut sugar 1 tablespoon cinnamon 1/2 cup organic unsalted butter, softened 3/4 cup chopped walnut or nut of your choice Icing 1 cup confectioners’ sugar 2 tablespoons organic unsalted butter, melted 1/2 teaspoon pure vanilla extract 2 tablespoons organic soy milk To make the dough first combine the ground flax and water. Whip with a fork and allow to sit for 5 to 7 minutes until a thick mixture is formed. Using the paddle attachment of a stand mixer, combine 2 1/4 cups flour and the yeast. In a small saucepan on low, heat the milk, butter, cane sugar, and salt. Stir unil the sugar has dissolved and the butter is almost melted. Slowly pour the milk mixture into the standing mixer with the flour and mix on low speed. Now add the flaxseed mixture and turn the speed to high and beat the for about 3 minutes. Replace the paddle attachment with the dough hook (or do by hand) and knead in as much of the remaining 2 1/4 to 2 3/4 cups flour as needed until the dough is soft, smooth, and elastic. This should take about 3 to 5 minutes. You know the dough is ready when it is no longer sticky. Shape dough into a ball, and place in a greased bowl. Cover with a clean towel and allow the dough to rise in a warm place for 1 to 2 hours or until doubled in size then punch it down. Place on a lightly floured surface, cover with a towel, and allow it to rest for another 10 minutes. To make the filling, mix the coconut sugar, cinnamon, butter, and nuts then set aside. Roll dough out into a rectangle (14x10). Evenly spread the filling onto the dough making sure to come close to the edges. Starting with the short end, carefully roll the dough into a log. Using unscented dental floss, make a crisscross on top of dough (pictured above) carefully pull floss through the dough. Repeat until you have 8-10 equal cinnamon buns. The purpose of the floss is to cut the dough without smashing it down. Place buns on buttered pan and allow to rise for 30 to 60 minutes at room temperature. You may also place in the fridge at this point if you wish to cook them the next morning. If buns are placed in fridge overnight, allow them to sit out at room temperature for 30 to 60 minutes before placing in the oven. To make the frosting, combine confectioners sugar, butter,milk, and vanilla. Stir until smooth then set aside. Preheat oven to 375°. Lightly brush the top of the buns with milk and cook for 25 to 30 minutes or until golden brown. Spread icing over the top, serve warm and enjoy with good company.  A complete hit right? With a cup of coffee or tea and a table full of loves ones, these buns will brighten any special morning. Remember, this will be our last post of 2015 friends but we can't wait to see you all in the New Year. We wish you for laughter, love and good food this holiday season! Happy Holidays, Jess and Cecelia   It seems that everywhere you look this month there is another pumpkin flavored food item. And don't get us wrong, we love pumpkin as much as you do, but we like our pumpkin flavored foods to actually contain pumpkin! Many pumpkin food products contain none or a small amount of actual pumpkin and are flavored with pumpkin pie spices. Not that there's anything wrong with that (it's delicious!) but then you aren't getting all the benefits from pumpkin as a food. So let's find out why you want pumpkin in your diet and get our amazing pumpkin bread recipe (containing real pumpkin of course!). 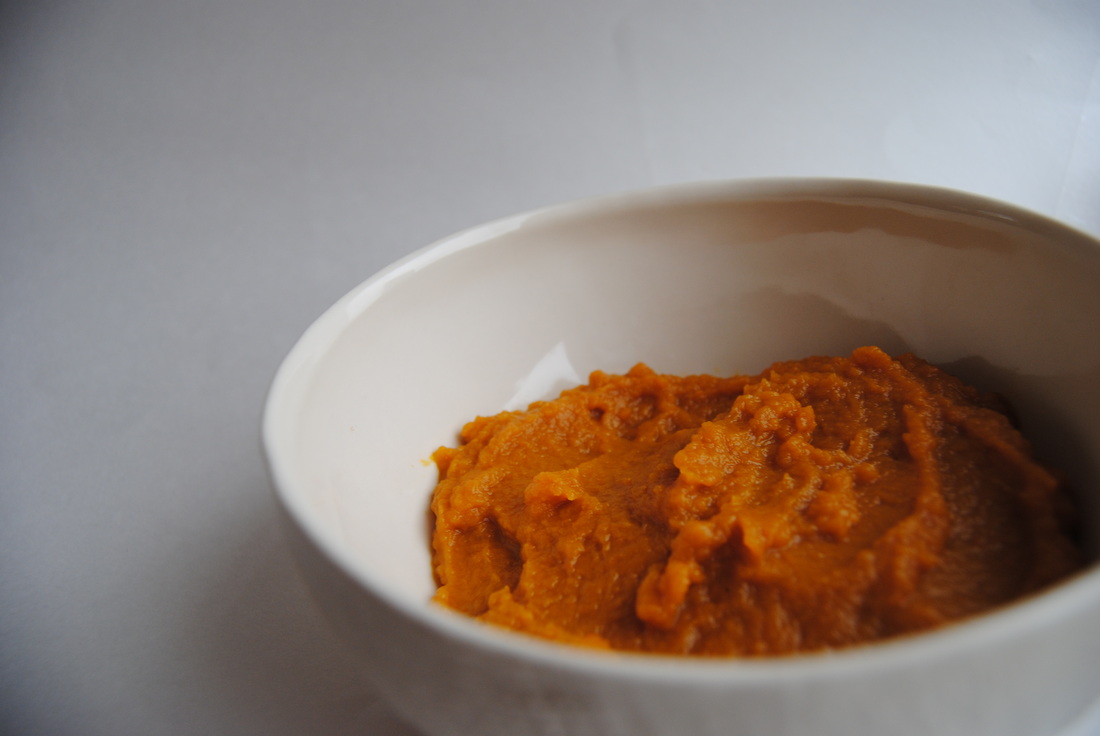 The glorious pumpkin is a member of the winter squash family which we discussed last week. Pumpkin is well know for it's decorative qualities this time of year and is also a nutrition power house! One cup of pumpkin contains only 49 calories, is a great source of potassium, and contains a high amount of vitamin A. It's these qualities that make pumpkin a heart healthy food (yay!). Not only good for your heart but also for your eyes, pumpkin contains eye protecting carotenoids, lutein and zeaxanthin. For the best absorption of carotenoids, make sure to consume your pumpkin with a little fat such as butter, ghee, or coconut oil because carotenoids are fat soluble. In the kitchen, the mild taste and velvety texture of pumpkin puree makes it a perfect medium - it takes on bold fall flavors with ease (think cinnamon, nutmeg, ginger, allspice) and can add moistness and brilliant color to a variety of recipes (think soups, puddings, breads). Canned pumpkin puree is abundant in stores this time of year, but remember that roasting and pureeing your own pumpkin may bring some added fun to the season! So now who's good and ready for this pumpkin bread recipe?? The Best Pumpkin Bread PREP TIME: 15 mins TOTAL TIME: 60 mins Servings: 10-12 slices Ingredients Bread 1 1/2 cups whole wheat flour (or gluten containing flour of your choice) 1 tsp baking powder 1/4 tsp baking soda 1/8 tsp sea salt 2 tsp ground cinnamon 1 Tbsp fresh ginger juice (or 2 tsp ground ginger) 1 stick of unsalted butter (or 8 Tbsp coconut oil) 3/4 cup cane sugar 1/8 cup black strap molasses 1 tsp vanilla extract 8 oz pumpkin puree (canned or fresh) 2 Tbsp ground flax seed 6 Tbsp warm water Topping 2 Tbsp maple syrup 1 tsp cinnamon 1/2 cup chopped walnuts or nut of your choice Preheat oven to 350°. Lightly butter a bread pan (we used 14" x 4" but you could also use a standard 9" x 5" pan). In a standing mixer using a paddle attachment whip butter, sugar, molasses, and vanilla on high until light and fluffy. In a small bowl, combine ground flax seed, water, and ginger juice and allow to sit for 5 minutes until thick. *If you are using ground ginger instead of fresh ginger juice add to the dry ingredients. In a separate bowl, combine the flour, baking powder, baking soda, salt, and cinnamon and set aside. Add pumpkin puree and flax seed mixture to the sanding mixer and mix until fully combined. Slowly add the dry ingredients to the mixer until fully incorporated, making sure to not over mix. Pour prepared mix into buttered pan. Mix maple syrup and cinnamon in a small bowl and drizzle across the entire top of the batter. Use a tooth pick or knife to swirl the maple syrup and cinnamon further into the batter (as pictured above). Sprinkle walnuts evenly over the top and gently press them into the batter. Place pan on the middle rack of your oven and bake for 40-45 minutes or until a tooth pick comes out clean. Let cool for at least 15 minutes before removing from pan and slicing.  This bread is, well, perfect. Just the right amount pumpkin flavor, sweetness, spice and a texture you can only get from real pumpkin. If you don't believe us then you'll just have to try this recipe quick. We can bet it will be the best pumpkin flavored food you have all season. Enjoy, Jess and Cecelia   In honor of our last post this August we just had to feature another favorite summer fruit, actually a whole family of fruits at that. There will be plenty of time for apples this fall but the season for stone fruits is short and almost over so don't miss out! Wondering what a stone fruit is? Let's find out before getting to this must have breakfast recipe.  If you've ever had a fresh plum (who hasn't!), you'll know that they contain a hard inner seed or pit. It's this quality that allows plums to be commonly called "stone fruits" along with nectarines, peaches, apricots, and cherries to name a few more commonly found during the summer months in North America. Most stone fruits are native to warmer climates and will only be found locally June-September. These stone fruits have thin, edible outer skin and soft flesh making them ideal for a variety of culinary preparations. We love them fresh, grilled, roasted and even dried. Dried plums, also unfortunately known as prunes, have gotten a bad reputation for bad taste and one important use (if you catch our drift). Though dried plums have been proven to be great for digestion, we also think that they taste great and can be utilized for convenient, on the go energy. Just remember to call them dried plums (instead of prunes) to avoid any negative connotations! But this time of year fresh, local stone fruits should be in abundance so get them while you can. This breakfast recipe is a must before stone fruits are gone until next year so let's get to it! Roasted Plum Toast PREP TIME: 10 mins TOTAL TIME: 12 mins Servings: 4 Ingredients 4 slices of hearty bread (tips for picking a quality bread here) 6 small plums 1/4 cup slivered almonds (we used honey roasted) 2 1/2 oz plain, organic goat cheese 2 tsp honey (we used raw clover honey) Sprinkle of sea salt Preheat oven to 325°. Cut plums in half, place on a lined baking sheet, and roast for 8-10 minutes or until plums are soft but still hold their shape. Lightly toast the bread on both sides and set aside. Combine the goat cheese, honey, and sprinkle of salt. Whip mixture with a fork into a thick frosting like texture. Evenly spread whipped honey goat cheese on each slice of toast. Using your hands gently place 3 small roasted plum halves (cut side down) on top of goat cheese. Sprinkle with slivered almonds. Serve warm or room temperature with napkins handy!  The sweet, creamy goat cheese is a perfect compliment to the warm, tart roasted plums creating a perfect start to any morning. Reminiscent to cream cheese and jam we find the roasted plums to be an exciting replacement for jelly while the season is right- you've got plenty of time for plain jam the rest of the year. So stick to stone fruit until the season is gone. Enjoy, Jess & Cecelia  |