|
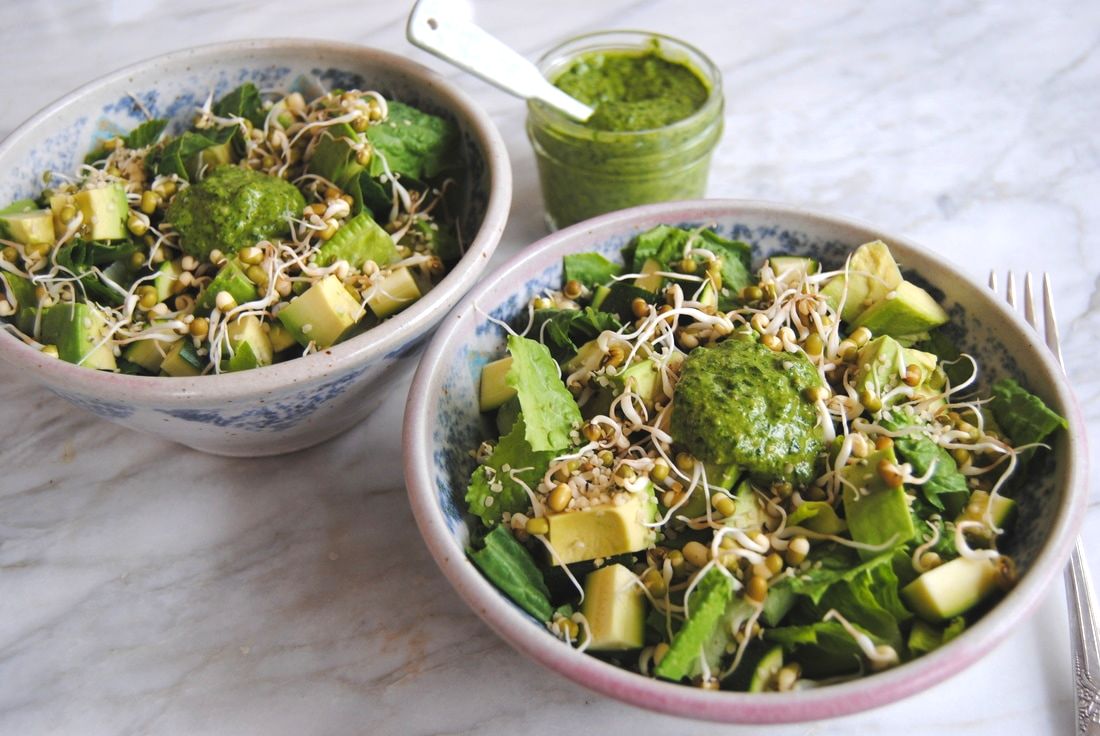
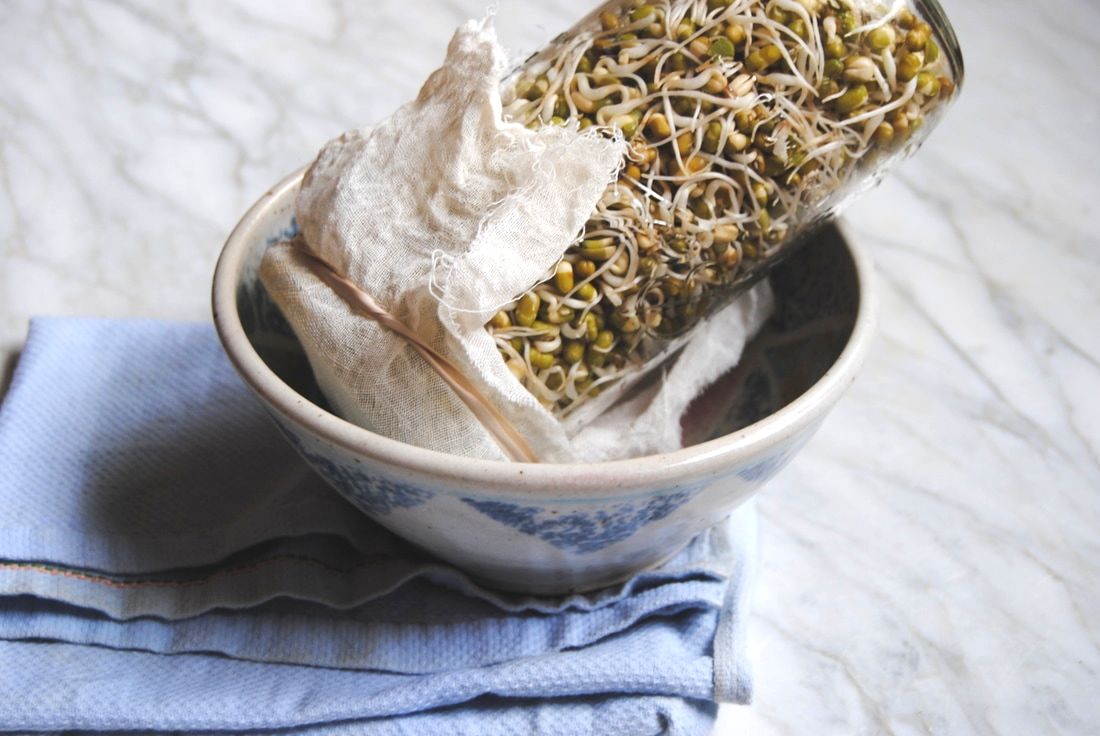
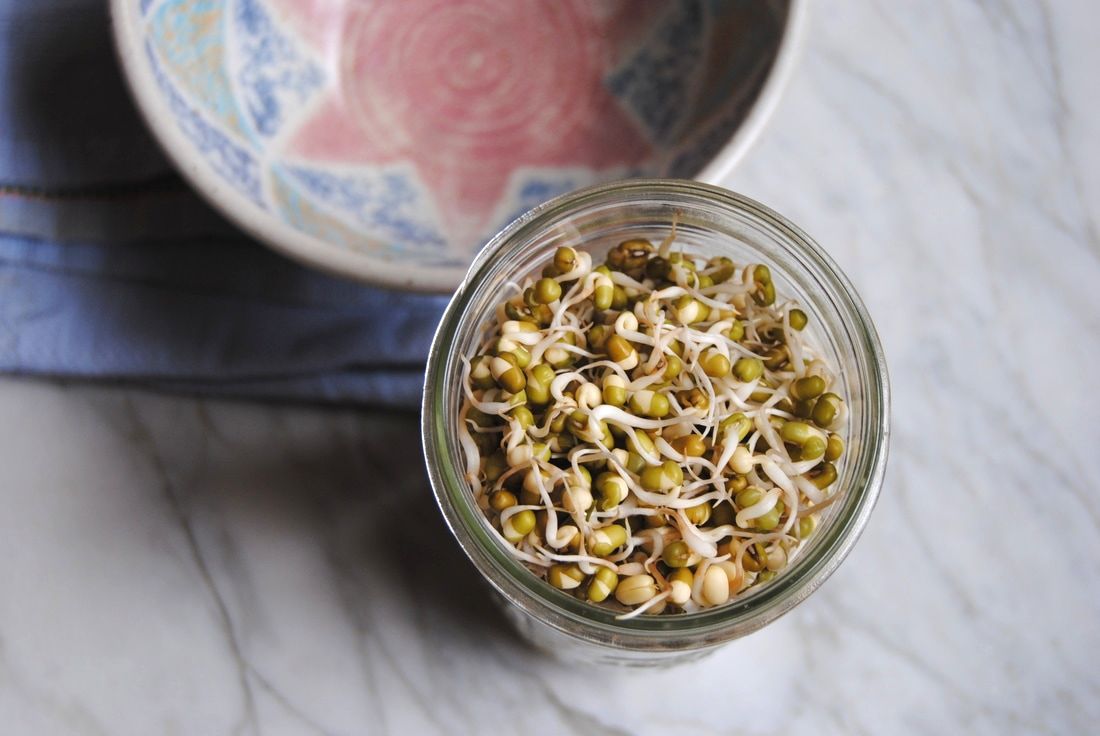
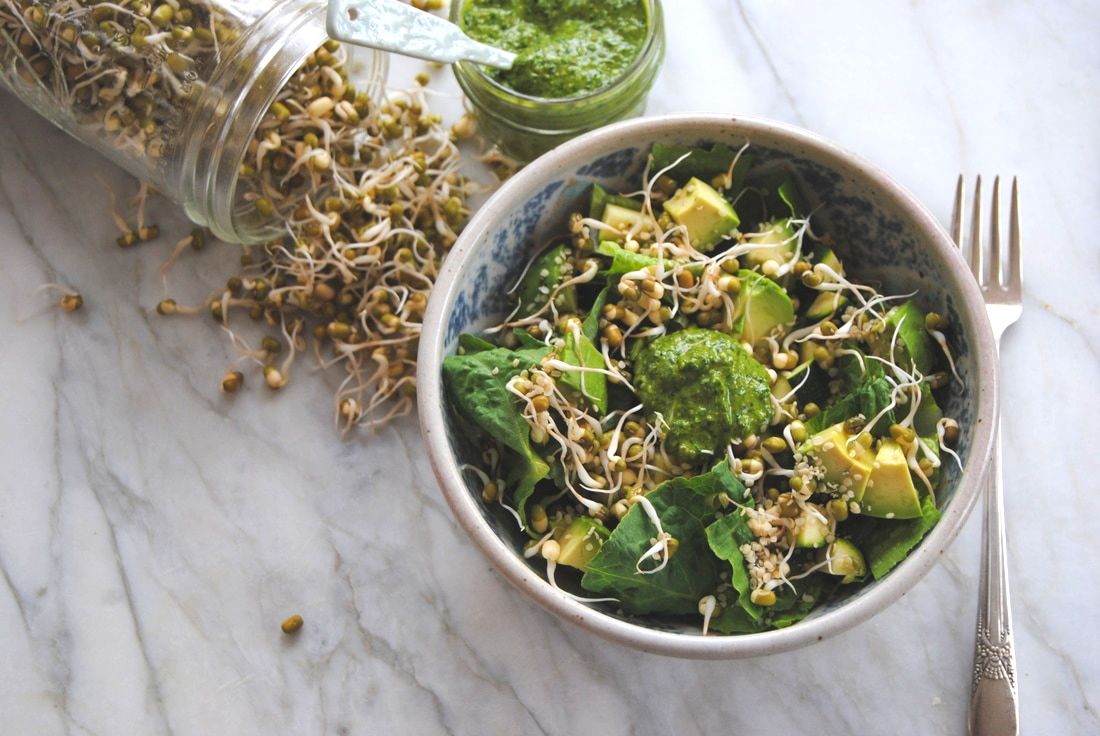
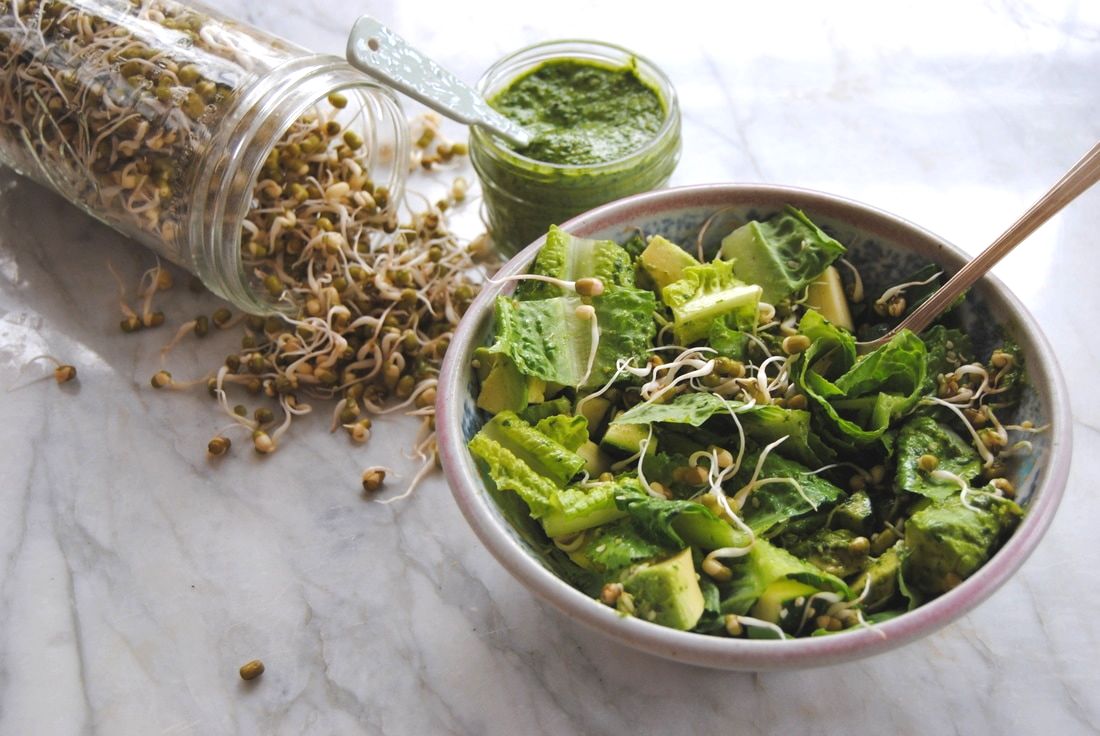
Ever wondered what those "sprouts" that you are sometimes offered on sandwiches or salads really are and why they are so darn good? Well it you have, you're in the right place! This week is dedicated to all things sprouts including how to instructions and a spring inspired, sprout containing recipe. Believe it or not, sprouting at home is very, very simple and is a great use for dried beans, lentils, grains, nuts, and seeds. We find it much easier than cooking dried beans as sprouting achieves the same as cooking - it makes dried beans edible but in a much different way than the typical warm cooking method. The taste of sprouts is fresh and unique and the nutrient value is actually improved with sprouting versus standard cooking methods. Sounds too goo to be true doesn't it? As mentioned, dried beans, grains, nuts and seeds can all be sprouted. Sprouting is essentially the process of initiating plant life but stopping at the sprout phase before a new plant is formed. This week we sprouted beans but the benefits and process discussed is applicable across different sprout varieties. Though beans are a great source of vegetarian protein they unfortunately get a bad reputation for being tough on digestion - especially for people who don't eat beans often. This is because beans contain carbohydrates, specifically oligosaccharides, that can cause increased intestinal gas in some people. Beans that have been sprouted are significantly lower in oligosaccharides which means less gas formation in the gut (yay!). Beans that have been sprouted are also easier for your body to digest due to the enzyme action that takes place during the sprouting process - starch is broken down into simple sugars, proteins are broken down into amino acids, and fats are broken down into fatty acids. Essentially, sprouting does the hard digestive work for you so your body can benefit from the nutrients without the extra work - sounds great right? Sprouting also makes more nutrients available to your body that wouldn't be if some of the bean fibers weren't pre-digested. So especially if you're eating beans as a large nutrient and protein source in the diet, sprouting is important to maximize their nutritional benefit and minimize your digestive effort! Just be sure to follow safe food handling practices and work with clean hands in a clean space as the sprouting process can harbor growth of bacteria if exposed. So are you ready to get sprouting? Basic Sprouts PREP TIME: 2 minutes TOTAL TIME: 2-3 days sprouting time Servings: 1 cup sprouts Ingredients/Supplies 1/4 cup dried beans of choice (mung beans pictured above) Large glass jar and bowl Cheese cloth and rubber band Start by soaking 1/4 cup mung beans with room temperature water in a glass jar with cheese cloth or a mesh topping for 10-12 hours. Keep in mind you want a jar that is large enough for your beans to expand and sprout. A good rule is that the jar should be large enough for the beans to expand 8 times their original size. Following the soak, drain the soaking water and rinse the beans well then return the beans to the jar and cover with cheese cloth or mesh topping to allow air to circulate. Keep the jar tilted upside down in a bowl in a spot where there will not be large temperature fluctuations (cold drafts or hot humid breezes). Rinse and drain beans in the jar 3 times per day (add cool water, swirl, and drain) and make sure to angle the jar on its side to allow excess water to drain off while the beans are working hard to become a sprout. If excess water sits in the jar while the beans are germinating this can lead to sour, spoiled sprouts. Repeat the rinsing and draining process for 2-3 days or until the beans have transformed into the sprout length of your liking. Sprouts can be eaten right away, or stored in the fridge in an air tight container for 5-7 days. Super Green Sprouted Salad PREP TIME: 10 minutes + 2 days to sprout mung beans TOTAL TIME: 10 minutes + 2 days to sprout mung beans Servings: 4 salads Ingredients Salad 2 heads romaine lettuce 4 baby zucchini, diced (1/2" by 1/2") 1 avocado, peeled, pitted, and diced 1 cup sprouted beans (we used sprouted mung beans with recipe above though store bought would also work) 4 tsp hemp seeds Cilantro Pesto 1 bunch cilantro, de-stemmed 1/2 cup extra virgin olive oil Juice of 1/2 lemon, ~2 Tbsp 3 Tbsp walnuts 1 Tbsp hemp seeds 1/2 tsp sea salt 1/4 tsp pepper To make the pesto, combine the cilantro, olive oil, lemon juice, walnuts, hemp seeds, salt, and pepper in a food processor or blender and process on high until a smooth dressing is formed. Store in a glass jar fitted with a lid and place in the fridge. This dressing can be made a day in advance and kept in the fridge for later use. To prepare the salad, chop, wash, and dry romaine lettuce then place in a large bowl. Add diced baby zucchini, diced avocado, sprouted mung beans, and hemp seeds to the bowl. Divide salad into 4 servings then add cilantro pesto dressing to the top of each salad. Serve and enjoy! *Note, if you do not plan to serve all four salads at once keep salad ingredients in an air tight container in the fridge and wait to add dressing until just prior to serving. To keep the avocado from turning brown, toss in lemon juice prior to saving. Weren't we right? Sprouting is so simple and such a fun use for the dried beans sitting in your pantry that you bought and then never cooked from scratch because, well, canned is just easier! We hope this post starts you on a lifelong sprouting journey that you, your gut, and your body will enjoy. Oh, and this salad - the perfect mix of the freshest green foods to awaken your Spring palate. Best enjoyed with a warm piece of crusty bread, or at least we think so.
Enjoy and have fun! Jess and Cecelia
0 Comments
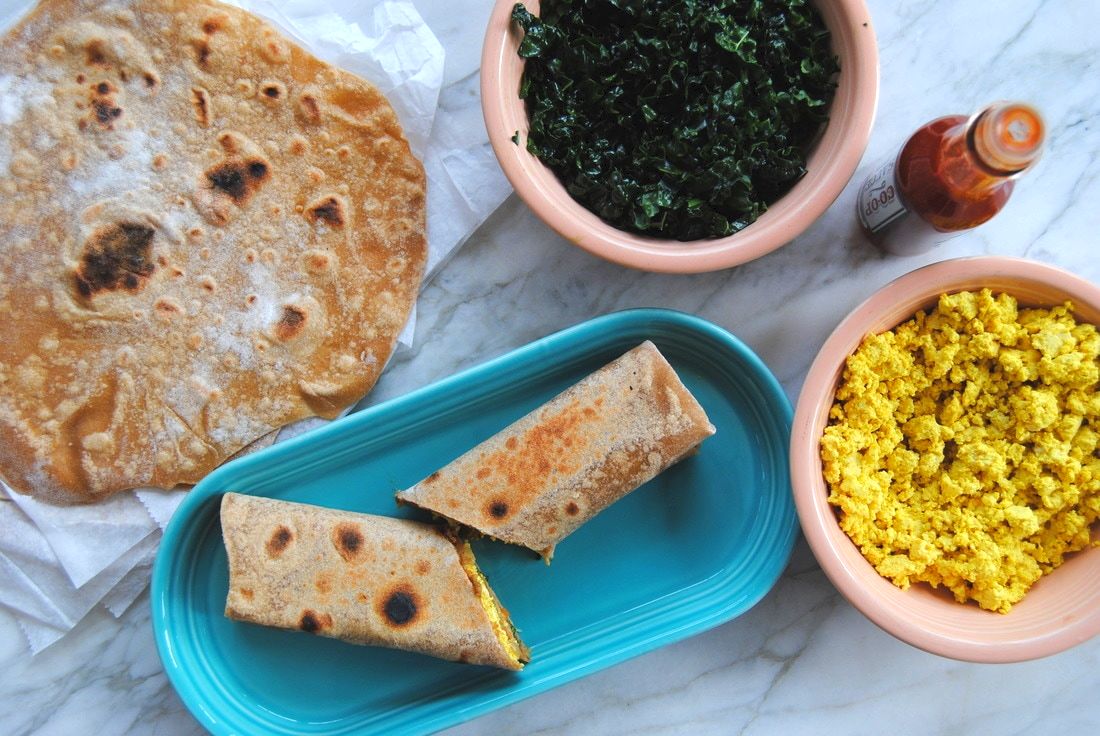
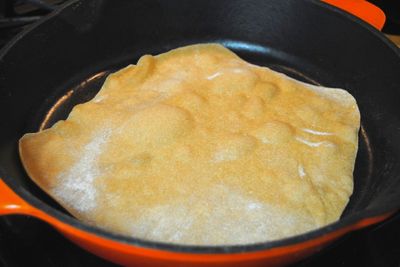
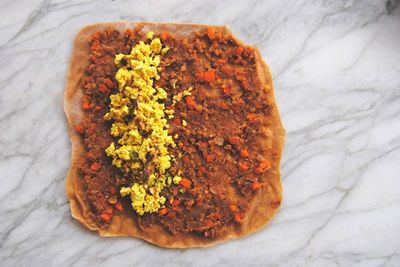
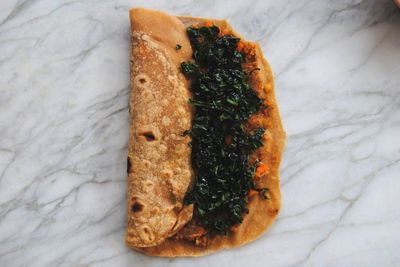
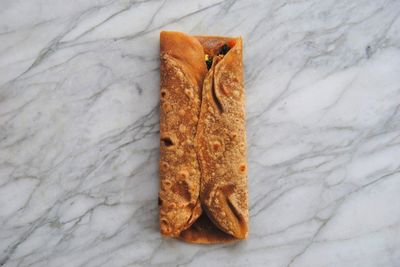
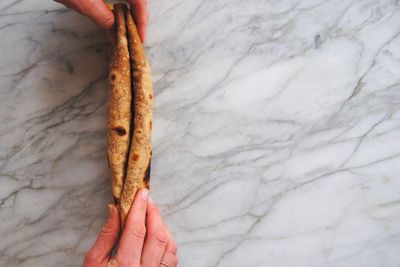
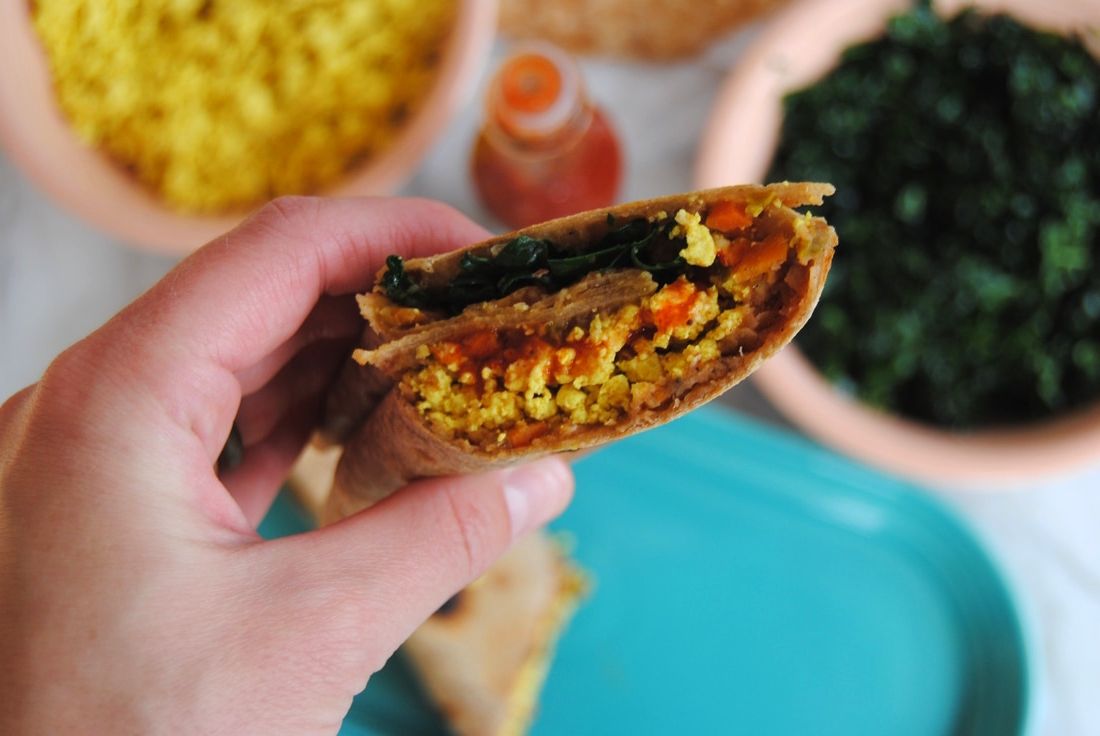
Hi friends! Our kitchen creativity is in full force this week and this recipe is the amazing outcome. Though there are many ingredients and a longer time commitment, the preparation is fairly simple and this recipe reheats well for meals all week! The one preparation that is more complicated is the making of yufka, a Turkish unleavened flatbread similar to a flour tortilla. But trust us, it is SO worth it. With preparation once a week you'll have delicious homemade bread available for snacking, dipping, or wrapping foods of your choice. And since this bread is unleavened, preparation is simpler than leavened, yeast breads. Also a note on shawarma which typically refers to a type of Middle Eastern meat preparation. Creatively, instead we used the traditional shawarma blend of spices in our lentils for an extra kick of flavor because hey, veggie protein needs love and flavor to! So, who's ready to get creative? Shawarma Spiced Red Lentil & Golden Tofu Wraps PREP TIME: 45 minutes (+ 4 hours to let yufka dough rest) TOTAL TIME: 60 minutes (+ 4 hours to let yufka dough rest) Servings: 6 wraps Ingredients Yufka Dough/Flour Tortilla (Adapted from Soframiz by Ana Sortun & Maura Kilpatrick) 1 2/3 cup whole wheat flour, plus more for dusting 1 tsp sea salt 2/3 cup warm water 2 Tbsp extra virgin olive oil Shawarma Spice Mix 1 Tbsp + 2 tsp ground black pepper 1 Tbsp + 1 tsp ground all spice 1 1/4 tsp ground cinnamon 1 1/4 tsp ground cumin 1 1/4 tsp ground nutmeg 1 1/4 tsp ground cardamom Lentils 1/2 cup split red lentils 1/2 cup tomato sauce 1/2 medium yellow onion, diced 3-4 medium carrots, diced 2 tsp coconut oil 1 Tbsp shawarma spice Golden Tofu 12 oz extra firm sprouted organic tofu 2 tsp coconut oil 1 tsp ground turmeric 1/2 tsp sea salt 1/8 tsp crushed red pepper flakes Messaged Kale 6-8 large stalks of organic kale 1 Tbsp coconut oil 1/4 tsp sea salt To make the yufka dough mix the whole wheat flour and salt together in a large bowl then make a well in the center. Pour the warm water and olive oil in the center of the well then use your hand to combine the wet and dry ingredients until a soft dough is formed. Lightly dust a clean work surface with flour and knead dough for 2-3 minutes or until the dough ball is smooth and elastic. Place the dough back in a bowl with a little olive oil to coat to prevent the dough from sticking to the bowl. Cover with plastic wrap and allow to sit at room temperature for 4 hours or overnight. This dough can be made a day in advance and stored in the fridge after a minimum of 4 hours sitting at room temperature. If stored in the fridge, remove the dough and allow to come to room temperature for 30 minutes. Cut the dough ball in half and divide each half into 3 equal pieces for a total of 6 small ~2 ounce dough balls. Dust a clean work surface with flour and roll each dough ball out as thin as possible, about 8-9" round. Using a seasoned cast iron pan or a non-stick pan set to medium heat cook the yufka on one side until bubbles start to form and the bottom is slightly browned, ~2 minutes. Remove from the pan after the one side has been cooked and place on a plate or sheet pan with a layer of parchment paper on top. You only want to partially cook the yufka dough at this point. Over cooking or cooking both sides can make the yufka too crunchy and hard to work with. Continue to cook each yufka and continue to stack on top of one another with a piece of parchment paper in between each layer. The heat and steam of the cooked yufka will help to keep the wraps soft and pliable as they sit on top of each other. Once cooled to room temperature store cooked yufka in a large plastic bag, sealed. Rinse the lentils until the water runs clear. Combine lentils with 3/4 cup water in a small sauce pan then bring to a boil. Reduce to a simmer, cover with a lid, and continue cooking for 12-15 minutes or until lentils are soft and the water is absorbed. While the lentils are cooking, add coconut oil to a sauté pan set to medium heat. Add the diced onion and carrots to the sauté pan and cook until soft and caramelized, about 10-15 minutes, then remove from the heat. Once the lentils are cooked, add tomato sauce, cooked onion and carrots, and shawarma spice mix to the pan with the lentils. Stir mixture to combine then set aside. Drain tofu from package then use your hands to crumble tofu into small pieces, similar to scrambled eggs. Add coconut oil to a sauté pan set to low-medium heat then add the tofu, turmeric, sea salt, and crushed red pepper flakes to the hot pan. Cook for 3-5 minutes stirring often. Remove from the heat and set aside. Wash, de-stem, and chop kale leaves into thin strips then place in a large bowl. Drizzle 1 Tbsp coconut oil over the kale and sprinkle with sea salt. Use your hands to massage coconut oil and salt onto the kale until leaves are soft and dark green then set aside. To assemble the wraps (steps pictured below) begin by placing one cooked yufka dough on a clean work surface. Evenly spread about 1/4 cup lentil mixture on to the yufka dough making sure to leave about 1/4" on the sides. On the left side of the wrap add 1/4 cup golden tofu then fold the left side of the yufka in to the middle. On the right side of the wrap add ~1/4 cup messaged kale then fold the right side of the yufka in to the middle. Finally fold the wrap in half lengthwise. The wrap should now be folded three times. Place wrap into a hot pan and cook on both sides until the yufka dough is slightly golden, about 1-2 minutes per side. Continue this process until you have made all 6 wraps. Place parchment paper around each wrap and slice in half. Serve warm with hot sauce if desired. Store additional wraps in the fridge in an air tight container. Wraps cane be eaten cold, room temperature, or slightly warmed in a hot sauté pan. Well, is this recipe creative or what? Starting with the soft and spongy yufka flatbread enveloping an exciting mix of flavors, from the spicy shawarma lentils to the turmeric tofu, and ending with a balance of brightness and texture from the massaged kale. And if you only decide to make one item from the recipe list this week (gasp), make the yufka! Yeah, it's that good.
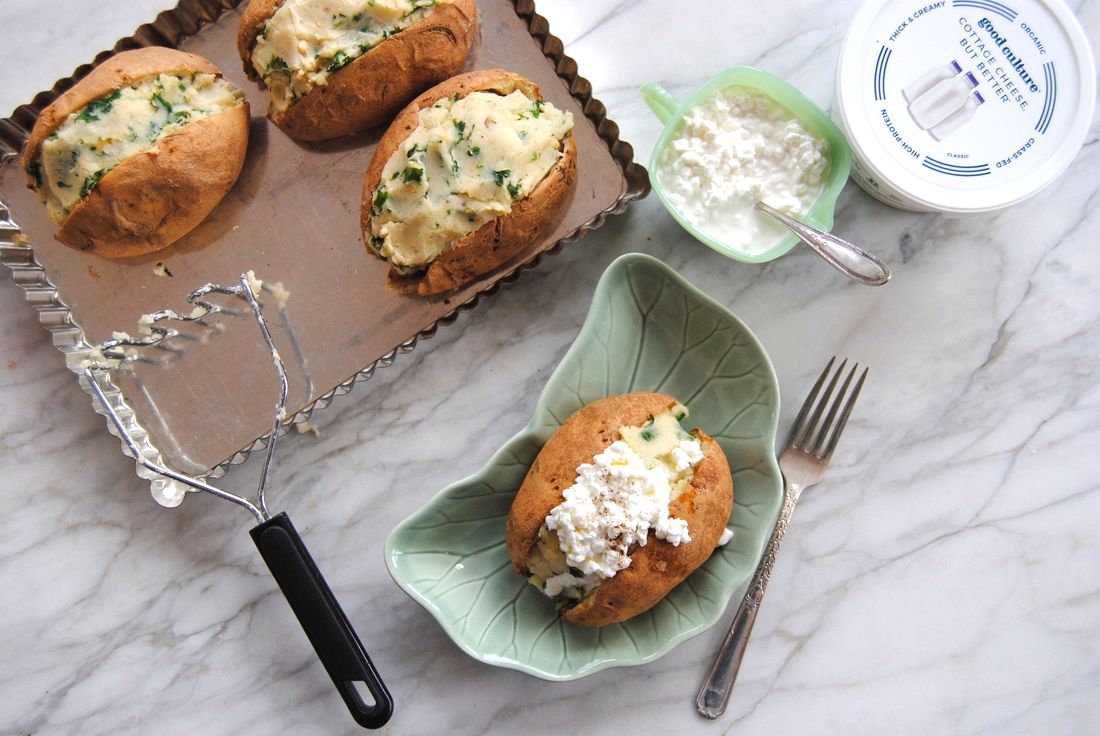
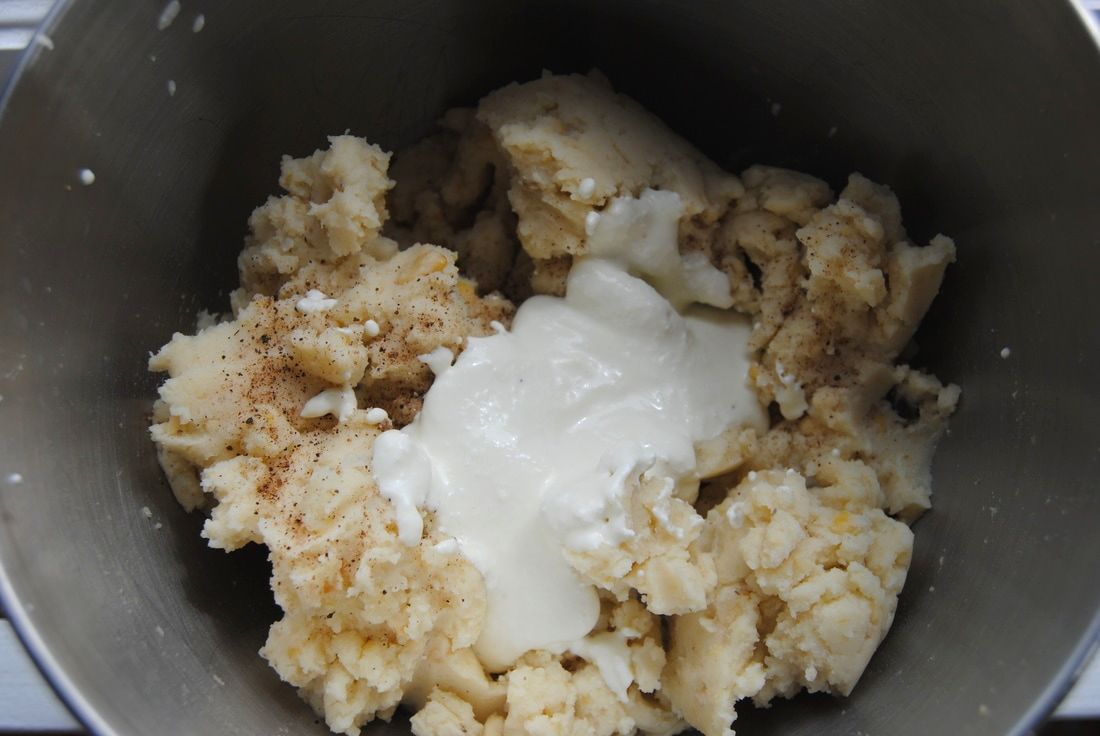
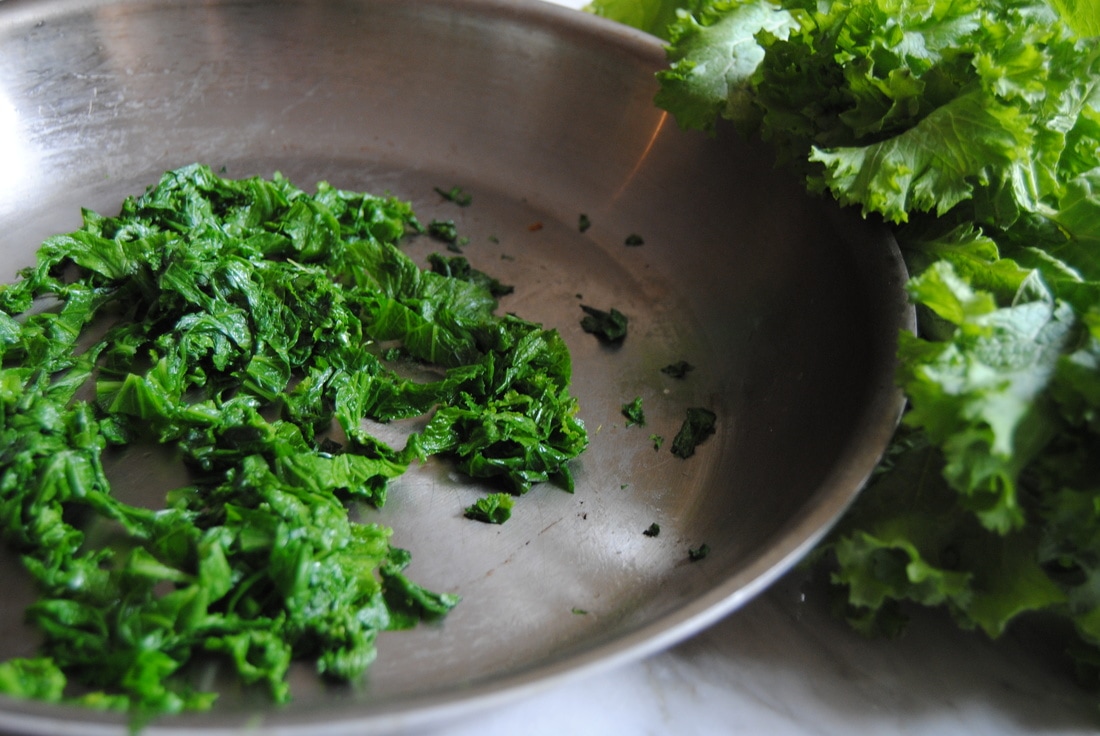
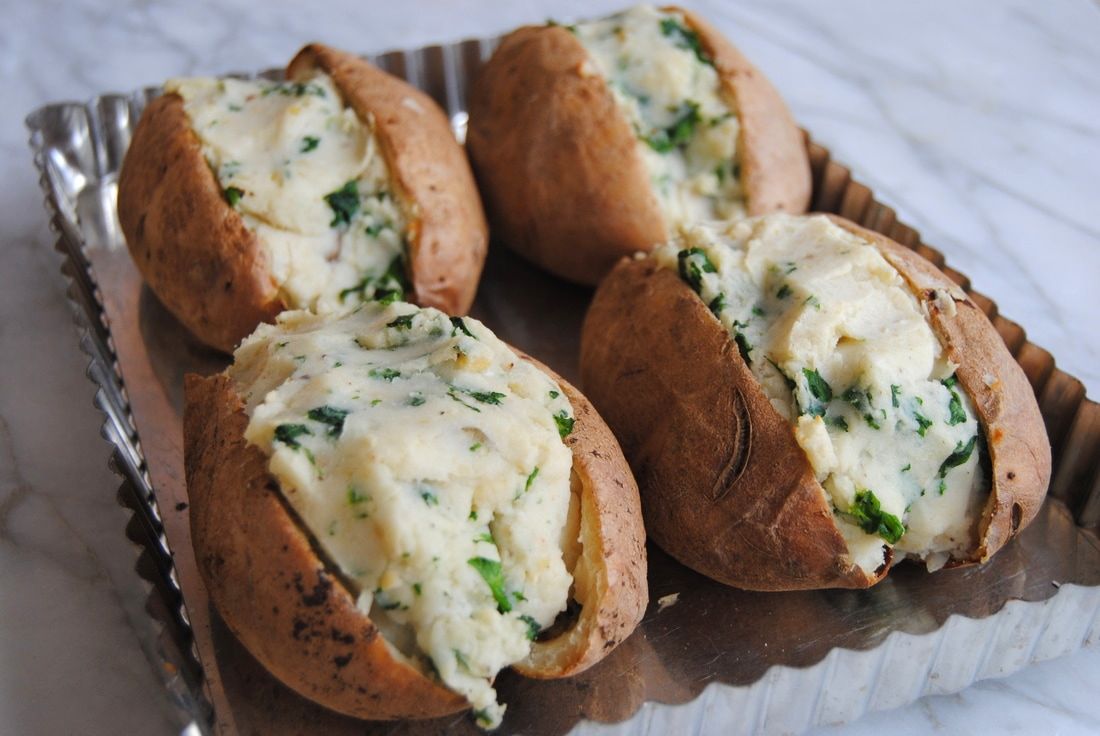
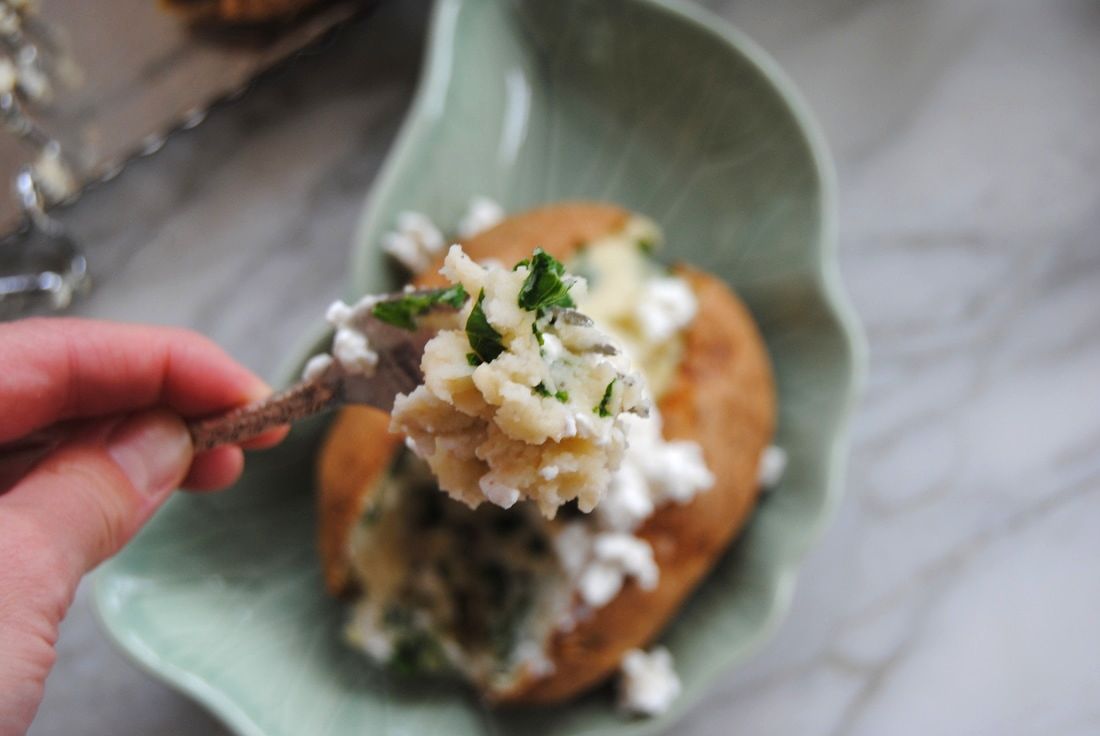
Enjoy, Jess and Cecelia We've been on a kick lately reinventing and recreating some of TGBK's first ever recipes. The Overloaded Spud (recipe here) debuted in February 2015 and has been a fan favorite every since. This time around we've taken the seemingly plain and nutritionally bland Russet potato and gave it quite a spin. With the addition of fava beans, fermented foods, and seasonal greens, this spud it anything but plain! This recipe was inspired by a unique Italian recipe we came across for mashed fava beans combined with potatoes and bitter greens (here). Though we love the idea of a good mashed potato we much prefer to eat our potato with the skin (that's where the fiber is!). The idea of incorporating fava beans into mashed potatoes intrigued us because this addition of protein helps to make the simple baked potato into a complete meal. Along that theme we chose to use cottage cheese instead of more traditional additives to mashed potato such as cream cheese, sour cream, or butter. Cottage cheese provides more protein to this dish and is a fermented food - you know how we love our probiotics! And we can't say enough about the Good Culture brand we chose. In their cottage cheese they use quality ingredients, no additives, and live and active cultures (important to note that not all cottage cheese will based on how it is produced). Finally, we found mashed potato to be a perfect vehicle for incorporating bitter greens. Greens with a bitter taste, such as mustard greens, chicory, endive, dandelion, and watercress, can be overwhelming taste-wise but we felt paired perfectly with this dish. Ready to find out for yourself? Fava Bean & Mustard Green Twice Baked Potato PREP TIME: 60 minutes TOTAL TIME: 1 hour 10 minutes Servings: 4 main dishes (full potato) or 8 sides (half potato) Ingredients 4 medium russet potatoes 1/2 cup organic full fat cottage cheese (we used 4% milk fat Good Culture cottage cheese) 4 Tbsp extra virgin olive oil 1 1/2 tsp sea salt 1/4 tsp ground black pepper 1 cup dried split fava beans 1/4 cup warm water 1/2 bunch organic mustard greens Toppings 1 cup organic full fat cottage cheese (we used 4% milk fat Good Culture cottage cheese) 4 tsp extra virgin olive oil Sprinkle of pepper Preheat oven to 400 degrees. Scrub the outside of each potato with warm water. Using a fork, carefully pierce each potato about 4-6 times to allow steam to escape while potatoes are cooking. Sprinkle each potato with sea salt then place in the oven for 40-50 minutes or until soft and the skin can easily be pierced with a fork. While the potatoes are cooking, rinse fava beans under warm water until water runs clear. Place in a pan and add 2 cups of water and bring to a boil for 10 minutes. Reduce the heat to a simmer and continue cooking for 20 minutes or until the liquid is absorbed and the fava beans are soft. Note fava beans can be pre-soaked for 1-2 hours to quicken cooking time. Transfer cooked fava beans to a large bowl and add 1/4 cup warm water. Using a potato masher, mash the fava beans until they are broken down (think lumpy mashed potato texture) then set aside. Remove potatoes from the oven and allow them to slightly cool before handling. Slice each potato open though not all the way through if possible. Scoop out the inside into the bowl with the fava beans, save the skins for later use. Using the potato masher, mash potatoes with the fava beans until a somewhat smooth texture is formed. In a blender or food processor add 1/2 cup cottage cheese and 3 Tbsp olive oil and process until creamy then fold into the fava bean and potato mixture until light and creamy. Wash and de-stem the mustard greens. Add 1 Tbsp olive oil, 1/4 tsp sea salt, and greens to a sauté pan and cook for 2 minutes or until wilted and bring green. Carefully strain off any liquid from the greens - this helps to remove the bitter taste. Chop greens into small pieces then fold into the fava bean and potato mixture. Evenly fill each potato skin with mixture* and place back in the oven to warm up for 5-10 minutes. Top each potato with a scoop of cottage cheese, drizzle of olive oil, and a sprinkle of pepper. If you do not plan to serve all the potatoes keep the toppings off until ready to eat. Potatoes will keep in the fridge for 2-5 days. To reheat, preheat oven to 350 degrees and cook for 10 minutes or microwave for 1 minute then top with cottage cheese, olive oil and pepper to taste. *You may have leftover mashed fava/potato mixture that does not fit back into potato skin, save to enjoy later! We can definitely attest to the final product being one overloaded and filling spud! The uniqueness of this recipe and flavor profile are sure to impress and excite. We found the flavor of fava beans (earthy and slightly bitter) to really shine and pair wonderfully with the mustard greens, and the mild flavored baked potato to be the perfect palate for the creation of this culinary magic.
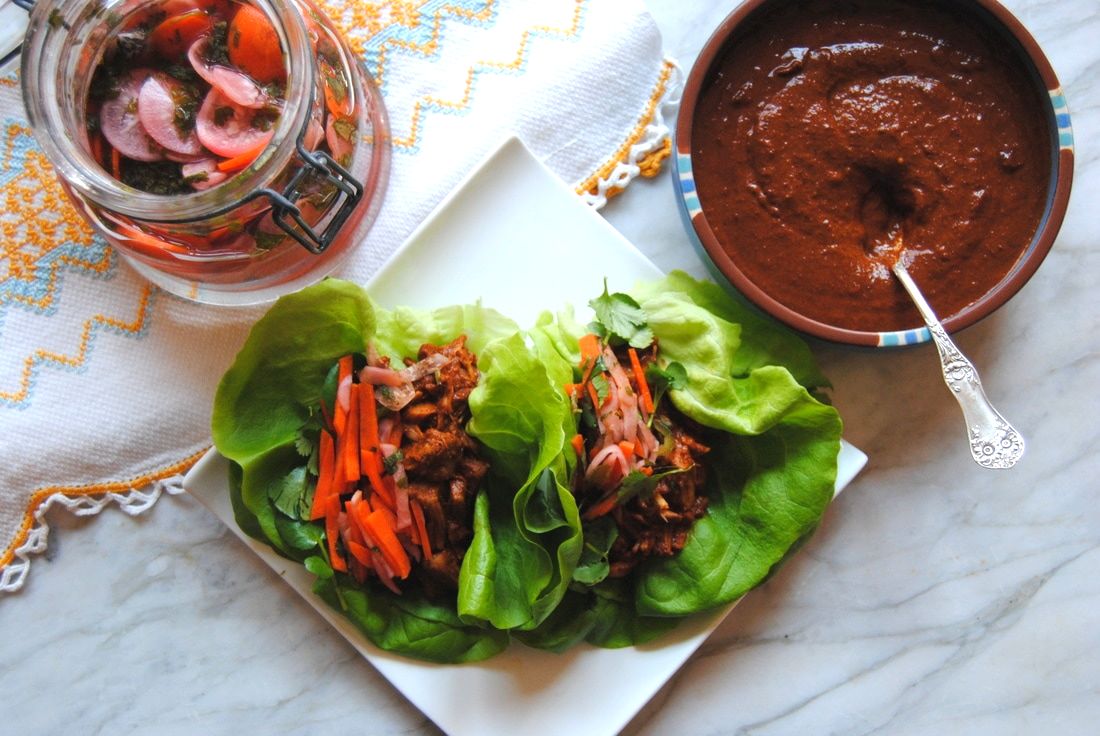
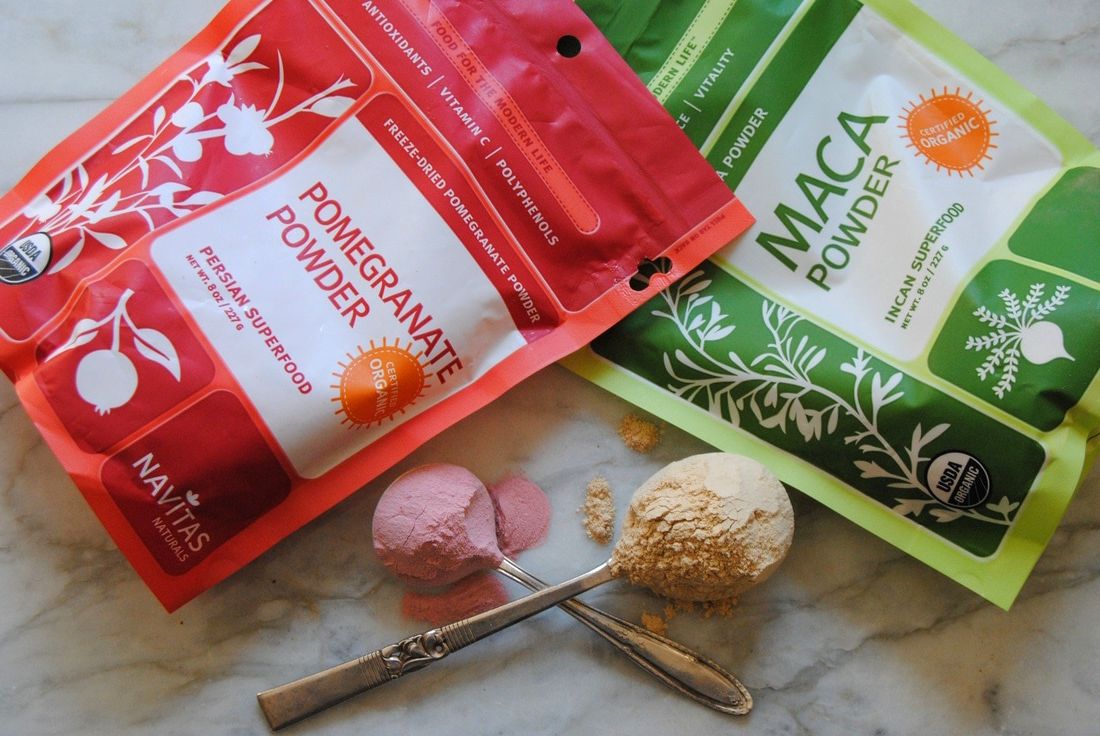
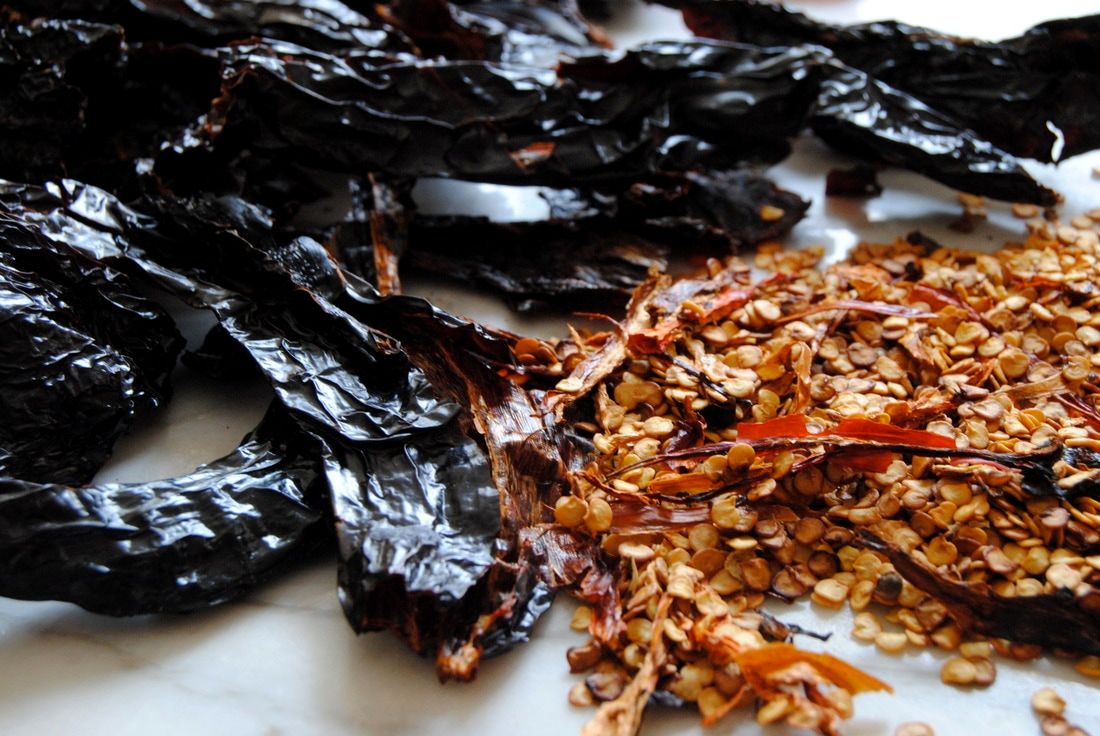
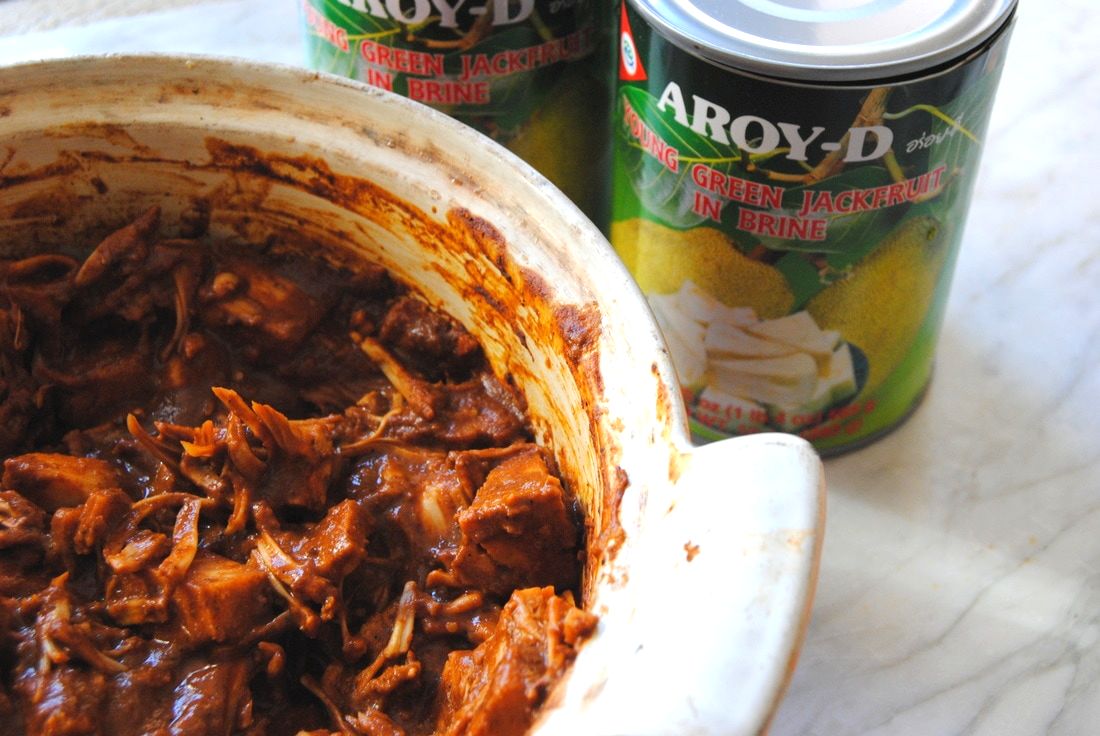
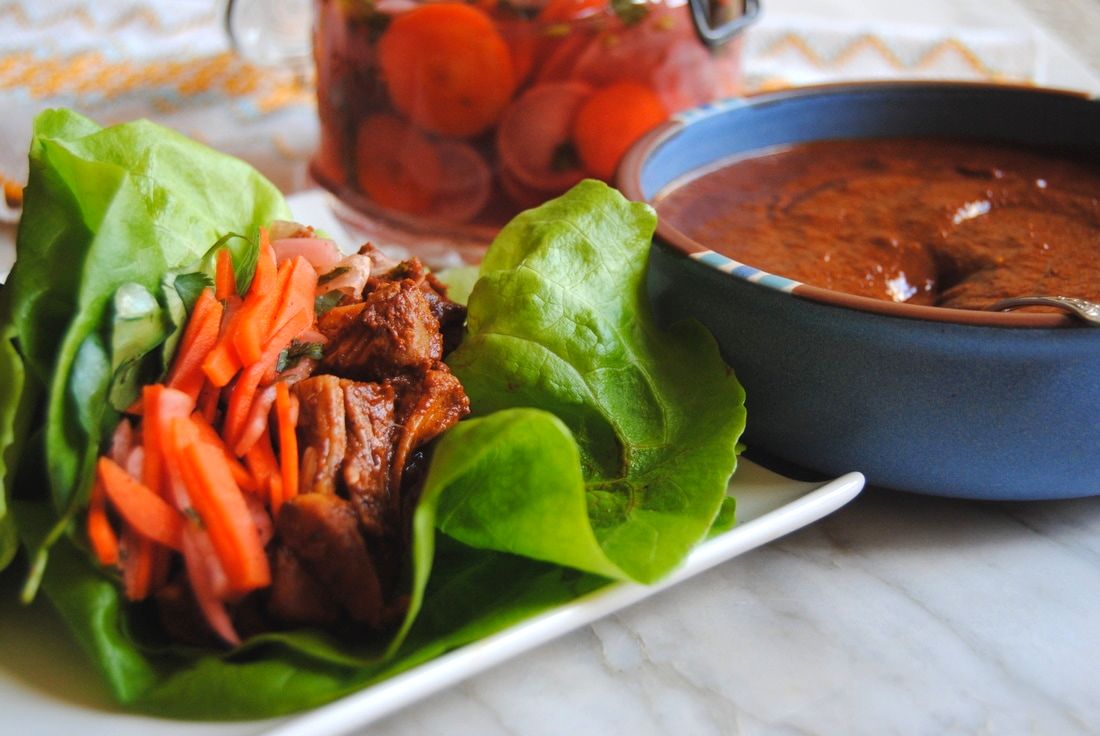
Enjoy! Jess and Cecelia We must admit, we've never truly understood the exclamation "holy mole" until we went through the amazing process of actually making mole. There are so many unexpected ingredients that go into this sauce and we've found that ingredients can vary depending on the variety of sauce being made. Mole is a chile based sauce used in Mexican cuisine that can be made with a variety of chiles and also contains vegetables, nuts, seeds, spices, and even chocolate. It is traditionally made in large batches for special occasions - perfect for our ongoing celebration of National Nutrition Month! The long ingredient list can look daunting but this sauce is truly worth the effort. You'll notice how healthy and nutrient packed this sauce really is and we even added our own superfood spin. We found mole to be a perfect base for both maca and pomegranate additions - from Navitas Organics, of course! For many of the other ingredients check out your local ethnic grocer, though note that the dried chile varieties can also be found online. Here at The Green Blossom Kitchen we have an ongoing love affair with maca. We've used it in previous recipes and explained some of the various health benefits (here). As a brief review, maca is a plant that grows at high altitudes in the Andean Mountains and the superfood powder is made from the maca root. Though maca is not a medical treatment, it is believed to aid in balancing hormones and the endocrine system, which could improve stress management, energy, and reproductive and fertility issues. Pomegranate powder, made from the pomegranate fruit seed, contains abundant antioxidants. We've also discussed antioxidants in prior posts (including here) but are happy to provide a refresher. Antioxidants help the body fight cellular damage from free radicals (or damaged molecules) that naturally occur in our bodies as a result of physiological process and exposure to the environment. Navitas Organics pomegranate powder is carefully processed - seeds are juiced, freeze dried, and then milled into powder - to preserve as much of these beneficial antioxidants as possible. Navitas has even more great information on their website (here) so definitely check them out! One question we often get about superfoods is how best to incorporate them into the diet. We think that any way you enjoy superfoods is great but love to provide new and unique recipe ideas to keep things exciting. This week's recipe is definitely a unique (and delicious!) use of both of these amazing superfoods. Superfood Mole PREP TIME: 60 minutes TOTAL TIME: 90 minutes Servings: 8-10 cups mole Ingredients 8 dried mulato chiles 8 dried pasilla chiles 4 dried chilhuacle negro chiles 1 plum tomato, halved ½ medium onion, sliced into quarters 3 tomatillos, husks removed, rinsed 3 garlic cloves 4 cups low-sodium vegetable broth 1 Tbsp coconut oil 1/2 ripe plantain, peeled and sliced lengthwise 1/2 cup Navitas Organics maca powder 4 Tbsp almonds 1, 4" corn tortilla, torn into 2" pieces 2 cinnamon sticks 3 whole allspice 3 whole cloves 2 Tbsp golden raisins 4 Tbsp Navitas Organics raw hemp seeds 2 Tbsp raw sesame seeds 1 tsp dried oregano ⅛ tsp aniseed ⅛ teaspoon cumin seeds 1/4 cup Navitas Organics pomegranate powder 4 ounces dark chocolate (65% or greater), chopped 2 Tbsp sugar 1 1/2 - 2 tsp sea salt Step 1 Using a damp cloth, clean outside of chiles. Cut chiles in half, discard stems, remove seeds and ribs and set aside. In a large skillet toast seeds and ribs until blacked - about 5 minutes - then remove from pan and save in a clean bowl. In the same pan, working in batches lay chiles in a single layer and cook until skin is slightly blistered and charred. Continue until all chilies have been toasted. Place cooked chiles into a large bowl and cover with boiled water. Allow chiles to soak for about 20 minutes to soften. Step 2 Add tomato, tomatillos, onion, and garlic to the skillet and place over medium to high heat. Cook vegetables until blackened making sure to turn as needed for an even char. Add charred vegetables to a blender with 1-2 cups of vegetable broth and process until smooth then set aside. Step 3 Add 1 Tbsp coconut oil to the same skillet, add the sliced plantain, and cook on medium heat until golden on both sides - about 3-4 minutes - then place in a bowl. Carefully wipe the skillet clean then add the almonds and tortilla pieces to the skillet and toast on medium heat until fragrant, about 3-5 minutes. Remove almonds and tortilla from the skillet and place in the bowl with the plantain. Add cinnamon sticks, allspice, cloves, golden raisins, hemp seeds, sesame seeds, oregano, aniseed, and cumin seeds to the pan and toast on low to medium heat for 3-4 minutes, or until fragrant, then add to the bowl with the plantain. Working in batches, add contents of plantain bowl, maca powder, and 2 cups broth to a blender and blend on high until completely smooth then set aside. Step 4 Drain chiles making sure to reserve the soaking liquid. Add chiles to a blender with 2 cups soaking liquid and blend on high until completely smooth. Add pomegranate powder, toasted chile seeds, and chile ribs to the blender and continue to blend on high until completely smooth. Step 5 In a large pot, add chile puree, plantain puree, and vegetable puree and cook on low to medium heat for 15-20 minutes, stirring often. Allow mole to cool, then place 1 1/2 cups aside for the jackfruit lettuce wraps (if making). Any mole you do not plan on eating or sharing with friends within 5 days should be stored in air tight containers to be frozen for later use. When ready to use, remove frozen mole sauce from the freezer and place in the fridge for about 24 hours prior to use to completely thaw. Mole sauce can be reheated on the stove top, in the oven, or microwave. *Note that this recipe will work best with a high speed blender (ex: Vitamix, Blendtec). If you don't have a high speed blender we recommend straining the chile puree (step 4) after blending through a fine mesh sieve. The plantain puree (step 3) may require an additional 1/2-1 cup vegetable broth for optimal blending. The other purees (step 2) should be fine without straining. Sweet & Spicy Pomegranate Pickled Relish PREP TIME: 10 minutes + 8 hours to pickle TOTAL TIME: 10 minutes + 8 hours to pickle Servings: 1 1/2-2 cups Ingredients 1 large carrot, peeled and sliced into 1/8" rounds 3 large pink radishes, peeled and sliced into 1/8" rounds 1/4 cup cilantro, chopped 3" fresh jalapeno, sliced into 1/8" rounds 1/2 cup white distilled vinegar 1/2 cup apple cider vinegar 1/4 cup cane sugar 1 Tbsp Navitas Organics pomegranate powder 1 tsp sea salt In a small sauce pan add vinegars, sugar, and salt and cook on medium heat stirring constantly until sugar and salt are fully dissolved. Remove from the heat and allow to cool. Using a sharp knife or a mandolin set to a 1/8" cut, slice peeled carrot, radishes, and jalapeno into rounds. Add vegetables, chopped cilantro, and pomegranate powder to a glass jar or bowl then pour cooled liquid over the top. Cover with a lid or plastic wrap and allow to sit out at room temperature for 8 hours until vegetables soften and slightly wilt. Store in the fridge for up to 5 days. Superfood Mole Jack Fruit Lettuce Wraps PREP TIME: 30 minutes TOTAL TIME: 30 minutes Servings: 4 (makes 8 wraps) Ingredients 2, 20 oz cans young jack fruit, drained and rinsed (we used Aroy-D brand found at some specialty grocers or online) 1 1/2 cup superfood mole sauce (recipe above) 16 fresh lettuce leaves, rinsed and dried (we used butter lettuce) 1/2 cup sweet & spicy pomegranate pickled relish (recipe above) Drain and rinse jack fruit. Using your hands, lightly pull jack fruit segments apart into smaller pieces. Place pulled jack fruit in a sauce pan along with 1 1/2 cups superfood mole sauce and cook on low heat for 25-30 minutes or until jack fruit is tender and well coated in sauce. Remove from heat and set aside. Overlap 2 butter lettuce leaves, fill each leaf with 1/4-1/2 cup jackfruit, and top with pickled relish. Serve wraps warm or at room temperature. Leftovers can be stored in the fridge in air tight containers for up to 5 days. We recommend keeping the leftover jack fruit separate from the relish and lettuce leaves for easy reheating. What else can we say but holy mole! This sauce recipe is a true show stopper and will make enough for a large group or extras to save for later use. The depth of flavor is astounding: spicy from the chiles, earthy from the scorched vegetables, tangy from the blend of spices, and rich from the nuts, seeds, and dark chocolate. We think this sauce will lend itself to a variety of uses, though absolutely loved it with pulled jackfruit in our butter lettuce wraps. We can't wait to hear from you about your experience with mole and Navitas' products.
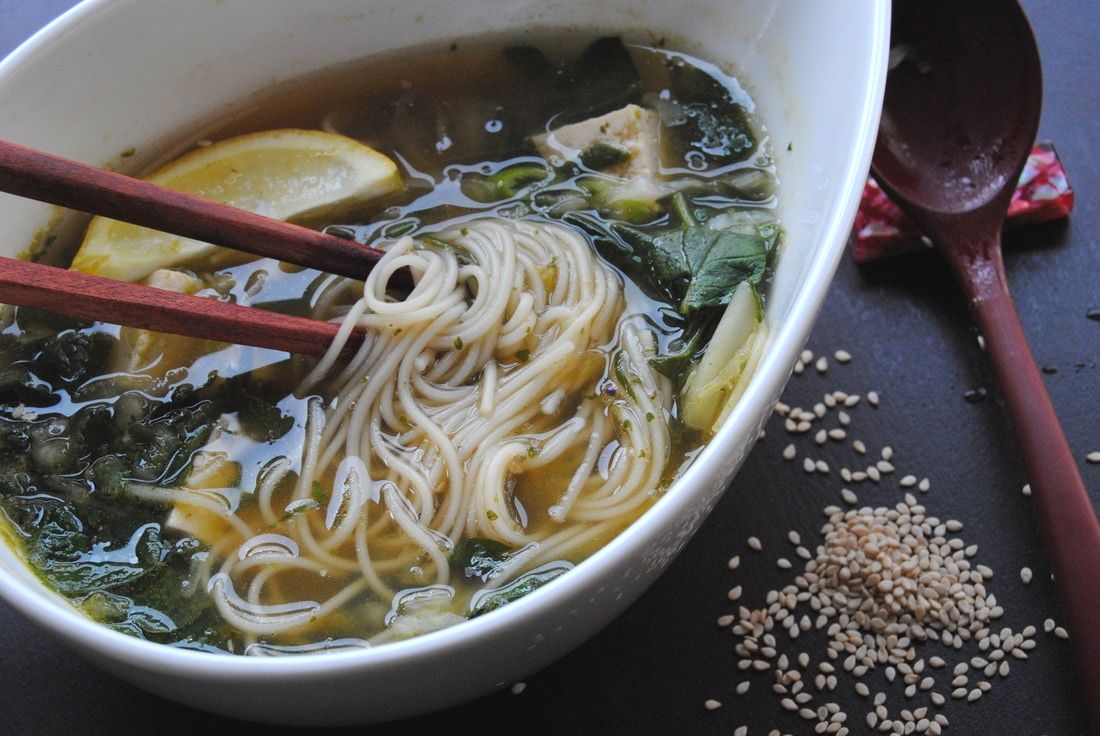
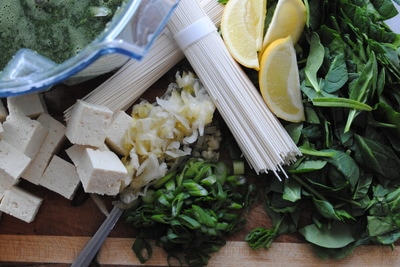
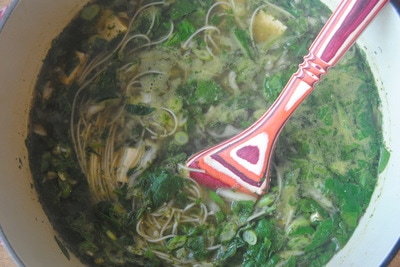
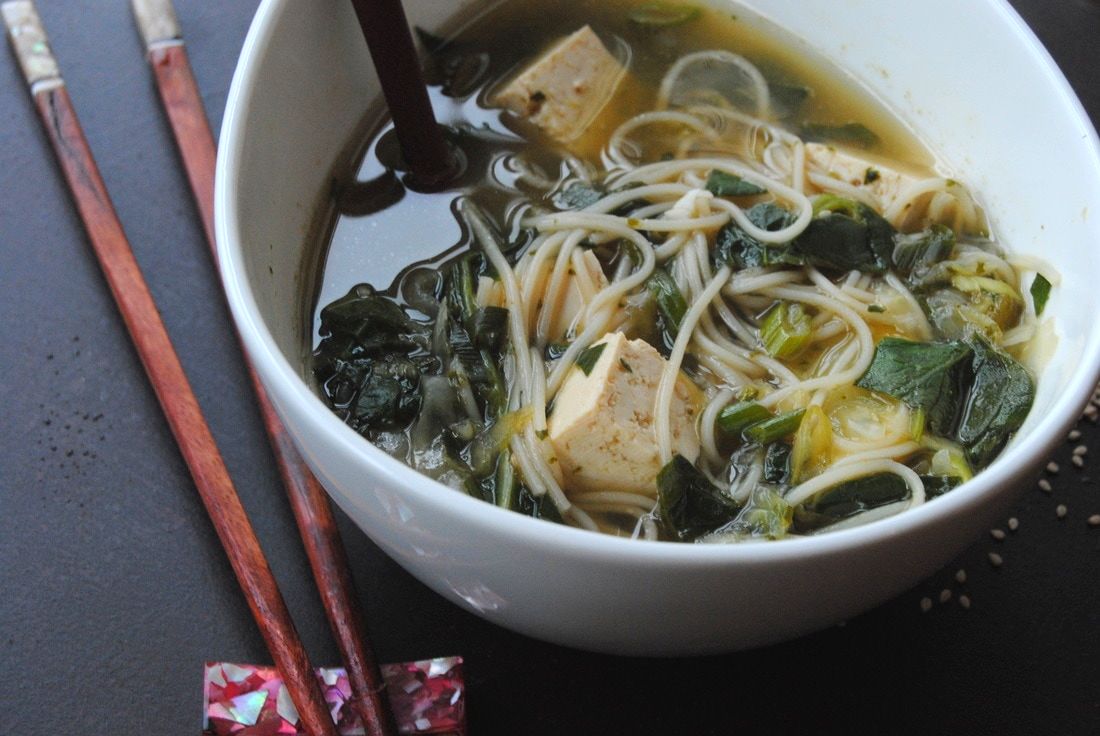
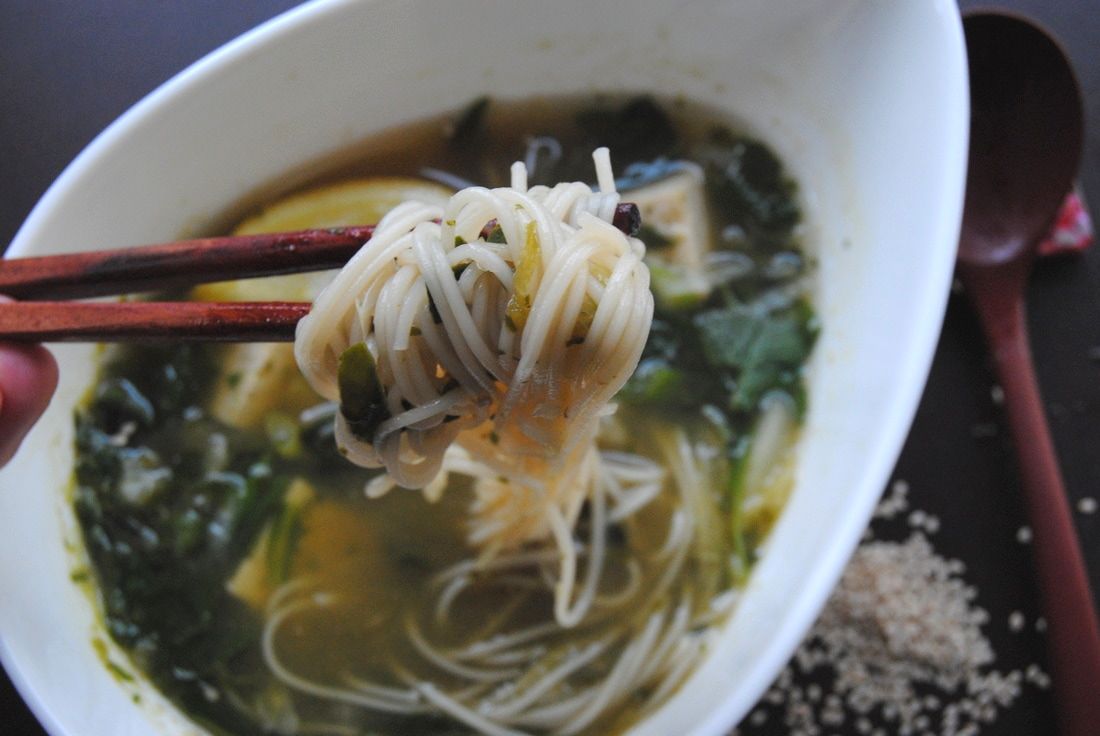
Enjoy, Jess and Cecelia The weather in Chicago this week has been unseasonably warm to a point where we are enjoying it but also slightly missing winter (gasp!). Mostly, we are realizing that the time for warming recipes is getting shorter and shorter as spring approaches. We decided that another hot soup recipe was in order and took inspiration from another oldie but goodie fan favorite recipe from our first days at TGBK (recipe for Soul Warming Miso Soup here). We know you love the flavors and ease of this previous recipe and created another miso broth based, one pot soup. Yes one pot! All the ingredients go into one large pot for easy preparation and clean-up. You must be super excited about this one so let's get straight to the recipe! Super Green One Pot Noodle Bowl PREP TIME: 10 minutes TOTAL TIME: 15 minutes Servings: 4 bowls Ingredients 8 oz organic tofu (we used sprouted extra firm tofu), cut into cubes 5 oz dried Japanese style noodles (udon or soba) 5 cups fresh spinach, washed and roughly chopped 1 cup raw sauerkraut (homemade or store bought) 2 green onions (green part only cut on the bias) 6 cups low sodium vegetable broth 3 Tbsp miso paste 1 bunch cilantro , destemmed and chopped 2 medium cloves garlic, minced Toppings 1 lemon, cut into 4 wedges 1 tsp toasted sesame oil (1/4 tsp per bowl) 1 tsp sesame seeds (1/4 tsp per bowl) Add 1 cup vegetable broth, miso paste, chopped cilantro, and minced garlic to a blender and process mixture until cilantro is finely chopped then set aside. In a large pot, add remaining vegetable broth and bring to a soft boil. Add noodles and cook for 2-3 minutes or follow cooking instructions the specific noodle you're using. Once noodles are fully cooked, add tofu, spinach, sauerkraut, and green onions to the pot. Remove pot from the heat, add the cilantro miso broth and stir. Divide soup into 4 bowls. Top each bowl with 1/4 tsp toasted sesame oil, 1/4 tsp sesame seeds, and a squeeze of lemon. Serve warm and enjoy! This soup is best served right from the stove. However, if you do have leftovers we recommend that you store them in the fridge for up to 2 days and keep the cilantro miso broth separate from the soup until ready to serve to keep the fresh cilantro flavor and bright green color. Simply reheat soup in a pan until hot (~2-3 minutes) then pour the cilantro miso broth into the hot soup. Add toasted sesame oil, sesame seeds, and lemon wedge. This recipe is quick and easy but still impressive and definitely tasty. The ingredients are easily adaptable to what you are able to find until produce is abundant in the upcoming seasons. But the true star of this recipe is the warming broth; it has a depth of flavor from the miso, a brightness from the cilantro, and an inside out warming quality that only a good, homemade broth can provide. We hope you enjoy this winter recipe as we transition towards a new season and warmer weather. Do we dare mention that we are still hoping for one last pretty snowfall?
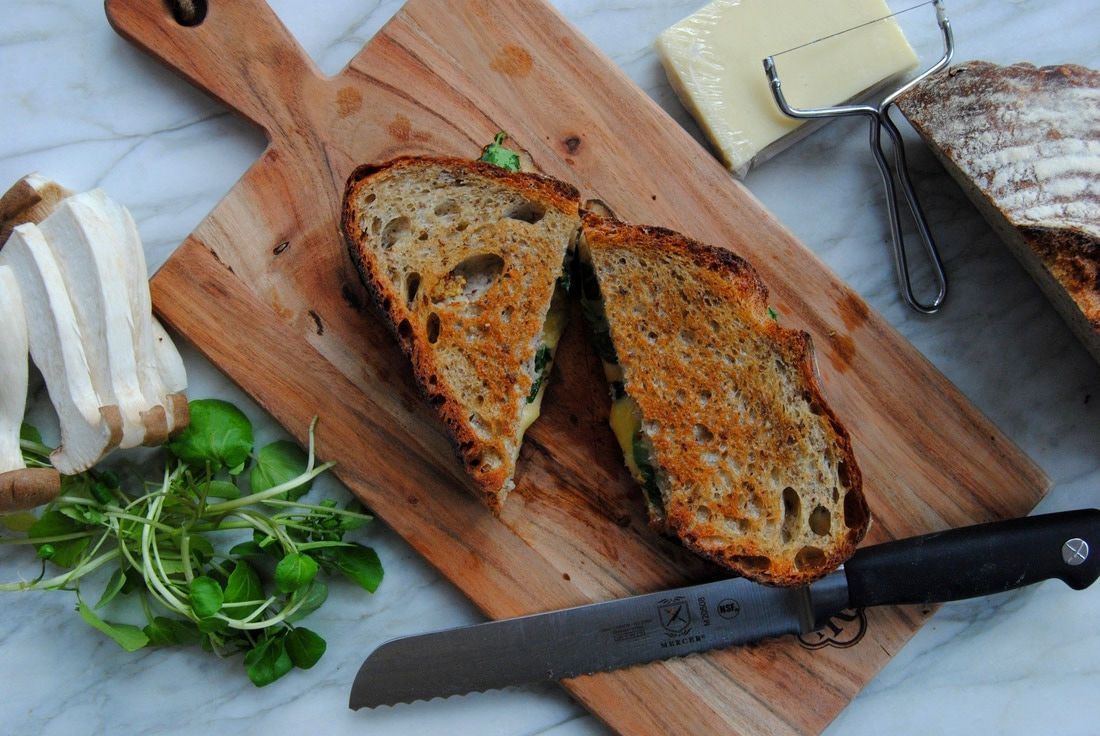
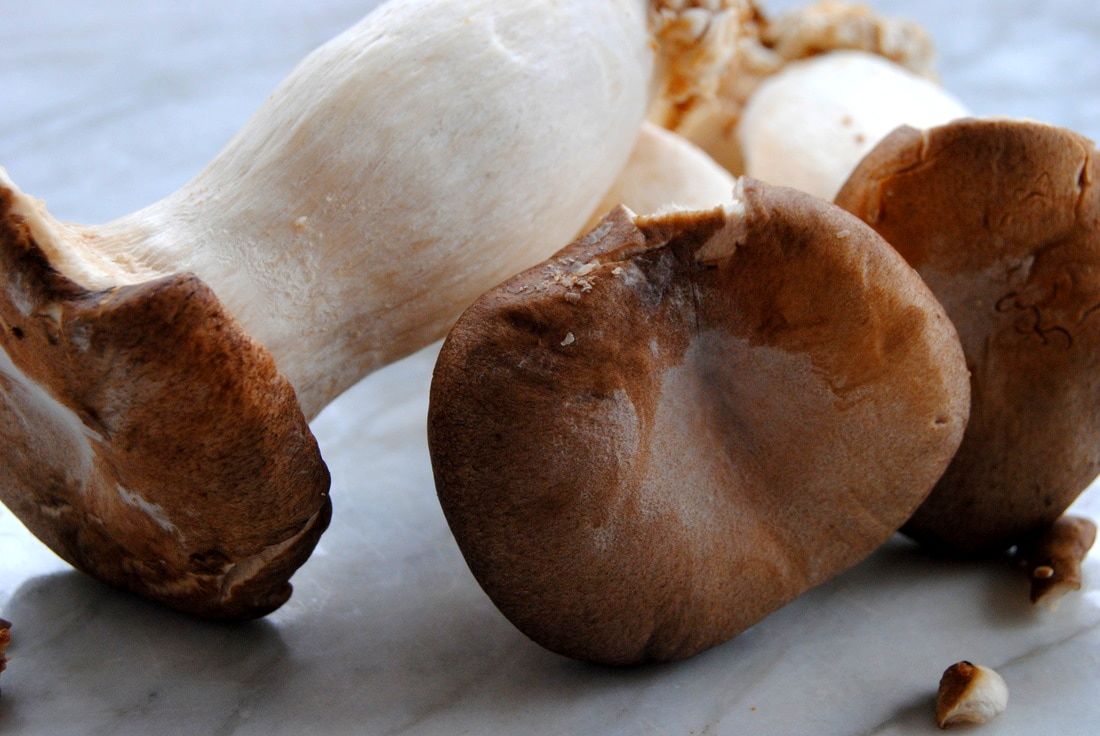
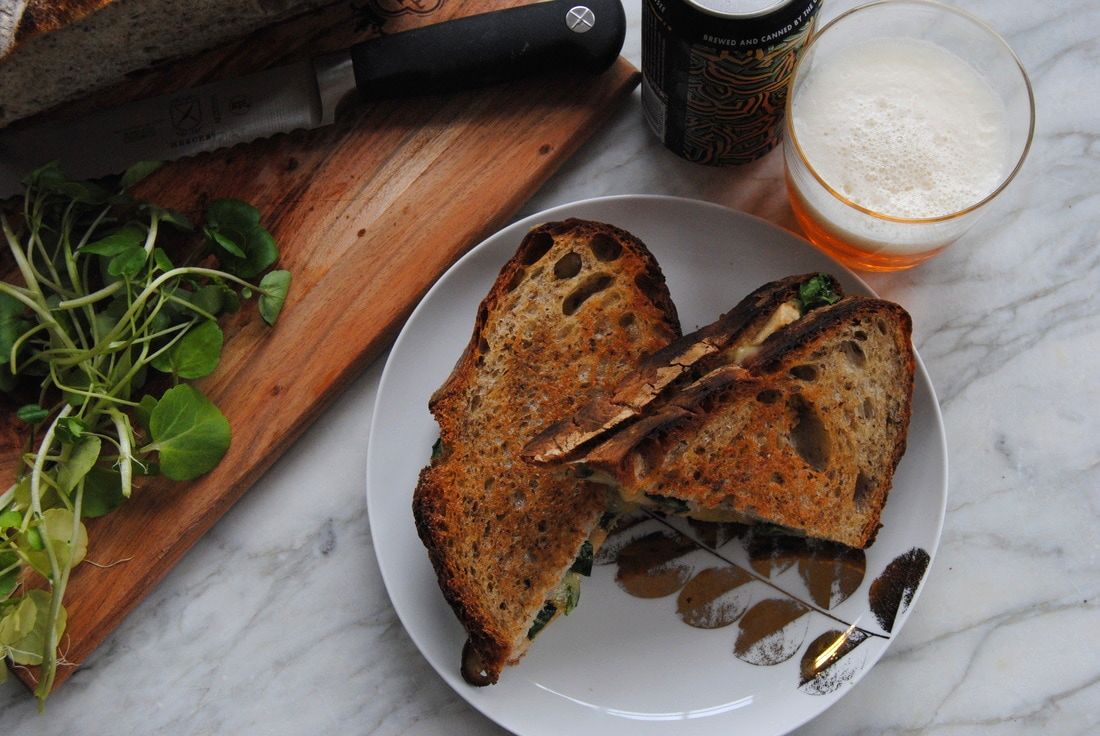
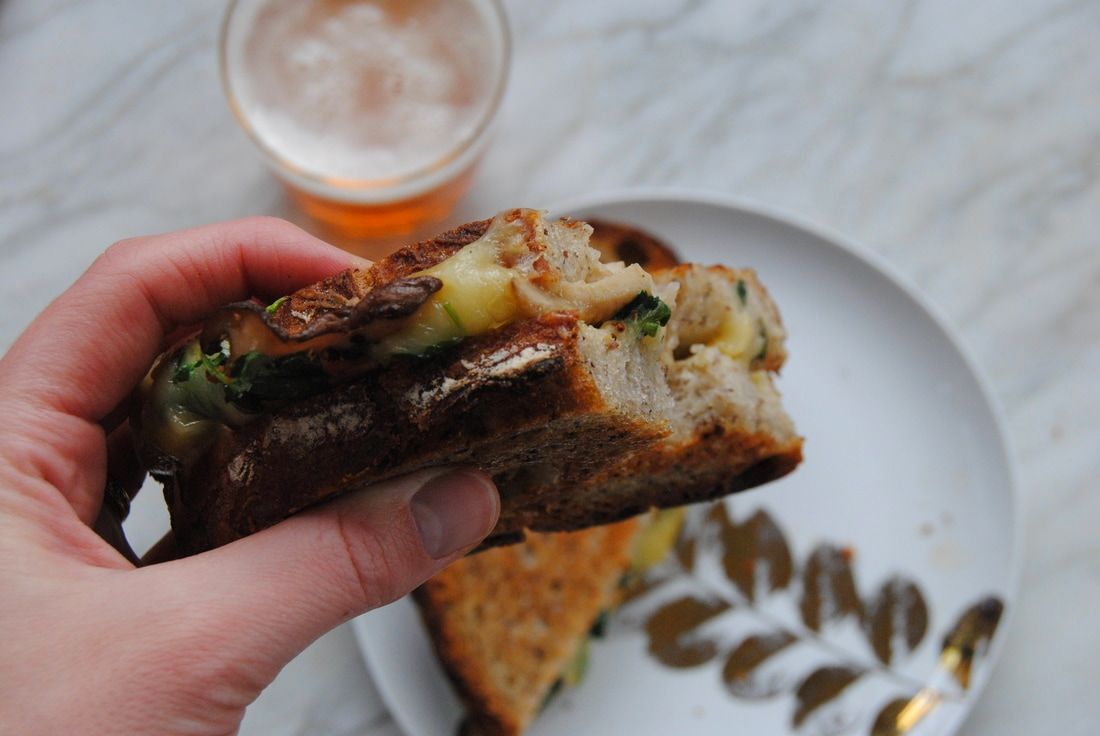
Enjoy, Jess and Cecelia We don't know about you friends but we've had one heck of a busy week! Between work, personal, and social commitments schedules can get out of control. When this happens we find that we may skip on other very important things like eating well, physical activity, and/or sleep. Though skimping on self-care routines usually makes hectic times more stressful and difficult to deal with. That's why our recipe this week is a healthier version of comfort food that can be prepared in under 15 minutes. Instead of a traditional grilled cheese, we've packed this recipe with mushrooms and greens for a more complete meal. Depending on the bread used this may be a very large sandwich that can be shared for two or saved for another rushed moment. If you can't find trumpet mushrooms don't stress! Any thinly sliced mushroom will work. We had fun shopping at the Golden Pacific Market in Edgewater last weekend and found this beautiful mushroom variety there - we hear they carry these year round! So let's get straight to the recipe this week... Trumpet Mushroom Grilled Cheese PREP TIME: 10 minutes TOTAL TIME: 15 minutes Servings: 1 large sandwich Ingredients Mushrooms 3-4 oz trumpet mushrooms, sliced ~1/4" thick 1 tsp butter (we used Kerrygold unsalted butter) sprinkle of salt and pepper Grilled cheese 2 slices of thick crusty bread Sautéed trumpet mushrooms 1/2 cup watercress or green of your choice 2 oz Havarti cheese 1 oz Gruyere cheese 1 tsp stone ground mustard 2 tsp butter In a medium pan melt 1 tsp butter then add sliced mushrooms. Sprinkle mushrooms with salt and pepper and sauté for 2 minutes per side until mushrooms have golden edges then remove from the heat and set aside. Butter each side of bread with 1 tsp butter. Layer inside of bread with cheese, sautéed mushrooms, greens, and mustard. Place the other slice of bread on top with the butter side facing up and cook on a cast iron griddle or in a cast iron pan on medium heat for 4-5 minutes, flipping sandwich half way through cooking time. If the cheese needs help melting, cover the sandwich with a lid over the pan or another pan upside down over the griddle creating a dome for the last 2 minutes of cooking. Cut sandwich in half, serve warm, and enjoy! If saving half for later this does reheat well at 350 degrees for 5-7 minutes. Unbelievably satisfying and so comforting during a hectic week. Taking those extra few minutes to prepare and sit down to a home cooked plate is worth it. We love our grilled cheese paired with a good IPA but beverage choice is up to you! After this, some rest and then back to the business, but right now, we eat.
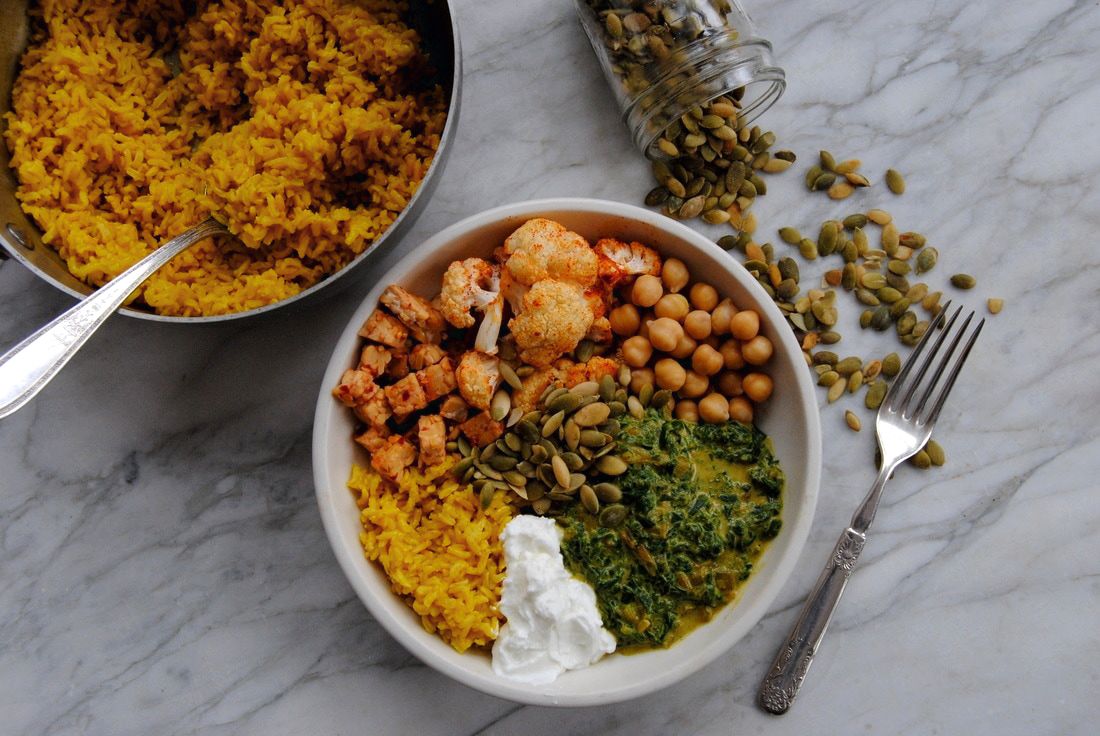
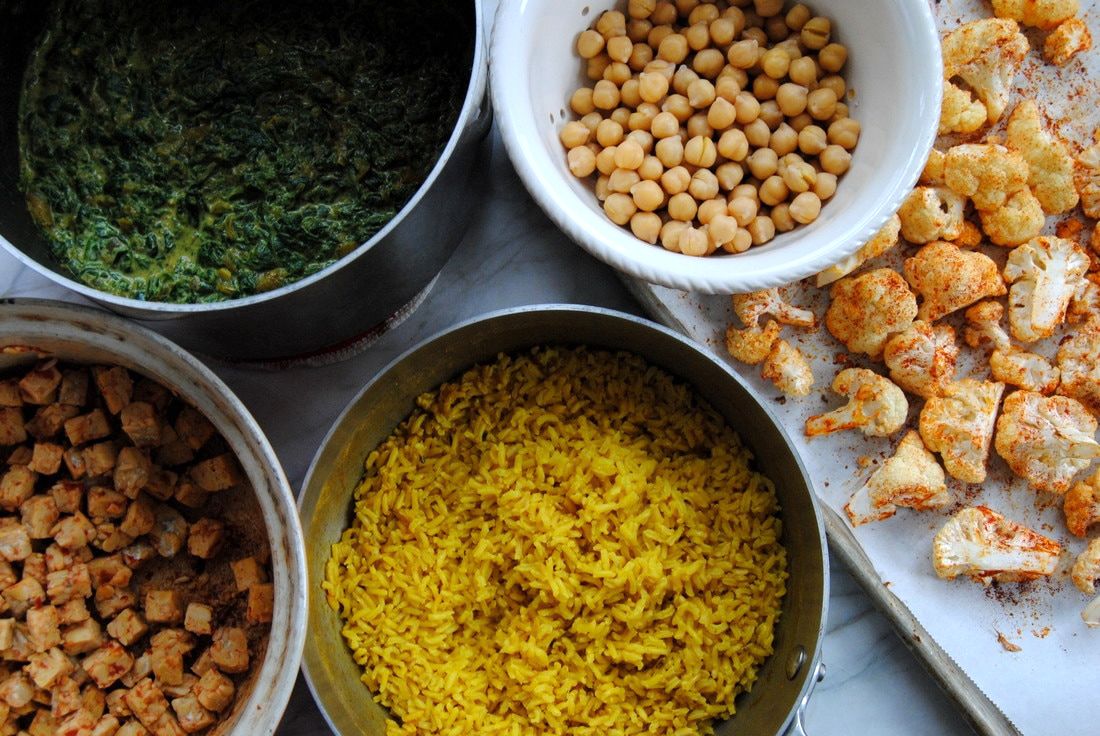
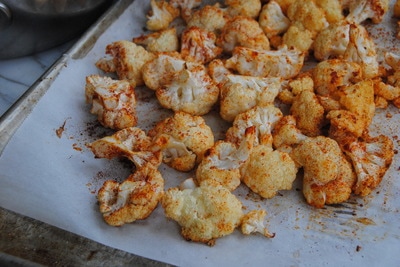
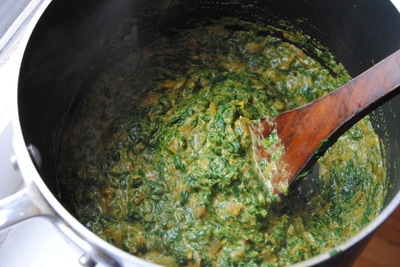
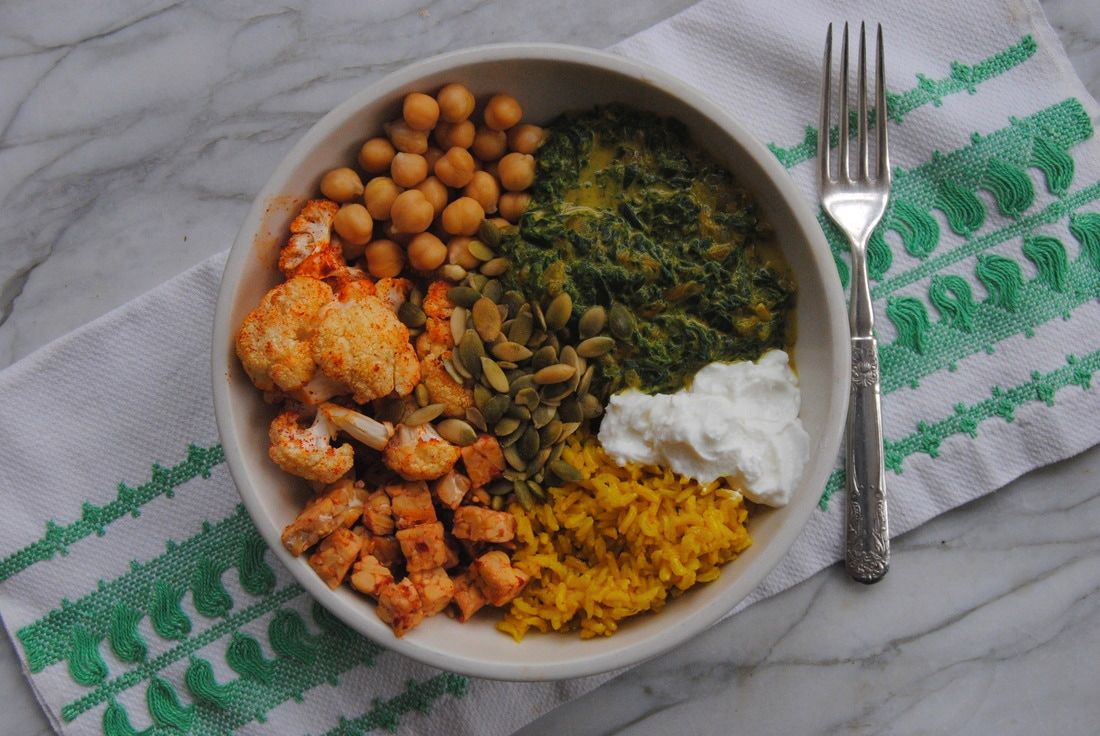
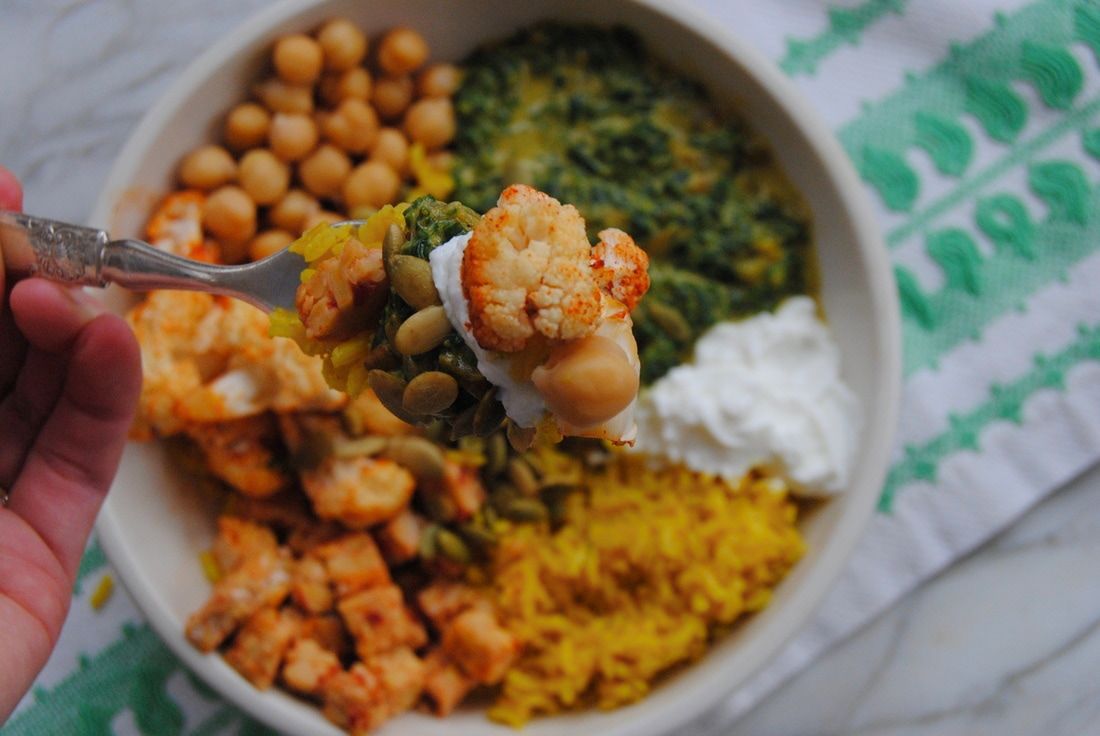
Enjoy, Jess and Cecelia So how are those New Year's healthy eating resolutions going now that we are a few weeks in? Ok, we get it. This is about that time that you may be getting sick of it and ready to ditch all those well meaning goals for 2017. And that's where we come in. This post is just for those of you ready to fall off the healthy eating bandwagon. We promise, you CAN do it! Though healthy eating as a sustainable change does take extra planning and preparation. This recipe is your fresh start - with simple food preparation one day out of the week you have many healthy meals that reheat well. So let's get going! We find that healthy eating is much more doable when you aren't shopping and cooking fresh meals every day of the week. It is important to have some meals that can be stored and still taste well when reheated later in the week when you just need a day off from meal preparation. This saag protein bowl is just that. First, saag is an Indian dish of cooked spinach and spices. It will make you feel super healthy when eating it because you'll remember just how much spinach went into the recipe (a whole pound to be exact!). Since spinach cooks down to a much smaller portion size, it is easy to eat a large portion of this super green when it's cooked. The ingredients for this dish may look like a lot but are all pretty standard food items that you may already have around the house, other than some spices that you may need to add to your collection for Indian dishes. This recipe takes under an hour to prepare and makes a large quantity, so plenty for meals during the week. As mentioned, it reheats very well without creating any "off" flavors as meat based dishes can when re-warmed. In the interest of time (that can be spent food prepping), on to the recipe. Saag Protein Bowls PREP TIME: 45 mins TOTOAL TIME: 50 mins Servings: 6 bowls Ingredients Saag 1 lb organic spinach 2 small or 1 large sweet onion, chopped 1 Tbsp coconut oil 3 cloves garlic, minced 2 Tbsp ginger juice or 1 tbsp fresh ginger, chopped 3/4 can full fat coconut milk 2 tsp coriander powder 2 tsp turmeric powder 1 tsp cumin powder 1 tsp curry powder (we used masala curry) 1/2 tsp cayenne powder 1/2 tsp sea salt 1/4 tsp cinnamon powder 1/8 tsp ground cloves Rice 1 cup brown rice 2 cups water 1 tsp turmeric 1 tsp coconut oil 1/4 tsp sea salt Cauliflower 1 head organic cauliflower 1 Tbsp coconut oil, melted 2 tsp paprika 1/4 tsp sea salt Tempeh 8 oz organic tempeh 2 Tbsp ginger juice or 1 tbsp fresh ginger, chopped 2 Tbsp garlic chili paste Chickpeas 1 can organic chickpeas, rinsed and drained 1/4 tsp sea salt Toppings 1/2 cup toasted pepita seeds 1 -1.5 cups plain Greek yogurt (optional if not making bowls vegan) Preheat oven to 350 degrees. In a medium pan combine 1 cup rice, 2 cups water, 1 tsp turmeric, 1 tsp coconut oil, and 1/4 tsp sea salt. Bring to a boil, then reduced to a simmer and cover pan with a lid. Continue cooking until rice is soft and the water has been absorbed, about 30-45 minutes. While the rice is cooking, wash and chop cauliflower into bite sized pieces then place on a parchment lined baking sheet. Add melted coconut oil, paprika, and sea salt then use your hands to evenly coat the cauliflower pieces. Place in preheated oven and roast for 25-30 minutes or until tender. To make the saag, add coconut oil and chopped onion to a saute pan on medium heat. Cook onions until translucent and golden on the edges, about 7 minutes. Add chopped garlic, ginger juice, and spice mixture to onion and continue cooking for an additional 2 minutes. Remove pan from heat, place spiced onions in a food processor or blender and blend or pulse until mixture comes together and is roughly chopped. You do not want to over blend the mixture and should still be able to see full pieces of onions. In the same saute pan you cooked the onions, wilt the spinach working in batches until a full pound of spinach has been cooked down, Add cooked spinach to the food processor or blender that contains the onion spice mixture and blend or pulse until spinach is roughly chopped but not liquefied. Place blender contents back into the saute pan, add coconut milk, stir to combine, then simmer for 15 minutes. While the saag is simmering, cube tempeh into bites sized pieces then add to a pan along with chili garlic paste and ginger juice. Cook on medium-low heat for 5 minutes stirring often, until tempeh has warmed and absorbed the chili and ginger. Drain and rinse the chickpeas then place in a bowl and sprinkle with sea salt. To assemble a bowl, add ~1/6 of the prepared rice, roasted cauliflower, tempeh, chickpeas, and sagg. Top bowls with pumpkin seeds and plain yogurt (if desired). Divide the rest of the ingredients among 5 more bowls fitting with air tight lids and place in the fridge for quick, healthy, flavorful, high protein meals all week long! We recommend keeping the yogurt separate and adding once you have re-warmed your saag bowls on the stove-top or in the oven at 350 degrees. If choosing to keep this bowl vegan, skip the yogurt and add a touch of full fat coconut milk to the top of your bowls. How right were we? You can absolutely do it! With a little extra thought and preparation, healthy eating can be a sustainable change for you this year. Remember that the extra time spent preparing will pay off when you feel great and achieve your personal goals. We hope you enjoy the kick of spices, variety of vegan proteins, and hearty dose of daily greens that this protein bowl provides. We've been full and satisfied with this recipe so far this week.
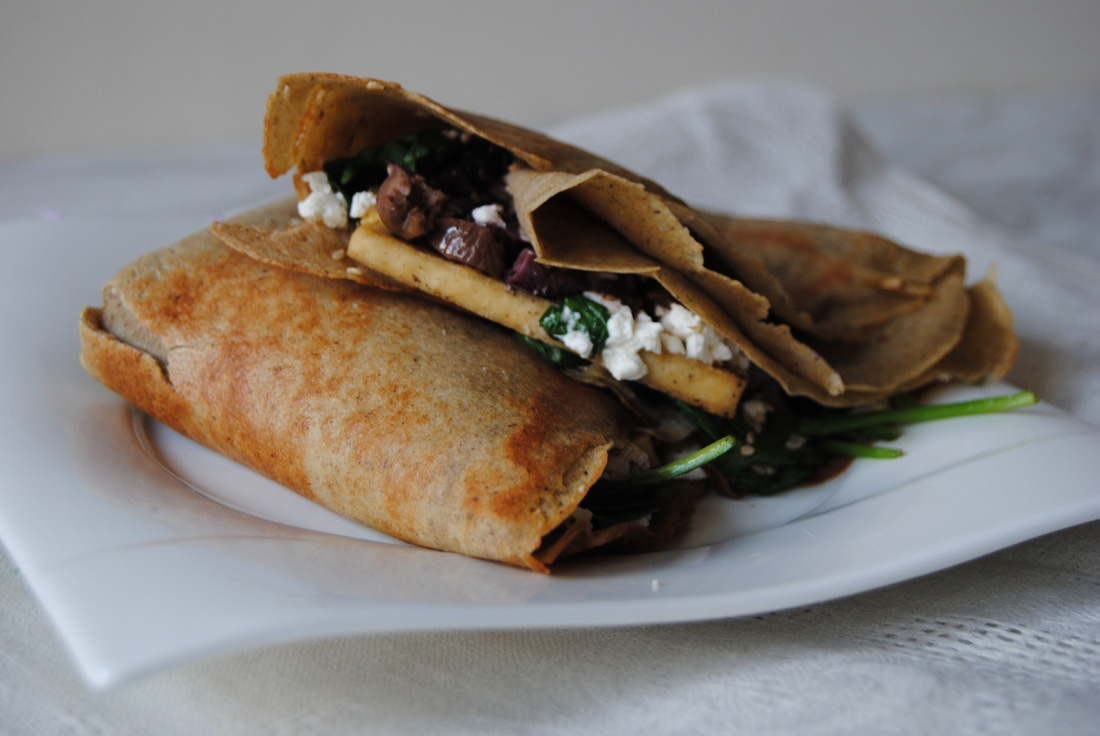
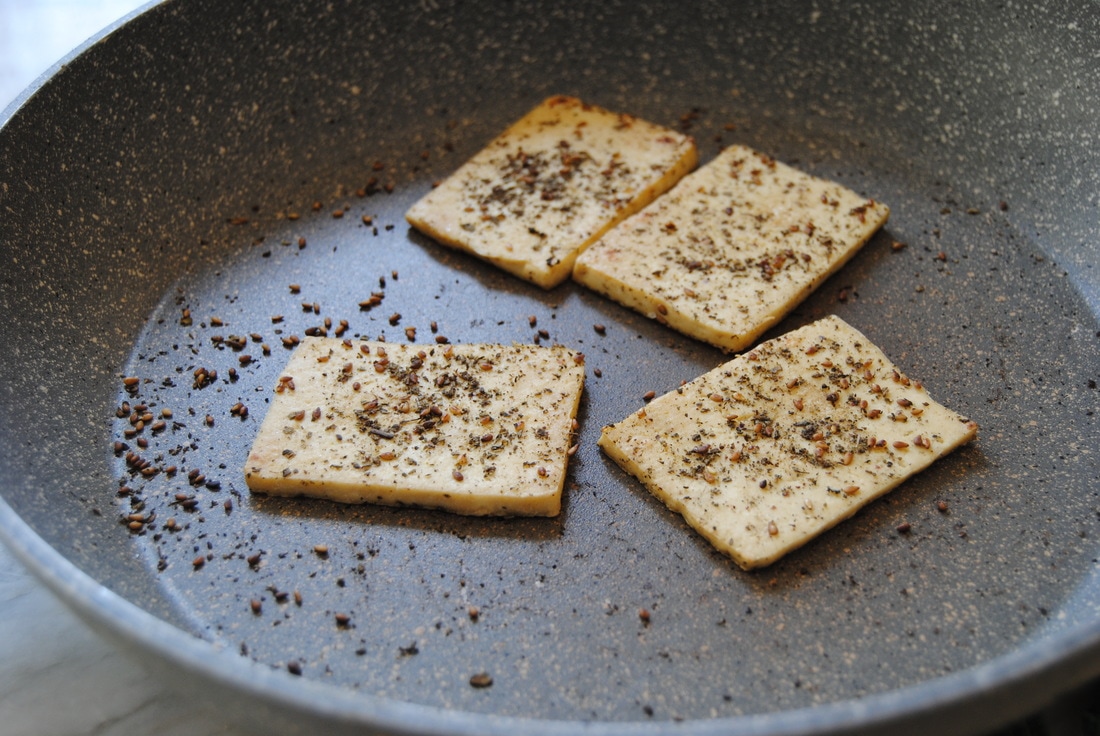
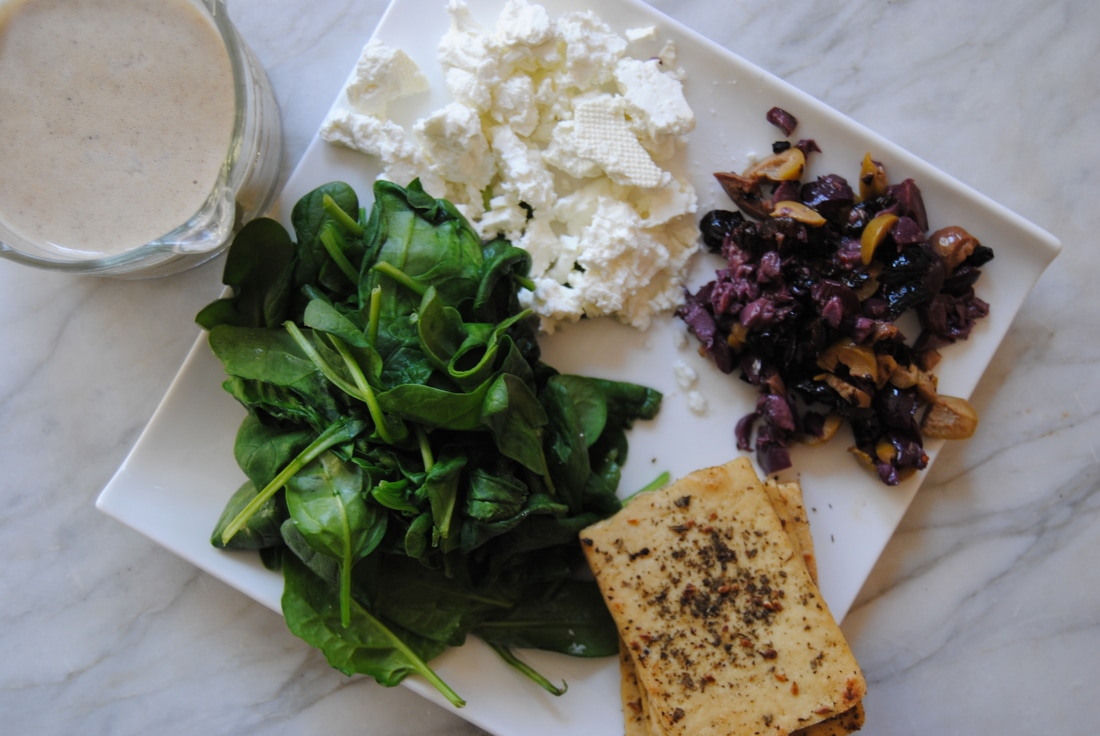
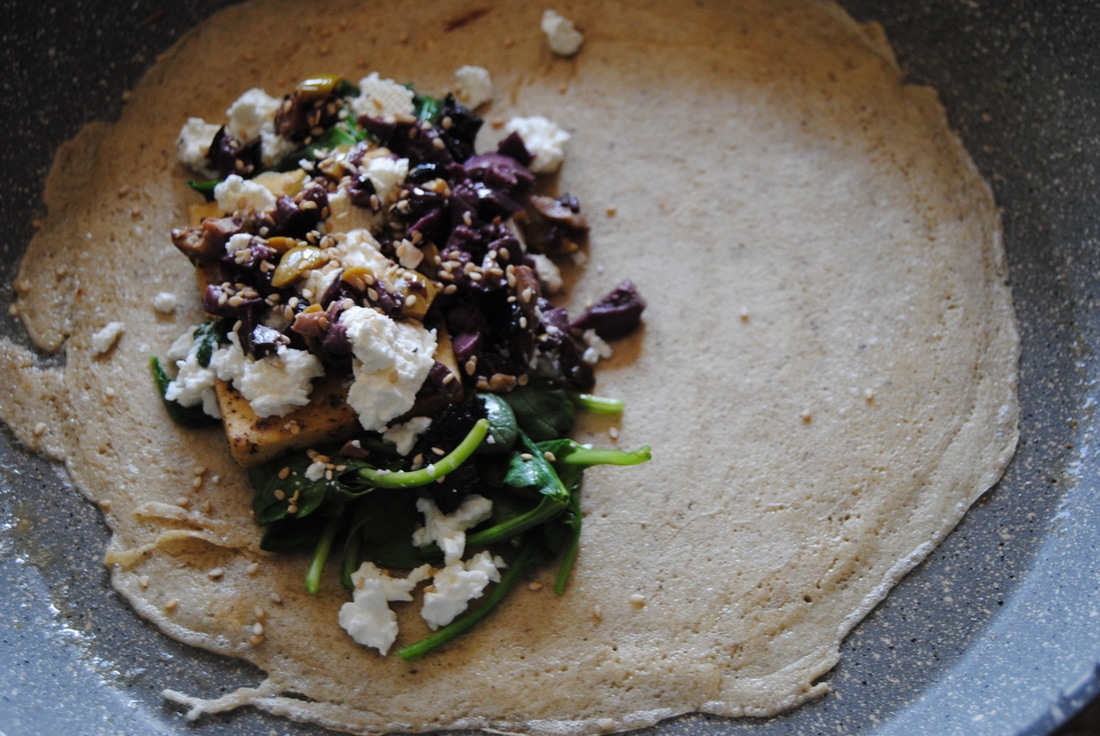
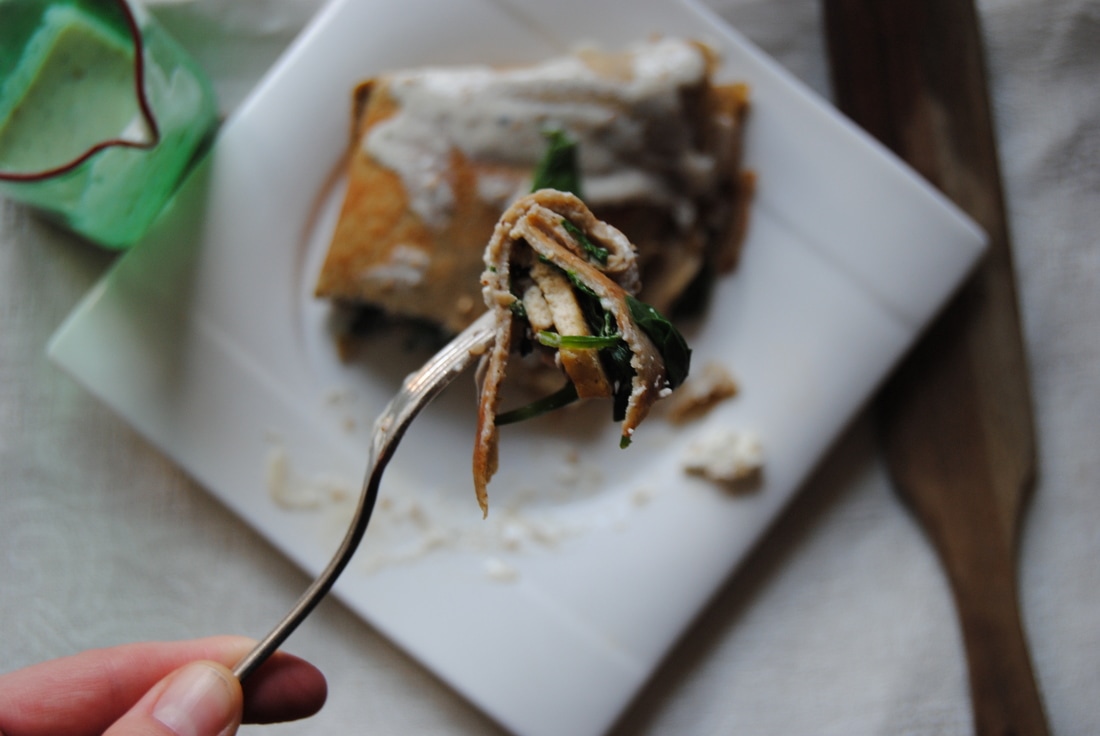
Enjoy, Jess and Cecelia Do you ever get so sick of your same lunch and dinner meals that you just think, oh crap, what am I going to eat!? Excuse our language but in this instance we want you to instead think, oh crepe! Though typically thought of as a decadent and overly sweet breakfast indulgence, crepe dough itself is a healthy homemade choice and is versatile enough to be transformed into a lunch or dinner meal. This protein packed, Mediterranean style crepe recipe will be your answer the next time you don't know what to eat. We were even able to pull this crepe recipe off without eggs, making it vegan friendly, but still gave you both recipe options. But before we get to the crepes, more on another cooking method we just love. If you're in the market for new ways to prepare vegetarian protein options (as we always are), than the dry fry tofu method is for you! It is as simple as the name sounds, a frying method that does not require oil. The tofu is cut into thin slices and fried in a grease-less non-stick pan over medium-low heat with a watchful eye to make sure that the tofu doesn't burn or stick. Flipping the tofu pieces every 2 minutes is a good way to monitor the cooking progress and make sure the pieces aren't sticking. Some tricks for preventing the tofu from sticking without oil include choosing the right tofu product, we think extra firm works best, and draining some of the tofu water before cooking. You can gently squeeze the block of tofu after removing from the packaging liquid and then wrap in a dish towel and let the block sit, weighted with a plate or book on top of the towel, for about 15-30 minutes to allow the towel to absorb some of the water. Your frying pan is also important and should be non-stick, though we recommend alternatives to the usual non-stick varieties as these are typically made using a chemical coating (Teflon is popular) that can potentially leach into food. We suggest spending the time and money to invest in a well seasoned cast iron, ceramic, or enameled cast-iron frying pan. These options can work as "non-stick" without oil and don't come with the potential for chemical exposure. Towards the end of cooking the tofu can be seasoned with herbs/spices of your choice (as we did) but be careful not to burn them. The final product is wonderfully crispy on the outside and still soft on the inside and absorbs sauce nicely in a finished dish. Basically, you haven't really tried tofu until you've had it dry-fry. And don't worry if you do have some sticking to the pan on your first try, just peel the pieces up with a fork and maybe try a different pan, lower heat, or firmer tofu your next go around. You'll get it! Mediterranean Dry-Fry Tofu Crepes PREP TIME: 20 minutes TOTAL TIME: 25 minutes Servings: 4 crepes Ingredients Crepe batter 1/2 cup water 1/2 cup organic unsweetened plain soy milk (or 1/2 cup organic cow or goat milk if not making vegan) 1/2 cup whole wheat flour 1/2 cup buckwheat flour 1/2 tsp sea salt 2 Tbsp ground flax seeds + 4 Tbsp water (or 2 organic eggs if not making vegan) 1 Tbsp coconut oil or butter to grease the bottom of the pan Filling 8 oz organic firm tofu 6 oz organic raw spinach 4 oz feta cheese (We used Bulgarian sheep milk feta. If making vegan we suggest 4 Tbsp roasted and salted chopped cashews instead.) 4 Tbsp olives, chopped (we used a combination of black and green olives) 2 tsp green za'atar or spice mix of your choice 4 tsp unbleached sesame seeds 1/8 tsp sea salt 1/8 tsp cracked black pepper Yogurt sauce 2 Tbsp plain yogurt 1 Tbsp olive oil 2 tsp lemon juice 1/4 tsp sea salt 1/8 tsp cracked black pepper 1/4 tsp garlic powder 1 tsp olive brine juice To make the crepe batter, combine the 2 Tbsp ground flax seeds with 4 Tbsp water, whisk with a fork, then allow to sit until thickened. Add the remaining water, milk, flours, salt, and flax seed/water mixture to a blender and blend on high for 30 seconds or until all ingredients come together. Set aside while you prepare the filling. Drain tofu from water, slice into thin 1/4" slices and sprinkle with sea salt, pepper, and za'atar seasoning. Using a non-stick or seasoned cast iron skillet, bring heat up to medium and add the seasoned tofu to the hot pan. Dry fry tofu for 3-5 minutes per side or until tofu is a light golden color then set aside. Using the same pan you used to cook the tofu, lightly wilt the spinach then set aside. To make the yogurt sauce, combine the yogurt, olive oil, lemon juice, sea salt, pepper, garlic powder, and olive brine juice and whisk until combined. To make the crepes, grease a 9" non-stick pan with coconut oil and place over medium heat. Pour 1/4 of the batter in the pan and holding the pan at an angle above the burner quickly swirl the pan to allow the batter to cover the bottom of the pan as close to the edge of the pan as possible. Continue to cook the crepe until it starts to form bubbles and the batter appears set. This batter cooks quickly. Using a flat wooden or metal spatula, check the bottom of the crepe after ~1-2 minutes of cooking. Once the crepe is golden and set all the way though, carefully flip the crepe and continue cooking on the other side for an additional ~1-2 minutes. After flipping and while the second side is cooking, add the filling ingredients towards the bottom of the crepe starting with the tofu, spinach, olives, feta cheese, and then the sesame seeds. Fold the crepe in half, and make another fold forming a triangle shape. Continue this process until all 4 crepes have been made. Serve crepes warm topped with yogurt sauce. Note that if you do not plan to serve all crepes at the same meal, the crepe batter can be stored in an air tight container in the fridge for up to 2 days. Allow the batter to come to room temperature and whisk to combine before cooking crepes according to instructions above. Crepe dough is just too good and so much easier to make at home than most people believe. The spongy dough is the perfect wrap for the mix of salty goodness inside this recipe. And the pack of protein from the feta cheese and dry-fry tofu will keep you full and satisfied until your next, oh no, what's for lunch/dinner moment. A crepe, that's what.
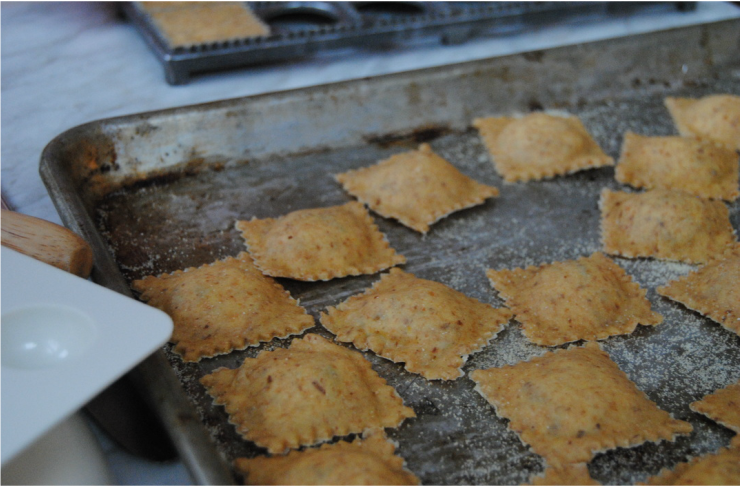
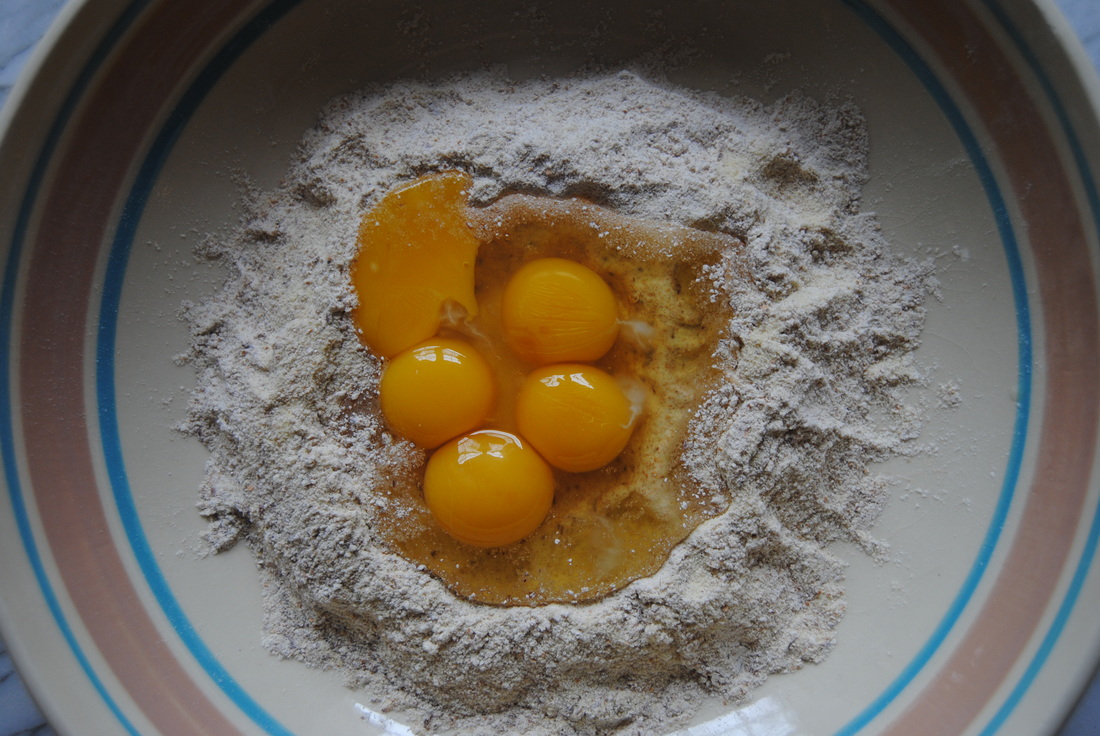
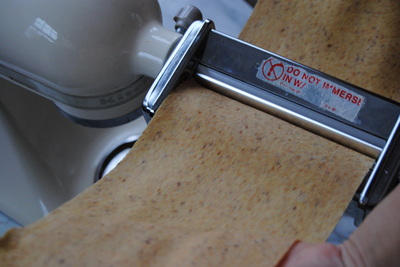
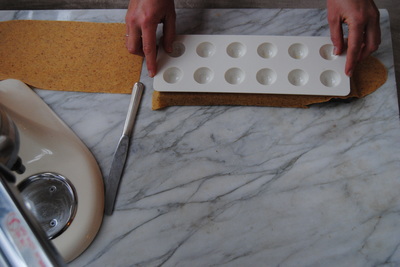
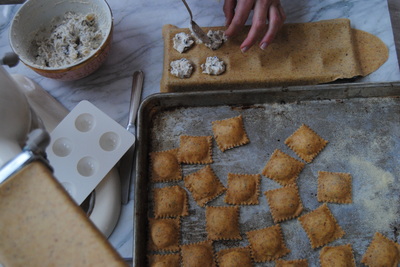
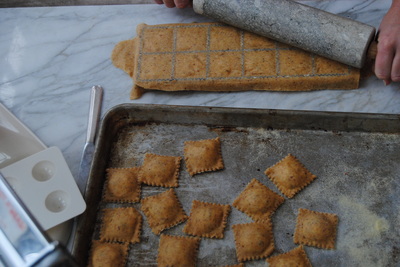
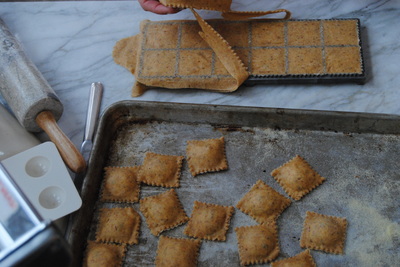
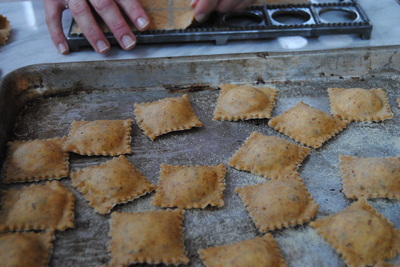
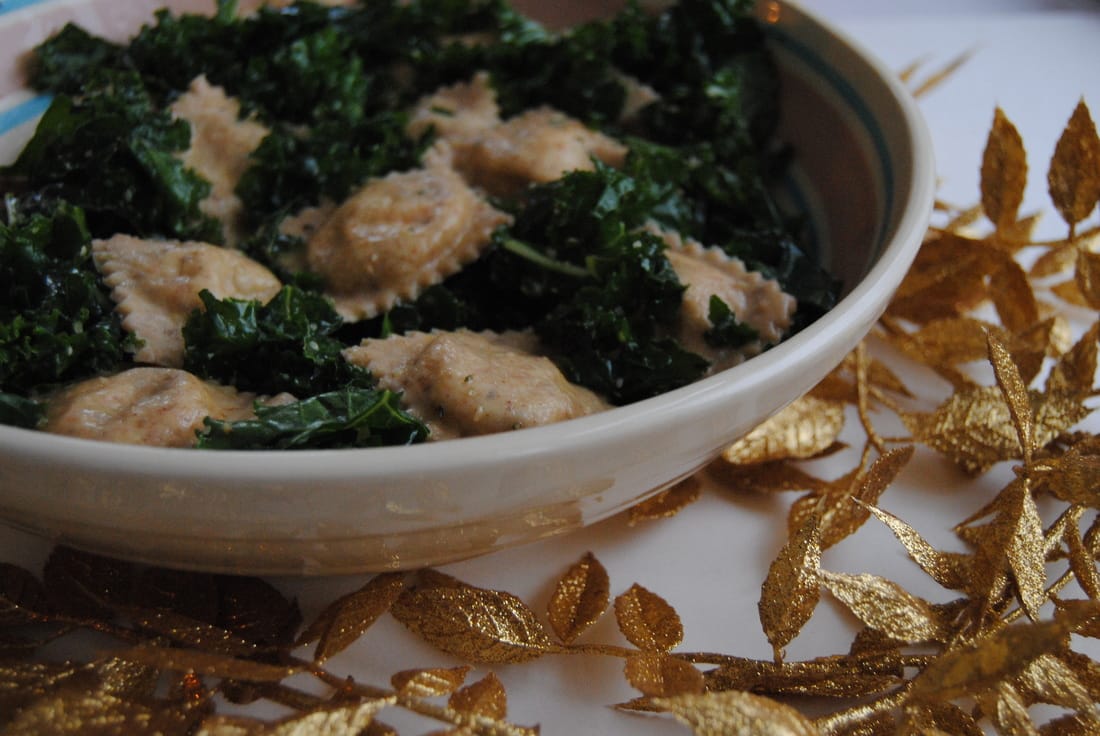
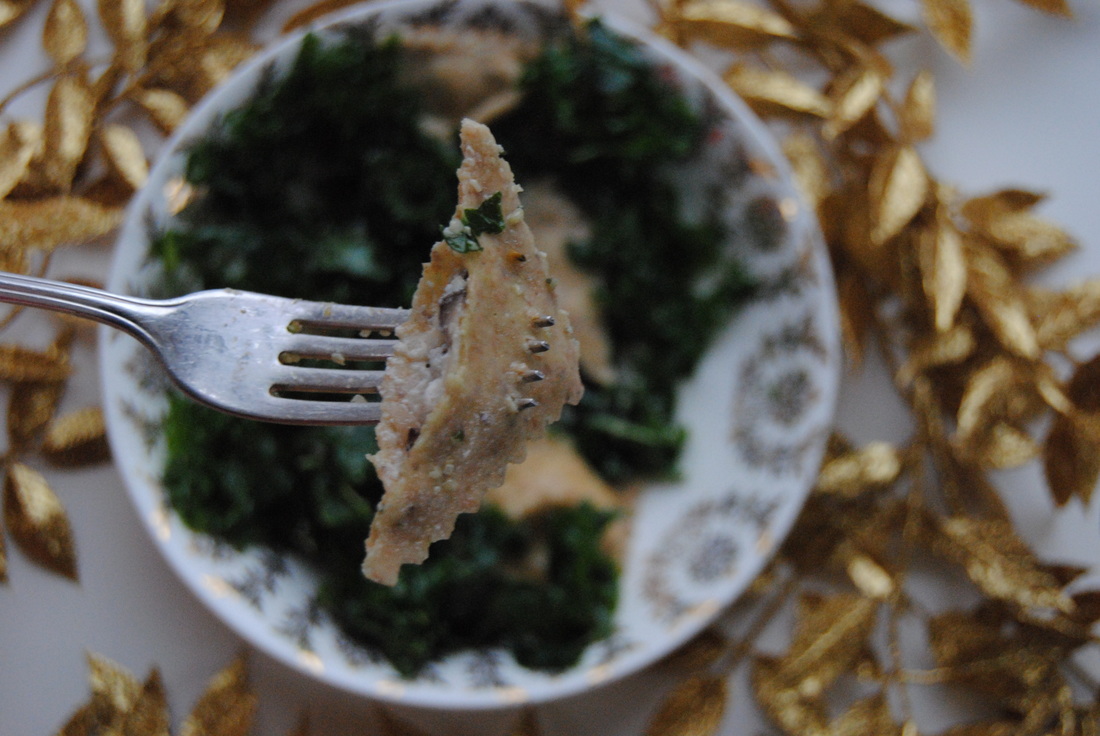
Enjoy, Jess and Cecelia Okay, so last week we provided some special kitchen tips to make the holidays a little easier and this week we are tackling home pasta!? We get how different these posts must seem, but think that vacations around the holidays can be the perfect time to have some fun and try something new in the kitchen. If you've been wanting to tackle homemade pasta, or even if you haven't, now is your chance! Add a pasta roller (hand or electric) to your holiday wish list and let's get started. First of all we want to comment on the fact that this is our first recipe including eggs - a complete must for fresh, homemade pasta. Being plant based foodies we do try to use plant based egg substitutes when possible to keep plants the focus of our diets. We find this quite easy when baking as ground flax seed produces a similar texture in the final product and what we feel is a superior taste in certain baked goods when substituted for eggs. However, there are specific homemade recipes that just aren't possible or the same without eggs - so we use them! Eggs provide a good dose of protein, B vitamins, and are one of the few natural sources of vitamin D. When using eggs we try to choose eggs that come from happy/healthy animals so eggs from local farmers or friends raising chickens are our first choice. This would be considered "pasture raised" and will likely not be found in stores. If purchasing eggs from the store we do spring for the more expensive options which include organic, cage-free, and free range. Though these designations do not guarantee that the chickens were raised as happily and healthfully as "pasture raised," the animal conditions will be better than most standard grade. One day we will have a chicken coop along with our kitchen to ensure the quality of our eggs - hey we can dream right! But back to pasta making, with the right ingredients and tools it is very manageable and so fun. We have detailed instructions for you and step by step pictures of the raviolis we created this week. Good luck! Shiitake Mushroom Ravioli Kale Salad with Brown Butter Miso Sauce PREP TIME: 1 hour TOTAL TIME: 1 hour 30 mins Servings: salad serves 4 (recipe makes 48-50 raviolis) Ingredients Dough 1 1/2 cup spelt flour 1/2 cup semolina flour 1 Tbsp ground flax seed 2 whole eggs 3 egg yolks Filling 5 oz shiitake mushroom, diced 1 medium yellow onion 1 medium garlic clove, minced 2 Tbsp butter 1/4 tsp sea salt 1/8 tsp cracked black pepper 7 1/2 oz whole milk ricotta cheese 4 oz goat cheese Sauce 4 Tbsp unsalted butter (we used Kerrygold butter) 2 tsp miso paste, any variety would work 2 Tbsp starch water (reserved from cooked ravioli) 2 Tbsp organic half and half or cream 1 small clove garlic, minced Kale Salad 6 cups raw kale 2 Tbsp extra virgin olive oil 1/4 tsp sea salt 2 Tbsp shelled hemp seeds In a shallow dish mix together spelt flour, semolina flour and ground flax seeds. Make a well in the middle of the flour mixture and add both the eggs and egg yolks. Using your hands, mix together flours and eggs until a dough is formed. Using a standing mixer with dough hook attachment or by hand knead dough for ~10 minutes or until a smooth dough that holds its shape is formed. Add 1 Tbsp additional flour at a time if dough is sticky while kneading. Make sure you knead the dough long enough to properly develop the gluten which will results in a strong and stretchy dough. Cover finished dough with plastic wrap and allow to sit at room temperature while you prepare the filling. To make the filling, begin by dicing the onion and mushrooms. In a saute pan on medium heat add butter and chopped onions and cook until onions are wilted with golden edges, ~5 minutes. Add chopped mushrooms to the pan along with the minced garlic and continue to cook for and additional 5 minutes. Remove from heat, place sauteed vegetables in a bowl, then add both the ricotta cheese and goat cheese. Add salt and pepper and stir until mixture is combined. Allow mixture to cool at room temperature while you roll out the pasta dough. Cut dough into 4 segments. Either using a standing mixer with the pasta attachment or a hand held pasta machine, set the roller to #1 (and if using a standing mixer turn to speed #2) then run pasta dough through the machine. Fold pasta sheet in half and repeat this step 4 times. Set roller to #2 then feed pasta sheet through the machine twice (now without folding) and continue this process until you have reached the #5 setting. The higher the number, the thinner the dough. Place finished dough on well floured surface and cut dough in half to fit metal ravioli mold making sure to leave about 1" of additional dough on both ends. Using the ravioli press, gently indent dough to create wells in the dough - this is where your filling will be placed (see photo above). Carefully place ~1 tsp of filling in each well then place the other flat pasta sheet on top. Using a rolling pin, press top dough sheet onto bottom filled dough sheet. The weight of the rolling pin along with the zig-zag grooves on the metal mold will seal the raviolis. At this point you should be able to remove the excess dough from the edges of the ravioli mold. Carefully remove each ravioli from mold and place on lightly floured pan. Repeat process with eat segment of dough until you have made ~48-50 raviolis. Cook raviolis in salted boiling water, 8-10 at a time, for 5-6 minutes. Repeat process until all raviolis are cooked. Please note, this recipe calls for 16 raviolis (4 per person). Any uncooked raviolis you do not plan to eat within 2-3 days should be placed on a pan in a single layer and put in the freezer until fully frozen . The frozen raviolis can then be stored in a freezer bag for up to 3 months. To make the sauce add butter to a small sauce pan and cook on medium heat, stirring constantly until butter begins to brown and become fragrant. Lower heat to a simmer, add garlic and miso paste to brown butter, and continue to stir until the miso is well incorporated. Add cream and starch water and continue to stir until sauce comes together. Remove from heat and set aside. To make the messaged kale salad, wash, destem, and chop the kale. Add olive oil, salt, and hemp seeds and begin to message kale until it is well covered and kale is slightly wilted. To assemble the salad, combine the cooked ravioli with the brown butter sauce then place over messaged kale salad. Serve warm with additional brown butter sauce as desired. How fun was that? And so worth it! We just love, love this meal! The raviolis are so fresh and rich that they seem to melt in your mouth. The massaged kale wilts slightly from the warmth of the ravioli yet still provides a delightful crunch. To top this off, the brown butter sauce envelopes everything with a decadent finish. Just the meal to enjoy this holiday season or anytime at all.
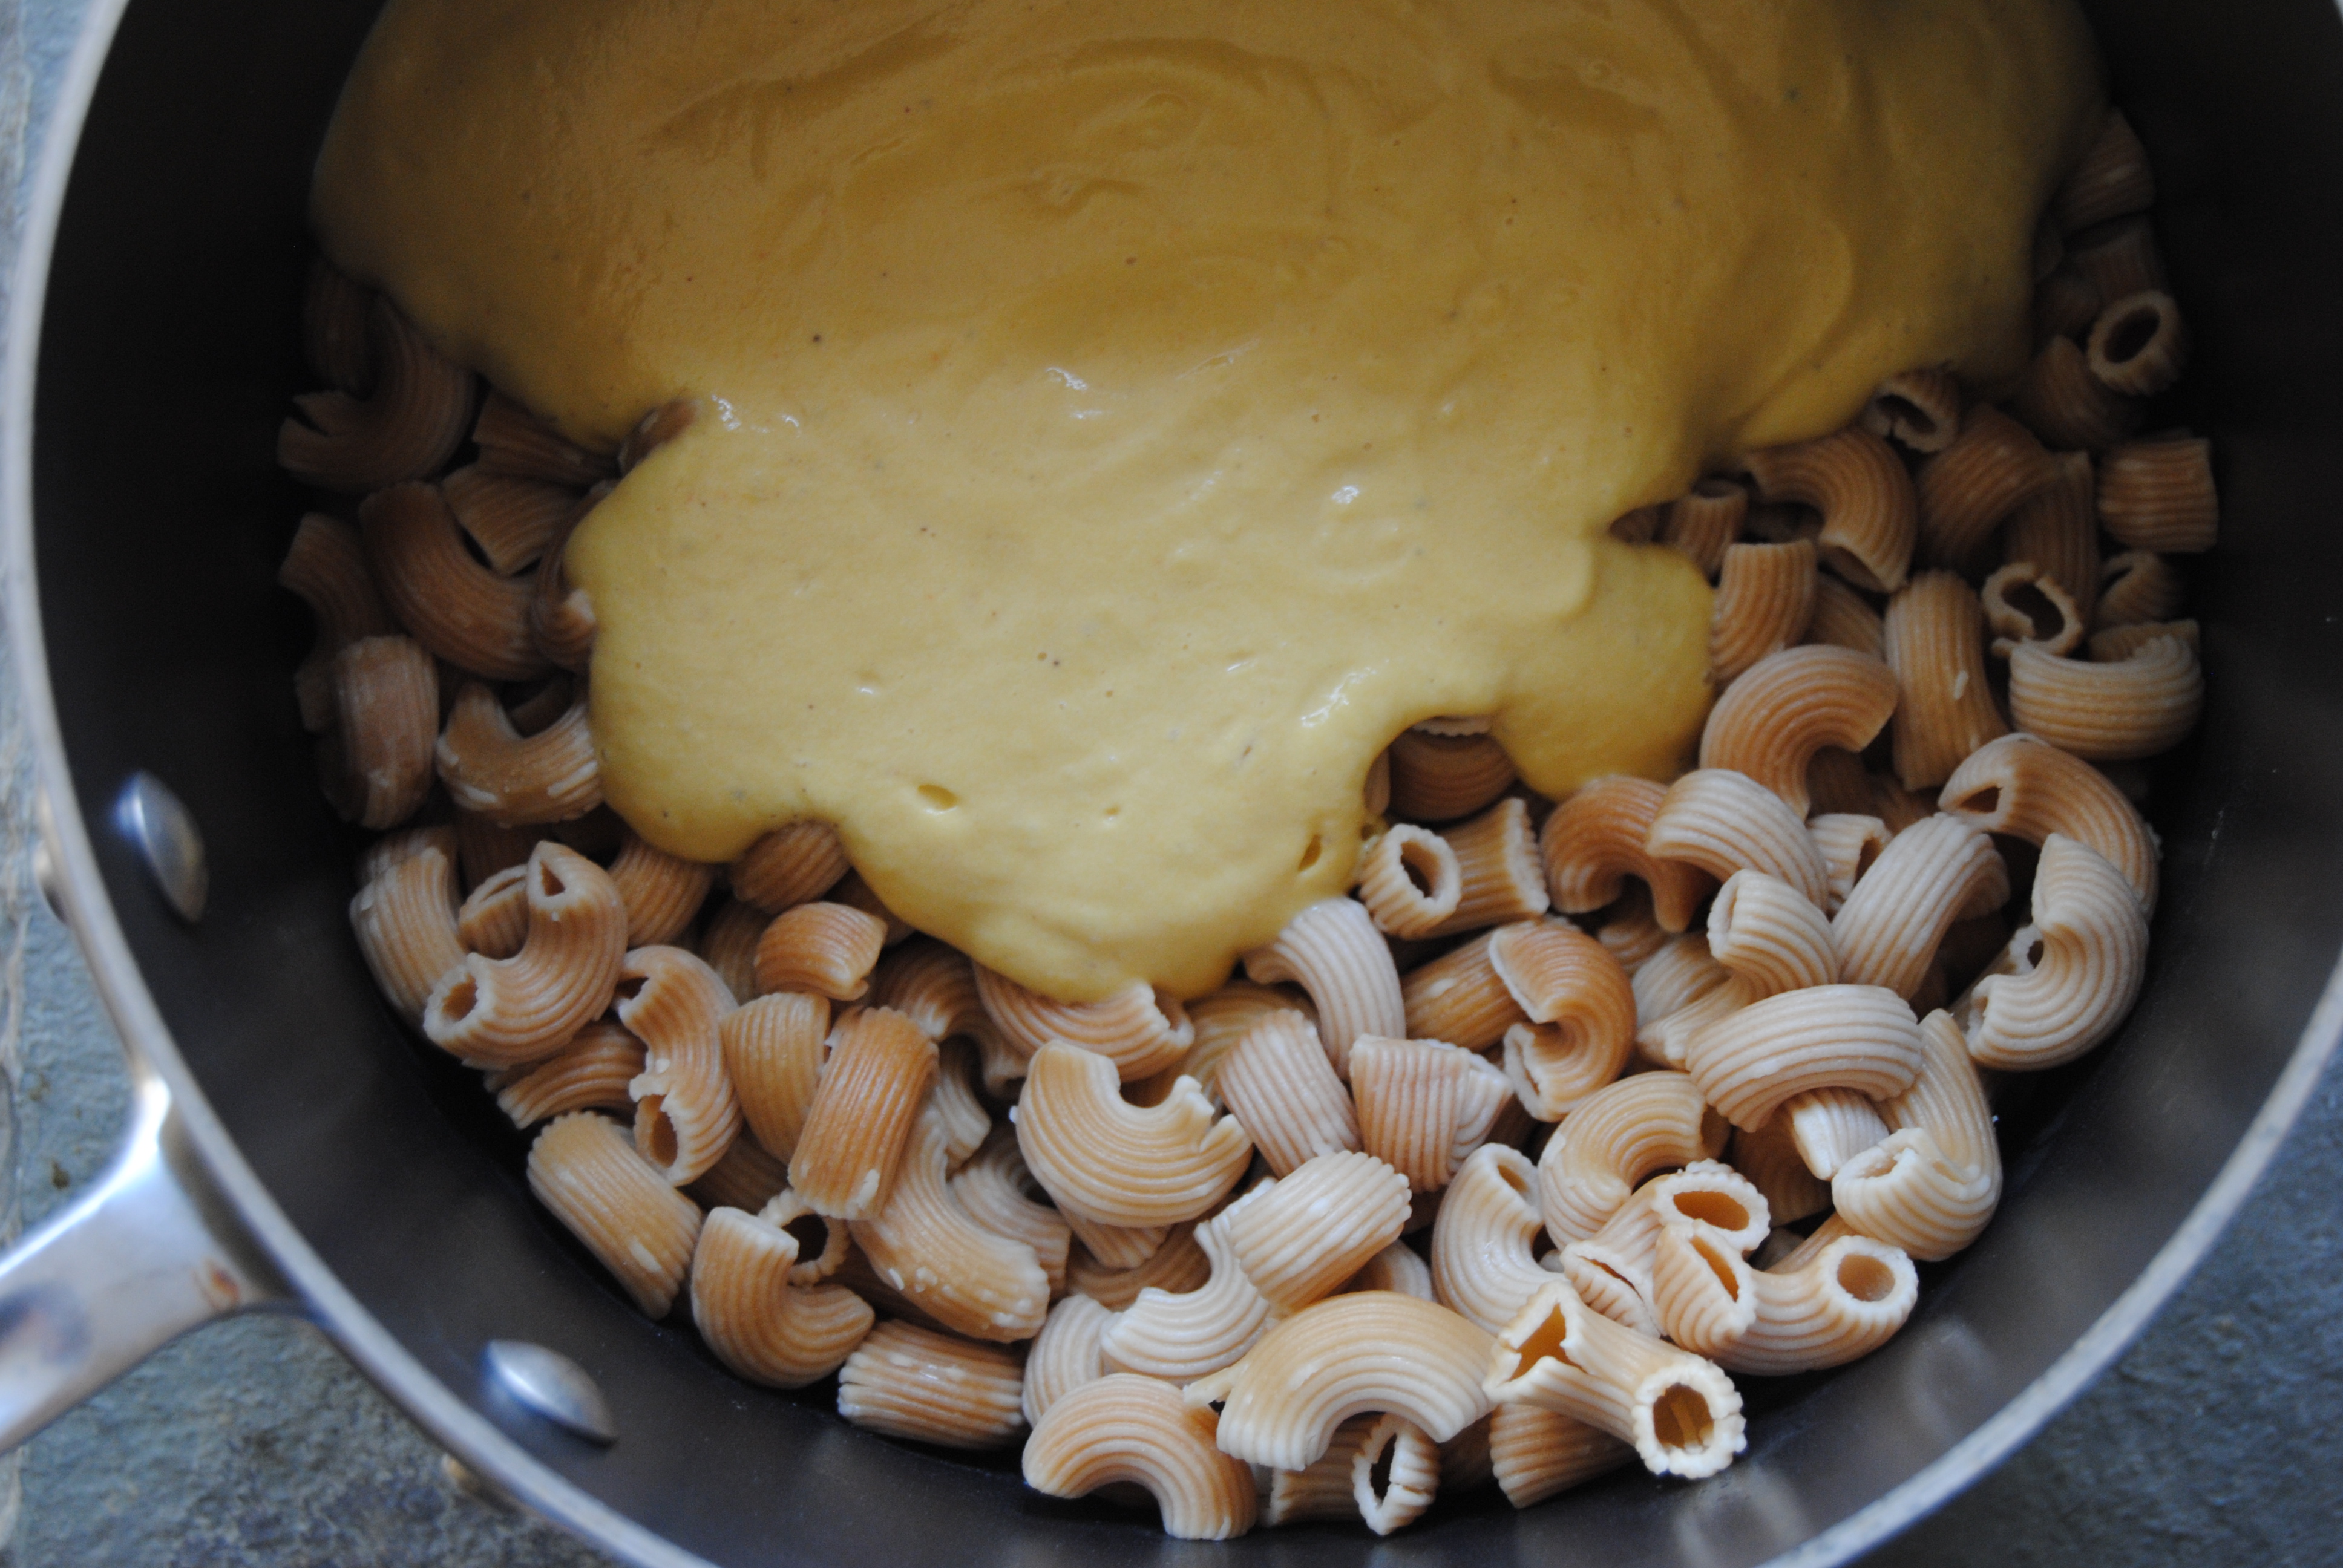
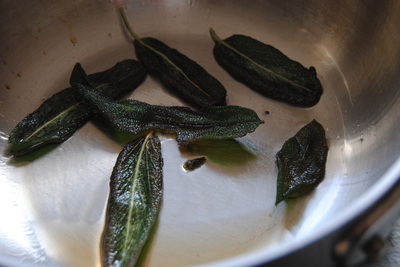
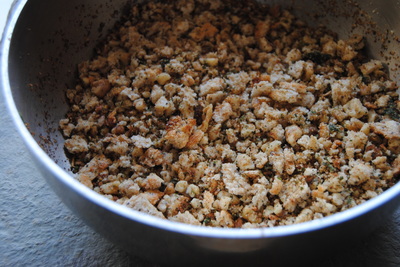
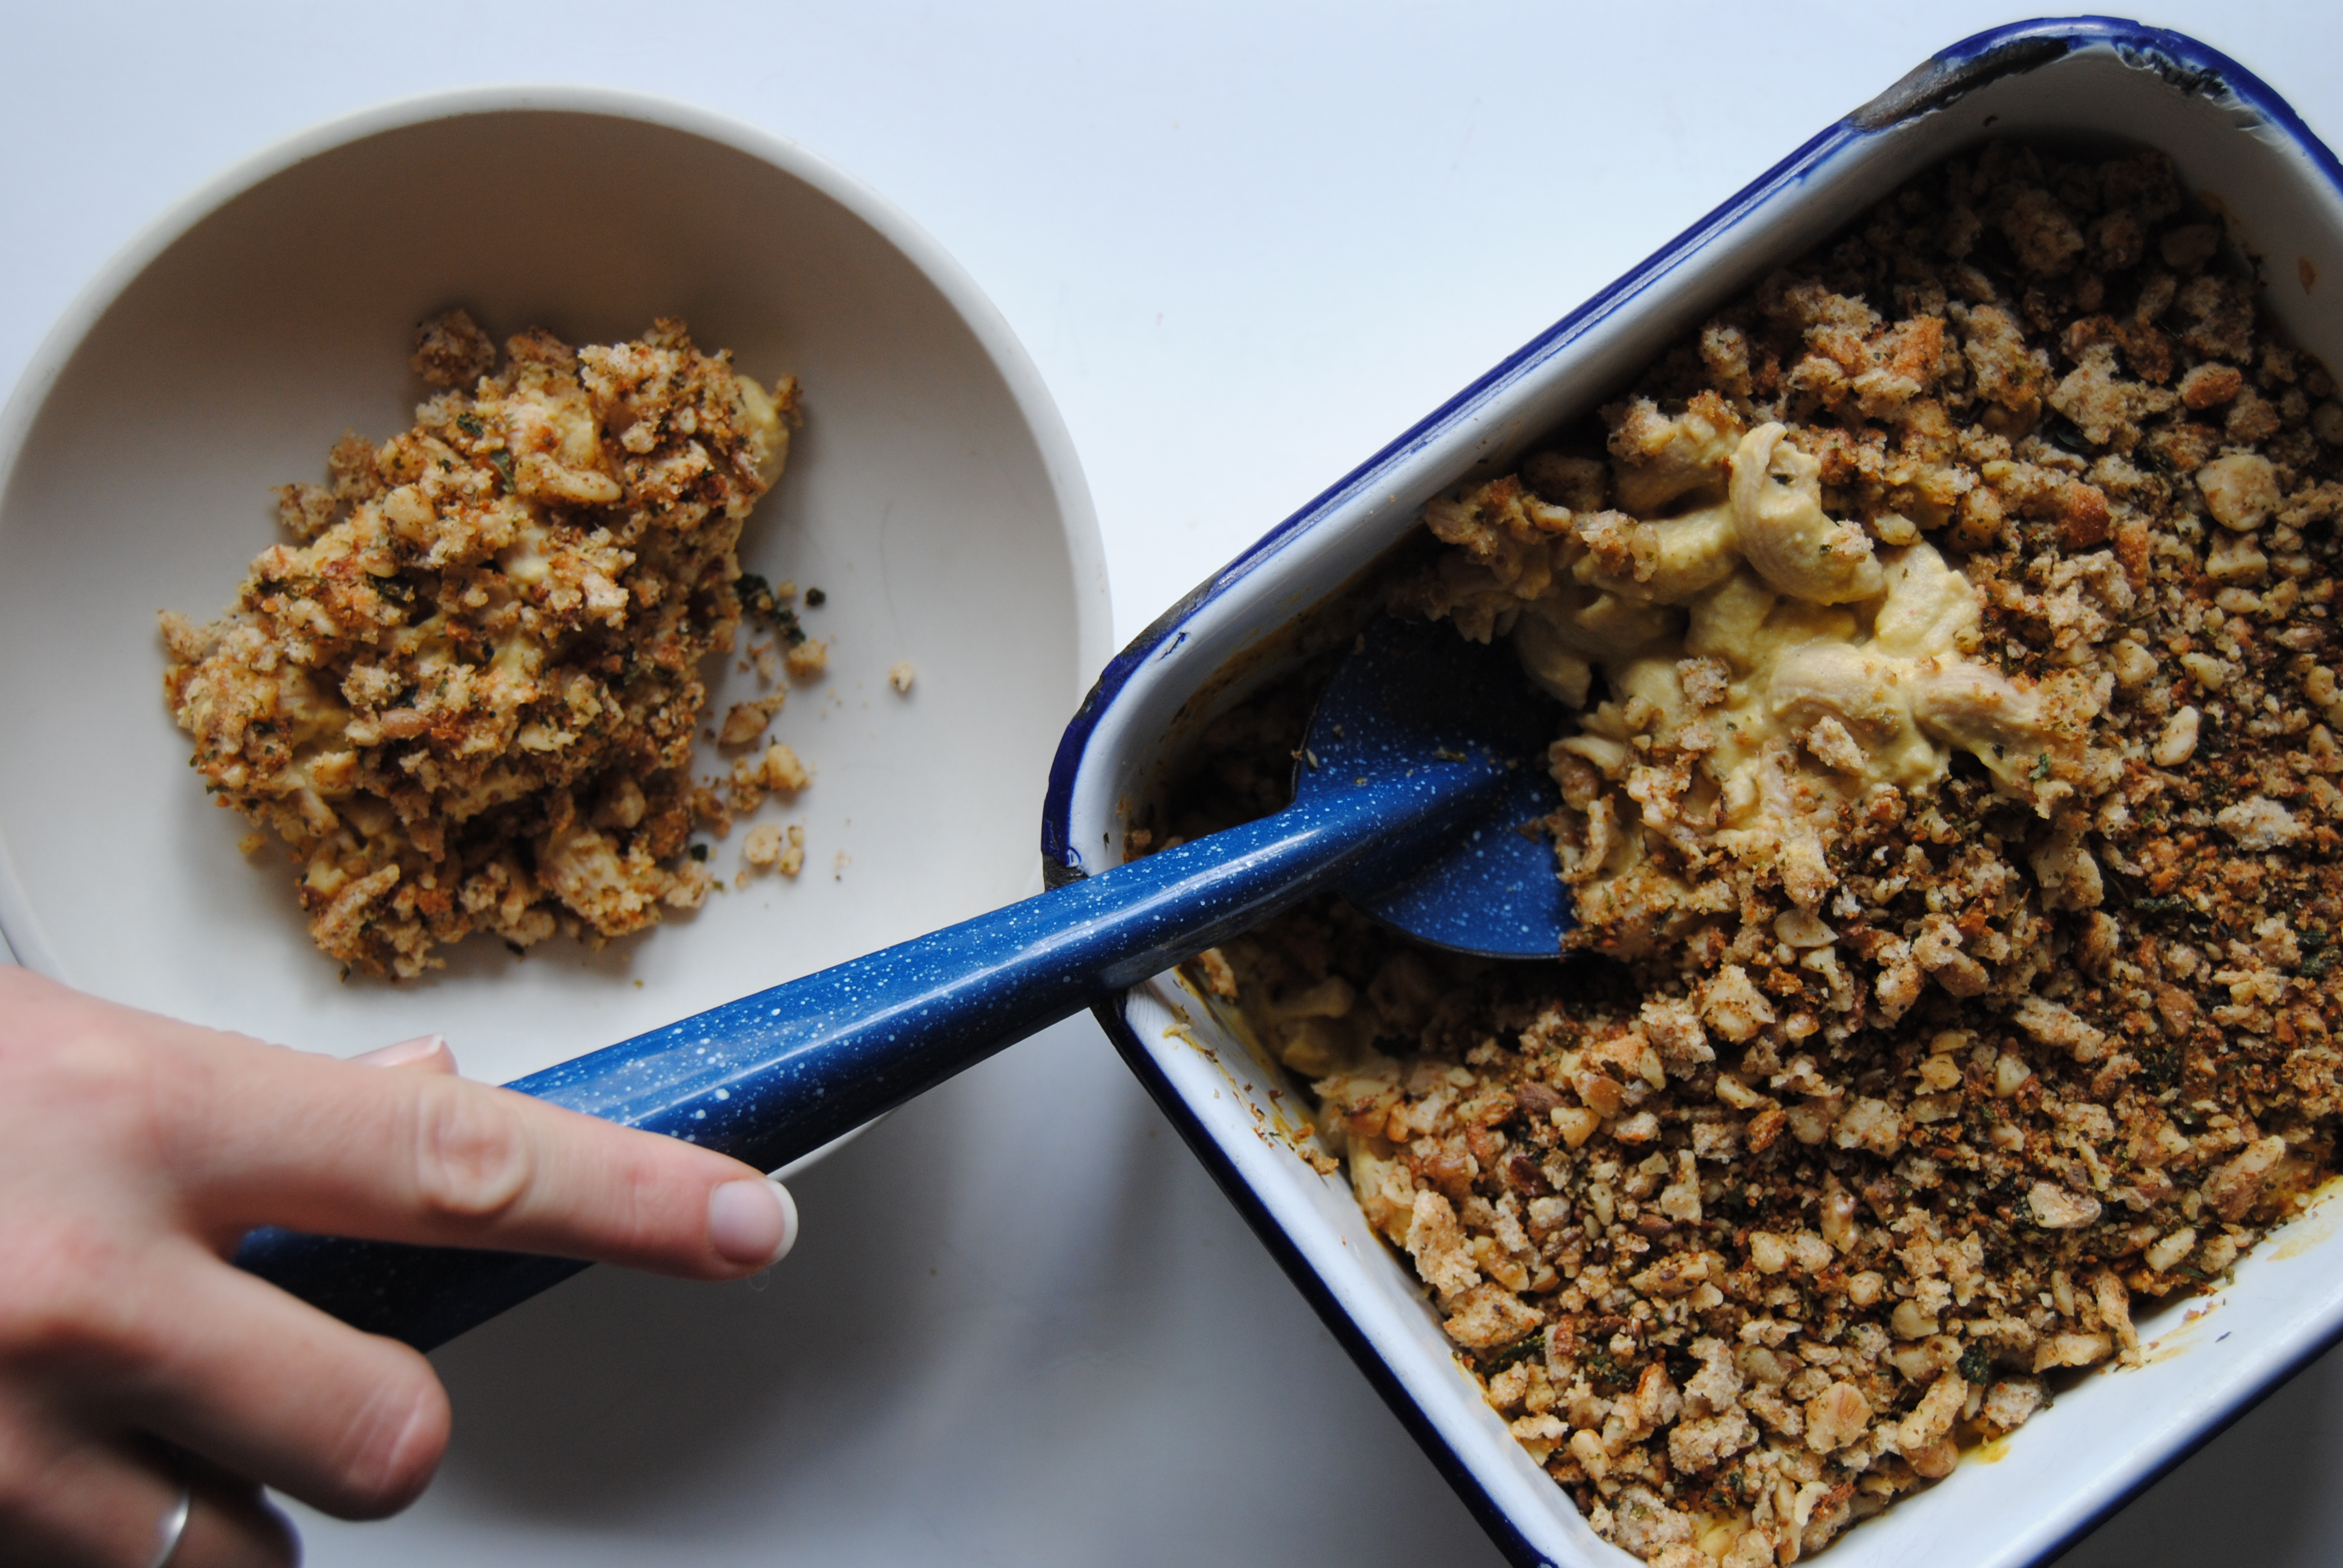
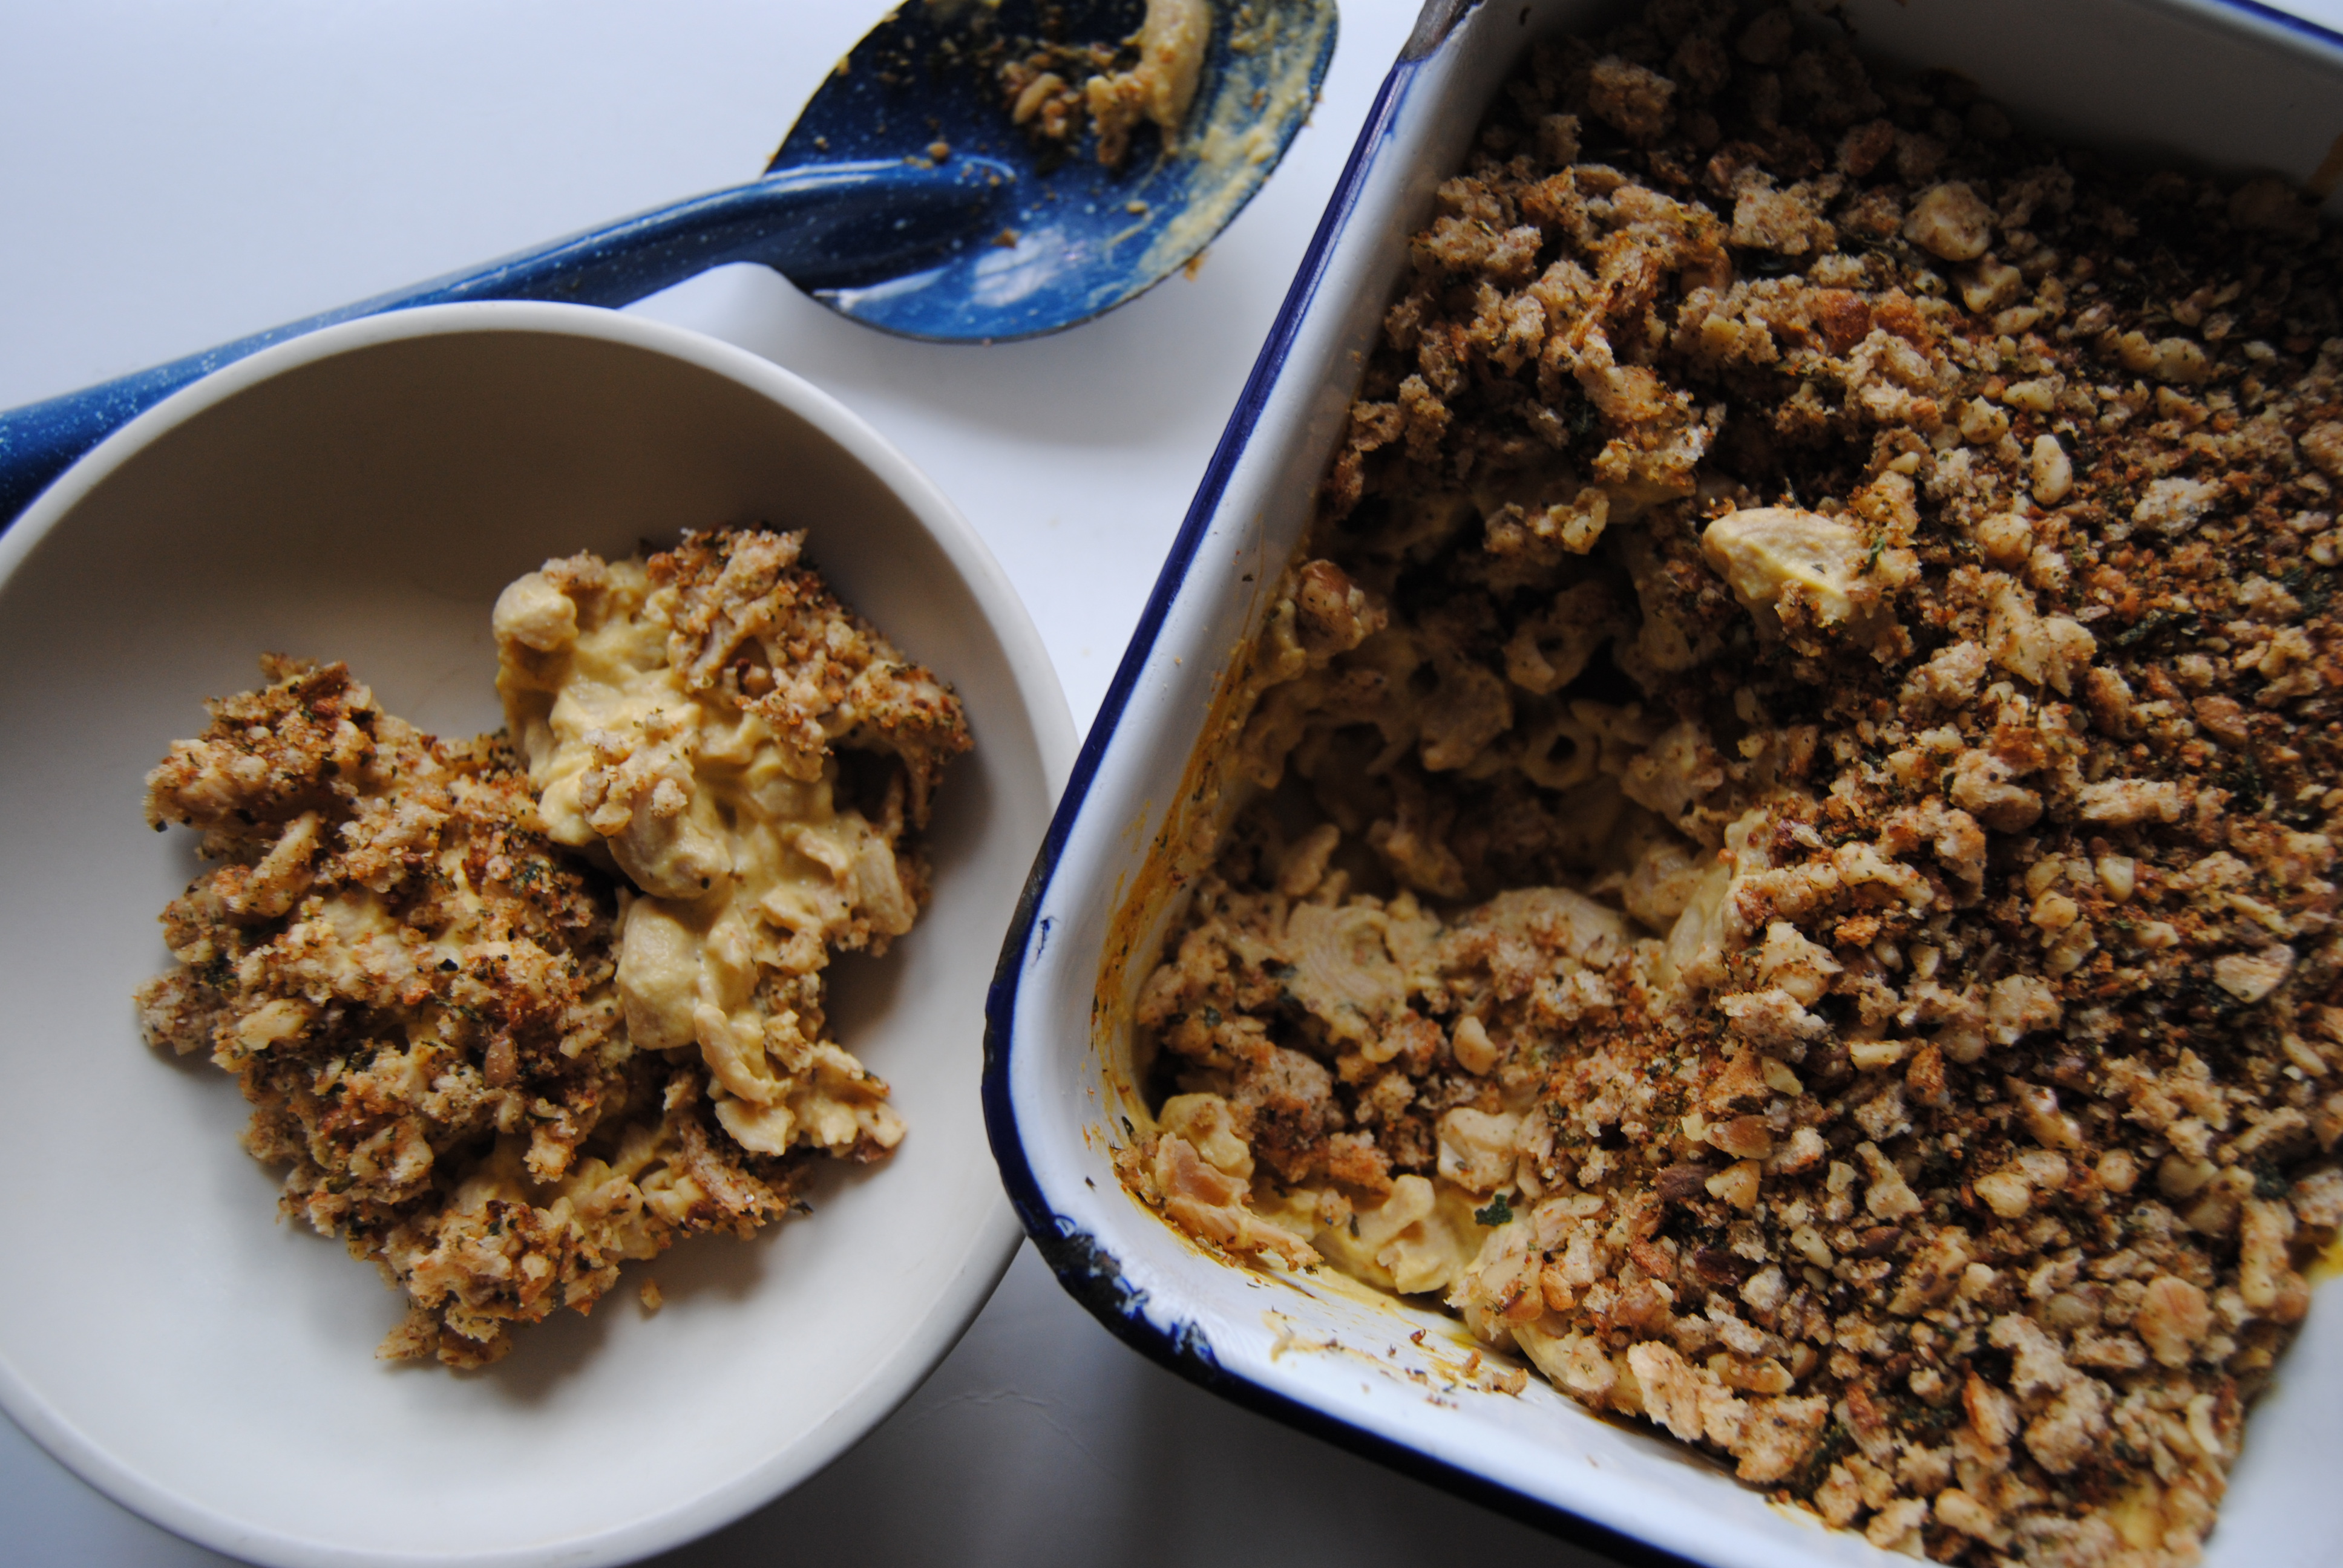
Enjoy, Jess and Cecelia TGBK friends, it's Thanksgiving this week and the perfect time to express how grateful we are for each and every one of you. Keeping up with new recipes and posts from week to week would seem a lot more like the hard work it is if we didn't love it so much. But knowing that there are people all over the country waiting on and enjoying our recipes makes it so enjoyable and definitely worth the time and energy. We wanted to create something really special for you all this week and are so happy with the result. If you're vegan/vegetarian and looking for a decadent dish to enjoy at Thanksgiving dinner then this one is especially for you - and even if you're not this will make a delicious side to enjoy and share. So in the spirit of the holidays let's get straight to the recipe (and eating!) and skip on the teaching this week. Pumpkin and Cashew Cream"Mac & Cheese" PREP TIME: 30 minutes + 8 hour soaking time TOTAL TIME: 40 minutes + 8 hour soaking time Servings: 4-6 servings Ingredients 8 oz dried pasta (we used quinoa pasta) "Cheese sauce" 3/4 cup raw cashews, soaked 3/4 cup water (fresh water, not the soaking water) 1 1/4 cup pumpkin puree 3 Tbsp nutritional yeast 1/2 tsp sea salt, more to taste 1/4 tsp nutmeg powder 1/4 tsp cayenne powder 1/8 tsp onion powder 1/8 tsp black pepper powder, more or less to taste Fried sage bread crumb topping 4 slices of quality bread, about 3 cups cubed (we used whole wheat sunflower seed bread) 1/2 cup walnut pieces 6 sage leaves 2 Tbsp dehydrated kale powder 1 Tbsp coconut oil 1/2 tsp sea salt 1/4 tsp black pepper Soak cashews in room temperature water for 8 hours or overnight. Drain cashews from soaking water then add to a high speed blender or food processor, cover with fresh water, and blend on high until a smooth cream like texture is formed. Add in pumpkin puree, nutritional yeast, salt, nutmeg, cayenne, onion powder, and black pepper. Process on high until a smooth "cheese sauce" texture is formed then set aside. Cook pasta according to package directions, drain and set aside. While the pasta is cooking start making the bread crumb topping. Begin by toasting the bread until golden brown. Cut into small cubes and place in a food processor. Process until bread crumb texture is formed then set aside. In a sauté pan add coconut oil and bring to medium heat. Add sage leaves and fry on both sides until crispy, about 1-2 minutes. Remove fried sage from the pan and with the remaining oil in the pan, add walnut pieces, bread crumbs, dehydrated kale powder, sea salt, and pepper. Toast mixture in sauté pan for 3-4 minutes until fragrant. Remove mixture from the heat then add in crumbled fried sage. To assemble the "mac and cheese" mix cooked pasta with "cheese sauce" then place in an oven proof dish (11" x 7" rectangular pan, 8" x 2" round pan, or 8" x 8" square pan). Top with bread crumb topping and bake in a pre-heated oven for 5-7 minutes until warmed through. This dish is best served warm right out of the oven. If you have left overs, store in the fridge and reheat in a 350 degree preheated oven for 8-10 minutes. We promise this is vegan but you could easily be fooled by the the final result. The pumpkin and cashew cream create that perfect creamy richness you would expect from traditional mac and cheese. The flavors of spicy cayenne, sweet nutmeg, and tangy nutritional yeast create such a perfect balance that you won't even miss or notice that this "mac and cheese" dish contains no actual cheese. Not to forget about the breadcrumb topping with crunchy walnuts and fried sage for an extra pop of texture and flavor. Top that all off with a beautiful color from the pumpkin puree and this dish will be the unexpected star this holiday. We hope you enjoy this and other good food with friends and family this holiday week. Since we will be doing a lot of the same we won't be posting next week but will be back first thing in December with more holiday inspired eats. See you then!
With heartfelt thanks, Jess and Cecelia |
AuthorsJess and Cecelia welcome you to our kitchen. We are fun-loving and passionate foodies working to make the world a healthier, happier place one plant based recipe at a time. Categories
All
Archives
December 2018
|

