Ok, we get it. We all have our least favorite foods and bad food related memories. Maybe an improper cooking method or unpleasant situation created a lasting negative memory surrounding a certain food. But if given a second chance with the right preparation and a balanced recipe these foods may still stand a chance to be enjoyed in our diets. We know many people will cite Brussels sprouts as a disliked food and are challenging any followers that can relate this week to give them a second chance! We think this savory tart recipe will provide the perfect medium to allow Brussels sprouts to shine in a delicious but unassuming way. Challenge accepted?
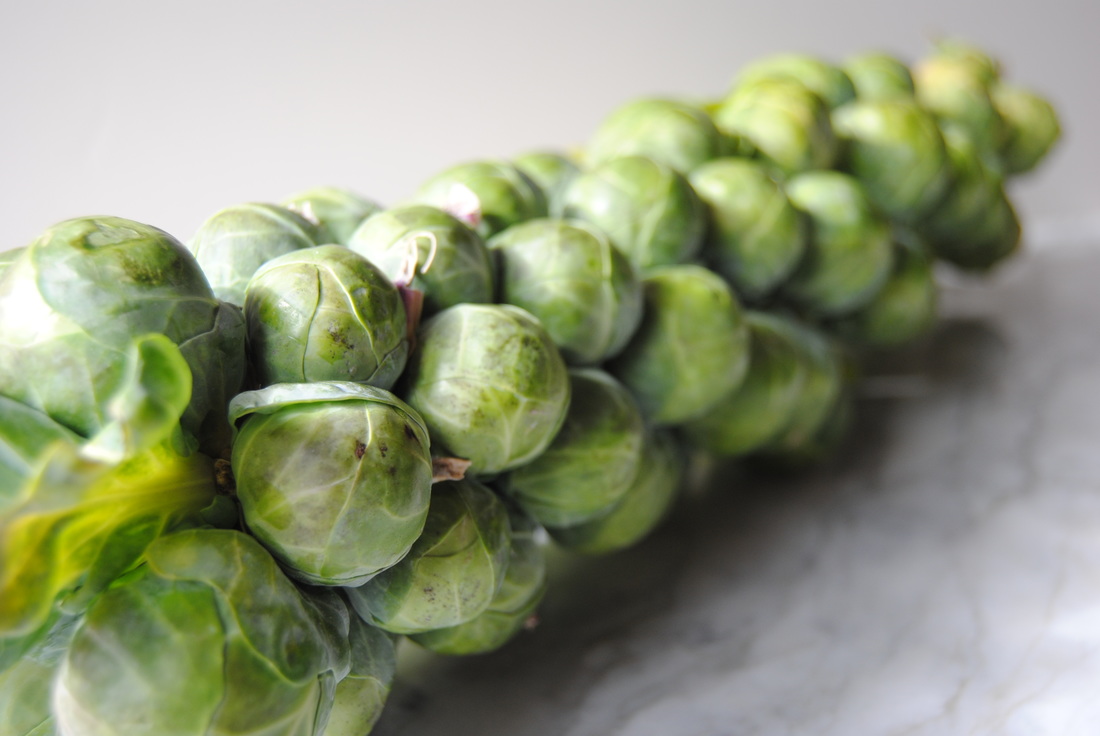
Brussels sprouts are so named as they were first reported in the Brussels region of Belgium 250-300 years ago. They are a member of the cruciferous family, require cool weather for growing, and have a long growing season that extends into late fall. The sprouts resemble small cabbages and grow along the stem of the plant between the leaves. If the leaves are removed you will get a fancy stalk of Brussels sprouts (pictured above) though you will often find them completely harvested as individual sprouts in stores. Nutritionally, Brussels sprouts pack a good dose of fiber as well as vitamin C and K. They also contain an organic compound, glucosinolate sinigrin, which contains sulfur and can lead to Brussels sprouts' "off" smell if they are overcooked. This compound has also been studied for its health promoting and protective qualities - just another reason why veggies, especially cruciferous vegetables, are promoted to prevent disease and maintain health. Unfortunately, Brussels sprouts can easily get a bad reputation if improperly cooked and are often cited as a most hated vegetable - so unfair! When roasted to golden brown, crisped into chips, or sautéed until just tender, Brussels sprouts are truly delicious and nutritious without the expected offensive smells. So please don't ever think of steaming these delightful sprouts to mush again!
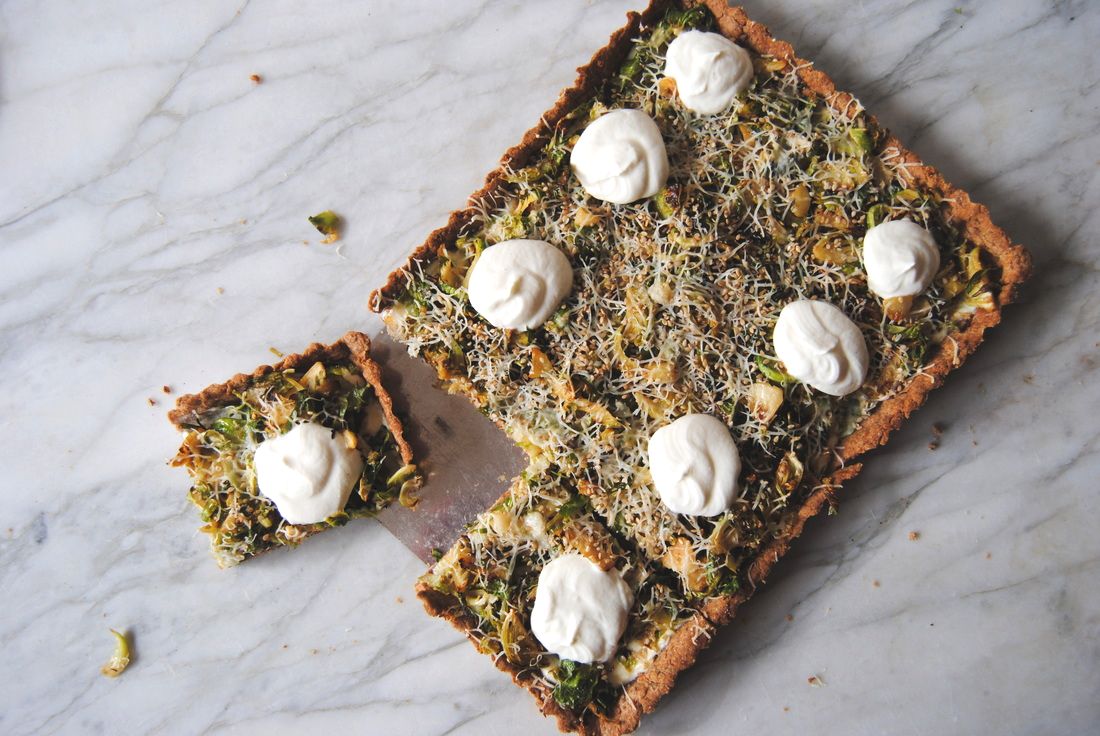
Brussels Sprouts Tart
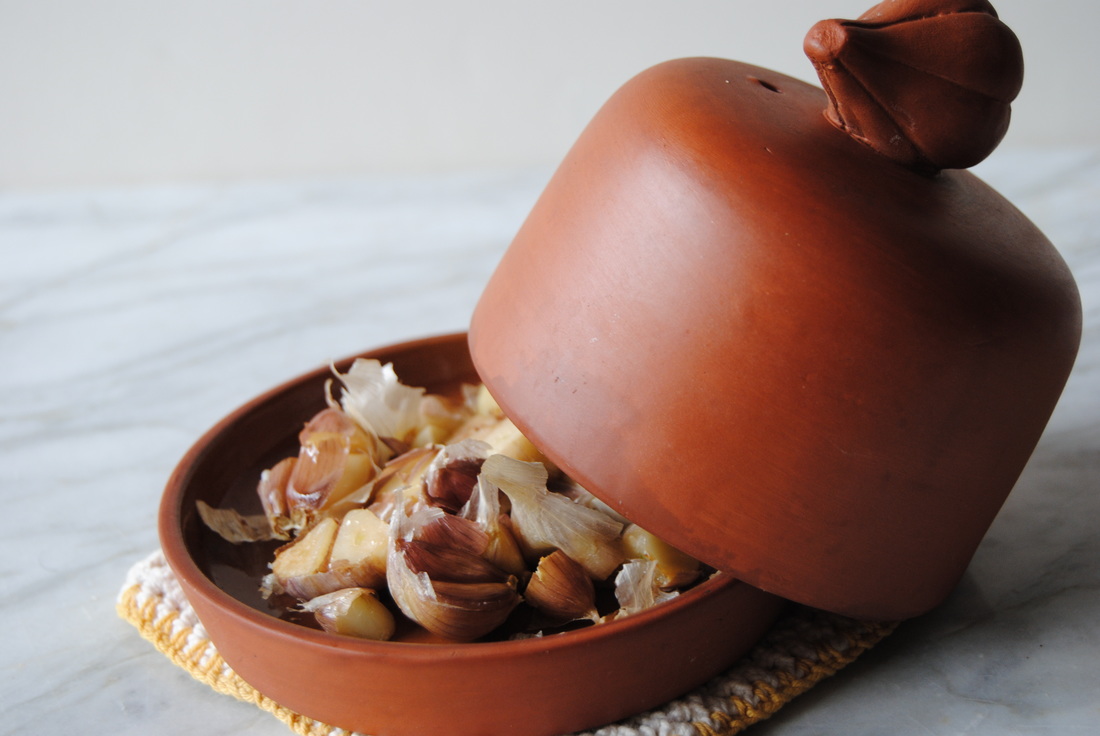
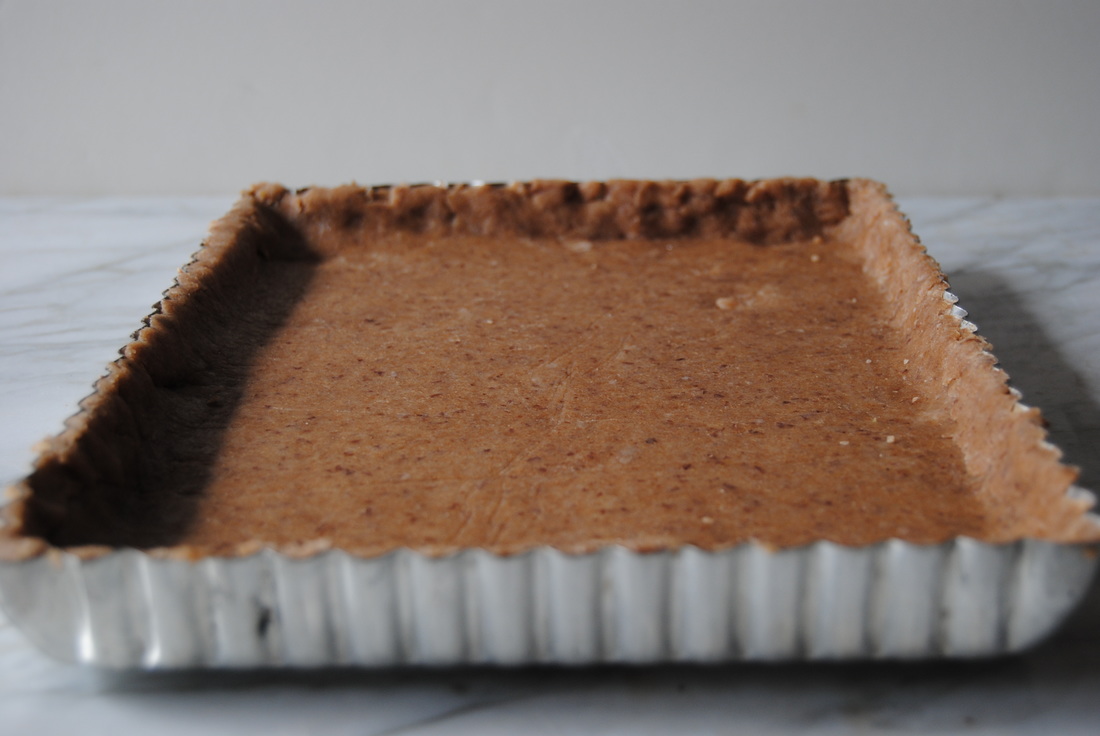
PREP TIME: 1 hour TOTAL TIME: 1 hour 15 minutes Servings: 8 Ingredients Dough 1 ½ cups + 6 Tbsp whole wheat flour 6 Tbsp salted butter, cold 2 Tbsp cane sugar 4 Tbsp whole milk 2 Tbsp ground flax seeds + 2 Tbsp water 1/8 tsp sea salt Brussels Sprouts 1 lb Brussels sprouts, ~4 cups once shaved 1 Tbsp salted butter ¼ tsp sea salt 1/8 tsp pepper or more to taste Cheese Sauce 8 oz whole milk ricotta 4 cloves roasted garlic 2 Tbsp extra virgin olive oil (we used roasted garlic extra virgin olive oil) Toppings 6-8 cloves roasted garlic 2 oz grated Parmasean 1 Tsbp sesame seeds Whipped Ricotta Swirls 8 oz whole milk ricotta 2 Tbsp labneh (or full fat Greek or Icelandic yogurt) 1/8 tsp sea salt Preheat oven to 350 degrees. Cut a head of garlic in half, drizzle with olive oil, and place in preheated oven either in a garlic roaster or in a piece of foil and roast for 30 minutes. Remove from the oven and allow to cool to room temperature. To make the tart dough, whisk together the ground flax seeds with water and set aside. In a standing mixer or by hand, mix the flour, sugar and salt. Add in the cold cubed butter and mix until a coarse texture is formed. Add in the flax seed mixture and whole milk and mix until dough comes together. Form into a disc, cover with plastic wrap, and refrigerate for at least 30 minutes. Dough can be made the day before and kept in the fridge until ready to use. Wash Brussels sprouts then use a sharp knife to finely shave sprouts until you have ~4 cups. To shave, cut off the ends of the sprouts then cut in half from top to bottom. Thinly cut each half either crosswise or lengthwise and pull apart any large pieces that stick together with your fingers. In a large pan over medium high heat add shaved sprouts, butter, salt, and pepper and sauté until sprouts become wilted with golden edges, about 7-10 minutes. Remove from heat and set aside. Remove the dough from the fridge and place between two pieces of parchment or wax paper. Using a rolling pin, roll the dough into a thin sheet, about ~1/8" thick making sure to roll the dough out a few inches larger then your tart pan. For this recipe we used a 11 X 7 " tart pan. Please note, a rectangle, square, or circular tart pan around this size will work. Carefully place dough over tart pan and again using a rolling pin, roll over all four edges to evenly cut the edges of the dough to perfectly fit the pan. Place dough in preheated oven at 425 degrees and cook for 25 minutes. Combine ricotta cheese sauce ingredients in a bowl and set aside. Remove tart shell from the oven and evenly spread the ricotta garlic sauce over the dough then place the Brussels sprouts over the ricotta sauce. Sprinkle with additional roasted garlic cloves (amount to taste), grated Parmesan, and sesame seeds over the top. Reduce oven temperature to 350 degrees and place the tart back in the oven and continue cooking for additional 5-10 minutes or until the cheese has melted. While the tart is cooking combine the remaining ricotta with labneh (or yogurt) and salt. Place mixture in a pastry bag fitted with a small piping tip or a resealable sandwich bag with a small cut out of the corner will also work. Once the tart is removed from the oven pipe out 1/2 oz of the cheese mixture into a swirl shape on top of the tart. We chose to pipe out 8 swirls, one for each piece. Serve tart warm or leftovers can be stored in the fridge for up to 3 days. Reheat leftovers in a 350 degree oven for 5-7 minutes prior to eating. 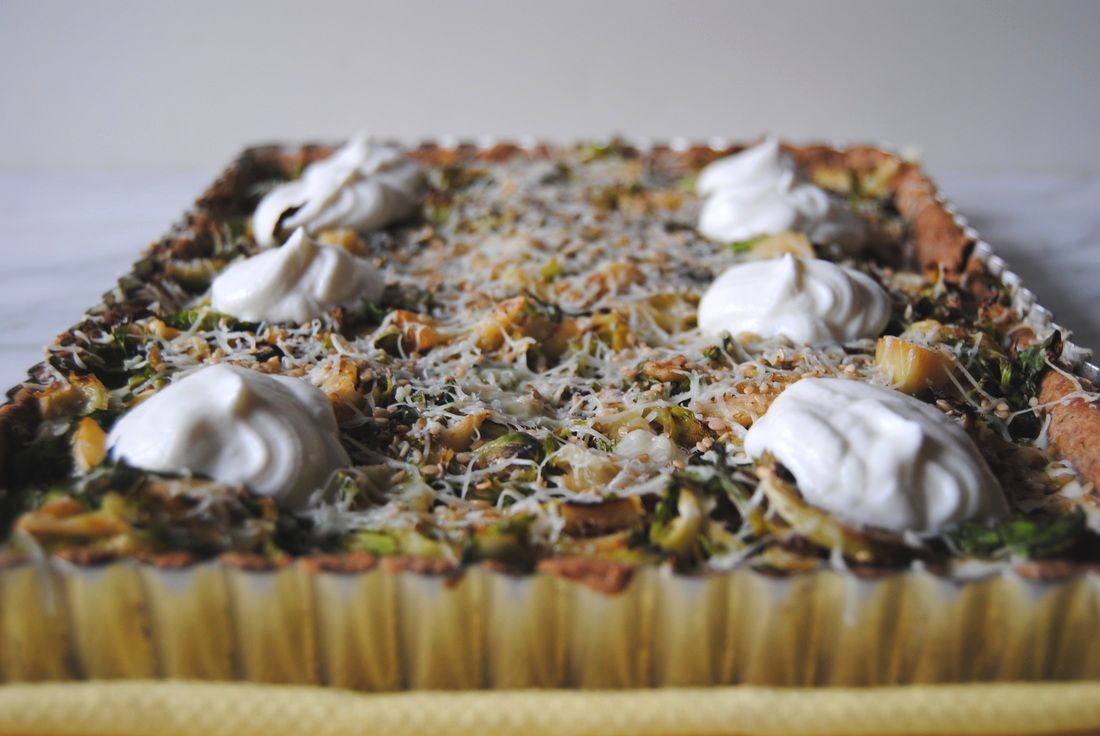
The best word to describe a bite of this tart is unexpected. The crust has a flakey sweetness that compliments the rich and creamy ricotta and the delicate roasted garlic packs a punch of flavor with each bite. All of this to highlight the tender and earthly Brussels sprouts that you've now come to appreciate and love, right? If you've accepted our challenge and changed your mind about this cruciferous veggie please share your revelation and our recipe with others - Brussels sprouts deserve a second chance! And if you've loved Brussels sprouts from the start, simply, enjoy.
Until next week, Jess and Cecelia 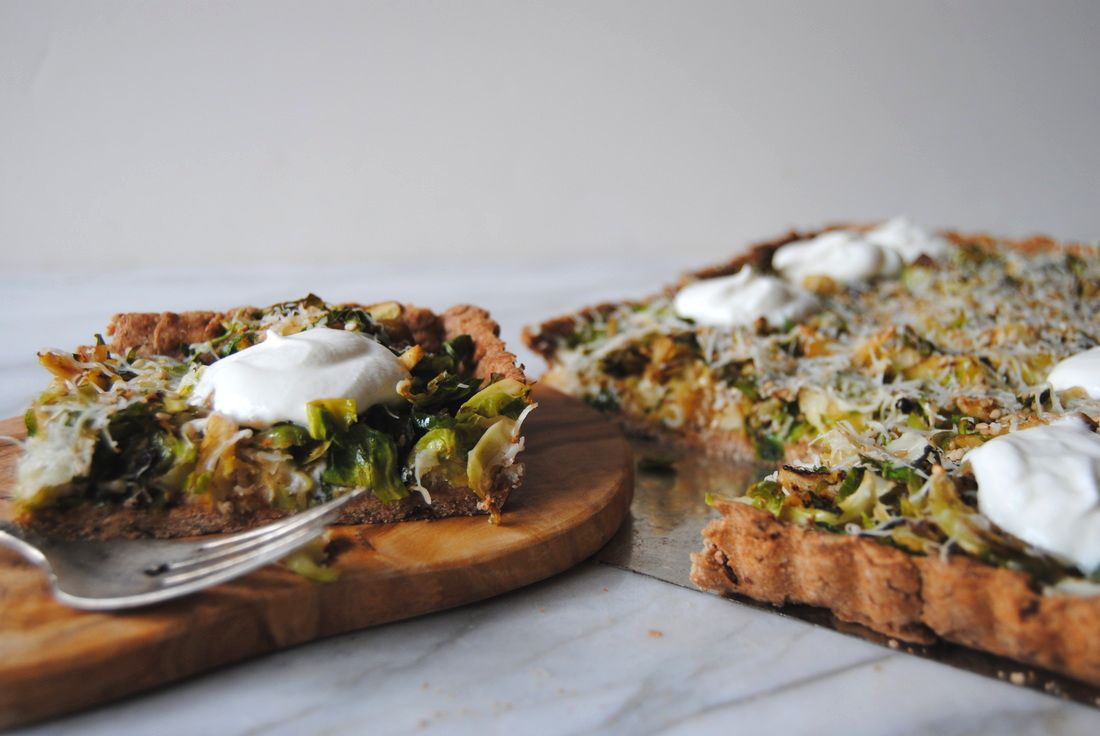
0 Comments
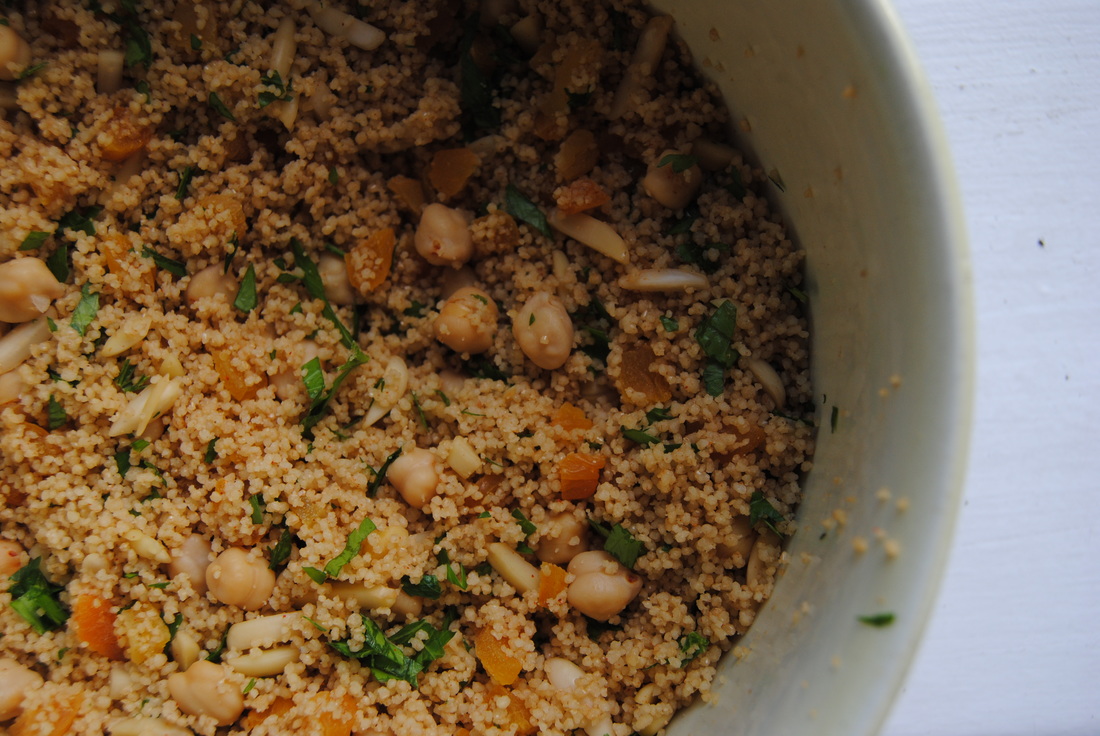
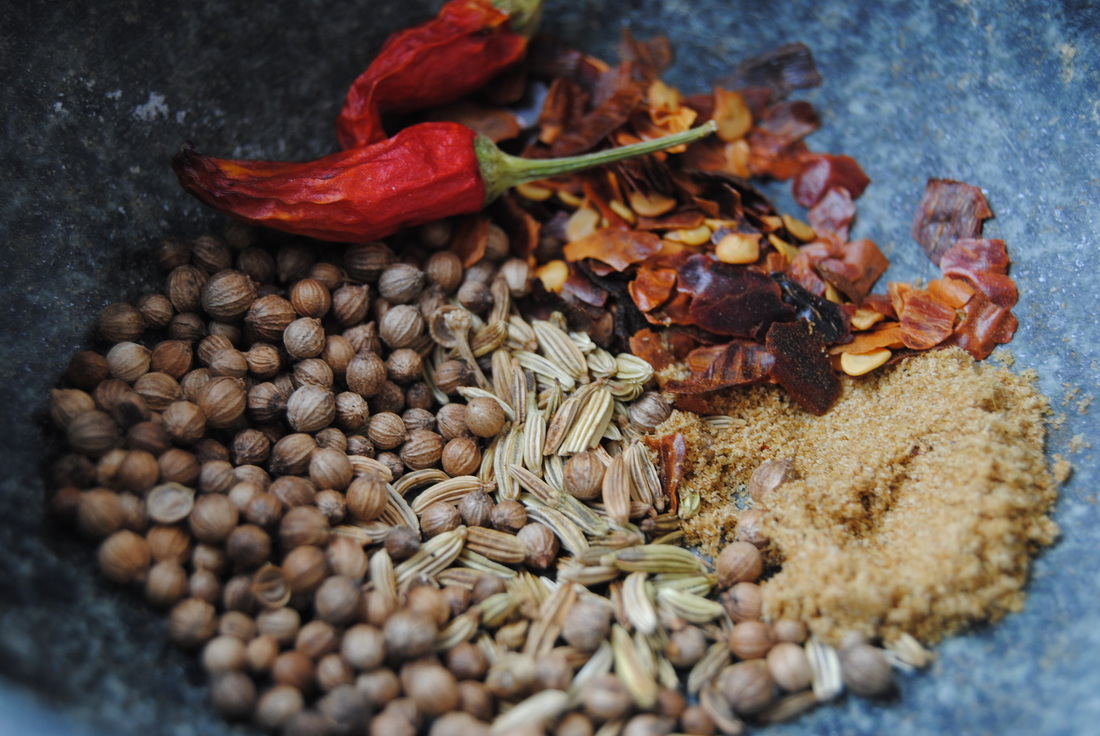
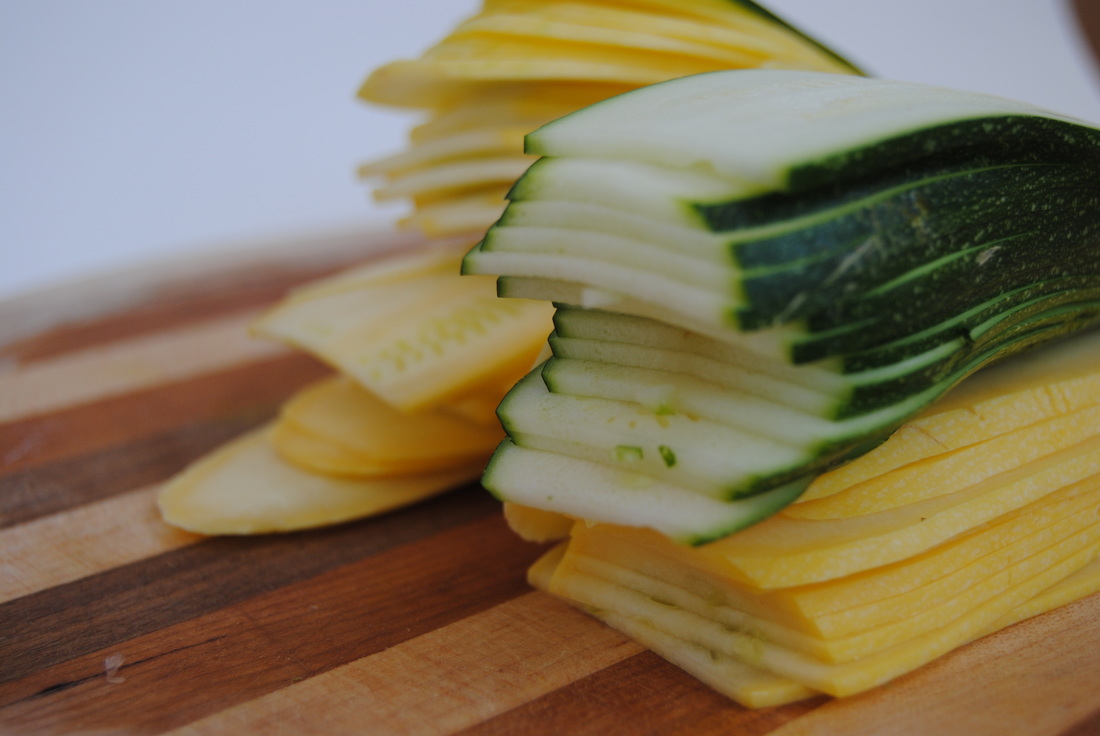
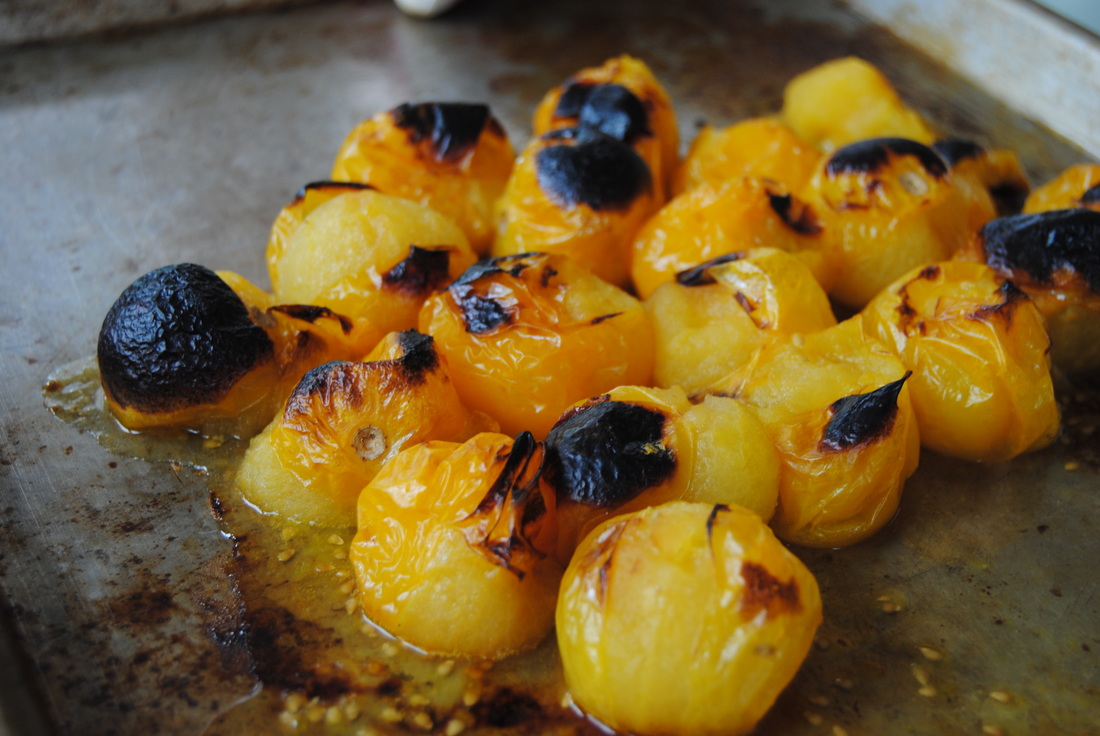
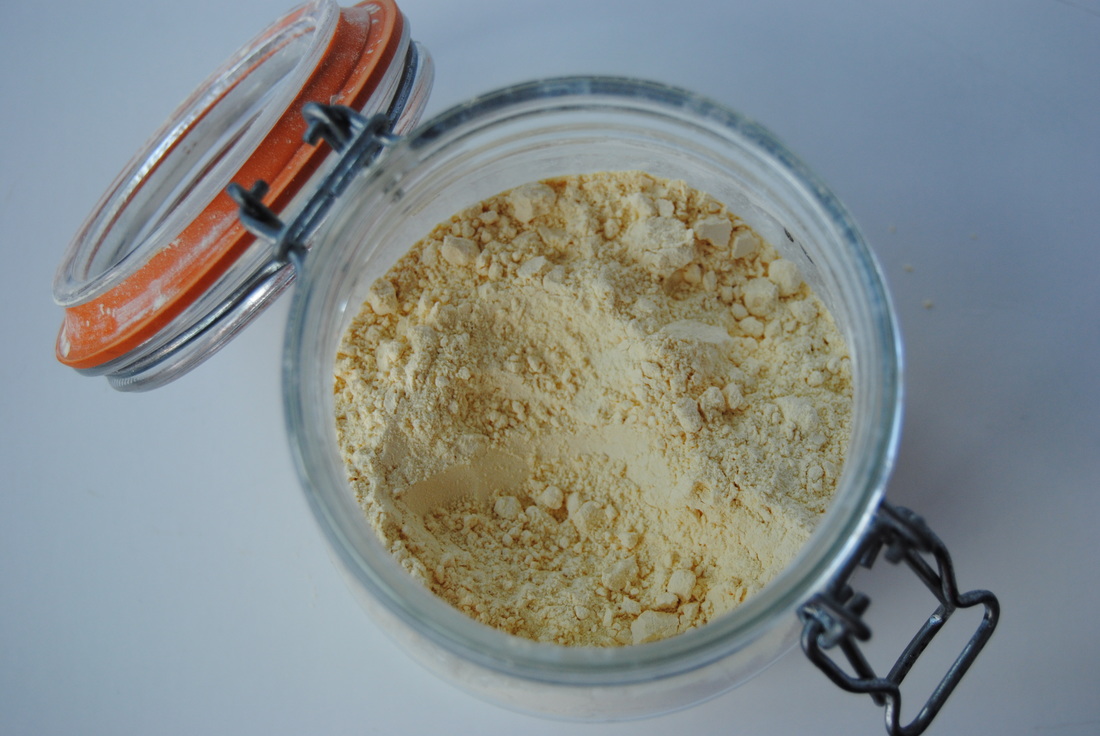
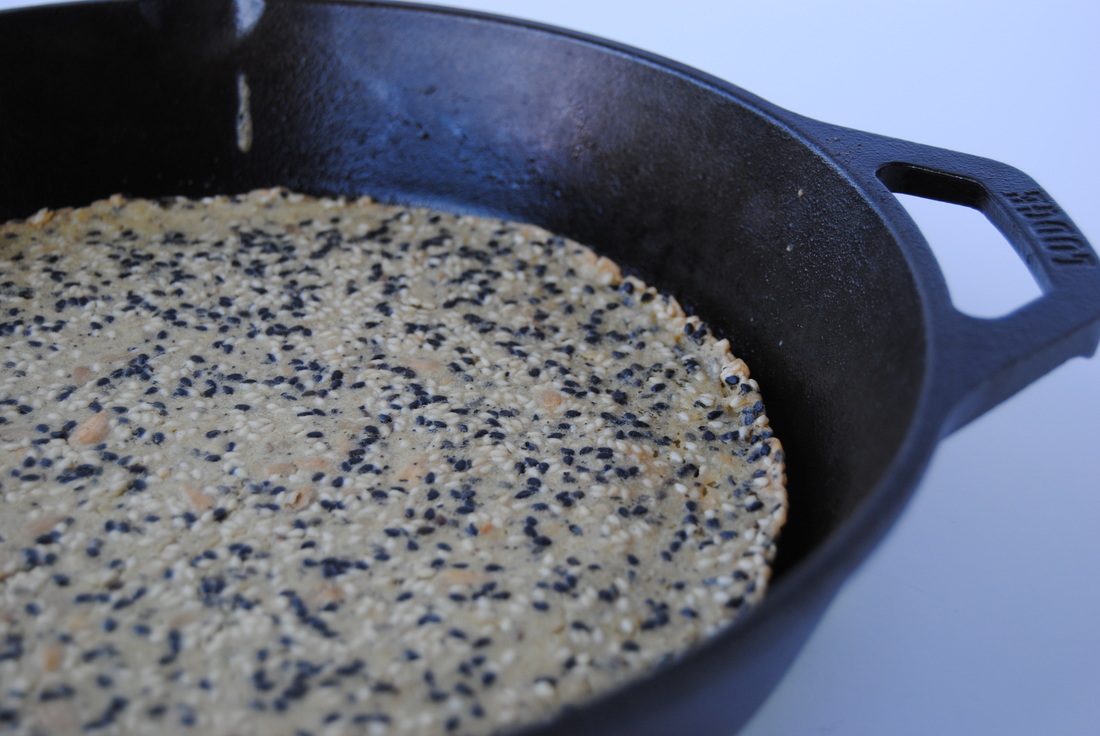
 Here at TGBK we believe that there are many ways to explore the world. Though travel is an exciting and obvious choice, experimenting with cuisine inspired by other countries and continents can bring a similar sense of wonder and new experience. With that being said, Cecelia has recently book a trip to Peru (can't wait!) and Jess has frequented Chile visiting a childhood best friend (hi Britt and family!). These two experiences came together in a wonderful way with our recipe this week. Using native South American ingredients, like quinoa, and our favorite Chilean spice blend, merken, we've created a warm fall stew that will take you beyond the four walls of your kitchen. 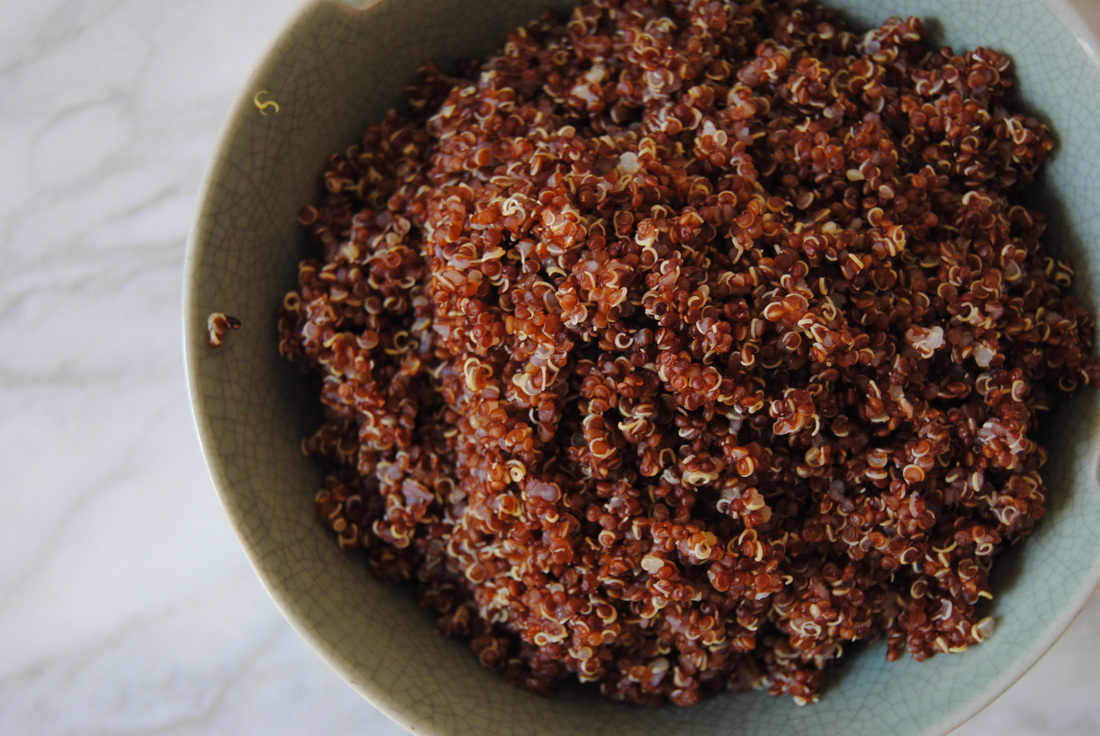 Quinoa (pronounced keen-wah) is an interesting grain and perfect for our South American inspired stew as it is native to the Andes mountains and the countries of Bolivia, Chile, and Peru. Quinoa was a staple food of the ancient Incan civilization and is still a prominent food source for their indigenous descendants. After the arrival of Spanish explorers, quinoa was replaced in the standard diet by more common cereal grains though has since regained popularity worldwide. This can partly be attributed to quinoa's unique nutritional profile. First being the fact that the quinoa plant is not a cereal grass like wheat, barley, oat etc. but a member of the Goosefoot plant family which contains beets, swiss chard, and spinach. This makes quinoa naturally gluten free and a perfect grain option for those following gluten free diets. Secondly, quinoa is one of the few plant sources of complete protein meaning it contains all of the essential amino acids that our bodies can't produce. In the kitchen quinoa should always be rinsed before using due to a bitter natural outer coating (saponin) even though this is usually removed during processing. We love quinoa's unique nutty flavor and versatility but our favorite way to enjoy it is in a good soup or stew just like this recipe. 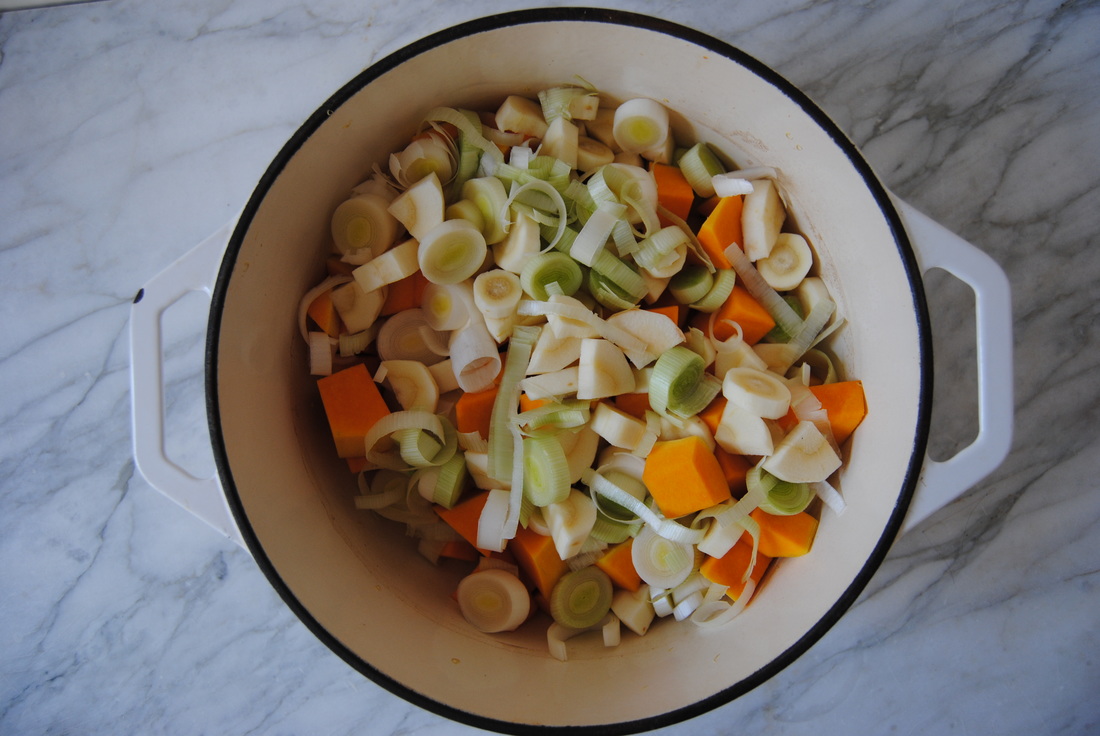 South American Inspired Vegetable Stew PREP TIME: 30 minutes TOTAL TIME: 90 minutes Servings: 6-8 Ingredients Stew 1 cup dried quinoa (we used red, any variety will work) 8 cups water 2 Tbsp olive oil 3-4 cups cubed butternut squash (about one medium squash) 2 medium parsnips, sliced 2 medium leeks, sliced 2 cloves garlic, minced 4 oz spinach, chopped 1/2 tsp ground coriander 3/4 tsp merken spice (if unable to find merken mix see substitute below) 1 1/2 tsp ground cumin 2 1/2 tsp sea salt 1 cup unsalted vegetable broth (we used homemade, our instructions here) Juice of 1 lemon 1 cup chopped cilantro 6-8 oz soft crumbly cheese (We used kefir cheese. Goat or feta would also be nice) Merken substitute 1 tsp dried oregano 1 tsp cayenne 1/2 tsp smoked paprika 1/2 tsp ground coriander Rinse quinoa under running water until water runs clear before cooking. Bring quinoa, 8 cups of water, and 1/2 tsp salt to a boil. Reduce the heat to simmer, cover pan, and continue cooking for 12-15 minutes. Drain quinoa and reserve cooking liquid for later use. Wash and peel butternut squash. A good tip for peeling butternut squash is to prick skin with a fork and place it in the microwave for 2 minutes. Carefully remove (it will be warm to the touch!) and peel outer skin with a vegetable peeler. Dice squash into 1" by 1" cubes and set aside. Peel and slice parsnips into 1/4" rounds and set aside. Wash leeks and slice into 1/4" rounds and set aside. Add olive oil to a large soup pan, set to medium heat, and stir in the minced garlic. Allow garlic to cook until fragrant ~1 minute then stir in the coriander, merken, cumin, remaining 2 tsp sea salt, butternut squash, parsnips, and leeks and allow to cook for ~5 minutes stirring often. Add the reserved quinoa liquid to the pan and continue cooking for another 10 minutes. Finally, add chopped spinach, vegetable broth, and cooked quinoa and continue to cook for an additional 10 minutes or until all the vegetables are soft. Stir in the fresh lemon juice and chopped cilantro. Serve soup warm with 1 oz of soft crumbly cheese of your choice. Leftover soup can be stored in the fridge for 3-5 days; soup will thicken as it sits so feel free to add a bit more vegetable broth as needed when re-warming. 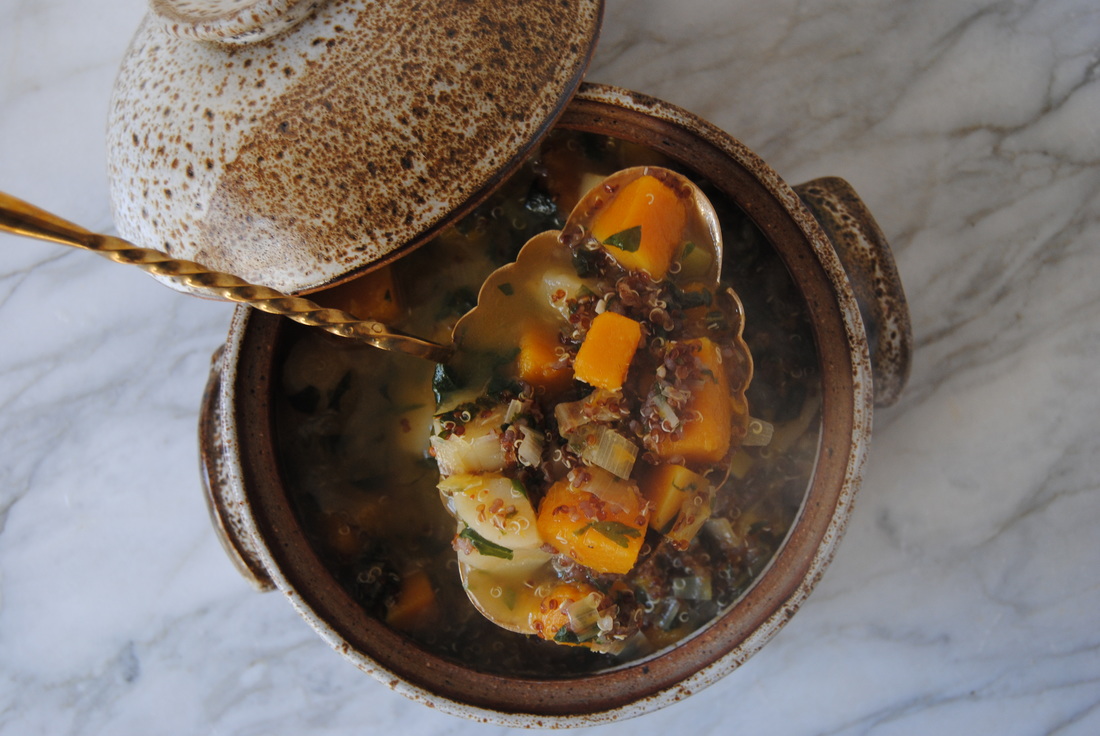 These flavors will take you around the world and back; the rich cumin and sweet coriander combine with the smokey spice of merken to create a flavor profile worth making this stew for. And not to mention the delicious and nutritious ingredients of the stew itself. A perfectly hearty and soul warming bowl to enjoy during the fall season. You never know where this South American inspired stew may inspire you to travel this winter! Happy trails, Jess and Cecelia 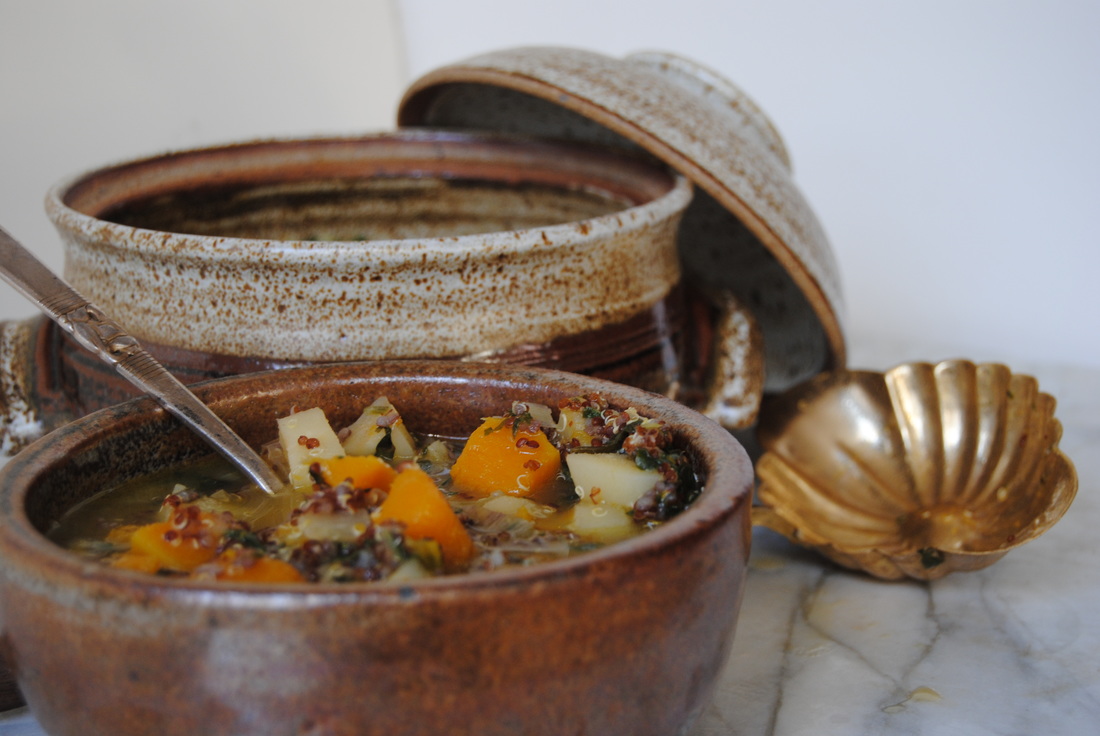 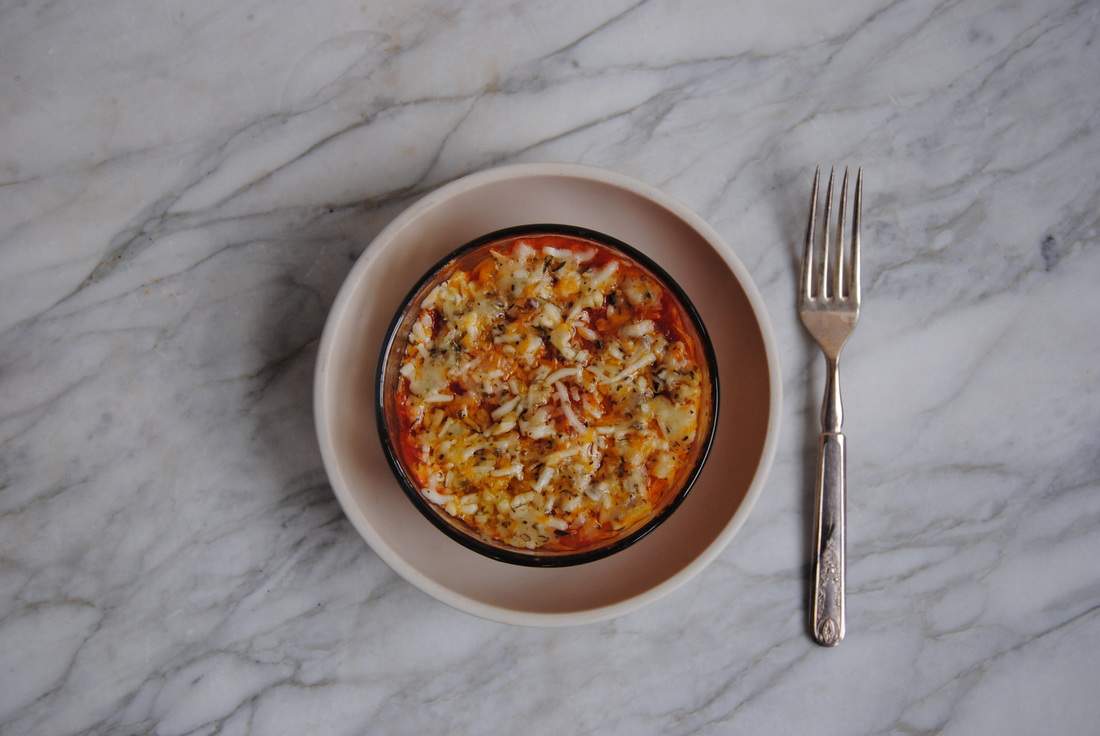 It's becoming that time of year when we start to crave comfort food and cold salads and sandwiches no longer cut it as a meal. While we excitedly dive head first into comfort food (and quickly approaching holiday) season, meals tend to become warmer and heavier. Though delicious and well deserved as we start to deal with the colder weather, these comfort food cravings can make healthy eating more challenging. But that's where we come in! Our recipe this week is still so comfy but substitutes squash for the traditional pasta ingredient, making this a recipe you can indulge in as often as you like. We've even made an indulgent garlic cheese spread with a special ingredient - let's find out more! 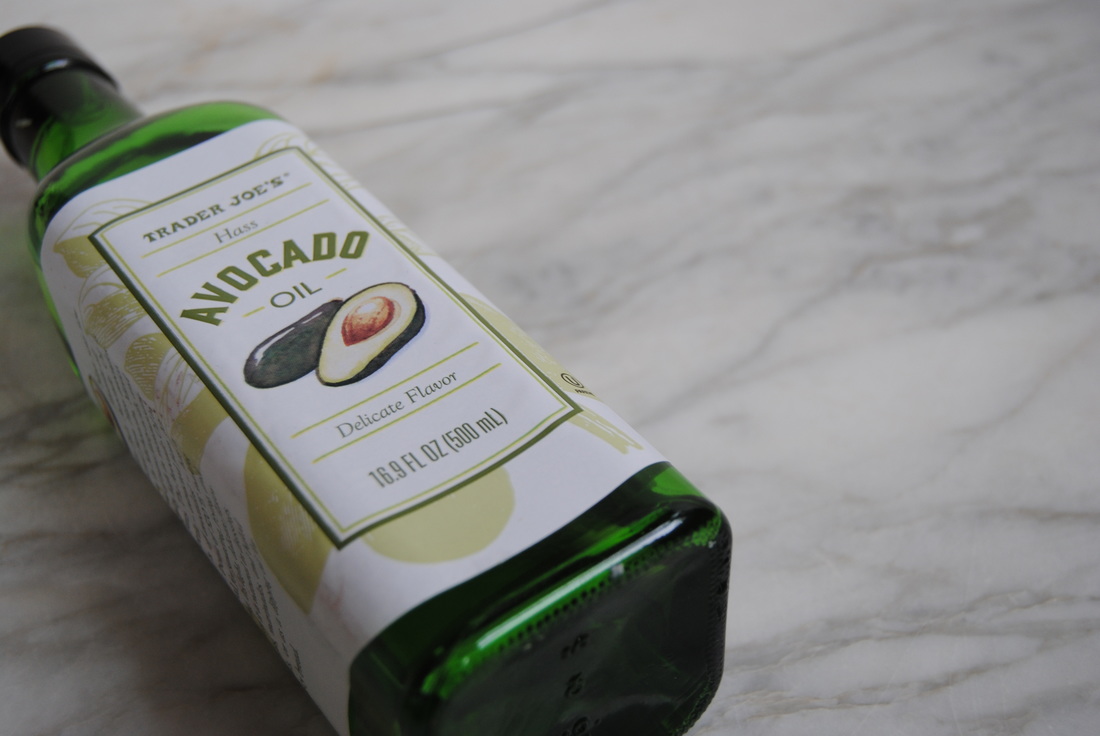 Talking about oil and the "best" oils to use in the diet can be tricky. Besides thinking about the actual properties of the oil and types of fat it contains, processing methods should be considered. Many of the commonly used oils in our food system are extracted from seeds through chemical processing methods and have a higher percentage of polyunsaturated omega-6 fatty acids than omega-3 fatty acids which can make them pro-inflammatory when consumed in large quantities. Seed oils are widely used due to availability, cost, and stability in processed foods and can be found on ingredient labels as canola, sunflower, safflower, soybean, cottonseed, grapeseed, corn, and rice brain oil. Though not all these oils sound like they come from seeds the oil itself is extracted from the seed of the plant, many of which don't sound like they should contain a whole lot of fat or oil to begin with. On the other hand, foods like olives, coconut, and avocado are known to be high in fat and therefore an oil created from these foods just seems to make more sense, doesn't it? Because of the high fat content physical extraction methods (cold or expeller pressing) are frequently utilized and preferred to chemical methods in our opinion. Avocado oil was first extracted by heating the mashed flesh of the fruit in water to allow the fat to rise to the surface and be skimmed off. For time and cost considerations, avocado oil is now extracted from dried fruit and either heated to high temperatures and pressed or placed in a machine called a centrifuge which rapidly spins the avocado to separate the oil from the solids. Unlike the seed oils, avocado oil (and olive oil) are lower in polyunsaturated omega-6 fats and contain mostly monounsaturated fats. Monounsaturated fats do not contain omega-6 or omega-3 fatty acids so the ideal ratio of the two in a high fat source, such as an oil, is not a concern. In the kitchen, avocado oil is a useful compliment to olive oil - it is stable and has a higher smoke point of ~500 degrees allowing it to be used for hotter cooking methods. Also different from olive oil is avocado oil's mild flavor which allows the addition of richness to recipes without changing the flavor. So if you've had your fill of oil education by now, on to the recipes! Five Cheese Garlic Spread PREP TIME: 10 minutes TOTAL TIME: 15 minutes Servings: makes ~4 cups Ingredients 1 cup mozzarella cheese, shredded 1 cup cheddar cheese, shredded 1 cup Havarti cheese, shredded 1/2 cup Parmesan cheese, shredded 1/2 cup Romano cheese, shredded 1/2 cup extra virgin olive oil 1/2 cup avocado oil 1 head of garlic (~10 cloves), minced 1 1/2 tsp oregano, fresh or dried 1 tsp parsley, fresh or dried 1 tsp thyme, fresh or dried In a large bowl mix all ingredients and stir to combine. Set aside 1 cup of cheese spread to top squash pot pies with and place remaining cheese spread in glass jars. Cheese spread will keep in the fridge for 2-3 weeks or freezes well for up to 6 months. Spaghetti Squash Pot Pie PREP TIME: 25 minutes TOTAL TIME: 40 minutes Servings: 4 Ingredients 1 medium spaghetti squash 1 cup mozzarella cheese, shredded 1 1/2- 2 cups red sauce (we prefer olive oil based red sauce*) 1 cup five cheese garlic spread Requires 4 small casserole dishes, we used 2-cup Pyrex bowls Preheat oven to 350 degrees. Carefully cut spaghetti squash in half (from stem to bottom), remove seeds, and place flat side down on a parchment lined baking sheet. Cook squash for 30-40 minutes or until a knife slides into the outer skin easily. Remove squash from the oven and allow to cool for 5 minutes or until easy to handle. Using a fork, scrap the inside to create long strands of "spaghetti". Place 1/8 of the squash in each oven proof bowl. Top squash layer with 1/4 cup red sauce and 1/4 cup mozzarella cheese then repeat with the rest of the squash and red sauce and ending with the five cheese garlic spread as the top cheese layer. Turn oven up to 400 degrees, place pot pies on a oven proof baking sheet, and bake for 7-10 minutes or until the cheese has melted and the pies are warmed through. If you do not plan to serve all the pot pies the same day, skip the last warming step and place in the fridge with an air tight lid for up to 5 days. The pot pies can be reheated in a 400 degree oven for 12-15 minutes. *Feel free to prepare from scratch or use your favorite jarred sauce. Read your ingredients lists and look for a sauce made with olive oil as a base oil instead of some of the other seed oils we've mentioned. 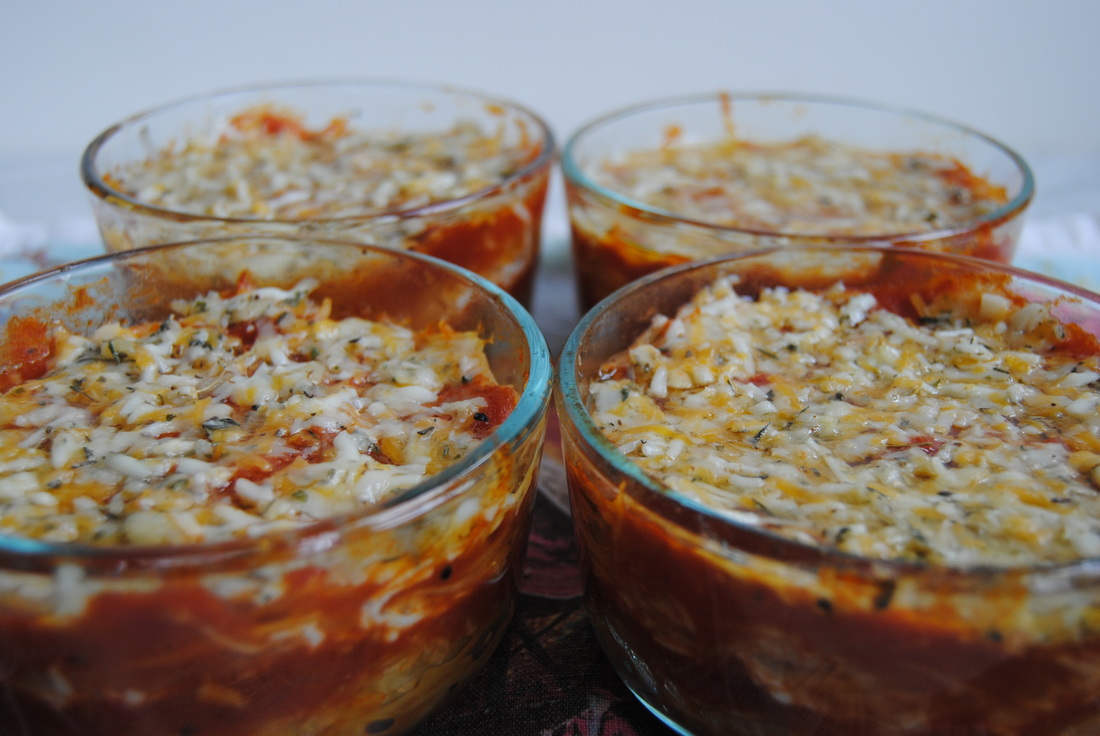 This recipe is so comfy that it almost makes the approaching cold weather okay, almost! Spaghetti squash substitutes perfectly for pasta noodles and provides an extra crunch of texture to the dish. And what else is there to say about warm cheese garlic spread other than yum!? If you don't make the garlic cheese spread right away this can be topped with plain mozzarella, garlic, and spices to keep things simple and even lighter. However you enjoy this one, please share! Stay comfy, Jess and Cecelia 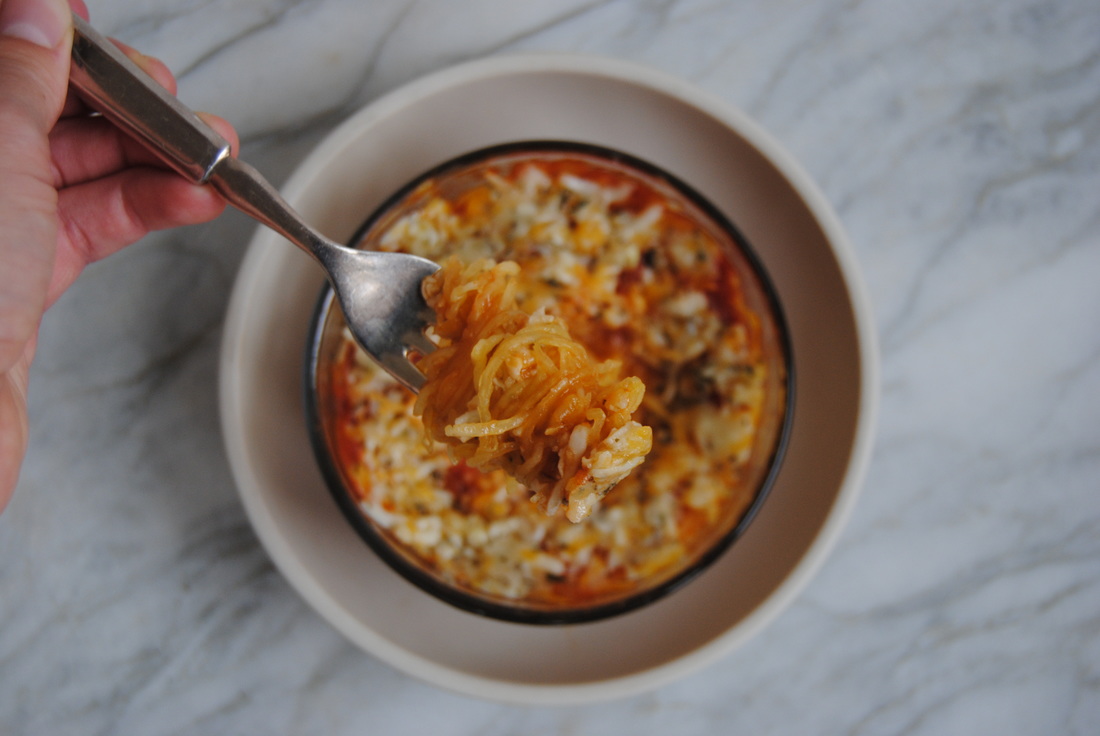 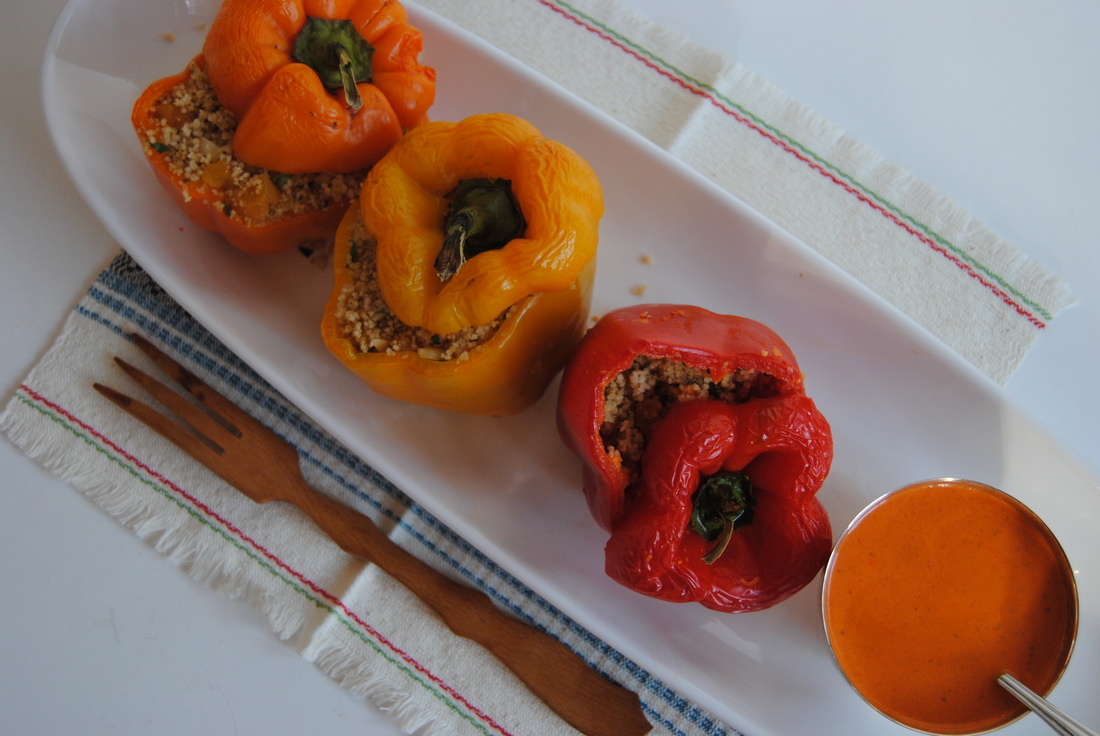 Peppers are very in season and SO colorful and delicious right now. Their beautiful, bright colors inspired our post this week influenced by North African cuisine. This stuffed pepper recipe will be a welcomed change to your palate with the variety of exciting flavors and unique uses for different ingredients. Take tea for example - for a twist we used tea in a completely new way. Interested? Read on! 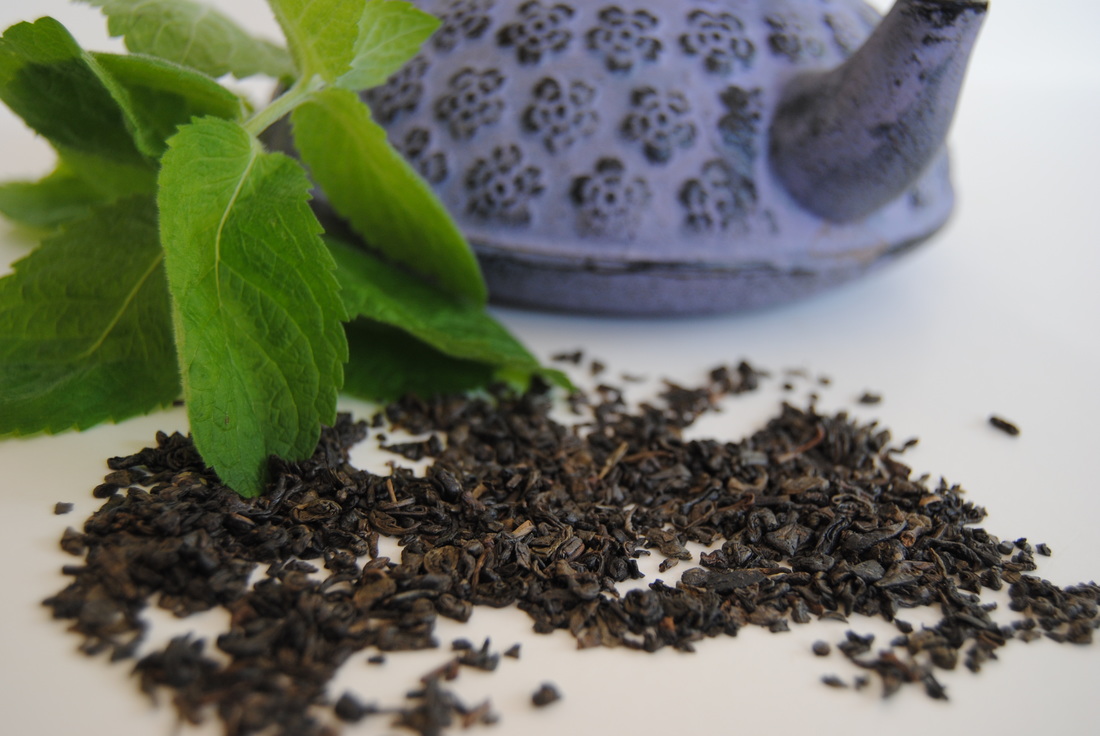 Tea in this recipe was not used as a warming beverage but a flavorful cooking liquid for our starch ingredient, couscous. Using a fresh mint and green tea cooking liquid provided a unique twist and a depth of flavor to the final recipe that only tea can provide. Typically cooked in water or broth, couscous (and other grains) can end up bland and needing a lot of flavor additives after cooking. So if tea as a cooking liquid is interesting to you than try experimenting with different cooked grains and your favorite teas. We find savory teas such as green, mint, chai, and black tea varieties to work well as substitutes for water or vegetable stock when preparing cooked grains. Just remember that if using in place of vegetable stock you'll likely need to add extra salt to the recipe. Has tea in foods sparked your creative side? We sure hope so! If it hasn't than you'll just have to try this recipe to understand. Moroccan Stuffed Peppers with Tunisian Harissa Yogurt Sauce PREP TIME: 25 minutes TOTAL TIME: 1 hour 10 minutes (includes cooking time) Servings: 5-6 Ingredients Mint & Honey Green Tea 2 Tbsp loose green tea (we used gunpowder green tea) 20 large mint leaves 2 Tbsp honey (we used raw creamed honey) 3 cups hot water Couscous Salad 1. 5 cups dried whole wheat couscous 1.5 cups prepared mint & honey green tea 1 Tbsp + 1 tsp olive oil 1 cup dried apricots, diced 1/2 cup slivered almonds 1 cup cooked garbanzo beans 1/4 tsp ground cumin 1/4 tsp ground paprika 1 tsp apple cider vinegar 2 Tbsp chopped fresh parsley 1/4 tsp sea salt Peppers 5-6 medium-large bell peppers Harissa Yogurt Sauce 1 medium roasted red bell pepper with skin removed 3 cloves of garlic, minced 3 Tbsp olive oil 1" of a fresh red jalapeno (more if you prefer a spicier sauce) 1.5 tsp paprika 1 tsp coriander seeds 1/2 tsp fennel seeds 1/2 tsp cumin seeds (or 1/4 tsp ground cumin) 1/2 tsp red pepper flakes 1/4 tsp sea salt 2 Tbsp water 1/4 cup plain Greek or Icelandic yogurt Preheat oven to 350 degrees. In a tea pot or glass container with a tea strainer add boiling water and honey and steep green tea and mint leaves for 5 minutes. Remove tea and mint leaves and set warm tea aside. To make the couscous, add 1.5 cups mint & honey green tea, 1 Tbsp olive oil, and 1/4 tsp sea salt to a medium sized sauce pan and bring to a boil. Remove from heat, add dried couscous to the hot liquid, and cover with a lid. Allow couscous to absorb tea for ~15 minutes then remove lid and fluff with a fork. Combine chick peas with 1 tsp olive oil, 1/4 tsp ground cumin, and 1/4 tsp paprika in a small bowl and stir to combine. Add cooked couscous, dried apricots, slivered almonds, spiced chick peas, parsley, and apple cider vinegar to a large bowl and stir to combine. Set prepared couscous filling to the side. Wash peppers and carefully cut the top ~1" off of each making sure to cut evenly all the way around the pepper as this will serve as your lid while cooking. Scoop the insides of the peppers clean removing ribs and seeds. Fill each pepper to the top with couscous filling, cover with its "lid", and place snugly in an oven proof pan. Pour the remainder of the mint and honey green tea in the bottom of the pan with the peppers to keep them moist while cooking and cook at 350 degrees for 35-45 minutes or until peppers are soft. While the peppers are cooking, combine coriander, fennel, cumin, and red pepper flakes in a small pan and lightly toast on the stove top until fragrant, ~2 minutes. Add roasted red pepper, garlic, olive oil, red jalapeno, paprika, toasted spices, sea salt, water, and yogurt to a blender or food processor and mix on high until harissa sauce is a smooth consistency. Once peppers are done cooking, serve with a side of harissa yogurt sauce. Any leftover peppers will stay fresh in the fridge for ~3-5 days in an air tight container. Reheat in the oven at 350 degrees for 10 minutes or for 1-2 minutes in the microwave. Harissa sauce will stay fresh in an air tight container in the fridge for 7-10 days. 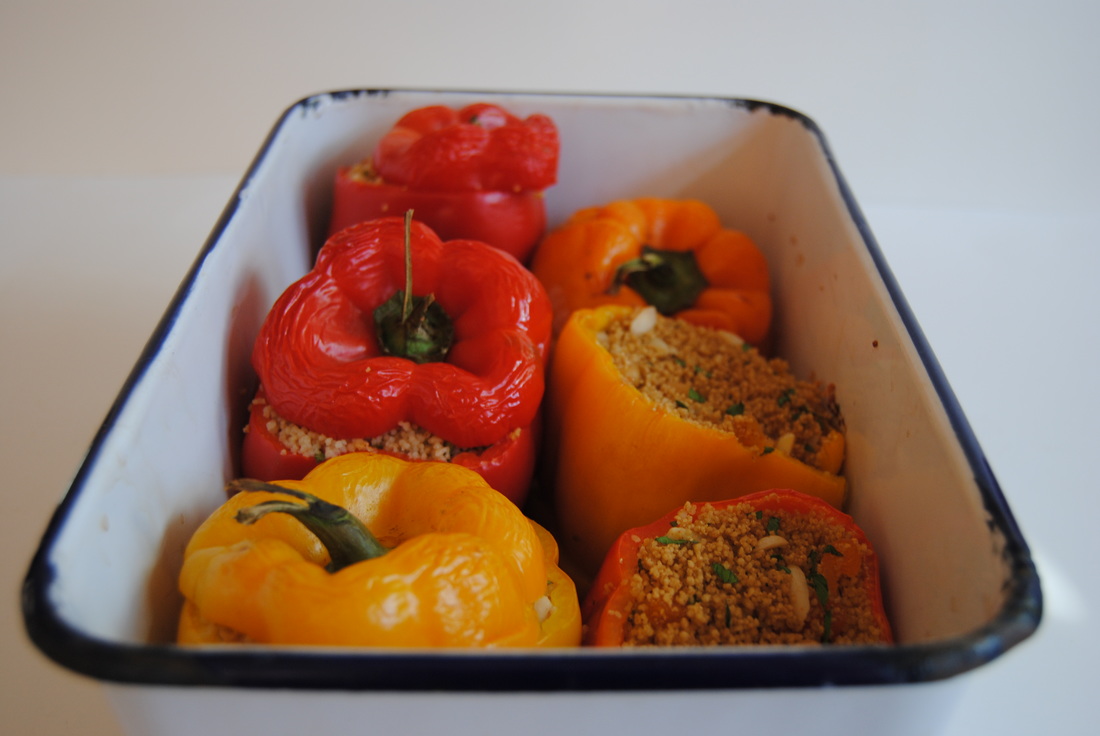 If you're wondering, yes - this recipe does taste just as colorful as it looks! The Moroccan couscous salad is sweet and savory from the honey tea broth and perfectly balanced with spicy chickpeas, crunchy almonds, and chewy apricots. The peppers are tangy and cooked to an ideal texture and the Tunisian harissa yogurt sauce tops everything off with fiery yet rich goodness. And this recipe is just beyond beautiful. We hope you love it just as much as we do and enjoy a new twist with tea in your kitchen. Enjoy, Jess and Cecelia 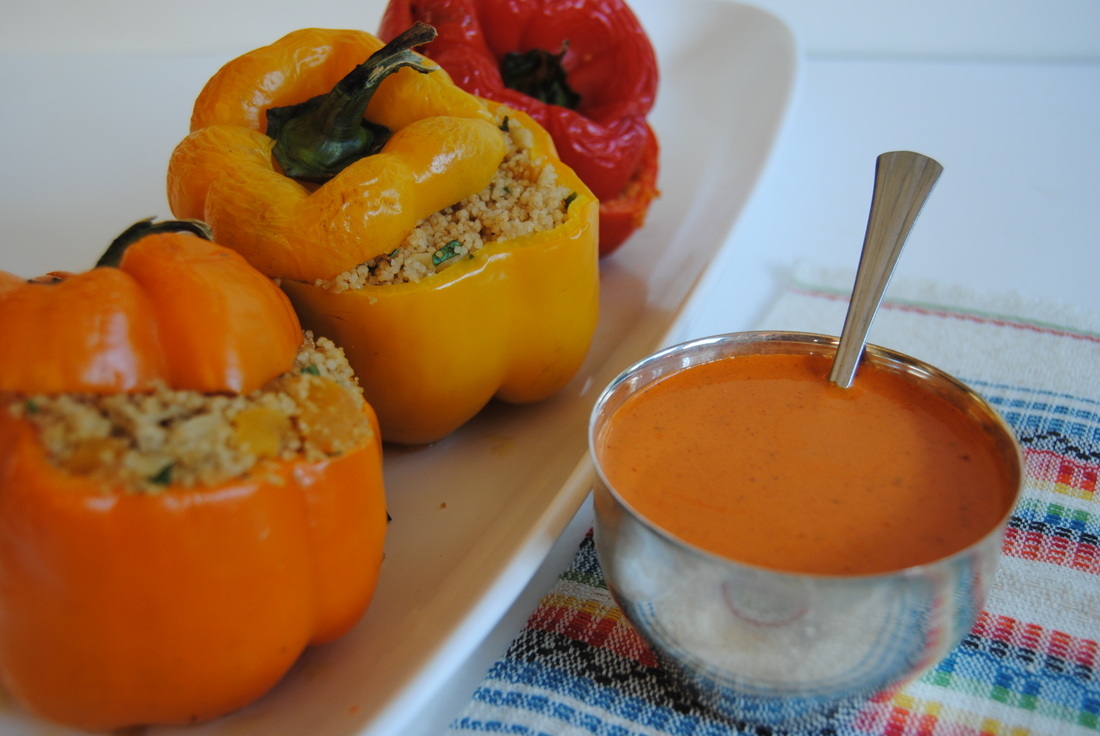  If you've been enjoying your local farmers market or CSA program as we've been this summer you may be seeing an abundance of hearty greens just waiting to make their way into your next recipe. Though kale is a very popular super green, there are many other varieties of hearty greens that offer similar benefits. We do have to admit that we love kale and had to challenge ourselves this week to give another hearty green a chance, and boy are we glad we did! Swiss chard has been making a steady appearance at the local markets and in our CSA boxes recently and inspired this recipe. But more on greens first!  The term dark green leafy vegetables refers to a large variety of lettuces (romaine, butterhead, arugula), greens (kale and collards), as well as spinach and swiss chard to name a few. Leafy greens are considered nutritional powerhouses due to their variety and high content of certain vitamins, minerals and antioxidants. Swiss chard in particular contains vitamin A, vitamin K, vitamin C, potassium, calcium, and iron. It is regarded as an important iron source specifically for those following vegan diets though may not be a reliable source of calcium due to the presence of oxalic acid in swiss chard which can bind calcium and inhibit absorption in the intestine. Swiss chard does have a more bitter taste than other greens and is less likely to be consumed raw for this reason. It cooks down well with long, slow cooking methods though we wanted to find a fresher use for this power green perfect for the late summer season. We think this recipe highlights chard in a subtle way and may help you fall in love with another green, we sure did! Swiss Chard and White Beans with Lemon Herb Olive Oil PREP TIME: 45 mins (+ 12 hour soaking time) TOTAL TIME: 50 minutes (+ 12 hour soaking time) Servings: 4 Ingredients Beans 1 1/2 cup dried white navy beans or any other variety of white bean Sauce* 1/2 cup extra virgin olive oil 1 bunch swiss chard 2 cloves garlic, minced 3 stems of fresh oregano, ~1 Tbsp of removed leaves 4 large fresh basil leaves, torn into small pieces I bay leaf, finely crushed 1 1/2 tsp paprika 1 /2 tsp sea salt Dash of red pepper flakes Juice of 1 small lemon Fresh tomato and pepper relish 1/2 cup diced cherry tomatoes (we used sweet yellow) 1/2 cup diced sweet pepper (we used sweet yellow) 1/4 tsp sea salt 1/4 tsp cracker black pepper 2 tsp red wine vinegar Start by placing the dried beans in a large bowl, cover with water, and place a lid or plate over the top. Allow beans to soak at room temperature for ~12 hours. Drain soaking water and give the beans a quick rinse before adding to a pot with enough liquid to cover and a sprinkle of sea salt. Bring mixture to a boil then lower heat to medium-low, partially cover with a lid allowing steam to escape, and simmer for ~45 minutes or until beans are tender but still firm enough to hold their shape. Drain beans from cooking liquid while reserving ~2-3 Tbsp of cooking water in a small bowl. Dice tomatoes and peppers into small cubes. Add red wine vinegar, salt, and pepper and stir to combine then set aside. Rise, de-stem, and chop swiss chard into bite size pieces and set aside. Using a mortar and pestle lightly smash the fresh oregano, basil, and bay leaf until fragrant. Add olive oil to a large pan and turn to medium low heat. Add crushed garlic to oil and stir until fragrant. Once oil has warmed, turn heat off and add chopped swiss chard, smashed herbs, paprika, salt, red pepper flakes, and lemon juice to the oil and stir to combine all ingredients. Add cooked beans to the finished sauce and stir until sauce is well dispersed. Serve beans warm with a spoon of fresh tomato pepper relish over the top. *Sauce inspired by this recipe from another food blog we love, 101 cookbooks by Heidi Swanson  This dish is leafy green perfection. The rich olive oil sauce brightened with plenty of paprika and flowery oregano creates a perfect medium for the slightly bitter swiss chard to truly shine. This over firm white beans and topped with a fresh tomato and sweet pepper relish is a meal you surely don't want to miss. With this recipe you won't have to wonder again what to do with those unique hearty greens - we think this will work with just about any variety! Enjoy, Jess and Cecelia   We've done it again friends. Another fresh summer recipe is waiting to make its way from our kitchen to yours. This dish is so right in the midst of summer. When it's this hot out we doubt you have plans to make standard lasagna anytime soon. This recipe is relatively quick, requires no cooking, and is a great way to use the abundant zucchini available at farmers markets and in home gardens. Just don't expect this to be anything like standard lasagna. Instead imagine a summer version of lasagna wearing a bikini. Still can't picture it? Well then this is a recipe you'll just have to try! Though first let's learn more about the star ingredient in this raw lasagna filling.  With the summer Olympics kicking off in Brazil this past weekend we were inspired to highlight the unique Brazil nut in this recipe. Though maybe less well known than some other nuts, Brazil nuts are an interesting nut variety with an important nutrient profile. Brazil nuts have protein, fiber, heart-healthy monounsaturated fat, and the highest selenium content of any other food (wow!). Selenium is an essential trace mineral necessary for inhibiting the oxidation of fat within the body, is important for immune protection, and helps to maintain healthy heart function. Selenium is also an antioxidant that when paired with vitamin E or vitamin A can help protect against inflammation. Given this fun fact, Brazil nuts paired with vitamin A rich tomatoes (as featured in this recipe!) may help improve inflammation from acne. Amazingly, Brazil nuts are the only naturally occurring concentrated source of selenium - you can get your daily dose with just two Brazil nuts a day! So now that you're completely pumped about Brazil nuts, let's hit the recipe. Raw Lasagna PREP TIME: 20 minutes + 12 hour soaking time TOTAL TIME: 30 minutes Servings: 9-12 Ingredients Nut cheese 1 1/2 cup raw unsalted Brazil nuts 1 1/2 cup raw unsalted cashews 1/4 cup raw shelled hemp seeds 1/4 cup nutritional yeast 2-4 Tbsp water 3 small cloves garlic, minced 1 tsp sea salt 1/8 tsp cracked black pepper Lasagna 3 medium or 5 small zucchinis 1 bunch raw kale (any variety will work) 1 Tbsp extra virgin olive oil 1/4 tsp sea salt 1/3 cup raw shelled hemp seeds Sauce 4 large tomatoes (we prefer a firmer tomato such as the roma variety which will hold their shape once cut) 2 small cloves garlic, minced 1/4 cup fresh basil, chopped 1/8 tsp cracked black pepper In a large bowl, combine Brazil nuts, cashews, and room temperature water to cover. Cover with a lid and allow nuts to soak for 8-12 hours. Drain water from nuts and place soaked nuts in a food processor. Add hemp seeds, nutritional yeast, garlic, salt, and pepper to the food processor. Turn machine on low and slowly add in 1 Tbsp water at a time until the texture resembles that of ricotta cheese. Place cheese in a bowl and set to the side. Using a mandolin, carefully cut zucchini into long strips 1/8" thick. Keep in mind you do not want the zucchini to be too thin as a thicker noodle will add texture to this dish. Place sliced zucchini to the side. Chop kale into bite size pieces and massage with olive oil and salt until kale has a wilted appearance. To make the tomato sauce, dice tomatoes and add to a bowl. Add minced garlic, chopped basil, and black pepper to the bowl of tomatoes and stir to combine. If you have very juicy tomatoes leading to a watery sauce, pour or strain off some of the additional liquid. To assemble the lasagna, place zucchini strips on the bottom of a 8"x 8" pan making sure to slightly overlap the strips. Spread 1/3 of the nut cheese over the zucchini, add 1/3 of the messaged kale, and a sprinkling of the hemp seeds. Repeat until you have 3 layers. Add an additional layer of zucchini on top. Using a piece of wax paper gently press down on the top of the finished lasagna. This will help to seal the layers. Using a very sharp knife, carefully cut lasagna into 9-12 pieces. Spoon tomato sauce onto a plate, place a piece of lasagna on top of the sauce, and finish with additional tomato sauce and a sprinkle of salt. Keep lasagna in an air tight container in the fridge. Lasagna is best consumed within 1-2 days.  This raw lasagna is every bit as different from standard lasagna as you can imagine, but in a really good way! So fresh and light from the thin strips of zucchini and massaged kale but satisfying and rich from the nut based filling. This all topped with a bright tomato sauce in the midst of tomato season is almost too good to be true. But it is true and can easily be making an appearance at your dinner table sometime soon. Enjoy (in a bikini), Jess and Cecelia  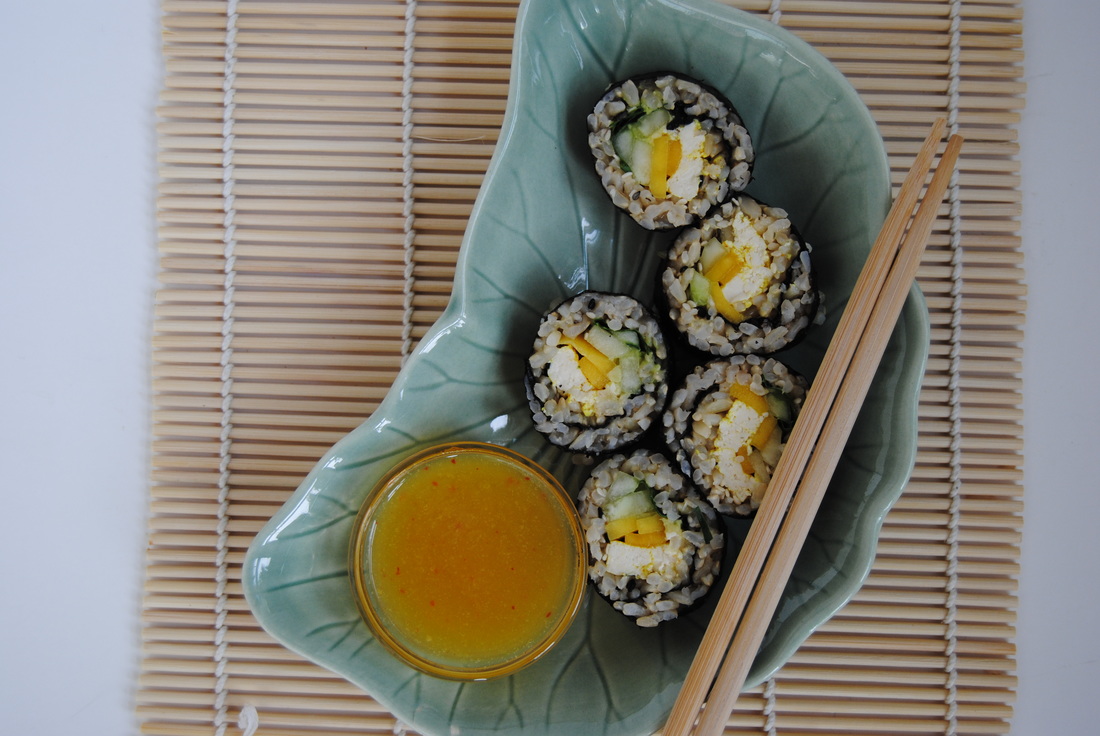 We've been on a roll this summer creating fabulous warm weather inspired recipes, or at least we think so! While it is still nice and warm we have less of a craving for hot meals requiring a lot of cooking time, leading us to wonder, what's for dinner? This week we decided on a vegetarian sushi roll packed with fresh flavors and bright colors. But before we get rolling let's find out more about the benefits of a key sushi making ingredient. 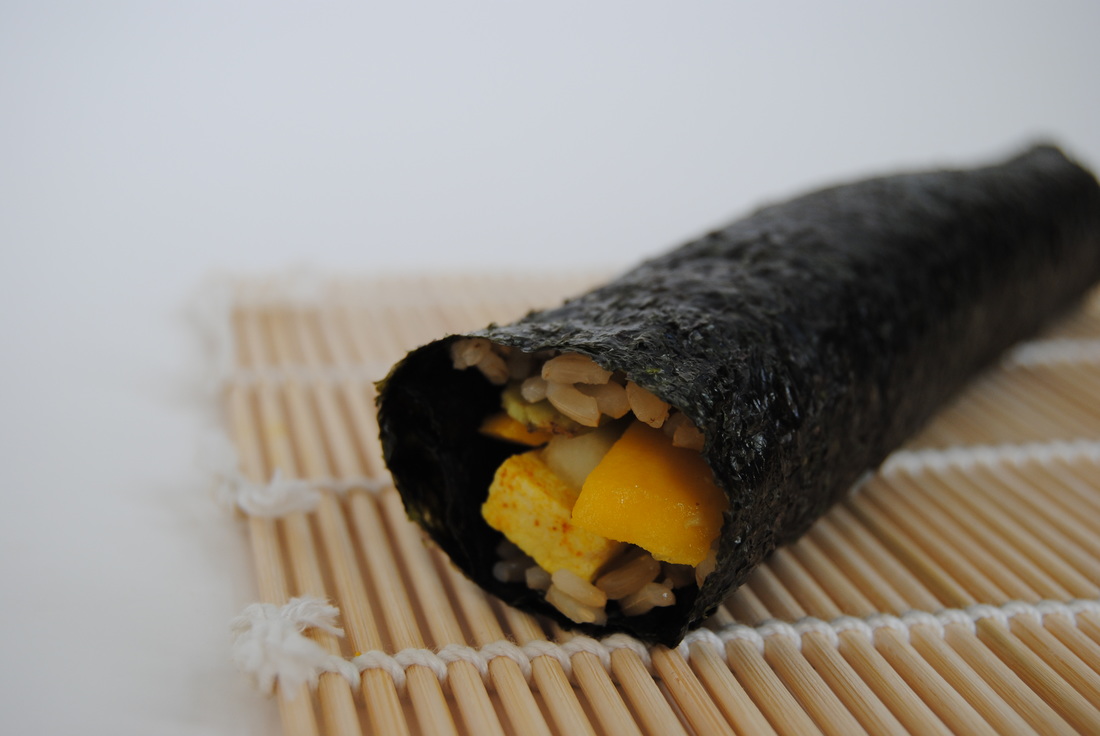 Seaweed is a key ingredient in sushi making that is rich in nutrients, minerals, and trace minerals and particularly high in iron, calcium, and iodine. Iodine is a trace element essential to the human body for normal thyroid function. It is found naturally in some foods (including seafood and seaweed), taken as a supplement, or consumed through fortified foods. Table salt, or iodized salt, is well known for its iodine fortification which began in the United States in the 1920s. Fortification began due to a large incidence of enlarged thyroid glands in the population shown to improve with iodine supplementation. Iodine deficiency still remains a global health concern mostly in developing countries without standard dietary fortification, though decreased intake of iodized salt in developed countries can lead to decreased iodine intake. Unlike seafood and seaweed, sea salt is not a good source of dietary iodine and has replaced iodized salt in many households. A sushi roll sized portion of seaweed does contain more than the recommended daily intake of iodine and can supply this vital nutrient in the diet. Though we will note recent concerns surrounding some seaweed and its exposure to toxins and pollutants in the ocean. But don't worry! Like with most foods we recommend balance and moderation to reap the benefits and minimize any potential risk. So now, on to seaweed's role in sushi making! Sushi rolling is truly an art that can be mastered with some practice. A common mistake in sushi making is over stuffing your roll. Over stuffed rolls are very difficult to roll, will be messy and difficult to seal. When new to sushi making, it will be easier to roll sushi with the rice on the inside of the seaweed as we did. Though if you prefer to have the rice on the outside of your role there are two key points to keep in mind: the rice must be sticky enough to hold to the seaweed paper and your sushi mat should be lined on both sides with plastic wrap to avoid the rice from sticking in the wooden grooves. With all sushi making it is important to keep the roll tight as you go to keep the ingredients from falling out once sliced. Well we hope that by now you are not too intimidated by the process and ready to tackle your own homemade sushi. Because sushi rolling at home is easy, quick, inexpensive, fun, and most importantly delicious! 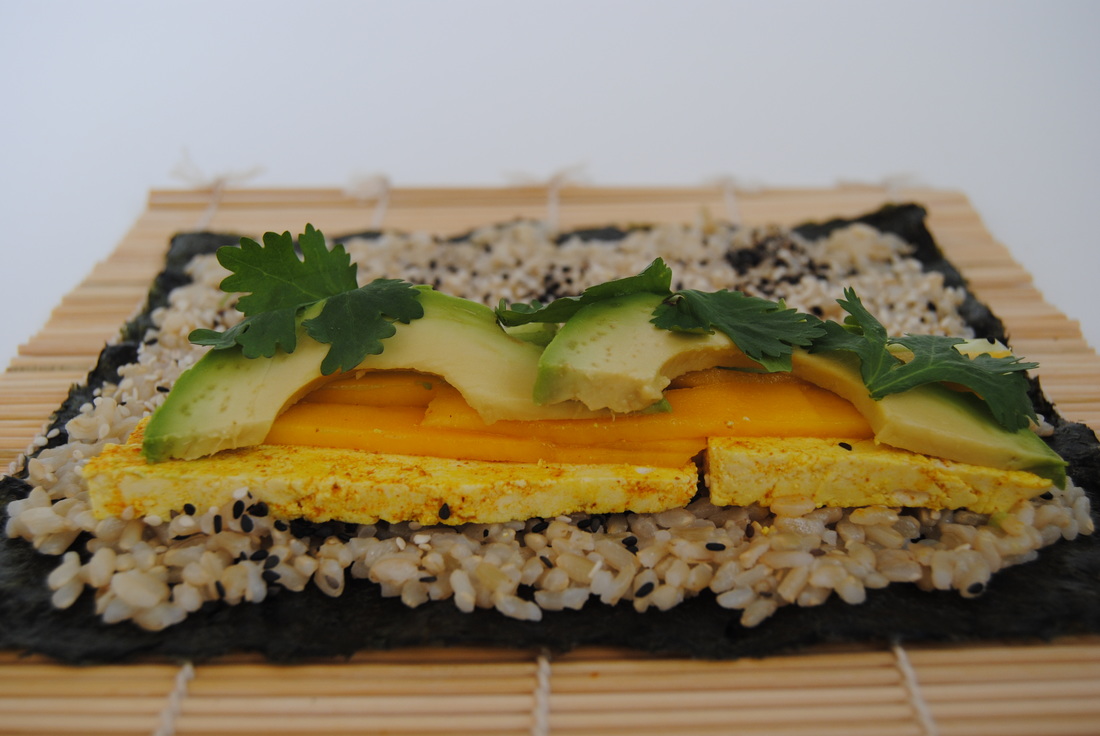 Summer Sushi Rolls with Mango Sweet and Sour Sauce PREP TIME: 1 hour (includes cooking & cooling rice) TOTAL TIME: 1 hour 15 mins Servings: 4 rolls Ingredients Sweet & Sour Rice 1 cup uncooked brown sushi rice 2 cups water 2 Tbsp raw apple cider vinegar 1 Tbsp cane sugar 1/2 tsp sea salt Roll 4 dried nori seaweed sheets 4 oz sprouted firm tofu 1/4 tsp powdered turmeric 1/4 fresh mango, thinly sliced 1 small cucumber, peeled and sliced into matchsticks 1/4 avocado, thinly sliced Fresh cilantro Black and white sesame seeds Mango Sweet & Sour Sauce 1/2 cup fresh mango, cubed 1/2 cup water 1/4 cup vinegar (we used lavender lemongrass vinegar, white vinegar will also work) 2 Tbsp cane sugar 1 dried red chili pepper 2 tsp wasabi powder (if unable to find look at specialty or Asian markets) Cook sushi rice according to package directions then remove from heat and add apple cider vinegar, cane sugar, and salt. Stir rice until well combined and place in the fridge to cool. To make the sauce, combine mango, water, vinegar, cane sugar, dried chili pepper, and wasabi powder in a blender. Mix on high until smooth. Place sauce into a shallow pan and simmer on the stove top for 10-15 minutes until sauce begins to thicken and sticks to the back of a spoon. Place in the fridge to cool. Next prepare the roll ingredients. Drain tofu, carefully cut into matchstick pieces, then generously sprinkle with powdered turmeric. If your tofu is on the dry side you made need to place in a shallow dish with ~1 Tbsp water to help the turmeric disperse and evenly cover the tofu. Peel the outer cucumber skin and slice into thin matchstick strips. Peel and slice mango and avocado into thin strips. To make your rolls place 1 sheet of nori on a sushi mat. Nori has a rough side and a smooth side - make sure the rough side is facing up. Place ~1/2 cup cooked sushi rice in the middle of the nori and carefully spread rice outward leaving ~1/2" space on the top and bottom of the nori. The sushi rice is sticky and we found it helpful to keep a small bowl of room temperature water on hand to dip your finger tips in to make spreading the rice easier. Starting at the end closet to you, place your filling ingredients in a horizontal line (pictured above). With the sushi mat underneath the nori sheet carefully roll nori over ingredients while pulling the mat tight as you roll to form a seal. Continue this process until you have a sealed sushi roll. Evenly cut roll into 8 slices. Repeat until all the ingredients have been used. If you do not plan to eat all the rolls at the time of making, uncut rolls will stay fresh in the fridge for 2-3 days. Dip and enjoy! 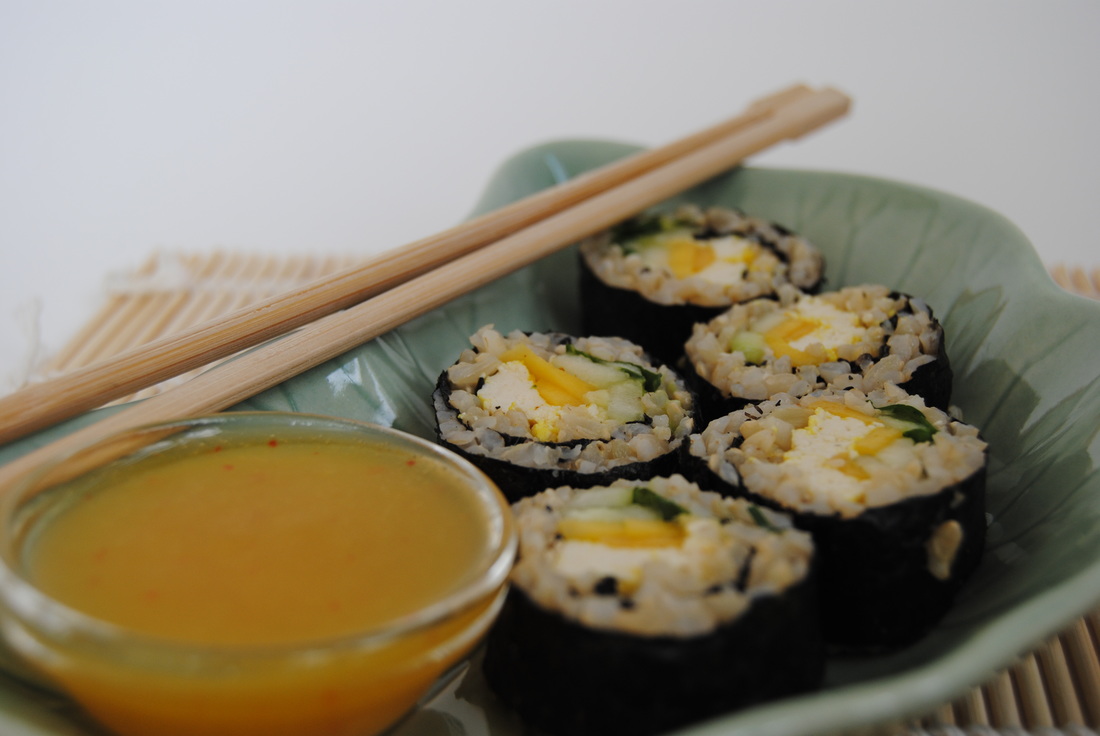 This roll is so fresh, bright, and light but filling - basically a perfect summer meal. And this mango sweet and sour sauce with wasabi is the ideal place for your gorgeous little sushi rolls to take a dip! It's sweet and tangy with a strong spicy kick from the wasabi. Now finish those rolls and get back to whatever fun summer activities you've been enjoying today. Have fun, Jess and Cecelia 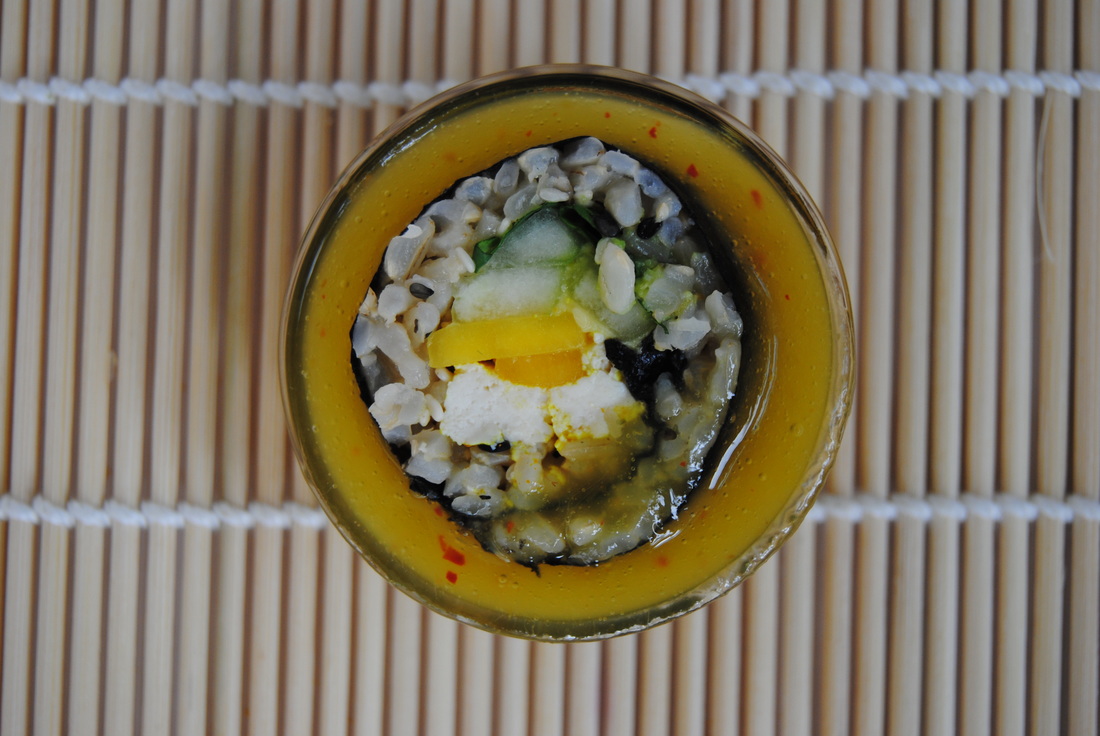 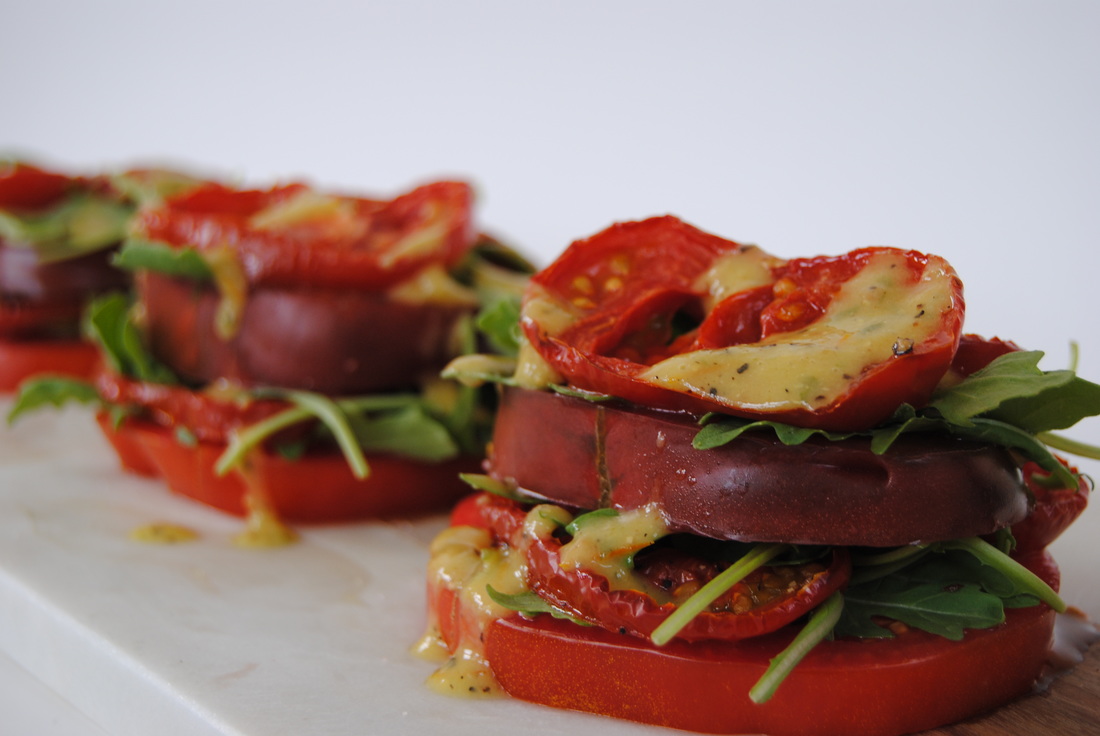 Oh happy day! It's tomato season again friends and we just couldn't be happier. There are truly few things better than a fresh, local, sun-ripened tomato in the middle of summer. You may remember our love of tomatoes from this post last year, but if not we have plenty more tomato fun where that came from. This year we're pulling out all the stops and preparing four different types of tomatoes in three different preparations. How? Read on to find out!  You may also remember from another post last summer our love for eating local. So we hope that this current post is a reminder to get to your local farm stand, farmers market, or grocer with local produce ASAP. This is the time for fresh, local produce and we don't have to remind you that it doesn't last long at this latitude. Or maybe even hit up that friend or neighbor with an abundant garden if they are willing to share. Fresh produce just can't be beat in terms of quality, nutrient density, and most of all taste! This week we've scoured Chicago and come up with four varieties of local tomatoes: Black Krim, Better Boy, Beefsteak and Yellow Cherry tomatoes. Any varieties of tomatoes that you like will work though, just adjust the portions you use accordingly. Stacked Tomato Salad PREP TIME: 30 mins TOTAL TIME: 35 mins Servings: 2 Ingredients Salad 1 large Black Krim tomato (or any heirloom) 1 large Beefsteak tomato (or any large, red variety) 2 medium-large Better Boy tomatoes (or any medium, red variety) 1/2 cup baby arugula 1 Tbsp extra virgin olive oil Sprinkle of salt and pepper Vinaigrette 1/2 pint yellow cherry tomatoes (~5 ping-pong sized tomatoes, can be any variety) 1/4 cup extra virgin olive oil 1.5 tsp raw apple cider vinegar 1.5 tsp fresh lemon juice 1 tsp stone ground mustard 1 Tbsp chopped fresh basil salt and pepper to taste Preheat oven to 350 degrees. Slice Better Boy tomatoes into half inch thick slices and place on a parchment lined baking sheet. Drizzle 1 Tbsp olive oil and a sprinkle of salt and pepper over the top of the tomato slices and roast in the oven for ~25 minutes or until candied. Remove tomatoes from the oven and allow to cool. Meanwhile, turn oven to broil and place cherry tomatoes on a baking pan under the broiler for 10-12 minutes or until well charred with a generous amount of blacked skin. Note that while broiling the cherry tomatoes they will begin to pop open - this is expected given the high heat. Removed charred tomatoes from the oven and place tomatoes and their juices in a blender or food processor along with the olive oil, vinegar, lemon juice, mustard, basil, salt and pepper for the vinaigrette. Blend ingredients on high until a smooth consistency is formed and set aside. To assemble the salad, slice the Black Krim and Beefsteak tomatoes into 1/2 inch slices. Layer 1 slice of Beefsteak tomato, 2 slices of roasted Better Boy, and 1 slice of Black Krim tomato on top of each other. Place baby arugula in between each tomato layer. Repeat with the remaining tomato slices and arugula. This should make 3-4 stacks about 3-4 layers thick. Sprinkle the top with salt and pepper to taste and drizzle charred tomato vinaigrette over the top of each stack. Serve as is or enjoy with thick sliced bread. We chose a seeded fennel anise bread from our local farmers market. Extra dressing can be stored in an air tight container in the fridge for ~1 week. 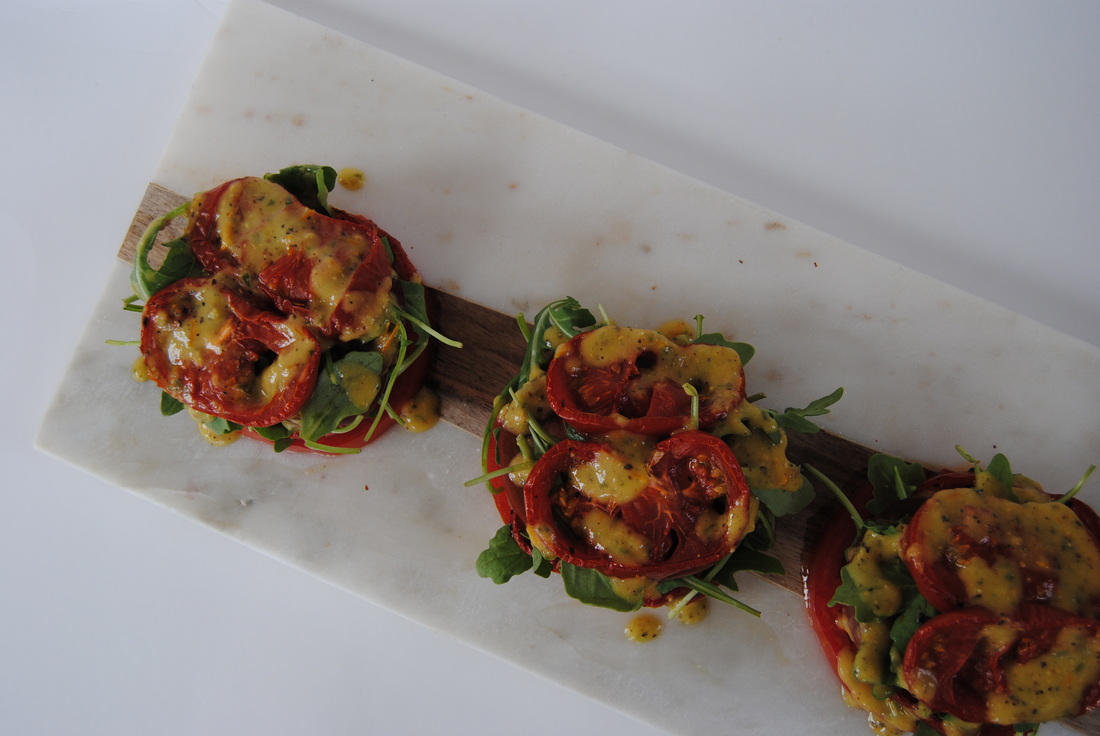 This salad is just so, summer. Each preparation highlights the tomato in a unique and exciting way. The charred vinaigrette is smokey and bold, the roasted tomatoes have a depth of tomato flavor and a perfect sweetness, and the fresh tomatoes are juicy and well, fresh! With this recipe you'll never have to think twice about buying an extra tomato (or four!) while they are abundant this season. Enjoy, Jess and Cecelia  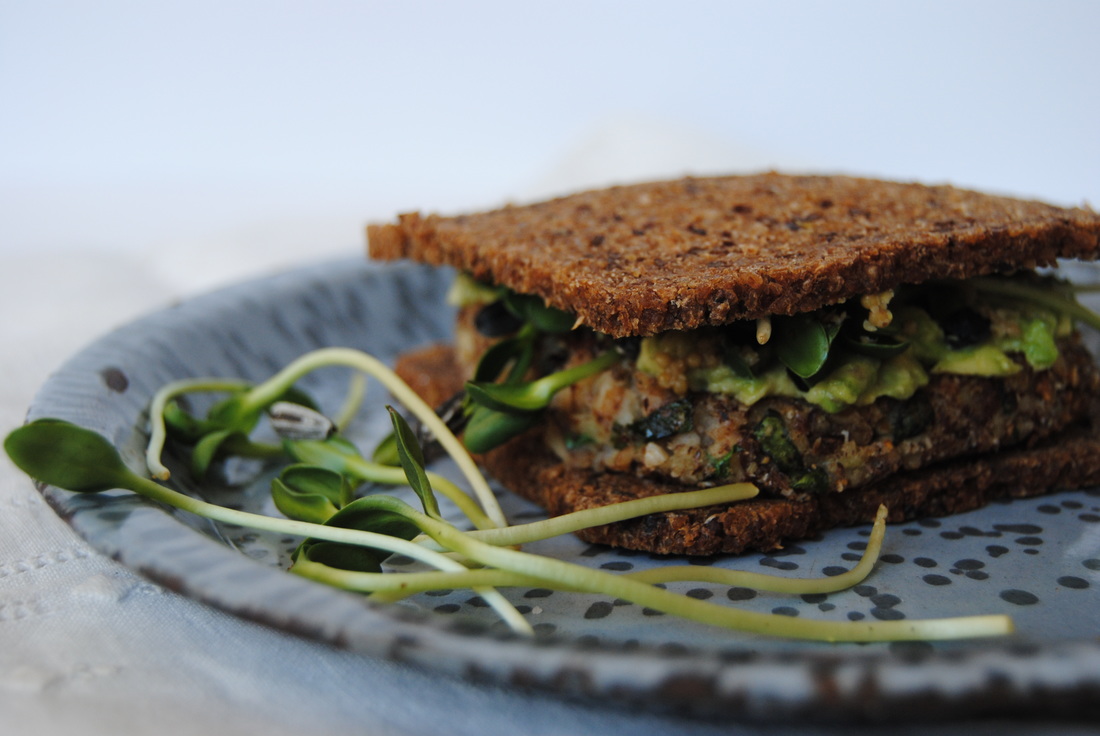 Okay, so we've officially made it to summer 2016 as of this Tuesday friends! As you know we are already well under-way with our summer inspired recipes and hope you've been enjoying them thus far. There is just so much to enjoy during the summer months that we can only think of one complaint; being invited to a BBQ to find that the only vegetarian friendly option is a bad veggie burger. Ever been in a similar situation? If so, we are here to solve your problems this summer! But first, what do we mean by a "bad" veggie burger.  It's not that veggie burgers are inherently bad (of course not, we made one!) but some are lacking in, well, veggies. Often veggie burgers can be a mix of heavy starches (beans, rice etc.) and held together with egg ingredient, so not vegan friendly. A starchy veggie burger like that on a bun can be unsatisfying due to lack of variety and texture and can leave you wondering if you even ate any vegetables at all. And not to mention the unpronounceable and undesirable ingredients hiding in many processed, brand name burgers. Well not in this kitchen! Our veggie burgers are changing the game with a base of mushroom and potato, packed with green kale, and crusted in hazelnuts for a satisfying crunch. You'll never say no to a BBQ again once you have one (or two) of these in your pack. But remember, even the best homemade veggie burger has a hard time holding up on the grill so we suggest cooking on foil or in a sauté pan on the stovetop if you're at an indoor/outdoor party. Let's get to it! Hazelnut Crusted Veggie Burger PREP TIME: 30 mins TOTAL TIME: 45 mins Servings: 8-10 burgers Ingredients Burger 1 cup white navy beans (we used canned white navy beans) 1/2 pound Yukon gold potatoes 3/4 cup cooked cracked bulgur wheat (or grain of choice, ex: cracked wheat berries, brown rice, oatmeal etc.) 1 small sweet yellow onion, diced 1 pound shiitake mushrooms, diced 1 cup kale, finely chopped 1/3 cup fresh parsley, chopped 3/4 cup roasted hazelnuts, crushed 1/2 cup fried onion strings 1 Tbsp ground flax seed 1 Tbsp coconut oil + another 1 Tbsp if cooking in a pan on the stove top 1 clove garlic, minced 1 tsp sea salt 1/2 tsp pepper Burger coating 1 cup roasted hazelnuts, crushed 2 Tbsp ground flax seed Burger bread & toppings Flaxseed bread (we used Feldkamp flaxseed bread) Avocado Sunflower sprouts Kombucha mustard (our recipe here) Cook cracked bulgur wheat according to package directions. Set aside and allow to cool. Cook potatoes in a large pot of boiling water until soft and a fork goes in easy, ~20 minutes While the potatoes are cooking, add coconut oil to a large saute pan on medium heat and add the diced onion, sea salt and pepper. Cook until onions are translucent and caramelized, then add the chopped mushrooms and minced garlic and cook until soft and fragrant, additional ~5 minutes. Add chopped kale to pan and continue to cook for an additional 2 minutes. Remove vegetables from heat and allow to cool. Drain potatoes from water and mash with a potato ricer. Add beans and continue to mash until combined. Note it is okay to have some full beans in the mixture. Add cooled bulgur wheat, cooled vegetables, fresh parsley, 3/4 cup chopped hazelnuts, onion strings, and 1 Tbsp ground flax seeds to the bean and potato mixture. Stir well to fully combine all ingredients. In a separate, small, shallow dish, combine 1 cup crushed hazelnut and 2 Tbsp ground flax seed and set aside. Using your hands shape mixture into 8-10 evenly sized burgers. Gently press into hazelnut/flax seed mixture to fully coat and place on wax paper. To cook the burgers indoors heat a non-stick pan or well seasoned cast iron skillet with 1 Tbsp coconut oil. Cook burger for 3-5 minutes on each side or until golden brown. Note that it is best to use a large spatula to flip burgers to prevent them from breaking apart. If you are cooking burgers outside on a grill, we suggest placing the burger on tin foil prior to placing on the grill. This will prevent the burger from sticking to the grill while still allowing the burger to fully heat up. Cook on the grill for 5-7 minutes. Lightly toast bread, place burger on one side, add smashed avocado, sunflower sprouts, kombucha mustard, and sprinkle of sea salt, and top with another slice of bread. Prepare all at once for a large group or save* for a later date. *If you do not plan to eat all the burgers at once, they will stay fresh in the fridge for 5-7 days. Simply follow cooking directions listed above when ready to eat. They also freeze really well. If freezing, place each burger in a sealed bag or place parchment or wax paper between each burger in a container and allow to freeze fully. They will keep in the freezer for up to 3 months. Just remember to fully thaw burger prior to cooking.  So stock your freezer full of these "good" veggie burgers this summer to enjoy at home, entertain with, or even bring with you to other events. Or maybe send those vegetarian un-friendly hosts (you know who they are) this post as a little hint! These veggie burgers have just the right amount of starch but are packed with plenty of actual veggies, have a great crunch from the hazelnuts, and a mild taste that will lend itself to any toppings you love (because BBQ's are really about the toppings right!?). We hope you have the best start to summer and a wonderful season ahead. Happy Summer, Jess and Cecelia  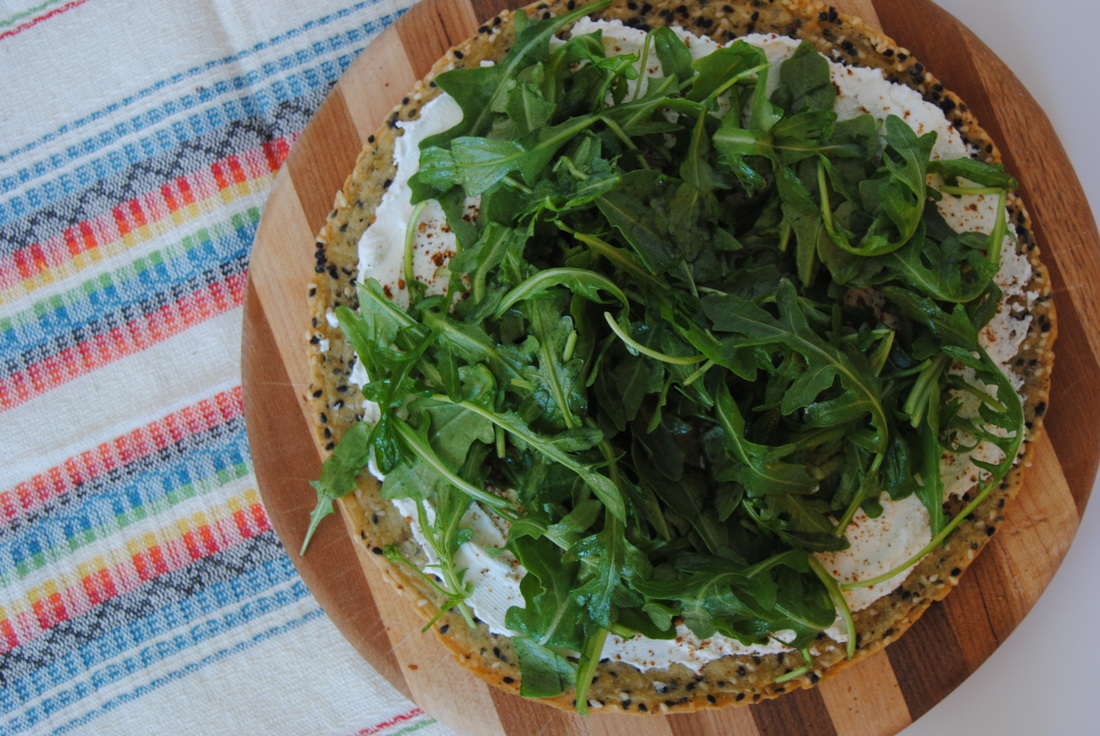 As the days get warmer and longer our food cravings naturally tend to get cooler and lighter. But there are some favorite comfort foods that we are still going to want day in and day out, take pizza for example. This pizza recipe made with the amazing socca bread (you'll learn all about socca next!) is so light, fresh and perfect for your culinary transition into the warmer months. And even though relatively easy to make, there is just something about socca that seems so unique and impressive. Ready to learn more? 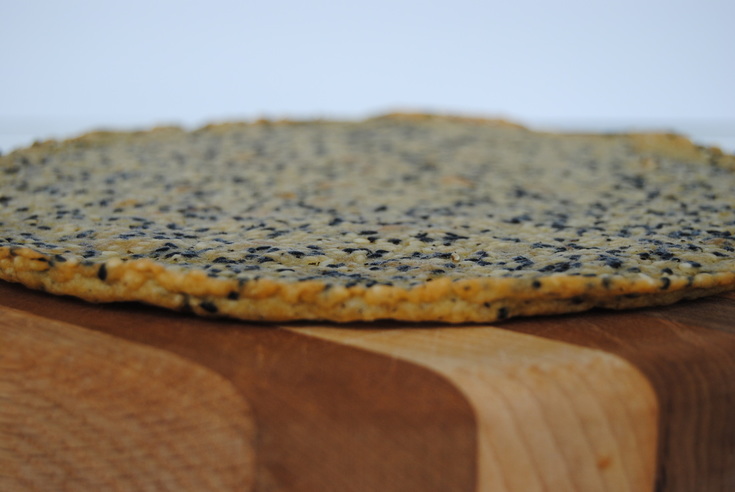 Socca is a thin pancake or crepe made from chickpea flour, water, olive oil, and salt. Socca bread is a typical street food in the Mediterranean and may go by a different name based on where it is made; socca in France, farinata in Italy, and faina in Argentina. This pancake can be as simple as flour, water, oil, and salt or completely dressed up with herbs, spices, nuts, and seeds. We prefer to toss in pretty much every seed we have in our pantry! Socca is really easy to make and the batter comes together in a matter of minutes. Keep in mind we do prefer to make the batter and let it rest for at least 2 hours covered at room temperature prior to cooking. This will not only improve the taste and texture of the finished product but will also make it easier for your body to digest because of the "pre-soak" for the chickpea flour (more on that topic here). Chickpea flour goes by many names including garbanzo flour, gram flour, or besan and is the main ingredient in socca bread. This flour is gluten free and high in protein and fiber. One cup of chickpea flour contains 21 grams of plant protein and 10 grams of fiber making this is a must have in your baking cabinet! And once you taste how good socca is, you'll being needing to stock-up often. So let's get to it! Super Seeded Socca Pizza PREP TIME: 10 mins + 2 hours soaking time TOTAL TIME: 2 hours 30 mins (with soaking) Servings: 2, 8" pizzas Ingredients Socca Dough 1 cup + 2 Tbsp chickpea flour 1 1/4 cup warm water 2 Tbsp olive oil 2 Tbsp chopped sunflower seeds 1 Tbsp shelled hemp seeds 1 Tbsp white sesame seeds 1 Tbsp black sesame seeds 1/2 tsp sea salt 1/4 tsp black pepper 2 Tbsp ghee added to the bottom of a cast iron skillet (we recommend a 8-9" skillet) Toppings 1/2 pound feta cheese (we used Bulgarian sheep's milk feta) 4 cups arugula 2 Tbsp olive oil 2 Tbsp fresh lemon juice Sprinkle of sea salt to taste 1 Tbsp + 1 tsp red zaatar (Mediterranean herb blend) In a large mixing bowl, whisk together the chickpea flour and water. Add the olive oil, salt, and pepper and continue to whisk until a smooth, thin batter is formed. Cover batter and allow to sit at room temperature for at least 2 hours. Once the batter has rested, add in the sunflower seeds, hemp seeds, and sesame seeds then stir to combine. Generously oil the bottom and sides of a cast iron skillet and place in the oven. Preheat the oven to 450 degrees with the skillet inside. Carefully remove hot skillet from oven and pour in half of the batter making sure to evenly coat the bottom of the pan. Place skillet back in the oven and cook for 10-12 minutes or until the socca pulls away from the sides of the pan. For the last 2 minutes, turn the broiler on and lightly toast the top of the socca bread. Remove from the oven and allow to cool for ~10 minutes. Using a thin metal spatula or butter knife, carefully loosen the socca from the pan. You could also invert the pan onto a large cutting board and allow the socca to release from the pan. Oil the cast iron skillet with 1 Tbsp ghee and cook the second socca bread.* Next, using a standing or a handheld mixer, whip feta cheese on high until light and fluffy. Evenly spread half the feta on each socca bread then sprinkle each with 2 tsp zaatar. Toss arugula in olive oil, lemon juice, and a pinch of sea salt and place evenly on top of both socca breads. Slice into wedges, serve, and enjoy! *If you do not plan to eat the second socca dough right away, it does freeze nicely in an airtight container. When reheating socca, preheat oven to 450 degrees and place frozen bread directly on the rack for 4-5 minutes.  Like we said, there is just something about socca bread. It's both soft and crispy at the same time and has a rich, savory taste that really just can't be described. These pizza toppings compliment socca perfectly but it's uses are many. Think socca as a wrap or crepe base, sliced for dipping, cut and toasted into crackers, or even a sweet dessert "pizza" with soft cheese, jam, and fresh fruits. Remember the added seeds are optional in the socca base depending on what you're making. We can't wait to hear how you use socca in your kitchen. Happy eating, Jess and Cecelia  |