|
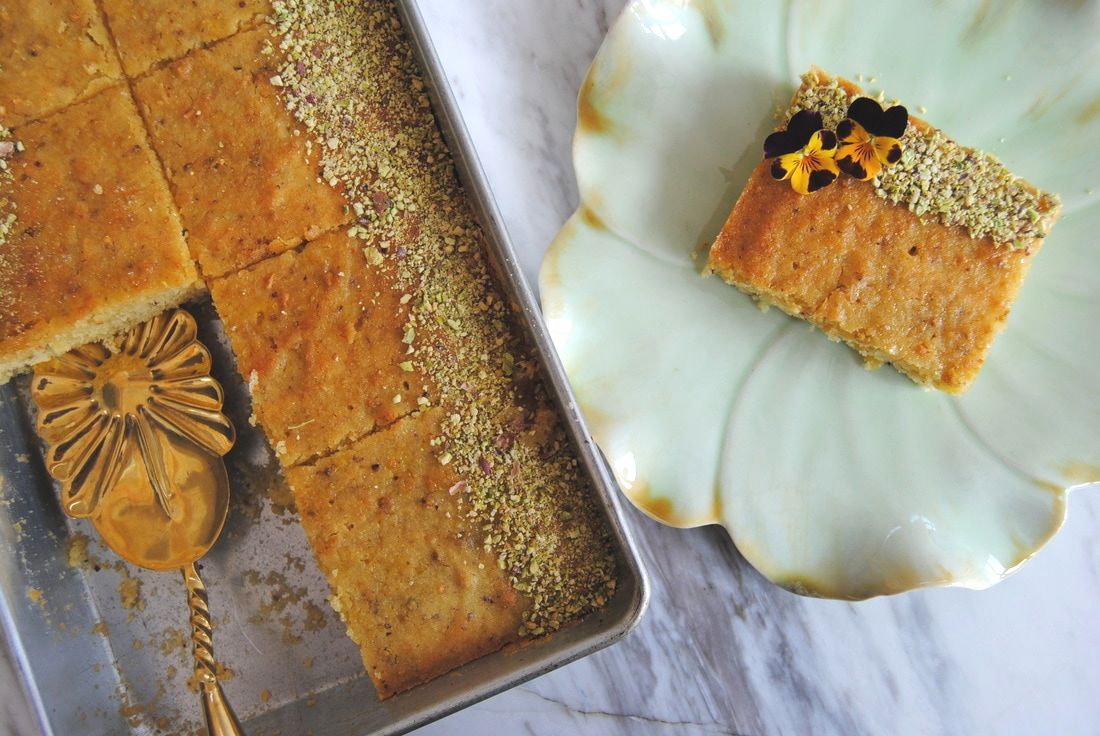
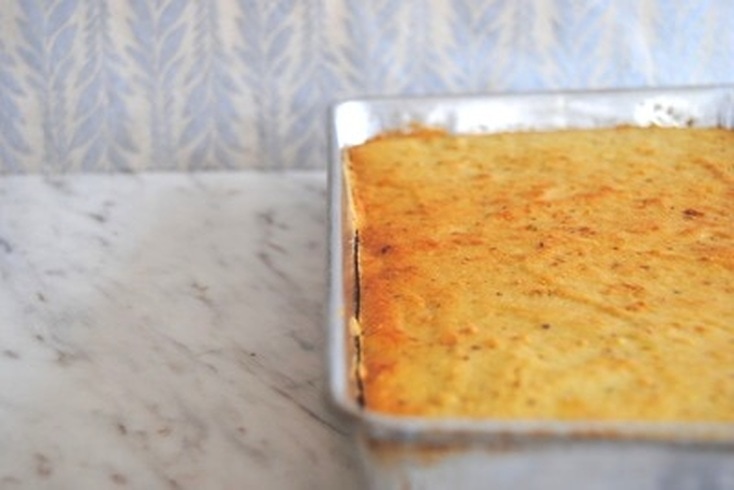
Hey you guys, Mother's Day is quickly approaching and we've got the treat planning under control. This is the cake she'll want for her special day and here's why - there are just so many options! We made a pistachio version of this cake last year (here) and since then have realized how versatile this cake really is. Of the many options, we know you'll either find one your mother will love or create your own amazing variation. We will start with a basic recipe for semolina cake and then help get your creativity going with a few of our favorites... Semolina Cake PREP TIME: 15 mins TOTAL TIME: 50 mins Servings: 10-12 Ingredients Cake 2 cups semolina flour 1 cup cane sugar 10 Tbsp unsalted butter, melted 1 cup plain milk kefir 1/3 cup thick vanilla yogurt; Greek or Icelandic 1 tsp baking powder Syrup 4 Tbsp freshly squeezed orange juice 2 Tbsp light clover honey 1/4 tsp sea salt 1. Preheat oven to 350°. Lightly butter a 9x13" pan and set aside. 2. In a large mixing bowl combine the kefir, yogurt, and sugar then add the semolina flour and baking powder. Stir in the melted butter and mix until just combined. Avoid over mixing the batter. Pour batter into prepared pan and cook in preheated oven for 35 minutes or until a toothpick comes out clean. Once the cake is fully cooked turn the oven to broil and move the cake to a higher rack for 3-5 minutes so that the top becomes a golden brown. Watch carefully the entire time you are broiling to avoid burning the top of the cake. 3. While the cake is baking, prepare the orange syrup. Combine orange juice, honey, and sea salt and mix well. Once the cake comes out of the oven, use a toothpick to carefully poke holes (making sure to reach the bottom of the pan) every one inch across the surface of the cake. The purpose of this is to help the cake absorb the syrup. While the cake is still warm, evenly pour the orange syrup over the top of the cake. OPTIONS 1. Lemon Semolina Cake Ingredients Cake 2 cups semolina flour 1 cup cane sugar 10 Tbsp unsalted butter, melted 1 cup plain milk kefir 1/3 cup thick vanilla yogurt; Greek or Icelandic Zest of one large lemon, ~1 Tbsp 1 tsp baking powder Syrup 4 Tbsp freshly squeezed lemon juice 2 Tbsp light clover honey 1/4 tsp sea salt 1. Preheat oven to 350°. Lightly butter a 9x13" pan and set aside. 2. In a large mixing bowl combine the kefir, yogurt, lemon zest, and sugar then add the semolina flour and baking powder. Stir in the melted butter and mix until just combined. Avoid over mixing the batter. Pour batter into prepared pan and cook in preheated oven for 35 minutes or until a toothpick comes out clean. Once the cake is fully cooked turn the oven to broil and move the cake to a higher rack for 3-5 minutes so that the top becomes a golden brown. Watch carefully the entire time you are broiling to avoid burning the top of the cake. 3. While the cake is baking, prepare the lemon syrup. Combine lemon juice, honey, and sea salt and mix well. Once the cake comes out of the oven, use a toothpick to carefully poke holes (making sure to reach the bottom of the pan) every one inch across the surface of the cake. The purpose of this is to help the cake absorb the syrup. While the cake is still warm, evenly pour the lemon syrup over the top of the cake. 2. Chia & Poppy Seed Semolina Cake Ingredients Cake 2 cups semolina flour 1 cup cane sugar 2 Tbsp chia seeds 1 Tbsp poppy seeds 10 Tbsp unsalted butter, melted 1 cup plain milk kefir 1/3 cup thick vanilla yogurt; Greek or Icelandic Zest of one large lemon, ~1 Tbsp 1 tsp baking powder Syrup 4 Tbsp freshly squeezed lemon juice 2 Tbsp light clover honey 1/4 tsp sea salt 1. Preheat oven to 350°. Lightly butter a 9x13" pan and set aside. 2. In a large mixing bowl combine the kefir, yogurt, lemon zest, and sugar then add the semolina flour, chia seeds, poppy seed, and baking powder. Stir in the melted butter and mix until just combined. Avoid over mixing the batter. Pour batter into prepared pan and cook in preheated oven for 35 minutes or until a toothpick comes out clean. Once the cake is fully cooked turn the oven to broil and move the cake to a higher rack for 3-5 minutes so that the top becomes a golden brown. Watch carefully the entire time you are broiling to avoid burning the top of the cake. 3. While the cake is baking, prepare the lemon syrup. Combine lemon juice, honey, and sea salt and mix well. Once the cake comes out of the oven, use a toothpick to carefully poke holes (making sure to reach the bottom of the pan) every one inch across the surface of the cake. The purpose of this is to help the cake absorb the syrup. While the cake is still warm, evenly pour the lemon syrup over the top of the cake. 3. Raspberry Swirl Semolina Cake Ingredients Cake 2 cups semolina flour 1 cup cane sugar 10 Tbsp unsalted butter, melted 1 cup plain milk kefir 1/3 cup thick vanilla yogurt; Greek or Icelandic 4 Tbsp raspberry preserves Zest of one large lemon, ~1 Tbsp 1 tsp baking powder Syrup 4 Tbsp freshly squeezed lemon juice 2 Tbsp light clover honey 1/4 tsp sea salt 1. Preheat oven to 350°. Lightly butter a 9x13" pan and set aside. 2. In a large mixing bowl combine the kefir, yogurt, lemon zest, and sugar then add the semolina flour and baking powder. Stir in the melted butter and mix until just combined. Avoid over mixing the batter. Pour batter into prepared pan then add 1 Tbsp, 4 dollops of raspberry preserves in each corner of the cake. Take a butter knife and swirl each raspberry dollop into the cake batter. Cook in preheated oven for 35 minutes or until a toothpick comes out clean. Once the cake is fully cooked turn the oven to broil and move the cake to a higher rack for 3-5 minutes so that the top becomes a golden brown. Watch carefully the entire time you are broiling to avoid burning the top of the cake. 3. While the cake is baking, prepare the lemon syrup. Combine lemon juice, honey, and sea salt and mix well. Once the cake comes out of the oven, use a toothpick to carefully poke holes (making sure to reach the bottom of the pan) every one inch across the surface of the cake. The purpose of this is to help the cake absorb the syrup. While the cake is still warm, evenly pour the lemon syrup over the top of the cake. Have you found your fancy? If not, create a cake of your own using the basic semolina cake recipe as the base. And as always, please share what you created. We love to hear from you!
Enjoy, Jess and Cecelia
0 Comments
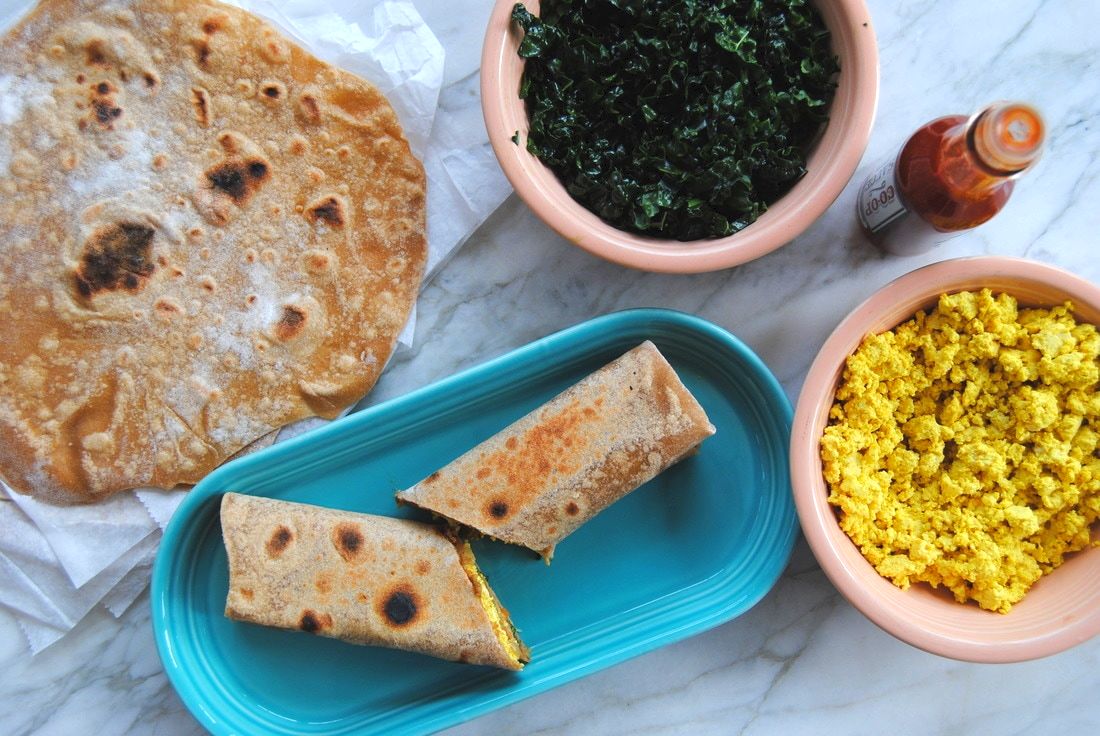
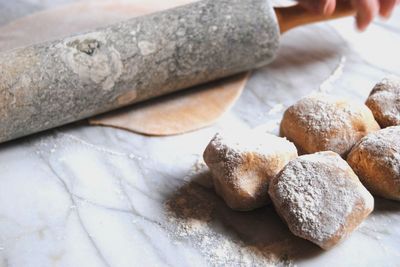
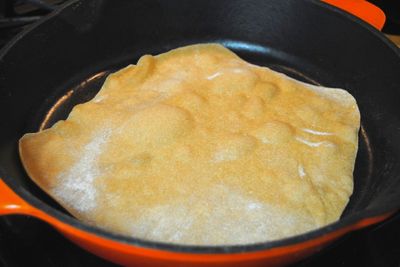
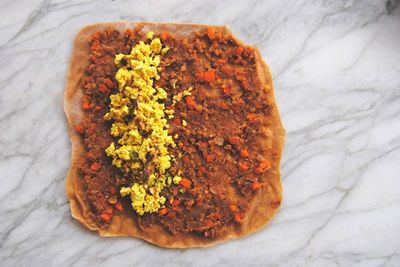
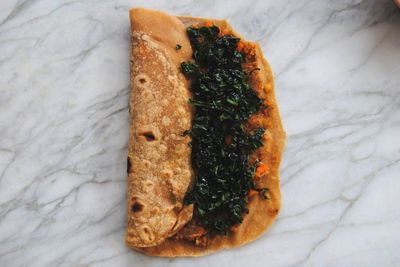
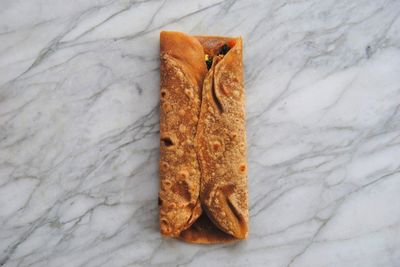
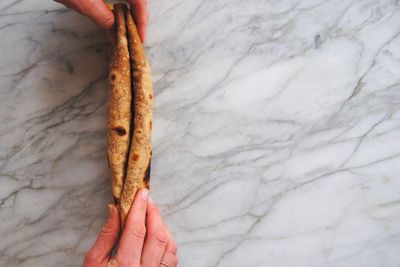
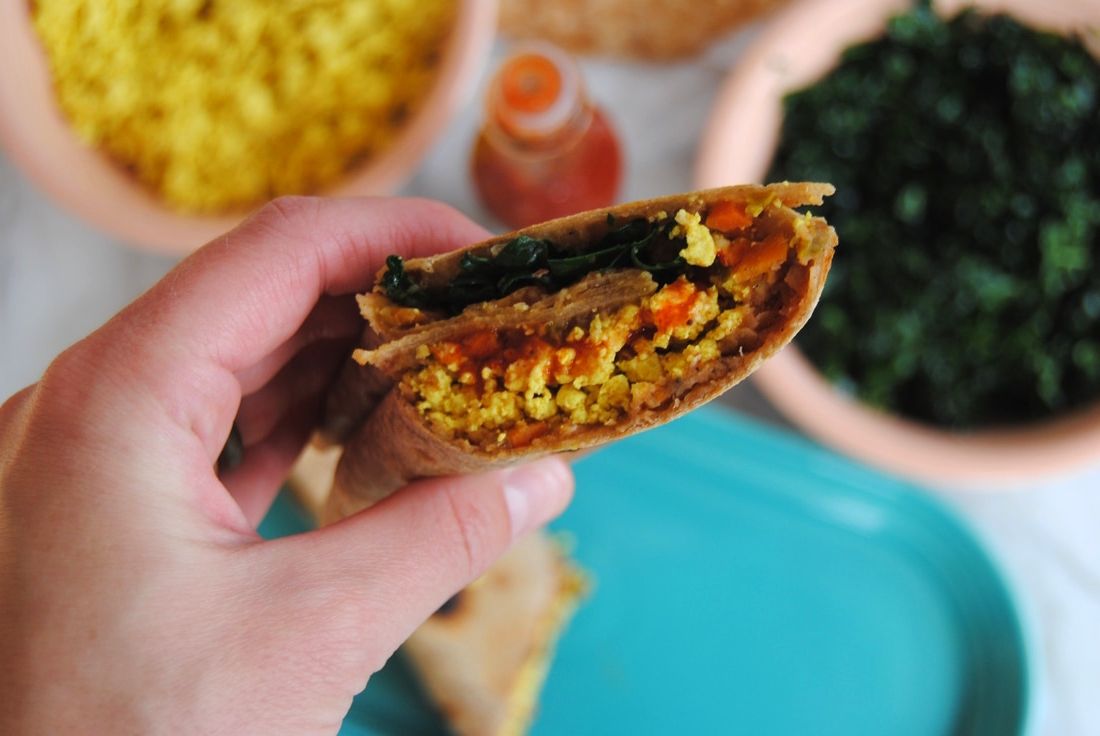
Hi friends! Our kitchen creativity is in full force this week and this recipe is the amazing outcome. Though there are many ingredients and a longer time commitment, the preparation is fairly simple and this recipe reheats well for meals all week! The one preparation that is more complicated is the making of yufka, a Turkish unleavened flatbread similar to a flour tortilla. But trust us, it is SO worth it. With preparation once a week you'll have delicious homemade bread available for snacking, dipping, or wrapping foods of your choice. And since this bread is unleavened, preparation is simpler than leavened, yeast breads. Also a note on shawarma which typically refers to a type of Middle Eastern meat preparation. Creatively, instead we used the traditional shawarma blend of spices in our lentils for an extra kick of flavor because hey, veggie protein needs love and flavor to! So, who's ready to get creative? Shawarma Spiced Red Lentil & Golden Tofu Wraps PREP TIME: 45 minutes (+ 4 hours to let yufka dough rest) TOTAL TIME: 60 minutes (+ 4 hours to let yufka dough rest) Servings: 6 wraps Ingredients Yufka Dough/Flour Tortilla (Adapted from Soframiz by Ana Sortun & Maura Kilpatrick) 1 2/3 cup whole wheat flour, plus more for dusting 1 tsp sea salt 2/3 cup warm water 2 Tbsp extra virgin olive oil Shawarma Spice Mix 1 Tbsp + 2 tsp ground black pepper 1 Tbsp + 1 tsp ground all spice 1 1/4 tsp ground cinnamon 1 1/4 tsp ground cumin 1 1/4 tsp ground nutmeg 1 1/4 tsp ground cardamom Lentils 1/2 cup split red lentils 1/2 cup tomato sauce 1/2 medium yellow onion, diced 3-4 medium carrots, diced 2 tsp coconut oil 1 Tbsp shawarma spice Golden Tofu 12 oz extra firm sprouted organic tofu 2 tsp coconut oil 1 tsp ground turmeric 1/2 tsp sea salt 1/8 tsp crushed red pepper flakes Messaged Kale 6-8 large stalks of organic kale 1 Tbsp coconut oil 1/4 tsp sea salt To make the yufka dough mix the whole wheat flour and salt together in a large bowl then make a well in the center. Pour the warm water and olive oil in the center of the well then use your hand to combine the wet and dry ingredients until a soft dough is formed. Lightly dust a clean work surface with flour and knead dough for 2-3 minutes or until the dough ball is smooth and elastic. Place the dough back in a bowl with a little olive oil to coat to prevent the dough from sticking to the bowl. Cover with plastic wrap and allow to sit at room temperature for 4 hours or overnight. This dough can be made a day in advance and stored in the fridge after a minimum of 4 hours sitting at room temperature. If stored in the fridge, remove the dough and allow to come to room temperature for 30 minutes. Cut the dough ball in half and divide each half into 3 equal pieces for a total of 6 small ~2 ounce dough balls. Dust a clean work surface with flour and roll each dough ball out as thin as possible, about 8-9" round. Using a seasoned cast iron pan or a non-stick pan set to medium heat cook the yufka on one side until bubbles start to form and the bottom is slightly browned, ~2 minutes. Remove from the pan after the one side has been cooked and place on a plate or sheet pan with a layer of parchment paper on top. You only want to partially cook the yufka dough at this point. Over cooking or cooking both sides can make the yufka too crunchy and hard to work with. Continue to cook each yufka and continue to stack on top of one another with a piece of parchment paper in between each layer. The heat and steam of the cooked yufka will help to keep the wraps soft and pliable as they sit on top of each other. Once cooled to room temperature store cooked yufka in a large plastic bag, sealed. Rinse the lentils until the water runs clear. Combine lentils with 3/4 cup water in a small sauce pan then bring to a boil. Reduce to a simmer, cover with a lid, and continue cooking for 12-15 minutes or until lentils are soft and the water is absorbed. While the lentils are cooking, add coconut oil to a sauté pan set to medium heat. Add the diced onion and carrots to the sauté pan and cook until soft and caramelized, about 10-15 minutes, then remove from the heat. Once the lentils are cooked, add tomato sauce, cooked onion and carrots, and shawarma spice mix to the pan with the lentils. Stir mixture to combine then set aside. Drain tofu from package then use your hands to crumble tofu into small pieces, similar to scrambled eggs. Add coconut oil to a sauté pan set to low-medium heat then add the tofu, turmeric, sea salt, and crushed red pepper flakes to the hot pan. Cook for 3-5 minutes stirring often. Remove from the heat and set aside. Wash, de-stem, and chop kale leaves into thin strips then place in a large bowl. Drizzle 1 Tbsp coconut oil over the kale and sprinkle with sea salt. Use your hands to massage coconut oil and salt onto the kale until leaves are soft and dark green then set aside. To assemble the wraps (steps pictured below) begin by placing one cooked yufka dough on a clean work surface. Evenly spread about 1/4 cup lentil mixture on to the yufka dough making sure to leave about 1/4" on the sides. On the left side of the wrap add 1/4 cup golden tofu then fold the left side of the yufka in to the middle. On the right side of the wrap add ~1/4 cup messaged kale then fold the right side of the yufka in to the middle. Finally fold the wrap in half lengthwise. The wrap should now be folded three times. Place wrap into a hot pan and cook on both sides until the yufka dough is slightly golden, about 1-2 minutes per side. Continue this process until you have made all 6 wraps. Place parchment paper around each wrap and slice in half. Serve warm with hot sauce if desired. Store additional wraps in the fridge in an air tight container. Wraps cane be eaten cold, room temperature, or slightly warmed in a hot sauté pan. Well, is this recipe creative or what? Starting with the soft and spongy yufka flatbread enveloping an exciting mix of flavors, from the spicy shawarma lentils to the turmeric tofu, and ending with a balance of brightness and texture from the massaged kale. And if you only decide to make one item from the recipe list this week (gasp), make the yufka! Yeah, it's that good.
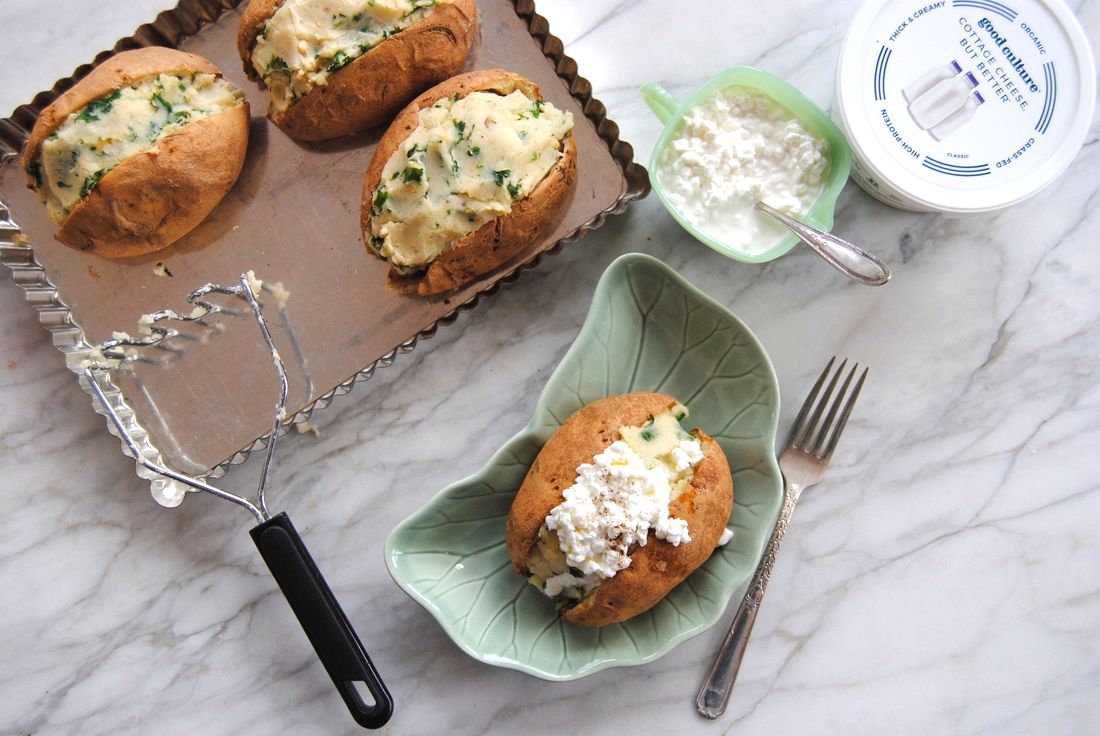
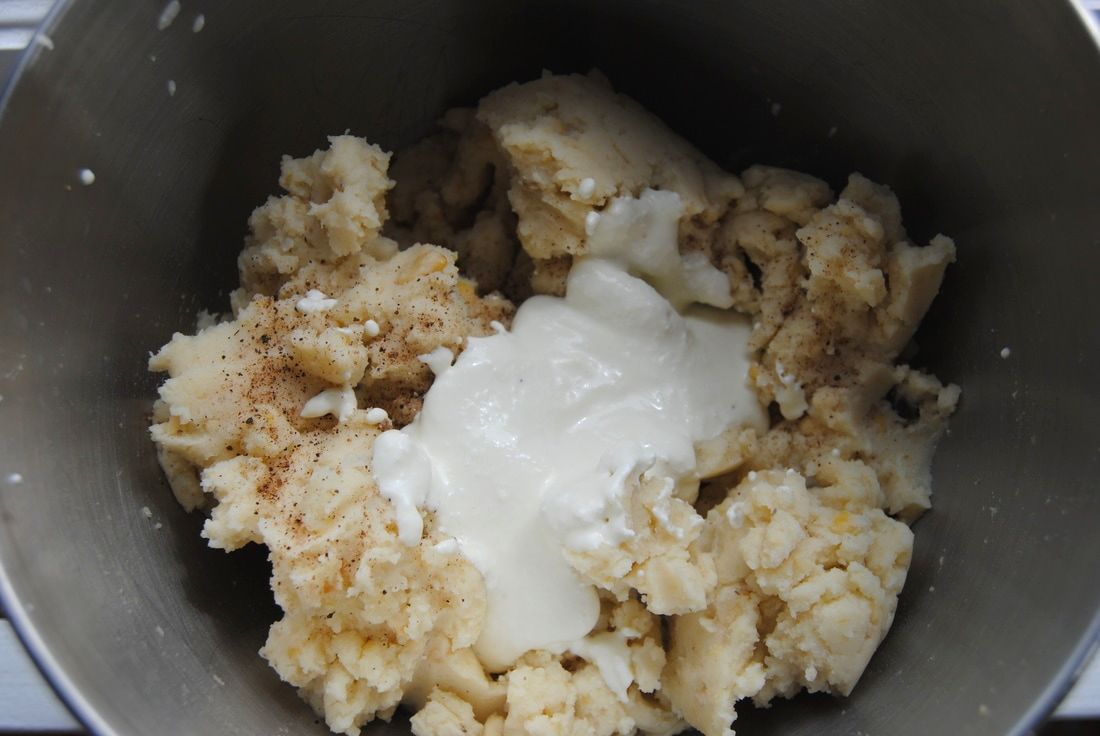
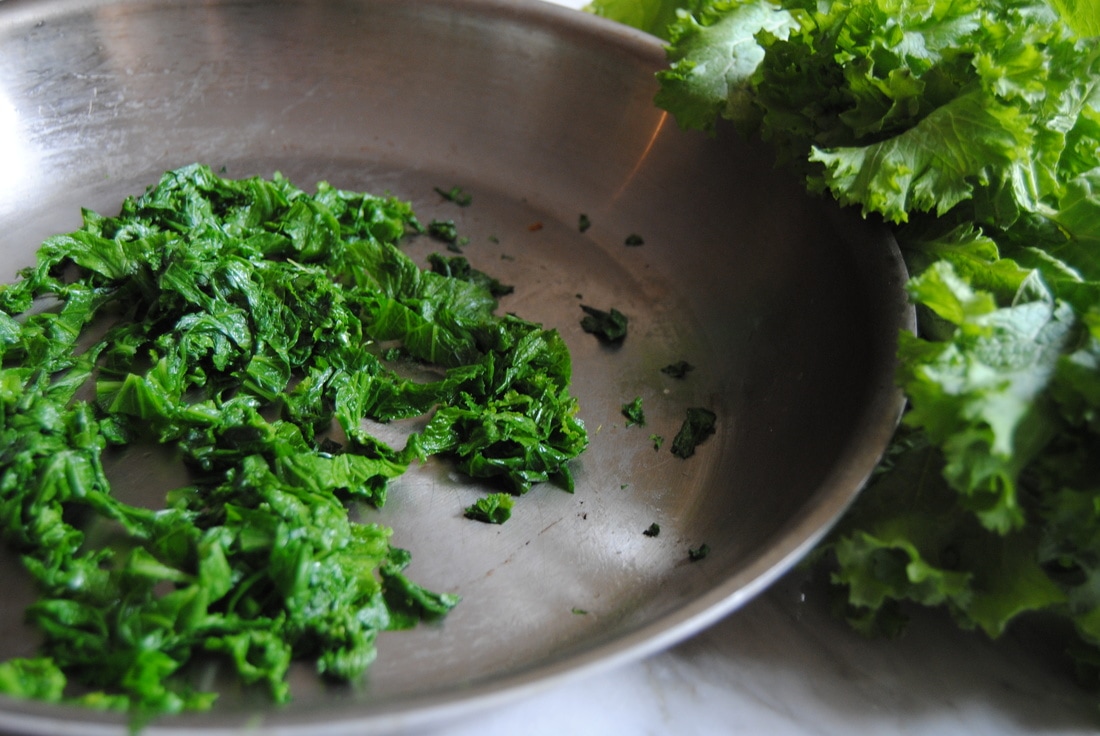
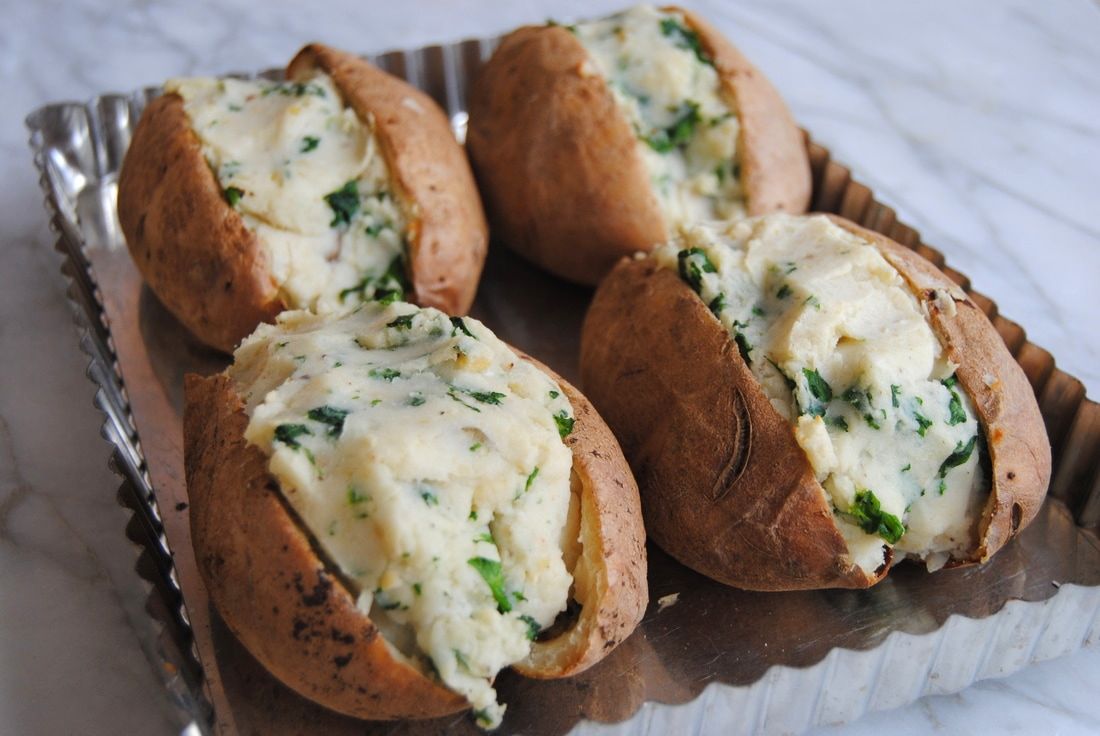
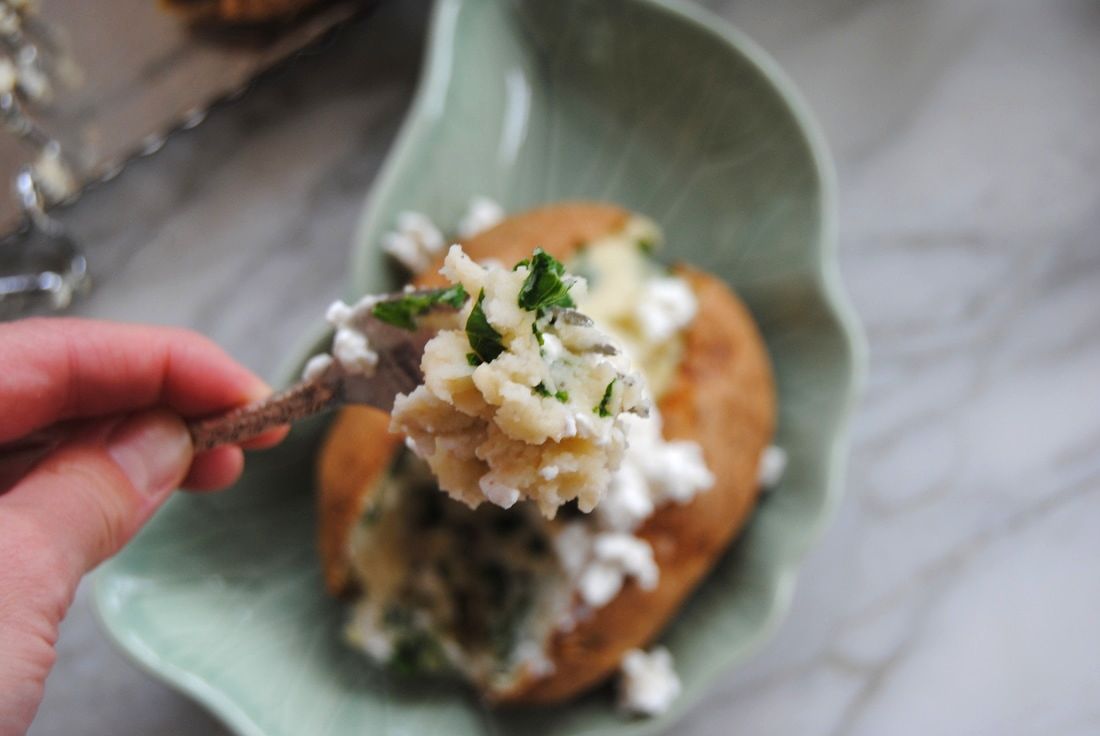
Enjoy, Jess and Cecelia We've been on a kick lately reinventing and recreating some of TGBK's first ever recipes. The Overloaded Spud (recipe here) debuted in February 2015 and has been a fan favorite every since. This time around we've taken the seemingly plain and nutritionally bland Russet potato and gave it quite a spin. With the addition of fava beans, fermented foods, and seasonal greens, this spud it anything but plain! This recipe was inspired by a unique Italian recipe we came across for mashed fava beans combined with potatoes and bitter greens (here). Though we love the idea of a good mashed potato we much prefer to eat our potato with the skin (that's where the fiber is!). The idea of incorporating fava beans into mashed potatoes intrigued us because this addition of protein helps to make the simple baked potato into a complete meal. Along that theme we chose to use cottage cheese instead of more traditional additives to mashed potato such as cream cheese, sour cream, or butter. Cottage cheese provides more protein to this dish and is a fermented food - you know how we love our probiotics! And we can't say enough about the Good Culture brand we chose. In their cottage cheese they use quality ingredients, no additives, and live and active cultures (important to note that not all cottage cheese will based on how it is produced). Finally, we found mashed potato to be a perfect vehicle for incorporating bitter greens. Greens with a bitter taste, such as mustard greens, chicory, endive, dandelion, and watercress, can be overwhelming taste-wise but we felt paired perfectly with this dish. Ready to find out for yourself? Fava Bean & Mustard Green Twice Baked Potato PREP TIME: 60 minutes TOTAL TIME: 1 hour 10 minutes Servings: 4 main dishes (full potato) or 8 sides (half potato) Ingredients 4 medium russet potatoes 1/2 cup organic full fat cottage cheese (we used 4% milk fat Good Culture cottage cheese) 4 Tbsp extra virgin olive oil 1 1/2 tsp sea salt 1/4 tsp ground black pepper 1 cup dried split fava beans 1/4 cup warm water 1/2 bunch organic mustard greens Toppings 1 cup organic full fat cottage cheese (we used 4% milk fat Good Culture cottage cheese) 4 tsp extra virgin olive oil Sprinkle of pepper Preheat oven to 400 degrees. Scrub the outside of each potato with warm water. Using a fork, carefully pierce each potato about 4-6 times to allow steam to escape while potatoes are cooking. Sprinkle each potato with sea salt then place in the oven for 40-50 minutes or until soft and the skin can easily be pierced with a fork. While the potatoes are cooking, rinse fava beans under warm water until water runs clear. Place in a pan and add 2 cups of water and bring to a boil for 10 minutes. Reduce the heat to a simmer and continue cooking for 20 minutes or until the liquid is absorbed and the fava beans are soft. Note fava beans can be pre-soaked for 1-2 hours to quicken cooking time. Transfer cooked fava beans to a large bowl and add 1/4 cup warm water. Using a potato masher, mash the fava beans until they are broken down (think lumpy mashed potato texture) then set aside. Remove potatoes from the oven and allow them to slightly cool before handling. Slice each potato open though not all the way through if possible. Scoop out the inside into the bowl with the fava beans, save the skins for later use. Using the potato masher, mash potatoes with the fava beans until a somewhat smooth texture is formed. In a blender or food processor add 1/2 cup cottage cheese and 3 Tbsp olive oil and process until creamy then fold into the fava bean and potato mixture until light and creamy. Wash and de-stem the mustard greens. Add 1 Tbsp olive oil, 1/4 tsp sea salt, and greens to a sauté pan and cook for 2 minutes or until wilted and bring green. Carefully strain off any liquid from the greens - this helps to remove the bitter taste. Chop greens into small pieces then fold into the fava bean and potato mixture. Evenly fill each potato skin with mixture* and place back in the oven to warm up for 5-10 minutes. Top each potato with a scoop of cottage cheese, drizzle of olive oil, and a sprinkle of pepper. If you do not plan to serve all the potatoes keep the toppings off until ready to eat. Potatoes will keep in the fridge for 2-5 days. To reheat, preheat oven to 350 degrees and cook for 10 minutes or microwave for 1 minute then top with cottage cheese, olive oil and pepper to taste. *You may have leftover mashed fava/potato mixture that does not fit back into potato skin, save to enjoy later! We can definitely attest to the final product being one overloaded and filling spud! The uniqueness of this recipe and flavor profile are sure to impress and excite. We found the flavor of fava beans (earthy and slightly bitter) to really shine and pair wonderfully with the mustard greens, and the mild flavored baked potato to be the perfect palate for the creation of this culinary magic.
Enjoy! Jess and Cecelia Hey TGBK friends, we are going to keep things super simple this week. After a month of fun with Navitas Organics' products we found our cupboards stocked with their superfoods and minds full of ideas. A new favorite product that we discovered last month was cacao butter and we just had to share this secret. Cacao butter has the best mouth-feel of any food we've ever eaten! It envelops your mouth with a rich, velvety feeling that we think can only be compared to the feel of silk or cashmere on your skin. Crazy right?! Cacao butter, or the similar product cocoa butter, are essential ingredients in chocolate making. Though the names are subtly different, cacao vs cocoa, the nutrient quality doesn't compare. Cacao butter is less processed with lower heat methods creating a raw product that retains more of the nutritional benefits (mainly antioxidants) that the cacao bean provides. So ditch those cocoa products for raw cacao - we haven't found a butter yet that we like better than Navitas (here). This recipe is the perfect use for this bombshell of an ingredient, enjoy!
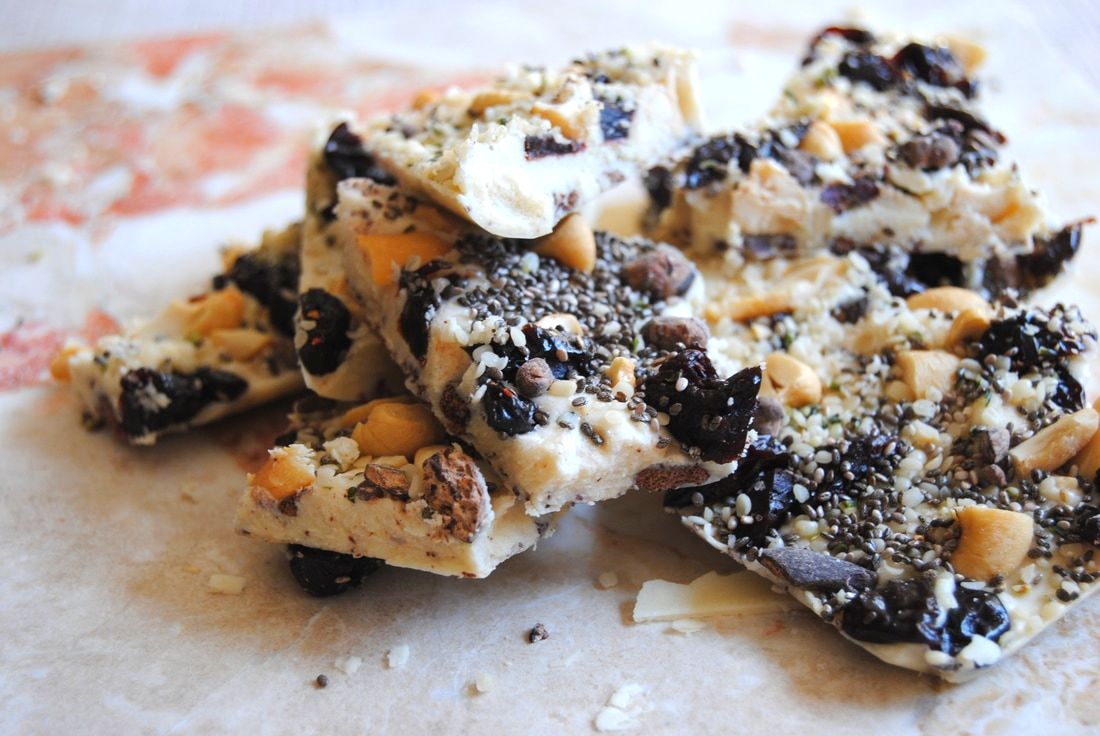
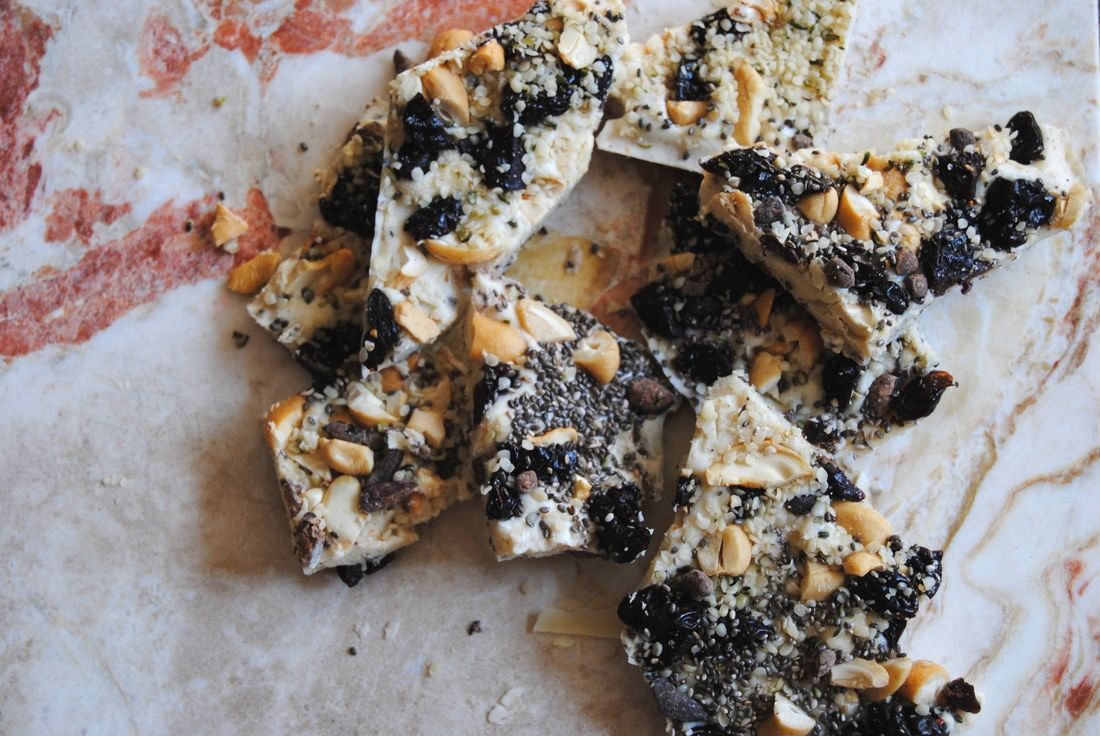
Sweet & Salty White Chocolate Bark PREP TIME: 10 minutes TOTAL TIME: 10 minutes + 20 minutes to set Servings: 8-10 Ingredients White Chocolate 1/2 cup organic cacao butter 2 Tbsp + 1 tsp coconut oil 1 Tbsp organic powdered sugar 1/2 vanilla bean, inside seeds scraped out (1 tsp pure vanilla extract will also work) Toppings 2 Tbsp chopped salted cashews 2 Tbsp chopped dried cherries 2 Tbsp sweetened cacao nibs 1 Tbsp chia seeds 1 Tbsp hemp seeds 1/4 tsp thick grain sea salt Prepare a 9" x 9" pan with a piece of wax paper cut to fit the bottom of the pan with 2 long ends hanging over the sides to help remove the chocolate once it is set. To make the white chocolate, add cacao butter and coconut oil to a double boiler set to medium heat. Stir mixture until fully melted. You could also do this in the microwave in 10 second increments, however, watch closely to avoid overheating. Remove from the heat and stir in the powdered sugar and vanilla bean until fully incorporated. Pour chocolate into prepared pan and allow to slightly set at room temperature for about 10 minutes. Evenly sprinkle chopped cashews, chopped dried cherries, cacao nibs, chia seeds, hemp seeds, and sea salt over the white chocolate. Place pan in the fridge and allow to cool and fully set, for about 10 minutes. You will know when the chocolate is fully set when it is hard to the touch. Remove the set chocolate from the pan by pulling up on the wax paper sides. Break chocolate into pieces about 2"x 2". Serve and enjoy! Chocolate will keep best in an air tight container in the fridge for up to 1 week. |
AuthorsJess and Cecelia welcome you to our kitchen. We are fun-loving and passionate foodies working to make the world a healthier, happier place one plant based recipe at a time. Categories
All
Archives
December 2018
|

