Holiday season is in full swing and with it comes specialty foods, recipes, and what we like to call food memories. Most of us have a special food (or many!) that elicit memories and remind us of past times and holidays spent with friends and family. The senses are very tied to memory and while eating both taste and smell senses are triggered, hence, food memories! This week we explore one of Cecelia's nearest and dearest food memories, gnocchi.

Gnocchi are a type of homemade pasta though are also considered dumplings as they contain potatoes. To make homemade, gnocchi are time intensive and can take a few attempts to master the texture, though are completely worth it! Gnocchi are common in Italian cuisine and Cecelia's Italian grandmother was somewhat of a gnocchi master. Cecelia remembers her grandmother's gnocchi as perfect pillows of dough that melt in the mouth and just the word gnocchi, to this day, conjures memories of Christmas days spent cooking and enjoying this delectable dish. Her grandmother didn't need to follow a recipe and seemingly easily prepared 300+ gnocchi for a single meal. Cecelia treasures making gnocchi every year for Christmas though may never achieve the gnocchi mastership living in her "food memories." But that's okay! Gnocchi are delicious in many forms, with different recipes, and made by different chefs. We took a more nutritious take on the traditional gnocchi by using sweet potato and the results were delicious and stunning. Are you ready for some gnocchi making?
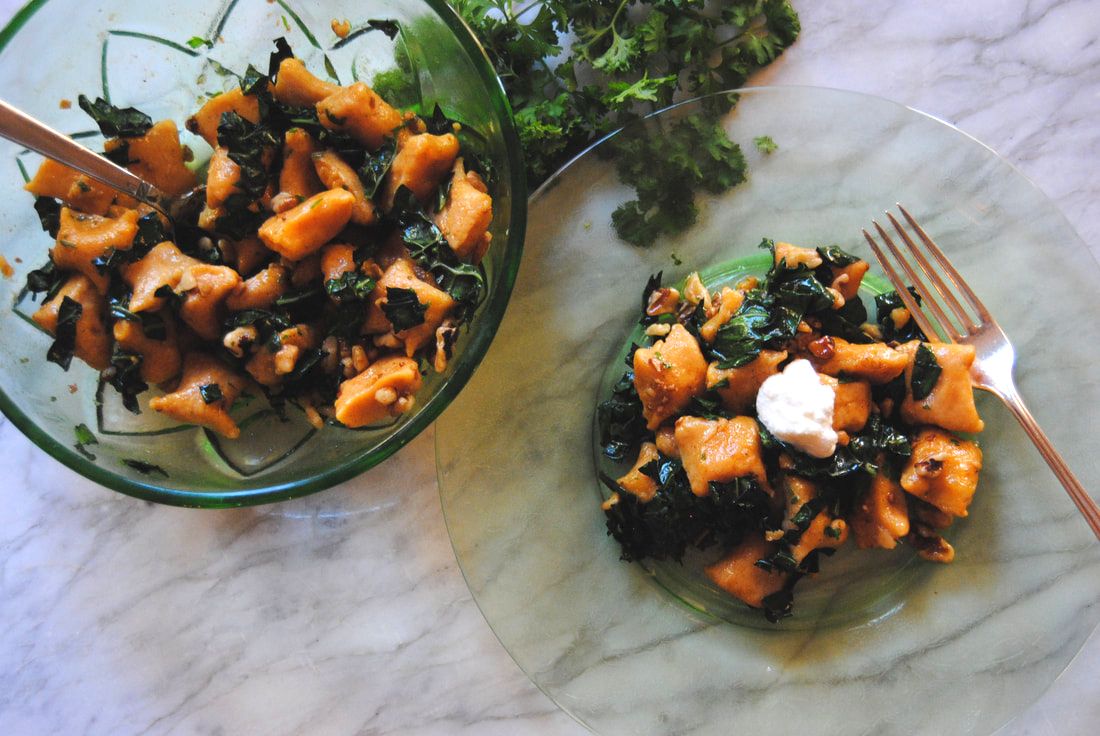
Sweet Potato Gnocchi with Brown Butter Sauce
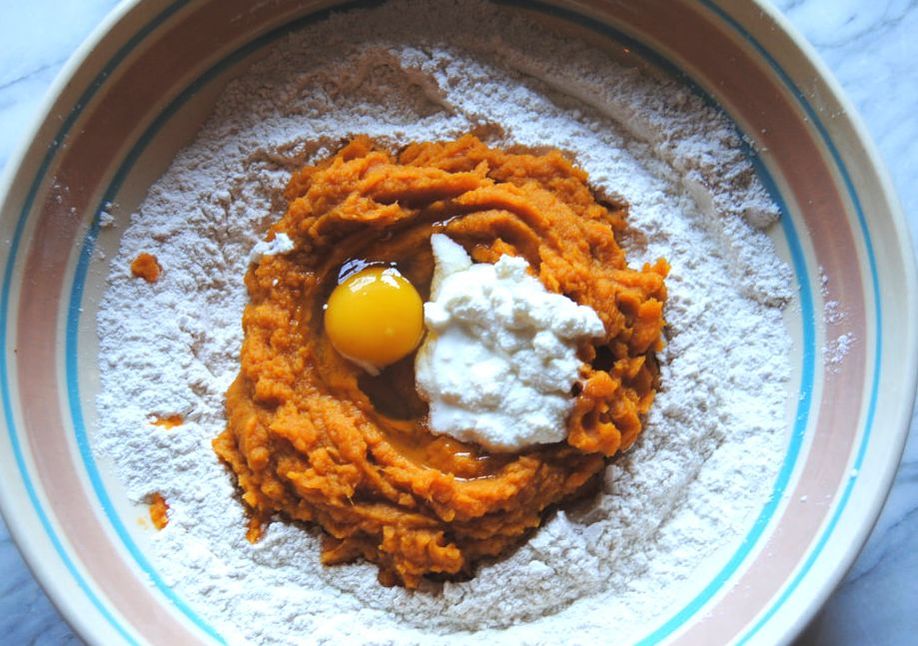
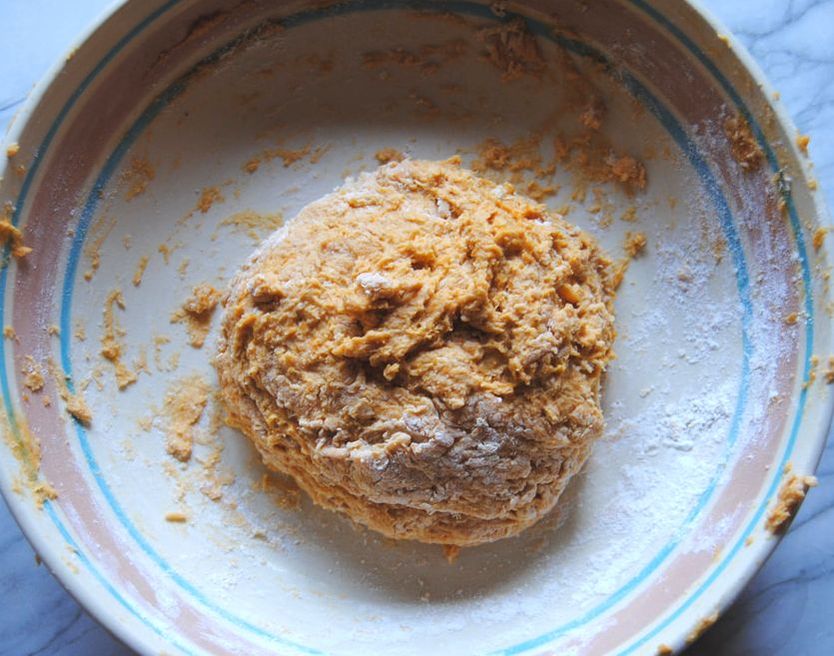
PREP TIME: 45 minutes TOTAL TIME: 60 minutes Servings: 8-10 servings Ingredients Gnocchi 2 lb sweet potato 1 cup all-purpose flour + 1/4-1/2 cup additional 1 tsp salt 1 egg 1/4 cup full fat ricotta cheese Sauce 8 Tbsp salted butter 4 Tbsp pasta water (reserved from cooking) 2 cloves garlic, minced 2 Tbsp fresh parsley, chopped 1/2 cup walnuts, chopped 8 large kale leaves + 1 Tbsp extra virgin olive oil + 1/4 tsp salt Additional Toppings 1/2 cup chopped walnuts 8 oz full fat ricotta cheese, about 1 oz per serving Boil sweet potatoes until soft in texture, about 20-25 minutes. Allow cooked potatoes to cool, then remove skin and process potatoes through a potato ricer. If you do not have a potato ricer a food processor will also work*. In a large bowl combine 1 cup flour and salt and form a well. In the center of the well, add in 1 egg, ricotta cheese, and riced sweet potatoes. Using your hands and working from the outside of the well, fold flour into the wet ingredients. Add an additional 1/4-1/2 cup flour 1 Tbsp at a time until the dough no longer sticks to your hands. Turn the dough onto a floured surface and knead dough gently for about 60 seconds until dough comes together. With floured hands and on a lightly floured surface, pinch off 2 Tbsp of dough and roll into a long cylinder about 3/4" thick using the tips of your fingers to roll to avoid compressing the dough. Cut each gnocchi into 3/4-1" pieces and repeat until all the dough has been shaped (pictures above). Continue to add flour to your hands and work surface if dough becomes too sticky to handle while working. Keep gnocchi on a lightly floured sheet pan while you're shaping the remainder. This gnocchi dough recipe will make about 100-120 gnocchi (more or less depending on the size you cut them). We froze 1/2 of the shaped, uncooked gnocchi to use later, just make sure to freeze on a sheet pan prior to placing in a air tight bag to prevent gnocchi from sticking. To cook the remaining 1/2 of the gnocchi, bring a large pot of water to a boil. Reduce to a simmer and add 7-10 gnocchi to the hot water at a time and cook for 3-4 minutes or until the gnocchi float to the top. Remove cooked gnocchi from the water and set aside. Continue this process until all gnocchi has been cooked. Reserve the cooking water for use in the sauce. To make the brown butter sauce, melt the butter in a sauce pan set to medium heat and cook until butter turns brown and fragrant, about 2 minutes. Reduce heat to low then add the chopped garlic and cook for an additional 1 minute. Add 4 Tbsp of reserved cooking water and stir to combine. Remove from the heat and stir in the chopped parsley. To prepare the messaged kale, wash, de-stem, and chop the kale. Add the olive oil and salt to the chopped kale and message until bright green and wilted then set aside. In the sauce pan used to make the brown butter sauce, add cooked gnocchi, messaged kale, and chopped walnuts. Stir gnocchi to evenly coat with sauce and serve with an additional dollop of ricotta cheese on top. *If using a food processor, avoid over processing the potatoes as this will cause them to become starchy and gummy. 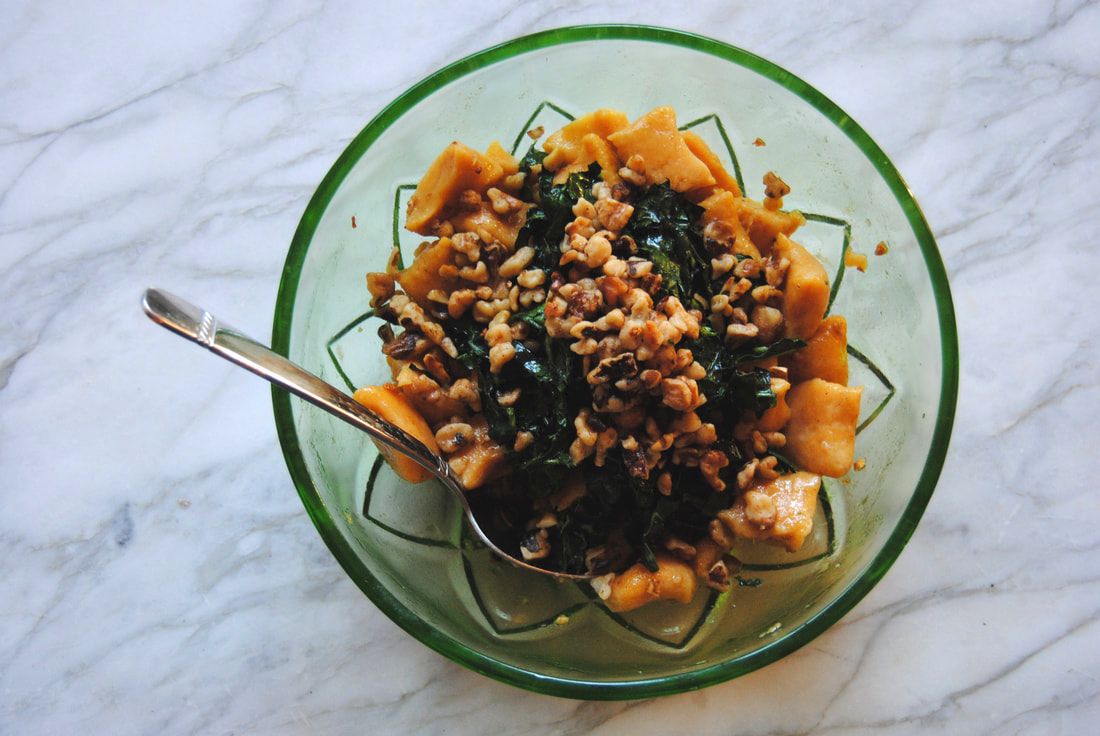
After one bite of homemade gnocchi, you just might be hooked and create some special food memories of your own. And we must stress how different homemade are from prepared, store bought options are much gummier and chewier and overall just not as enjoyable (in our opinion). Each bite of this dish is loaded with sweet and savory flavor, a mix of textures including pillowy gnocchi, and a gorgeous pop of colors. We hope you're creating great memories this holiday season.
Enjoy, Jess and Cecelia 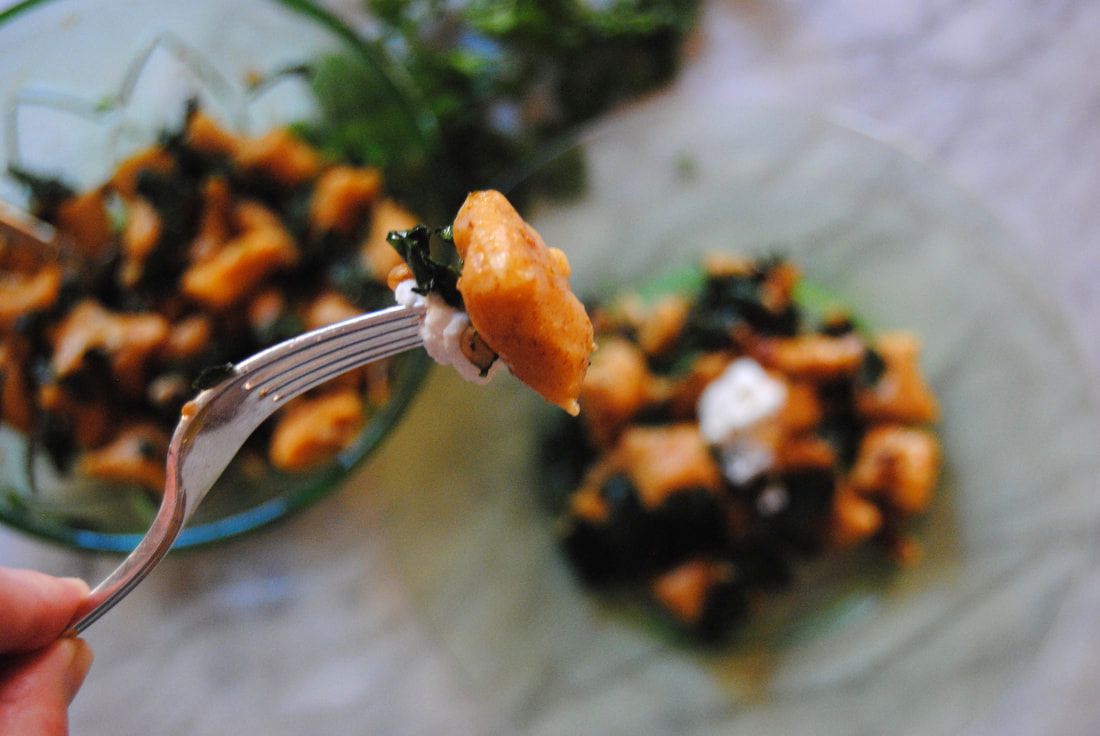
2 Comments
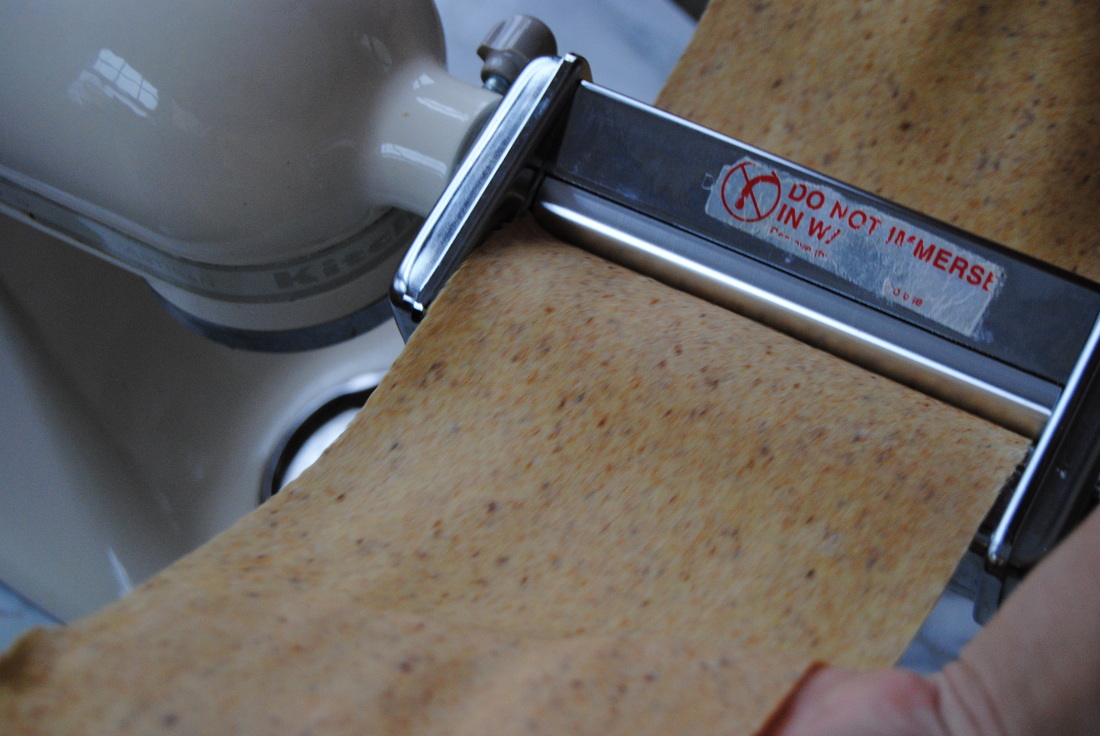
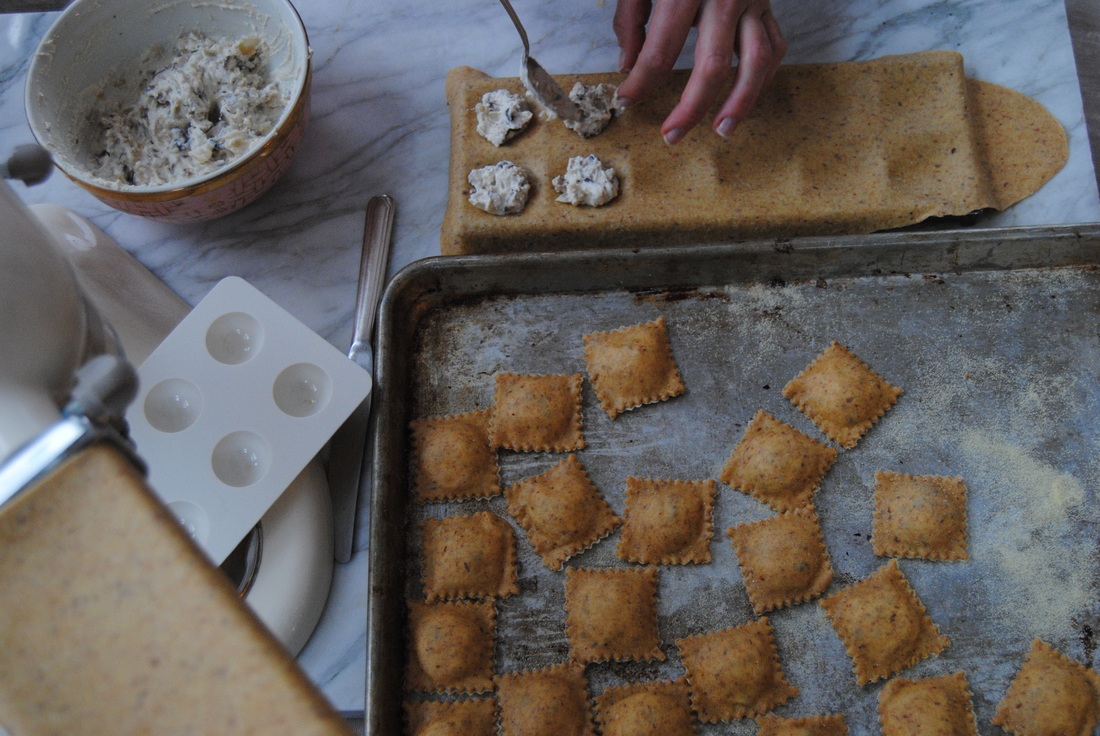
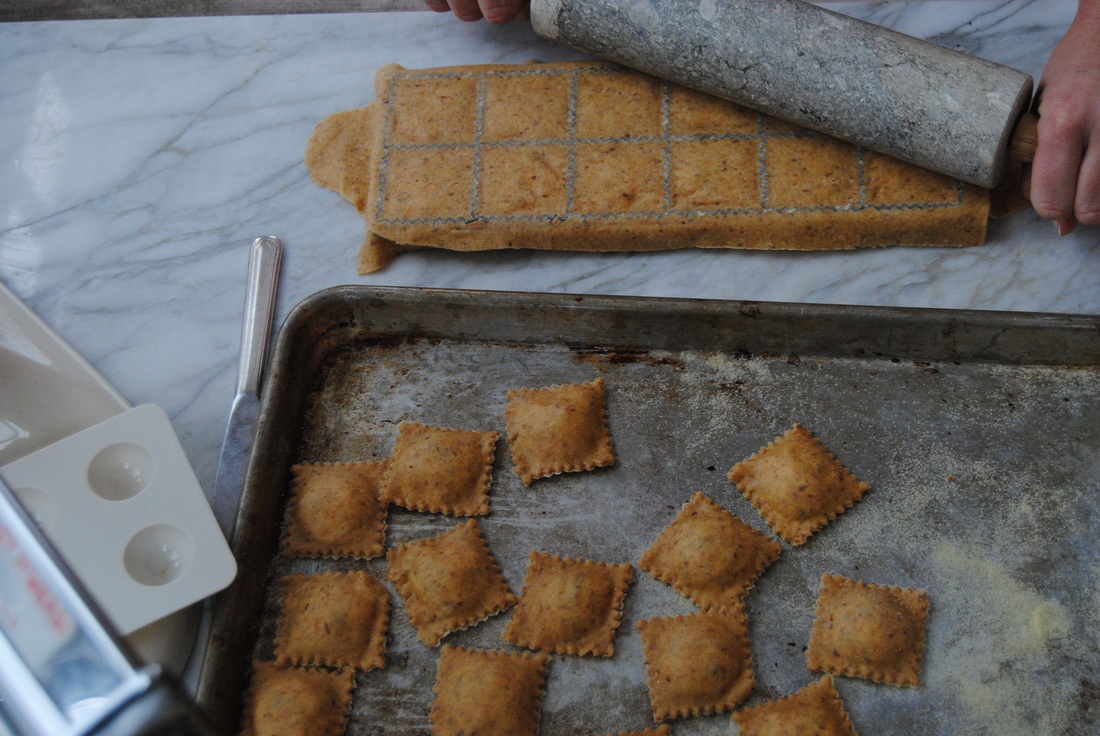
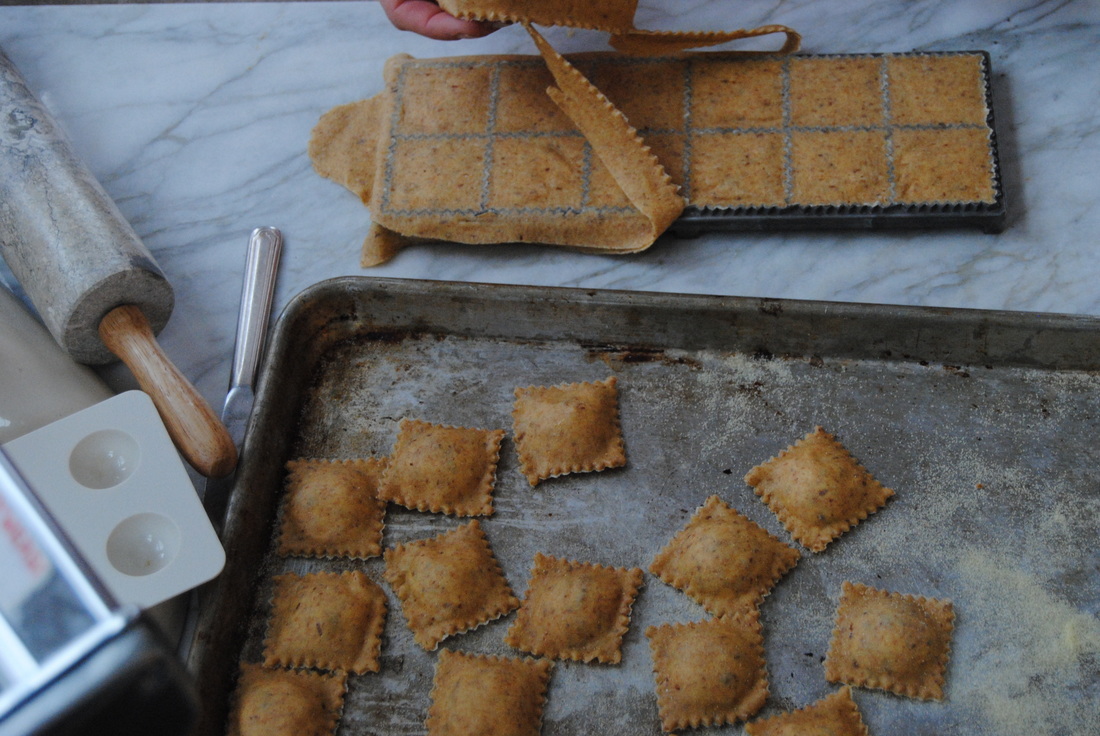
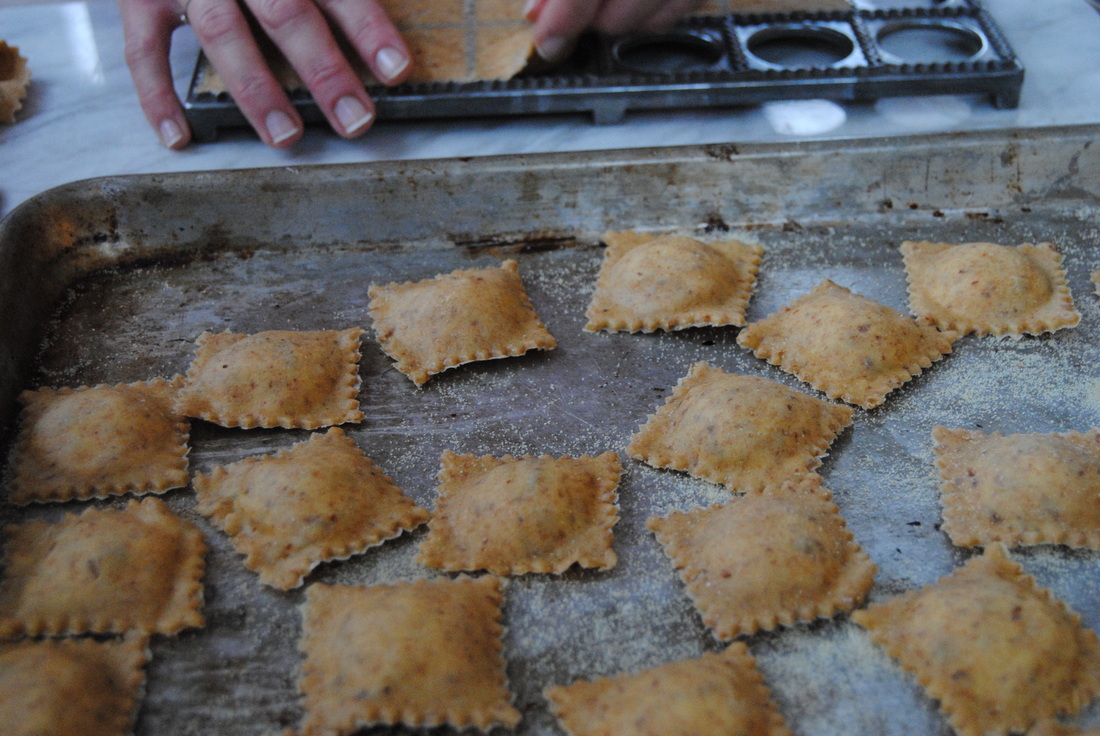
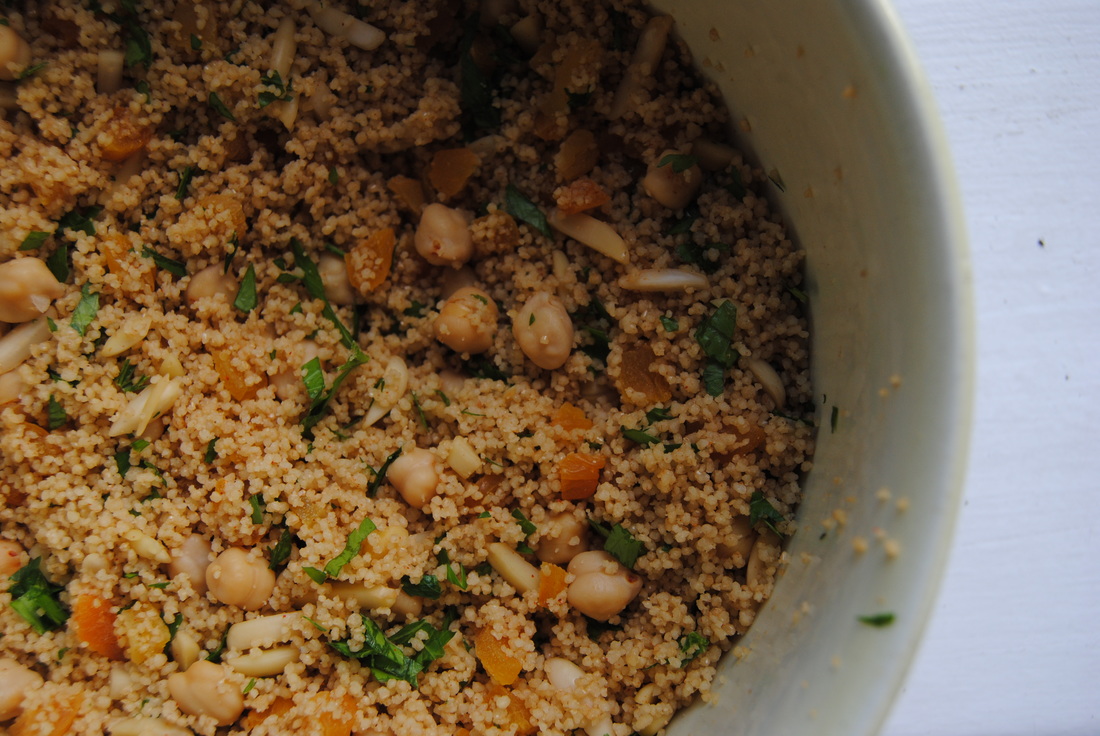
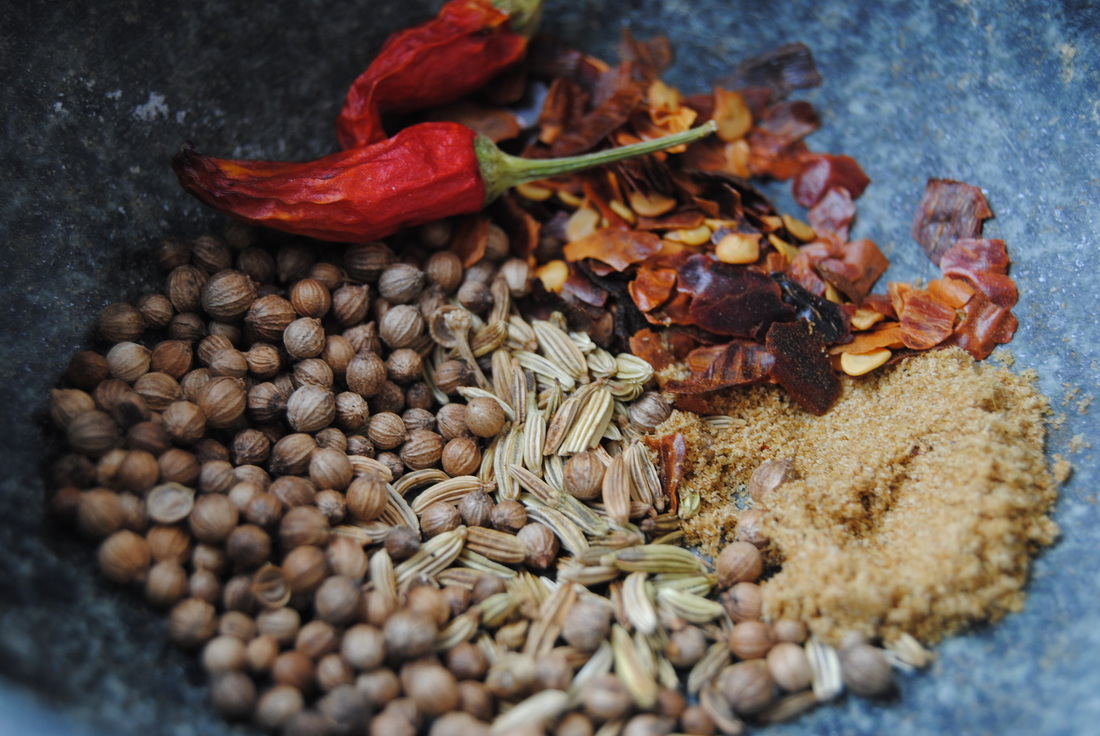
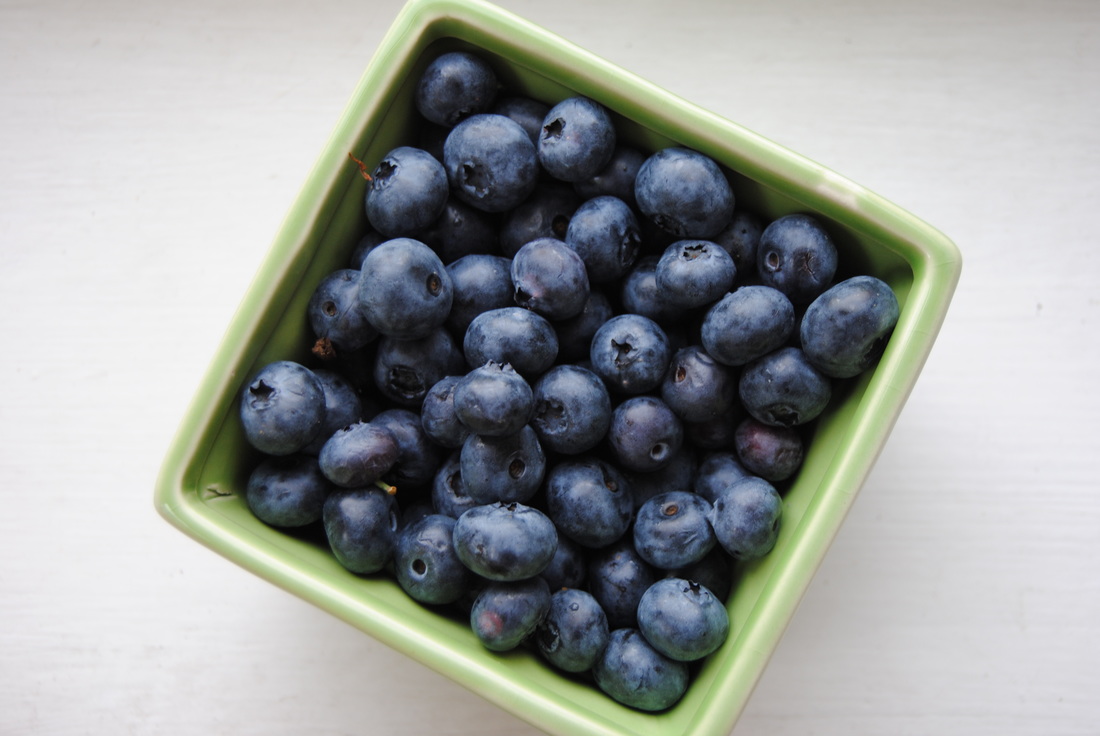
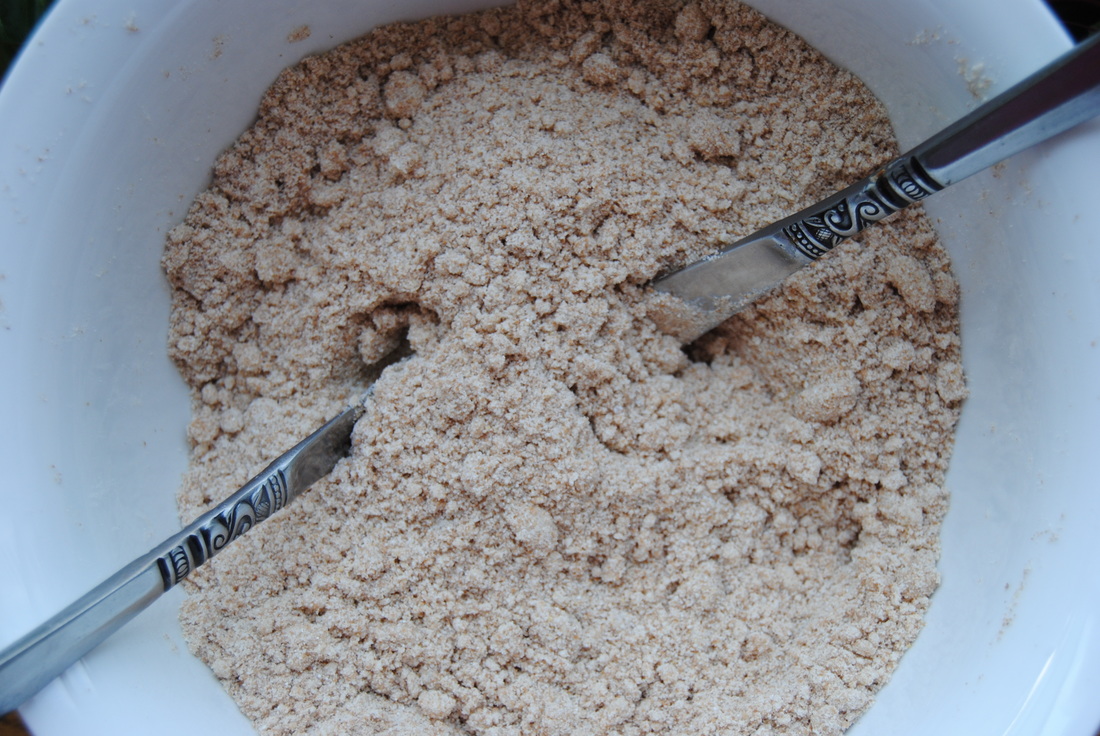
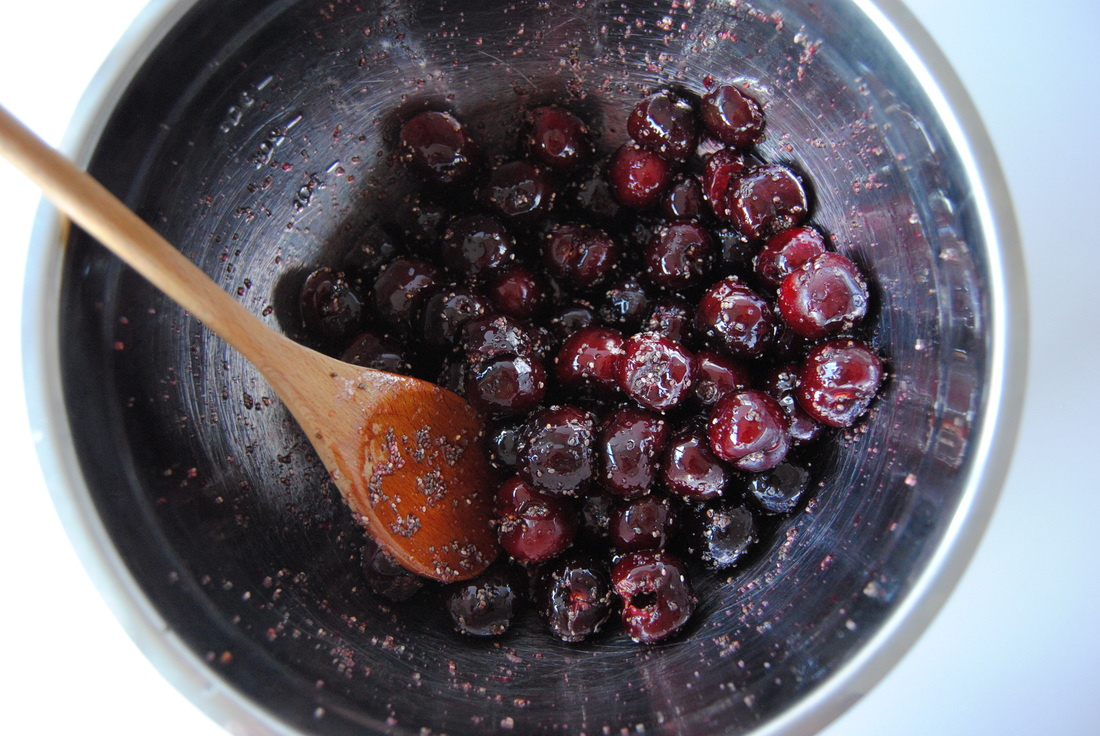
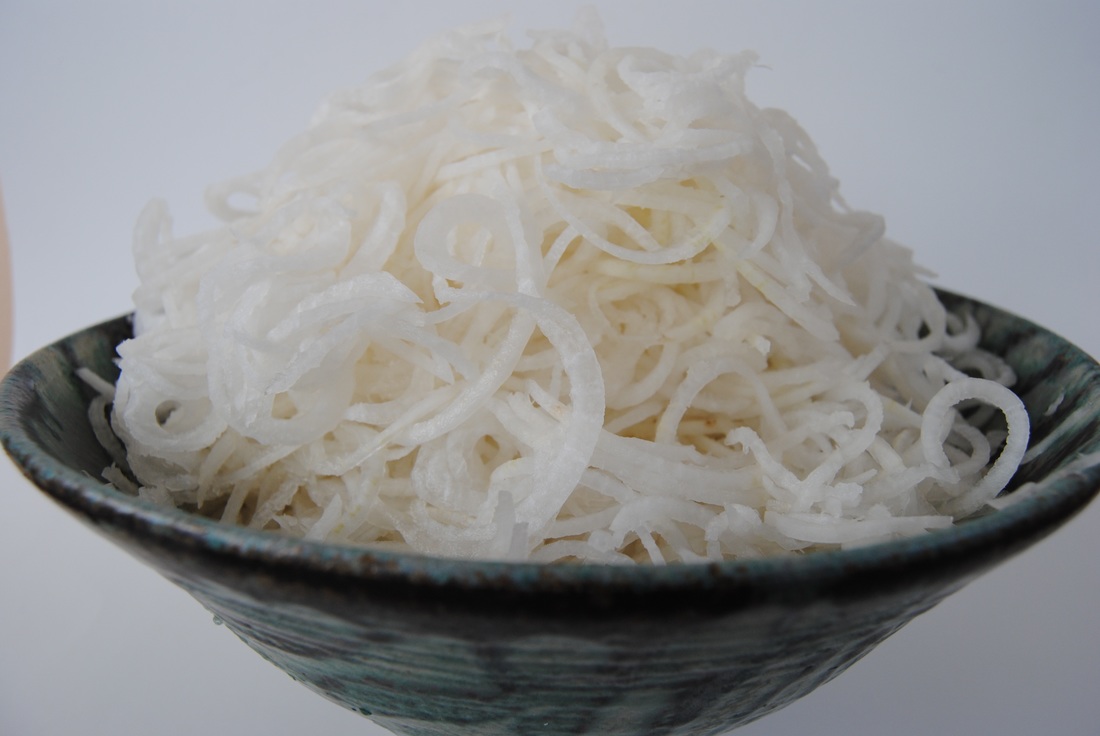
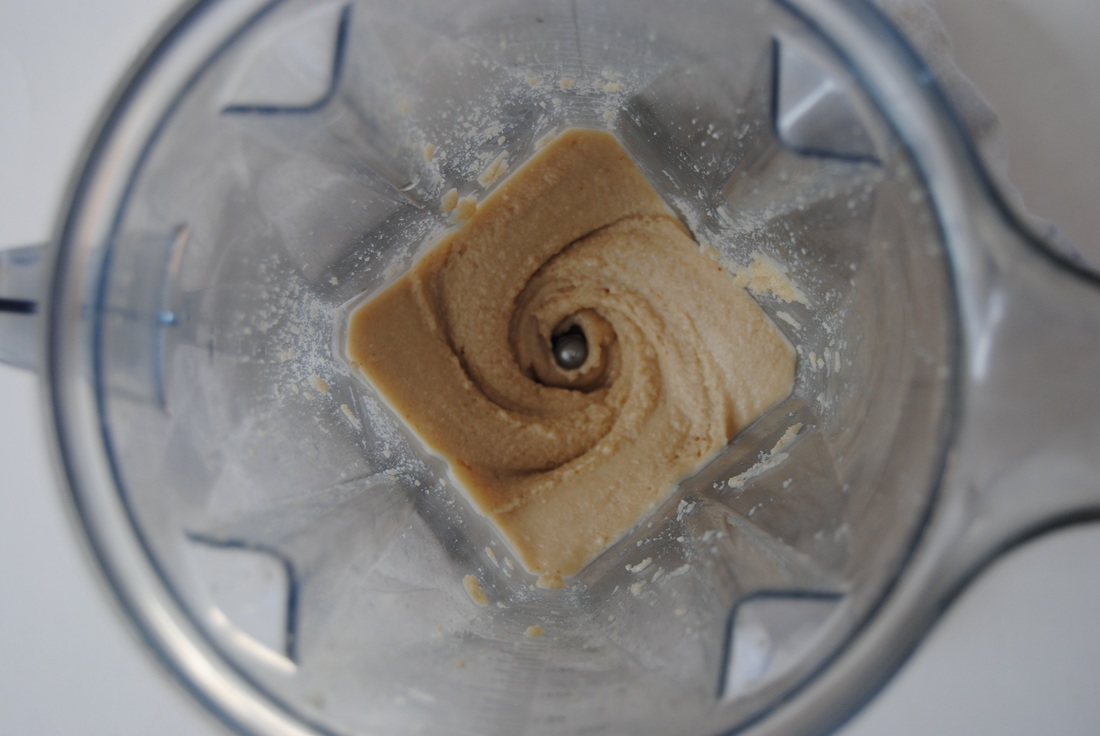
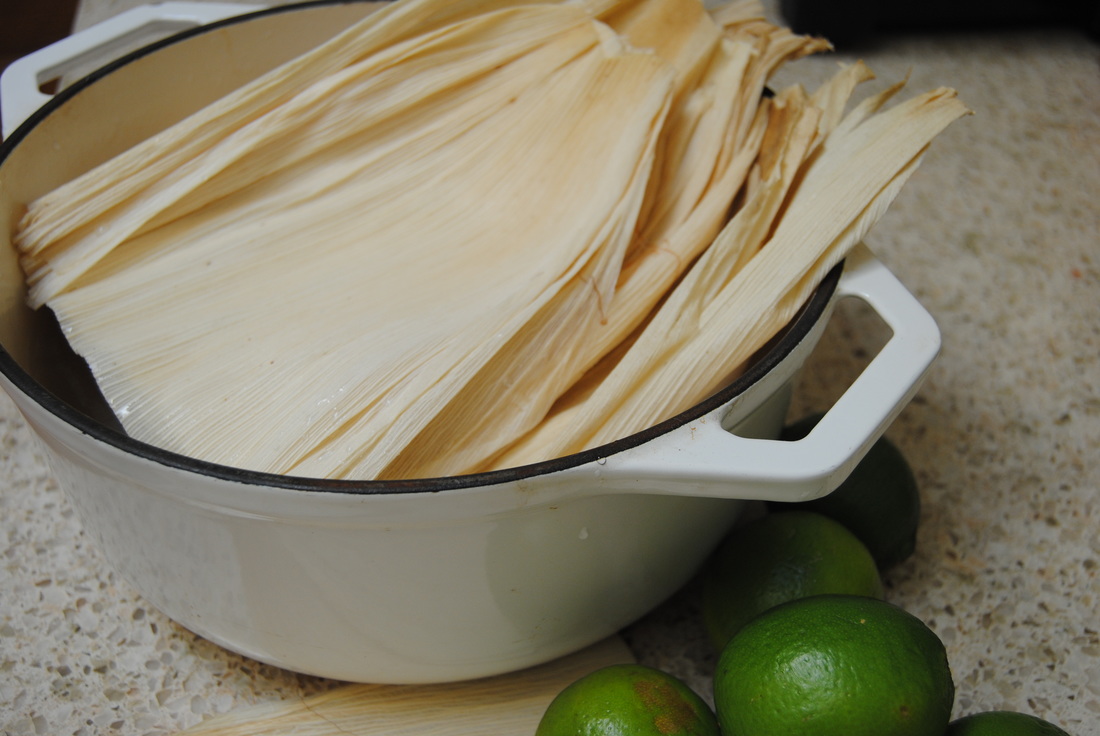
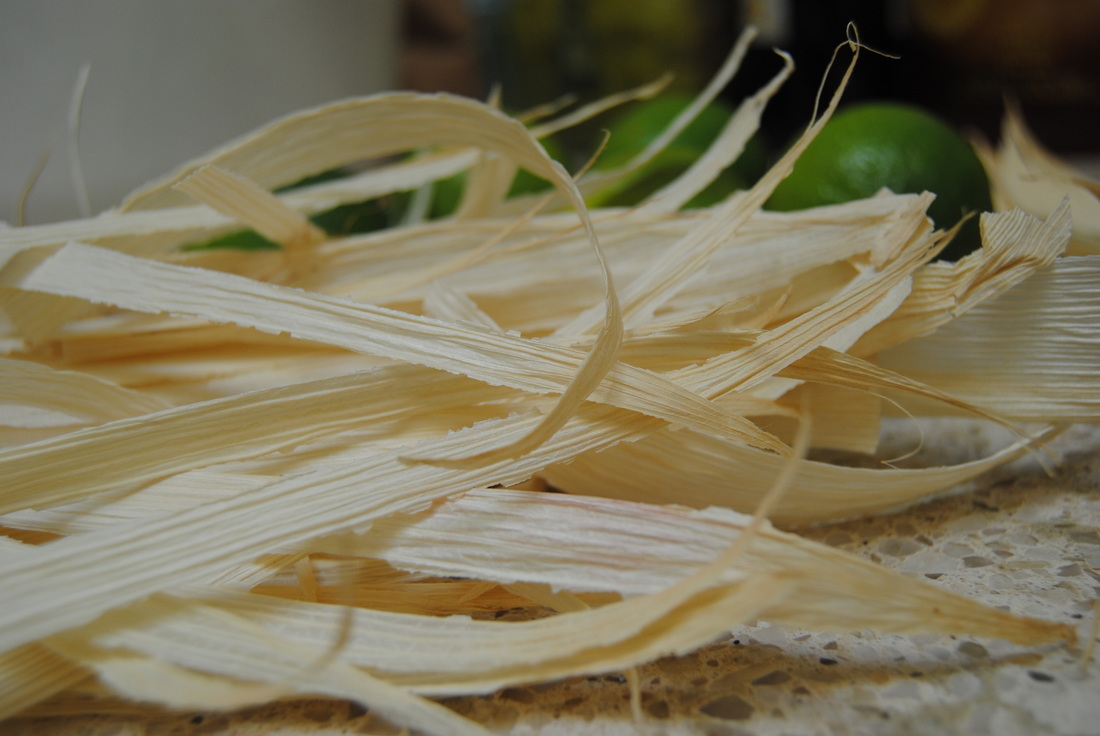
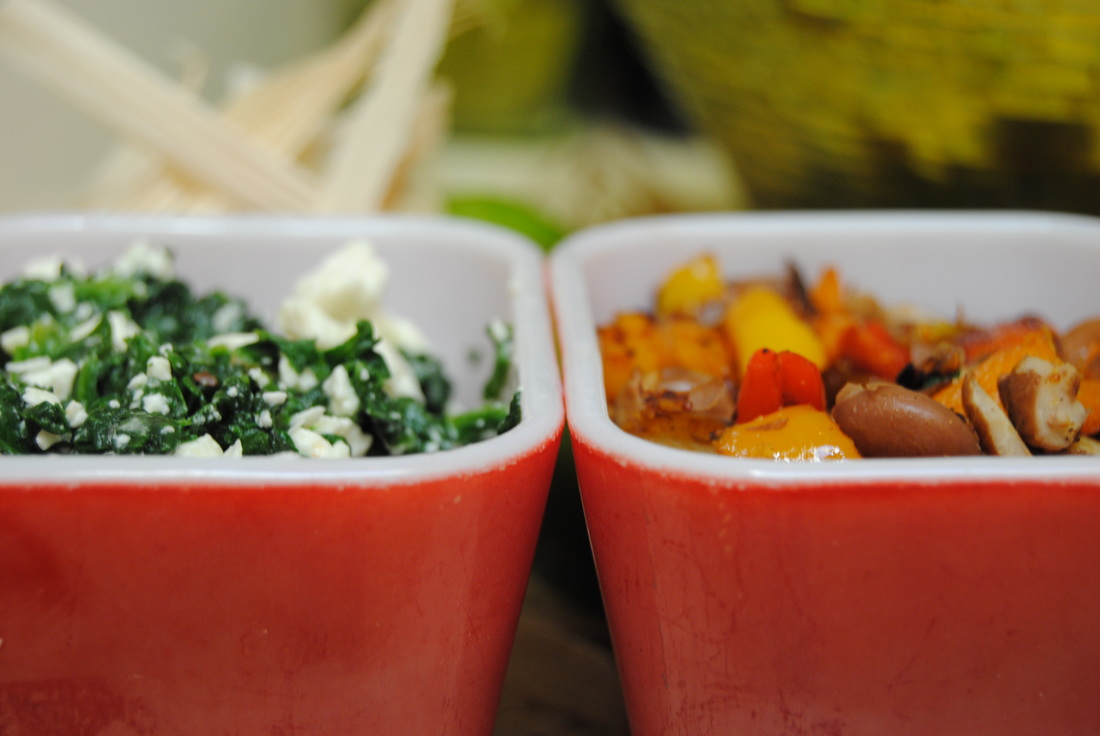
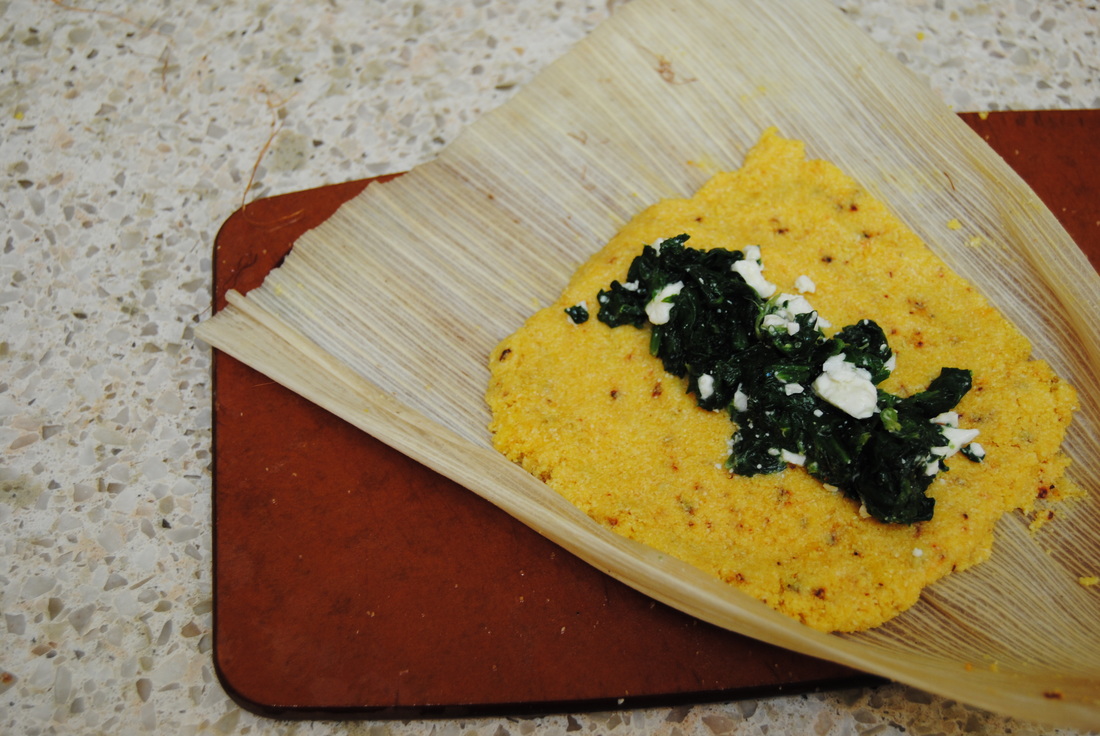
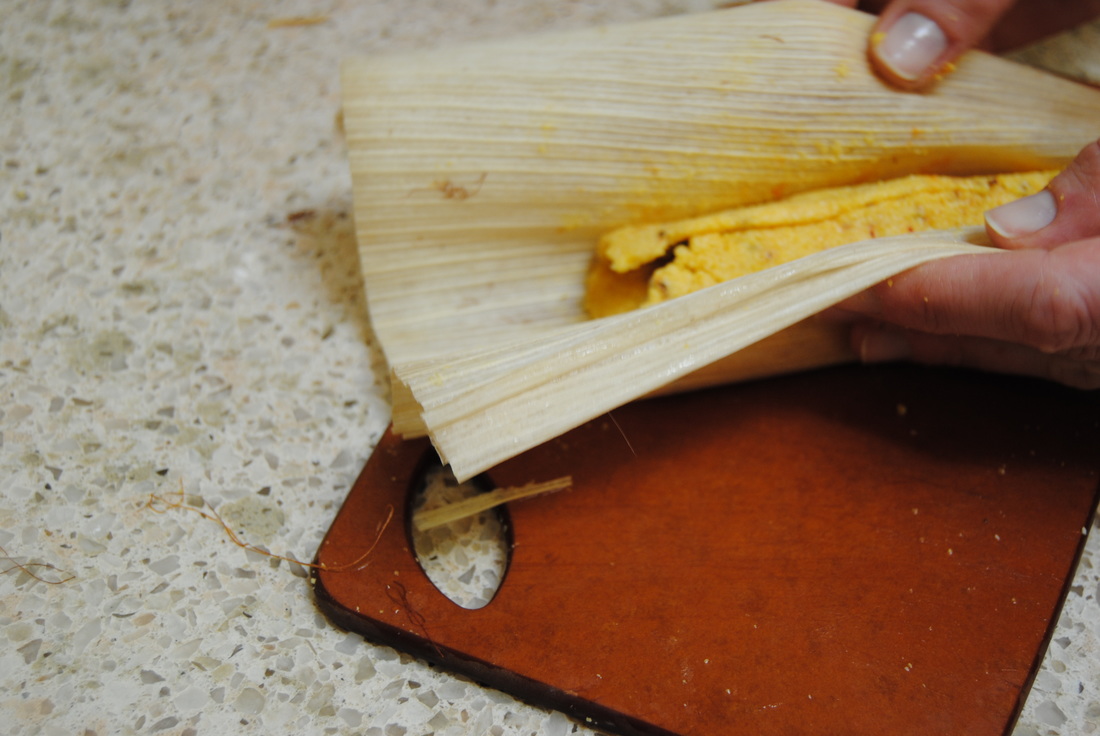
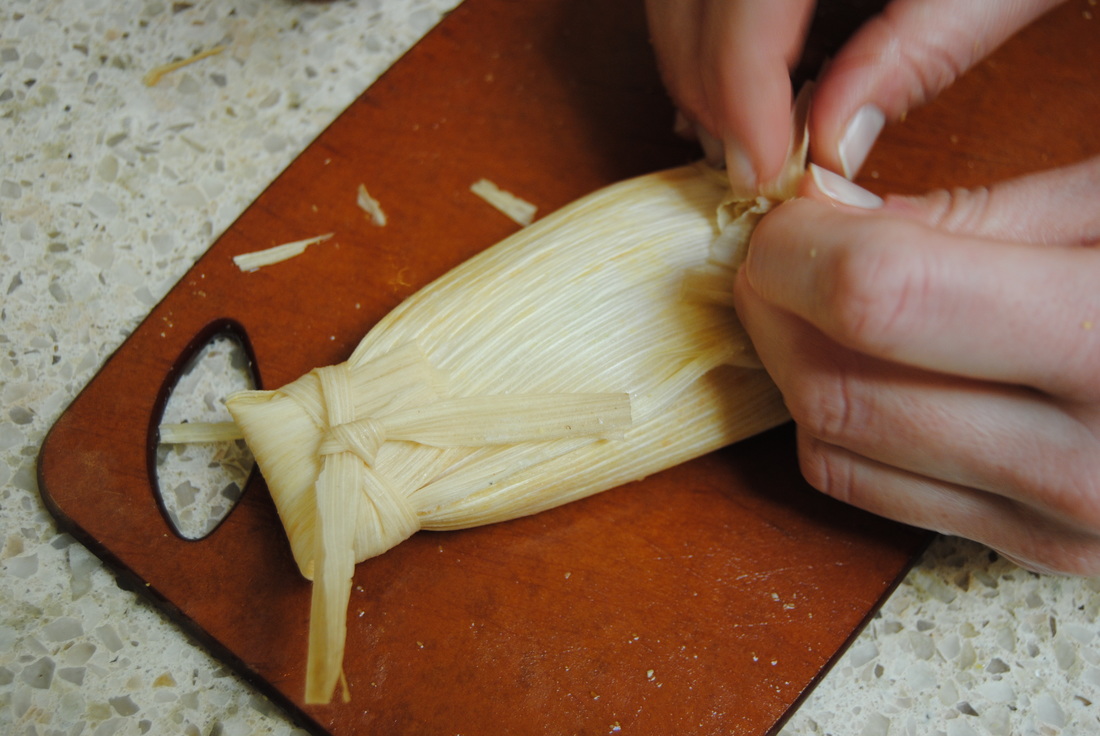
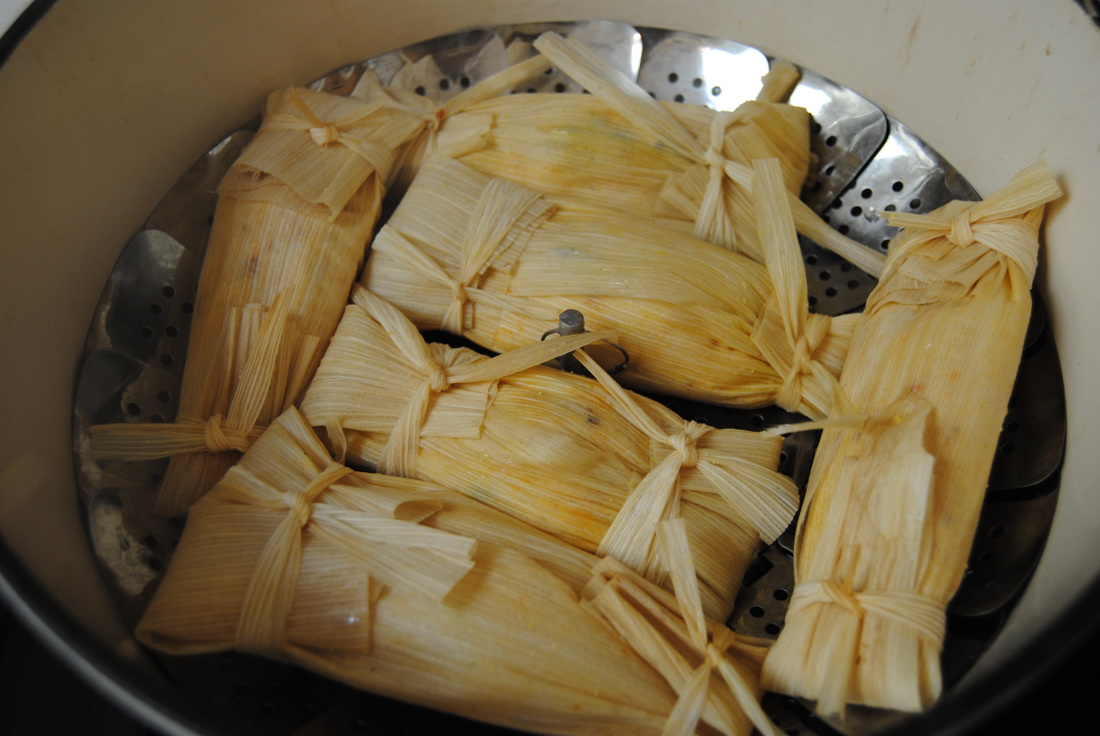
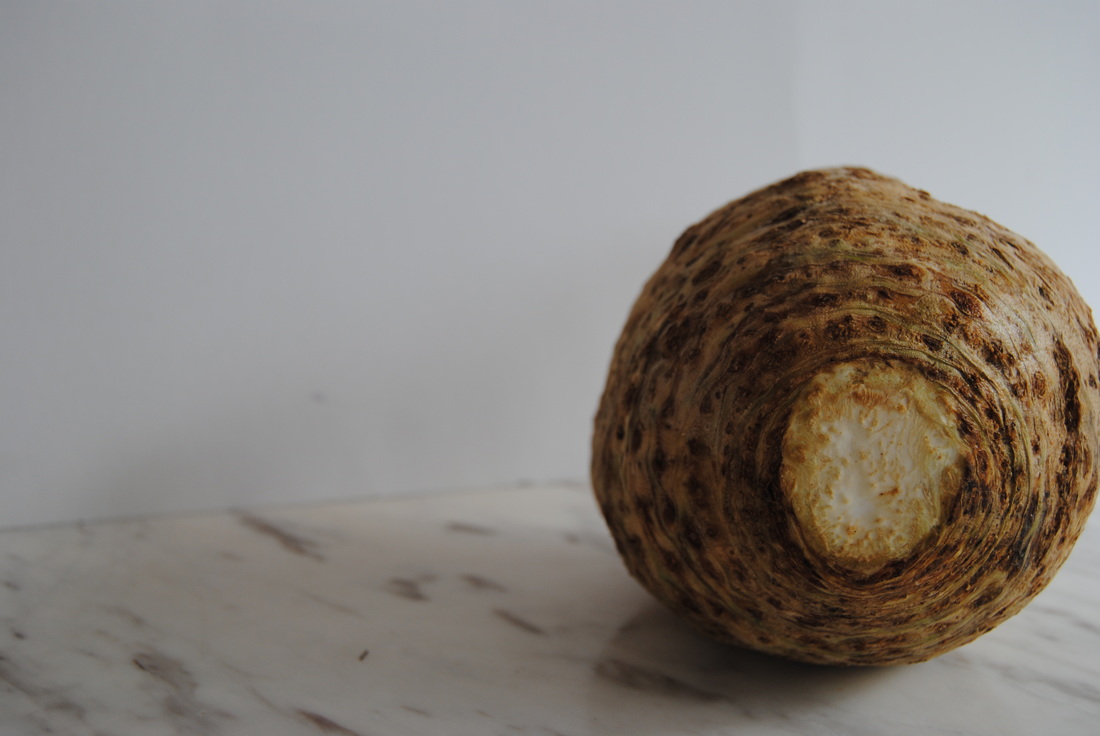
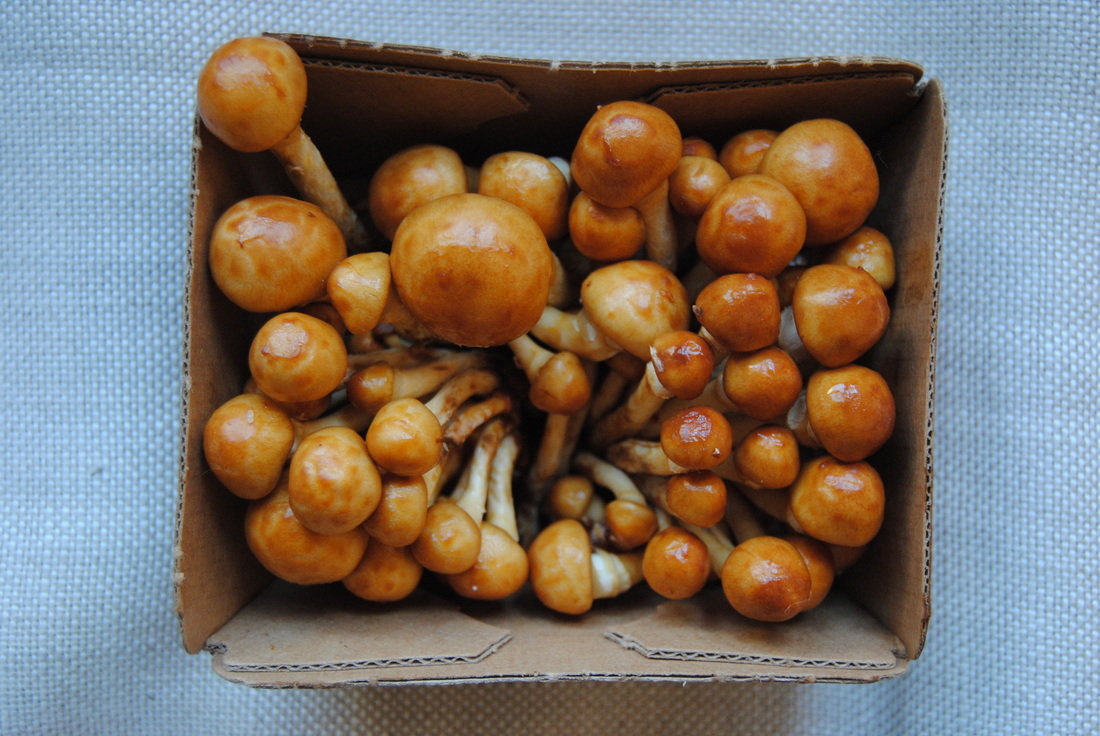
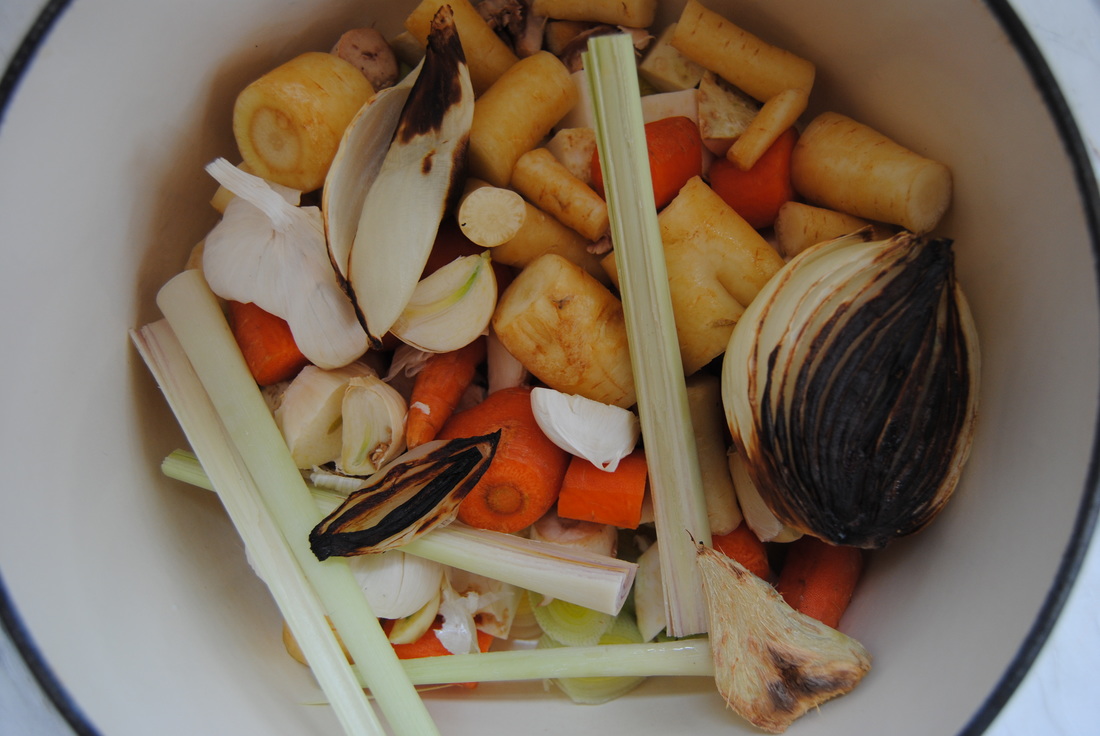
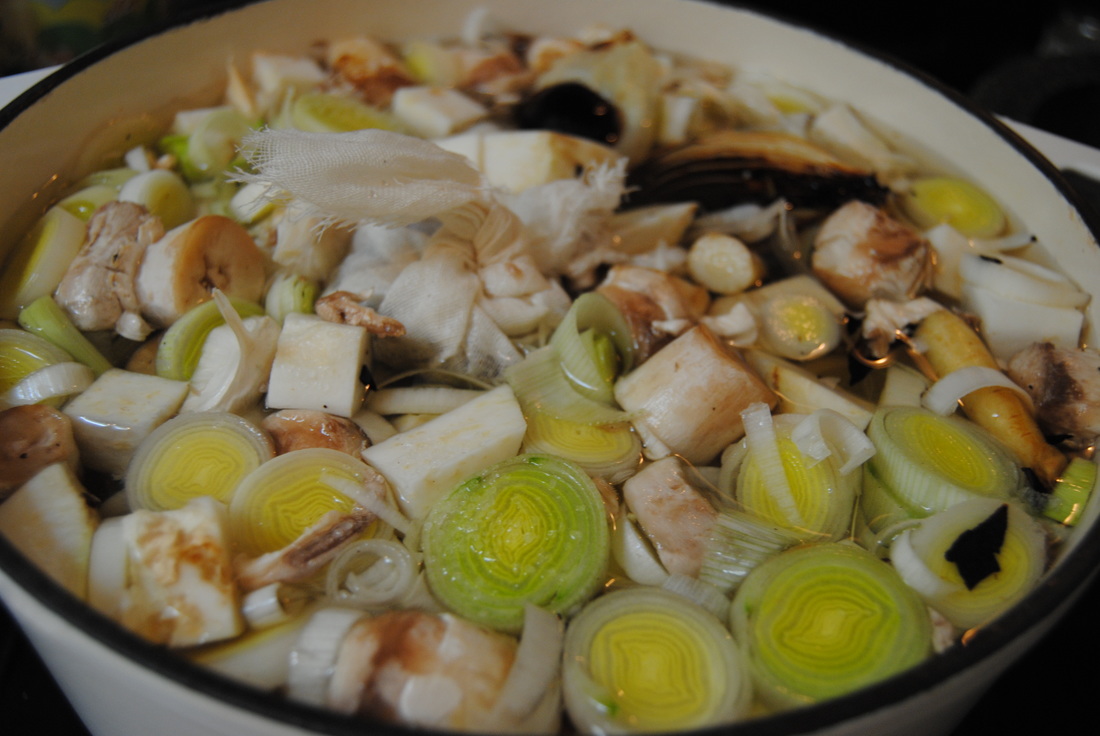
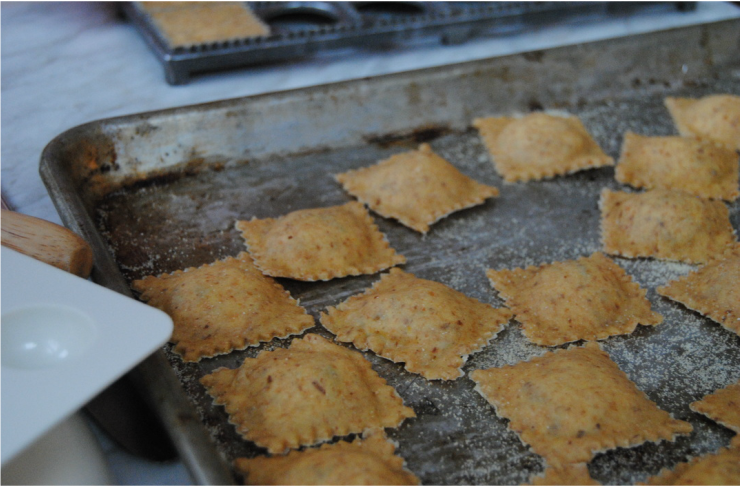 Okay, so last week we provided some special kitchen tips to make the holidays a little easier and this week we are tackling home pasta!? We get how different these posts must seem, but think that vacations around the holidays can be the perfect time to have some fun and try something new in the kitchen. If you've been wanting to tackle homemade pasta, or even if you haven't, now is your chance! Add a pasta roller (hand or electric) to your holiday wish list and let's get started. 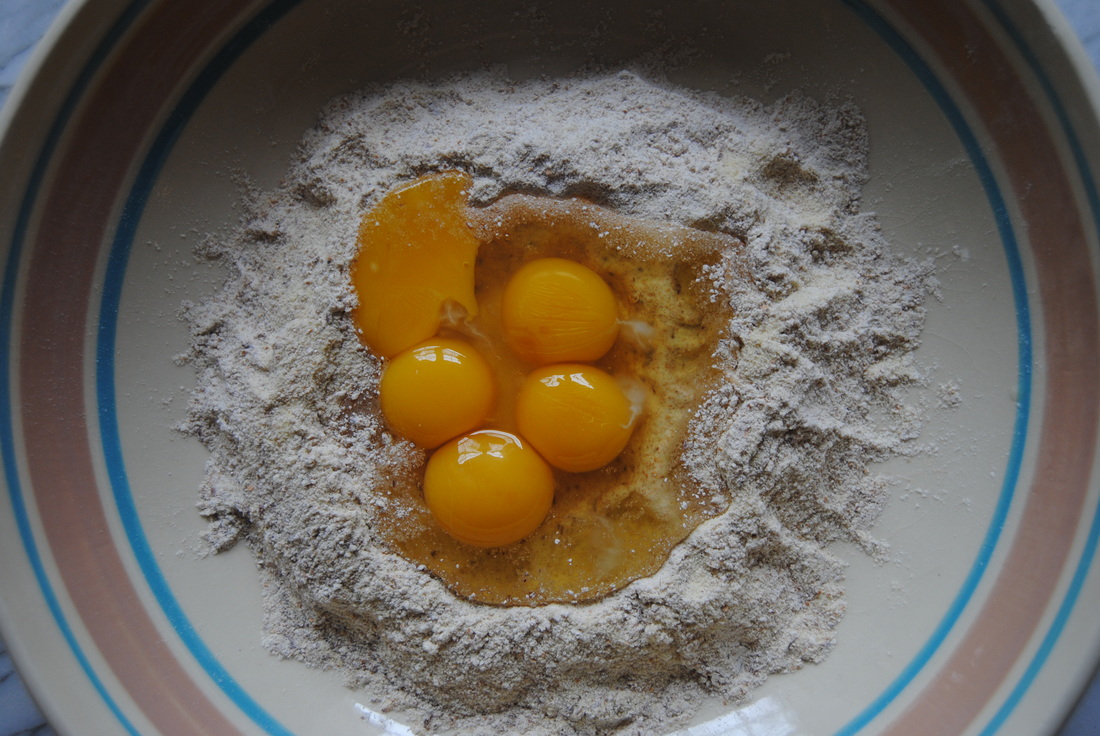 First of all we want to comment on the fact that this is our first recipe including eggs - a complete must for fresh, homemade pasta. Being plant based foodies we do try to use plant based egg substitutes when possible to keep plants the focus of our diets. We find this quite easy when baking as ground flax seed produces a similar texture in the final product and what we feel is a superior taste in certain baked goods when substituted for eggs. However, there are specific homemade recipes that just aren't possible or the same without eggs - so we use them! Eggs provide a good dose of protein, B vitamins, and are one of the few natural sources of vitamin D. When using eggs we try to choose eggs that come from happy/healthy animals so eggs from local farmers or friends raising chickens are our first choice. This would be considered "pasture raised" and will likely not be found in stores. If purchasing eggs from the store we do spring for the more expensive options which include organic, cage-free, and free range. Though these designations do not guarantee that the chickens were raised as happily and healthfully as "pasture raised," the animal conditions will be better than most standard grade. One day we will have a chicken coop along with our kitchen to ensure the quality of our eggs - hey we can dream right! But back to pasta making, with the right ingredients and tools it is very manageable and so fun. We have detailed instructions for you and step by step pictures of the raviolis we created this week. Good luck! Shiitake Mushroom Ravioli Kale Salad with Brown Butter Miso Sauce PREP TIME: 1 hour TOTAL TIME: 1 hour 30 mins Servings: salad serves 4 (recipe makes 48-50 raviolis) Ingredients Dough 1 1/2 cup spelt flour 1/2 cup semolina flour 1 Tbsp ground flax seed 2 whole eggs 3 egg yolks Filling 5 oz shiitake mushroom, diced 1 medium yellow onion 1 medium garlic clove, minced 2 Tbsp butter 1/4 tsp sea salt 1/8 tsp cracked black pepper 7 1/2 oz whole milk ricotta cheese 4 oz goat cheese Sauce 4 Tbsp unsalted butter (we used Kerrygold butter) 2 tsp miso paste, any variety would work 2 Tbsp starch water (reserved from cooked ravioli) 2 Tbsp organic half and half or cream 1 small clove garlic, minced Kale Salad 6 cups raw kale 2 Tbsp extra virgin olive oil 1/4 tsp sea salt 2 Tbsp shelled hemp seeds In a shallow dish mix together spelt flour, semolina flour and ground flax seeds. Make a well in the middle of the flour mixture and add both the eggs and egg yolks. Using your hands, mix together flours and eggs until a dough is formed. Using a standing mixer with dough hook attachment or by hand knead dough for ~10 minutes or until a smooth dough that holds its shape is formed. Add 1 Tbsp additional flour at a time if dough is sticky while kneading. Make sure you knead the dough long enough to properly develop the gluten which will results in a strong and stretchy dough. Cover finished dough with plastic wrap and allow to sit at room temperature while you prepare the filling. To make the filling, begin by dicing the onion and mushrooms. In a saute pan on medium heat add butter and chopped onions and cook until onions are wilted with golden edges, ~5 minutes. Add chopped mushrooms to the pan along with the minced garlic and continue to cook for and additional 5 minutes. Remove from heat, place sauteed vegetables in a bowl, then add both the ricotta cheese and goat cheese. Add salt and pepper and stir until mixture is combined. Allow mixture to cool at room temperature while you roll out the pasta dough. Cut dough into 4 segments. Either using a standing mixer with the pasta attachment or a hand held pasta machine, set the roller to #1 (and if using a standing mixer turn to speed #2) then run pasta dough through the machine. Fold pasta sheet in half and repeat this step 4 times. Set roller to #2 then feed pasta sheet through the machine twice (now without folding) and continue this process until you have reached the #5 setting. The higher the number, the thinner the dough. Place finished dough on well floured surface and cut dough in half to fit metal ravioli mold making sure to leave about 1" of additional dough on both ends. Using the ravioli press, gently indent dough to create wells in the dough - this is where your filling will be placed (see photo above). Carefully place ~1 tsp of filling in each well then place the other flat pasta sheet on top. Using a rolling pin, press top dough sheet onto bottom filled dough sheet. The weight of the rolling pin along with the zig-zag grooves on the metal mold will seal the raviolis. At this point you should be able to remove the excess dough from the edges of the ravioli mold. Carefully remove each ravioli from mold and place on lightly floured pan. Repeat process with eat segment of dough until you have made ~48-50 raviolis. Cook raviolis in salted boiling water, 8-10 at a time, for 5-6 minutes. Repeat process until all raviolis are cooked. Please note, this recipe calls for 16 raviolis (4 per person). Any uncooked raviolis you do not plan to eat within 2-3 days should be placed on a pan in a single layer and put in the freezer until fully frozen . The frozen raviolis can then be stored in a freezer bag for up to 3 months. To make the sauce add butter to a small sauce pan and cook on medium heat, stirring constantly until butter begins to brown and become fragrant. Lower heat to a simmer, add garlic and miso paste to brown butter, and continue to stir until the miso is well incorporated. Add cream and starch water and continue to stir until sauce comes together. Remove from heat and set aside. To make the messaged kale salad, wash, destem, and chop the kale. Add olive oil, salt, and hemp seeds and begin to message kale until it is well covered and kale is slightly wilted. To assemble the salad, combine the cooked ravioli with the brown butter sauce then place over messaged kale salad. Serve warm with additional brown butter sauce as desired. 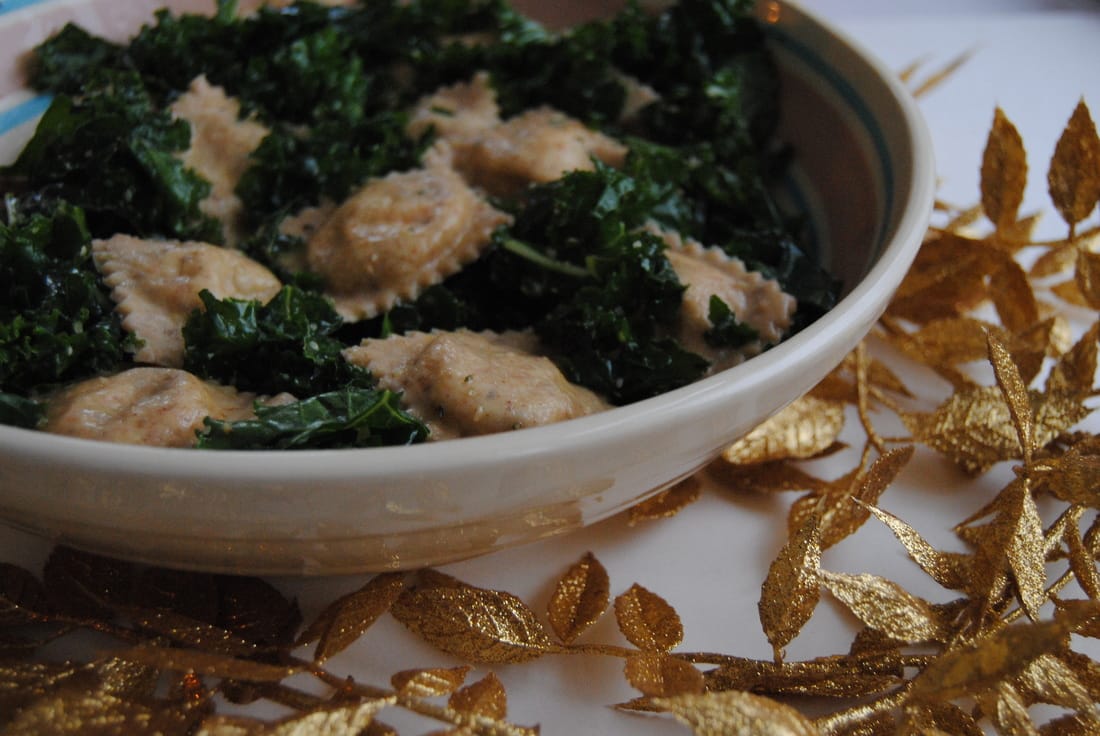 How fun was that? And so worth it! We just love, love this meal! The raviolis are so fresh and rich that they seem to melt in your mouth. The massaged kale wilts slightly from the warmth of the ravioli yet still provides a delightful crunch. To top this off, the brown butter sauce envelopes everything with a decadent finish. Just the meal to enjoy this holiday season or anytime at all. Enjoy, Jess and Cecelia 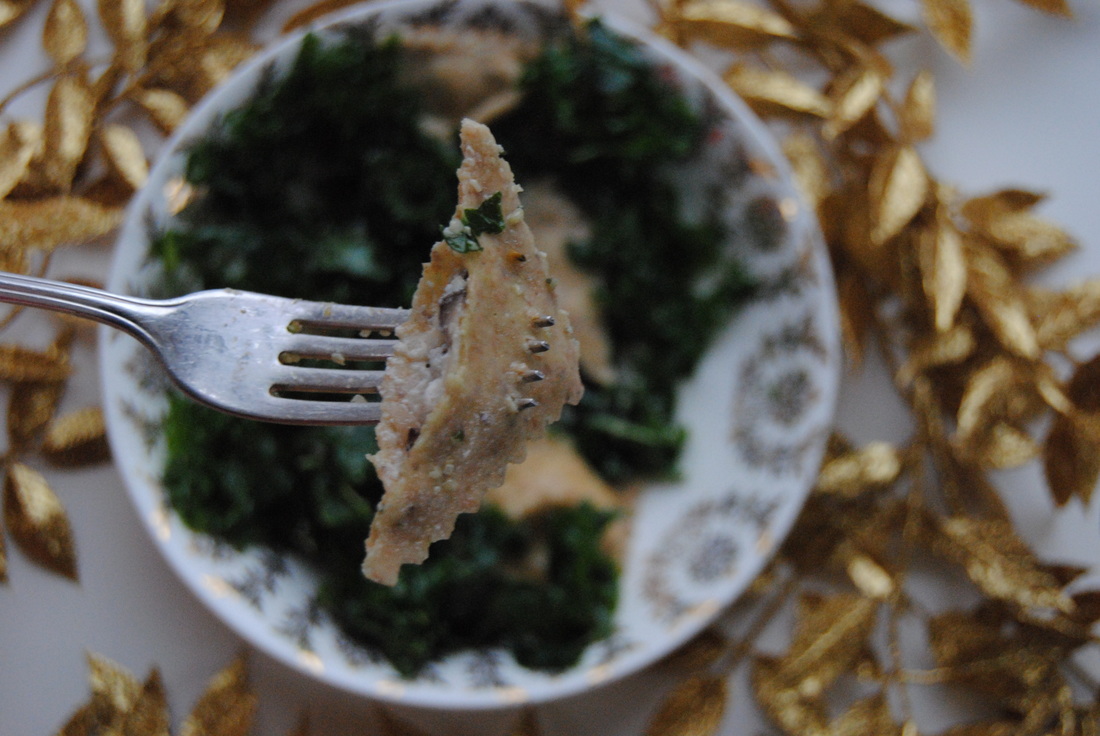 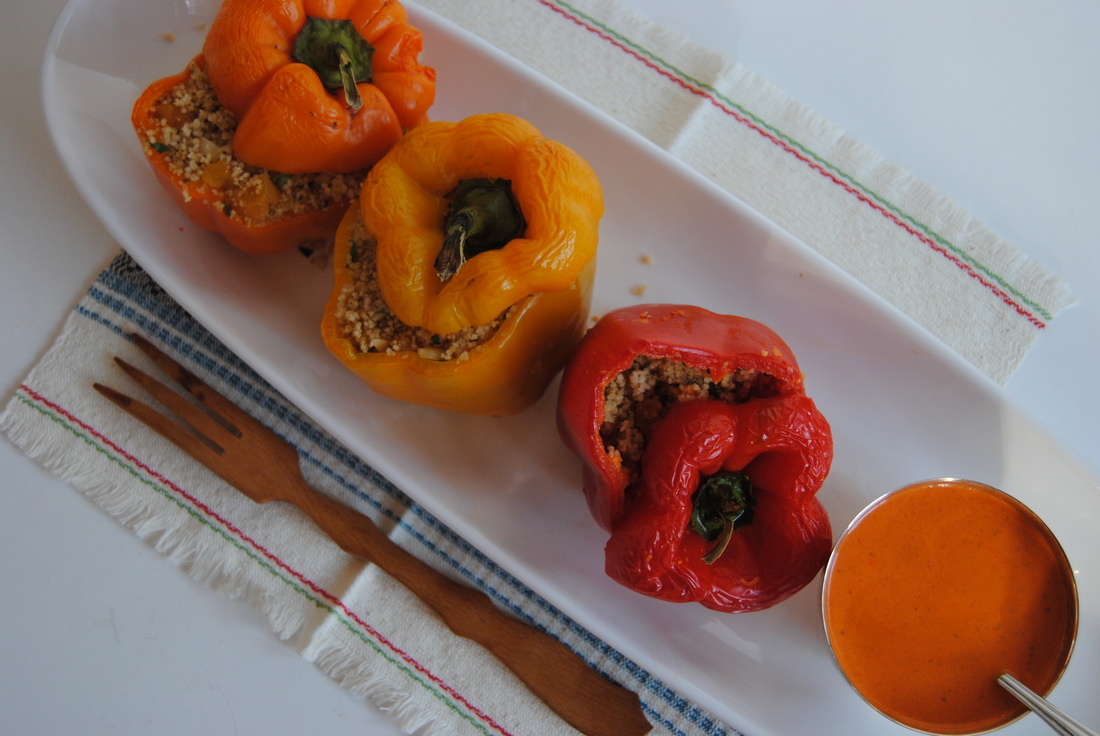 Peppers are very in season and SO colorful and delicious right now. Their beautiful, bright colors inspired our post this week influenced by North African cuisine. This stuffed pepper recipe will be a welcomed change to your palate with the variety of exciting flavors and unique uses for different ingredients. Take tea for example - for a twist we used tea in a completely new way. Interested? Read on! 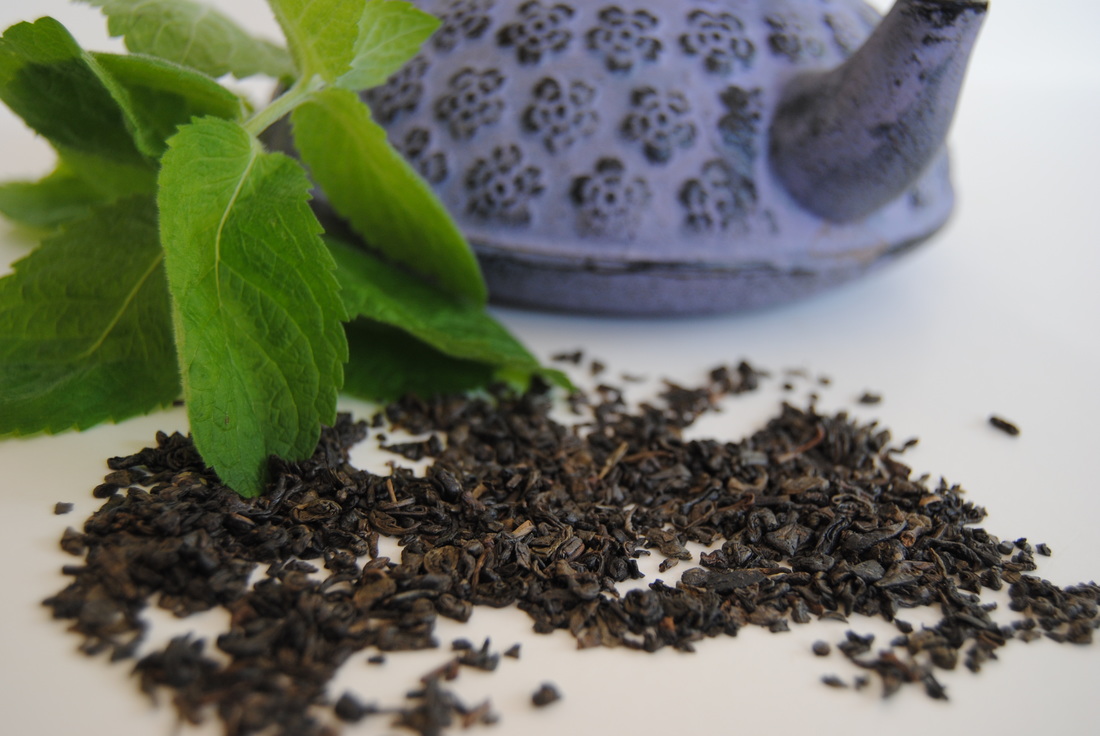 Tea in this recipe was not used as a warming beverage but a flavorful cooking liquid for our starch ingredient, couscous. Using a fresh mint and green tea cooking liquid provided a unique twist and a depth of flavor to the final recipe that only tea can provide. Typically cooked in water or broth, couscous (and other grains) can end up bland and needing a lot of flavor additives after cooking. So if tea as a cooking liquid is interesting to you than try experimenting with different cooked grains and your favorite teas. We find savory teas such as green, mint, chai, and black tea varieties to work well as substitutes for water or vegetable stock when preparing cooked grains. Just remember that if using in place of vegetable stock you'll likely need to add extra salt to the recipe. Has tea in foods sparked your creative side? We sure hope so! If it hasn't than you'll just have to try this recipe to understand. Moroccan Stuffed Peppers with Tunisian Harissa Yogurt Sauce PREP TIME: 25 minutes TOTAL TIME: 1 hour 10 minutes (includes cooking time) Servings: 5-6 Ingredients Mint & Honey Green Tea 2 Tbsp loose green tea (we used gunpowder green tea) 20 large mint leaves 2 Tbsp honey (we used raw creamed honey) 3 cups hot water Couscous Salad 1. 5 cups dried whole wheat couscous 1.5 cups prepared mint & honey green tea 1 Tbsp + 1 tsp olive oil 1 cup dried apricots, diced 1/2 cup slivered almonds 1 cup cooked garbanzo beans 1/4 tsp ground cumin 1/4 tsp ground paprika 1 tsp apple cider vinegar 2 Tbsp chopped fresh parsley 1/4 tsp sea salt Peppers 5-6 medium-large bell peppers Harissa Yogurt Sauce 1 medium roasted red bell pepper with skin removed 3 cloves of garlic, minced 3 Tbsp olive oil 1" of a fresh red jalapeno (more if you prefer a spicier sauce) 1.5 tsp paprika 1 tsp coriander seeds 1/2 tsp fennel seeds 1/2 tsp cumin seeds (or 1/4 tsp ground cumin) 1/2 tsp red pepper flakes 1/4 tsp sea salt 2 Tbsp water 1/4 cup plain Greek or Icelandic yogurt Preheat oven to 350 degrees. In a tea pot or glass container with a tea strainer add boiling water and honey and steep green tea and mint leaves for 5 minutes. Remove tea and mint leaves and set warm tea aside. To make the couscous, add 1.5 cups mint & honey green tea, 1 Tbsp olive oil, and 1/4 tsp sea salt to a medium sized sauce pan and bring to a boil. Remove from heat, add dried couscous to the hot liquid, and cover with a lid. Allow couscous to absorb tea for ~15 minutes then remove lid and fluff with a fork. Combine chick peas with 1 tsp olive oil, 1/4 tsp ground cumin, and 1/4 tsp paprika in a small bowl and stir to combine. Add cooked couscous, dried apricots, slivered almonds, spiced chick peas, parsley, and apple cider vinegar to a large bowl and stir to combine. Set prepared couscous filling to the side. Wash peppers and carefully cut the top ~1" off of each making sure to cut evenly all the way around the pepper as this will serve as your lid while cooking. Scoop the insides of the peppers clean removing ribs and seeds. Fill each pepper to the top with couscous filling, cover with its "lid", and place snugly in an oven proof pan. Pour the remainder of the mint and honey green tea in the bottom of the pan with the peppers to keep them moist while cooking and cook at 350 degrees for 35-45 minutes or until peppers are soft. While the peppers are cooking, combine coriander, fennel, cumin, and red pepper flakes in a small pan and lightly toast on the stove top until fragrant, ~2 minutes. Add roasted red pepper, garlic, olive oil, red jalapeno, paprika, toasted spices, sea salt, water, and yogurt to a blender or food processor and mix on high until harissa sauce is a smooth consistency. Once peppers are done cooking, serve with a side of harissa yogurt sauce. Any leftover peppers will stay fresh in the fridge for ~3-5 days in an air tight container. Reheat in the oven at 350 degrees for 10 minutes or for 1-2 minutes in the microwave. Harissa sauce will stay fresh in an air tight container in the fridge for 7-10 days. 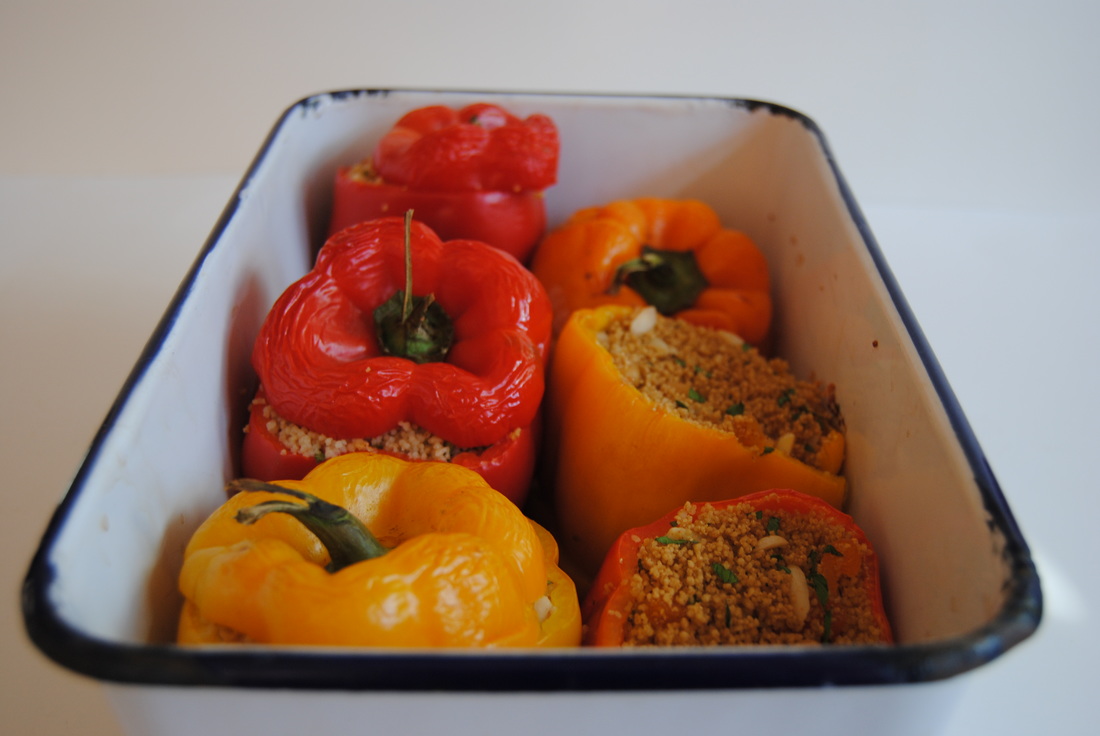 If you're wondering, yes - this recipe does taste just as colorful as it looks! The Moroccan couscous salad is sweet and savory from the honey tea broth and perfectly balanced with spicy chickpeas, crunchy almonds, and chewy apricots. The peppers are tangy and cooked to an ideal texture and the Tunisian harissa yogurt sauce tops everything off with fiery yet rich goodness. And this recipe is just beyond beautiful. We hope you love it just as much as we do and enjoy a new twist with tea in your kitchen. Enjoy, Jess and Cecelia 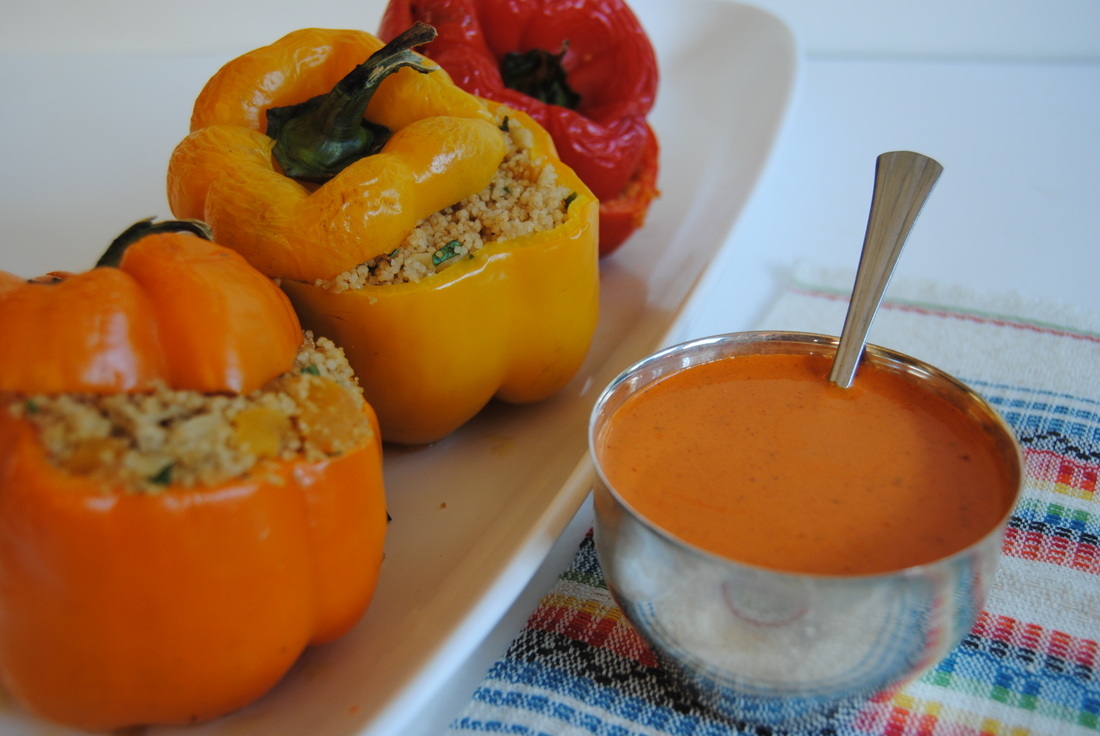 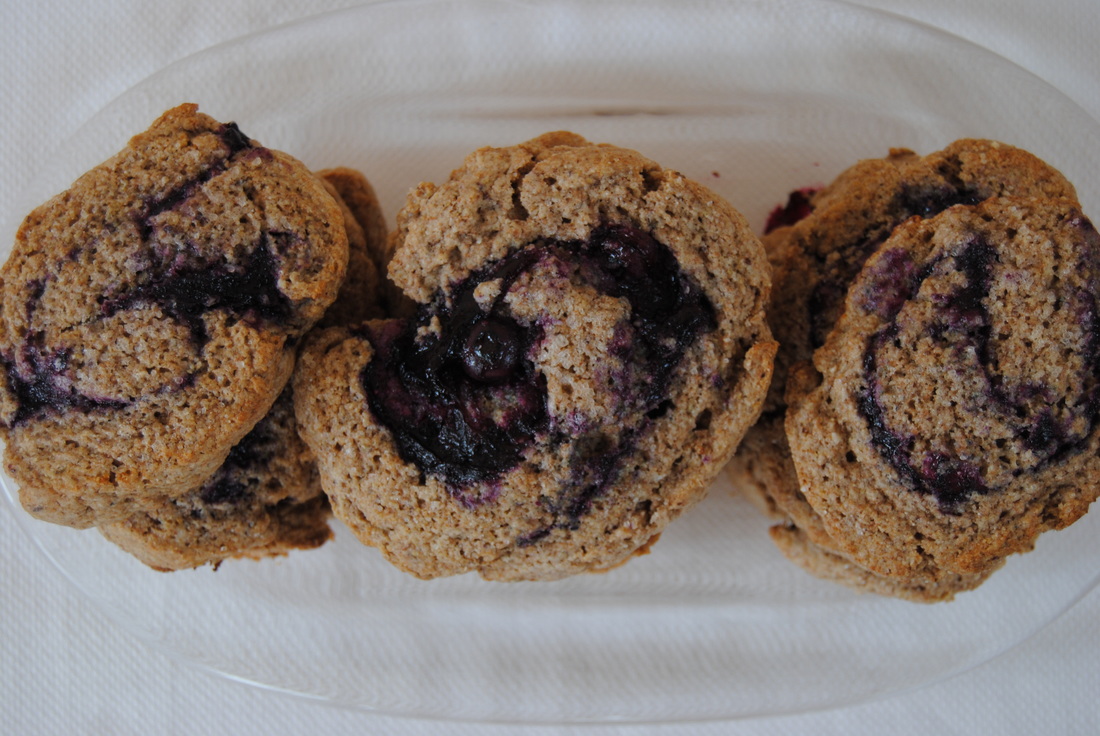 Let's face it, sometimes mornings can be hard. One thing that helps us get up and going is knowing that delicious foods await us (such dietitians!), and what could be a better treat on a tough morning than a fresh blueberry scone? If you're wondering, yes, these scones do qualify as a nutritious breakfast. Made with a blend of whole grain flours, fresh berries, and two type of goat milk products these treats are enjoyable and dietitian approved. But why did we choose goat milk for this recipe? Let's find out! 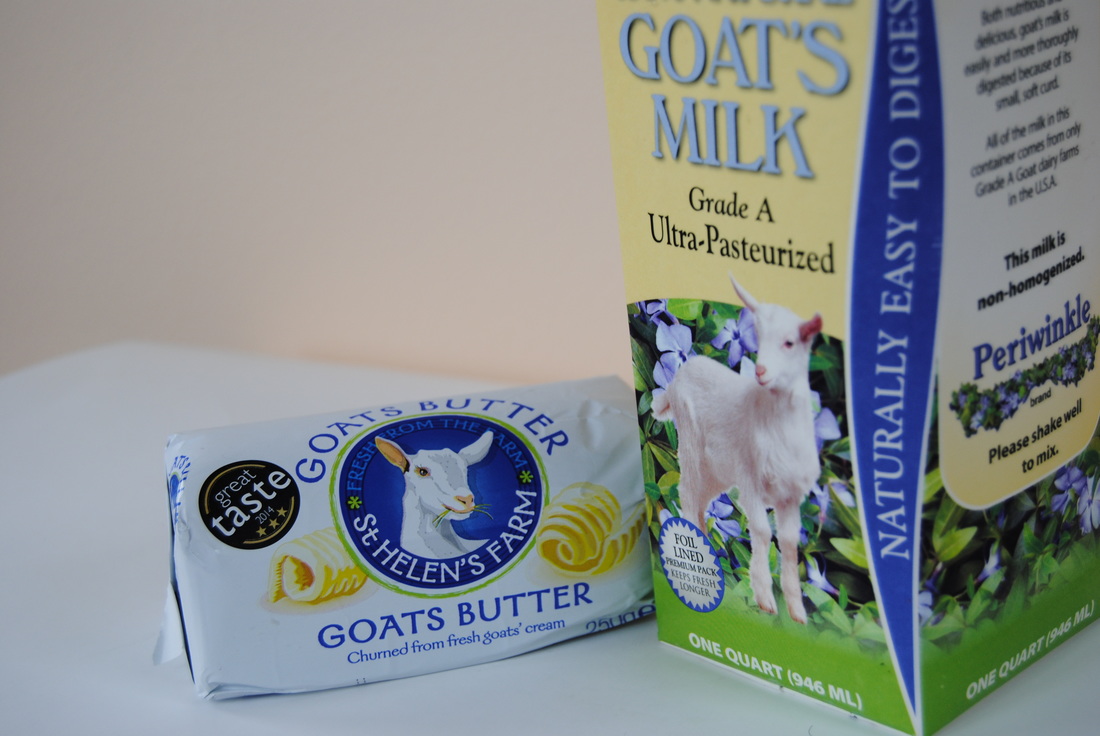 So what is the deal with goat milk and goat milk products anyway? Is goat milk really different from cow's milk? Though similar in many ways, goat milk does have some significant nutritional differences and we believe, benefits. For starters, goat milk is easier to digest, with digestion being a common concern with dairy products. The fat globules in goat milk are smaller than cow's milk allowing for easier digestion. Also for this reason, goat milk does not require homogenization as cow's milk does. Homogenization is the process of breaking down fat molecules so that the mixture will will resist separation, and is basically one more step in processing that goat milk does not require. But back to digestion, goat milk also contains slightly less lactose than cow's milk making it a better alternative for those sensitive to lactose. Additionally, goat milk contains a higher percentage of fat from medium chain triglycerides which compared to long and short chain triglycerides are absorbed faster, used more effectively for energy, and are less likely to be stored in the body. As if all this wasn't enough, goat milk may even be more tolerable then cow's milk for people with milk protein sensitivity or intolerance. This is because goat milk only contains a trace amount of an allergic casein protein, alpha-S1, found in cow's milk. However, goat milk does contain similar levels to cow's milk of other allergenic proteins and should still be used with caution in the case of severe dairy allergies. Finally, goat milk contains more oligosaccharides (short chain carbohydrates) which are prebiotics needed in a healthy gut for probiotics to feed on. If we have to find a negative about goat milk we will note that because the fat globules are smaller than in cow's milk, it is more difficult and more time consuming to obtain the rich cream from goat milk required to produce goat buttermilk and butter. Though in terms of diary production goats may truly be a more sustainable future. Goats thrive on less, lower quality pasture and in areas that cows could not be kept such as hilly, rocky terrain. Wow, a whole lot of reasons to get your hands on some goat milk products and get started on this recipe! Blueberry Swirl Scones PREP TIME: 30 mins TOTAL TIME: 45 mins Servings: 8-10 scones Ingredients Blueberry Sauce 1 pint organic blueberries 1/8 cup cane sugar 1 tsp fresh lemon juice 1 tsp pure vanilla extract Scones 1 1/2 cups whole wheat pastry flour 1/2 cup oatmeal flour 1/2 cup buckwheat flour 1 Tbsp ground flax seed 3 Tbsp warm water 1/3 cup cane sugar 4 tsp baking powder 1/2 tsp sea salt 3/4 cup goat butter (cow's milk butter will also work), cold 1/2 cup full fat goat milk (cow's milk or other alternative milk will also work) Additional 2-3 Tbsp goat milk (or milk of choice) for brushing the top of the scones 1-2 Tbsp cane sugar for sprinkling To make the blueberry sauce, combine 3/4 pint fresh blueberries (reserve 1/4 of the blueberries for later) and 1/8 cup cane sugar in a small sauce pan on medium heat. Cook for 3-5 minutes until the blueberries begin to pop, making sure to stir frequently to dissolve the sugar. Reduce heat to a simmer and continue to cook for an additional 5 minutes until mixture becomes syrup like and will stick to the back of a spoon. Remove from heat and add in fresh lemon juice and vanilla bean. Set blueberry syrup in the fridge to cool while you start the dough. Preheat oven to 425 degrees and line a baking sheet with parchment paper. Using a fork , whip together the ground flax seed and water in a small bowl until combined and set aside. To make the dough sift together the flours, baking powder, and sea salt. Using a pastry cutter or two knives, cut cold goat butter into dry ingredients until the butter is about the size of peas. These small butter pieces within the dough will help create a flaky scone. Add the goat milk and flax/water mixture to the batter and mix to fully combine. Avoid over mixing the dough as this will cause the scones to become tough from over-development of the gluten. Roll the dough into a ball, cover with plastic wrap, and place in the fridge to cool for at least 15 minutes. Once the dough has cooled, roll the dough out into an 8" by 12" rectangle on a lightly floured surface. Evenly spread the cooled blueberry sauce on top of the dough and add the reserved fresh blueberries on top. With well floured hands and starting with the short end, carefully roll the dough into a log. Our trick for cutting the dough without smashing it down is using unscented dental floss - slide floss under the log and make a crisscross on top of the dough. Carefully pull floss through the dough to make your scones (technique pictured in this post). Repeat until you have 8-10 equal sized scones. Space scones evenly on parchment lined baking sheet and brush each scone with goat milk and sprinkle with 1/2 tsp cane sugar. Place in pre-heated oven and cook for 12-15 minutes or until the edges are golden. Allow to cool for 5 minutes. Serve warm or keep out at room temperature for 2-3 days. We found that if stored in an air tight container scones will lose some of their crunch. Scones may also be saved in the freezer, just make sure to fully thaw and bake at 350 degrees for about 5 minutes prior to serving. 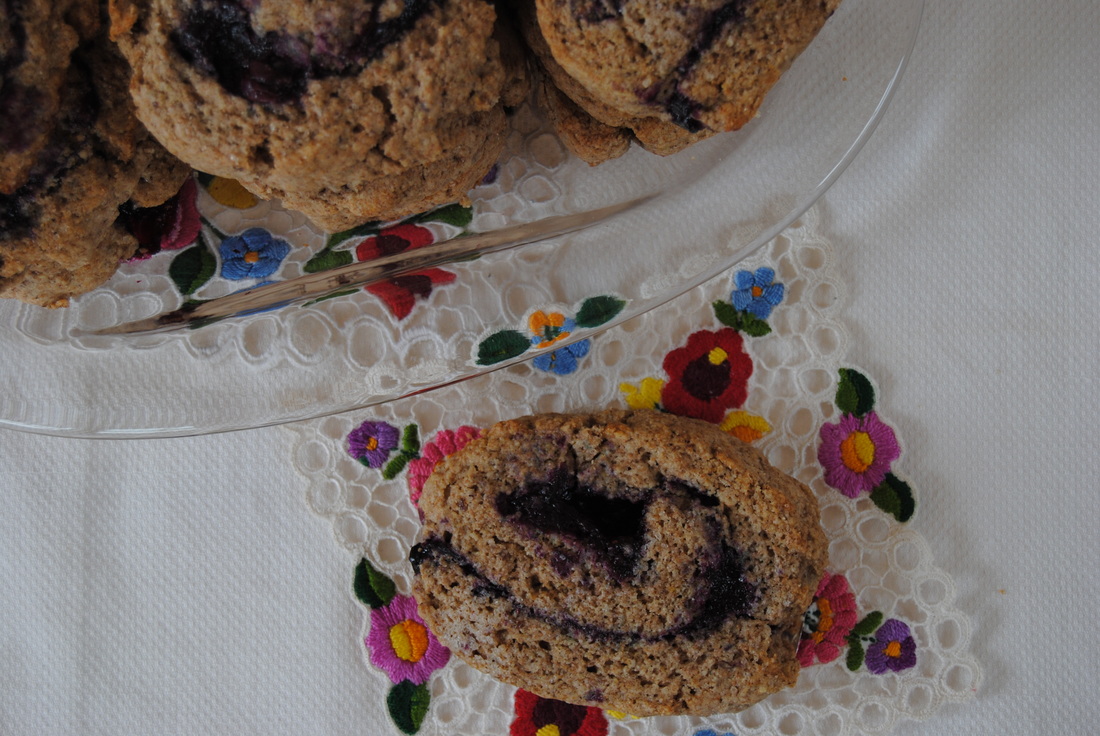 Picture this morning- hot coffee or cold brew (our recipe here!) with a crumbly scone full of ripe blueberries bursting with flavor, packed with the richness of whole goat milk and goat butter, and swirled into a picture perfect work of art. Now this will get you out of bed and keep you satisfied until your next meal. Also highly recommended as a summer dessert or tea party treat. Really any way that you want to enjoy this scone will totally rock. Oh, and share the news about goat milk and maybe add goat milk products into your rotation a little more often now that you know how great it really is. Have a good morning, Jess and Cecelia 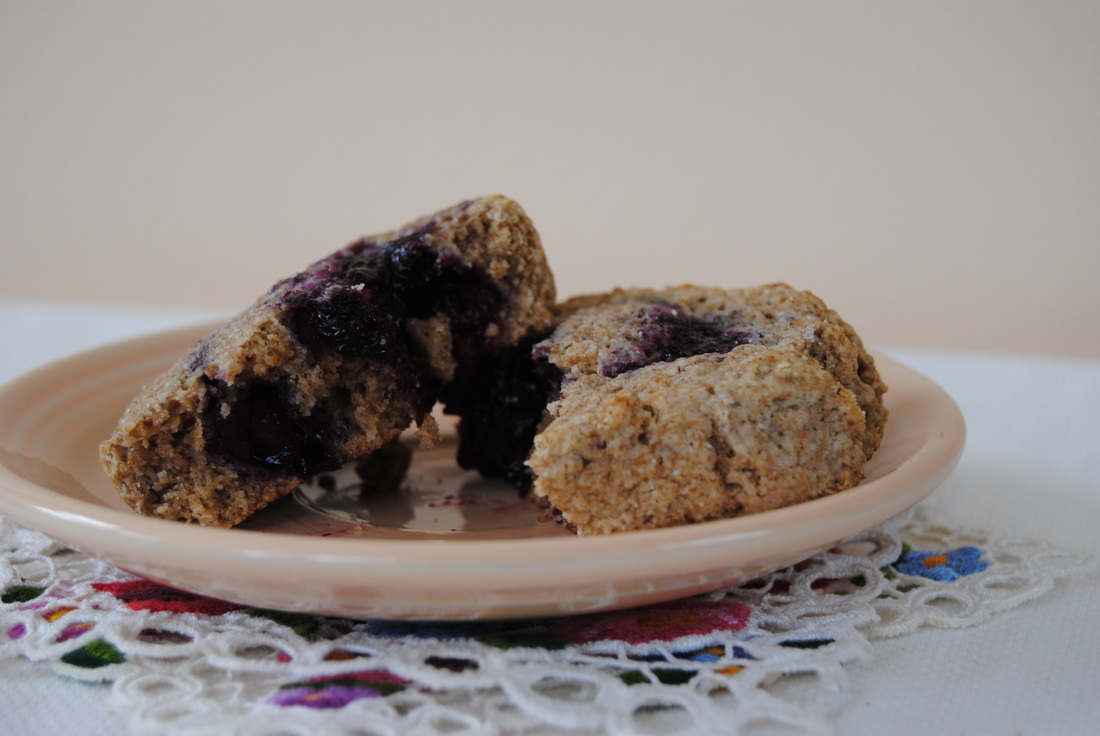 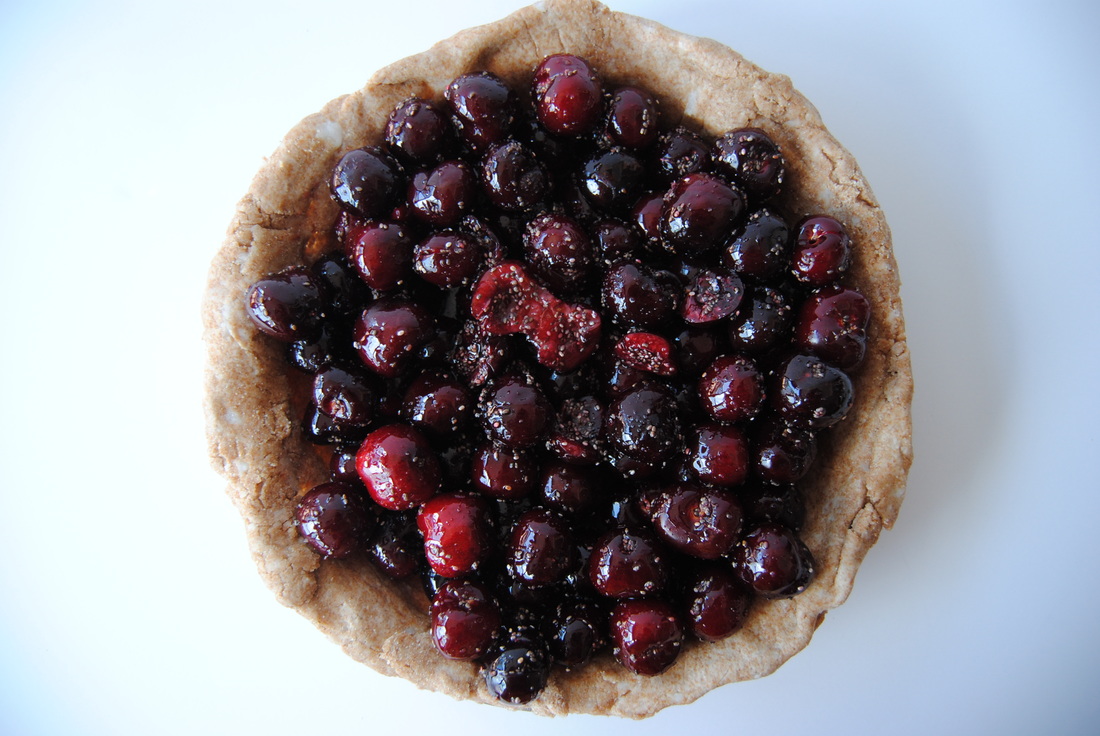 Happy 4th of July TGBK friends! We hope you're celebrating this amazing country in the best way you know how today. If you know us by now, you know that we love to celebrate with fresh, seasonal, and beautiful food. That's why a good old cherry pie had to be on the menu for us today. We put in the work ahead of time to make this 100% homemade starting with a coconut oil crust. You'll have to put this on the menu for your next celebration since we didn't give you much of a heads up for today (sorry!). This one will be worth the wait though, we promise. So let's learn more about why homemade pie crust is an absolute must before we get to the recipe. With these tips and tricks we will free you from anything but wholesome, homemade pie crust from now on. 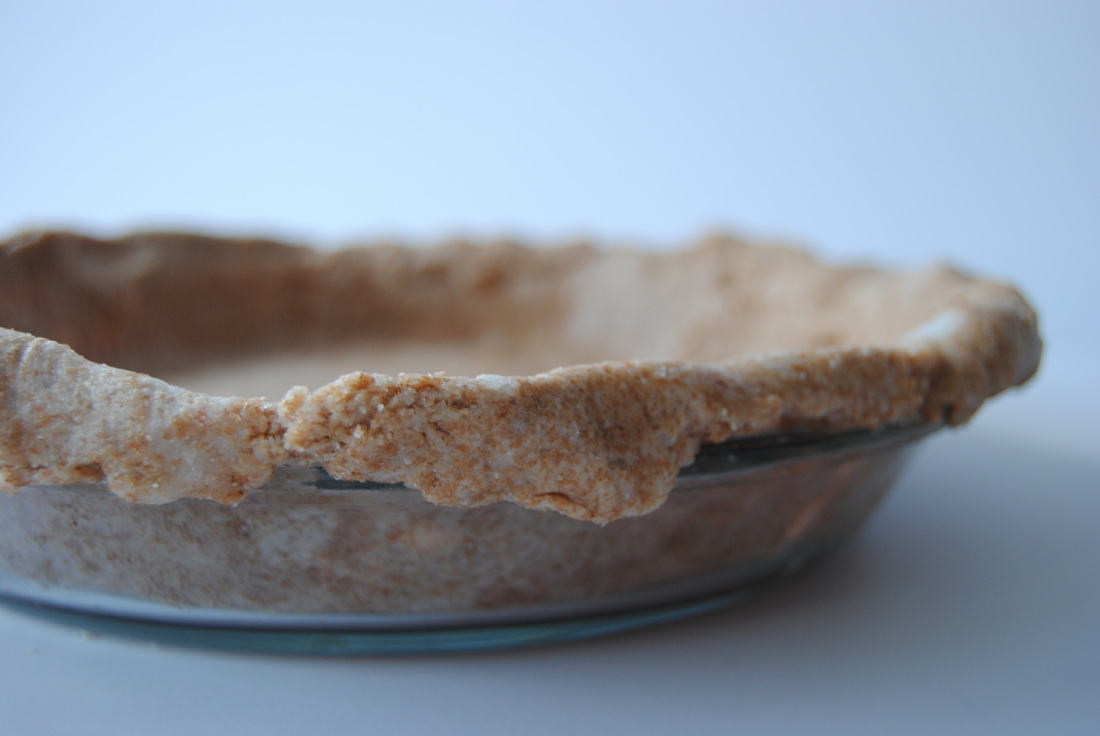 Now don't get us wrong, we know that perfecting the homemade pie crust can be quite a challenge. It takes time, patience, and plenty of practice. But putting in that time really does pay off in terms of taste as well as healthfulness of the final pie. Typical pre-made, store bought pie crust contains trans fat which in simple terms is a nutritional no, no. Trans fat is a man made, chemical based fat used in processed foods to lengthen shelf life, which may sound good, but it also takes your body a very long time (months even) to fully metabolize and clear this fat from your body. Store bought pie crust may also contain artificial dyes and food preservatives (ex BHA and BHT) that we prefer to avoid as much as possible. Even homemade pie crust can contain undesirable ingredients if vegetable shortening (like Crisco) is used as the fat source. Vegetable shortenings are another man made food invention that produce what we consider negative fats during the process of turning liquid vegetable oils into a semi-solid. Instead, we suggest using a whole food based fat source that is naturally in the right consistency for a pie crust, like butter or coconut oil. Since coconut oil is more unique and vegan friendly we decided to give you that recipe this time around. We hope our pie crust making tips will help you become a pro in no time. One last tip, if your crust doesn't look perfect the first go around, don't worry! It will still taste great. Summer Cherry Pie PREP TIME: 45 mins TOTAL TIME: 3 hours 30-45 mins (includes resting of dough and cooking time) Servings: 8 Ingredients Coconut Oil Crust (makes two crusts) 3 cups whole wheat pastry flour 1 cup solid coconut oil (cool in the fridge as needed if soft/liquid) 1/4 tsp salt 1 cup + 2 Tbsp ice water Cherry Pie Filling 5 cups organic cherries, any sweet variety 1/4 cup cane sugar 2 Tbsp maple syrup 2 Tbsp chia seeds 1 Tbsp lime juice One vanilla bean, insides scraped out Optional Topping Vanilla full fat Greek or Icelandic yogurt Start by preparing the crust at least 90 minutes before the filling. Combine whole wheat pastry flour and salt in a large bowl. Add solid coconut oil to the bowl and use a pastry cutter or butter knife in each hand to cut coconut oil repeatedly for several minutes until the mixture resembles large crumbs (pictured above). Add ice water two tablespoons at a time and mix by hand with a fork until the mixture just begins to come together. If you press the mixture between your fingers it should hold together but easily crumble. Note that you may use slightly more or less ice water to achieve the correct consistency. Turn dough out onto a smooth, lightly floured surface and separate in half using floured hands to press dough gently so that it holds together. Place each dough on plastic wrap and press into a flattened disc with your palms (also pictured above). Wrap each disc fully with plastic wrap and place in the fridge for at least one hour. Dough can be prepared ahead of time and stored in the fridge for 2-3 days. Before rolling the dough allow to sit out at room temperature for 30-60 minutes to allow dough to soften until pliable. To prepare the filling start by removing cherry stems and pitting the cherries using a cherry pitter or a chopstick. For the chopstick method hold the cherry firmly in one hand and use the wide end of the chopstick to press up through the middle of the cherry from the bottom. The pit should easily break through the top where the cherry was previously attached to its stem. Add prepared cherries to a large bowl and add cane sugar, maple syrup, chia seeds, lime juice, and insides of the vanilla bean to the bowl and mix to fully combine. Allow to sit while you roll the dough. Remove dough from plastic wrap and place each between two sheets of waxed paper (pictured above). Use a rolling pin to roll each dough into a a large circle slightly larger than a standard 9" pie pan. Remove top piece of waxed paper from one rolled dough and transfer first dough into the pie pan with the waxed paper side facing up. Shape dough into the pan and then remove waxed paper by peeling it back slowly from the sides and working into the middle. Don't worry if pieces of crust break off or come up with the waxed paper, these can be molded back into place easily with floured fingers. If dough overlaps the pan fold up the edges slightly. Transfer filling into pie pan and spread evenly. Repeat process with second dough to cover the top of the pie. With floured fingers, press together the top and bottom dough around the edges and prick the top multiple times with a fork to allow steam to escape while cooking. You can also press a fork around the edges to decorate and make shapes (stars!) with extra pieces of crust for the top (pictured below). Place pie pan on a large piece of aluminum foil and fold foil up around just the edges of the crust to protect from burning during baking. Bake in a preheated 425 degree oven on the lowest rack for 75-90 minutes. The crust should look golden brown and there should be some juices bubbling up through the fork holes in the crust when the pie is done. Carefully remove from oven and let cool for 3-4 hours on a wire rack before cutting into slices. If you can't wait pie can be enjoyed earlier but the filling will be runny. Toppings of your choice! 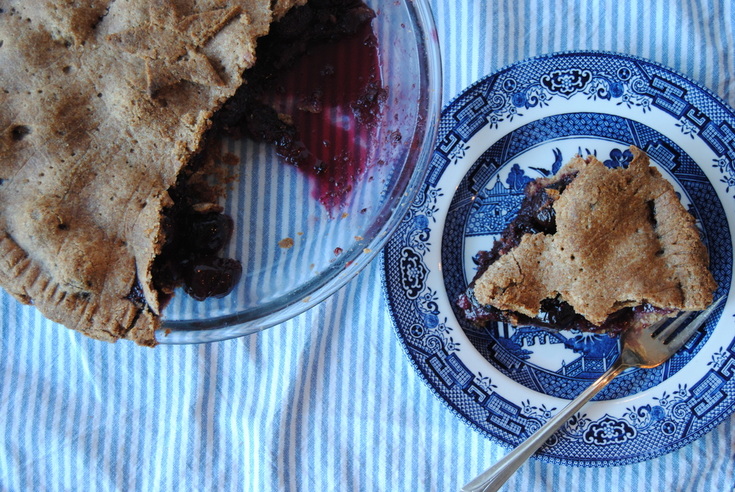 This is an anytime pie. It's great as a dessert (of course!) but we've also enjoyed it as breakfast or even a decadent snack. The whole wheat pastry crust gives this pie a toasty, feel-good flavor that reminds you that pie doesn't have to be reserved only for dessert. The filling is low in added sugar as far as pie fillings go but is still wonderfully sweet from the natural fruit sugars. And topped with a full fat, high protein yogurt this pie does work as a balanced meal (or at least we think so!). Hey, this holiday is all about freedom right? Happy Fourth, Jess and Cecelia 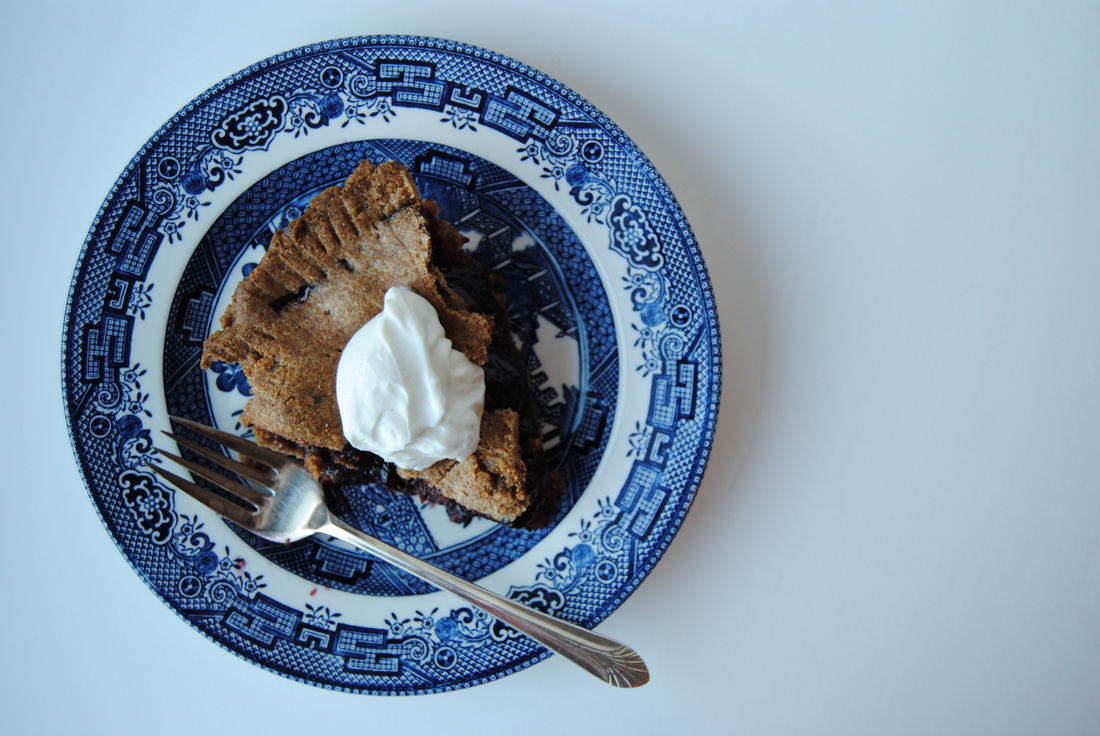 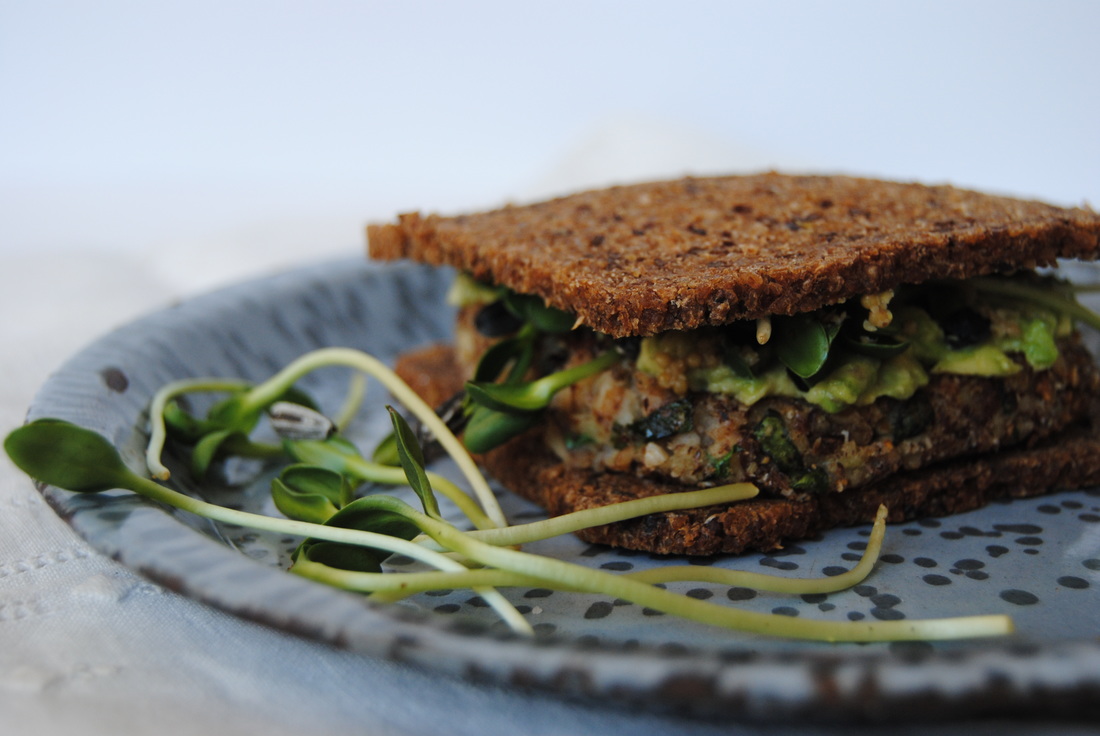 Okay, so we've officially made it to summer 2016 as of this Tuesday friends! As you know we are already well under-way with our summer inspired recipes and hope you've been enjoying them thus far. There is just so much to enjoy during the summer months that we can only think of one complaint; being invited to a BBQ to find that the only vegetarian friendly option is a bad veggie burger. Ever been in a similar situation? If so, we are here to solve your problems this summer! But first, what do we mean by a "bad" veggie burger.  It's not that veggie burgers are inherently bad (of course not, we made one!) but some are lacking in, well, veggies. Often veggie burgers can be a mix of heavy starches (beans, rice etc.) and held together with egg ingredient, so not vegan friendly. A starchy veggie burger like that on a bun can be unsatisfying due to lack of variety and texture and can leave you wondering if you even ate any vegetables at all. And not to mention the unpronounceable and undesirable ingredients hiding in many processed, brand name burgers. Well not in this kitchen! Our veggie burgers are changing the game with a base of mushroom and potato, packed with green kale, and crusted in hazelnuts for a satisfying crunch. You'll never say no to a BBQ again once you have one (or two) of these in your pack. But remember, even the best homemade veggie burger has a hard time holding up on the grill so we suggest cooking on foil or in a sauté pan on the stovetop if you're at an indoor/outdoor party. Let's get to it! Hazelnut Crusted Veggie Burger PREP TIME: 30 mins TOTAL TIME: 45 mins Servings: 8-10 burgers Ingredients Burger 1 cup white navy beans (we used canned white navy beans) 1/2 pound Yukon gold potatoes 3/4 cup cooked cracked bulgur wheat (or grain of choice, ex: cracked wheat berries, brown rice, oatmeal etc.) 1 small sweet yellow onion, diced 1 pound shiitake mushrooms, diced 1 cup kale, finely chopped 1/3 cup fresh parsley, chopped 3/4 cup roasted hazelnuts, crushed 1/2 cup fried onion strings 1 Tbsp ground flax seed 1 Tbsp coconut oil + another 1 Tbsp if cooking in a pan on the stove top 1 clove garlic, minced 1 tsp sea salt 1/2 tsp pepper Burger coating 1 cup roasted hazelnuts, crushed 2 Tbsp ground flax seed Burger bread & toppings Flaxseed bread (we used Feldkamp flaxseed bread) Avocado Sunflower sprouts Kombucha mustard (our recipe here) Cook cracked bulgur wheat according to package directions. Set aside and allow to cool. Cook potatoes in a large pot of boiling water until soft and a fork goes in easy, ~20 minutes While the potatoes are cooking, add coconut oil to a large saute pan on medium heat and add the diced onion, sea salt and pepper. Cook until onions are translucent and caramelized, then add the chopped mushrooms and minced garlic and cook until soft and fragrant, additional ~5 minutes. Add chopped kale to pan and continue to cook for an additional 2 minutes. Remove vegetables from heat and allow to cool. Drain potatoes from water and mash with a potato ricer. Add beans and continue to mash until combined. Note it is okay to have some full beans in the mixture. Add cooled bulgur wheat, cooled vegetables, fresh parsley, 3/4 cup chopped hazelnuts, onion strings, and 1 Tbsp ground flax seeds to the bean and potato mixture. Stir well to fully combine all ingredients. In a separate, small, shallow dish, combine 1 cup crushed hazelnut and 2 Tbsp ground flax seed and set aside. Using your hands shape mixture into 8-10 evenly sized burgers. Gently press into hazelnut/flax seed mixture to fully coat and place on wax paper. To cook the burgers indoors heat a non-stick pan or well seasoned cast iron skillet with 1 Tbsp coconut oil. Cook burger for 3-5 minutes on each side or until golden brown. Note that it is best to use a large spatula to flip burgers to prevent them from breaking apart. If you are cooking burgers outside on a grill, we suggest placing the burger on tin foil prior to placing on the grill. This will prevent the burger from sticking to the grill while still allowing the burger to fully heat up. Cook on the grill for 5-7 minutes. Lightly toast bread, place burger on one side, add smashed avocado, sunflower sprouts, kombucha mustard, and sprinkle of sea salt, and top with another slice of bread. Prepare all at once for a large group or save* for a later date. *If you do not plan to eat all the burgers at once, they will stay fresh in the fridge for 5-7 days. Simply follow cooking directions listed above when ready to eat. They also freeze really well. If freezing, place each burger in a sealed bag or place parchment or wax paper between each burger in a container and allow to freeze fully. They will keep in the freezer for up to 3 months. Just remember to fully thaw burger prior to cooking. 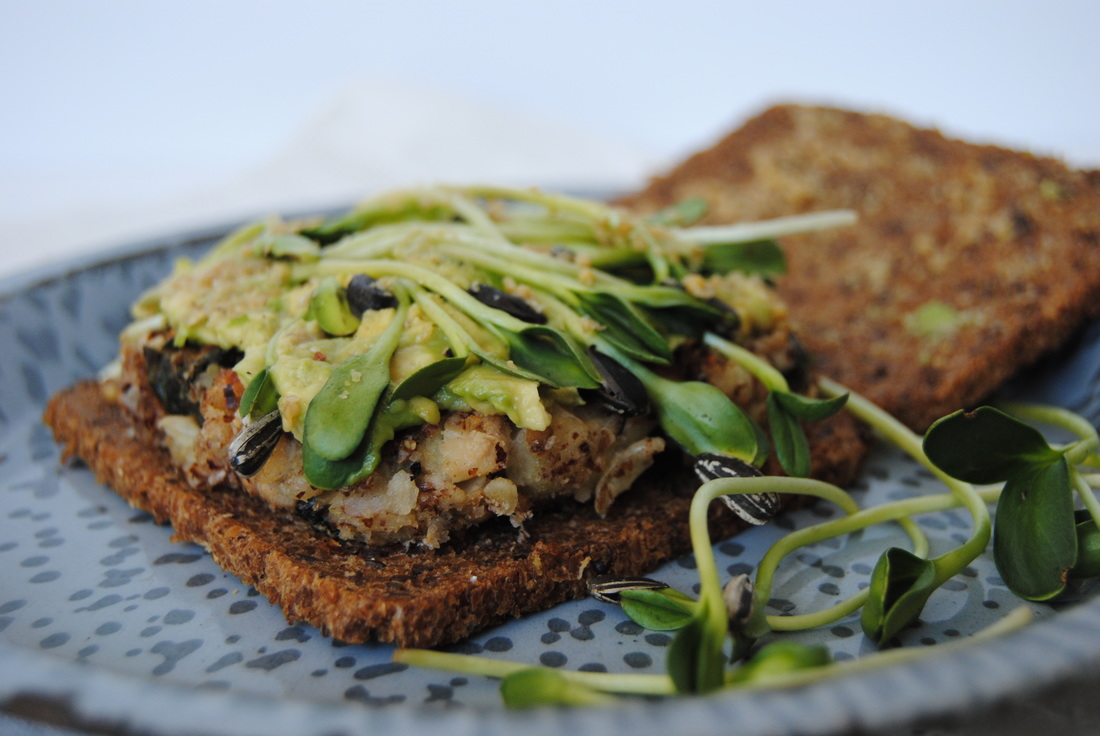 So stock your freezer full of these "good" veggie burgers this summer to enjoy at home, entertain with, or even bring with you to other events. Or maybe send those vegetarian un-friendly hosts (you know who they are) this post as a little hint! These veggie burgers have just the right amount of starch but are packed with plenty of actual veggies, have a great crunch from the hazelnuts, and a mild taste that will lend itself to any toppings you love (because BBQ's are really about the toppings right!?). We hope you have the best start to summer and a wonderful season ahead. Happy Summer, Jess and Cecelia 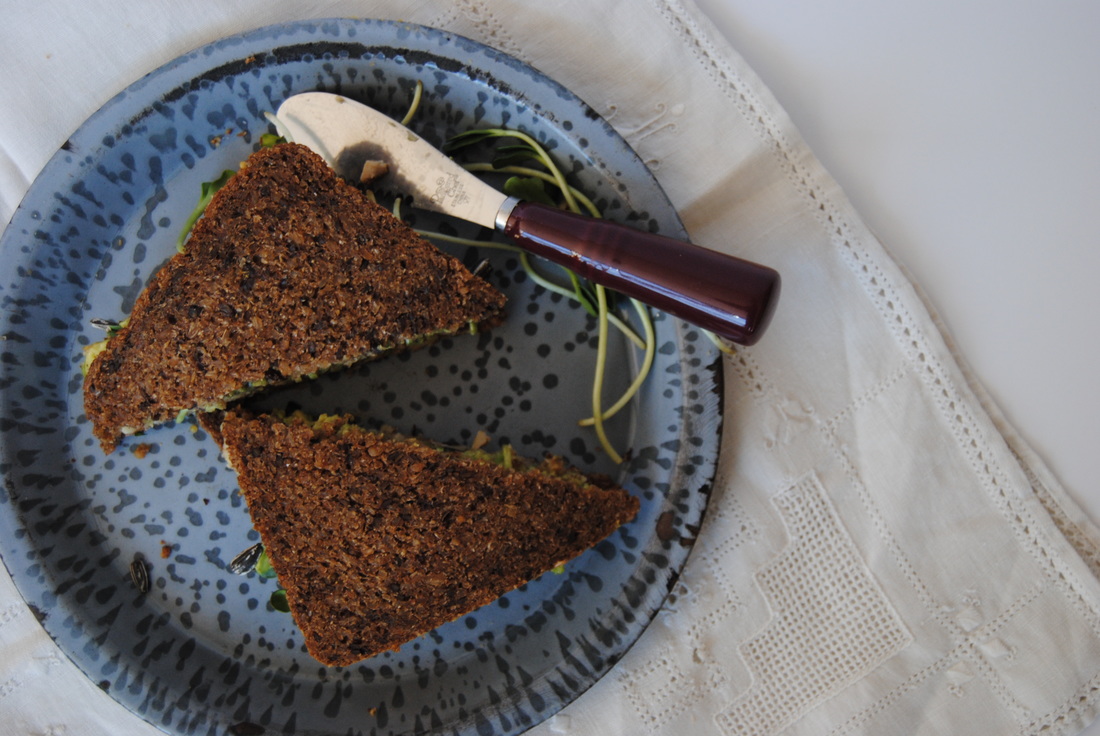 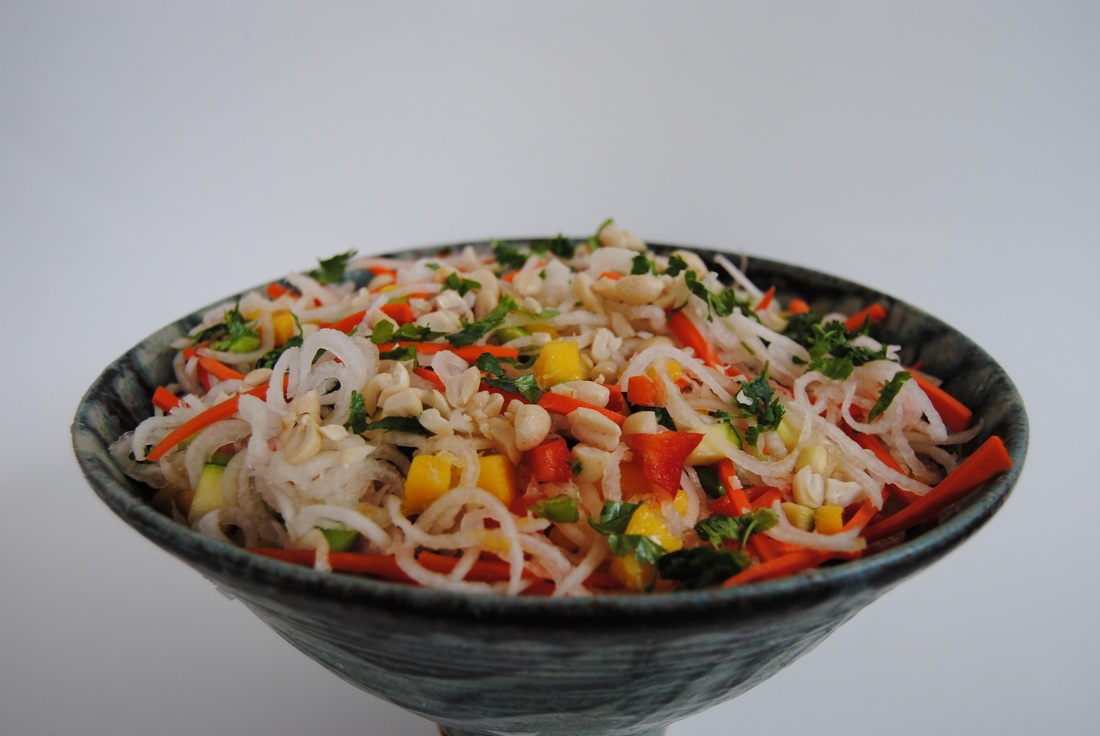 Can you think of a food you love that you wish you could eat in endless portions without a care in the world? I'm sure we all can and may share one food that comes to our minds, noodles. Noodles of all varieties are just so good and satisfying but definitely cannot be eaten endlessly, well maybe until now. We've created for you this week an amazing recipe featuring an almost calorie free and never-ending noodle. But how is this even possible? Read on! 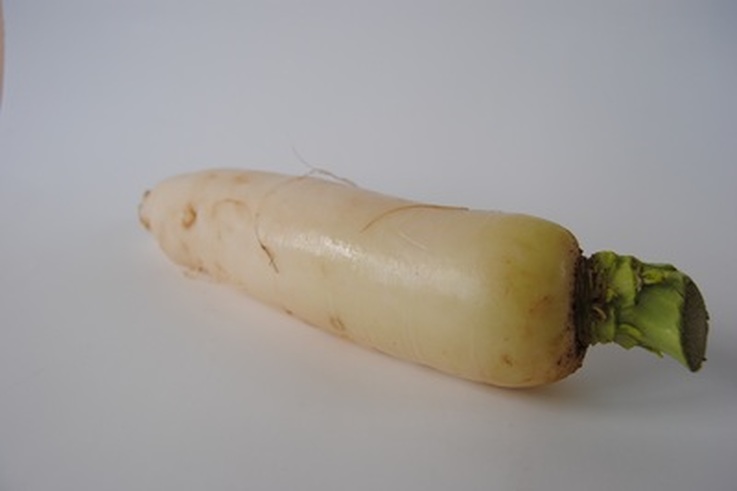 So this seemingly impossible noodle became a reality because of a unique vegetable, the daikon radish (pictured above). The daikon radish is a root vegetable used widely in Asian cooking and also called the Japanese horseradish. Though popular in especially Southeast Asian cuisine, this vegetable is grown and available around the world. The daikon radish has a crunchy texture and more mild radish flavor compared to the commonly known red radish. It's high fiber and water content make it a very low calorie food with just 6 calories per ounce or about 50-60 calories per radish, though this can vary because daikon radishes can grow up to 20 inches long! For this recipe we chose large daikon radishes and used our spiralizer (featured in this recipe) to create insanely long, basically never-ending, low-calorie noodles. See, it is possible! Also a note that this recipe is completely raw so we used liquid aminos (basically a raw version of soy sauce) and made our own peanut butter from raw peanuts. Though if you aren't heart-set on making this a raw dish yourself, feel free to use standard soy sauce or tamari and natural, roasted peanut butter as substitutes to simplify (it's okay really!). Raw Peanut Pad Thai PREP TIME: 30 mins TOTAL TIME: 35 mins Servings: 6 Ingredients Noodle Bowl 3 large daikon radishes, ~10 cups of noodles once spiralized 2 medium zucchini, ~3.5 cups diced 2 small red peppers, ~1 cup diced 2 green onions, cut on the bias 1 medium carrot, ~1 cup julienned 1 medium mango, ~1 cup cubed 1 1/2 cups raw, shelled edamame 1/2 cup raw peanuts, chopped 1/4 cup cilantro, chopped 6 lime wedges to serve Marinade 1/8 cup fresh lime juice 1/4 cup liquid aminos 1 clove garlic, minced 1/8 tsp dehydrated red pepper flakes Dressing 1/3 cup raw peanut butter *If making your own you will need 1 cup of raw unsalted peanuts 1/4 cup reserved marinade Juice of 1 lime 1 Tbsp raw clover honey 1 Tbsp room temperature water 1 tsp liquid aminos 1/4 tsp dehydrated red pepper flakes Cut zucchini and bell pepper into small cubes and place in a bowl. Mix together marinade ingredients, pour over zucchini and pepper cubes, and allow to marinate for at least 15 minutes. Peel radishes then using a spiralizer with the thin noodle insert, process radishes into noodles and place in a very large mixing bowl. Peel carrot, thinly cut julienne style, and add to the bowl of noodles. Peel and cut mango into small cubes then add to the bowl of noodles along with the shelled edamame and green onion. Strain zucchini and peppers from marinade, add to the bowl of noodles, and set reserved liquid aside. Gently toss all ingredients together. If making your own raw peanut butter, in a high speed blender add 1 cup of raw unsalted peanuts and process on high for 5 minutes until a creamy butter is formed. To make the peanut dressing, combine 1/3 cup raw peanut butter, 1/4 cup reserved marinade, juice of 1 lime, 1 Tbsp honey, 1 Tbsp water, 1 tsp liquid aminos, and 1/4 tsp dehydrated red pepper flakes. Whisk to combine and set aside. Pour dressing over noodle bowl and gently toss to combine making sure to incorporate dressing all the way down to the bottom of the bowl. Add chopped raw peanuts and chopped cilantro to the top. Divide into 6 bowls and serve with a lime wedge and a pair of chop sticks. *If you do not plan to serve the whole salad at once, pour dressing over the portion you plan to eat and reserve remaining dressing in an air tight container for later use. The raw vegetables will keep in an air tight container for ~3-5 days in the refrigerator. 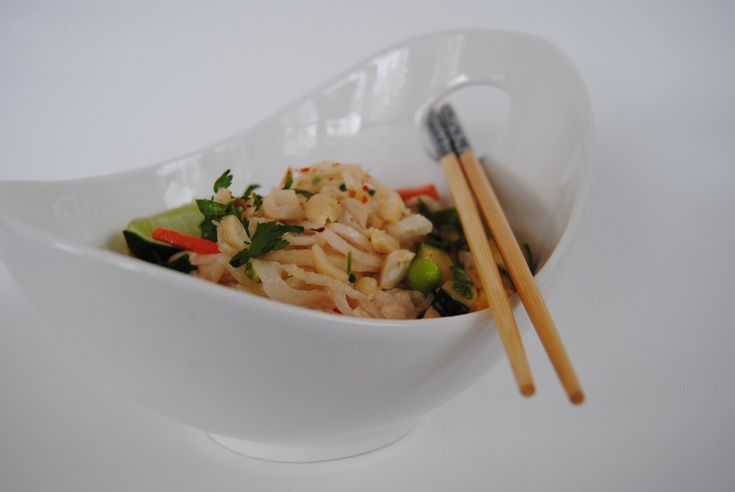 This raw pad thai is going to blow your mind. The noodles are crunchy with a mild radish flavor and go on and on until you've had your noodle fill. The variety of raw veggies in different preparations keeps things interesting, and the salty, raw peanut sauce slathers everything in decadent goodness. We just love this recipe and hope we've made your endless noodle dreams come true. Enjoy, Jess and Cecelia 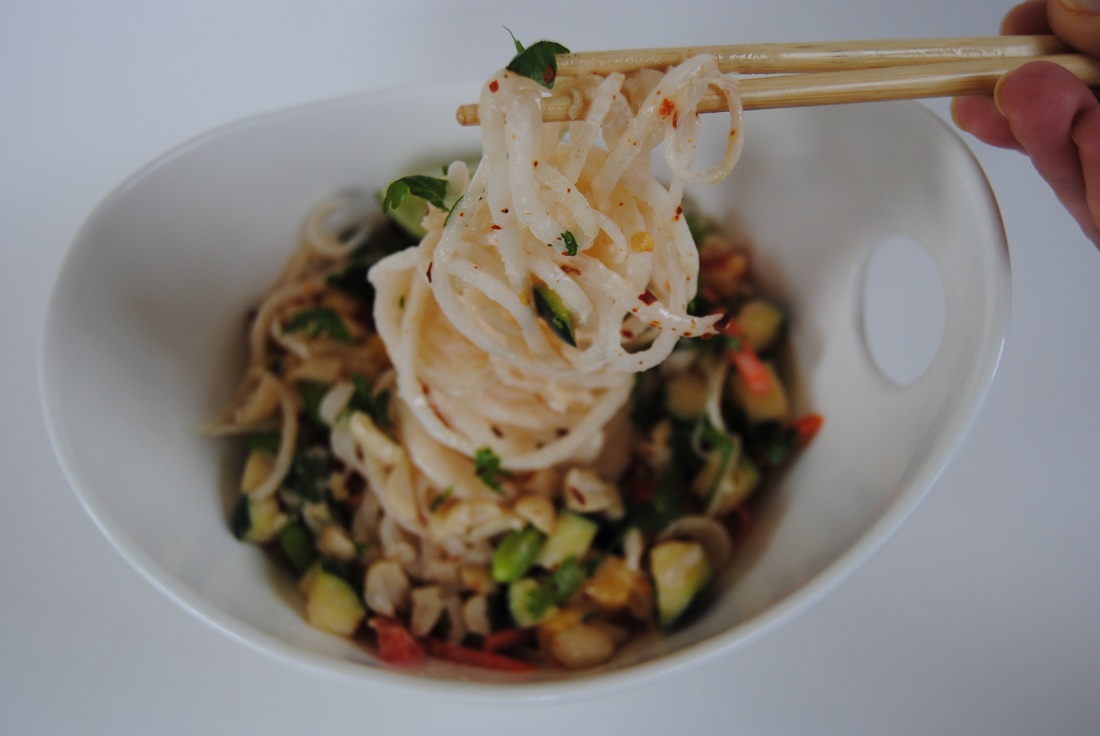 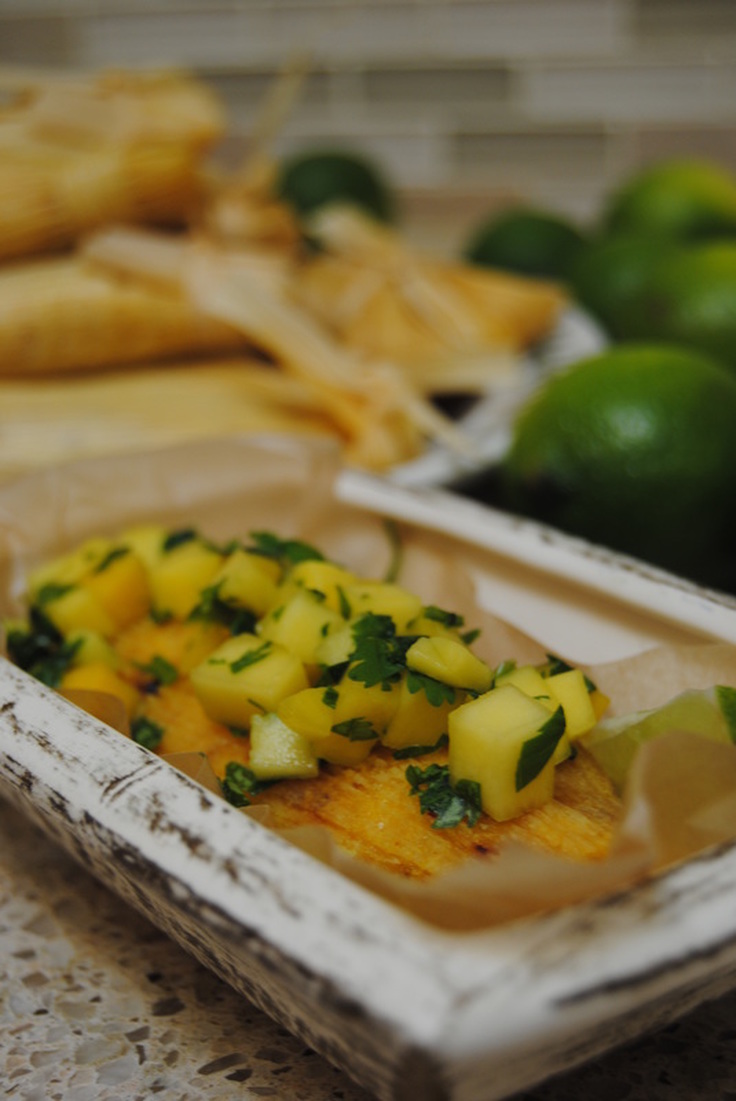 Okay, so picture a town with streets full of different varieties of tamale vendors....amazing right! So we had the bright idea of recreating that image right here in the TGBK kitchen. Being that we don't have a town full of people to feed, we decided on just two delicious varieties of tamales this time around. Also, as this is a plant and health based blog we of course used a few substitutes to make these tamales not only friendly to the taste buds but to our bodies as well. If you are new to tamale making then read (and look!) on, we have plenty of pictures and instructions to help you get started creating tamales in your own kitchen. Tamales are a traditional Mexican dish of a variety of fillings stuffed in a corn dough, or masa, and wrapped in corn husks. Traditionally, the fat source used in the masa is animal lard but we substituted with coconut oil with great success! We've given you one vegan and one vegetarian filling option but the possibilities are endless: consider any variety of beans, veggies, and cheese, meat options if you are a meat eater, or even sweet, dessert variations. Tamales are so delicious and very portable given their corn husk wrapping. Dried corn husks can be found at most grocery stores and definitely at ethnic and specialty grocers. Remember that they have to be pre-soaked before tamale making to become pliable. The masa flour for the corn dough is a specialty type of corn flour used for tamale making and can also be found at most grocers. So once you have your corn husks, masa, and filling ready (pictured above), you move on to the art of tamale making. As you can see (pictured below) the masa is pressed into the pre-soaked corn husks, layered with filling, wrapped, and then tied into a neat little package for steaming. They are easy to freeze and save for future meals and easy to pack and transport for on the go meals, what could be better? So now that you have the gist of the tamale process let's get to the recipe! Vegetarian Tamales PREP TIME: 45 mins TOTAL TIME: 1 hour Servings: 16-20 tamales Ingredients 24 corn husks Filling Option #1 16 oz fresh spinach, cooked and drained 4 oz feta cheese 1/4 tsp red pepper flakes Sprinkle of sea salt Filling Option #2: 1/2 sweet onion 8-10 mini bell peppers or 1 small- medium bell pepper 1/4 cup black beans 1 Tbsp olive oil 1 Tbsp taco seasoning 1/4 tsp sea salt Masa Dough 3 cups masa flour 1 1/2 tsp baking powder 1 1/2 tsp salt 1 tsp turmeric (optional, gives the dough a beautiful golden hue) 1 Tbsp powdered ancho chili pepper (optional for a slightly smokey flavor) 1 cup coconut oil, softened 1 cup room temperature water Fill a large bowl with water and soak about 24 corn husks making sure they are fully submerged. Allow to soak while you prepare the fillings. Reserve 4 soaked husks and tear into small strips to tie your tamale packages. To make filling option one, place spinach in a large pan over medium heat and saute until wilted. Press spinach through a mesh strainer to remove excess water then rough chop spinach and place in a bowl. Add feta cheese, red pepper flakes, and sea salt and stir to combine. To make filling option two, add olive oil to a medium pan over medium heat. Dice onion into small cubes and add to the hot pan. Cook the onion for 3-5 minutes until edges are golden brown. Dice the peppers to about the same size as the onion and rough chip the beans. Add peppers and beans to the pan along with taco seasoning and sea salt. Continue cooking until the onions have caramelized and the peppers and beans are softened. Remove from heat and set aside. To make the dough, combine masa flour, baking powder, salt, turmeric, and chili pepper in a large bowl. Add the softened coconut oil to the dry ingredients and slowly add the water, stirring gently until a soft dough is formed. Now it's time to assemble the tamales! Remove the corn husks from the water. Lay softened husks on a clean work space and evenly spread about 2 heaping tablespoons of dough in the center of the husks (view pictures above). Spread about 1 tablespoon of filling down the center of the dough then press the tamale together lengthwise. Wrap the corn husk around the dough and fold the ends in like a package. Carefully wrap a thin piece of husk around each end of the corn husk package and tie together. Continue this process until all the dough has been used. This recipe makes about 16-20 tamales depending on the size you make them. Place wrapped tamales in a steamer basket over boiling water, making sure to not overlap them for even steaming. Partially cover with a lid and steam for 15 minutes. Repeat process until all tamales have been steamed. Serve warm or keep in the fridge for 5 days. If you do not plan to eat your tamales within this time frame, feel free to freeze them. When heating frozen tamales keep in mind that they should first be thawed and then re-steamed for about 5-7 minutes. Serve with salsa (we whipped up a mango salsa) or hot sauce of your choice. Oh and share with friends, you'll have plenty! Mango Salsa PREP TIME: 10 mins TOTAL TIME: 12 mins Servings: ~ 2 cups Ingredients 2 ripe mangos 1/4 cup cilantro 1 inch jalapeño pepper Splash of fresh lime juice Sprinkle of sea salt Peel and chop the mangos into 1/4" cubes. Chop cilantro and dice jalapeño pepper then add to the chopped mango. Sprinkle with fresh lime juice and salt to taste. Just like that you have fresh, fruity, and spicy salsa! Serve over hot tamales or keep in an air tight container in the fridge for 5-7 days. 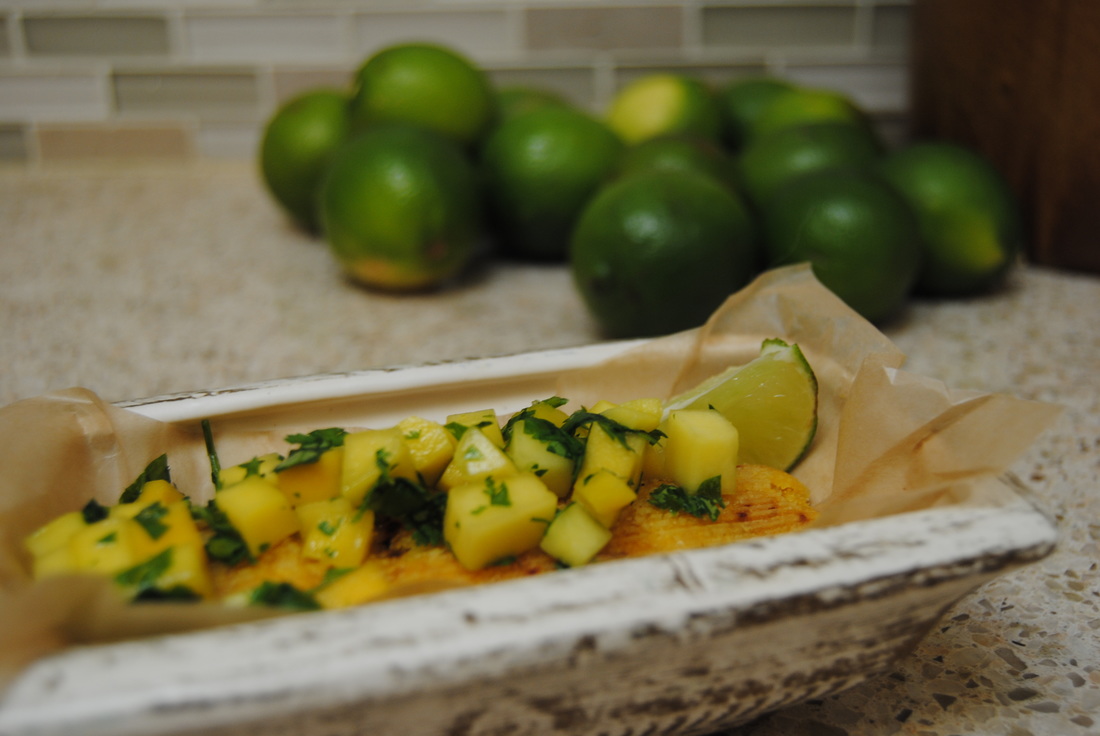 So this is definitely just what we had pictured, tamales of all varieties just waiting to be shared. We hope that you enjoy the crumbly but rich, coconut oil based masa dough stuffed with your favorite variety of fillings. Just remember to discard (and not eat!) the corn husk packaging. Hopefully this instruction and recipe has given you the confidence to create your own tamale town! Enjoy, Jess and Cecelia 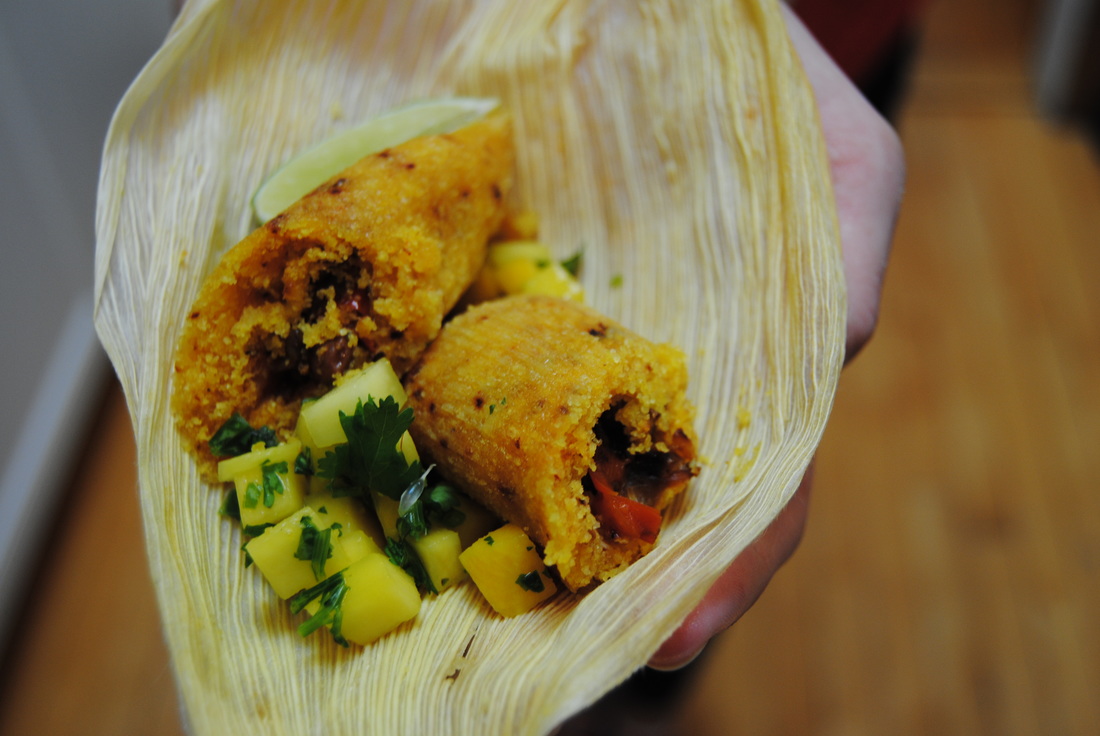 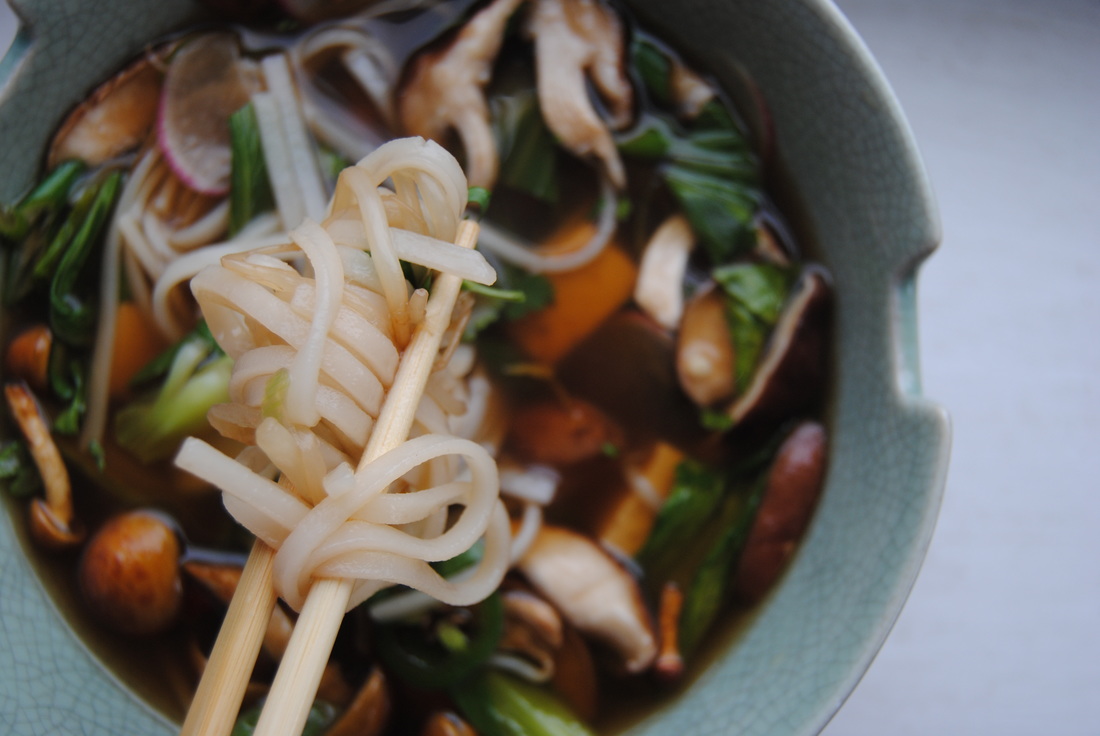 If you're new to pho (pronounced "fuh"), then the most important thing to know (other than the pronunciation!) is that it's all about the broth. And trust us, the ingredient list and time commitment to make this delicious broth is completely worth it. What more could you want on a cold weekend day then to have a pot of golden liquid simmering on the stove for hours perfuming your house and enticing your taste buds? Need some more convincing on this whole pho thing? Read on!  Pho is a Vietnamese soup typically eaten as a breakfast meal. The term pho actually refers to the rice noodle ingredient and not the actual soup but the quality of a pho is judged by the taste of the broth. Hence, it's all about the broth! Now a traditional pho broth is made with beef and chicken through a long simmering process and the use of spices, though vegetarian versions of the broth have been developed to accommodate vegetarian and vegan lifestyles. But the trick with a vegetarian broth is finding a way to develop a rich, deep flavor that a meat based broth will easily provide. And we were up for the challenge! We found that a variety of root vegetables, charred onion and ginger, traditional spices, and a balance of salty, sweet and acidic ingredients helped to develop the flavor profile we were looking for. Though you have to taste it to believe, on to the recipe! Vegetarian Pho Bowl PREP TIME: 45 mins TOTAL TIME: 3 hours (includes 2 hours for broth to simmer) Servings: 4 bowls Ingredients Broth 1 large sweet onion, peeled and cut in half 3 inch piece of fresh ginger, peeled and cut in half 3 quarts water 2 leeks, chopped 2 cups peeled and chopped celery root (pictured above whole) 3 large carrots, peeled and chopped 1 cup mushroom stems 1 head of garlic, cut in half 2 stalks of lemon grass, cut in half lengthwise 2 tsp salt 1/4 cup coconut sugar 1 Tbsp star anise 1 Tbsp black peppercorn 1 cinnamon stick (~3" long) 1 tsp clove 1/4 cup soy sauce 1/8 tsp toasted sesame oil 1 Tbsp rice vinegar Bowl 1 cup bean sprouts 2-3 baby bok choy, chopped and steamed 4 radishes, thinly sliced 1 jalapeno, thinly sliced 2 green onions, thinly sliced 1/4 cup chopped cilantro 2 cups mushrooms (we used a combination of shiitake & nameko mushrooms - pictured above), chopped if large 4 oz organic sprouted tofu, cubed 4 oz dried rice noodles *Hot sauce if desired Peel onion and ginger and cut in half. Place under the broiler flame until they are scorched black in spots. Using a large pot combine the scorched onion and ginger with the leeks, celery root, carrots, mushroom stems, garlic, lemon grass, salt, and coconut sugar and bring to a boil. Meanwhile combine the star anise, black peppercorn, cinnamon stick, and clove in a small piece of cheesecloth and tie into a satchel. Add spice satchel to the pot, reduce heat, cover with a lid, and simmer for ~1 hour to start to develop the flavors. Taste broth for desired richness then add soy sauce, toasted sesame oil, and rice vinegar and continue simmering for another ~1 hour. While broth is simmer start preparing the bowl ingredients. Rinse bean sprouts well and set aside, Chop baby bok choy and lightly steam until wilted. Using a mandolin, carefully slice radishes and jalapeno as thin as possible, Chop green onions, mushrooms, and cilantro and cube tofu then set aside. Cook rice noodles according to package instructions. Once broth is done simmering, carefully strain solids away from the liquid. We suggest using a piece of cheese cloth over a strainer to keep small solids out of the broth. Return broth to the pot and add remaining ingredients, allow to warm over low-medium heat for ~5-10 minutes. Ladle into bowl bowls and enjoy! For extra heat garnish with your favorite hot sauce or green chili paste. Our lacto-fermented hot sauce recipe would be perfect with this pho, recipe here! *Note if you will not be serving all four bowls at once and want to save some for leftovers we suggest keeping bowl ingredients separate and ladling broth into bowls over prepared ingredients. Refrigerate bowl and broth ingredients separately in the fridge and reheat together in a small pot when desired. 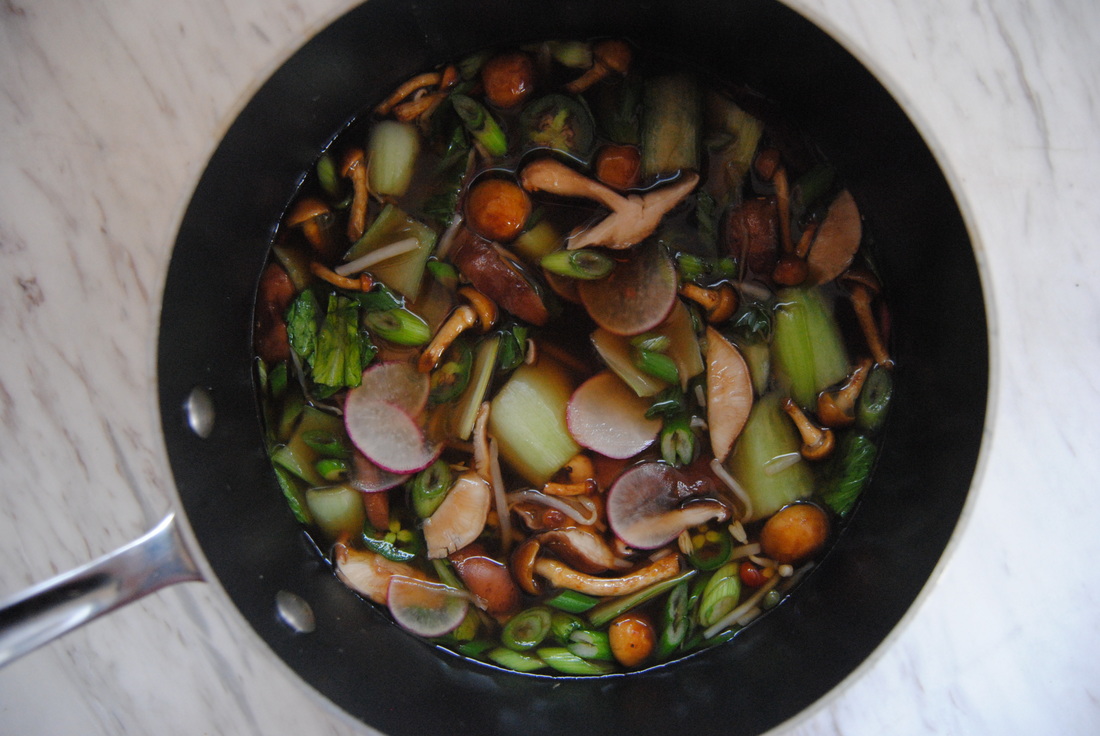 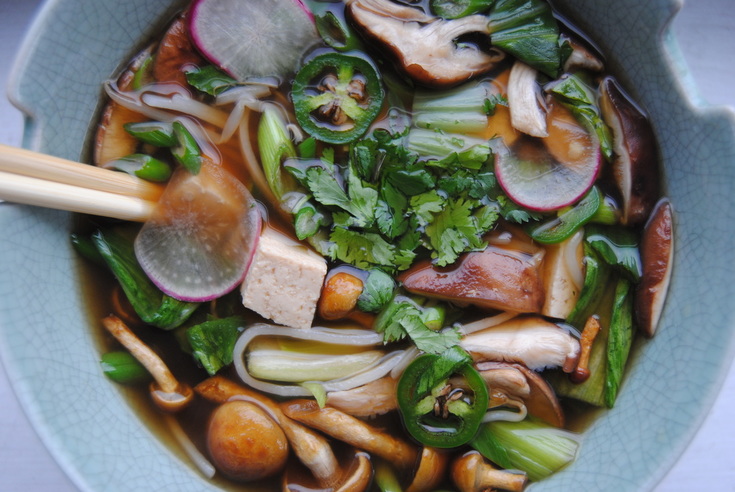 Totally worth it right? The flavor of this broth is so developed and deep with hints of sweetness, spice, and plenty of salt. It is the perfect compliment for any fresh vegetable ingredients that you like but we just love it with rich mushrooms and fresh bok choy and bean sprouts. Super fun and challenging to eat with chopsticks but don't forget the large spoon so that you can enjoy every last drop! To the broth, Jess and Cecelia 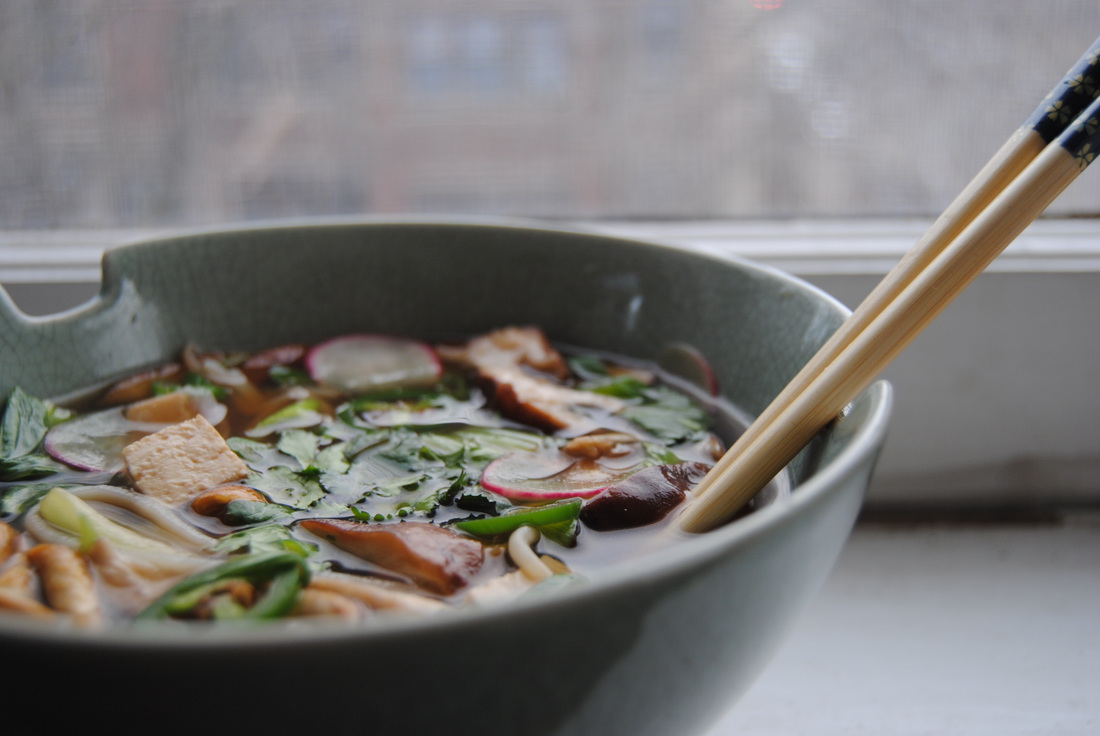 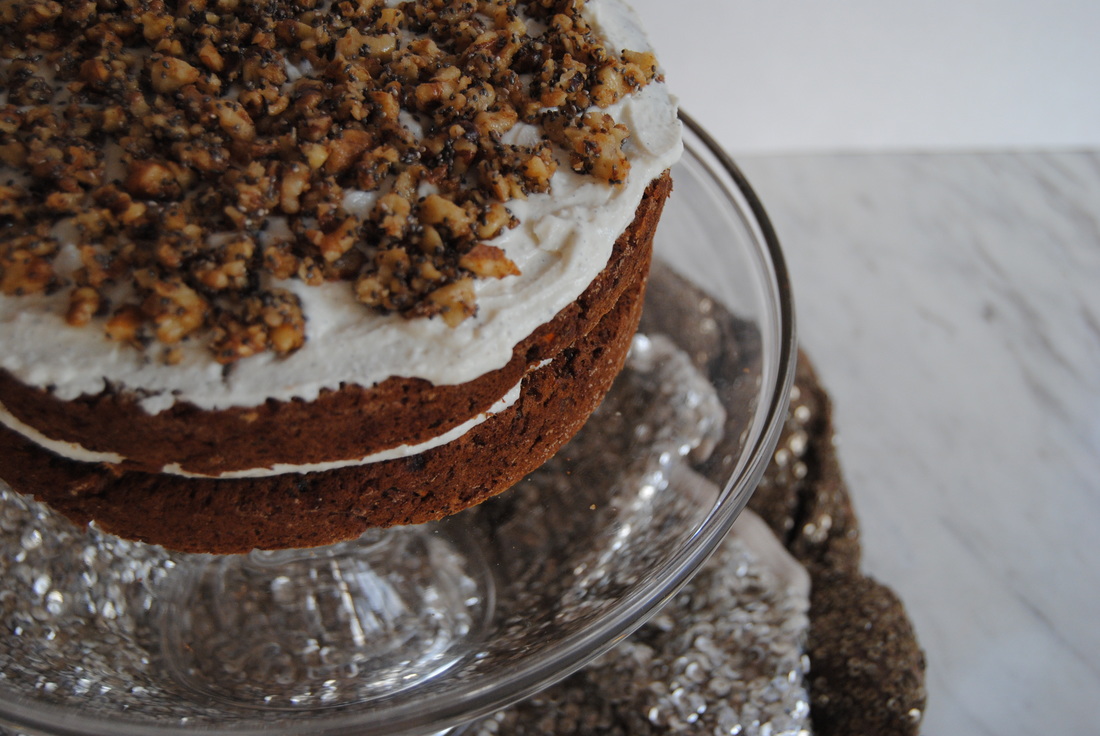
Can you believe it's been a whole year already!? And what a year it's been. Creating and sharing recipes these past twelve months has honestly been a dream come true for us. We are so appreciative of our amazing family, friends, and loyal blog followers for all of your love and support. So this post is truly for all of you as a celebration of an amazing year. We hope that you love this cake as much as we do and enjoy it while celebrating something really, really special. We sure did.
This cake is special for many reasons; it is 100% homemade, a delicious use of vegetables, and is finished with a mouthwatering, unique, and protein packed frosting. But that's not all! It also contains a nice dose of omega-3 fatty acids (or omega 3s). This is special because omega-3s are nutritionally wonderful. Omega-3 fats come in three different forms. The first is ALA (alphalinolenic acid) and is most commonly found in flax seeds. ALA is an essential fatty acid, meaning our body does not make it and is therefore crucial to get from food. There are two other omega-3s, DHA (decosahexaenoic acid) and EPA (eicosapentaenoic acid). These two omegas are commonly found in wild caught salmon. Omega-3s have anti-iflammatory properties, may support circulation by transporting oxygen from red blood cells to the tissues, can act similar to blood thinners when taken in the right doses, and DHA found in wild salmon plays a large role in the developing brain of a human fetus. We used plant based forms of omega-3s in this recipe including walnuts, chia and flax seed. Ground flax seed specifically contains a great deal of ALA and is also considered a good source of dietary fiber, with a 4 Tbsp serving of ground flax seed providing 8 grams! So now that you know a little more about omega-3s, let's get on to making this carrot omega cake!!
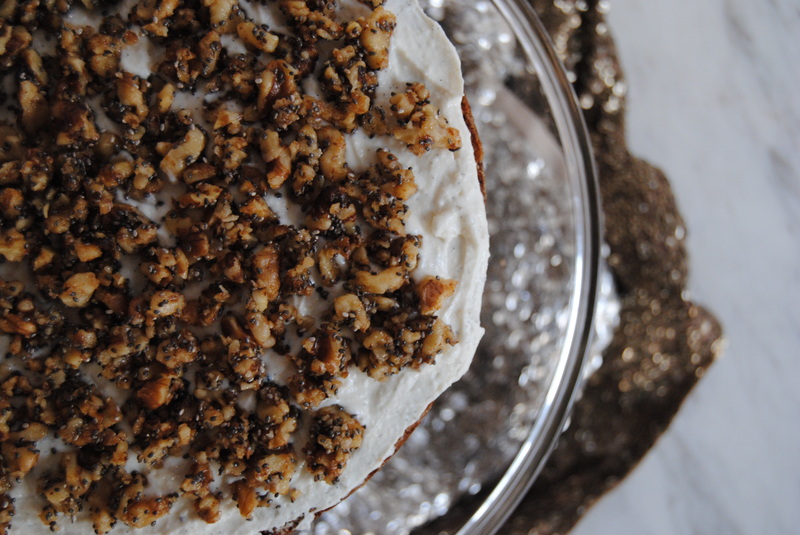
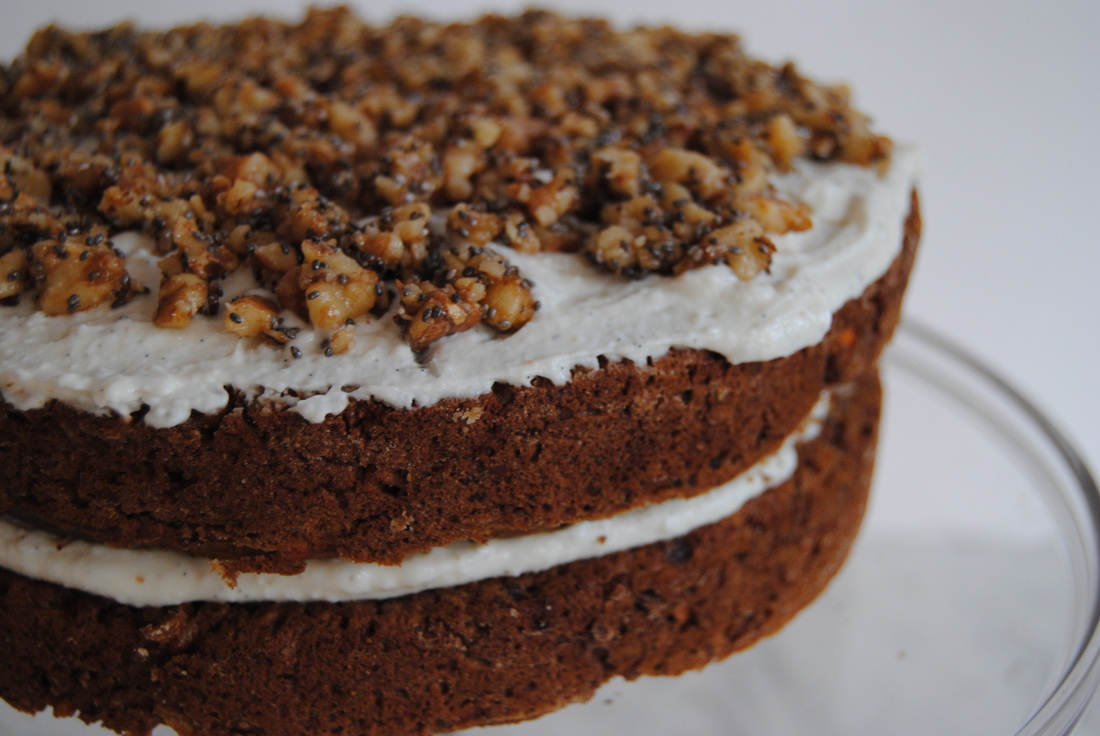
Rainbow Carrot Omega Cake with Goat Cheese Frosting
PREP TIME: 20 mins TOTAL TIME: 60 mins Servings: 8-10 Ingredients: Cake 1 1/2 cup white whole wheat flour 1/4 cup coconut flour 2 tsp baking soda 1 tsp cinnamon 1/2 tsp allspice 4 Tbsp ground flax seed + 1 Tbsp reserved for middle frosting layer 12 Tbsp warm water 1/2 cup honey 1/4 cup + 2 Tbsp pure maple syrup 2 Tbsp molasses 1/2 cup melted coconut oil 3 cups carrot shavings (we used rainbow carrots-purple, yellow, & orange) Frosting 3/4 cup thick vanilla Greek yogurt (we used Siggi's 4% fat) 3/4 cup soft goat cheese 3 Tbsp honey 2 Tbsp coconut butter, melted 1/2 vanilla bean, inside scraped out Candied Nut/Seeds 1/2 cup walnuts 1/8 cup chia seeds 1 Tbsp honey Sprinkle of sea salt Preheat over to 375 degrees. Prepare 2, 9" round cake pans with a parchment lined bottom and make sure to oil the sides of both pans. Using a food processor, or this can be done by hand using a large grater, process or shave carrots until you have ~3 cups of shavings. In a large bowl, sift white whole wheat flour, coconut flour, baking soda, cinnamon, and allspice and set aside. Combine ground flax seed and warm water and whisk until fully combined. Allow flax and water mixture to sit for a few minutes to thicken. In a separate bowl, combine honey, maple syrup, molasses, coconut oil, and thickened flax mixture. Add liquid ingredients to dry ingredients and stir until just combined. Add carrot shavings to the bowl and again mix until just combined. Avoid over mixing the batter. Pour batter into prepared pans and place on middle rack of the preheated oven. Bake for ~40 minutes or until a toothpick comes out clean. Allow cake to fully cool before removing from the pans. In a small sauce pan on medium heat, combine walnuts, chia seeds, honey, and sea salt. Stir mixture until lightly toasted, take off the heat and set aside. To make the frosting, using a standing mixer or hand held mixer, combine yogurt, goat cheese, honey, coconut butter, and vanilla bean. Mix on high until light and fluffy and set aside. To assemble the cake, carefully invert one cooled cake onto cake stand. Spread half of the frosting on top of the cake then sprinkle with 1 Tbsp ground flax seed. Carefully invert second cake on top of the first cake, then finish frosting the top of the second cake. Sprinkle with cooled candied nut/seed mixture, serve, and enjoy! 
One bite and we swear you will be hooked. The cake itself is just delicious and has the perfect amount of sweet carrot flavor, but the frosting is a whole other level! Creamy, sweet, salty, and tangy all in one and definitely something to celebrate. We would like to send a special thank you to Jess's brother Max for this delicious cake inspiration! And as we enjoy this recipe we are looking forward to another year of amazing food. So stay with us here at TGBK, there is so much more to come!
Happy birthday blossom, Jess and Cecelia 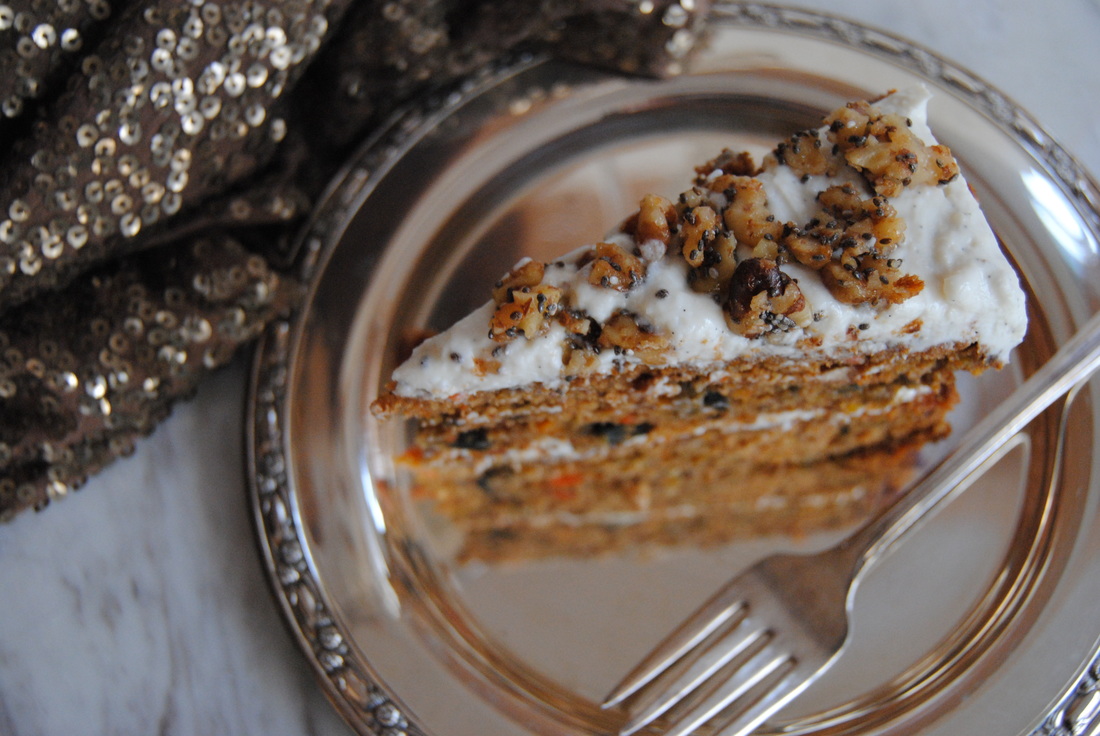
|