|
You can totally make this bread! We find that many people are hesitant to try yeast breads, and if that sounds familiar, focaccia bread is for you. The preparation is fairly simple and doesn't require complex kneading, rolling, or shaping. The final outcome is super impressive and delicious, and the variations are endless. Plain focaccia is a great accompaniment to a meal, whereas flavored (like this recipe) can be the meal (or most of it). Focaccia can be sliced and used as panini bread or as a base for Sicilian style pizza. If there is one bread you master how to make - this is it!
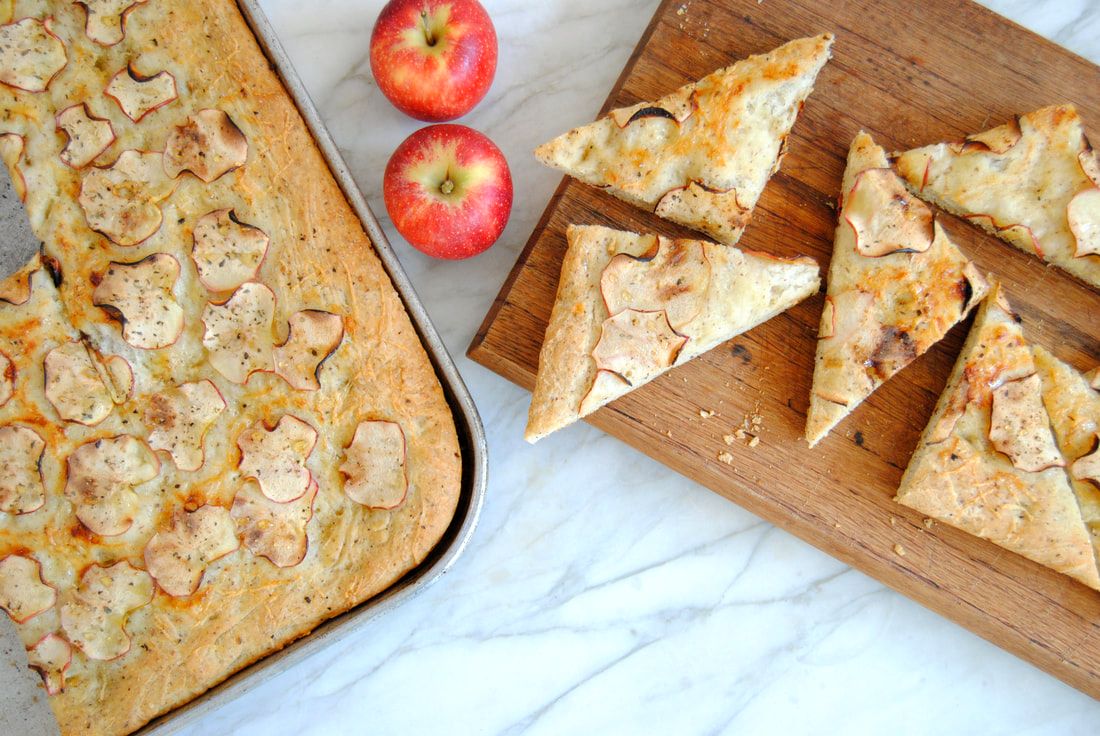
Apple & Cheddar Focaccia Bread
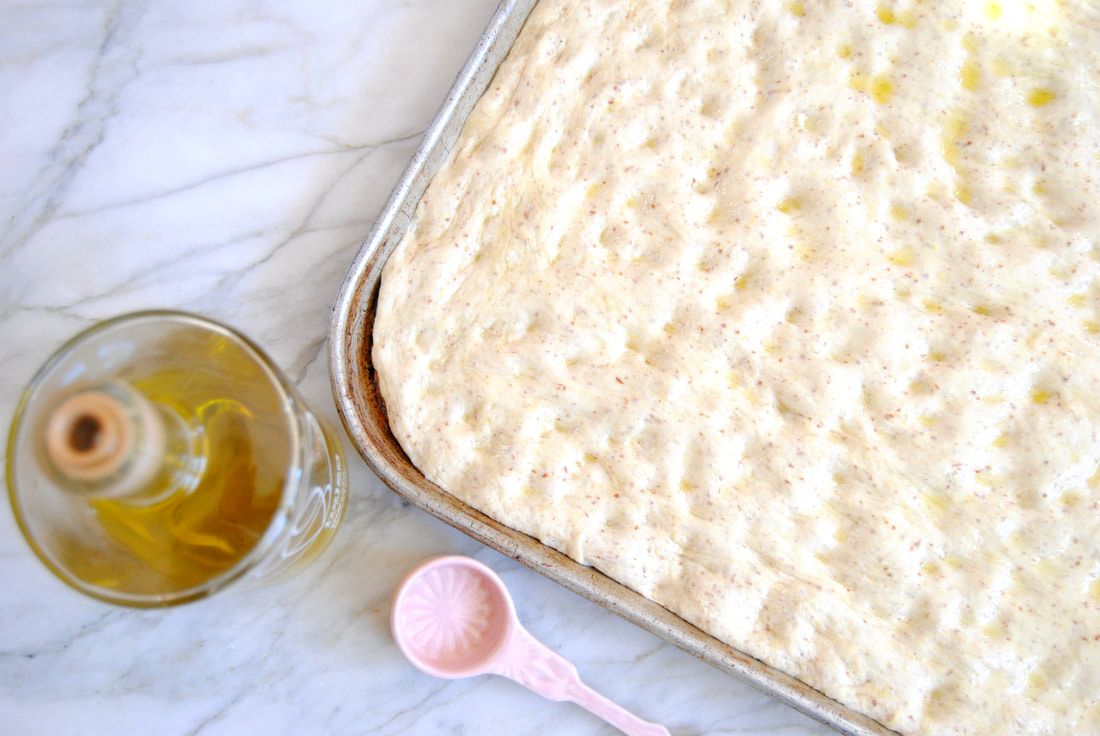
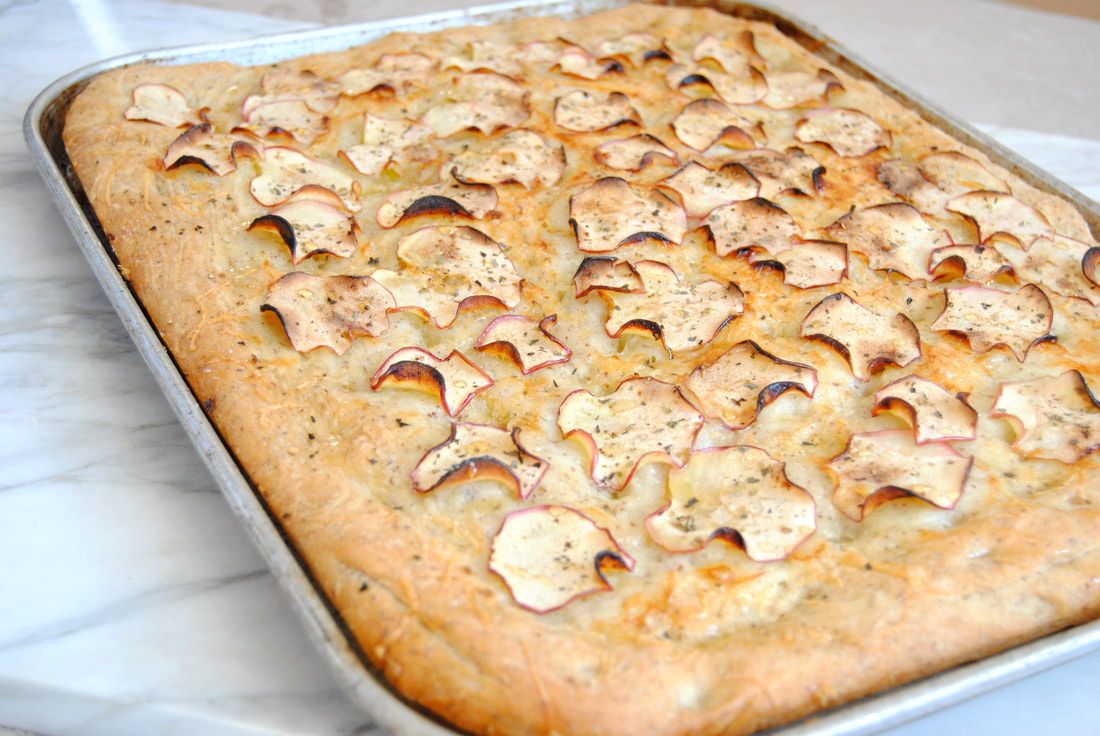
PREP TIME: 3 hours 30 minutes TOTAL TIME: 4 hours Servings: ~24 slices (21" X 15" sheet pan) Ingredients 2 cups warm water (105 degrees- 115 degrees) 2 tsp dry yeast 3 3/4 cups unbleached white flour 1/2 cup semolina flour 1/4 cup ground flax seeds 2 tsp fine salt 3 Tbsp olive oil + 1 tsp to oil bowl 3 oz grated sharp cheddar cheese 3 small or 2 medium apples, sliced into thin slices 1/4 tsp salt 1/4 tsp cracked black pepper 1 tsp dried oregano In a large bowl combine 2 cups warm water with dry yeast and stir to combine. Allow mixture to sit for 10 minutes, or until yeast has fully dissolved. Add flour, semolina flour, and ground flax seeds to the water and yeast mixture then mix until fully combined (the dough will be somewhat sticky). On a clean and well-floured surface, knead dough until a smooth ball is formed, about 8-10 minutes. If dough is sticky as you are kneading, add 1 Tbsp of flour at a time as needed. Place dough into lightly oiled bowl and cover with plastic wrap. Allow dough to rise at room temperate for 1 1/2 hours, or until doubled in size. Punch down the dough, then knead on a well-floured surface. Return dough to the bowl, cover with plastic wrap, and allow to rise for an additional 45 minutes or until doubled in size. Preheat oven to 425 degrees. Coat a sheet pan with 1 Tbsp olive oil then punch dough down for a second time. Place dough onto your prepared pan and using your fingertips, lightly spread dough out until it fills about 3/4 of the pan. Allow dough to rest for 10 minutes then continue spreading dough with your fingertips until it hits all four edges of the pan. Drizzle remaining 2 Tbsp olive oil over the top of the dough then sprinkle evenly with shredded cheese, thin slices of apples, salt, pepper, and oregano. Allow dough to rise at room temperature for about 20-25 minutes. Place in preheated oven and cook for 25-30 minutes or until bread is golden brown. Remove from the oven, slice into desired shape (squares or triangles) and serve warm or at room temperature. Enjoy!
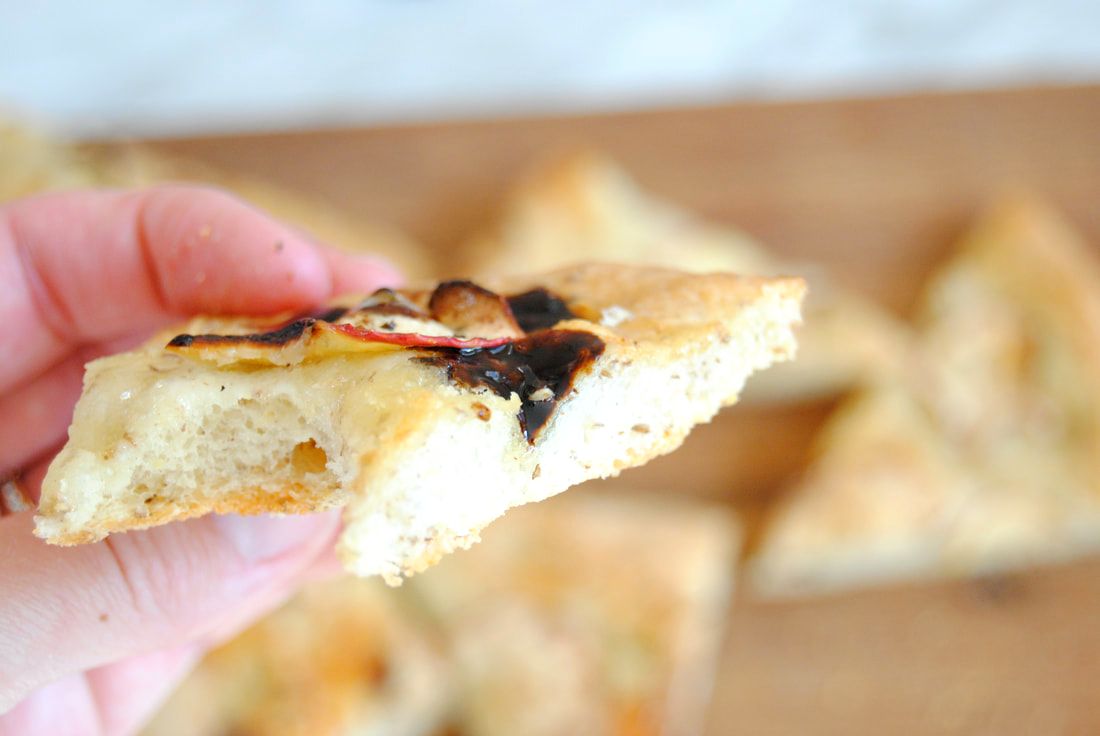
Were we right, or what? This bread is so light and airy but super rich and decant from the generous olive oil with a perfectly crunchy outer crust. We love this fall variation with apples and cheddar but can't wait to try many more. Share your favorite creations, please!
Enjoy, Jess and Cecelia
In our Pantry:
1 Comment
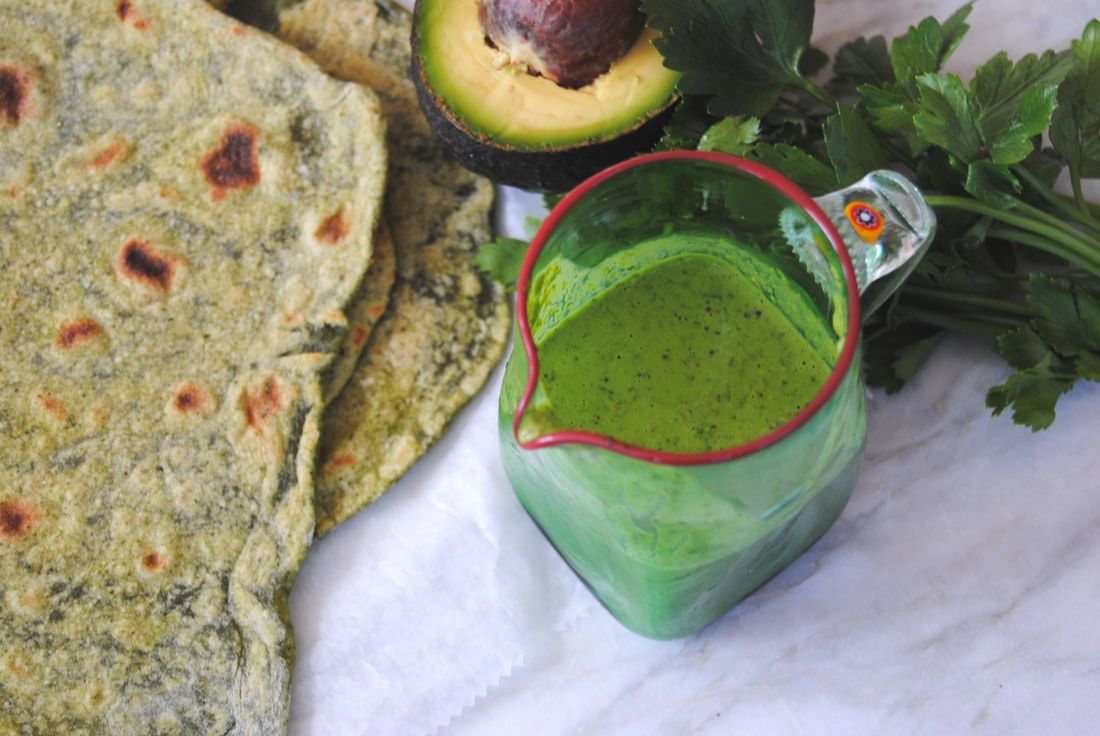
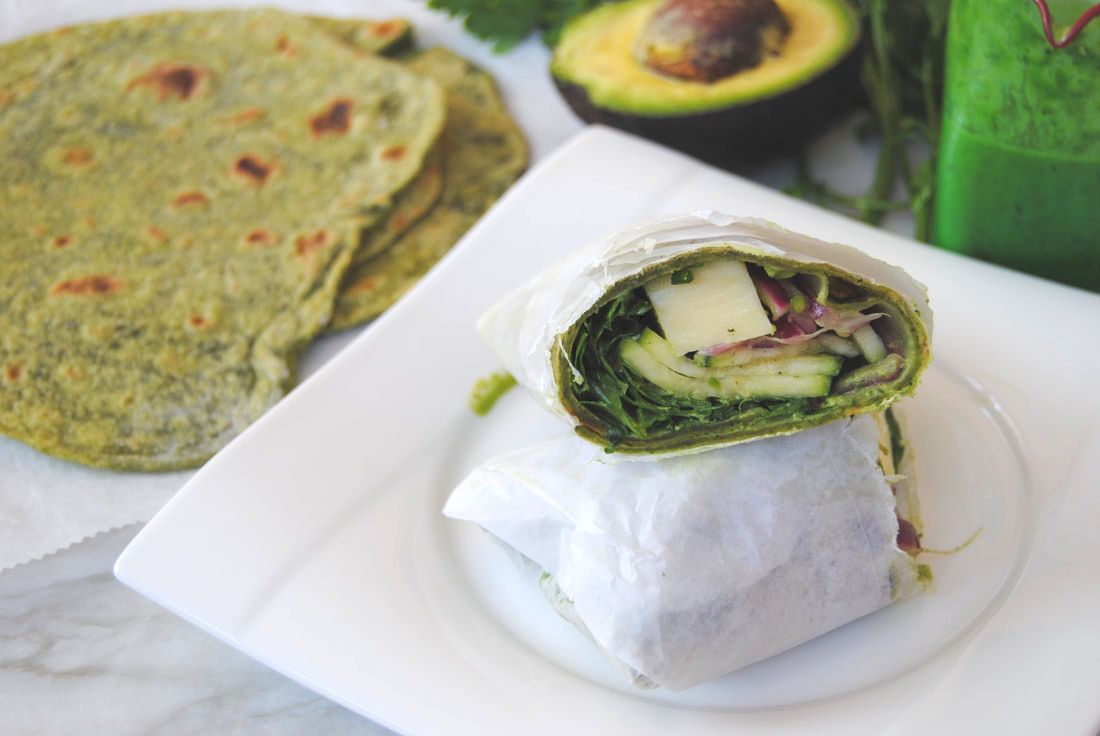
By the look of things, we're sure your wondering what we've gotten ourselves into this week. Definitely more than we bargained for! Inspired by Green Goddess dressing and all the abundant green produce this time of year, we've created a recipe using all things green. Though there are many steps to the recipe, the results are worth the effort - with several recipes combined into one, you'll have multiple homemade tortillas, a jar of fresh dressing, and ingredients for several wraps when you're done. Just take it step by step to create one (or all!) of these super green recipes with us.
Super Green Veggie Goddess Wrap
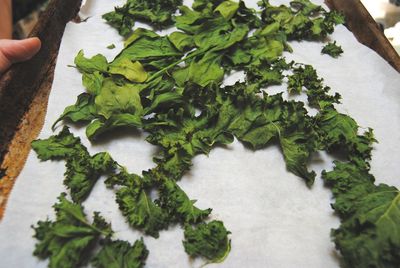
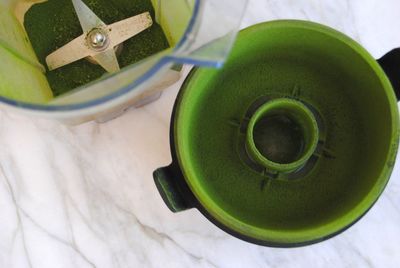
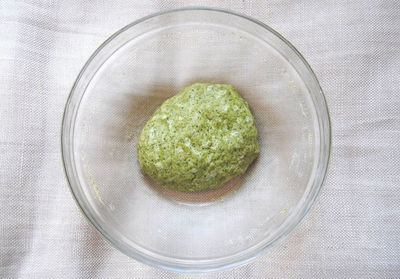
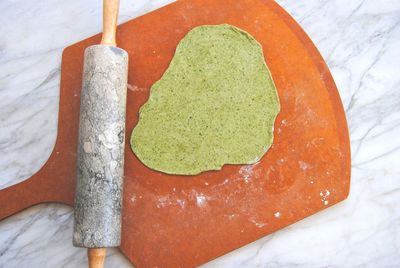
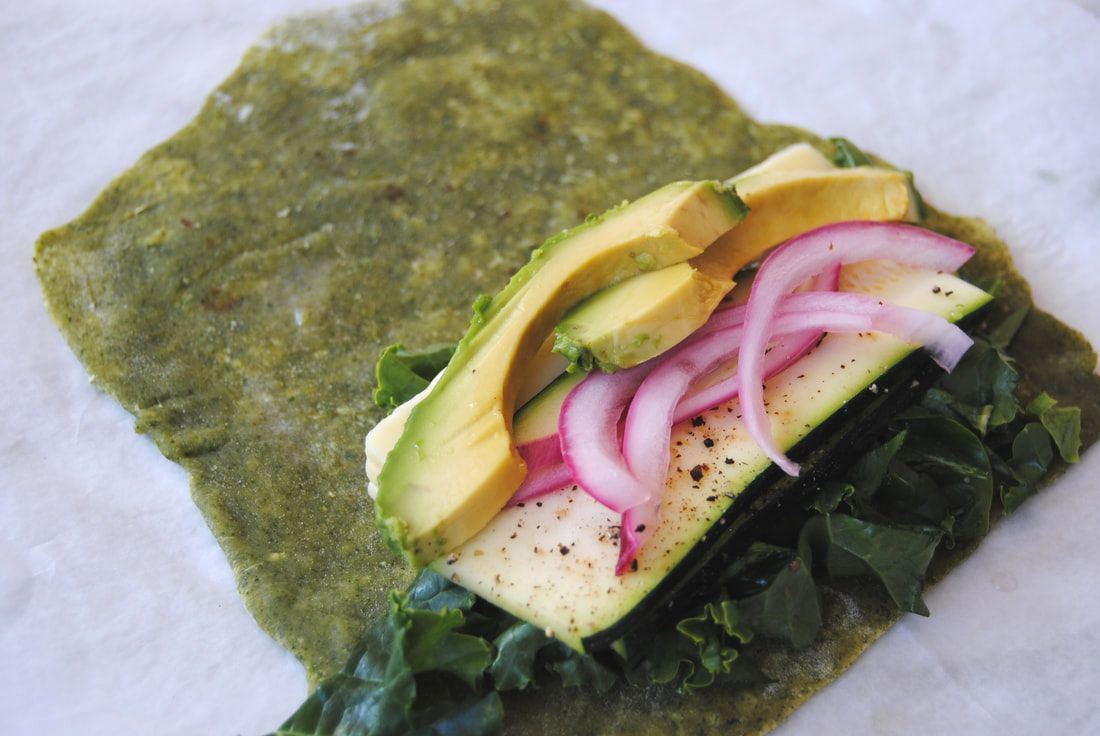
PREP TIME: 45 minutes (+ 4 hours to let yufka dough rest) TOTAL TIME: 60 minutes (+ 4 hours to let yufka dough rest) Servings: 6 wraps Ingredients: Green Yufka Dough/Flour Tortilla (Adapted from Soframiz by Ana Sortun & Maura Kilpatrick) 1 1/3 cup whole wheat flour, plus more for dusting 1/3 cup powdered spinach or kale (instructions below) 1 tsp sea salt 2/3 cup warm water 2 Tbsp extra virgin olive oil Quick Pickled Red Onion 1 medium red onion, peeled and sliced thin 1/4 cup apple cider vinegar 3 Tbsp water 3/4 tsp salt Filling 6 oz Havarti cheese, cut into 1 oz servings 1 1/2 cup messaged kale (+ 1 Tbsp olive oil and 1/4 tsp sea salt) 2 small zucchini, cut into thin slices and sprinkled with salt and pepper 1 large avocado, cut into 6 slices Egg-Free Green Goddess Dressing 1/2 cup Greek or Icelandic yogurt 2 Tbsp olive oil 1 Tbsp lemon juice 1 cup fresh basil leaves 1/2 cup fresh parsley leaves 2 Tbsp fresh tarragon, chopped 2 cloves garlic, chopped 1 tsp Dijon mustard 1/8 tsp sea salt Step 1 (powdered greens): To make powdered greens, preheat oven to 200 degrees. Fill a baking sheet with raw spinach or kale and cook for 12-15 minutes flipping greens once halfway through the cooking process until lightly curled on the edges and crunchy. We allowed the greens to cool with the oven off and the door open to make sure all of the greens were fully dried out without over cooking and burning the greens. Once cooled, place in a zip lock bag and smash until you have a very fine powder. Remove any large stems from the bag and store in an air tight container. Step 2 (yufka dough): To make the yufka dough mix the whole wheat flour, powdered greens, and salt together in a large bowl, then make a well in the center. Pour the warm water and olive oil in the center of the well and use your hand to combine the wet and dry ingredients until a soft dough is formed. Lightly dust a clean work surface with flour and knead dough for 2-3 minutes or until the dough ball is smooth and elastic. Place the dough back in a bowl with a little olive oil to coat to prevent the dough from sticking to the bowl. Cover with plastic wrap and allow to sit at room temperature for 4 hours or overnight. This dough can be made a day in advance and stored in the fridge after a minimum of 4 hours sitting at room temperature. If stored in the fridge, remove the dough and allow to come to room temperature for 30 minutes. Cut the dough ball in half and divide each half into 3 equal pieces for a total of 6 small ~2 ounce dough balls. Dust a clean work surface with flour and roll each dough ball out as thin as possible, about 8-9" round. Use a seasoned cast iron pan or a non-stick pan set to medium heat to cook the yufka on one side until bubbles start to form and the bottom is slightly browned, ~2 minutes. Remove from the pan after the one side has been cooked and place on a plate or sheet pan with a layer of parchment paper on top. You only want to partially cook the yufka dough at this point. Over cooking or cooking both sides can make the yufka too crunchy and hard to work with. Continue to cook each yufka and continue to stack on top of one another with a piece of parchment paper in between each layer. The heat and steam of the cooked yufka will help to keep the wraps soft and pliable as they sit on top of each other. Once cooled to room temperature store cooked yufka in a large plastic bag, sealed. Step 3 (pickled onion): Place sliced onion, apple cider vinegar, water,and salt in a bowl and toss to coat. Allow onions to marinate in the brine for at least 15 minutes or longer. Step 4 (messaged kale): Wash and de-stem, and chop the kale. Combine in a bowl with olive oil and sea salt. Use your hands to lightly message the kale until leaves are dark green and wilted. Step 5 (green goddess dressing): Combine all dressing ingredients in a blender or food processor and mix on high until fully combined. Store dressing in an air tight container. Step 6 (the wrap): Place one wrap on your work surface. Towards the bottom of the wrap (see picture below) add 1/4 cup messaged kale, 2 thin slices of zucchini, 1 slice of avocado, and 1 oz of Havarti cheese. Drizzle with goddess dressing then tightly roll the wrap up. Repeat until all 6 wraps are made. If you do not intend to serve all the wraps right away, keep all ingredients separate and roll each wrap as needed.
There is just so much to love here. The yufka dough is a hearty, pliable tortilla perfect for any wrap and made even more delicious (and nutritious) with a hint of powdered greens. The pickled onion provides a pop of color, flavor, and texture. Fresh greens brighten this wrap and avocado and Havarti add a savory richness. But the true star here is that dressing! We opted for an egg-free Green Goddess variation and focused on a blend of delicious herbs perfectly highlighted with fresh Dijon mustard. We hope you have a super good and green time with this one!
Enjoy, Jess and Cecelia
In our Cupboard:
We like a rolling pin with a smooth surface and heavy weight similar to this:
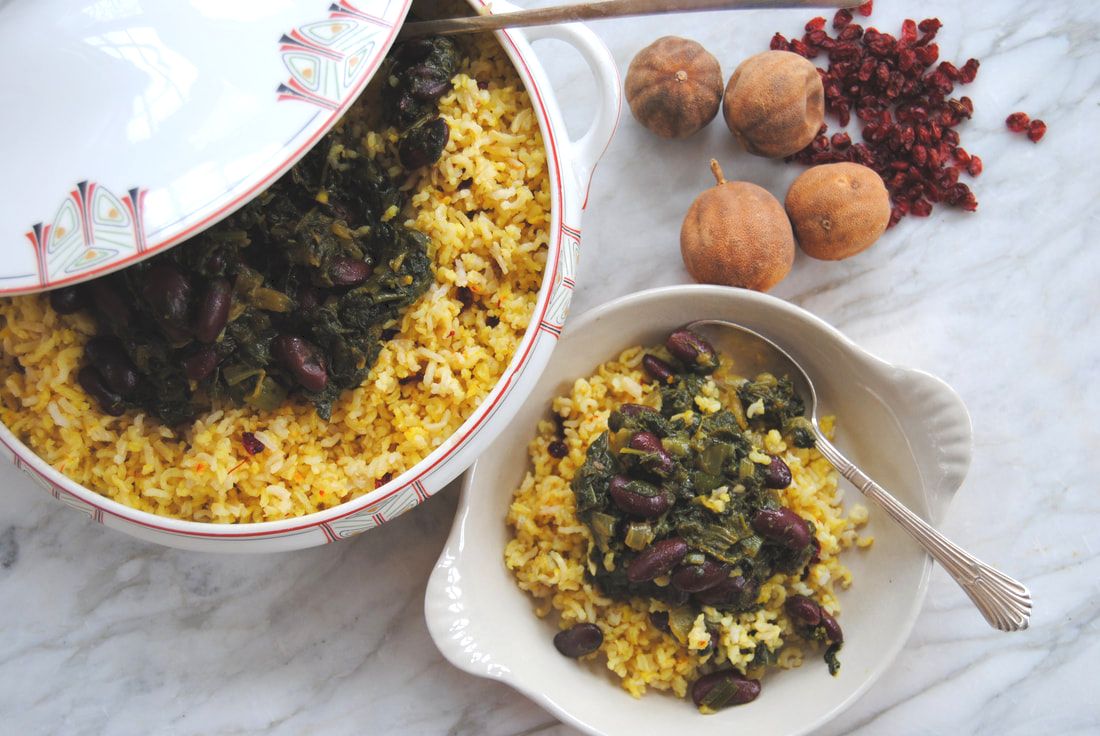
Happy Persian New Year friends! Okay, okay we are juuuust a little late on this, but this recipe is too good not to share. Over a month ago, on the first calendar day of Spring, Cecelia celebrated Nowruz - also known as Persian New Year - with a good friend who is Iranian. She was overwhelmed and inspired by the array of new ingredients and tastes in the traditional dishes that were served. Tasting a new food for the first time feels so special and reminds both of us that we will always be learning in the kitchen. We decided to tackle one of the traditional Persian recipes and have been working on perfecting it ever since. The recipe is now ready to share, and boy are we excited! Come along with us to discover some cool ingredients and a flavor profile that will blow your mind. Promise!
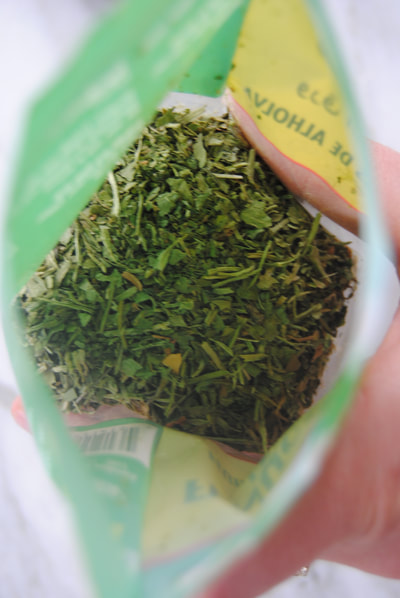
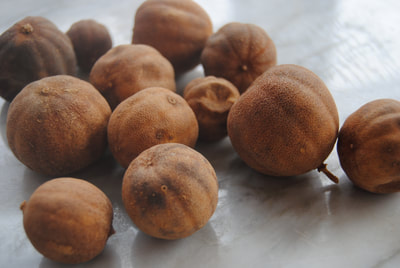
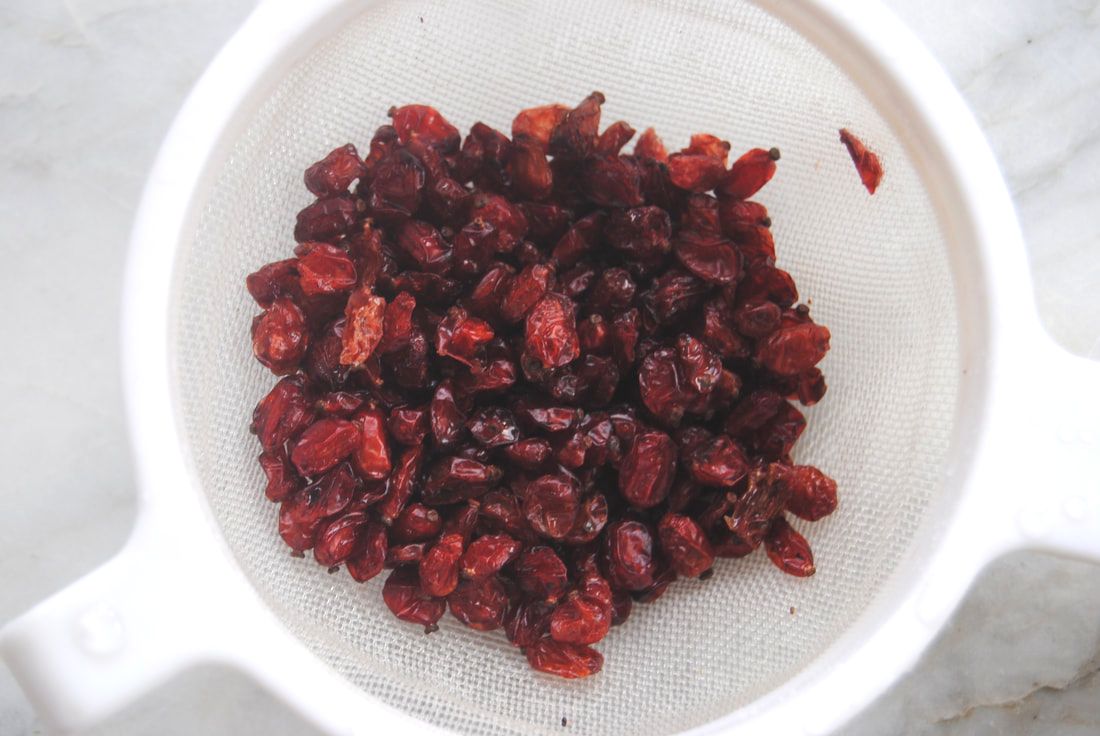
Pictured above are a few of the new ingredients that combine to make this stunning dish. From top left to bottom: fenugreek, dried limes, and barberries. Starting with fenugreek - an herb native to the Mediterranean region and used in cooking as well as for medicinal uses. Fenugreek's flavor is quite pungent and earthy and a little goes a long way to bring a unique depth of flavor to dishes. Fenugreek also has many medicinal uses primarily treating digestive or inflammatory conditions when taken by mouth or used as a poultice to treat local pain and swelling. The next ingredient, dried limes, we found just as interesting. Using limes dried, instead of fresh, lends the ingredient to being added whole while cooking to impart acidity to the dish. As the limes soften during cooking, they can be broken open to release more flavor and acidity depending on the flavor profile you are looking for in the final dish. Lastly, barberries which are small, tart berries thought to be native to the Middle East. Typically used dried they bring a pop of color and tangy sweetness to dishes.
Vegetarian Ghormeh Sabzi with Saffron Rice
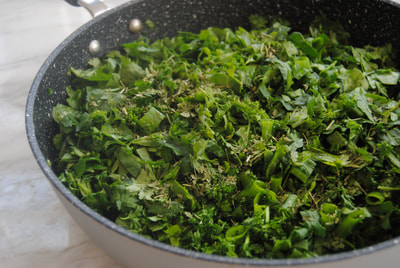
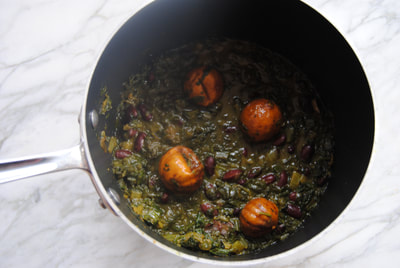
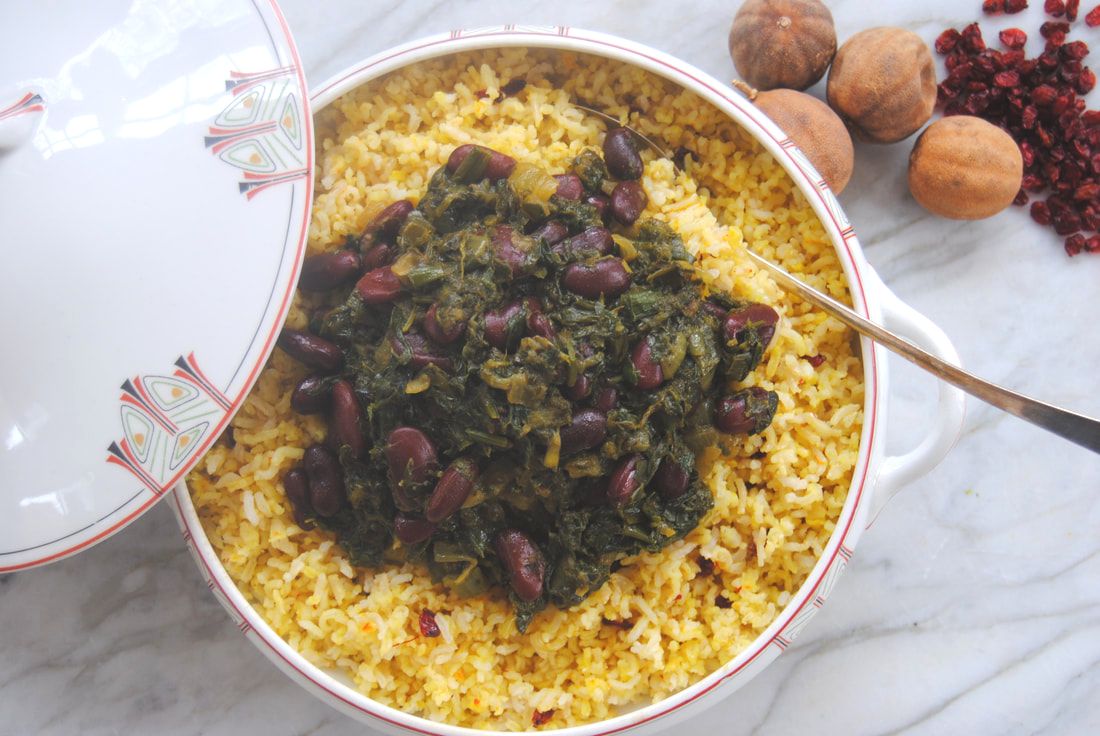
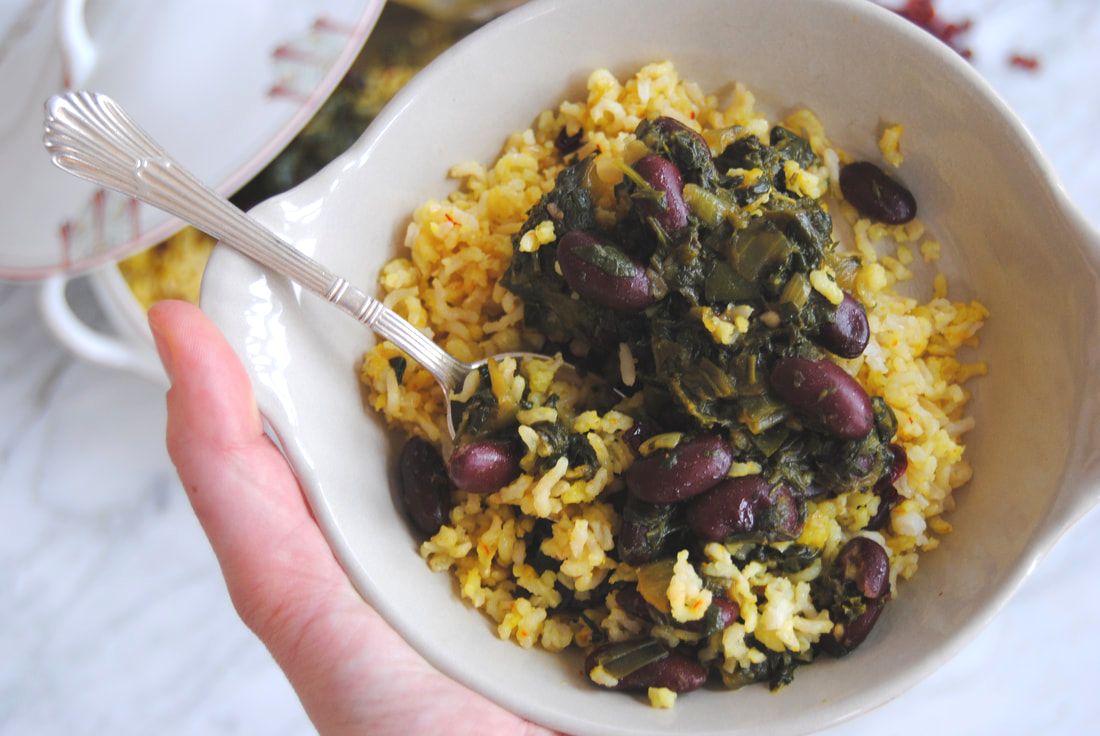
PREP TIME: 20 minutes TOTAL TIME: 40 minutes Servings: 4-6 Ingredients Rice 1 cup brown basmati rice 1 tsp saffron + 1/3 cup room temperate water 1 Tbsp olive oil 4 Tbsp barberries, rinsed 1/2 tsp sugar Ghormeh Sabzi 1/4 cup olive oil 1 large yellow onion, chopped 1/4 tsp sea salt 1 tsp turmeric 1 Tbsp dried fenugreek leaves 3 cups unsalted vegetable broth 3 cups fresh cilantro, chopped 2 cups spinach, chopped 2 cups green onion tops, sliced 1 cup fresh parsley, chopped 4 dried limes 1 can organic kidney beans, drained and rinsed 10-12 oz 4% milk fat Greek or Icelandic yogurt (optional) Rinse rice under running water, then place into a large pot and cook according to package instructions. Allow rice to cool, then fluff with a fork and set aside. Meanwhile use your fingers to break saffron threads into small pieces and place in a shallow bowl with 1/3 cup water. Allow saffron to bloom in the water for 5 minutes. In a saute pan set to medium heat, add 1 Tbsp olive oil, barberries, and 1/2 tsp sugar cook for 1-2 minutes until all barberries are evenly coated with oil and sugar and slightly fragrant. Add bloomed saffron water and barberries to the fluffed rice and stir to evenly combine. To make the ghormeh sabzi, set a large pot over medium heat then add 1/4 cup olive oil, chopped onion, and 1/4 tsp sea salt and stir to combine. Continue cooking until the onion is translucent, ~5-7 minutes. Add 1 tsp turmeric to the onions and continue to cook for another 1 minute then add 1 1/2 cups vegetable broth and reduce to a simmer. In a separate pot set to medium heat, add cilantro, spinach, green onion tops, parsley, and dried fenugreek. Stir constantly until greens are wilted, ~2 minutes. Add the remainder 1 1/2 cups vegetable broth, the 4 dried limes, kidney beans, and the onion mixture to the pot of greens and continue to cook for 15-20 minutes on a low simmer. For a more acidity, puncture the dried limes with a fork. Remove from the heat and spoon ghormeh sabzi over saffron rice and place a dollop of yogurt on top if desired. Store leftovers in separate containers and reheat servings as needed. Leftovers will keep for 3-5 days.
Thoughts, feelings? Are you all as excited about this dish as we were/are? There is just so much goodness going on here. The savory saffron rice highlighted by pops of tangy barberries topped with earthy and acidic greens makes for many delicious bites. This dish is best enjoyed with friends for a special occasion where you share your newest kitchen learning. Finally, this post wouldn't be complete without a huge shout-out to Sophia Ahwazi and the Ahwazi family. Thank you for sharing and teaching your food traditions to us!
Enjoy, Jess and Cecelia
In Our Pantry
From this recipe, our pantries are now stock with Persian ingredients. We shopped at a local Persian Market, Sahar International Supermarket at 4851 N Kedzie, that any Chicagoans should check out! If you aren't local, we found comparable ingredients here:
One of our all time favorite ingredients has got to be miso paste, especially miso made from alternative ingredients other than soybean like this chickpea miso from South River (here). Though soybean is the most popular miso paste found in stores, we love the complexity of flavors in the different varieties of miso we've tried. Miso is a fermented food so it is slightly sour and tangy and also very salty as it is traditionally used as a base for soups and broth. We also love it as an ingredient for sauces, dressings, and even on popcorn (remember this recipe?)! This time around we opted for a hearty and bright bowl because when you're really hungry nothing is more satisfying than a dose of grains + protein slathered in salty goodness, or at least we think so. Join us!
Miso Bowl
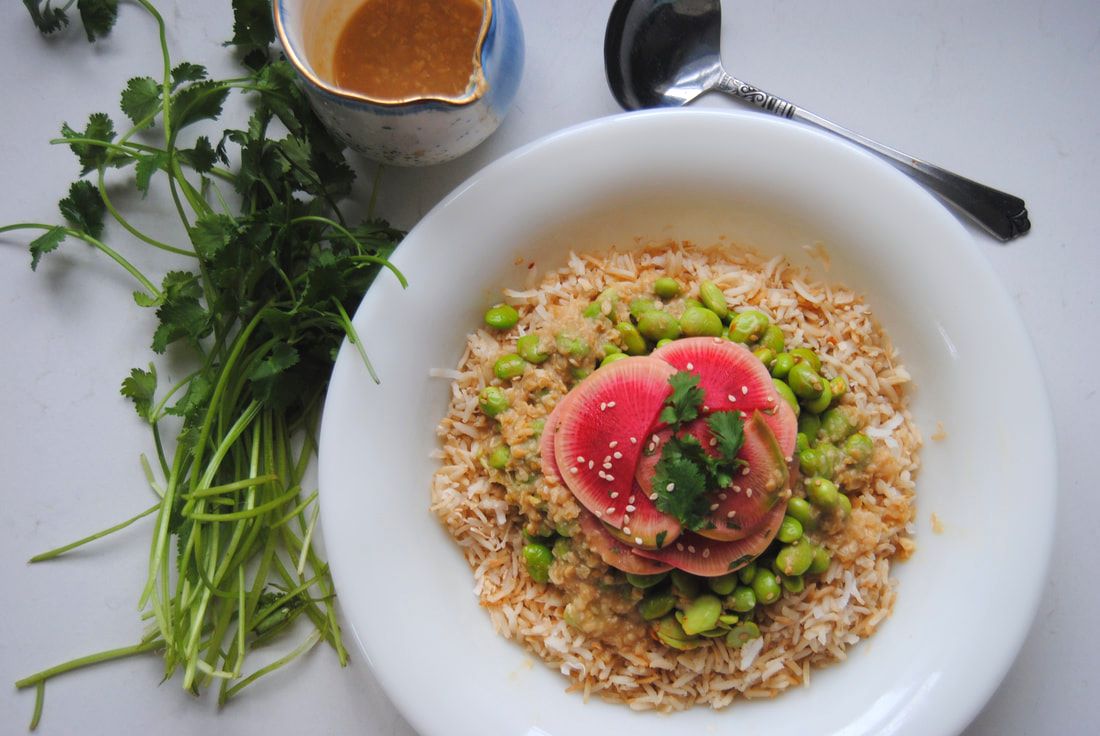
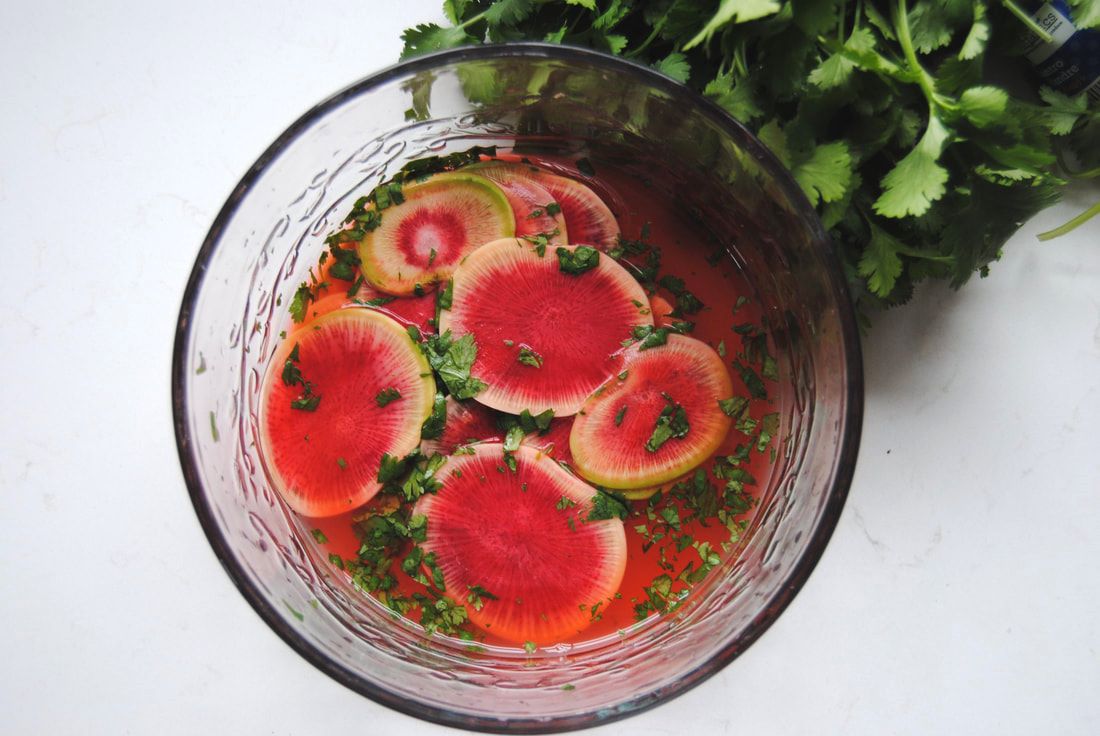
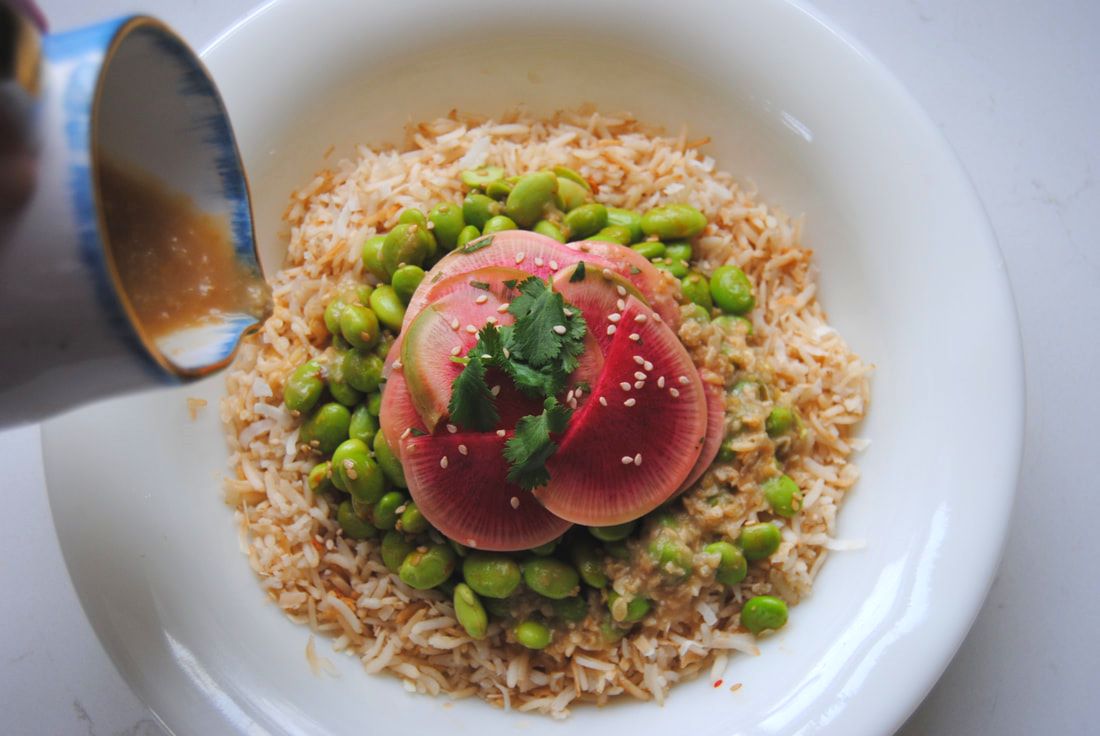
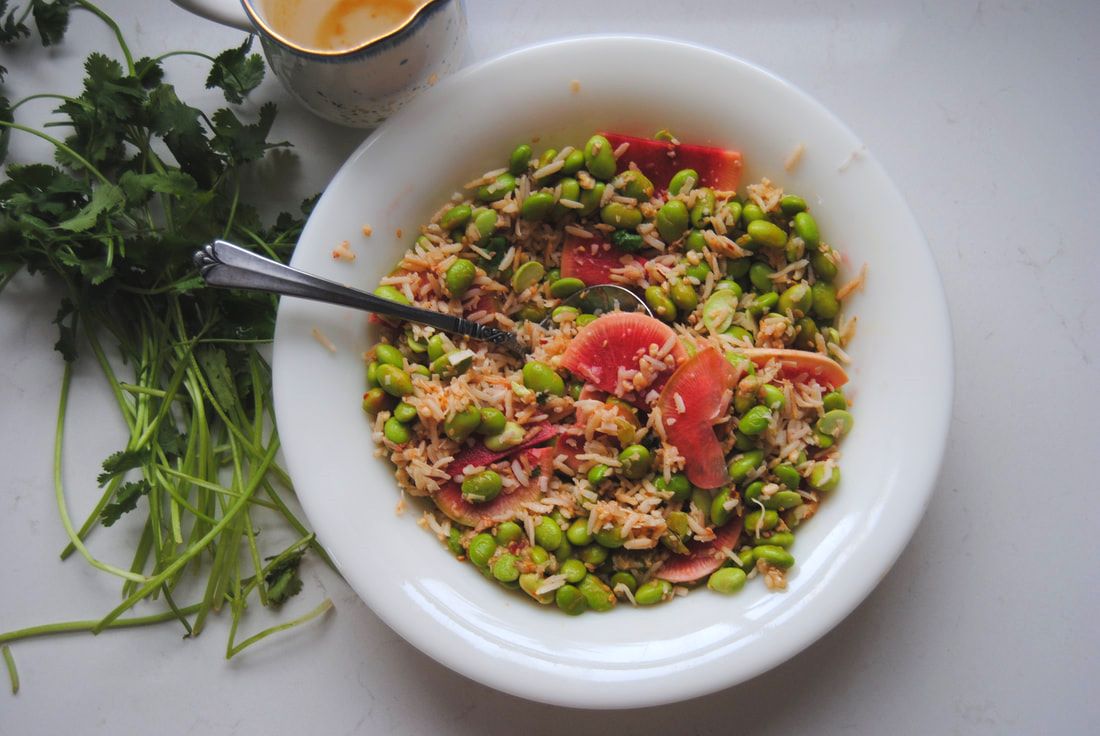
PREP TIME: 50 mins TOTAL TIME: 55 minutes Servings: 4 Ingredients Rice 1 cup brown rice 1/2 cup toasted unsweetened coconut flakes Edamame 2 cups shelled edamame 1 Tbsp sesame seeds 2 tsp toasted sesame oil 1 tsp chili paste Quick Pickled Radishes 1 large radish, we used a large watermelon radish 1/4 cup apple cider vinegar 3 Tbsp water 1 Tbsp fresh ginger juice 1 Tbsp fresh cilantro, chopped 3/4 tsp salt Dressing 4 Tbsp miso paste, we used our favorite chickpea miso from South River Miso Co 4 Tbsp water 2 Tbsp lemon juice Begin by making the quick pickled radishes. Use a mandolin or a sharp knife to thinly slice radish into uniform circles. Place sliced radishes, apple cider vinegar, water, ginger juice, chopped cilantro, and salt in a bowl and toss to coat. Allow radishes to marinate in the brine for at least 15 minutes or longer while you prepare the rest of the dish. Cook rice according to package then fluff with a fork and set aside. In a medium pan set to low heat, add coconut flakes and toast until light golden brown and fragrant, about 2 minutes. Remove toasted coconut from the heat and add to the fluffed rice. Meanwhile, in a sauce pan set to medium heat add edamame, sesame seeds, sesame oil and chili paste and cook until mixture is warmed through, about 5 minutes. Remove from heat and set aside. To make the dressing, combine the miso paste, water, and lemon juice and whisk until fully combined. This dish can be served family style on a larger platter or in individual bowls. Place toasted coconut rice on a platter and top with edamame and radishes (without the brine). Sprinkle with sesame seeds and top with a drizzle of miso dressing. Serve warm or cold. If you do not plan to serve this all at once, keep each element of the dish separate and prepare just prior to eating. Left overs will keep in the fridge for up to 5 days.
This dish is as stunning as it is satisfying with a pop of bright colors perfect for the coming spring season. Though while the nights stay cold, we hope these hearty flavors topped with salty miso dressing will be the soul warming you need.
Enjoy, Jess and Cecelia
In Our Cupboard
Did you notice the gorgeous mini porcelain pitcher we used for our miso dressing? Because hey, presentation is everything! If you want something similar for your kitchen, head to Anthropologie --> Kitchen & Dining. Happy shopping :)
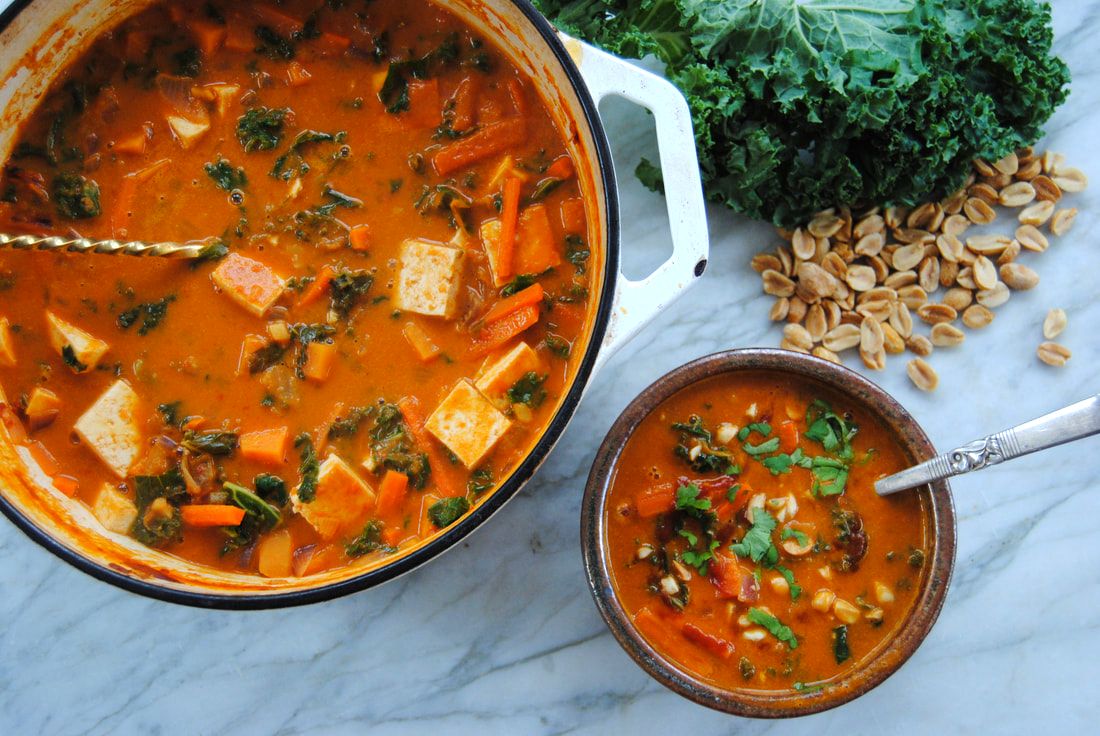
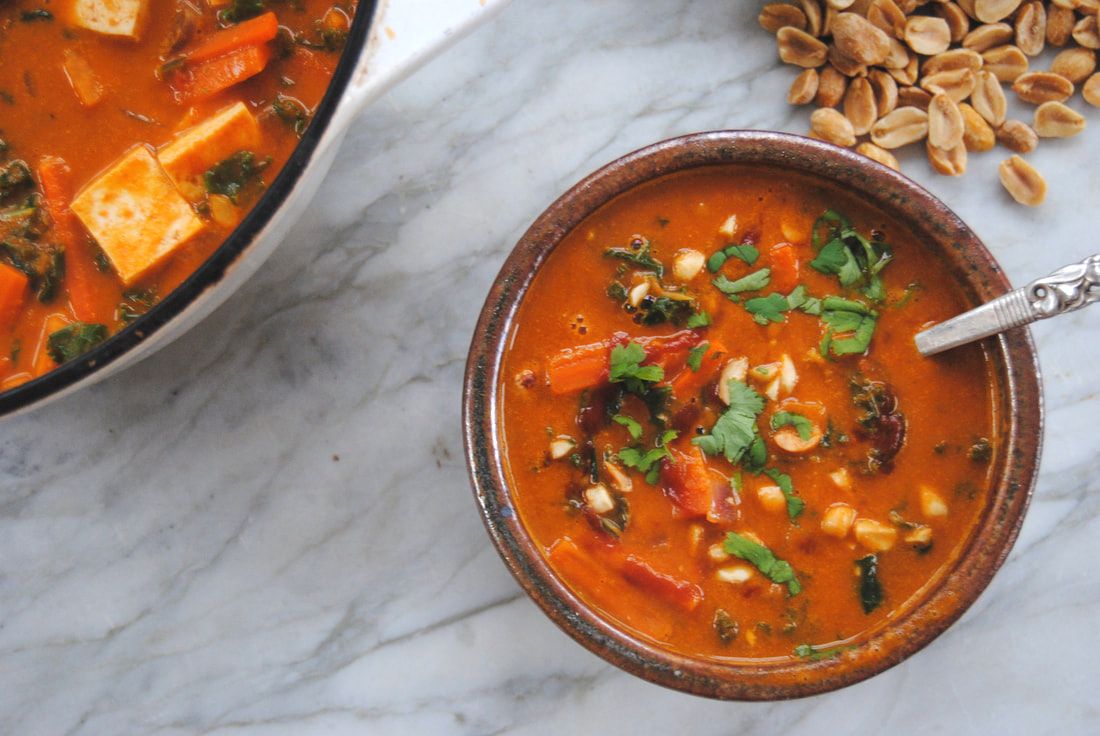
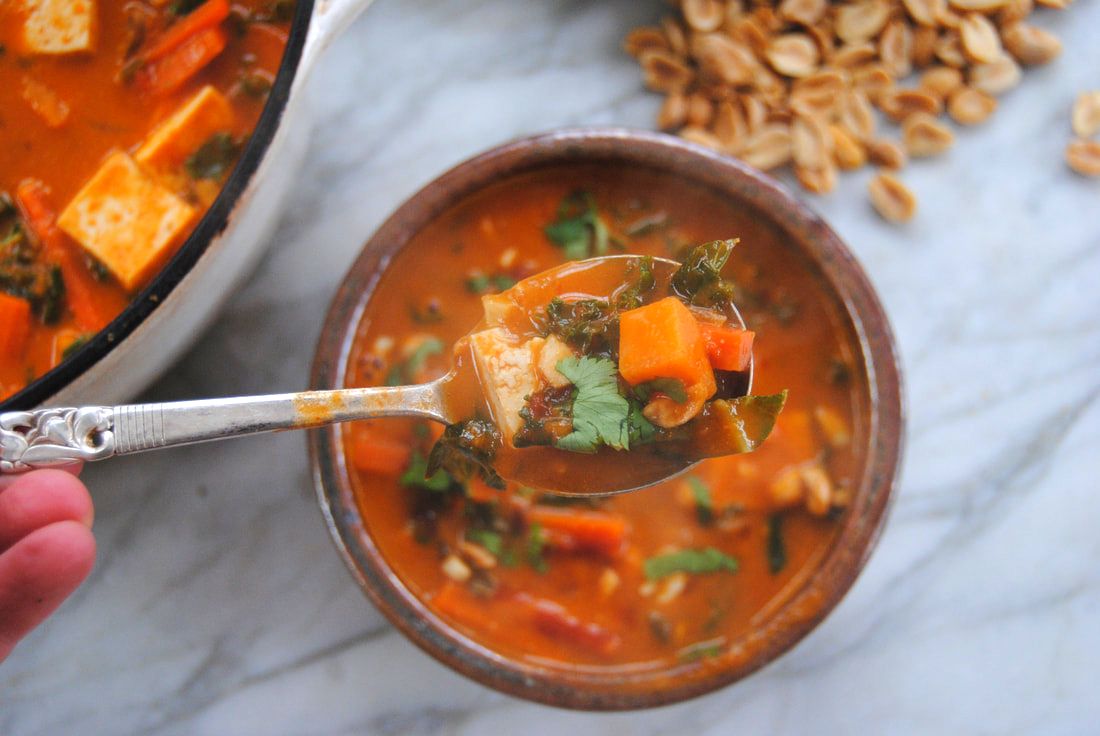
Soup's on! We had so much fun creating this soup this week. Back in the fall we used peanut in a pureed soup (recipe here) and loved it so much that we just had to do it again with a stew. One thing that really stands out when looking at the pictures of this recipe is, you got it, the colors! What a vibrant and beautiful way to brighten these dark winter days. Also more colors (natural of course) = more variety of nutrients. How much better can food really get?
Mixed Vegetable Peanut Stew
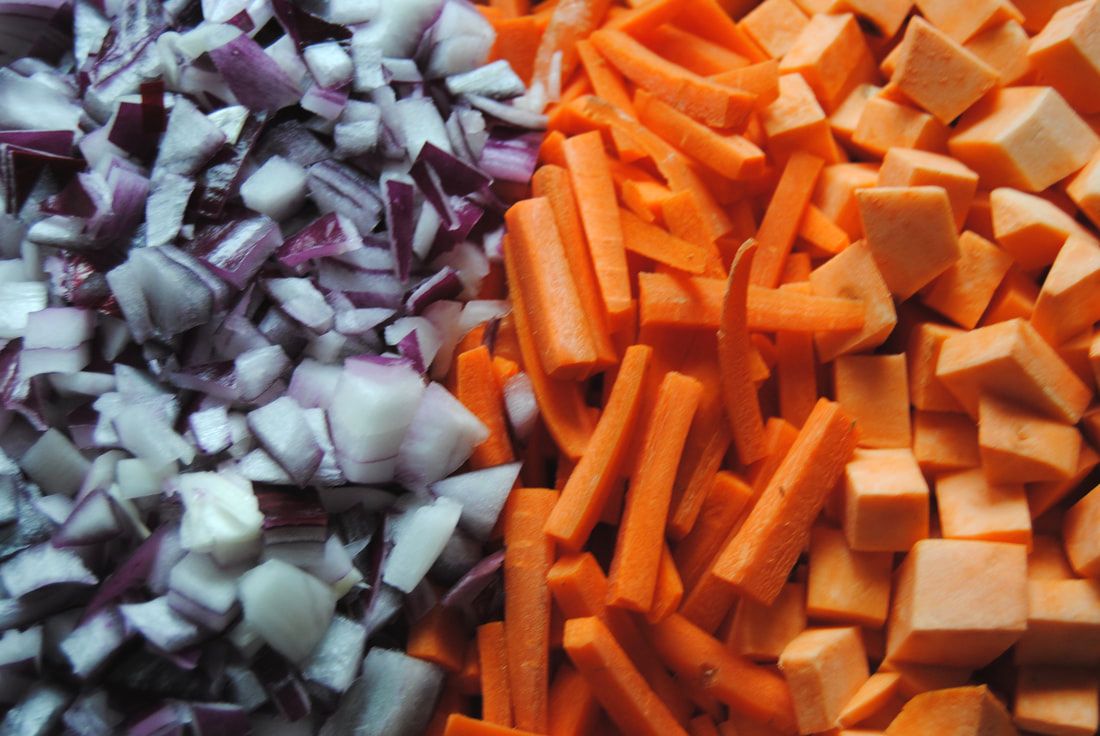
PREP TIME: 20 minutes TOTAL TIME: 1 hour Servings: 6-8 Ingredients 2 Tbsp coconut oil 2 cups cubed sweet potato 2 medium carrots, cut into matchsticks 1 medium red onion, chopped 1-2 inch fresh jalapeno pepper, de-seeded and minced 3 Tbsp ginger root, minced 3 cloves garlic, minced 1 tsp salt 32 oz low sodium vegetable stock 2 roasted red peppers blended with 2 cups water 6 oz tomato paste 3/4 cup creamy peanut butter 1/2 bunch of kale or 3 large leaves, chopped 1 Tbsp hot sauce, we used sriracha 1, 15.5 oz package sprouted organic tofu 1/2 cup chopped peanuts 1 bunch fresh cilantro Wash and peel sweet potatoes, carrots, and onion. Cut sweet potatoes into 1/2" x 1/2" cubes then set aside. Cut carrots into 2" long matchsticks and dice the onion then set aside. In a large Dutch oven or soup pot heat the coconut oil over medium heat. Add cubed sweet potato, carrots, onion, and jalapeno to the pot and cook stirring occasionally until the onion is translucent and the sweet potato and carrots soften, about 10-12 minutes. Next, add the ginger, garlic, and salt to the pot and continue to cook for 1-2 minutes or until fragrant. Add the vegetable stock, reduce the heat to a simmer and continue to cook for 15 minutes. Meanwhile, in a high speed blender add roasted red peppers with 2 cups water, tomato paste, and peanut butter and blend on high until smooth. Add blender contents to the soup pot and stir to combine. Add the chopped kale and tofu cubes to the pot and continue to cook for an additional 5-10 minutes on low heat. Serve soup with chopped peanuts and cilantro on top. Any left over soup will keep well in the fridge in an air tight container for 5 days or freeze for up to 3 months. To reheat soup simply allow soup to thaw and place in a pot on the stove top set to medium heat and cook until warmed through.
We hope you love the flavors of this stew as much as we do. Bold, bright and earthy all at once with a kick of spice from the jalapeno and hot sauce and a depth of savory flavor from the peanut butter. The bright colors and flavors are our survival gift to you for these winter months.
Enjoy, Jess and Cecelia
In Our Pantry
Less than $20 for 54 ounces of unrefined, cold-pressed, organic coconut oil. Yes please!
Holiday season is in full swing and with it comes specialty foods, recipes, and what we like to call food memories. Most of us have a special food (or many!) that elicit memories and remind us of past times and holidays spent with friends and family. The senses are very tied to memory and while eating both taste and smell senses are triggered, hence, food memories! This week we explore one of Cecelia's nearest and dearest food memories, gnocchi.
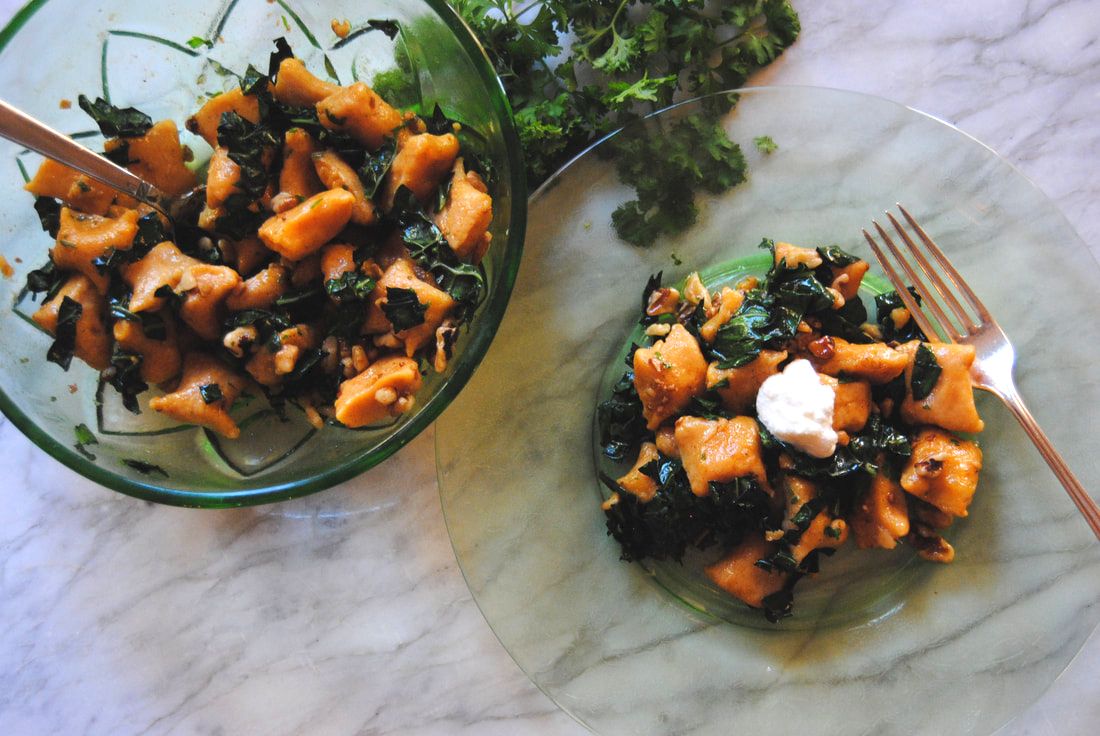
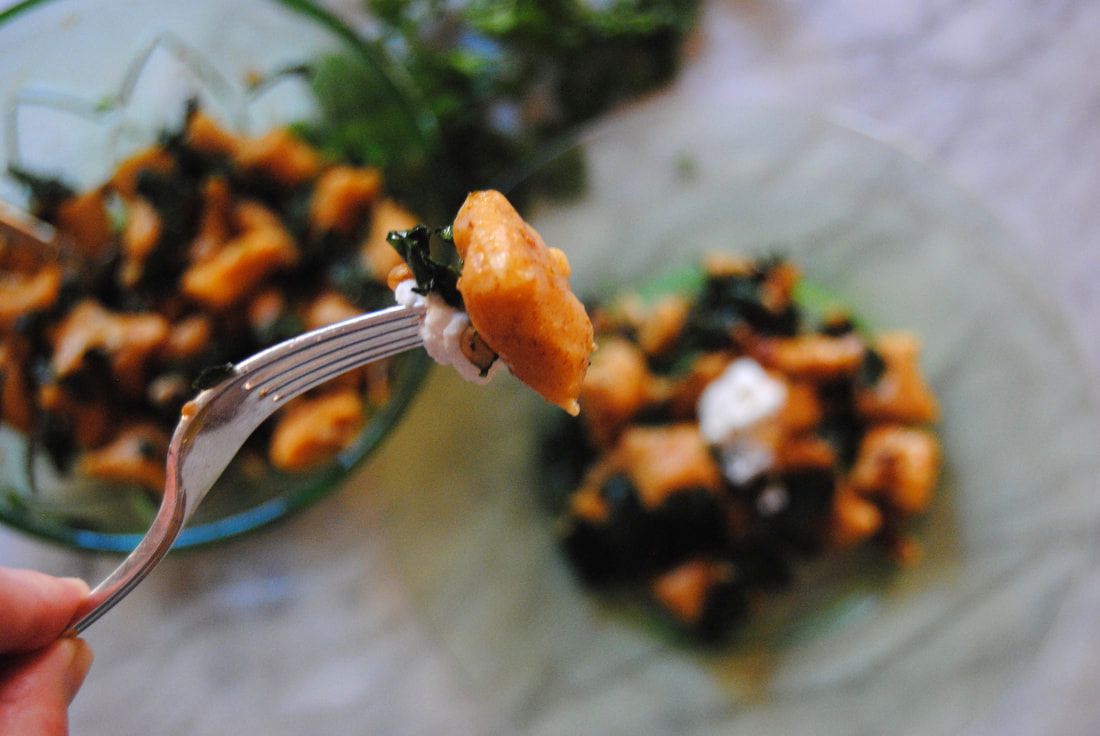
Gnocchi are a type of homemade pasta though are also considered dumplings as they contain potatoes. To make homemade, gnocchi are time intensive and can take a few attempts to master the texture, though are completely worth it! Gnocchi are common in Italian cuisine and Cecelia's Italian grandmother was somewhat of a gnocchi master. Cecelia remembers her grandmother's gnocchi as perfect pillows of dough that melt in the mouth and just the word gnocchi, to this day, conjures memories of Christmas days spent cooking and enjoying this delectable dish. Her grandmother didn't need to follow a recipe and seemingly easily prepared 300+ gnocchi for a single meal. Cecelia treasures making gnocchi every year for Christmas though may never achieve the gnocchi mastership living in her "food memories." But that's okay! Gnocchi are delicious in many forms, with different recipes, and made by different chefs. We took a more nutritious take on the traditional gnocchi by using sweet potato and the results were delicious and stunning. Are you ready for some gnocchi making?
Sweet Potato Gnocchi with Brown Butter Sauce
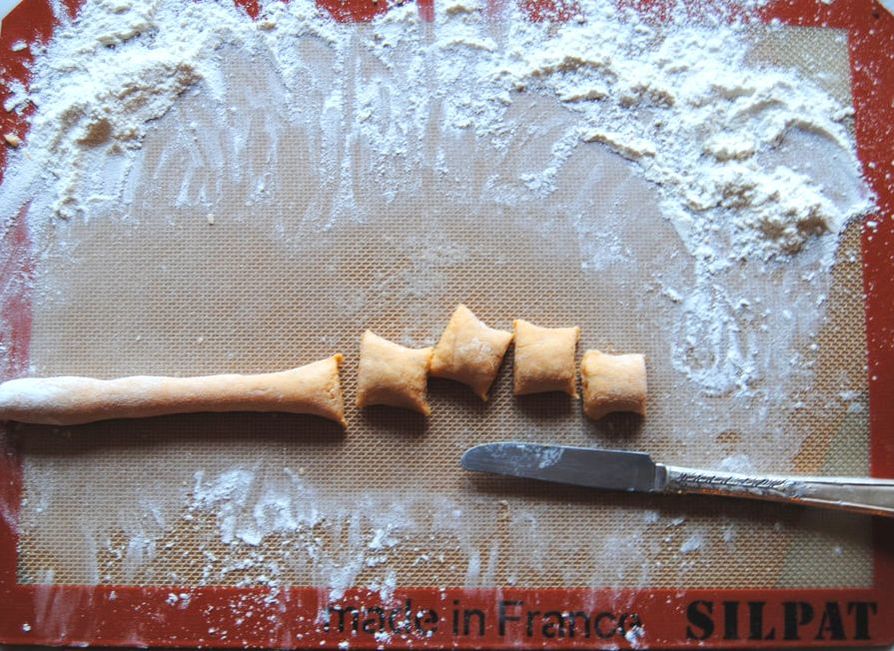
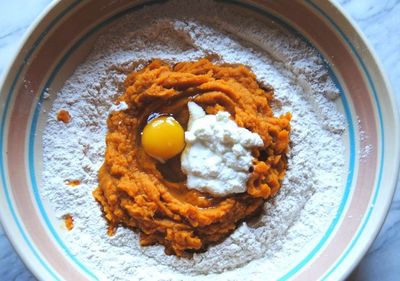
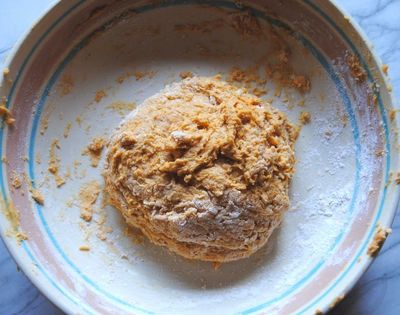
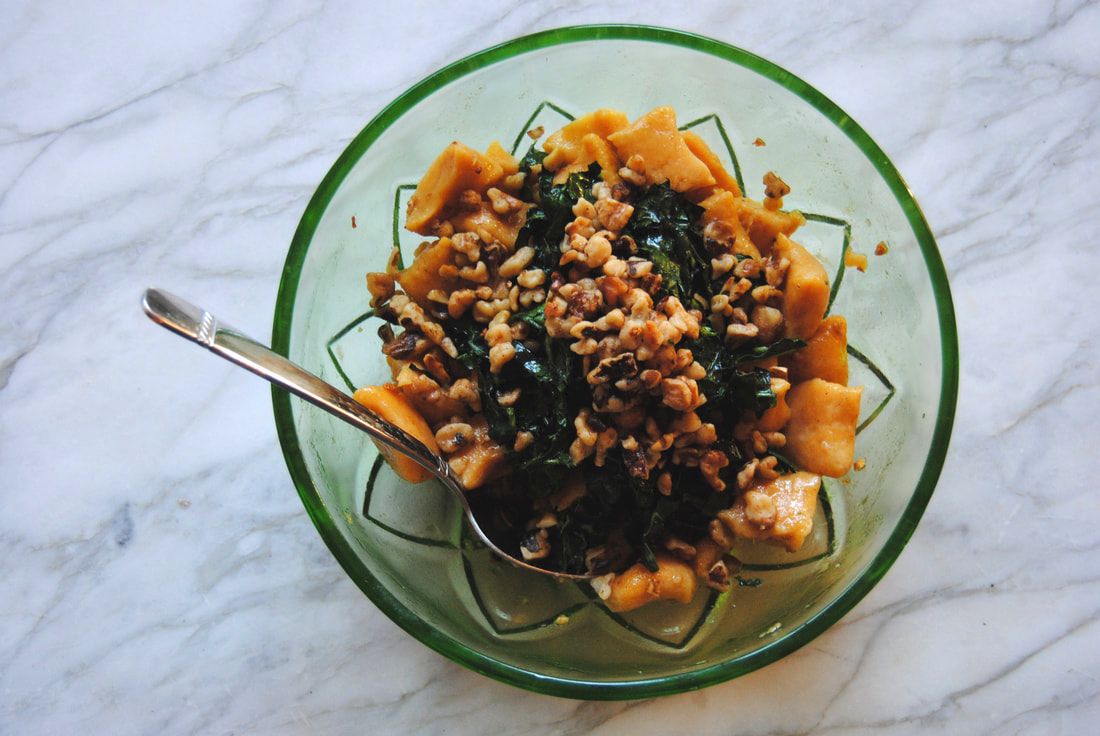
PREP TIME: 45 minutes TOTAL TIME: 60 minutes Servings: 8-10 servings Ingredients Gnocchi 2 lb sweet potato 1 cup all-purpose flour + 1/4-1/2 cup additional 1 tsp salt 1 egg 1/4 cup full fat ricotta cheese Sauce 8 Tbsp salted butter 4 Tbsp pasta water (reserved from cooking) 2 cloves garlic, minced 2 Tbsp fresh parsley, chopped 1/2 cup walnuts, chopped 8 large kale leaves + 1 Tbsp extra virgin olive oil + 1/4 tsp salt Additional Toppings 1/2 cup chopped walnuts 8 oz full fat ricotta cheese, about 1 oz per serving Boil sweet potatoes until soft in texture, about 20-25 minutes. Allow cooked potatoes to cool, then remove skin and process potatoes through a potato ricer. If you do not have a potato ricer a food processor will also work*. In a large bowl combine 1 cup flour and salt and form a well. In the center of the well, add in 1 egg, ricotta cheese, and riced sweet potatoes. Using your hands and working from the outside of the well, fold flour into the wet ingredients. Add an additional 1/4-1/2 cup flour 1 Tbsp at a time until the dough no longer sticks to your hands. Turn the dough onto a floured surface and knead dough gently for about 60 seconds until dough comes together. With floured hands and on a lightly floured surface, pinch off 2 Tbsp of dough and roll into a long cylinder about 3/4" thick using the tips of your fingers to roll to avoid compressing the dough. Cut each gnocchi into 3/4-1" pieces and repeat until all the dough has been shaped (pictures above). Continue to add flour to your hands and work surface if dough becomes too sticky to handle while working. Keep gnocchi on a lightly floured sheet pan while you're shaping the remainder. This gnocchi dough recipe will make about 100-120 gnocchi (more or less depending on the size you cut them). We froze 1/2 of the shaped, uncooked gnocchi to use later, just make sure to freeze on a sheet pan prior to placing in a air tight bag to prevent gnocchi from sticking. To cook the remaining 1/2 of the gnocchi, bring a large pot of water to a boil. Reduce to a simmer and add 7-10 gnocchi to the hot water at a time and cook for 3-4 minutes or until the gnocchi float to the top. Remove cooked gnocchi from the water and set aside. Continue this process until all gnocchi has been cooked. Reserve the cooking water for use in the sauce. To make the brown butter sauce, melt the butter in a sauce pan set to medium heat and cook until butter turns brown and fragrant, about 2 minutes. Reduce heat to low then add the chopped garlic and cook for an additional 1 minute. Add 4 Tbsp of reserved cooking water and stir to combine. Remove from the heat and stir in the chopped parsley. To prepare the messaged kale, wash, de-stem, and chop the kale. Add the olive oil and salt to the chopped kale and message until bright green and wilted then set aside. In the sauce pan used to make the brown butter sauce, add cooked gnocchi, messaged kale, and chopped walnuts. Stir gnocchi to evenly coat with sauce and serve with an additional dollop of ricotta cheese on top. *If using a food processor, avoid over processing the potatoes as this will cause them to become starchy and gummy.
After one bite of homemade gnocchi, you just might be hooked and create some special food memories of your own. And we must stress how different homemade are from prepared, store bought options are much gummier and chewier and overall just not as enjoyable (in our opinion). Each bite of this dish is loaded with sweet and savory flavor, a mix of textures including pillowy gnocchi, and a gorgeous pop of colors. We hope you're creating great memories this holiday season.
Enjoy, Jess and Cecelia
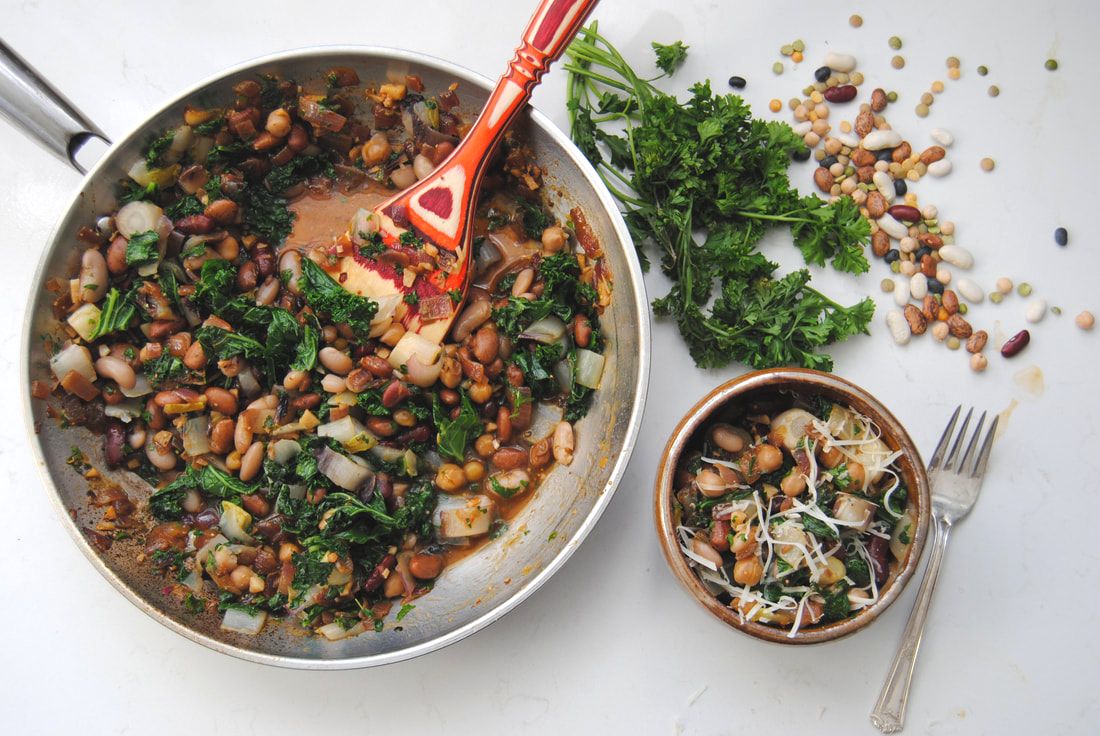
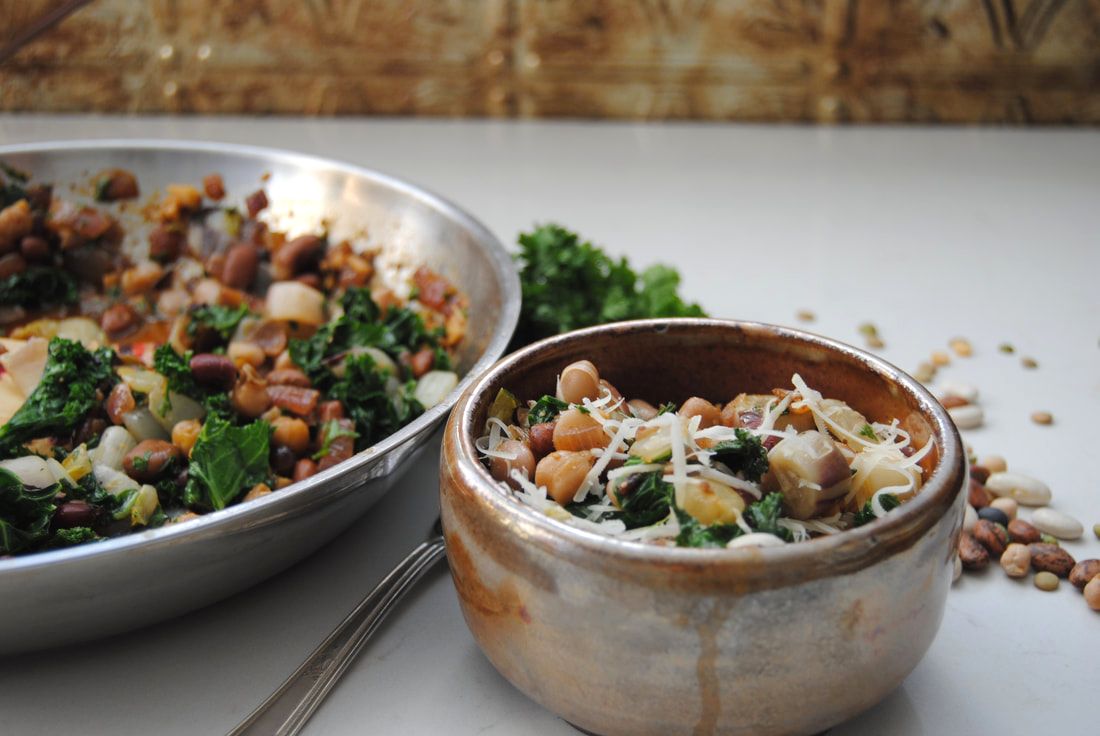
Hi friends! We hope you had a great holiday last week and enjoyed some great eats like we did. With it being that time of year when it starts to get colder and darker, we've noticed a shift in our recipes to some "cozier" foods. Rich flavors, warm dishes, and hearty meals are just what we are craving during this transition in seasons. This recipe for example includes hearty fall greens and starchy beans with a rich but still bright white wine sauce. Let's get to it.
Hearty Greens N' Beans
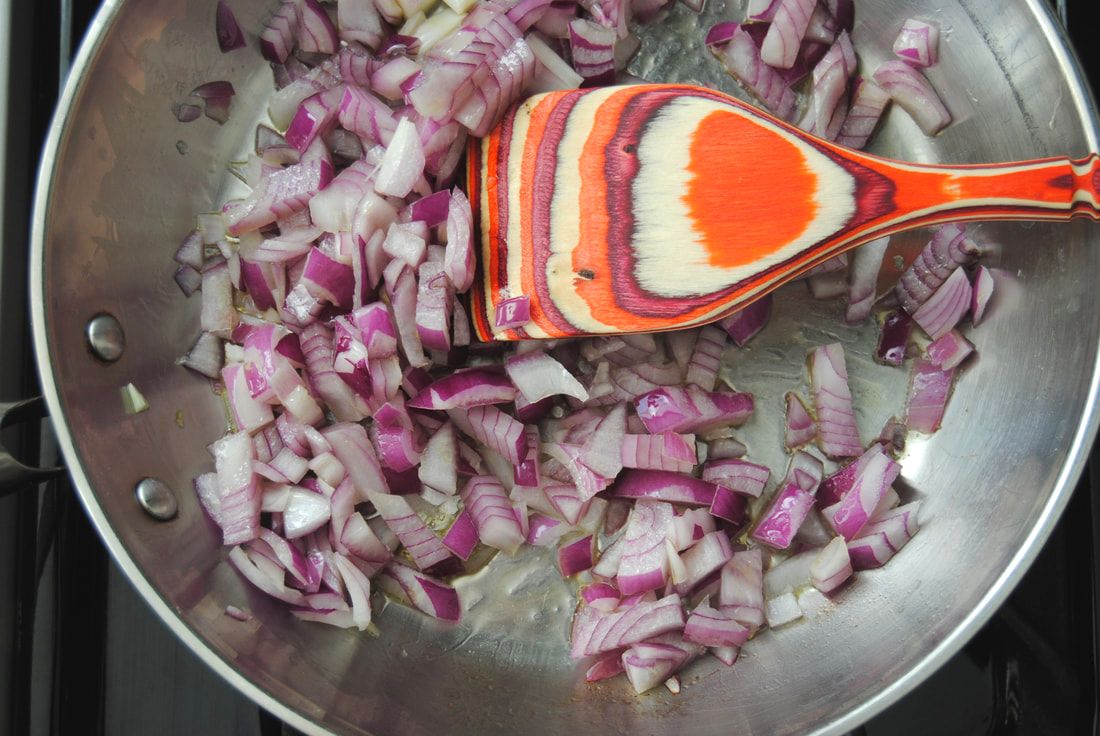
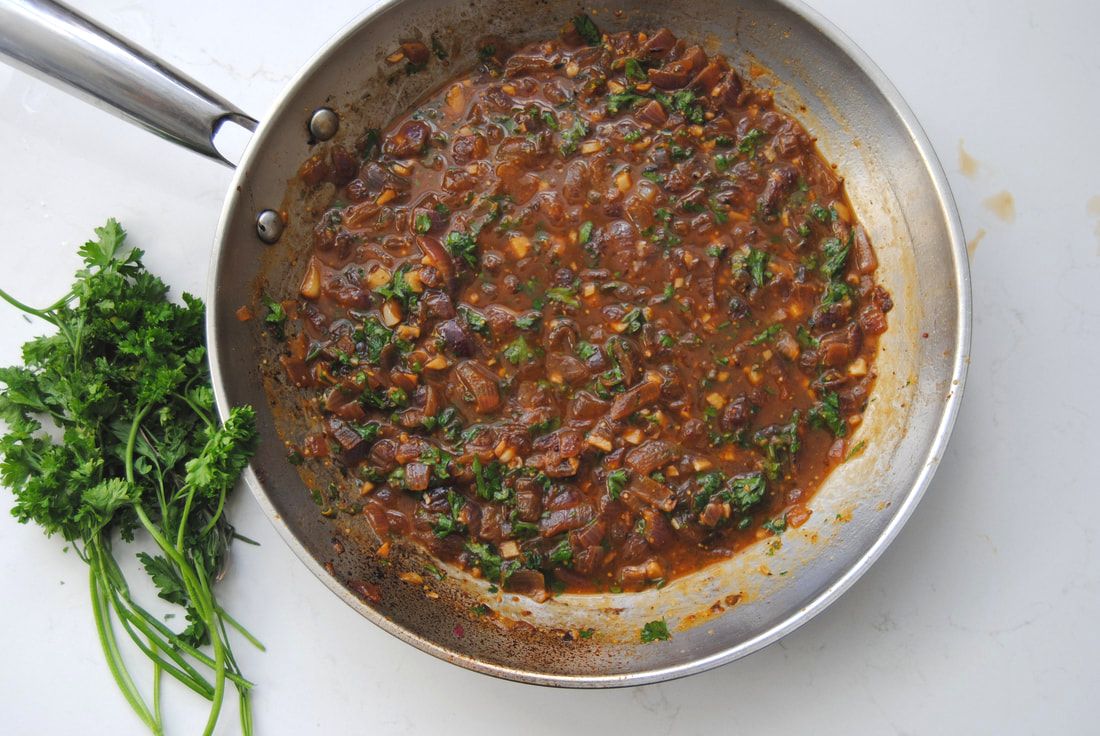
PREP TIME: 10 minutes (plus 8 hours to soak beans) TOTAL TIME: 60-90 minutes, includes cooking beans* (plus 8 hours to soak beans) Servings: 4 Ingredients 2/3 cup dried beans, ~2 cups cooked (we used a variety of heirloom beans, however any dried bean would work) 3 Tbsp extra virgin olive oil 2 small red onions, diced 2 large or 4 small cloves garlic, minced 1 tsp stone ground mustard 1/2 cup dry white wine 1 cup low sodium vegetable stock 1/2 tsp salt 1/4 tsp cracked black pepper 1/2 large bunch kale, de-stemmed and chopped 3 small endive, chopped 2 Tbsp fresh parsley, chopped Shaved Parmesan to taste (~2 oz or 1/2 oz per dish) Pre-soak beans in room temperature water for 8 hours or overnight. Drain and rinse beans, cover with water in a large pot, and gently boil for at least one hour* or until soft. In a medium sauté pan set to medium heat, add olive oil and chopped onion and sauté until translucent and golden on the edges, ~10 minutes. Add minced garlic and mustard to the pan and continue cooking for 2-3 minutes. Add wine to de-glaze the pan, then add the vegetable stock and turn the heat down to a simmer. Add the cooked beans, chopped kale and endive, and salt and pepper then simmer for 3-5 minutes or until the greens are somewhat wilted and bright green in color. Remove from the heat, add chopped parsley and shaved Parmesan and serve immediately. This dish is best eaten the same day it is cooked. *Cooking times will vary depending on the beans used and may take 1-3 hours to fully cook
Well there you have it, a warming and cozy but still completely nutritious dish. Though containing mostly greens and beans, this dish feels extra hearty and rich from the flavorful herb and wine sauce. If you're looking to make this meal extra cozy, serve over pasta or with fresh bread. Go on, get cozy!
Enjoy, Jess and Cecelia
Hello friends, we've got a unique take on a classic fall recipe for you this week. Along with that we have some fun new developments that you could say are also orange in color....
Just what are we talking about, Yummly. If you aren't familiar yet, Yummly is a recipe database on which you can search for millions of recipes and save your favorites to your personal page - check it out here. We've started to add the Yum button to the bottom of our posts (look for a little orange "Yum") so that you can easily save our recipes once you've created a Yummly account. On Yummly you can begin to build a portfolio of your favorite recipes from all over the web (with a large percentage of TGBK recipes of course, wink, wink). All our new recipes will include this Yum button and we will start adding the button to older posts though this will take some time (there are just so many!). We have a few recipes published to our Yummly account which you can check out here, and look forward to "yumming" many more. We thank you for your patience as we get more added and hope you enjoy creating your own virtual recipe book.
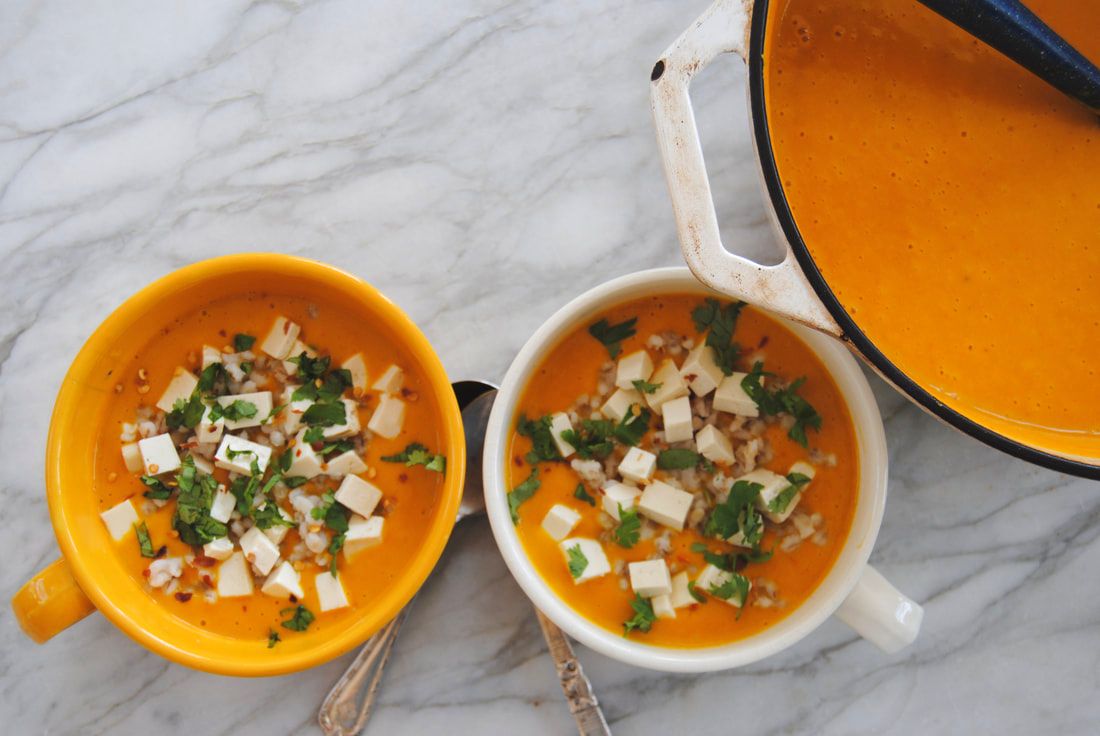
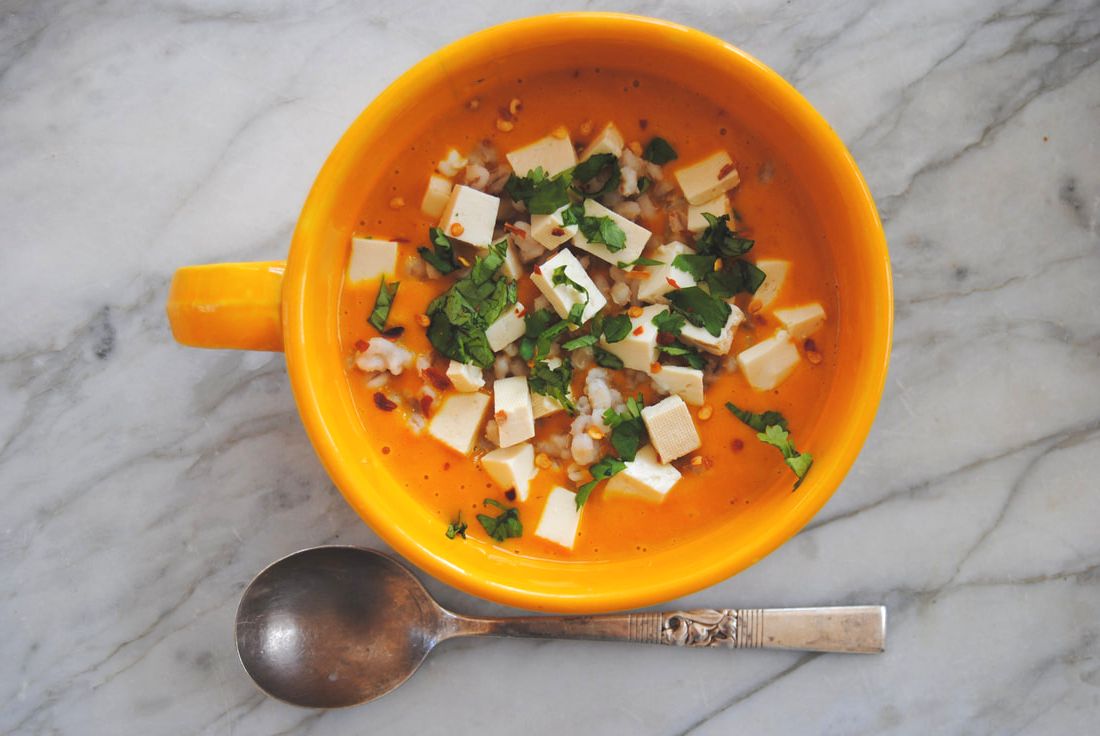
Butternut Squash Red Curry Soup
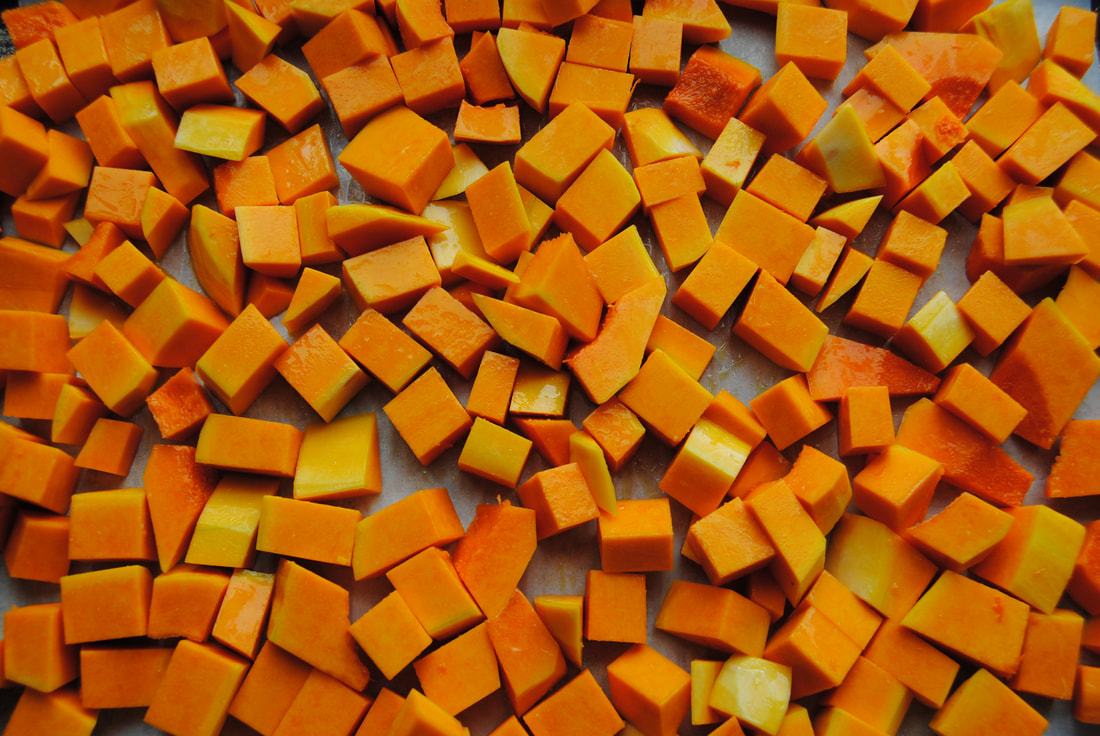
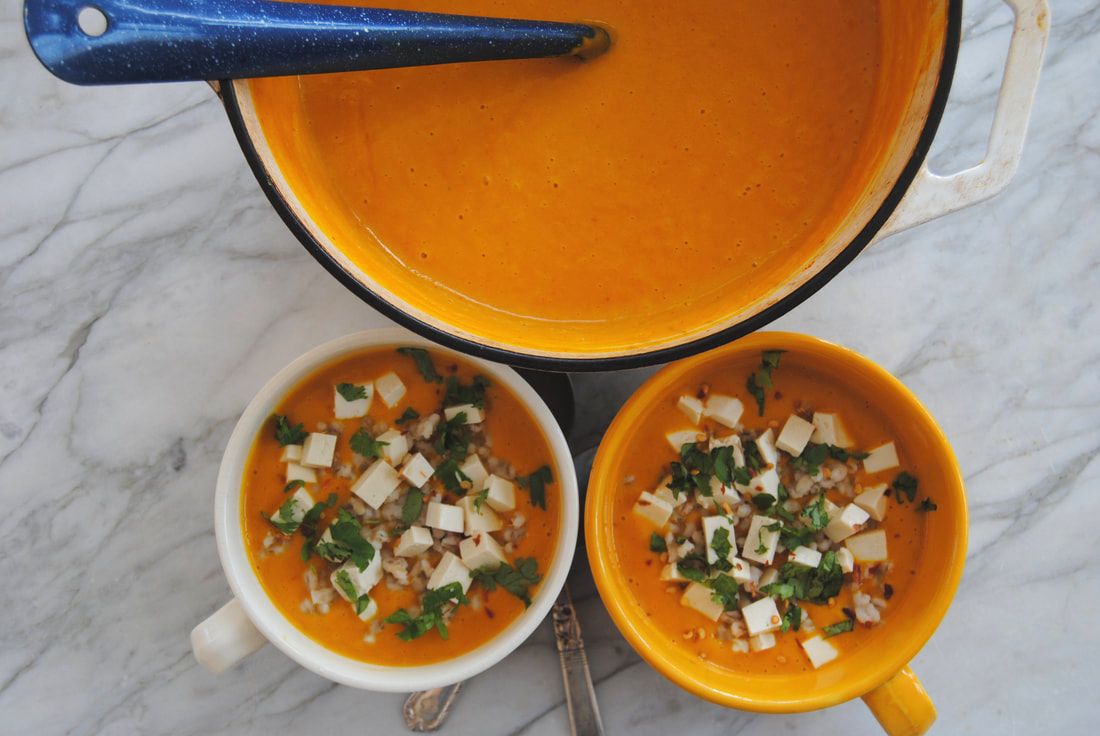
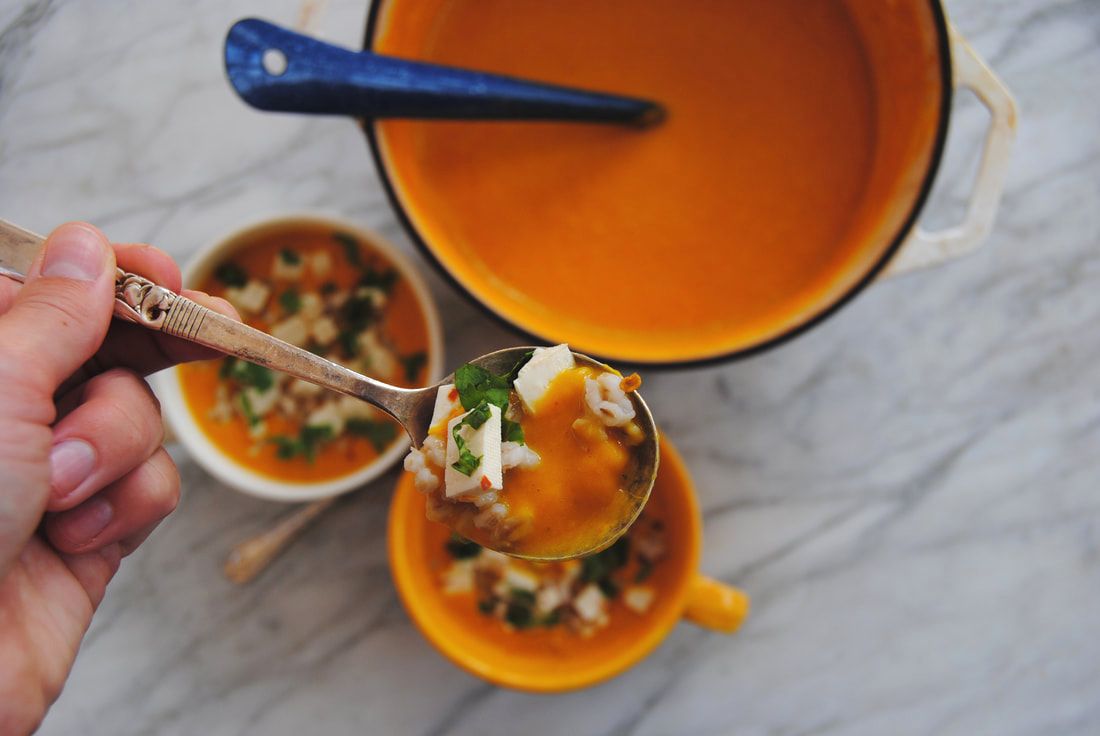
PREP TIME: 35 minutes TOTAL TIME: 60 minutes Servings: ~ 10 cups of soup Ingredients 1 medium butternut squash, peeled and cubed 1 medium yellow onion, chopped 1 Tbsp extra virgin olive oil 1/4 tsp sea salt + 1/4-1/2 tsp to taste 1/4 tsp black pepper 2 cloves garlic, minced 3 Tbsp fresh ginger juice (2 Tbsp chopped ginger root would also work) 3 Tbsp red curry paste 4 cups low sodium vegetable broth 2 Tbsp peanut butter 2 cups full fat coconut milk Toppings 1 package (15 oz) sprouted tofu, cubed (or protein of your choice - white beans or chick peas would also work) 1 cup dry pearl barley (or grain of your choice - quinoa, spelt berries, or wheat berries would also work) 1/2 bunch cilantro, chopped Lime wedges Sprinkle of crushed red pepper flakes Preheat oven to 350 degrees. Wash, peel, and cube butternut squash then place on a parchment lined backing sheet and roast for 25-30 minutes or until soft enough to pierce with a fork. Remove from the oven and set aside. Cook pearl barley according to package instructions then set aside. Drain tofu from water and cube into bite size pieces then set aside. In a large pot set to medium heat, sauté onion with 1 Tbsp olive oil, 1/4 tsp sea salt, and 1/4 tsp black pepper. Cook onion until translucent and golden on the edges, about 5-7 minutes. Add minced garlic to the pot and continue cooking for 1-2 minutes. Stir in the ginger juice or chopped fresh ginger and red curry paste. Stir until combined then add vegetable broth, peanut butter, and cooked butternut squash to the pot and continue cooking for an additional 5 minutes. Remove from the heat and work in batches to puree soup contents in a large blender on high until completely smooth. Add pureed soup back to the pot, stir in 2 cups coconut milk and simmer for 5-10 minutes. Add additional 1/4-1/2 tsp salt to taste. Pour hot soup into serving bowls and top with cubed tofu, pearl barley, a sprinkle of chopped cilantro, the juice of 1 lime wedge, and a sprinkle of crushed red pepper flakes. If you do not plan to serve all the soup at once, store soup in an airtight container in the fridge for up to 5 days or in the freezer for up to 2 months. If you freeze your left overs, remove from the freezer and place in the fridge to thaw about 2 days prior to consuming. It's best to keep the toppings separate from the puree and add them in when you're ready to warm up your next bowl of soup. Enjoy!
This soup really does deserve the "Yum." Such an interesting twist on a fall favorite - butternut squash soup. Though in this preparation the mild squash is brightened by red curry and made super rich with the addition of coconut milk. Peanut butter provides a nutty finish and the various toppings can be adjusted to your liking. Why not take a risk with your next squash and try this variation? And don't forget the Yum!
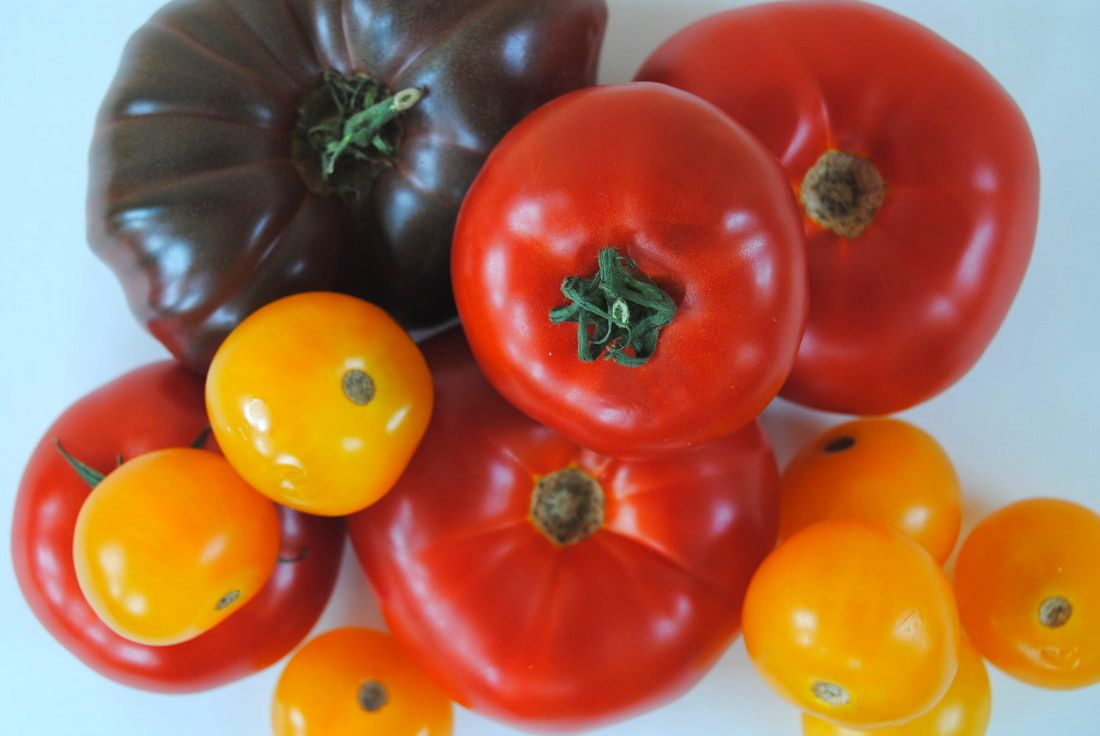
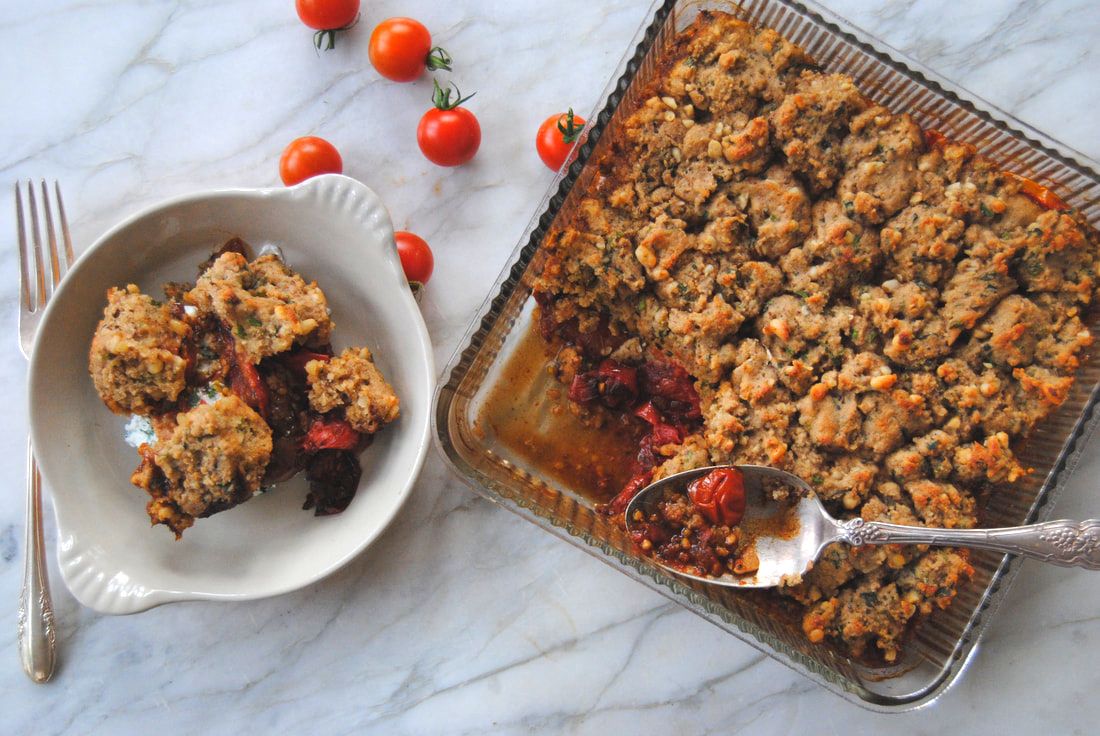
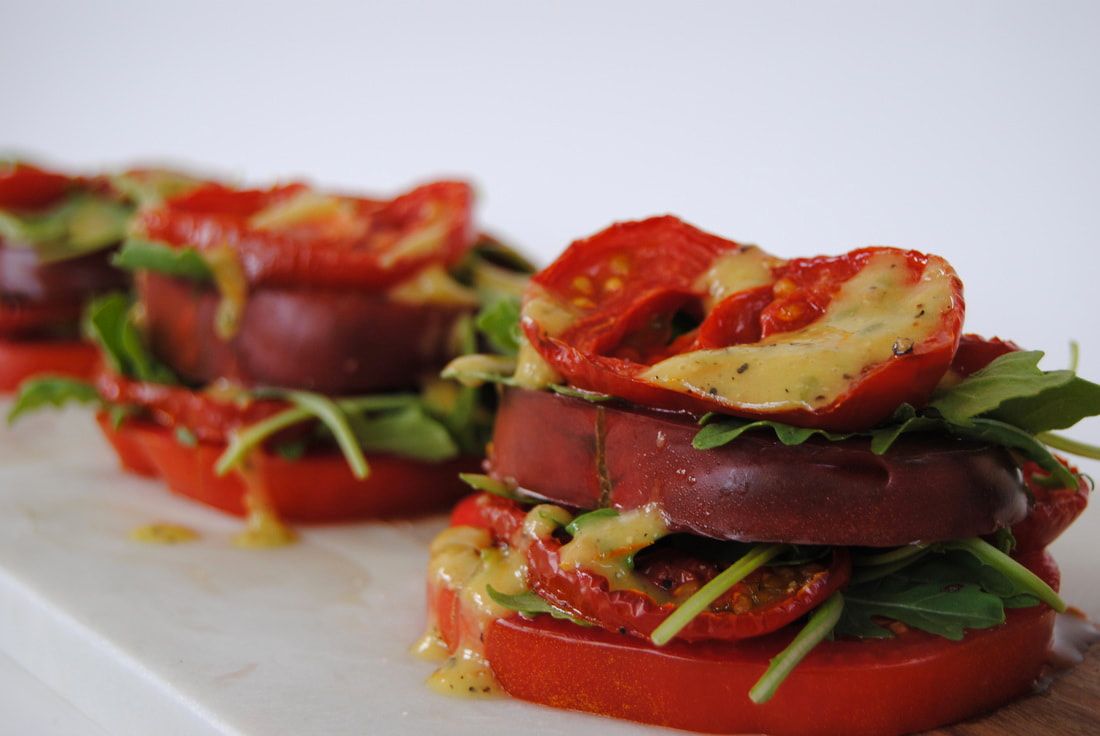
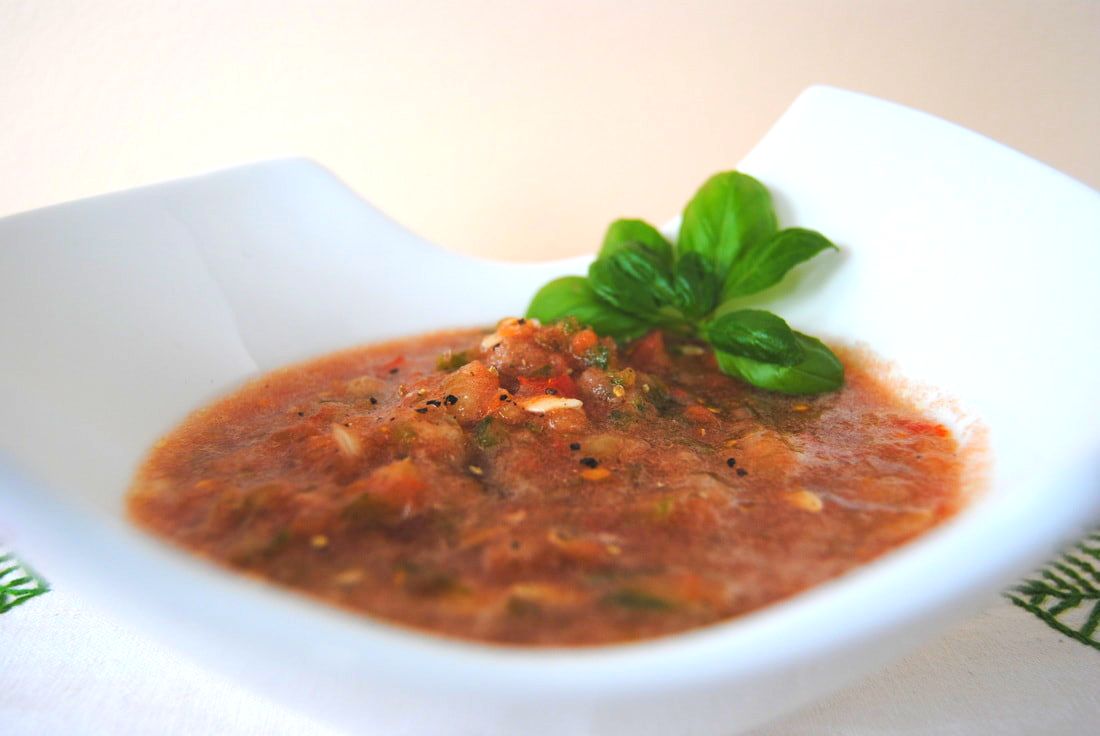
Enjoy, Jess and Cecelia If you know us (and we think you do by now!), you know that August is all about tomatoes for us. There is just no better time of year than mid-August to enjoy a local tomato fresh off the vine. Unfortunately, winter tomatoes that have traveled across continents to get to us in Chicago just don't compare. We have a fabulously creative new tomato recipe for you this summer and thought a look back at tomato recipes from summers past would be fun and delicious! Take your pick of any of these three, or all, you just can't go wrong. Roasted Tomato Cobbler PREP TIME: 55 minutes (includes roasting time) TOTAL TIME: 1 hour 20 minutes (includes roasting and baking time) Servings: 6 Ingredients Roasted Tomatoes 5 large tomatoes, any variety will work 2 cups cherry tomatoes 2 Tbsp extra virgin olive oil 1-2 Tbsp reduced balsamic vinegar Salt and pepper to taste Cobbler Dough 1/2 cup whole wheat flour* 1/2 cup semolina flour* 1/4 cup buckwheat flour* 1/4 cup chickpea flour * *Note that 1 1/2 cups whole wheat flour will work to substitute if you don't have a variety of flours on hand 2 Tbsp cane sugar 1 Tbsp chopped fresh basil 1 Tbsp chopped fresh parsley 2 tsp baking powder 1/4 tsp sea salt 1/2 cup chopped pine nuts (or nut of your choice) 1 flax egg (1 Tbsp ground flax + 3 Tbsp warm water) 3 Tbsp butter, melted and cooled + 1 tsp to butter the dish 1/2 cup plain kefir To make the roasted tomatoes, begin by preheating your oven to 350 degrees. Line a large baking pan with a non-stick silicon mat or a piece of parchment paper. Wash and slice tomatoes about 1/4 inch thick and place in a single layer on the prepared pan. Drizzle with olive oil, reduced balsamic, and sprinkle of salt and pepper then place in the oven to roast for 45-50 minutes. While the tomatoes are roasting, begin the cobbler dough. Place all flours in a large mixing bowl then add cane sugar, chopped herbs, baking powder, sea salt, and chopped pine nuts and stir to combine. In a separate bowl whisk together ground flax seed and water and allow to sit until it becomes gelatinous, ~3-5 minutes. Add melted butter and plain kefir to the flax egg and stir mixture well. Add wet ingredients to dry ingredients and stir until a dough is formed, but avoid over stirring. Place dough in the fridge to chill while the tomatoes continue to roast. Once the tomatoes are fully roasted, remove from the oven and spoon into a buttered 9"x9" pan. Remove cobbler dough from the fridge. Use a tablespoon to portion and drop dollops of dough over the tomatoes one at a time until you have covered the entire top of the tomatoes. Keep in mind that there can be tiny holes between the dollops of dough so that the tomato juice will peep through and bubble up while baking. Bake in a 350 degrees preheated oven for 25 minutes with the last 2 minutes under the broiler or until golden brown. Remove cobbler from the oven and allow to sit out at room temperature for at least 10 minutes before cutting. Divide cobbler into 6 servings. Can be served on top of a pro-biotic containing cheese (such as Lifeway Farmers Cheese as we did), cottage cheese, sliced fresh mozzarella, cooked beans of choice, or enjoyed on its own. Leftovers can be stored in the fridge for up to 3 days. Reheat cobbler in a 350 degree oven for 7-10 minutes, in the microwave for a minute, or just eat cold right out of the refrigerator. Enjoy! Stacked Tomato Salad PREP TIME: 30 minutes TOTAL TIME: 35 minutes Servings: 2 Ingredients Salad 1 large Black Krim tomato (or any heirloom) 1 large Beefsteak tomato (or any large, red variety) 2 medium-large Better Boy tomatoes (or any medium, red variety) 1/2 cup baby arugula 1 Tbsp extra virgin olive oil Sprinkle of salt and pepper Vinaigrette 1/2 pint yellow cherry tomatoes (~5 ping-pong sized tomatoes, can be any variety) 1/4 cup extra virgin olive oil 1.5 tsp raw apple cider vinegar 1.5 tsp fresh lemon juice 1 tsp stone ground mustard 1 Tbsp chopped fresh basil salt and pepper to taste Preheat oven to 350 degrees. Slice Better Boy tomatoes into half inch thick slices and place on a parchment lined baking sheet. Drizzle with 1 Tbsp olive oil and sprinkle with salt and pepper. Roast in the oven for ~25 minutes or until candied. Remove tomatoes from the oven and allow to cool. Turn oven to broil and place cherry tomatoes on a baking pan under the broiler for 10-12 minutes or until well charred with a generous amount of blacked skin. Note that while broiling the cherry tomatoes they will begin to pop open - this is expected given the high heat. Removed charred cherry tomatoes from the oven and place tomatoes and their juices in a blender or food processor along with the olive oil, vinegar, lemon juice, mustard, basil, salt and pepper to make the vinaigrette. Blend ingredients on high until a smooth consistency is formed and set aside. To assemble the salad, slice the Black Krim and Beefsteak tomatoes into 1/2 inch slices. Layer 1 slice of Beefsteak tomato, 2 slices of roasted Better Boy, and 1 slice of Black Krim tomato on top of each other. Place baby arugula in between each tomato layer. Repeat with the remaining tomato slices and arugula. This should make 3-4 stacks about 3-4 layers thick. Sprinkle the top with salt and pepper to taste and drizzle charred tomato vinaigrette over the top of each stack. Serve as is or enjoy with thick sliced bread. We chose a seeded fennel anise bread from our local farmers market. Extra dressing can be stored in an air tight container in the fridge for ~1 week. August Harvest Gazpacho PREP TIME: 10 mins TOTAL TIME: 15 mins Servings: 4 Ingredients 4 cups diced tomatoes (any variety) 1 large bell pepper (we used green) 1/4 sweet onion 1 large or 2 small cucumbers 2 cloves garlic 1 inch jalapeño pepper 1 Tbsp extra virgin olive oil 2 tsp balsamic vinegar 1/2 tsp sea salt 1/3 tsp cracked black pepper Optional garnish: fresh basil Rough chop onion, garlic, bell pepper, tomatoes, cucumber, and jalapeño pepper. Start by adding the onion, garlic, and jalapeño to a food processor. Pulse until minced. Add the bell pepper and pulse until finely chopped. Next add cucumber and tomatoes and do the same. By adding each component of the soup one at a time to the food processor you are able to create a variety of textures in your finished product - if you were to add all the ingredients to the food processor at the same time you would end up with a pureed vegetable soup. For this recipe, we prefer a textured gazpacho. Once all vegetables are chopped to preferred texture mix in olive oil, balsamic vinegar, sea salt and cracked black pepper. Garnish as you like and serve finished gazpacho at room temperature. It can also be stored in the fridge for up to five days but make sure to bring gazpacho to room temperature prior to serving. Also note that leftover gazpacho may thicken in the fridge, you can add a little water and extra sprinkle of salt prior to serving. So get those local August tomatoes wherever you can, while you can. Cherish these recipes and fresh tomato memories to help get you through until next tomato season.
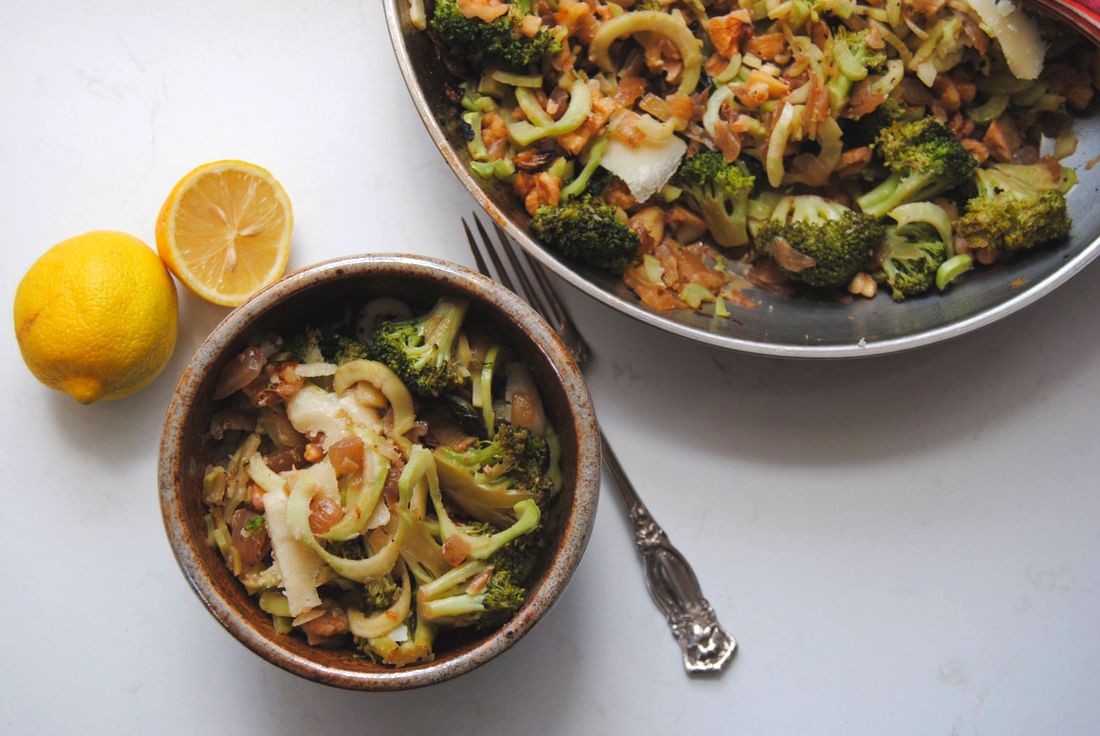
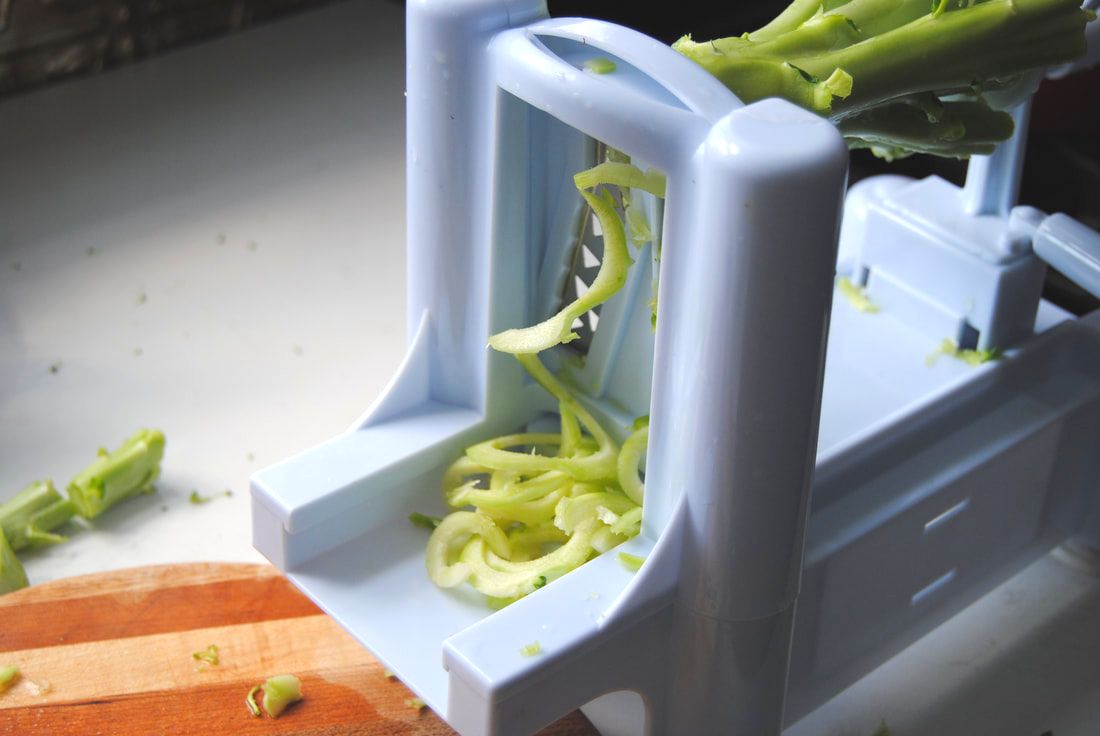
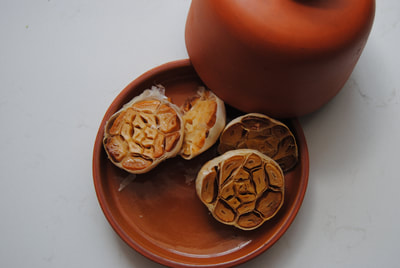
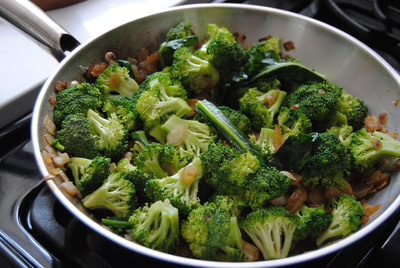
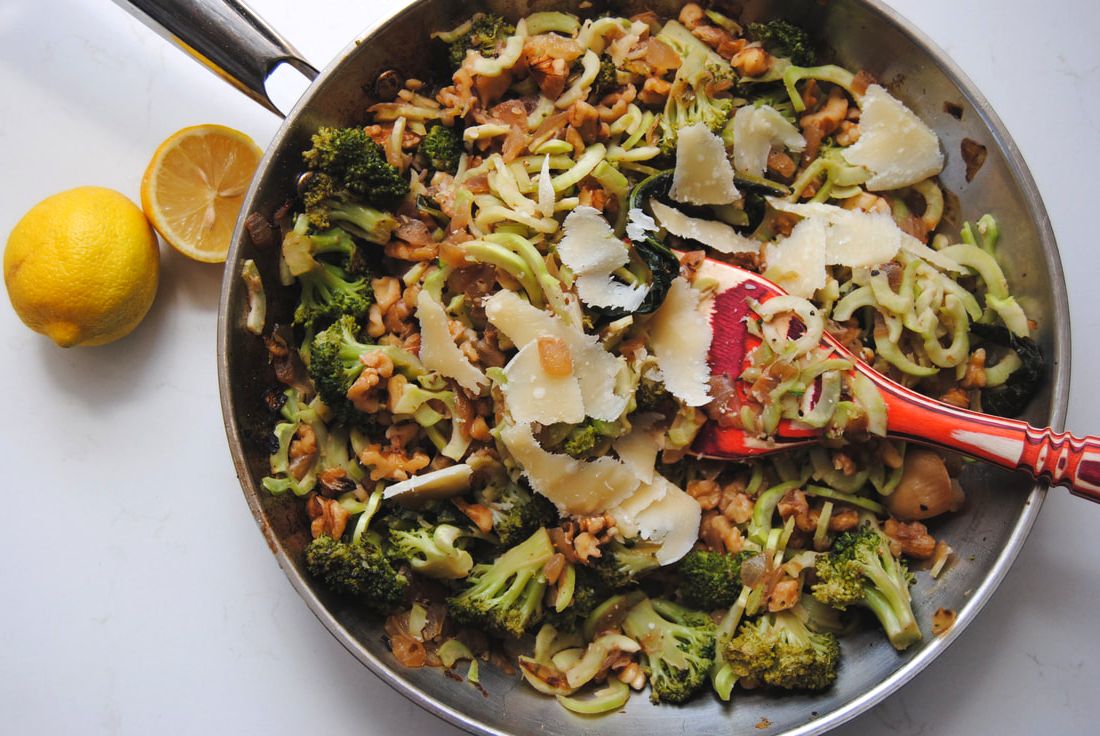
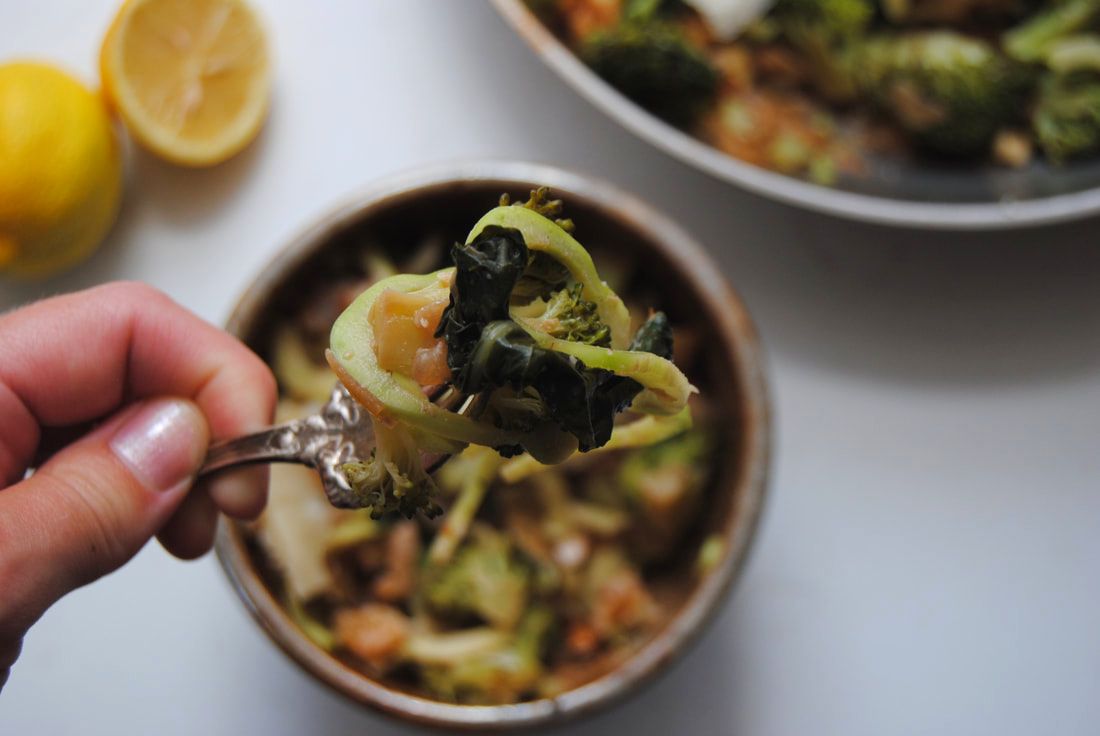
Enjoy, Jess and Cecelia Hey there friends! You know we couldn't let a summer season pass us by without pulling out our spiralizer. The summer is the perfect time to experiment with alternate and lighter "noodle" options. We were inspired by broccoli this summer and the idea of using the entire plant - and boy we did! A little less common than the famous zucchini noodle (previous post here) though just as good. So get out your spiralizer that may or may not have been hiding away in your cupboard and join us! For this recipe we used ALL of the fresh, organic broccoli that we purchased at our local farmers market. Even more of a plus if you are purchasing broccoli by the pound - you are paying for that stalk so use it! The stalks we spiralized into broccoli noodles (boodles?) with success, though it was slightly trickier than spiralizing zucchini. We looked for broccoli with large, wide stalks to maximize the boodle outcome. If you have a spiralizer with multiple settings, we found the boodles to be good at any thickness though we used the larger noddle setting. The boodles did tend to break into smaller pieces unlike zucchini noodles which can get very long without breaking. This was due to variations in shape of the broccoli stalk that is different than a zucchini. The broccoli florets we chopped and cooked as usual though we also used the small leaves that can be found nestled between the florets. The leaves are small and tender, cook down well, and taste very similar to dark leafy greens. So no need to create broccoli waste again! The whole plant can be eaten and enjoyed with this recipe. Broccoli Florets, Leaves, and Noodles with Walnuts and Roasted Garlic PREP TIME: 45 minutes TOTAL TIME: 50 minutes Servings: 4 Ingredients Roasted garlic 1 head garlic 1 Tbsp olive oil Pasta 2 stalks of broccoli with florets and leaves 1 medium yellow onion, diced 1 head roasted garlic cloves 1 cup roasted walnut pieces 2 Tbsp olive oil 1/4 cup dry white wine 1/4-1/2 cup water 1-2 oz Parmesan cheese, shaved (or other salty hard cheese) Juice of 1 lemon Salt and pepper to taste To roast garlic, preheat oven to 350 degrees. Slice garlic in half and drizzle with 1-2 tsp olive oil then place in a garlic roaster (or loosely wrapped in tinfoil) and roast for 45 minutes. Wash broccoli and cut florets and leaves from the stalks and set aside. Try to cut high on the stalk to preserve as much stalk as possible for spiralizing. Use a spiralizer with the medium noodle attachment to make broccoli "noodles" with the broccoli stalks then set aside. In a medium-large sauté pan add 2 Tbsp olive oil and diced onion and sauté for 20-25 minutes or until the onion is golden. Add broccoli florets, broccoli leaves, and peeled roasted garlic cloves to the pan along with 1/4 cup dry white wine and 1/4 cup water. Place a lid over the pan, reduced to a simmer, and cook for 5-7 minutes or until broccoli is tender. Remove from heat and add broccoli "noodles", roasted walnuts, shaved Parmesan cheese, and lemon juice and sprinkle with salt and pepper to taste. Stir to combine all flavors then serve immediately. *This dish does change color as it sits (lemon juice reacting with chlorophyll in the broccoli - food science!), so for the best texture and presentation we recommend eating this noodle dish right away! That's all there is to it. Grab a couple stalks of broccoli and a few simple ingredients and you have a whole dish! This recipe has a great mix of texture from the different forms of broccoli - crunchy boodles and softer florets - and a unique array of flavors from earthy broccoli leaves to sweet caramelized onions and roasted garlic. Your summer dinner solution is here.
Enjoy, Jess and Cecelia |
AuthorsJess and Cecelia welcome you to our kitchen. We are fun-loving and passionate foodies working to make the world a healthier, happier place one plant based recipe at a time. Categories
All
Archives
December 2018
|

