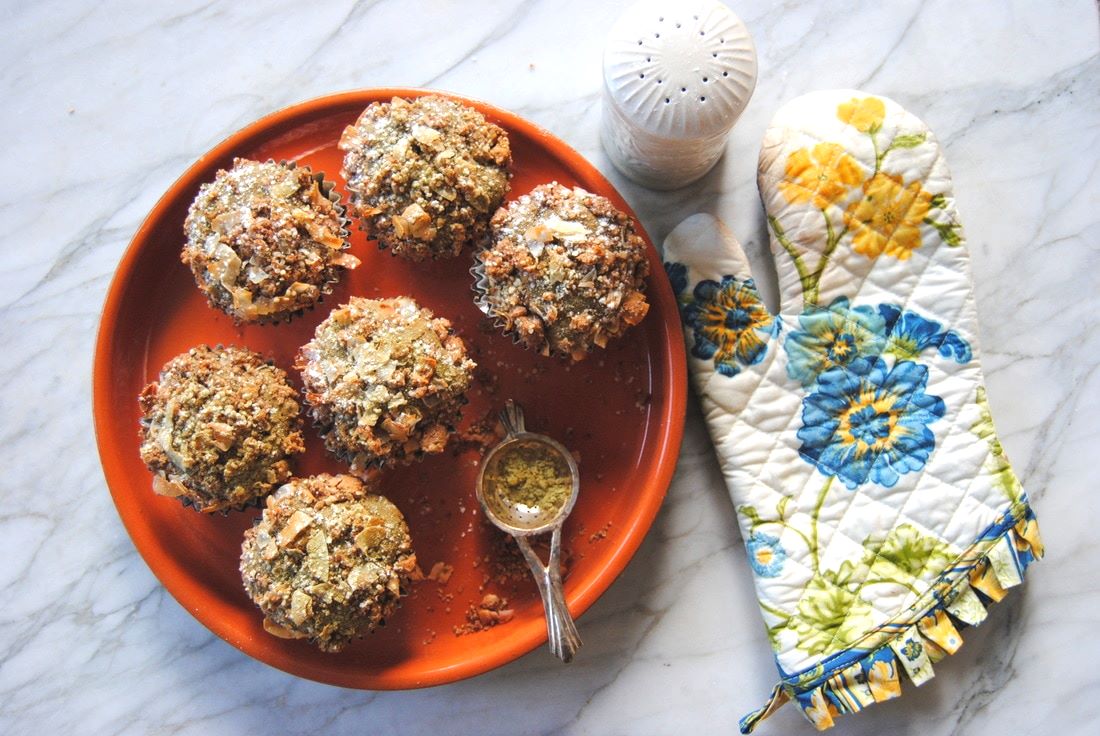
 For you tea lovers out there, this post is for you. We've got a recipe to enjoy tea (green tea powder to be exact) in muffin form and with hot or iced tea on the side if you like! Though any tea can be adapted to culinary uses, one of our favorites to experiment with is matcha powder. The bright color and flavor profile are just so unique and fun - we hope you think so too once you learn more. Read on! 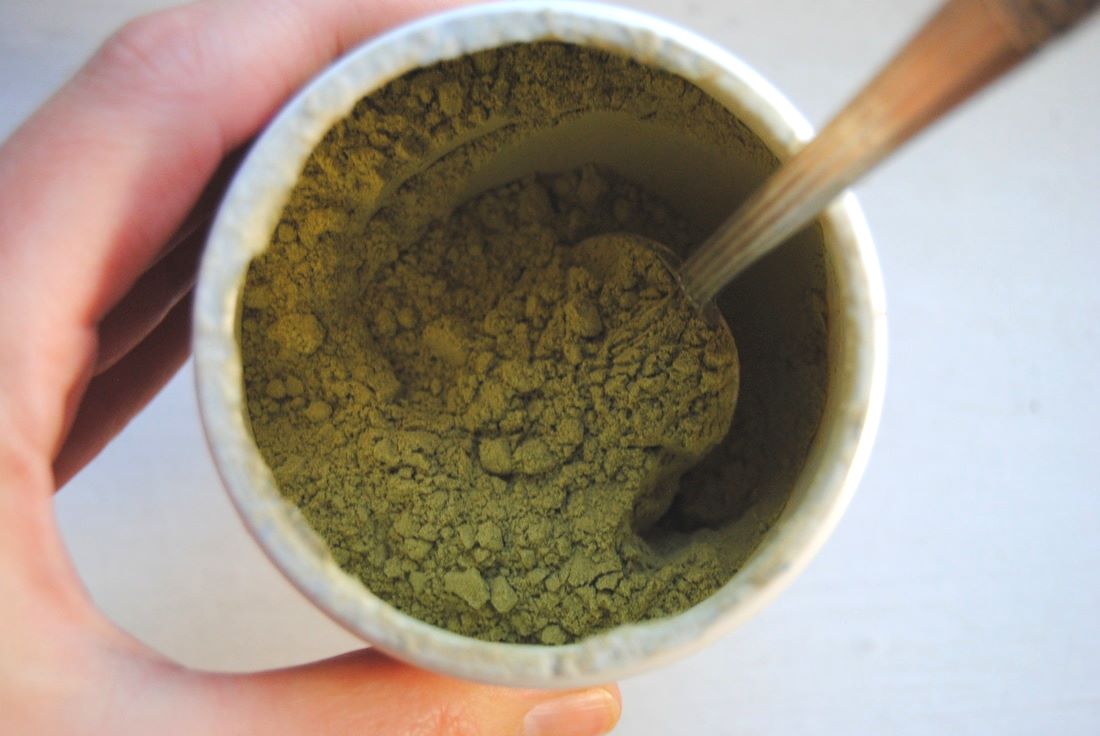 A few years ago (boy time flies!) we introduced matcha with this post. Take a look back for the fun facts we shared then. Now matcha is back but in a much different recipe. Though matcha is powdered green tea leaves and perfect for making tea beverages, it can also be incorporated into baked goods for an interesting twist! Some matcha powder is sweetened and can provide sweetness to your recipe and all is green and can bring an interesting pop of color if used in the right amounts. For the color to really show, enough matcha powder needs to be used and combined with other lighter colored ingredients so as not to overshine the light green matcha powder. Flavor wise, we think matcha has a fresh, bright, somewhat grassy taste (but in a really good way, promise!). If you are skeptical then you'll just have to try for yourself, matcha has been somewhat of a food craze lately and becoming more and more available in beverages and food products. And remember, when consuming matcha you are getting the benefits of green tea (think antioxidants) in a higher dose than traditional steeped tea because you are consuming the whole tea leaf. Finally, a note on caffeine content which is much less in matcha than coffee though matcha is considered a mild stimulant. Caffeine in the form of whole tea leaves is believed to metabolize slower and provide more sustained energy as compared to the typical jolt and crash some may experience with highly caffeinated coffee beverages. But today we are making matcha muffins and it's time to get to it! 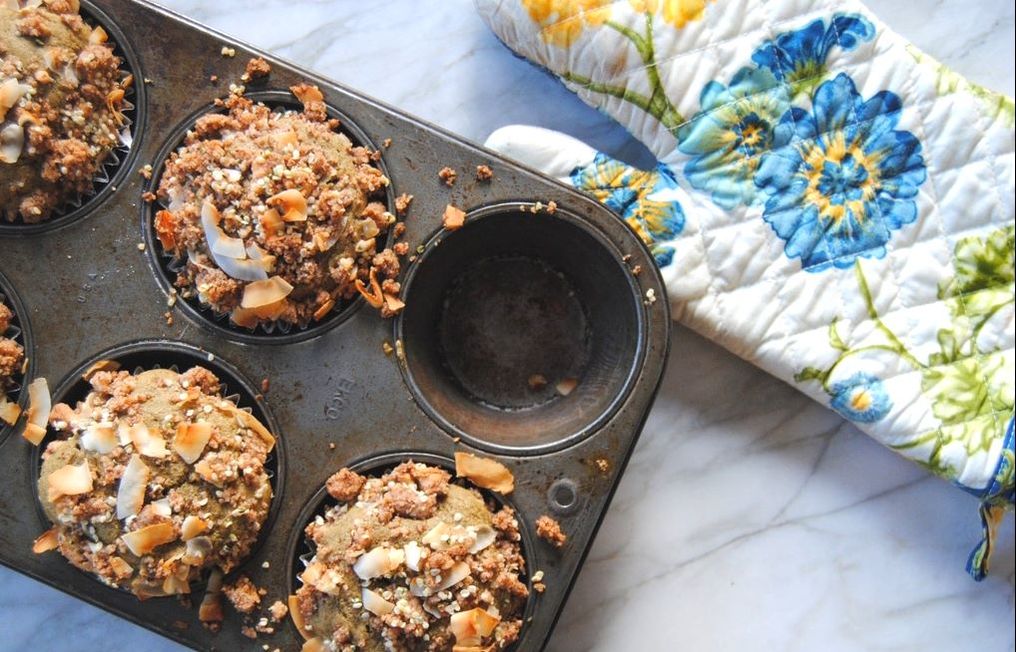 Coconut Crumb Matcha Muffins PREP TIME: 20 minutes TOTAL TIME: 55-60 minutes Servings: 6 large muffins Ingredients Crumb Topping 1/4 cup whole wheat flour 1/3 cup coconut sugar 3 Tbsp coconut butter, melted 1 Tbsp coconut oil, melted 3 Tbsp unsweetened coconut flakes 3 Tbsp hemp seeds 1/8 tsp sea salt 2-3 tsp matcha powder, sprinkled over the top of each muffin once cooled 2-3 tsp powdered sugar, sprinkled over the top of each muffin once cooled Muffin Batter 1/3 cup plain Greek yogurt + 3 Tbsp 1 large egg 1 large egg yolk 2 tsp pure vanilla extract 1 cup whole wheat flour 1/2 cup cane sugar 3 Tbsp unsweetened matcha powder 1/2 tsp baking soda 1/2 tsp baking powder 1/4 tsp salt 6 Tbsp coconut oil, softened Preheat oven to 350 degrees. Line a large muffin pan with 6 large liners, or lightly oil with coconut oil to prevent muffins from sticking to the pan. To make the crumb topping, melt coconut butter and coconut oil in a microwave safe bowl. Add flour, coconut sugar, coconut flakes, hemp seeds and sea salt to the melted butter and oil then stir to combine. Place mixture in the fridge to cool while you prepare the muffin batter. To make the muffin batter add the yogurt, egg, egg yolk, and vanilla in a bowl and whisk to combine. Using a standing mixer fitted with a paddle attachment, combine the flour, sugar, matcha powder, baking soda, baking powder, and salt. Add softened coconut oil and half of the yogurt to the standing mixer and mix on medium speed for about 20 seconds. Add the remaining yogurt and continue to mix for 10 seconds. Stop the mixer and scrap down the sides of the bowl then continue to mix for an additional 10 seconds to fully incorporate all ingredients. Remove crumb topping from the fridge and use your hands to gently break mixture into big crumbs. Fill each muffin liner 2/3 full with batter then sprinkle crumb mixture over the top of each muffin. Continue this process until all 6 muffin liners have been filled. Place pan in a preheated oven and bake for 35-40 minutes or until a toothpick comes out clean. Allow muffins to cool to room temperature then sprinkle with powdered sugar and additional matcha powder. These muffins are best served the same day, however will keep at room temperature for an additional day or two. 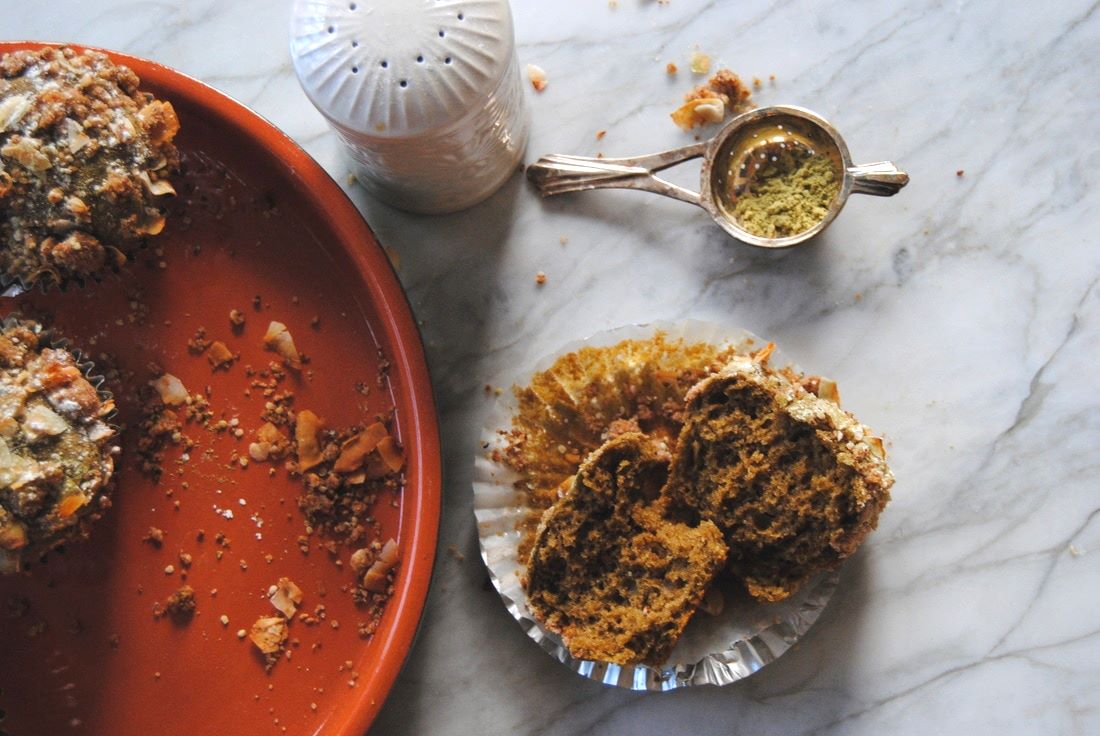 These muffins are picture perfect and taste even better than they look. They have the perfect cake-like texture with a light sweetness and gentle matcha flavor. The crumb topping adds some additional sweetness, a little salt, and hints of coconut. All together, a unique blend of colors and flavors to excite your eyes and palate. Remember, this recipe is for jumbo muffins that can easily be split and/or shared with friends and family. Now everyone can have their tea, and eat it too! Enjoy, Jess and Cecelia 
2 Comments
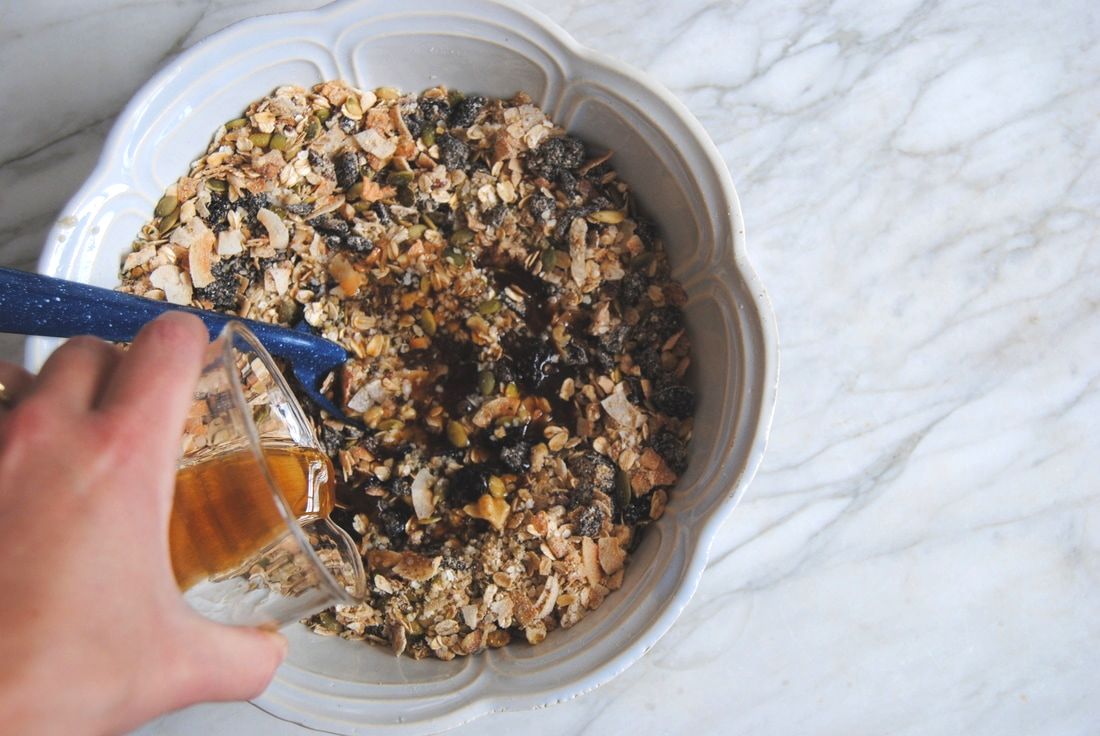
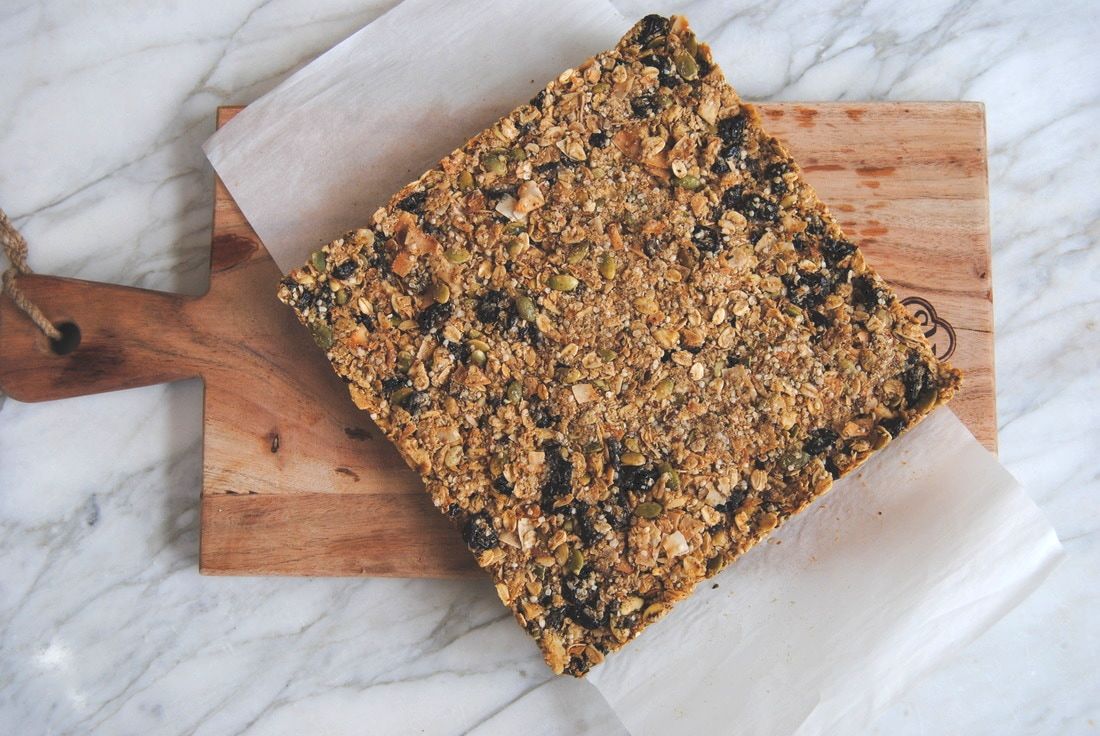
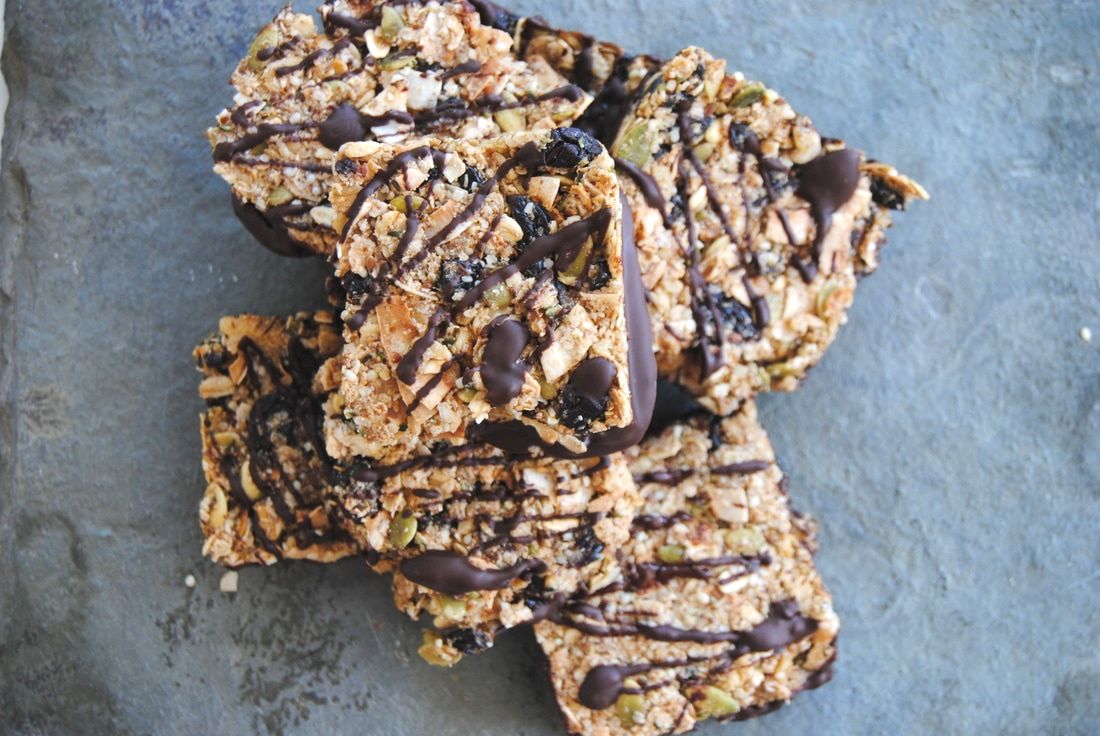 Hi friends! We've got a recipe for granola bars to clear out your pantry this week for some late Spring cleaning. These bars are packed full of SO much goodness and the ingredients are easily adaptable to what you have in your pantry. Of course we had to try one new food product - quinoa flakes - though this recipe will definitely work without it! We found quinoa flakes similar to instant oatmeal but with a mild quinoa flavor. They don't provide a different nutritional benefit from standard quinoa but rather, another interesting way to include this ancient grain in your diet. Ready?  Dark Chocolate Cherry Quinoa Granola Bars PREP TIME: 25 minutes TOTAL TIME: 1 hour 45 minutes Servings: 9 large or 12 small granola bars Ingredients 1 cup old-fashioned oatmeal 1 cup quinoa flakes (instant unflavored oatmeal would also work) 1/2 cup raw walnuts, chopped (or raw chopped nut of your choice) 1/2 cup raw pepitas (raw sunflower seeds would also work) 1 cup unsweetened coconut flakes 1/4 cup ground flax seeds 1/4 cup oatmeal flour (wheat bran would also work) 1/8 cup hemp seeds + 1 Tbsp reserved for the top 2/3 cup pure maple syrup 3 Tbsp coconut oil, melted 1 1/2 teaspoons pure vanilla extract 1/4 teaspoon kosher salt 1 cup dried cherries, chopped (or dried fruit of your choice) 6 oz dark chocolate, shaved + 2 tsp coconut oil Preheat oven to 350 degrees. Line a 9x9" pan with parchment paper allowing two ends to overhang for easy removal. Mix together the oatmeal, quinoa, walnuts, pepitas, and coconut on a large sheet pan and bake in preheated oven for 6-8 minutes, stirring at least once for even toasting. Remove from the oven then add mix to a large bowl. Stir in the ground flax seeds, oatmeal flour, hemp seeds, sea salt and dried cherries. In a separate bowl add maple syrup, vanilla extract, and melted coconut oil and stir to combine. Pour liquid ingredients over dry and stir until well coated. Add granola mixture to a parchment lined pan. Use your hands and a small piece of parchment paper to press mixture firmly into the pan to create compact bars. Sprinkle remaining 1 Tbsp hemp seeds on top and place in preheated oven to bake for 35 minutes or until golden. Allow to fully cool prior to cutting (about 30 minutes). If you cannot wait to dig in, and cut the bars too soon, you may end up with uneven shaped/more crumbly bars...they will still taste the same but may not be as uniform in size and shape! Once fully cooled, cut into desired bar size (we used a 9"x9" pan which made 9 large bars). In a microwave safe bowl combine the shaved chocolate with 2 tsp coconut oil and melt the mixture in the microwave in 10 second increments (making sure to stir between each 10 seconds to avoid burning the chocolate). Dip each bar into the chocolate half way then place on a wax paper lined baking sheet. Allow bars to cool in the fridge for 15 minutes. Store bars in an air tight container in the fridge for up to 5 days. Well friends, that's it. By this point your pantry should be clean and your belly full of nutrient packed ingredients. Depending on what you choose to use the flavor can vary though our bars were a perfect mix of tart and sweet from the cherries and chocolate with an undertone of toastiness from the toasted grains, nuts/seeds, and coconut. Enjoy the goodness, Jess and Cecelia 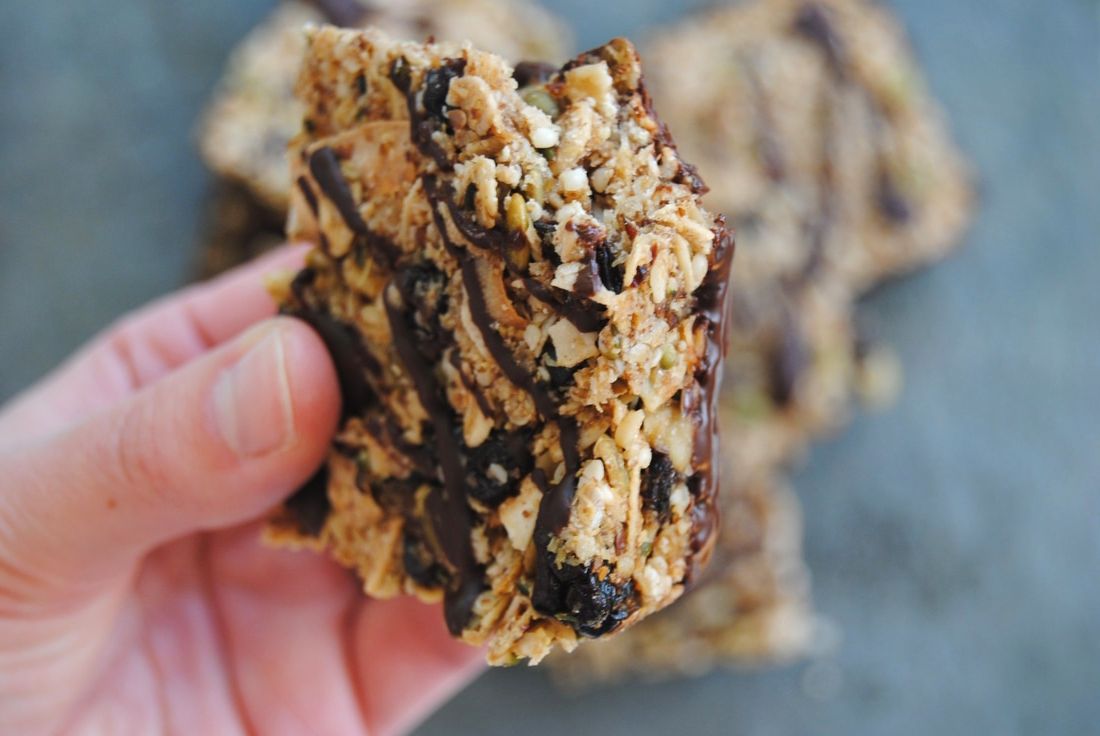  As you guys know, here at TGBK we primarily focus on nutritious food recipes but love a good adult drink now and again. But we think that adult beverages can provide nutritional benefit too - believe it or not! This week we created a drink inspired by a Cosmopolitan (Sex and the City flashbacks anyone?) but with a very important ingredient swap. We switched out the traditional juice ingredient for a flavored kombucha. And if you remember from our previous kombucha post (here), kombucha is packed full of gut friendly probiotics to help support healthy digestion and immunity. So while enjoying your next hard drink, why not get your daily dose of probiotics while you're at it? This recipe can also be made as a "mocktail" without liquor so there are tons of ways to indulge! If this all sounds good to you, let's get to the recipes.  Kombucha Cocktail or Mocktail PREP TIME: 5 minutes (+ 48 hours to ferment kombucha with juice) TOTAL TIME: 5 minutes (+ 48 hours to ferment kombucha with juice) Servings: 2 Ingredients 4 oz cherry kombucha (homemade - instructions below or store bought) 2 oz vodka (for mocktail omit and add additional 2 oz cherry kombucha) 2 oz cherry juice 2 Tbsp simple syrup 2 Tbsp fresh lime juice 2 thin lime slices for garnish Ice Flavored Kombucha To make basic kombucha follow our directions here. Once basic kombucha is prepared, strain the kombucha from the SCOBY making sure to reserve at least 1/2 cup of basic kombucha liquid for your next batch. Fill a glass bottle/bottles 2/3 of the way full with basic kombucha and fill remaining 1/3 of the bottle/bottles with fruit juice of choice (we used tart cherry juice from Door County for this recipe) leaving 1-2 inches of space at the top of the jar. Place a tight fitting lid on each bottle and allow to sit out at room temperature to ferment for 48 hours. Keep in mind it is important to use a juice that contains sugar. Yeast in the kombucha will feed off of the sugar in the juice and continue to ferment the kombucha. The longer you let the kombucha ferment with the juice, the less sweet and the more acidic the final product will taste. This fermentation time may also create more carbonation in your final kombucha. A good rule of thumb is to taste the kombucha each day until it's to your liking then store in the fridge until ready to drink. If you do not have the time to make homemade kombucha but you would like to try out this recipe, store bought cherry, berry, or cranberry kombucha would also work well. Simple Syrup To make simple syrup combine equal parts sugar and water in a small sauce pan. Simmer mixture on low, stirring often until the sugar has dissolved and the mixture has thicken up into a syrup like texture, ~3-5 minutes. Allow to cool then store in a glass jar with a tight fitting lid. Simple syrup can be stored in the fridge for up to 1 month. Cocktail/Mocktail Add kombucha, vodka (if using), cherry juice, simple syrup, lime juice, and ice to a cocktail shaker and shake mixture well. Strain cocktail into 2 martini glasses, add a lime slice to each glass for garnish and serve cold.  This cocktail/mocktail has a nice amount of tartness from the cherry juice and fermented kombucha and easily disguises that this drink may contain vodka - so be careful! We love the unique taste of this adult beverage and use for kombucha and hope you do too. Cheers! Jess and Cecelia  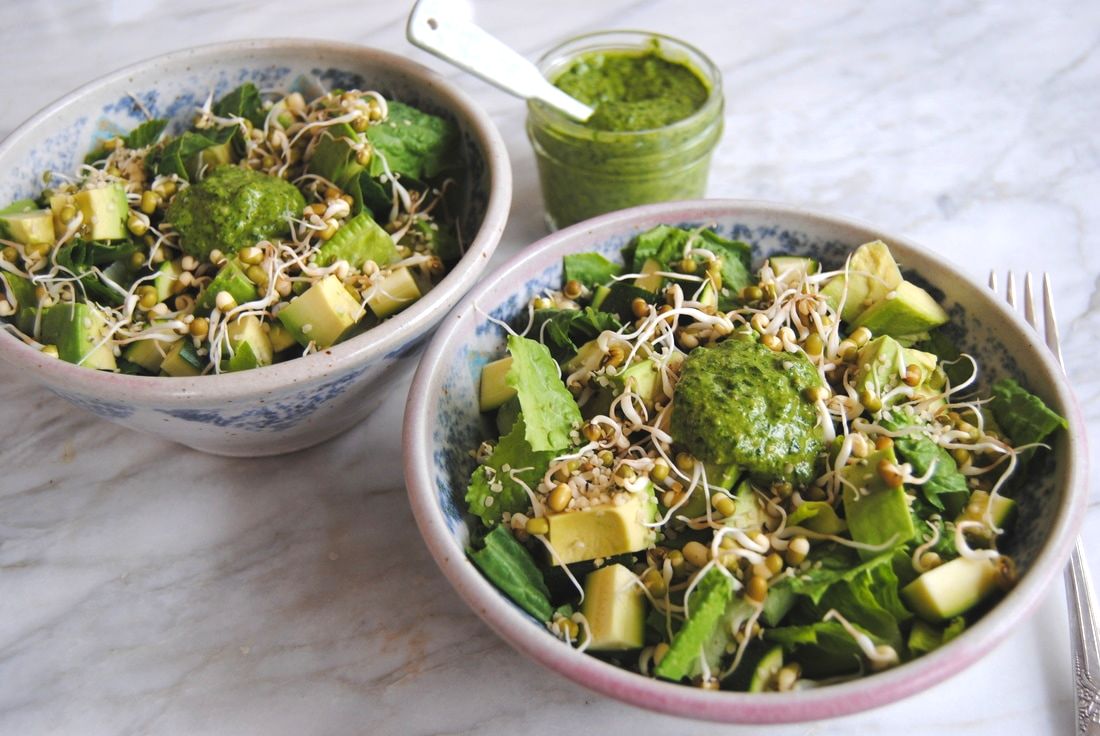 Ever wondered what those "sprouts" that you are sometimes offered on sandwiches or salads really are and why they are so darn good? Well it you have, you're in the right place! This week is dedicated to all things sprouts including how to instructions and a spring inspired, sprout containing recipe. Believe it or not, sprouting at home is very, very simple and is a great use for dried beans, lentils, grains, nuts, and seeds. We find it much easier than cooking dried beans as sprouting achieves the same as cooking - it makes dried beans edible but in a much different way than the typical warm cooking method. The taste of sprouts is fresh and unique and the nutrient value is actually improved with sprouting versus standard cooking methods. Sounds too goo to be true doesn't it? 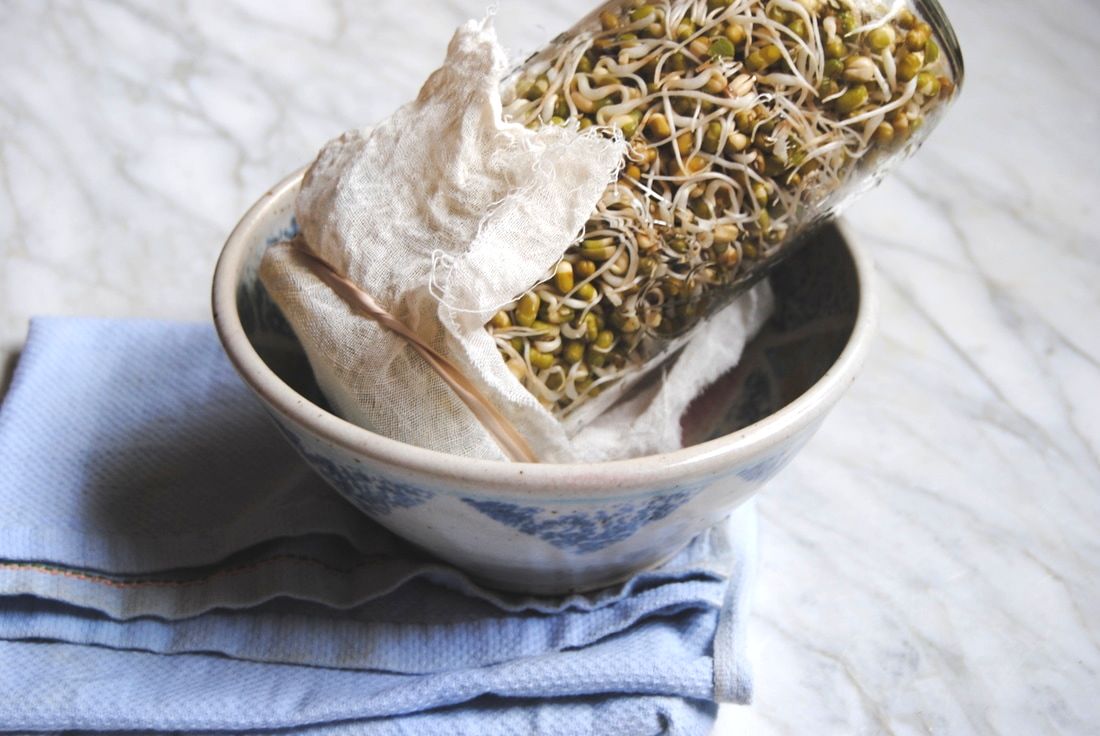 As mentioned, dried beans, grains, nuts and seeds can all be sprouted. Sprouting is essentially the process of initiating plant life but stopping at the sprout phase before a new plant is formed. This week we sprouted beans but the benefits and process discussed is applicable across different sprout varieties. Though beans are a great source of vegetarian protein they unfortunately get a bad reputation for being tough on digestion - especially for people who don't eat beans often. This is because beans contain carbohydrates, specifically oligosaccharides, that can cause increased intestinal gas in some people. Beans that have been sprouted are significantly lower in oligosaccharides which means less gas formation in the gut (yay!). Beans that have been sprouted are also easier for your body to digest due to the enzyme action that takes place during the sprouting process - starch is broken down into simple sugars, proteins are broken down into amino acids, and fats are broken down into fatty acids. Essentially, sprouting does the hard digestive work for you so your body can benefit from the nutrients without the extra work - sounds great right? Sprouting also makes more nutrients available to your body that wouldn't be if some of the bean fibers weren't pre-digested. So especially if you're eating beans as a large nutrient and protein source in the diet, sprouting is important to maximize their nutritional benefit and minimize your digestive effort! Just be sure to follow safe food handling practices and work with clean hands in a clean space as the sprouting process can harbor growth of bacteria if exposed. So are you ready to get sprouting?  Basic Sprouts PREP TIME: 2 minutes TOTAL TIME: 2-3 days sprouting time Servings: 1 cup sprouts Ingredients/Supplies 1/4 cup dried beans of choice (mung beans pictured above) Large glass jar and bowl Cheese cloth and rubber band Start by soaking 1/4 cup mung beans with room temperature water in a glass jar with cheese cloth or a mesh topping for 10-12 hours. Keep in mind you want a jar that is large enough for your beans to expand and sprout. A good rule is that the jar should be large enough for the beans to expand 8 times their original size. Following the soak, drain the soaking water and rinse the beans well then return the beans to the jar and cover with cheese cloth or mesh topping to allow air to circulate. Keep the jar tilted upside down in a bowl in a spot where there will not be large temperature fluctuations (cold drafts or hot humid breezes). Rinse and drain beans in the jar 3 times per day (add cool water, swirl, and drain) and make sure to angle the jar on its side to allow excess water to drain off while the beans are working hard to become a sprout. If excess water sits in the jar while the beans are germinating this can lead to sour, spoiled sprouts. Repeat the rinsing and draining process for 2-3 days or until the beans have transformed into the sprout length of your liking. Sprouts can be eaten right away, or stored in the fridge in an air tight container for 5-7 days. Super Green Sprouted Salad PREP TIME: 10 minutes + 2 days to sprout mung beans TOTAL TIME: 10 minutes + 2 days to sprout mung beans Servings: 4 salads Ingredients Salad 2 heads romaine lettuce 4 baby zucchini, diced (1/2" by 1/2") 1 avocado, peeled, pitted, and diced 1 cup sprouted beans (we used sprouted mung beans with recipe above though store bought would also work) 4 tsp hemp seeds Cilantro Pesto 1 bunch cilantro, de-stemmed 1/2 cup extra virgin olive oil Juice of 1/2 lemon, ~2 Tbsp 3 Tbsp walnuts 1 Tbsp hemp seeds 1/2 tsp sea salt 1/4 tsp pepper To make the pesto, combine the cilantro, olive oil, lemon juice, walnuts, hemp seeds, salt, and pepper in a food processor or blender and process on high until a smooth dressing is formed. Store in a glass jar fitted with a lid and place in the fridge. This dressing can be made a day in advance and kept in the fridge for later use. To prepare the salad, chop, wash, and dry romaine lettuce then place in a large bowl. Add diced baby zucchini, diced avocado, sprouted mung beans, and hemp seeds to the bowl. Divide salad into 4 servings then add cilantro pesto dressing to the top of each salad. Serve and enjoy! *Note, if you do not plan to serve all four salads at once keep salad ingredients in an air tight container in the fridge and wait to add dressing until just prior to serving. To keep the avocado from turning brown, toss in lemon juice prior to saving. 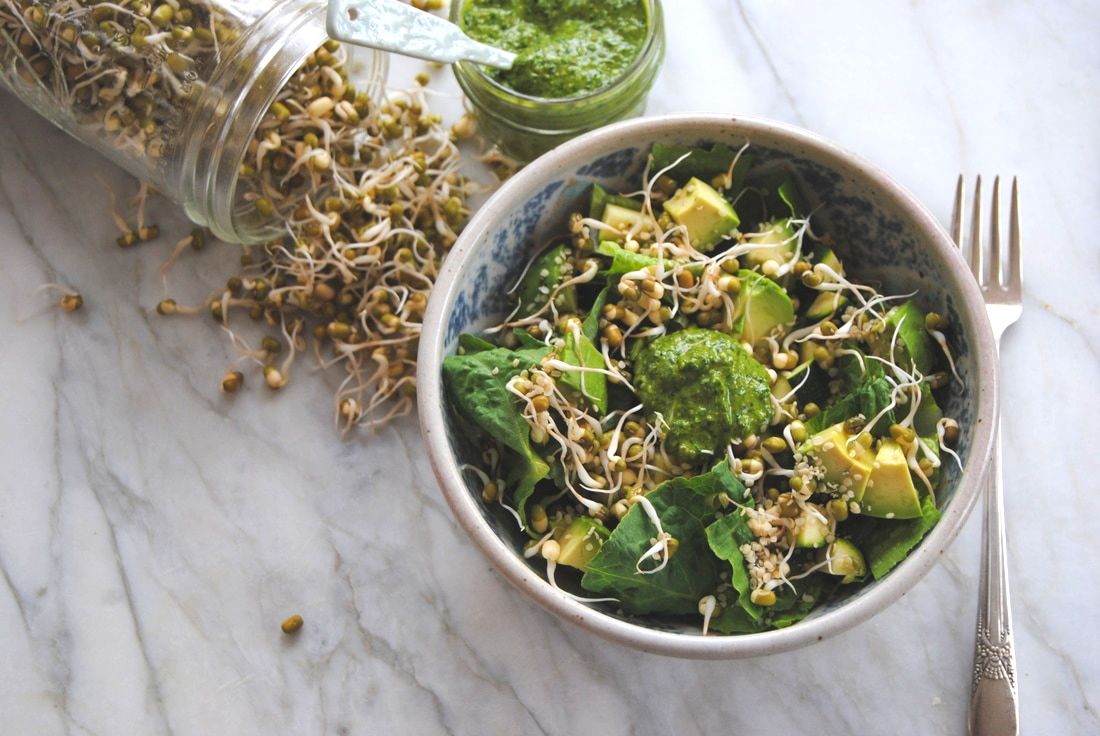 Weren't we right? Sprouting is so simple and such a fun use for the dried beans sitting in your pantry that you bought and then never cooked from scratch because, well, canned is just easier! We hope this post starts you on a lifelong sprouting journey that you, your gut, and your body will enjoy. Oh, and this salad - the perfect mix of the freshest green foods to awaken your Spring palate. Best enjoyed with a warm piece of crusty bread, or at least we think so. Enjoy and have fun! Jess and Cecelia 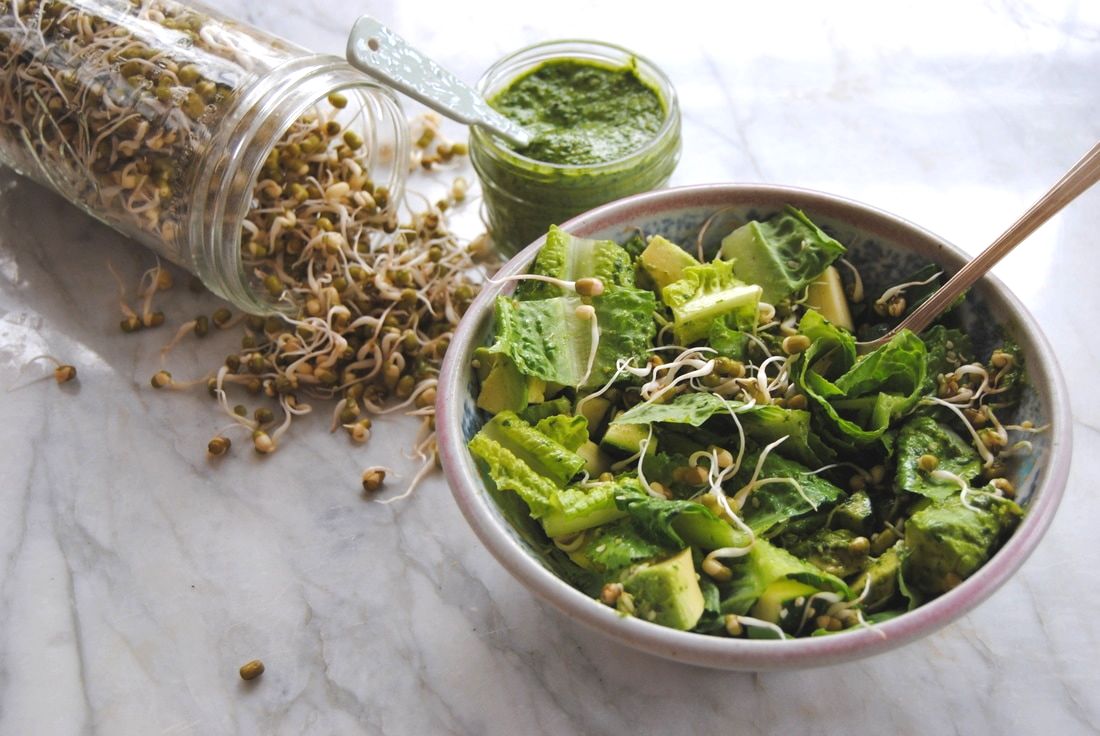 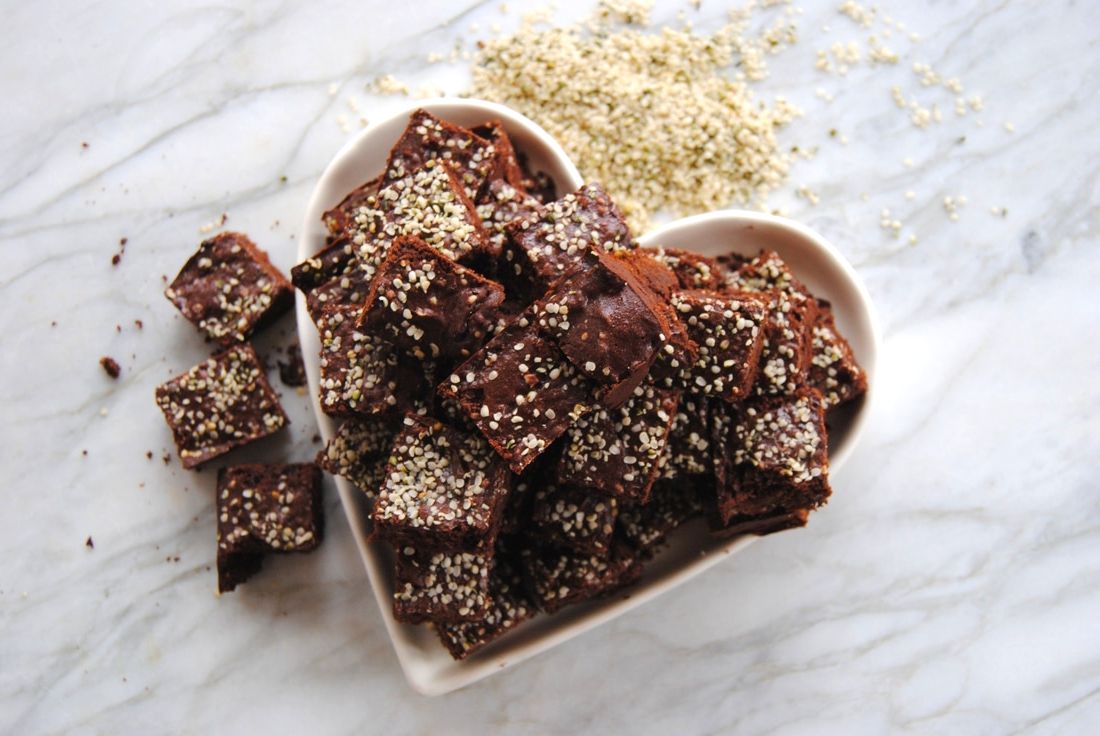 We've been SO busy and have packing on the brain as Cecelia is in the process of moving into her new home in Chicago. Besides the busyness, packing and moving require energy and strength (she's already starting to question the decision of a second floor walk up, ha!). But jokes and moving grumbles aside we decided to focus on protein this week and found a way to pack tons of protein into a beloved dessert - brownies! These bites are chocolatey and delicious and contain a good dose of protein from a variety of sources - one being hemp butter. Yes, hemp butter!  So now you're probably thinking "what is hemp butter and why have I never heard about it?" Well, hemp butter is just like any other nut/seed butters in that it is a blended version of hemp seeds. However, it is different than other nut/seed butters because the color, taste, and texture change significantly, in our opinion, once the hemp seeds are blended. As you can see from the picture above, hemp seed butter is a dull green which may not look all that appetizing. The hemp seed flavor is also enhanced in the butter which has a stronger flavor than the plain hemp seeds and the texture becomes quite thick. These changes may make hemp seed butter less appealing and underutilized in the kitchen - probably why you've never heard about it! We found that adding hemp butter to recipes for additional protein and nutrient value was a great use of this underused product. But if you find that you love hemp butter plain on toast - go for it! 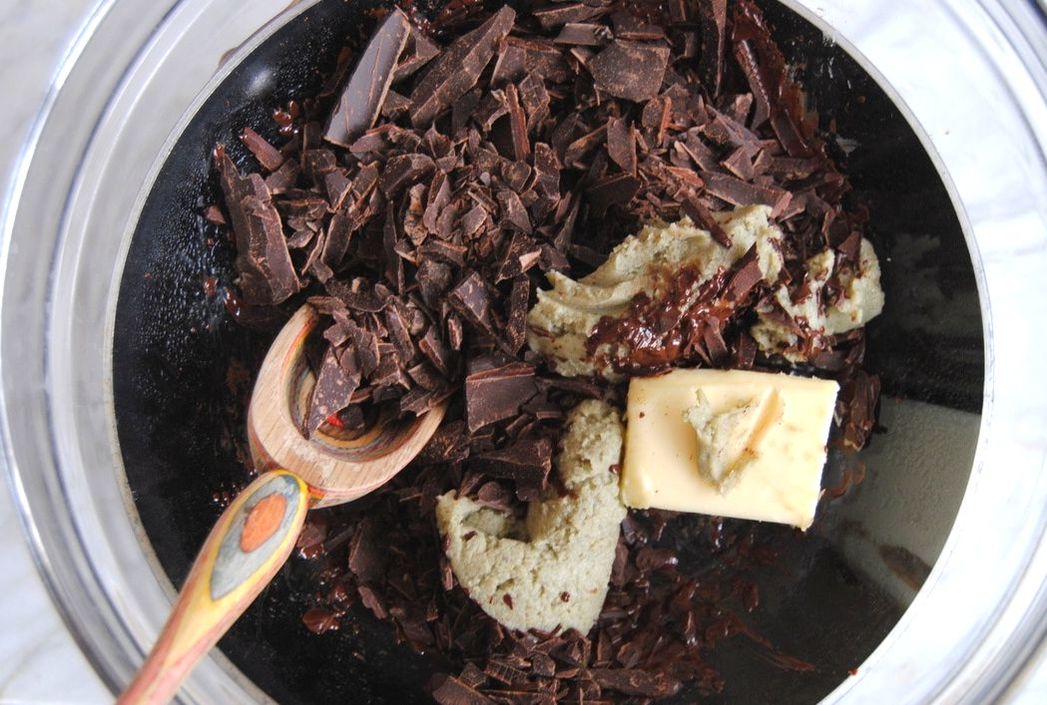 Hemp Protein Brownie Bites PREP TIME: 20 minutes TOTAL TIME: 55 minutes Servings: 26-30 bites Each bite contains ~2.8 grams protein Ingredients 3/4 cup + 1 Tbsp whole wheat flour 3/4 cup + 1 Tbsp coconut sugar 3 Tbsp hemp seed butter (make by blending hemp seeds in a high speed blender or purchase at your local specialty grocer, also available online, here) 3 Tbsp unsalted butter 1/4 cup cacao powder 6 oz coarsely chopped semisweet chocolate + 1/3 cup 60% cacao chocolate shavings 1/4 cup hemp seeds + 1 Tbsp reserved for top 2 eggs 2 tsp pure vanilla extract 1/4 tsp baking powder 1/4 tsp sea salt Preheat oven to 350 degrees. Line an 8"X 8" pan with parchment paper allowing 2 sides to hang over the edges for easy removal. Lightly butter the bottom and sides of the prepared pan with a dab of unsalted butter then set aside. Place 3 Tbsp butter, 3 Tbsp hemp seed butter, 6 oz chopped chocolate, and 1/4 cup cacao powder in a double boiler or a heat proof bowl placed over a pan with an inch or two of simmering water. Allow the butters and chocolate to fully melt, stirring often then set aside to slightly cool. Combine the flour, baking soda and sea salt in a separate bowl and whisk to combine. Combine the coconut sugar, eggs, and vanilla in the bowl of stand mixer fitted with the whisk attachment and mix on medium until light in color, about 3-4 minutes. Add the cooled melted butter and chocolate mixture then continue to whisk. Add in the flour mixture and mix until fully incorporated, avoid over mixing the batter. Stir in 1/3 cup chocolate shavings and 1/4 cup hemp seeds into the batter. Pour batter into the prepared pan, sprinkle 1 Tbsp hemp seeds over the top of the batter and place in the oven for 30-35 minutes or until a toothpick comes out clean. Allow brownies to cool for 15 minutes before cutting. Cut into 1" X 1" bites. Store leftover brownie bites in an air tight container at room temperature for 2 days or in the fridge for up to 5 days. 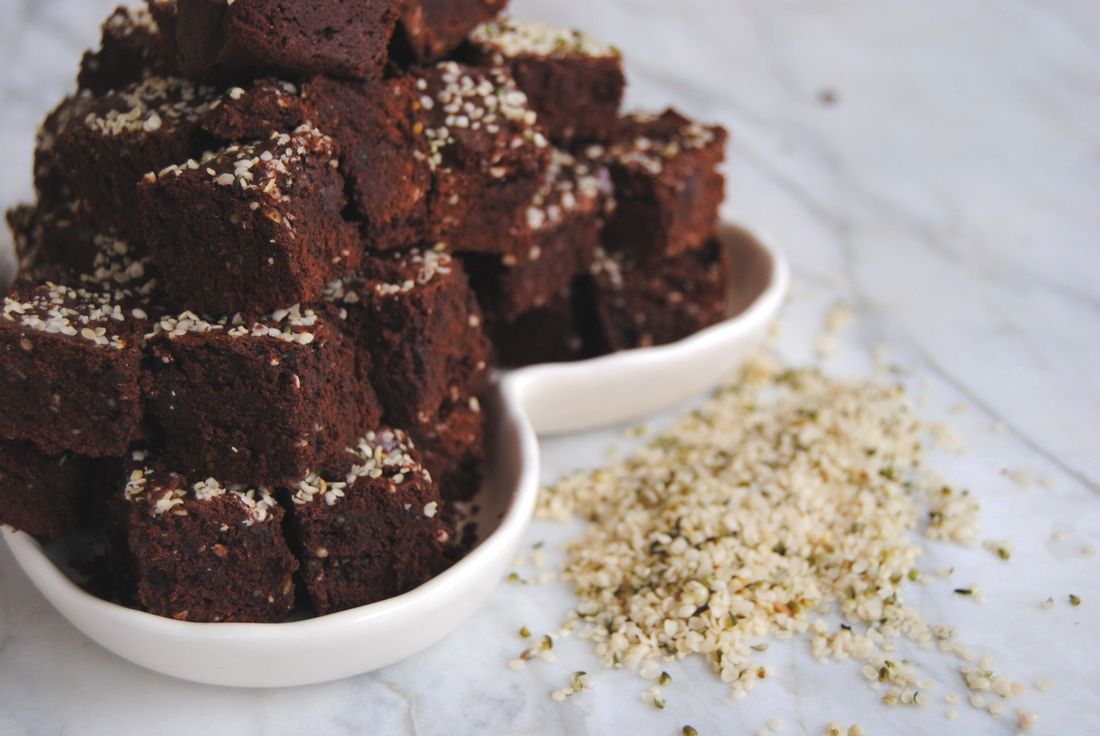 Thoughts? Is your mind blown that there is such a thing as hemp seed butter? Are you excited that you can now make "hemp brownies" that would be appropriate to eat at work (unlike another type of hemp brownie that may come to mind)? We are most excited that we can now ditch processed protein bars and make our own high protein goodies to keep us fueled during Cecelia's move and beyond. Enjoy, Jess and Cecelia 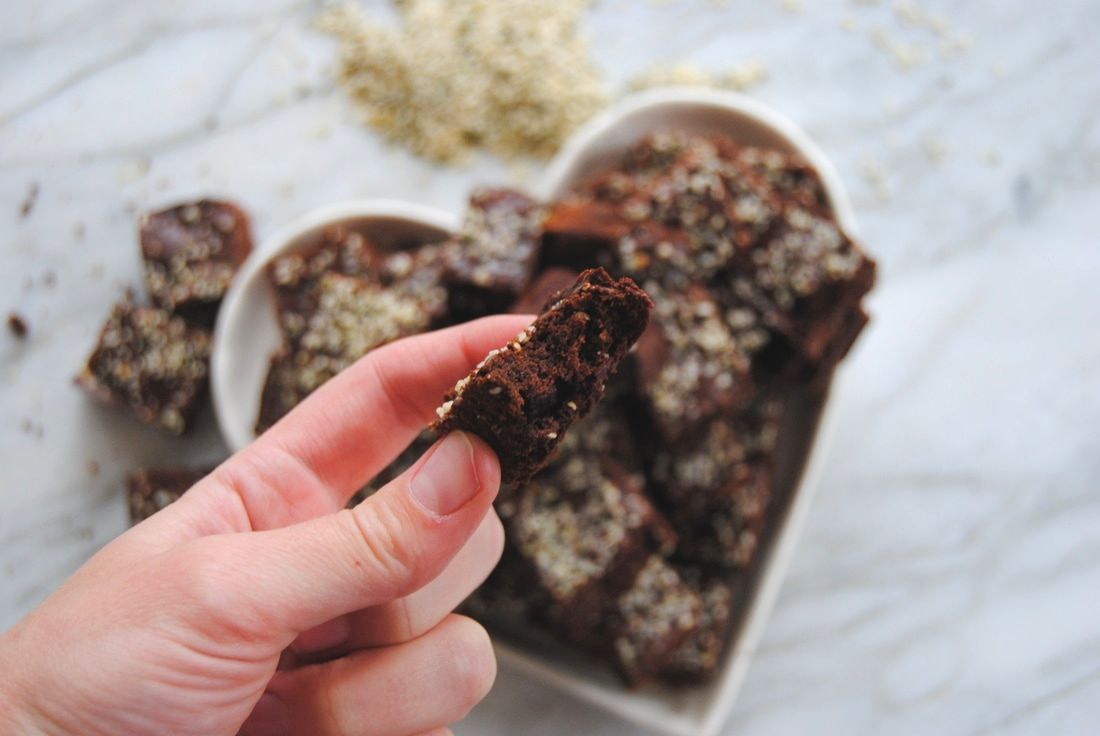 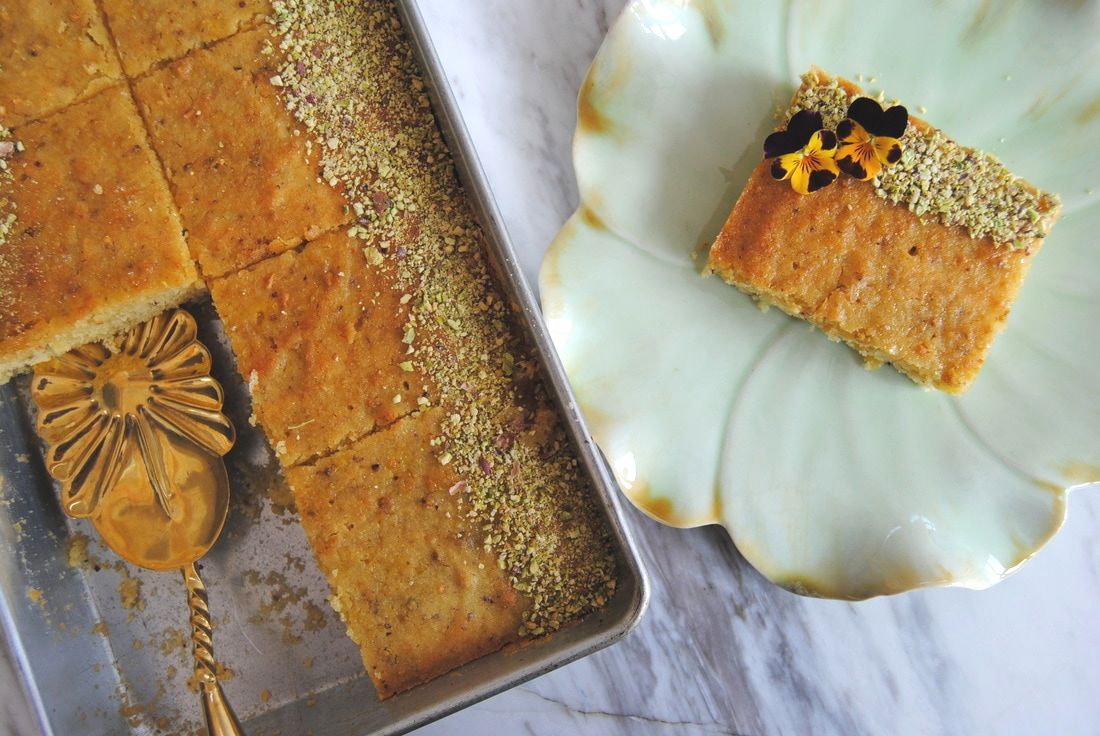 Hey you guys, Mother's Day is quickly approaching and we've got the treat planning under control. This is the cake she'll want for her special day and here's why - there are just so many options! We made a pistachio version of this cake last year (here) and since then have realized how versatile this cake really is. Of the many options, we know you'll either find one your mother will love or create your own amazing variation. We will start with a basic recipe for semolina cake and then help get your creativity going with a few of our favorites... Semolina Cake PREP TIME: 15 mins TOTAL TIME: 50 mins Servings: 10-12 Ingredients Cake 2 cups semolina flour 1 cup cane sugar 10 Tbsp unsalted butter, melted 1 cup plain milk kefir 1/3 cup thick vanilla yogurt; Greek or Icelandic 1 tsp baking powder Syrup 4 Tbsp freshly squeezed orange juice 2 Tbsp light clover honey 1/4 tsp sea salt 1. Preheat oven to 350°. Lightly butter a 9x13" pan and set aside. 2. In a large mixing bowl combine the kefir, yogurt, and sugar then add the semolina flour and baking powder. Stir in the melted butter and mix until just combined. Avoid over mixing the batter. Pour batter into prepared pan and cook in preheated oven for 35 minutes or until a toothpick comes out clean. Once the cake is fully cooked turn the oven to broil and move the cake to a higher rack for 3-5 minutes so that the top becomes a golden brown. Watch carefully the entire time you are broiling to avoid burning the top of the cake. 3. While the cake is baking, prepare the orange syrup. Combine orange juice, honey, and sea salt and mix well. Once the cake comes out of the oven, use a toothpick to carefully poke holes (making sure to reach the bottom of the pan) every one inch across the surface of the cake. The purpose of this is to help the cake absorb the syrup. While the cake is still warm, evenly pour the orange syrup over the top of the cake. OPTIONS 1. Lemon Semolina Cake Ingredients Cake 2 cups semolina flour 1 cup cane sugar 10 Tbsp unsalted butter, melted 1 cup plain milk kefir 1/3 cup thick vanilla yogurt; Greek or Icelandic Zest of one large lemon, ~1 Tbsp 1 tsp baking powder Syrup 4 Tbsp freshly squeezed lemon juice 2 Tbsp light clover honey 1/4 tsp sea salt 1. Preheat oven to 350°. Lightly butter a 9x13" pan and set aside. 2. In a large mixing bowl combine the kefir, yogurt, lemon zest, and sugar then add the semolina flour and baking powder. Stir in the melted butter and mix until just combined. Avoid over mixing the batter. Pour batter into prepared pan and cook in preheated oven for 35 minutes or until a toothpick comes out clean. Once the cake is fully cooked turn the oven to broil and move the cake to a higher rack for 3-5 minutes so that the top becomes a golden brown. Watch carefully the entire time you are broiling to avoid burning the top of the cake. 3. While the cake is baking, prepare the lemon syrup. Combine lemon juice, honey, and sea salt and mix well. Once the cake comes out of the oven, use a toothpick to carefully poke holes (making sure to reach the bottom of the pan) every one inch across the surface of the cake. The purpose of this is to help the cake absorb the syrup. While the cake is still warm, evenly pour the lemon syrup over the top of the cake. 2. Chia & Poppy Seed Semolina Cake Ingredients Cake 2 cups semolina flour 1 cup cane sugar 2 Tbsp chia seeds 1 Tbsp poppy seeds 10 Tbsp unsalted butter, melted 1 cup plain milk kefir 1/3 cup thick vanilla yogurt; Greek or Icelandic Zest of one large lemon, ~1 Tbsp 1 tsp baking powder Syrup 4 Tbsp freshly squeezed lemon juice 2 Tbsp light clover honey 1/4 tsp sea salt 1. Preheat oven to 350°. Lightly butter a 9x13" pan and set aside. 2. In a large mixing bowl combine the kefir, yogurt, lemon zest, and sugar then add the semolina flour, chia seeds, poppy seed, and baking powder. Stir in the melted butter and mix until just combined. Avoid over mixing the batter. Pour batter into prepared pan and cook in preheated oven for 35 minutes or until a toothpick comes out clean. Once the cake is fully cooked turn the oven to broil and move the cake to a higher rack for 3-5 minutes so that the top becomes a golden brown. Watch carefully the entire time you are broiling to avoid burning the top of the cake. 3. While the cake is baking, prepare the lemon syrup. Combine lemon juice, honey, and sea salt and mix well. Once the cake comes out of the oven, use a toothpick to carefully poke holes (making sure to reach the bottom of the pan) every one inch across the surface of the cake. The purpose of this is to help the cake absorb the syrup. While the cake is still warm, evenly pour the lemon syrup over the top of the cake. 3. Raspberry Swirl Semolina Cake Ingredients Cake 2 cups semolina flour 1 cup cane sugar 10 Tbsp unsalted butter, melted 1 cup plain milk kefir 1/3 cup thick vanilla yogurt; Greek or Icelandic 4 Tbsp raspberry preserves Zest of one large lemon, ~1 Tbsp 1 tsp baking powder Syrup 4 Tbsp freshly squeezed lemon juice 2 Tbsp light clover honey 1/4 tsp sea salt 1. Preheat oven to 350°. Lightly butter a 9x13" pan and set aside. 2. In a large mixing bowl combine the kefir, yogurt, lemon zest, and sugar then add the semolina flour and baking powder. Stir in the melted butter and mix until just combined. Avoid over mixing the batter. Pour batter into prepared pan then add 1 Tbsp, 4 dollops of raspberry preserves in each corner of the cake. Take a butter knife and swirl each raspberry dollop into the cake batter. Cook in preheated oven for 35 minutes or until a toothpick comes out clean. Once the cake is fully cooked turn the oven to broil and move the cake to a higher rack for 3-5 minutes so that the top becomes a golden brown. Watch carefully the entire time you are broiling to avoid burning the top of the cake. 3. While the cake is baking, prepare the lemon syrup. Combine lemon juice, honey, and sea salt and mix well. Once the cake comes out of the oven, use a toothpick to carefully poke holes (making sure to reach the bottom of the pan) every one inch across the surface of the cake. The purpose of this is to help the cake absorb the syrup. While the cake is still warm, evenly pour the lemon syrup over the top of the cake. 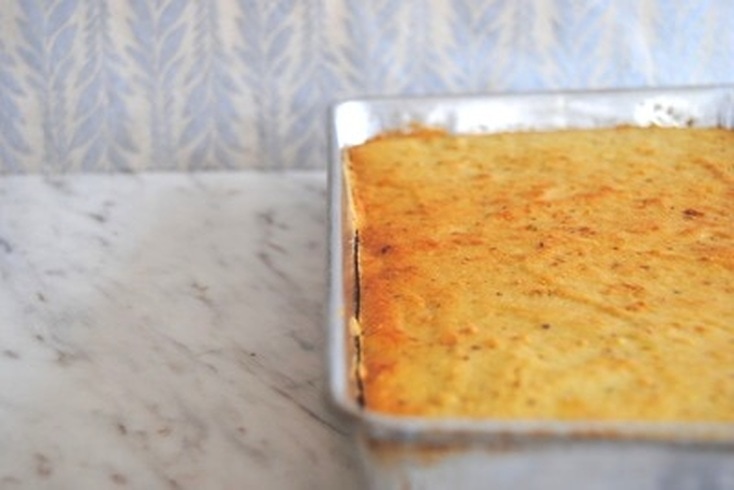 Have you found your fancy? If not, create a cake of your own using the basic semolina cake recipe as the base. And as always, please share what you created. We love to hear from you!
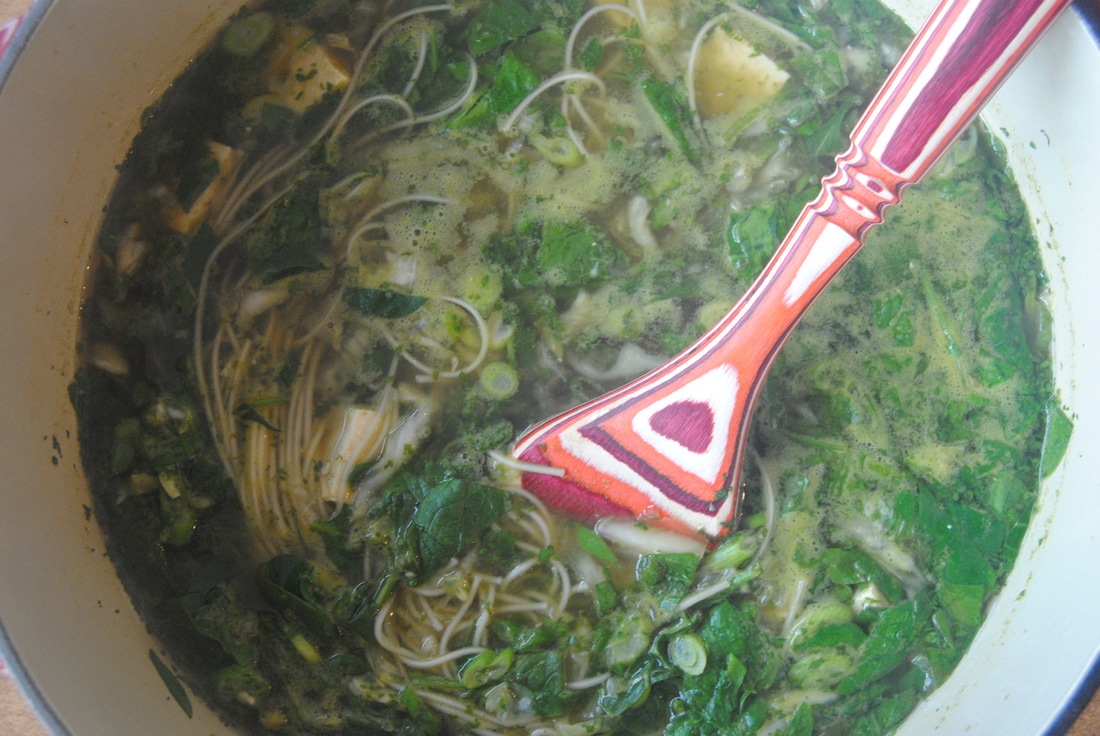
Enjoy, Jess and Cecelia 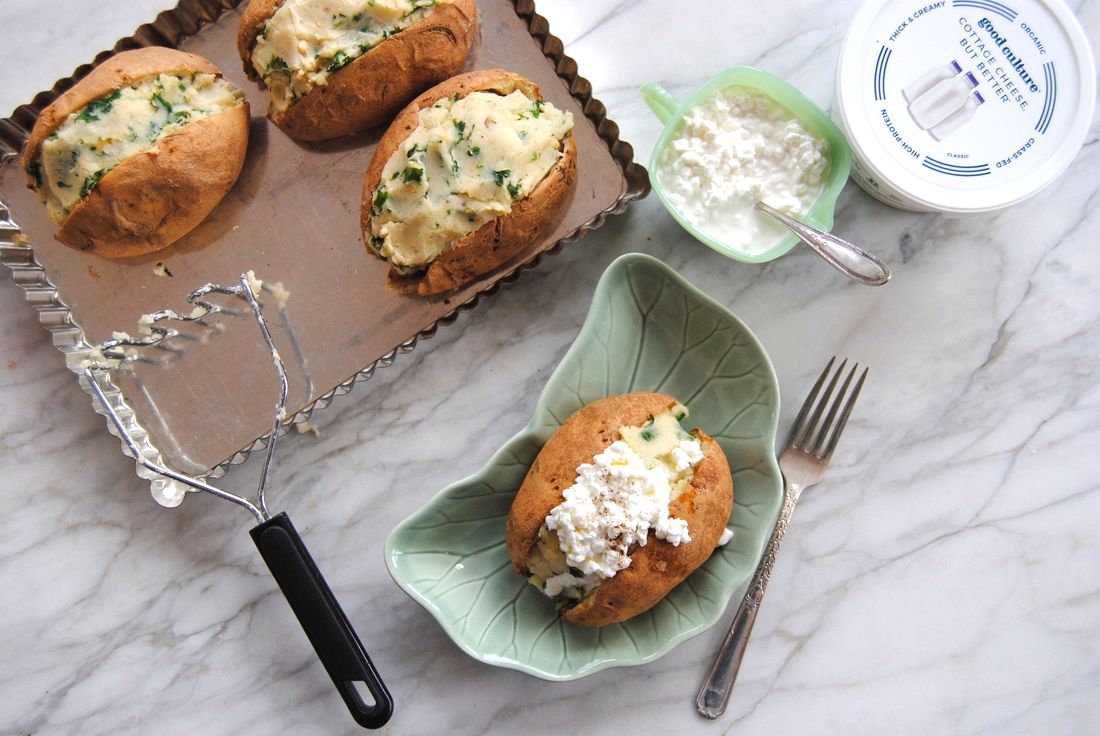 We've been on a kick lately reinventing and recreating some of TGBK's first ever recipes. The Overloaded Spud (recipe here) debuted in February 2015 and has been a fan favorite every since. This time around we've taken the seemingly plain and nutritionally bland Russet potato and gave it quite a spin. With the addition of fava beans, fermented foods, and seasonal greens, this spud it anything but plain! 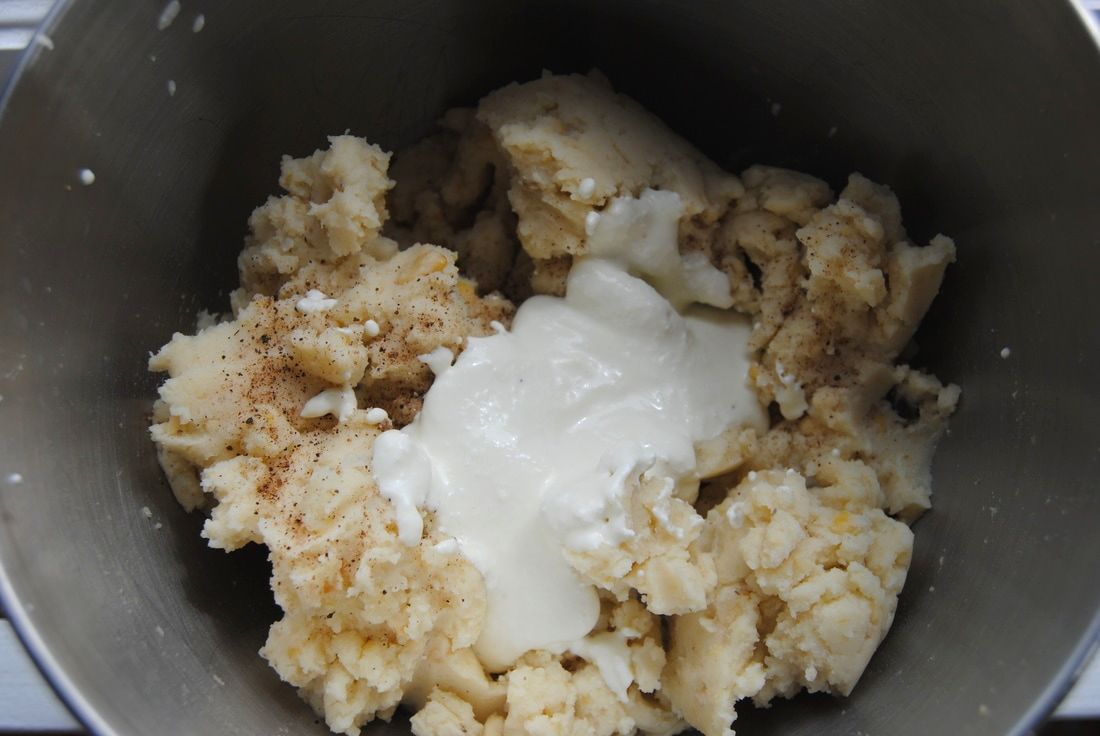 This recipe was inspired by a unique Italian recipe we came across for mashed fava beans combined with potatoes and bitter greens (here). Though we love the idea of a good mashed potato we much prefer to eat our potato with the skin (that's where the fiber is!). The idea of incorporating fava beans into mashed potatoes intrigued us because this addition of protein helps to make the simple baked potato into a complete meal. Along that theme we chose to use cottage cheese instead of more traditional additives to mashed potato such as cream cheese, sour cream, or butter. Cottage cheese provides more protein to this dish and is a fermented food - you know how we love our probiotics! And we can't say enough about the Good Culture brand we chose. In their cottage cheese they use quality ingredients, no additives, and live and active cultures (important to note that not all cottage cheese will based on how it is produced). Finally, we found mashed potato to be a perfect vehicle for incorporating bitter greens. Greens with a bitter taste, such as mustard greens, chicory, endive, dandelion, and watercress, can be overwhelming taste-wise but we felt paired perfectly with this dish. Ready to find out for yourself? 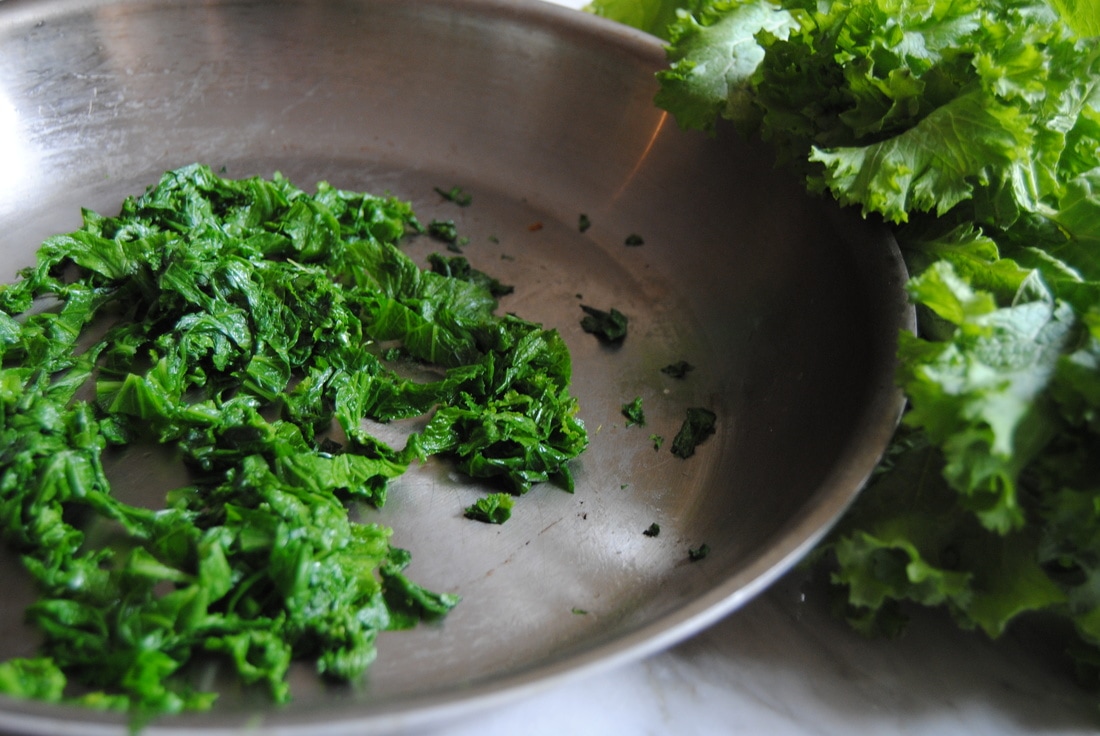 Fava Bean & Mustard Green Twice Baked Potato PREP TIME: 60 minutes TOTAL TIME: 1 hour 10 minutes Servings: 4 main dishes (full potato) or 8 sides (half potato) Ingredients 4 medium russet potatoes 1/2 cup organic full fat cottage cheese (we used 4% milk fat Good Culture cottage cheese) 4 Tbsp extra virgin olive oil 1 1/2 tsp sea salt 1/4 tsp ground black pepper 1 cup dried split fava beans 1/4 cup warm water 1/2 bunch organic mustard greens Toppings 1 cup organic full fat cottage cheese (we used 4% milk fat Good Culture cottage cheese) 4 tsp extra virgin olive oil Sprinkle of pepper Preheat oven to 400 degrees. Scrub the outside of each potato with warm water. Using a fork, carefully pierce each potato about 4-6 times to allow steam to escape while potatoes are cooking. Sprinkle each potato with sea salt then place in the oven for 40-50 minutes or until soft and the skin can easily be pierced with a fork. While the potatoes are cooking, rinse fava beans under warm water until water runs clear. Place in a pan and add 2 cups of water and bring to a boil for 10 minutes. Reduce the heat to a simmer and continue cooking for 20 minutes or until the liquid is absorbed and the fava beans are soft. Note fava beans can be pre-soaked for 1-2 hours to quicken cooking time. Transfer cooked fava beans to a large bowl and add 1/4 cup warm water. Using a potato masher, mash the fava beans until they are broken down (think lumpy mashed potato texture) then set aside. Remove potatoes from the oven and allow them to slightly cool before handling. Slice each potato open though not all the way through if possible. Scoop out the inside into the bowl with the fava beans, save the skins for later use. Using the potato masher, mash potatoes with the fava beans until a somewhat smooth texture is formed. In a blender or food processor add 1/2 cup cottage cheese and 3 Tbsp olive oil and process until creamy then fold into the fava bean and potato mixture until light and creamy. Wash and de-stem the mustard greens. Add 1 Tbsp olive oil, 1/4 tsp sea salt, and greens to a sauté pan and cook for 2 minutes or until wilted and bring green. Carefully strain off any liquid from the greens - this helps to remove the bitter taste. Chop greens into small pieces then fold into the fava bean and potato mixture. Evenly fill each potato skin with mixture* and place back in the oven to warm up for 5-10 minutes. Top each potato with a scoop of cottage cheese, drizzle of olive oil, and a sprinkle of pepper. If you do not plan to serve all the potatoes keep the toppings off until ready to eat. Potatoes will keep in the fridge for 2-5 days. To reheat, preheat oven to 350 degrees and cook for 10 minutes or microwave for 1 minute then top with cottage cheese, olive oil and pepper to taste. *You may have leftover mashed fava/potato mixture that does not fit back into potato skin, save to enjoy later!  We can definitely attest to the final product being one overloaded and filling spud! The uniqueness of this recipe and flavor profile are sure to impress and excite. We found the flavor of fava beans (earthy and slightly bitter) to really shine and pair wonderfully with the mustard greens, and the mild flavored baked potato to be the perfect palate for the creation of this culinary magic. Enjoy! Jess and Cecelia 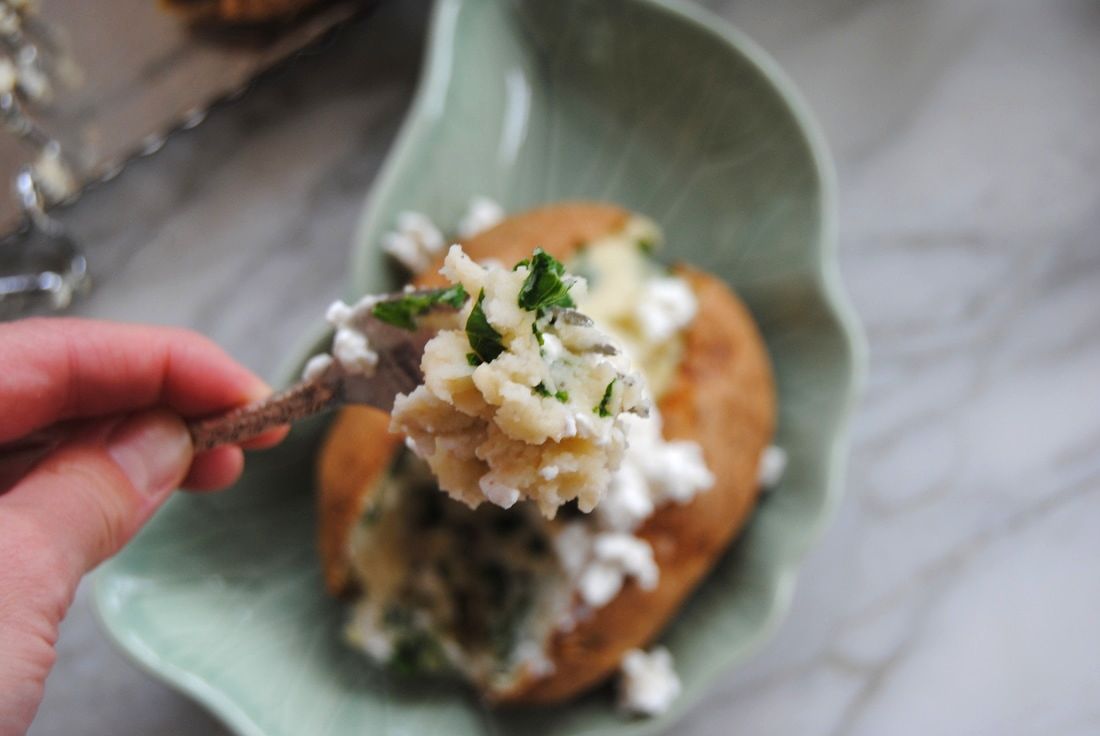 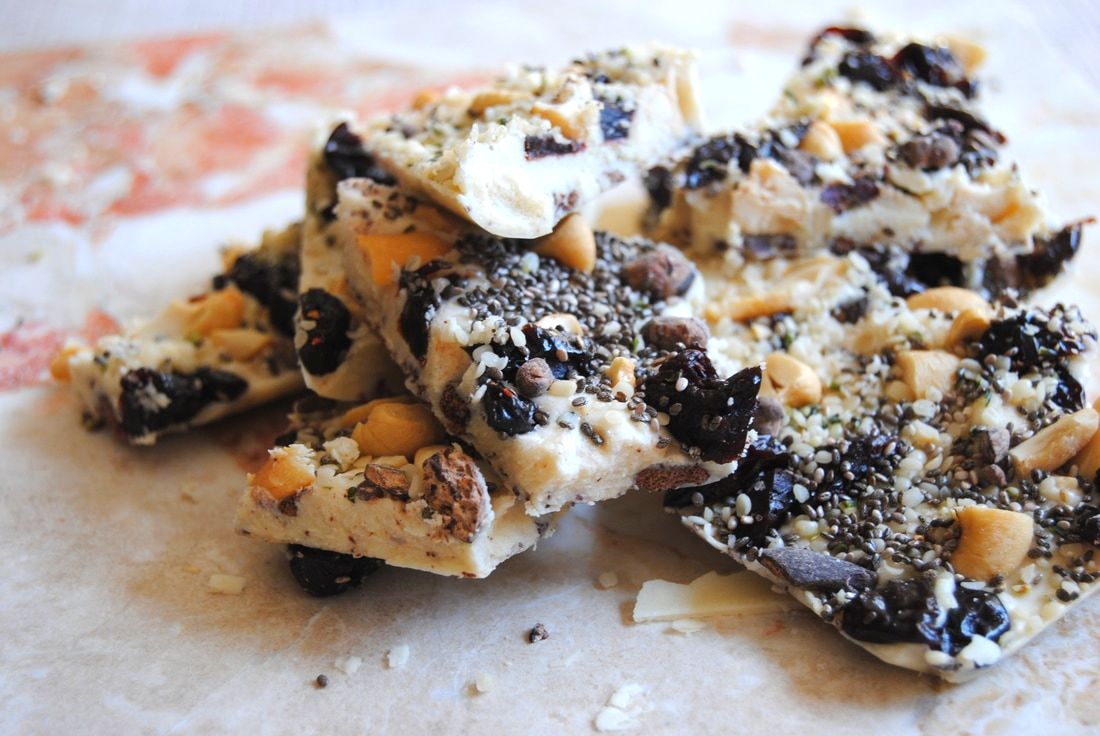 Hey TGBK friends, we are going to keep things super simple this week. After a month of fun with Navitas Organics' products we found our cupboards stocked with their superfoods and minds full of ideas. A new favorite product that we discovered last month was cacao butter and we just had to share this secret. Cacao butter has the best mouth-feel of any food we've ever eaten! It envelops your mouth with a rich, velvety feeling that we think can only be compared to the feel of silk or cashmere on your skin. Crazy right?! Cacao butter, or the similar product cocoa butter, are essential ingredients in chocolate making. Though the names are subtly different, cacao vs cocoa, the nutrient quality doesn't compare. Cacao butter is less processed with lower heat methods creating a raw product that retains more of the nutritional benefits (mainly antioxidants) that the cacao bean provides. So ditch those cocoa products for raw cacao - we haven't found a butter yet that we like better than Navitas (here). This recipe is the perfect use for this bombshell of an ingredient, enjoy! Sweet & Salty White Chocolate Bark PREP TIME: 10 minutes TOTAL TIME: 10 minutes + 20 minutes to set Servings: 8-10 Ingredients White Chocolate 1/2 cup organic cacao butter 2 Tbsp + 1 tsp coconut oil 1 Tbsp organic powdered sugar 1/2 vanilla bean, inside seeds scraped out (1 tsp pure vanilla extract will also work) Toppings 2 Tbsp chopped salted cashews 2 Tbsp chopped dried cherries 2 Tbsp sweetened cacao nibs 1 Tbsp chia seeds 1 Tbsp hemp seeds 1/4 tsp thick grain sea salt Prepare a 9" x 9" pan with a piece of wax paper cut to fit the bottom of the pan with 2 long ends hanging over the sides to help remove the chocolate once it is set. To make the white chocolate, add cacao butter and coconut oil to a double boiler set to medium heat. Stir mixture until fully melted. You could also do this in the microwave in 10 second increments, however, watch closely to avoid overheating. Remove from the heat and stir in the powdered sugar and vanilla bean until fully incorporated. Pour chocolate into prepared pan and allow to slightly set at room temperature for about 10 minutes. Evenly sprinkle chopped cashews, chopped dried cherries, cacao nibs, chia seeds, hemp seeds, and sea salt over the white chocolate. Place pan in the fridge and allow to cool and fully set, for about 10 minutes. You will know when the chocolate is fully set when it is hard to the touch. Remove the set chocolate from the pan by pulling up on the wax paper sides. Break chocolate into pieces about 2"x 2". Serve and enjoy! Chocolate will keep best in an air tight container in the fridge for up to 1 week. 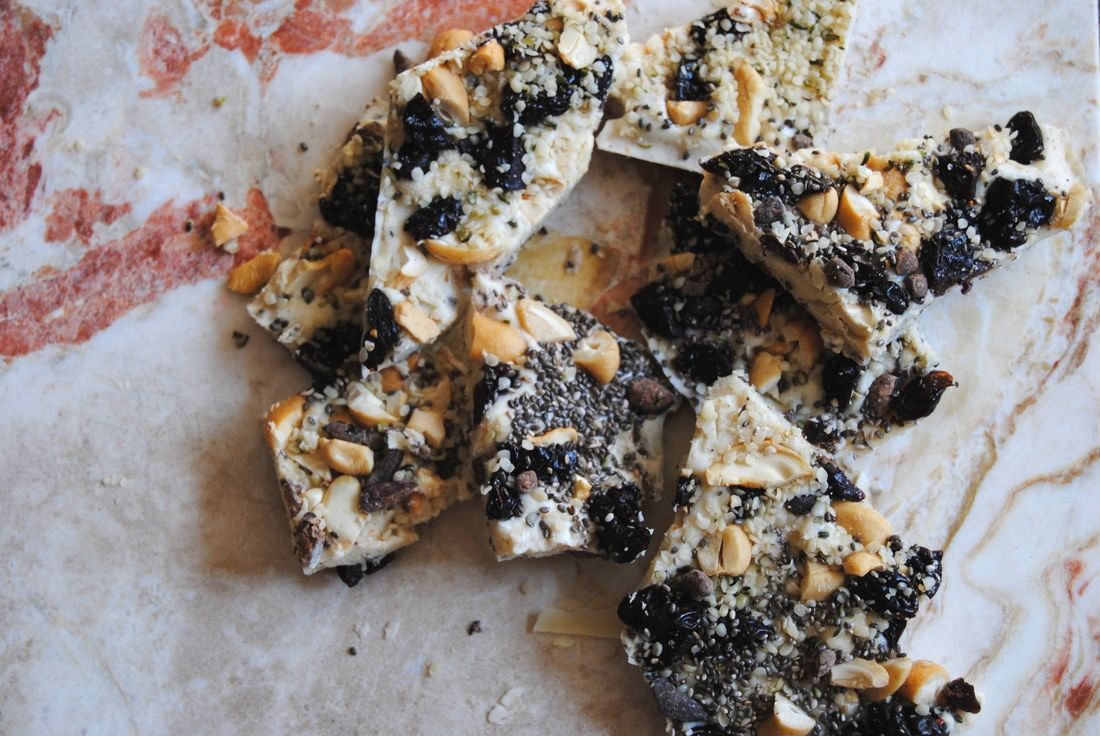 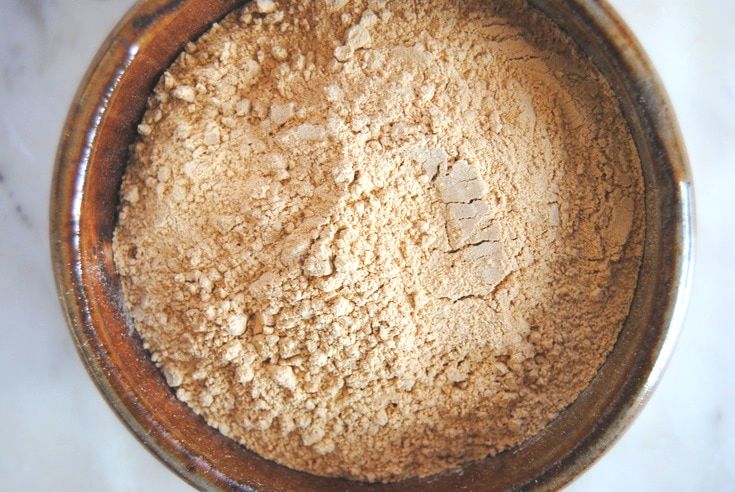 March has been a month to remember here at TGBK. We've had the best time celebrating National Nutrition Month by teaming up with Navitas Organics as Insiders of the Month and sharing recipes featuring their superfood products. Maca has been one of this month's highlighted superfoods and by now we hope you've given it a try. If not, it's definitely time to get some maca in your pantry! Like other superfoods, the benefits one might experience from maca in the diet are based on consistency - we suggest about a tablespoon of maca daily. Maca can simply be added to yogurt, smoothies, and drinks or incorporated into recipes to make things more interesting and fun. And that's where we come in! We've been filling the blog this month with maca packed recipes and decided to finish up with an oldie but goodie. We created this recipe for Magical Maca Maple Granola over year ago but are still enjoying it frequently in our recipe rotation. We love this granola over yogurt, handfuls as a snack, or simply with homemade nut milk. It's definitely a delicious way to add maca to your diet. If you don't already have this recipe printed and posted on your fridge (wink, wink), we've provided it for you again. Enjoy! 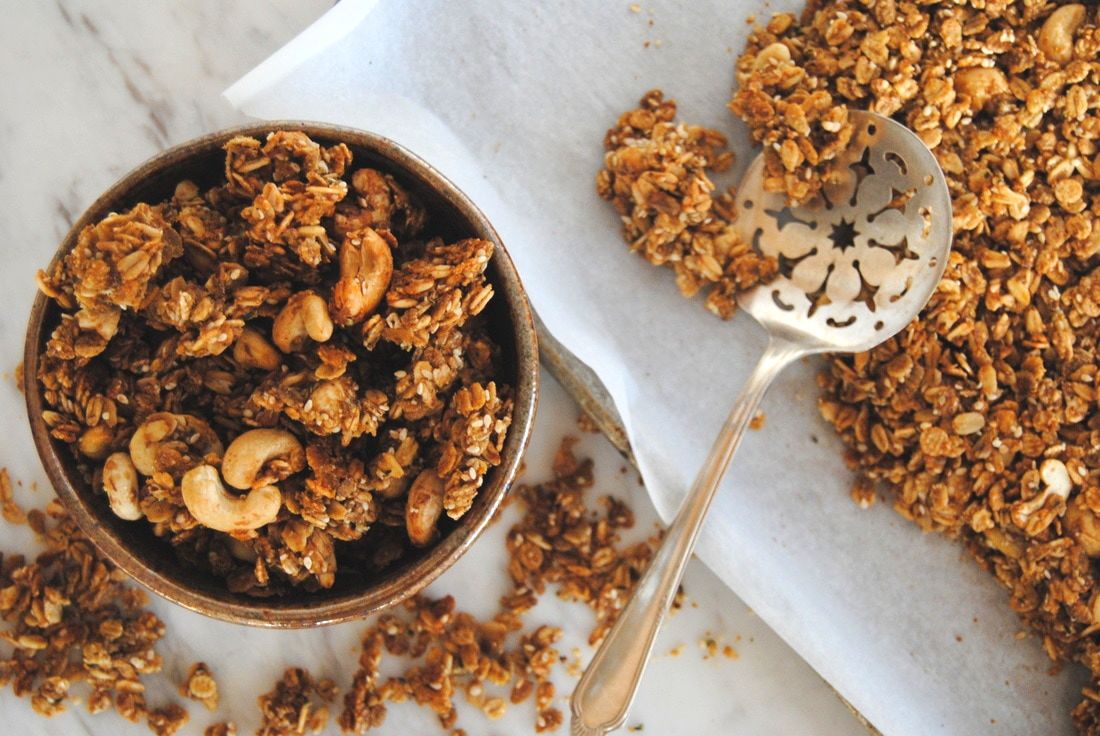 Magical Maca Maple Granola PREP TIME: 15 mins TOTAL TIME: 45 mins Servings: 18-24 quarter cup servings (note that granola is quite rich and best eaten in small portions or as a crunchy topping) Ingredients 2 cups thick rolled oats 1 cup rolled barley* 1 cup rolled rye* 1/4 cup oat bran 1/4 cup Navitas Organics maca powder 1/4 cup ground flax meal 1/2 tsp sea salt 1 1/2 cups Navitas Organics cashew nuts 1/4 cup Navitas Organics hemp seeds 1/8 cup unbleached, white sesame seeds* 1/2 cup coconut oil 3/4 cup pure maple syrup 1/2 cup Navitas Organics coconut sugar 1/4 cup water 1/2 vanilla bean pod (insides scraped out) or 1 tsp pure vanilla extract Preheat the oven to 350°. Line a large baking sheet with parchment paper and set aside. In a large bowl, mix together the oats, barley, rye, oat bran, maca, flax, salt, cashews, hemp, and sesame seeds. In a sauce pan, combine coconut oil, maple syrup, coconut sugar, and vanilla. Turn burner on to medium heat and stir until the oil has melted and sugar has dissolved. Pour warm oil and sugar mixture over dry ingredients and stir until evenly covered. Add 1/4 cup water to the mixture and stir to combine. Evenly spread mixture onto the parchment lined baking sheet. Bake for 30 minutes or until granola is golden brown. Let sit until cooled. Using a large spoon, break granola into large chunks. Place granola back into the oven and continue cooking for an additional 7-10 minutes. Make sure to stir granola at least once while cooking. Allow granola to completely cool before storing in an air tight container. Adding granola to the container before it has completely cooled will add moisture and soften the granola. *Note that you can use 4 cups of rolled oats and omit rolled barley and rye which may be more difficult to find. Hemp seeds and sesame seeds can also be used interchangeably, just keep the total amount the same (~2/3 cup). 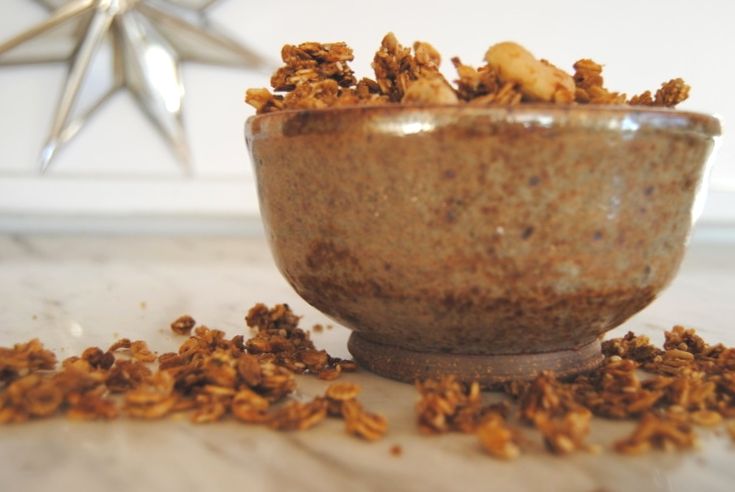 Well friends, that should do it for our maca-filled month. We hope you've had as much fun as we did and have started your own experiments with Navitas products. The nutrient quality of your food and brands you support with food purchases DOES matter. Your body will thank you and your money can be well spent - now is the time to put ideals into practice. Go for it! Jess and Cecelia 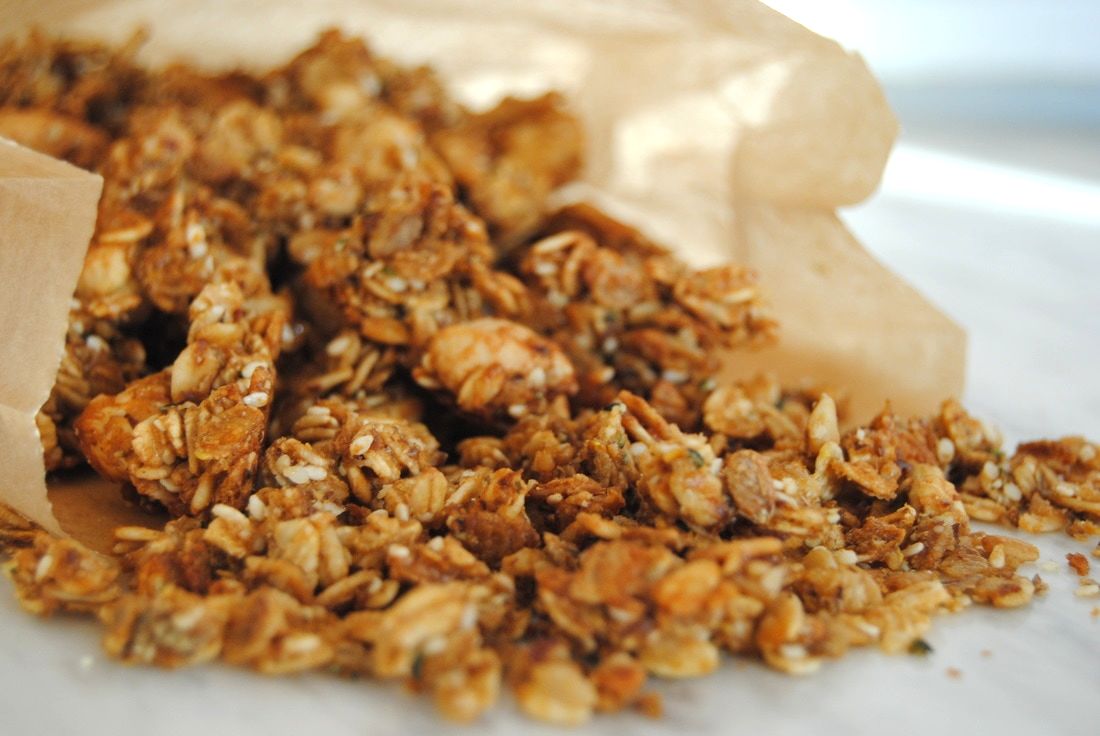  The weather in Chicago this week has been unseasonably warm to a point where we are enjoying it but also slightly missing winter (gasp!). Mostly, we are realizing that the time for warming recipes is getting shorter and shorter as spring approaches. We decided that another hot soup recipe was in order and took inspiration from another oldie but goodie fan favorite recipe from our first days at TGBK (recipe for Soul Warming Miso Soup here). We know you love the flavors and ease of this previous recipe and created another miso broth based, one pot soup. Yes one pot! All the ingredients go into one large pot for easy preparation and clean-up. You must be super excited about this one so let's get straight to the recipe! Super Green One Pot Noodle Bowl PREP TIME: 10 minutes TOTAL TIME: 15 minutes Servings: 4 bowls Ingredients 8 oz organic tofu (we used sprouted extra firm tofu), cut into cubes 5 oz dried Japanese style noodles (udon or soba) 5 cups fresh spinach, washed and roughly chopped 1 cup raw sauerkraut (homemade or store bought) 2 green onions (green part only cut on the bias) 6 cups low sodium vegetable broth 3 Tbsp miso paste 1 bunch cilantro , destemmed and chopped 2 medium cloves garlic, minced Toppings 1 lemon, cut into 4 wedges 1 tsp toasted sesame oil (1/4 tsp per bowl) 1 tsp sesame seeds (1/4 tsp per bowl) Add 1 cup vegetable broth, miso paste, chopped cilantro, and minced garlic to a blender and process mixture until cilantro is finely chopped then set aside. In a large pot, add remaining vegetable broth and bring to a soft boil. Add noodles and cook for 2-3 minutes or follow cooking instructions the specific noodle you're using. Once noodles are fully cooked, add tofu, spinach, sauerkraut, and green onions to the pot. Remove pot from the heat, add the cilantro miso broth and stir. Divide soup into 4 bowls. Top each bowl with 1/4 tsp toasted sesame oil, 1/4 tsp sesame seeds, and a squeeze of lemon. Serve warm and enjoy! This soup is best served right from the stove. However, if you do have leftovers we recommend that you store them in the fridge for up to 2 days and keep the cilantro miso broth separate from the soup until ready to serve to keep the fresh cilantro flavor and bright green color. Simply reheat soup in a pan until hot (~2-3 minutes) then pour the cilantro miso broth into the hot soup. Add toasted sesame oil, sesame seeds, and lemon wedge.  This recipe is quick and easy but still impressive and definitely tasty. The ingredients are easily adaptable to what you are able to find until produce is abundant in the upcoming seasons. But the true star of this recipe is the warming broth; it has a depth of flavor from the miso, a brightness from the cilantro, and an inside out warming quality that only a good, homemade broth can provide. We hope you enjoy this winter recipe as we transition towards a new season and warmer weather. Do we dare mention that we are still hoping for one last pretty snowfall? Enjoy, Jess and Cecelia 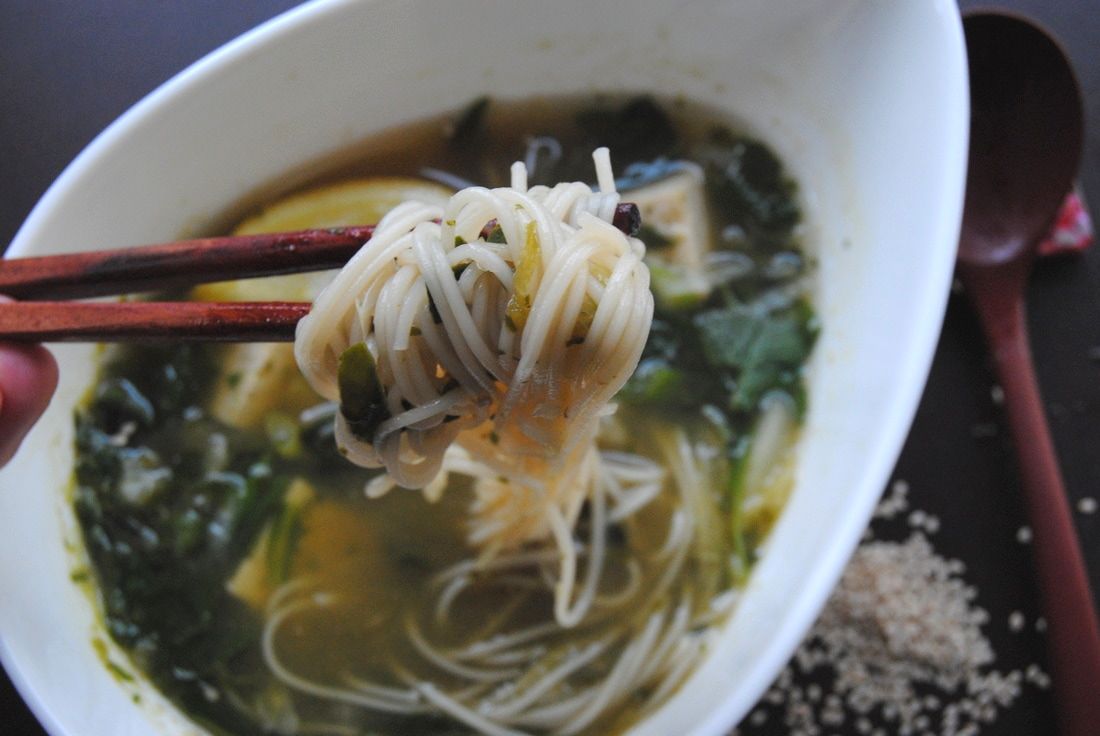 |