 In need of an extra dose of caffeine this week in a unique preparation? We gotcha here at TGBK because that's just what we needed this week too! We love mixing up our beverage game and trying new things - this week horchata. What is horchata you ask? We gotcha...  Horchata is a traditional beverage consumed in Latin America with different varieties of recipes/flavors depending on location. In Mexico, horchata is made with long grain rice, cinnamon, and sugar. In Spain, horchata's main ingredient is tiger nuts instead of rice which gives the final product a nutty flavor. In Puerto Rico, horchata is made with sesame seeds, cinnamon, vanilla, and sugar and sometimes has added almonds, evaporated milk, coconut milk, allspice, and even rum! We like the versions of horchata that provide an alternative, non-dairy milk beverage and created a rice based recipe this week. An important lesson that we learned just yesterday is that horchata is pronounced with a silent H - you're welcome! 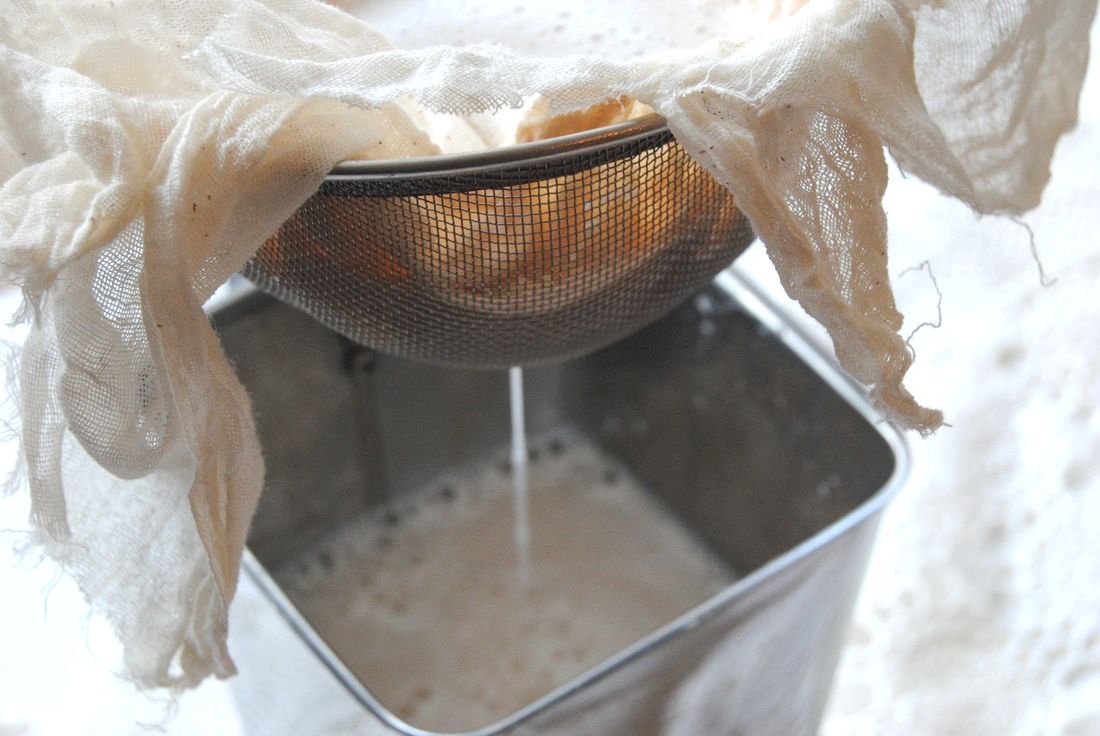 Horchata Iced Latte PREP TIME: 10 minutes + 4 hours soaking time TOTAL TIME: 10 minutes + 4 hours soaking time Servings: 6 cups horchata milk Ingredients 1 cup long grain white rice 6 cups water 1 cinnamon sick 1/3 cup pure maple syrup Combine 1 cup of rice with 3 cups room temperature water and 1 cinnamon stick in a large bowl covered with a lid or clean towel. Allow mixture to sit out at room temperature for at least 4 hours or overnight. Transfer soaked rice, soaking water, cinnamon stick, and 3 additional cups of room temperature water to a high speed blender. Blend mixture on high for 2-3 minutes then strain through a fine sieve lined with 2 pieces of cheese cloth over a large pitcher. Once solid and are liquid are separated, discard the solid retained in the cheese cloth and place the liquid horchata milk back into a clean blender. Add 1/3 cup pure maple syrup and blend for a few seconds until combined. Store horchata milk in a glass container fitted with a tight lid for up to 7 days. Note that liquids and solids will separate when sitting but easily recombine with a good shake. To make a horchata iced latte pour 4 oz of cold brew coffee (recipe here) and 4 oz of horchata milk into a glass with ice. Top with a spoon of foam created from blending and a sprinkle of cinnamon, stir, and sip away!  We hope this beverage is a refreshing pick-me-up amidst your busy week. Having homemade horchata on hand is never a bad idea so that you have an alternative milk ready to go for any of your culinary needs. To spark your imagination we used horchata as our milk ingredient in a sweet crepe recipe and it was amazing! Enjoy, Jess and Cecelia 
0 Comments
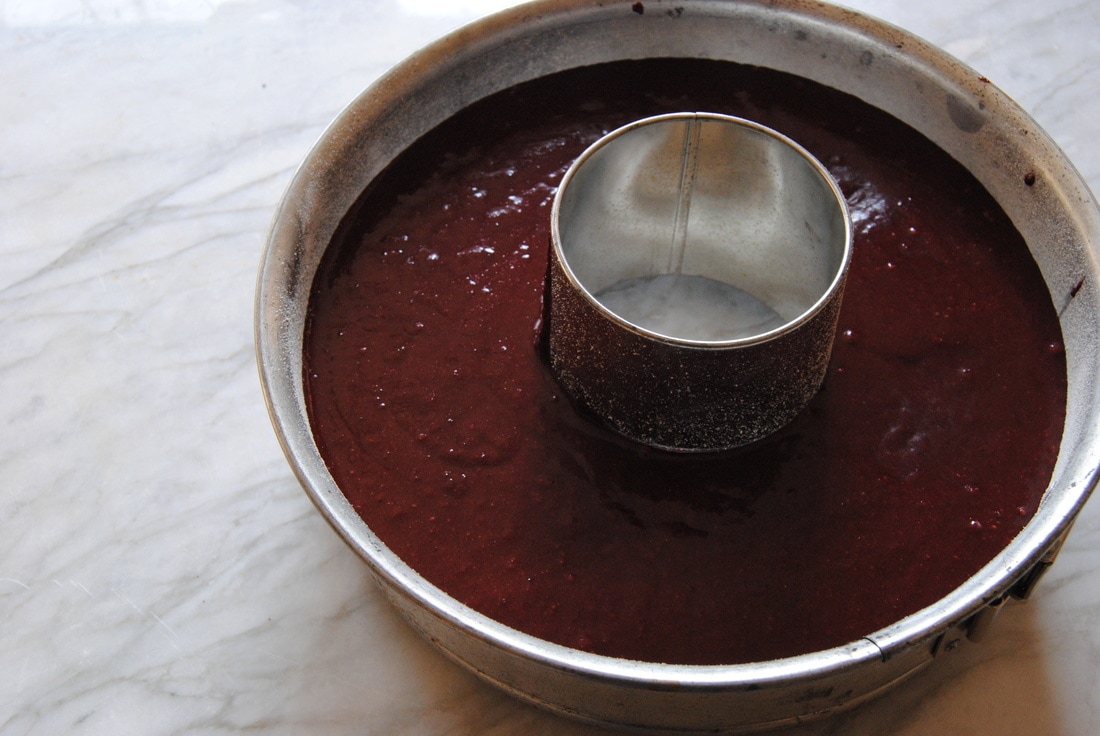
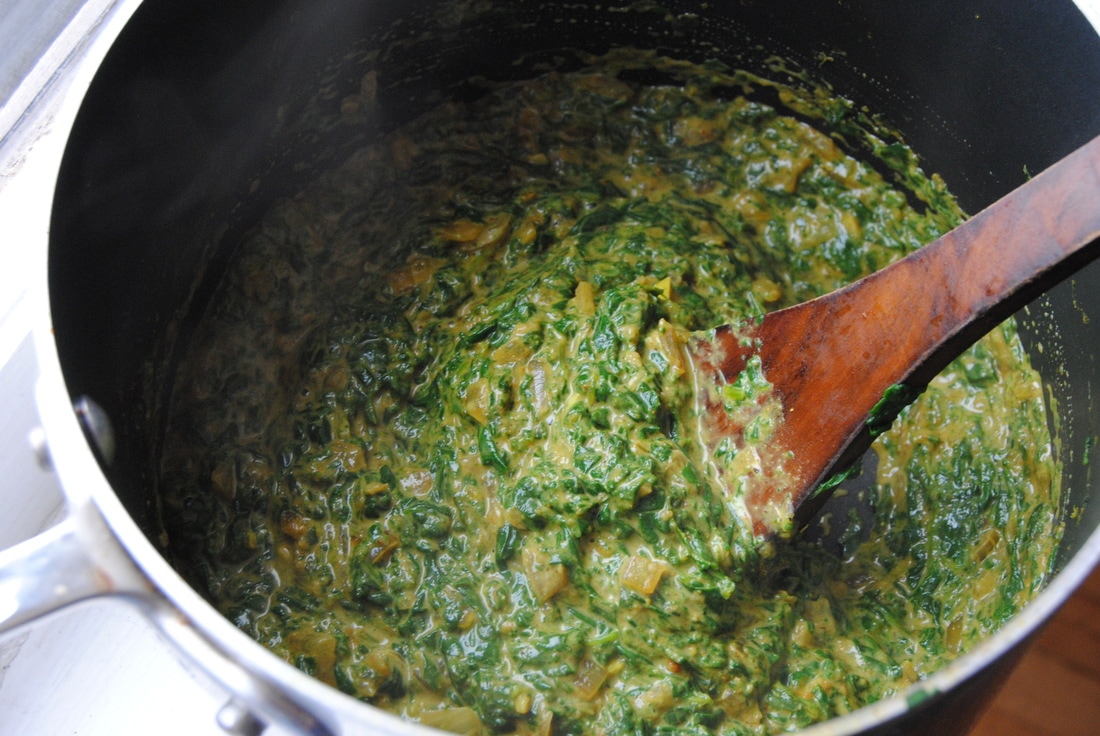
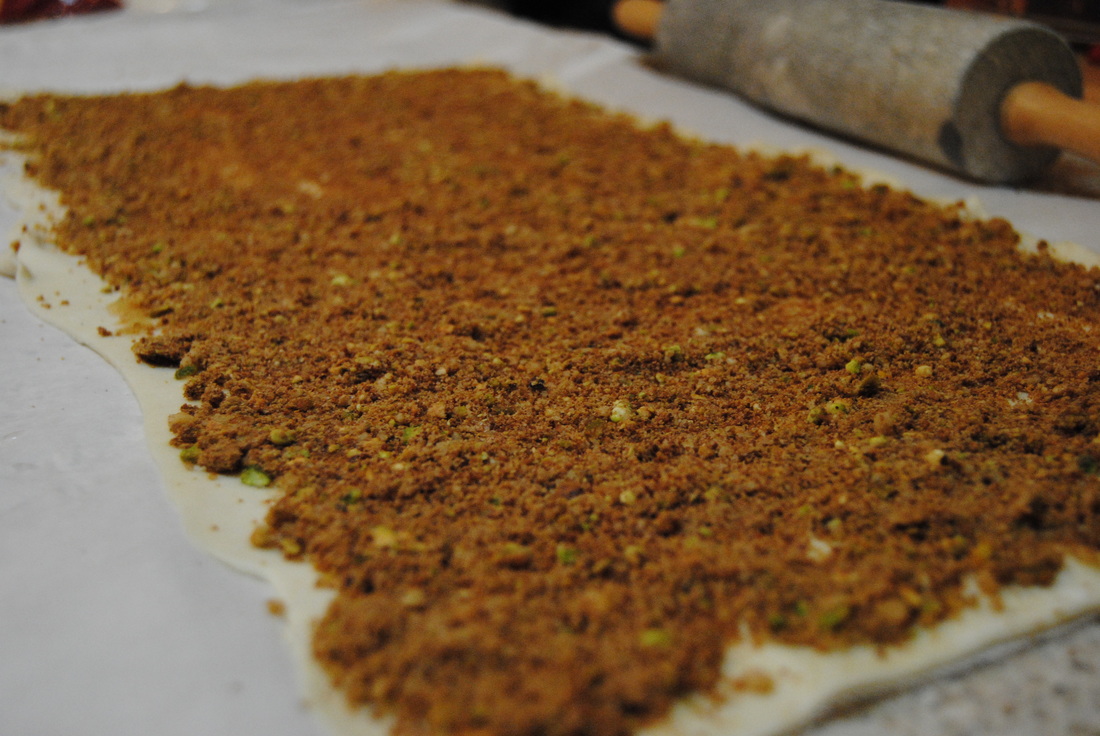
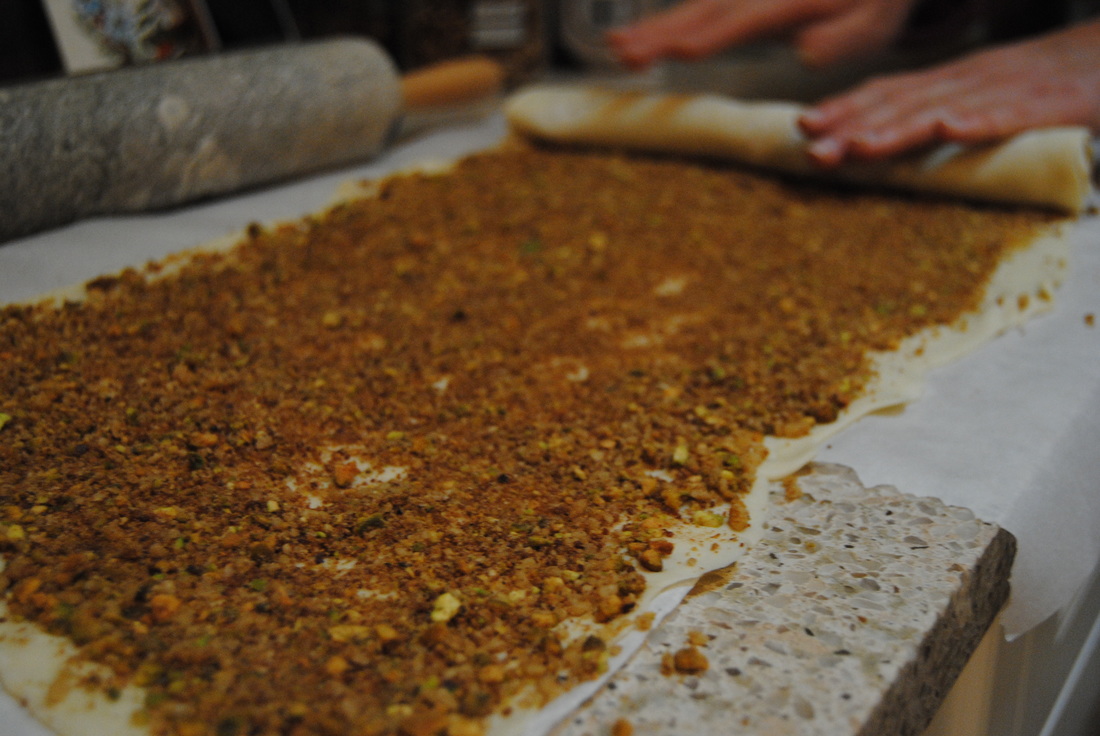
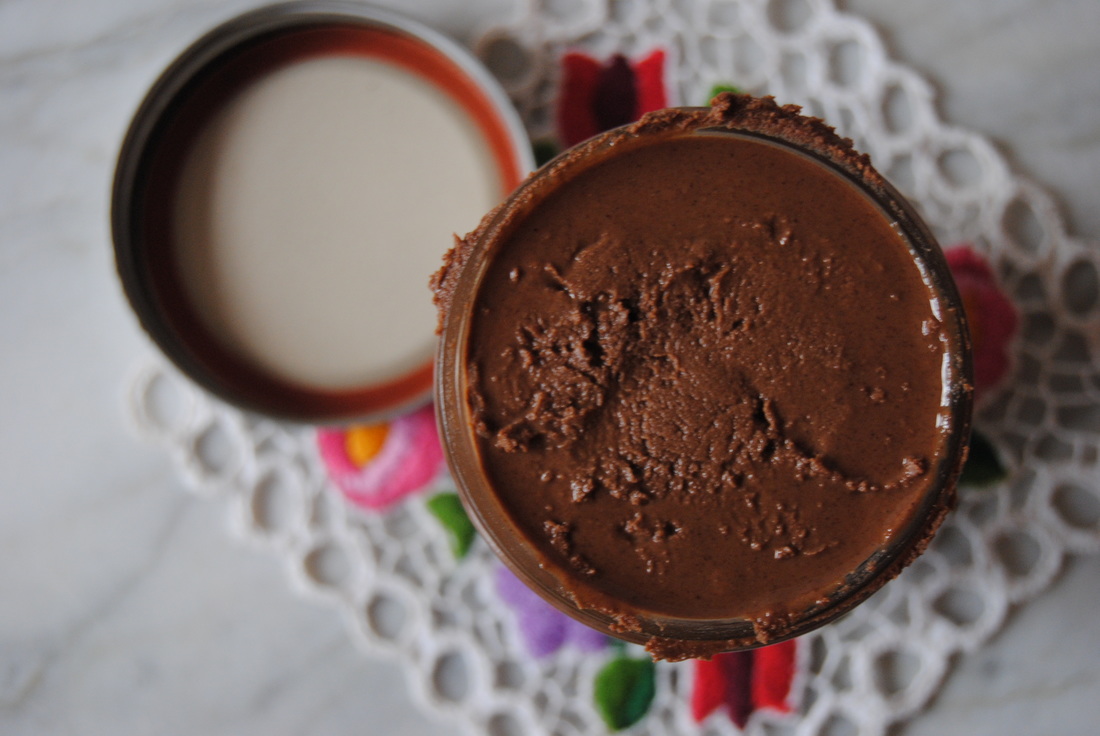
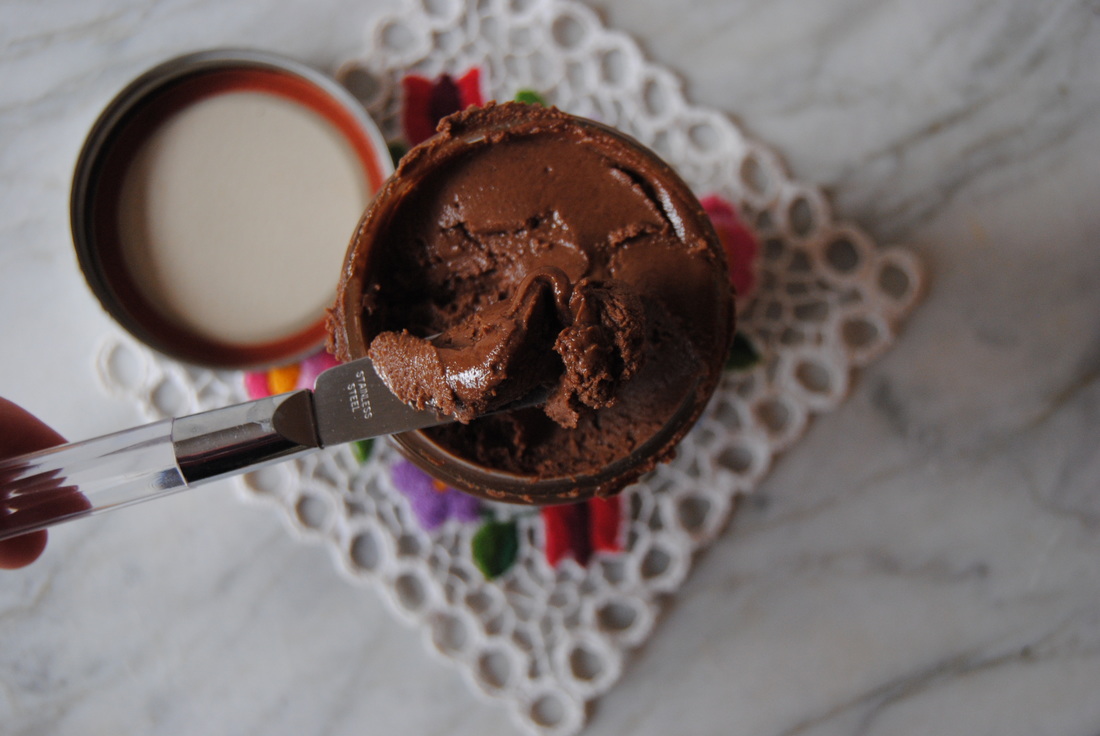
 You must know by now that here at TGBK we just love YOU (our followers!) and love to celebrate every and all occasions. Well then, this is our week. We've created a special cake in celebration of Cecelia's 30th birthday, The Green Blossom Kitchen's second full year, and of course, Valentine's Day. And this really is a special cake. If you remember our first ever post and still fan favorite recipe, then you may notice a resemblance this week. We used a similar chocolate cake base recipe but with some very different spins. Come find out what we did! 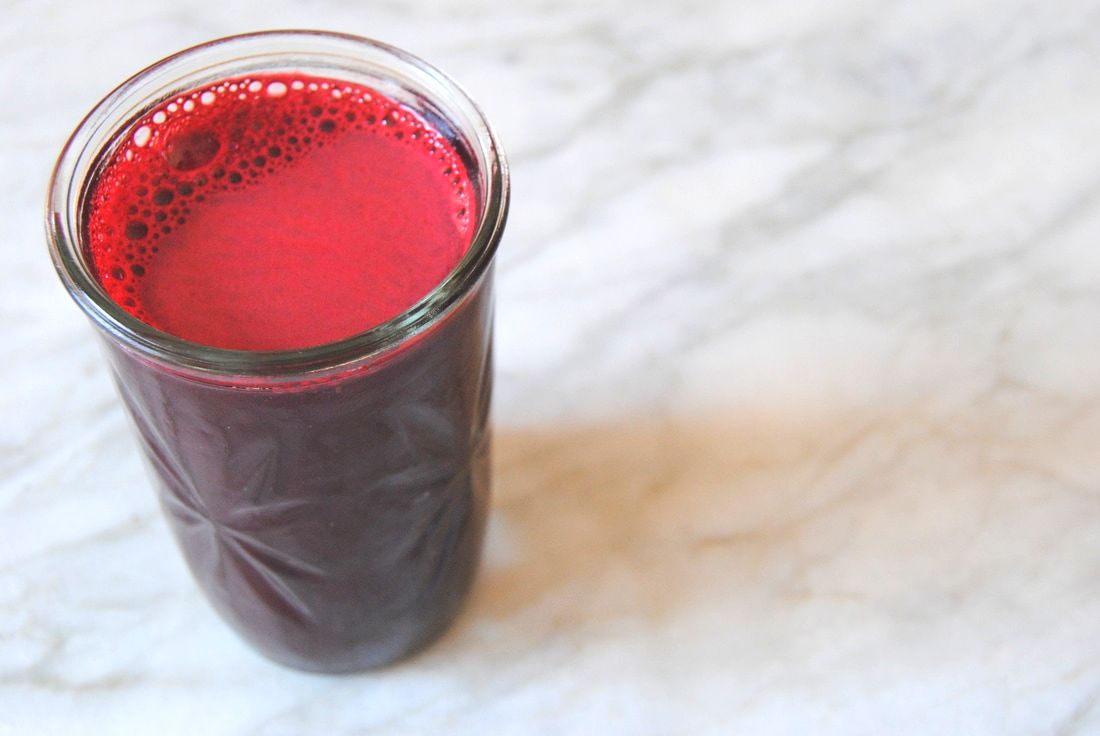 First we must note that this cake was made with a lot of love and no artificial colors. We attempted a red velvet cake variation using beet juice as our natural coloring. As you will notice from the pictures, our uncooked batter had a beautiful red color but our final cake was mostly chocolatey goodness. We still knew the beet juice was there and enjoyed our version of red velvet but think the red color may be brighter in your final cake if less cacao powder is used. This is your chance to experiment and let us know! If you do decide to play around, increase the flour in the same ratio that you decrease the cacao powder - we suggest no less then 1/4 cup cacao. So why did we choose beet juice as coloring anyways? Well, the traditional red velvet cake is most often simply chocolate cake with red food coloring added. We prefer foods without chemical coloring for the simple fact that food dye is not a natural part of the diet and not necessary to be consumed. And with so may natural food sources of coloring agents, we just don't see a reason for chemical additives. Finally, we'd like to send a huge thank you to Navitas Naturals for sending us a box full of natural superfoods to use in our recipes. We just love this brand and their products and suggest you check out their website soon. With all that said, on to the recipe! Natural Red Velvet Cake PREP TIME: 40 minutes TOTAL TIME: 1 hour 30 minutes Servings: 8-12 Ingredients Cake 1 3/4 cup whole wheat flour 2 cups coconut sugar 3/4 cup cacao powder 2 tsp baking soda 1 tsp baking powder 1 tsp sea salt (we used pink Himalayan) 1 cup "buttermilk" (1 cup coconut milk + 1 Tbsp apple cider vinegar, let sit for 10 minutes to curdle) 1/2 cup coconut oil, melted 2 Tbsp ground flax seeds + 6 Tbsp room temperature water (let sit for 5 minutes until gelatinous) 1 tsp pure vanilla extract 1 cup fresh beet juice (store bought will also work) Frosting 1/2 cup Lebneh (strained Greek yogurt) 1/2 cup powdered sugar 1 Tbsp coconut oil 1-2 tsp beet juice to decorate Pre-heat oven to 350 degrees. Lightly coat a 10-12 cup Bundt pan with coconut oil and dust with flour to lightly coat. Sift the dry ingredients together - whole wheat flour, coconut sugar, cacao, baking soda, baking powder, and salt - into a large bowl. In a separate bowl, combine the wet ingredients - "buttermilk", coconut oil, ground flax with water, and vanilla. Add the dry ingredients to a standing mixer fitted with a paddle attachment and mix on low speed while slowly adding the wet ingredients to the dry. With the mixer still on low, add the beet juice and mix to just combine, making sure to scrape the bottom of the bowl with a rubber spatula. The batter will be pretty thin but don't worry, this is what you want. Pour the batter into the prepared pan and bake for 45-50 minutes until a toothpick comes out clean. Cool in the pan for at least 30 minutes. While the cake is cooling, begin making the frosting. To make the frosting combine the lebneh, powdered sugar, and coconut oil in a standing mixer and beat on medium high until fluffy. Spoon frosting into a plastic sealed bag and place in the fridge to cool for at least 15 minutes. Cut a small hole in the bottom corner of the bag to allow for easing piping. Carefully invert the cake onto a cake stand or cake plate. Use your best decorating skills to decorate the cake with the frosting, piping it out into your favorite design. Use a toothpick dipped in beet juice to add a red natural food coloring to the top of the frosting. Serve cake at room temperature or store in the fridge for 3-5 days.  This cake will make you feel loved - it's true! The ingredients are real, natural foods and combine in such a delightful way in this recipe. And what a perfect way to include beets in the diet of those who are not as fond of this colorful root vegetable. We hope you make this cake for a special occasion and share it with those that you love. Thank you for an amazing two years of creating recipes for YOU. With love and gratitude, Jess and Cecelia  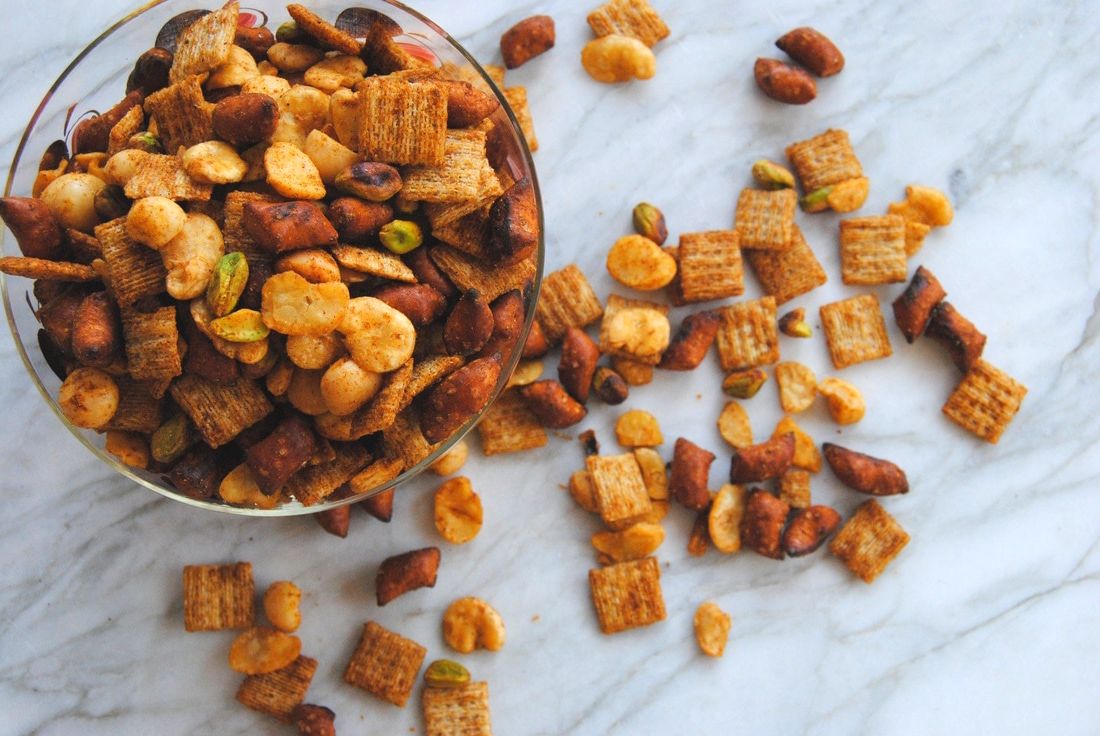 Super Bowl shenanigans yesterday got us in a snacking mood and thinking about better, homemade snacks. Often prepackaged snack mixes have undesirable ingredients and leave no room for creativity. If you love our oldie but goodie recipe for Snack Attack Bars than you'll be glad that we're back with round two - Snack Attack Berbere Mix. But what is berbere you ask, let's find out! 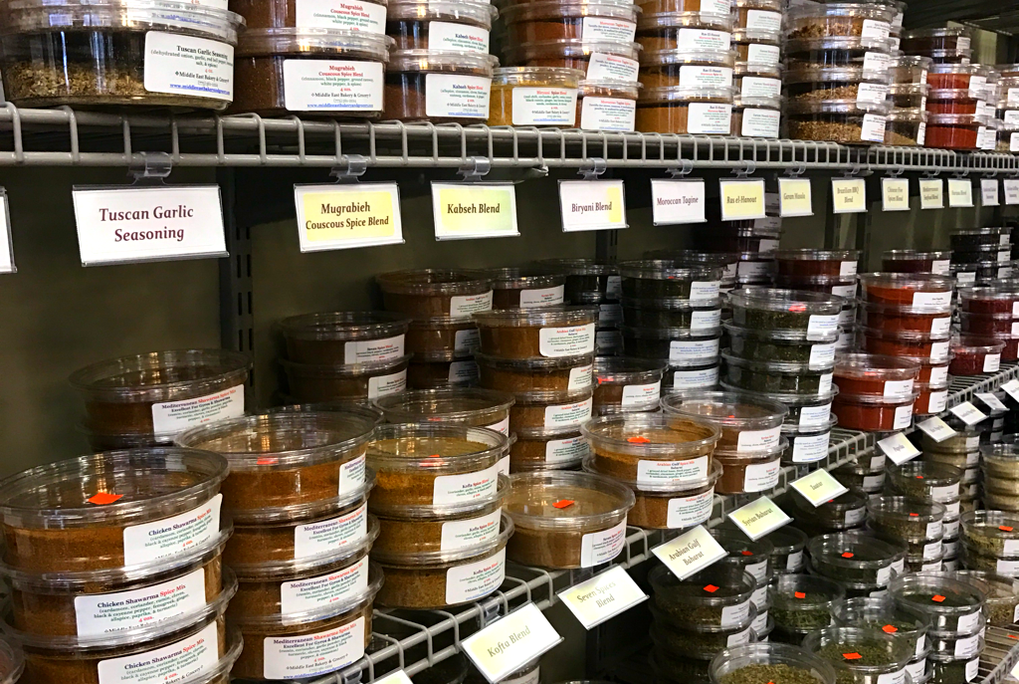 We had some fun at one of our favorite specialty grocers in Chicago this weekend - Middle East Bakery and Grocery in Andersonville. They have a delicious eat in cafe and an amazing selection of hard to find Mediterranean ingredients. What really wows us about this grocer, however, is their colorful selection of spices and unique spice blends without strange additives. It's here that we discovered berbere and are sure glad we did. Berbere is a traditional Ethiopian spice blend with a delectable balance of spice, savoriness, and a touch of sweetness. Our blend contains paprika, ginger, cumin, gram masala, anise seeds, cinnamon, allspice, cardamom, curry, onion, and garlic powder. From what we've found there can be a variety of spices in different berbere blends or recipes but we love the one that Middle East Bakery and Grocery carries. Check them out soon for this gem or find a local specialty grocer that carries unique spices. If you have a great spice cabinet already and want to experiment with a mixture of these ingredients that would be fun too! Though this snack mix would be amazing with any of your favorite spices/spice blends. 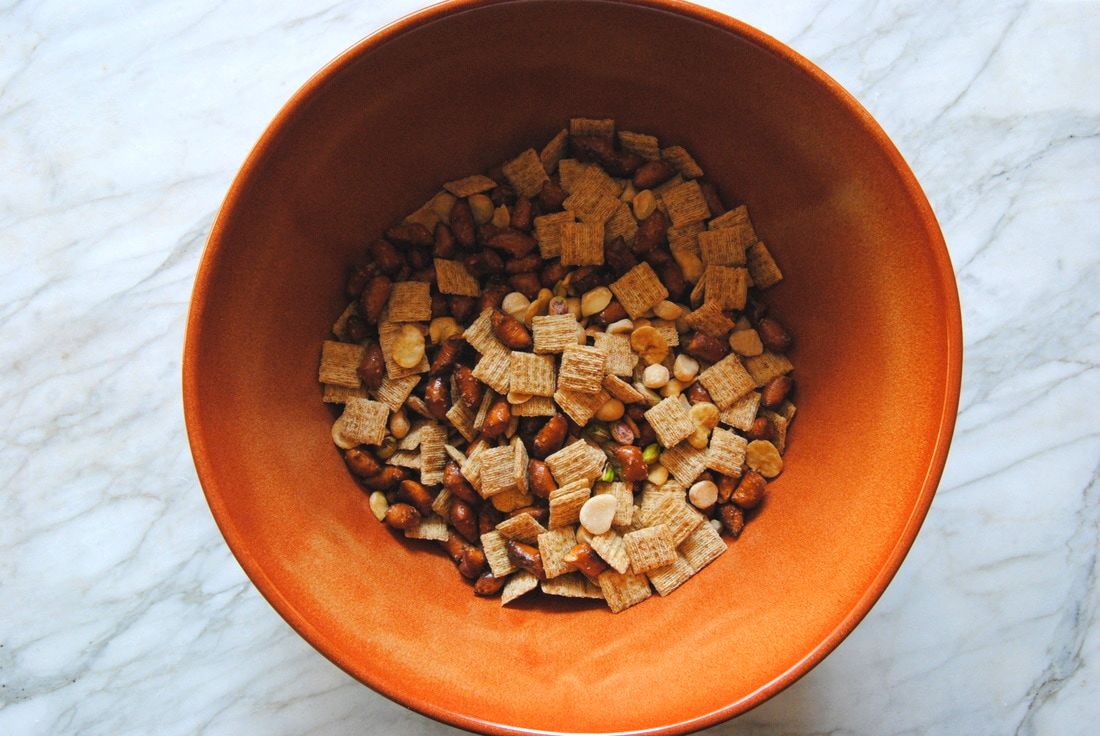 Snack Attack Berbere Mix PREP TIME: 10 minutes TOTAL TIME: 40 minutes Servings: ~7 cups Ingredients 3 cups mini woven wheat crackers (rice, corn, or wheat woven unsweetened plain cereal would also work) 2 cups pretzels (any shape will work, we used whole wheat pretzel bites) 1 1/4 cup roasted broad bean crisps (we used Enlightened brand, roasted chickpeas would also be great) 1/2 cup unsalted macadamia nuts 1/2 cup unsalted, shelled pistachios 4 Tbsp melted, unsalted butter 2 Tbsp + 2 tsp low sodium soy sauce 2 tsp apple cider vinegar 1 tsp honey 1 Tbsp + 1 tsp berbere seasoning powder (paprika, ginger, cumin, gram masala, anise seeds, cinnamon, allspice, cardamom, curry, onion, & garlic powder) OR spice mix of your choice Pre-heat oven to 250 degrees. In a large bowl, mix together the mini woven wheat crackers, pretzels, roasted broad beans, macadamia nuts, and pistachios then set aside. In another small bowl, combine the melted butter, soy sauce, apple cider vinegar, and honey then pour over the dry ingredients. Gently stir the mix until well coated. Sprinkle berbere seasoning powder over the mix and stir again to evenly coat. Spread mix in an even layer on a large parchment lined sheet pan then bake for 30 minutes, stirring every 10 minutes. Remove from the oven, allow mix to fully cool for ~15 minutes, then store in an air tight container for up to 10 days. 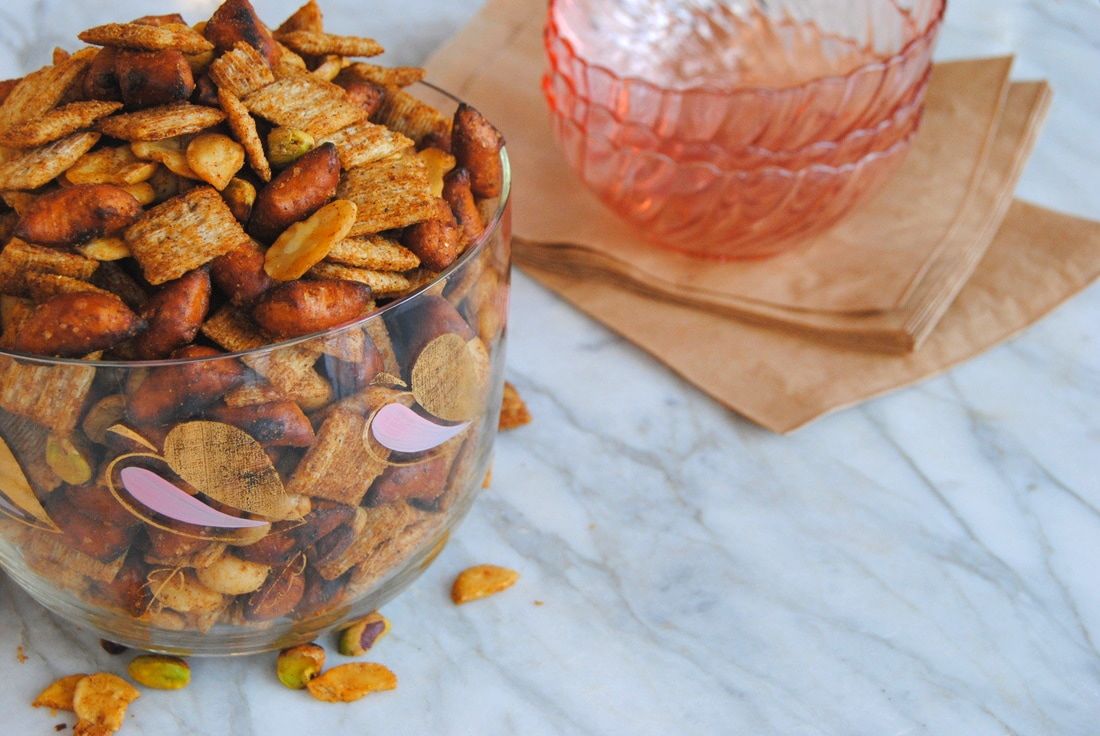 This mix is a snack that won't quit. It's perfectly crunchy but also rich and buttery, the mixture of nut and bean protein will keep you full and satisfied, and the unique tang of the berbere will keep you coming back for more. This can be shared with a group and will easily travel for an on the go snack. And don't forget to support your local businesses and specialty ethnic grocers - finds like this mix may not be possible without them! Thank you Middle East Bakery and Grocery, see you soon. Snack on, Jess and Cecelia   We don't know about you friends but we've had one heck of a busy week! Between work, personal, and social commitments schedules can get out of control. When this happens we find that we may skip on other very important things like eating well, physical activity, and/or sleep. Though skimping on self-care routines usually makes hectic times more stressful and difficult to deal with. That's why our recipe this week is a healthier version of comfort food that can be prepared in under 15 minutes. Instead of a traditional grilled cheese, we've packed this recipe with mushrooms and greens for a more complete meal. Depending on the bread used this may be a very large sandwich that can be shared for two or saved for another rushed moment. If you can't find trumpet mushrooms don't stress! Any thinly sliced mushroom will work. We had fun shopping at the Golden Pacific Market in Edgewater last weekend and found this beautiful mushroom variety there - we hear they carry these year round! So let's get straight to the recipe this week... 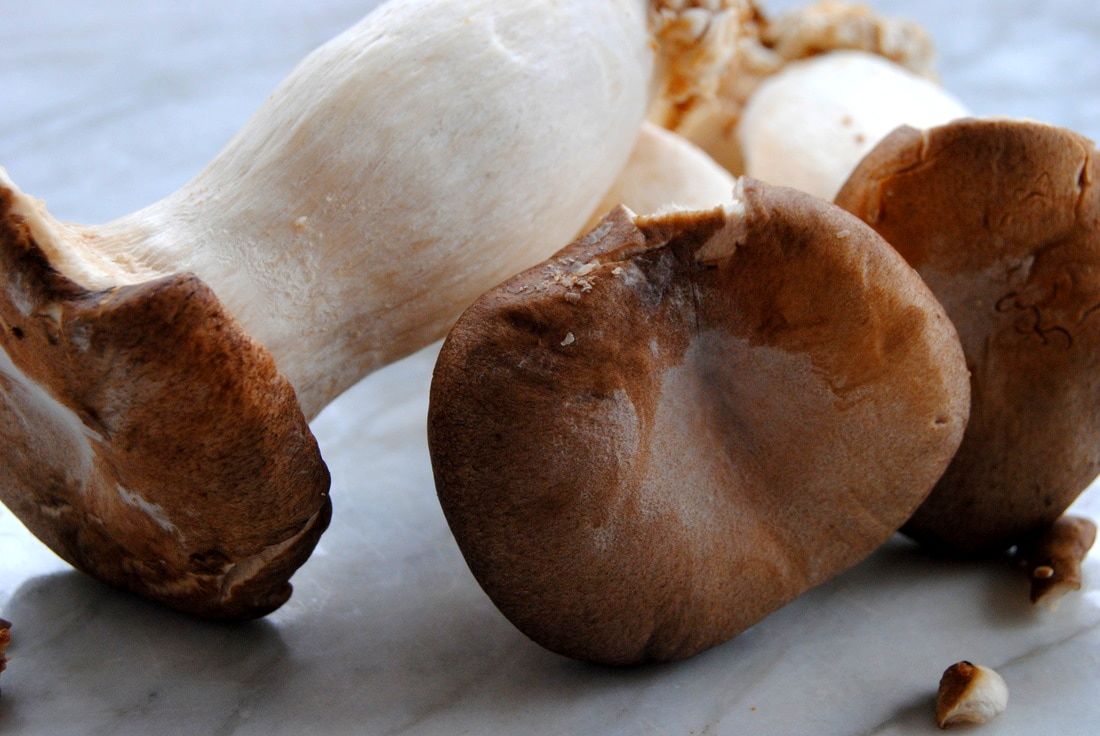 Trumpet Mushroom Grilled Cheese PREP TIME: 10 minutes TOTAL TIME: 15 minutes Servings: 1 large sandwich Ingredients Mushrooms 3-4 oz trumpet mushrooms, sliced ~1/4" thick 1 tsp butter (we used Kerrygold unsalted butter) sprinkle of salt and pepper Grilled cheese 2 slices of thick crusty bread Sautéed trumpet mushrooms 1/2 cup watercress or green of your choice 2 oz Havarti cheese 1 oz Gruyere cheese 1 tsp stone ground mustard 2 tsp butter In a medium pan melt 1 tsp butter then add sliced mushrooms. Sprinkle mushrooms with salt and pepper and sauté for 2 minutes per side until mushrooms have golden edges then remove from the heat and set aside. Butter each side of bread with 1 tsp butter. Layer inside of bread with cheese, sautéed mushrooms, greens, and mustard. Place the other slice of bread on top with the butter side facing up and cook on a cast iron griddle or in a cast iron pan on medium heat for 4-5 minutes, flipping sandwich half way through cooking time. If the cheese needs help melting, cover the sandwich with a lid over the pan or another pan upside down over the griddle creating a dome for the last 2 minutes of cooking. Cut sandwich in half, serve warm, and enjoy! If saving half for later this does reheat well at 350 degrees for 5-7 minutes.  Unbelievably satisfying and so comforting during a hectic week. Taking those extra few minutes to prepare and sit down to a home cooked plate is worth it. We love our grilled cheese paired with a good IPA but beverage choice is up to you! After this, some rest and then back to the business, but right now, we eat. Enjoy, Jess and Cecelia  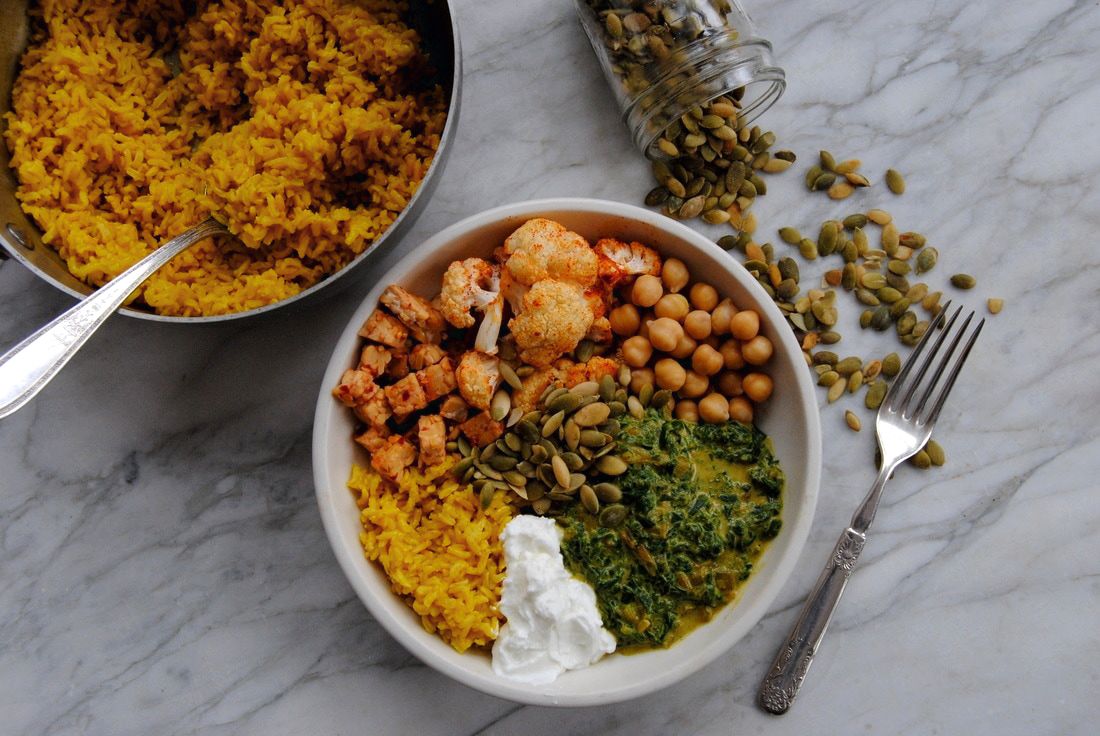 So how are those New Year's healthy eating resolutions going now that we are a few weeks in? Ok, we get it. This is about that time that you may be getting sick of it and ready to ditch all those well meaning goals for 2017. And that's where we come in. This post is just for those of you ready to fall off the healthy eating bandwagon. We promise, you CAN do it! Though healthy eating as a sustainable change does take extra planning and preparation. This recipe is your fresh start - with simple food preparation one day out of the week you have many healthy meals that reheat well. So let's get going! 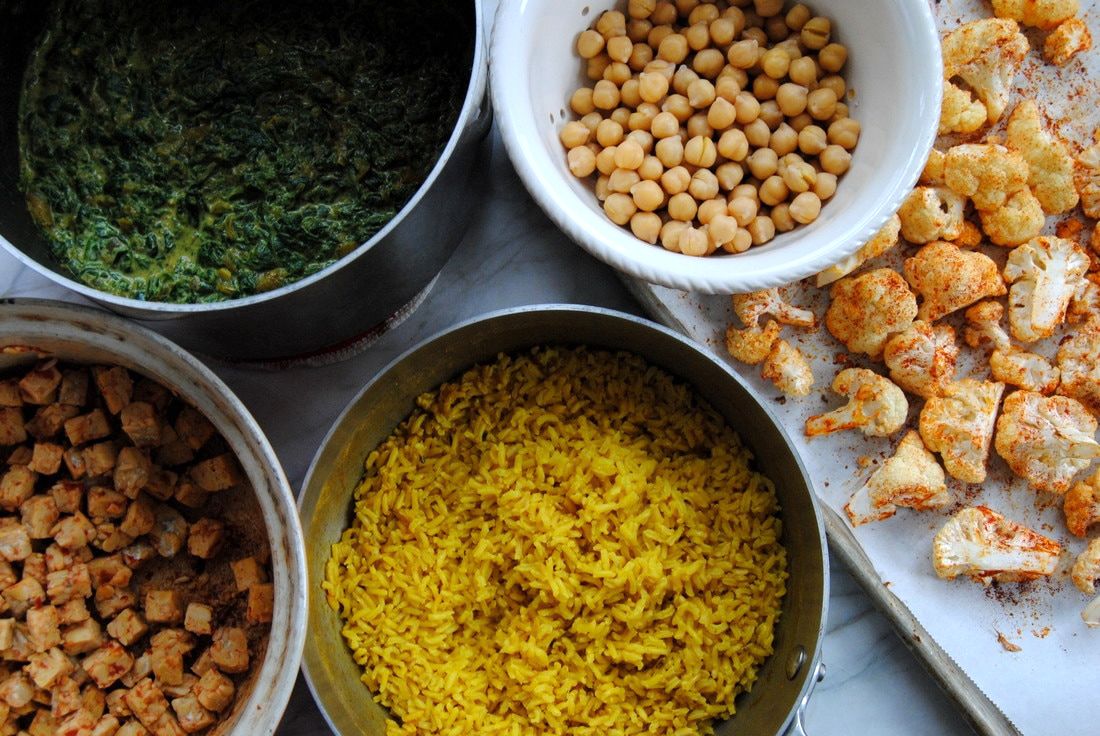 We find that healthy eating is much more doable when you aren't shopping and cooking fresh meals every day of the week. It is important to have some meals that can be stored and still taste well when reheated later in the week when you just need a day off from meal preparation. This saag protein bowl is just that. First, saag is an Indian dish of cooked spinach and spices. It will make you feel super healthy when eating it because you'll remember just how much spinach went into the recipe (a whole pound to be exact!). Since spinach cooks down to a much smaller portion size, it is easy to eat a large portion of this super green when it's cooked. The ingredients for this dish may look like a lot but are all pretty standard food items that you may already have around the house, other than some spices that you may need to add to your collection for Indian dishes. This recipe takes under an hour to prepare and makes a large quantity, so plenty for meals during the week. As mentioned, it reheats very well without creating any "off" flavors as meat based dishes can when re-warmed. In the interest of time (that can be spent food prepping), on to the recipe. Saag Protein Bowls PREP TIME: 45 mins TOTOAL TIME: 50 mins Servings: 6 bowls Ingredients Saag 1 lb organic spinach 2 small or 1 large sweet onion, chopped 1 Tbsp coconut oil 3 cloves garlic, minced 2 Tbsp ginger juice or 1 tbsp fresh ginger, chopped 3/4 can full fat coconut milk 2 tsp coriander powder 2 tsp turmeric powder 1 tsp cumin powder 1 tsp curry powder (we used masala curry) 1/2 tsp cayenne powder 1/2 tsp sea salt 1/4 tsp cinnamon powder 1/8 tsp ground cloves Rice 1 cup brown rice 2 cups water 1 tsp turmeric 1 tsp coconut oil 1/4 tsp sea salt Cauliflower 1 head organic cauliflower 1 Tbsp coconut oil, melted 2 tsp paprika 1/4 tsp sea salt Tempeh 8 oz organic tempeh 2 Tbsp ginger juice or 1 tbsp fresh ginger, chopped 2 Tbsp garlic chili paste Chickpeas 1 can organic chickpeas, rinsed and drained 1/4 tsp sea salt Toppings 1/2 cup toasted pepita seeds 1 -1.5 cups plain Greek yogurt (optional if not making bowls vegan) Preheat oven to 350 degrees. In a medium pan combine 1 cup rice, 2 cups water, 1 tsp turmeric, 1 tsp coconut oil, and 1/4 tsp sea salt. Bring to a boil, then reduced to a simmer and cover pan with a lid. Continue cooking until rice is soft and the water has been absorbed, about 30-45 minutes. While the rice is cooking, wash and chop cauliflower into bite sized pieces then place on a parchment lined baking sheet. Add melted coconut oil, paprika, and sea salt then use your hands to evenly coat the cauliflower pieces. Place in preheated oven and roast for 25-30 minutes or until tender. To make the saag, add coconut oil and chopped onion to a saute pan on medium heat. Cook onions until translucent and golden on the edges, about 7 minutes. Add chopped garlic, ginger juice, and spice mixture to onion and continue cooking for an additional 2 minutes. Remove pan from heat, place spiced onions in a food processor or blender and blend or pulse until mixture comes together and is roughly chopped. You do not want to over blend the mixture and should still be able to see full pieces of onions. In the same saute pan you cooked the onions, wilt the spinach working in batches until a full pound of spinach has been cooked down, Add cooked spinach to the food processor or blender that contains the onion spice mixture and blend or pulse until spinach is roughly chopped but not liquefied. Place blender contents back into the saute pan, add coconut milk, stir to combine, then simmer for 15 minutes. While the saag is simmering, cube tempeh into bites sized pieces then add to a pan along with chili garlic paste and ginger juice. Cook on medium-low heat for 5 minutes stirring often, until tempeh has warmed and absorbed the chili and ginger. Drain and rinse the chickpeas then place in a bowl and sprinkle with sea salt. To assemble a bowl, add ~1/6 of the prepared rice, roasted cauliflower, tempeh, chickpeas, and sagg. Top bowls with pumpkin seeds and plain yogurt (if desired). Divide the rest of the ingredients among 5 more bowls fitting with air tight lids and place in the fridge for quick, healthy, flavorful, high protein meals all week long! We recommend keeping the yogurt separate and adding once you have re-warmed your saag bowls on the stove-top or in the oven at 350 degrees. If choosing to keep this bowl vegan, skip the yogurt and add a touch of full fat coconut milk to the top of your bowls. 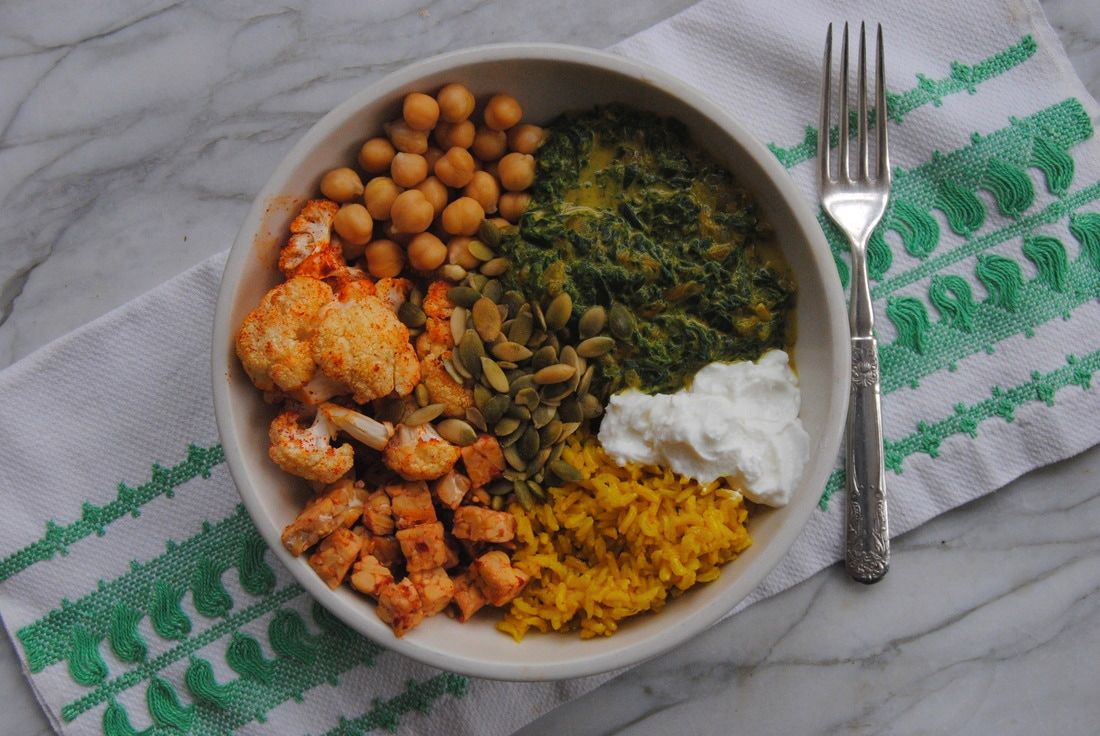 How right were we? You can absolutely do it! With a little extra thought and preparation, healthy eating can be a sustainable change for you this year. Remember that the extra time spent preparing will pay off when you feel great and achieve your personal goals. We hope you enjoy the kick of spices, variety of vegan proteins, and hearty dose of daily greens that this protein bowl provides. We've been full and satisfied with this recipe so far this week. Enjoy, Jess and Cecelia 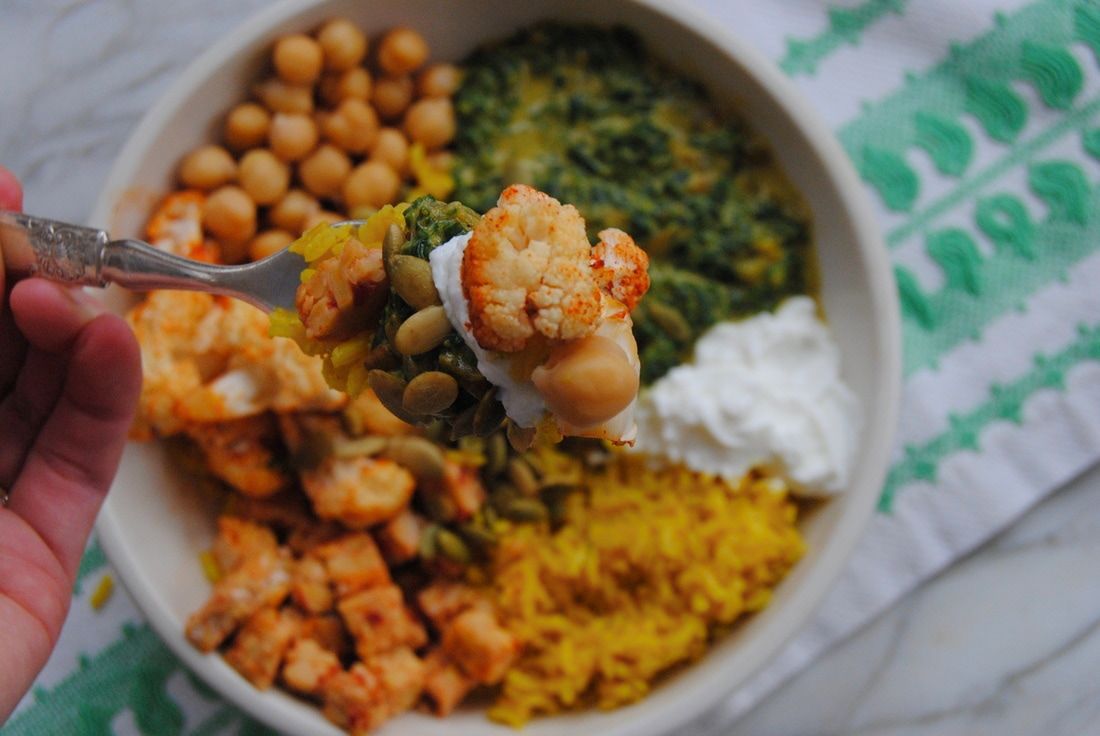  Well hello again TGBK friends! We hope you've had a lovely start to 2017. In the spirit of the New Year we chose a topic this week that may inspire some new healthy choices and food habits. Because let's face it, we are the same people (though slightly older) as we were on December 30, 2016 but may now have the renewed commitment to healthier habits. Cecelia, for example, is wholeheartedly committed to taking the stairs more at work (goodbye elevators!). And Jess wants to make more food from scrach (as if that's even possible!). If your resolution has anything to do with gut health and improved digestion then read on for one way to try to make that happen this year. 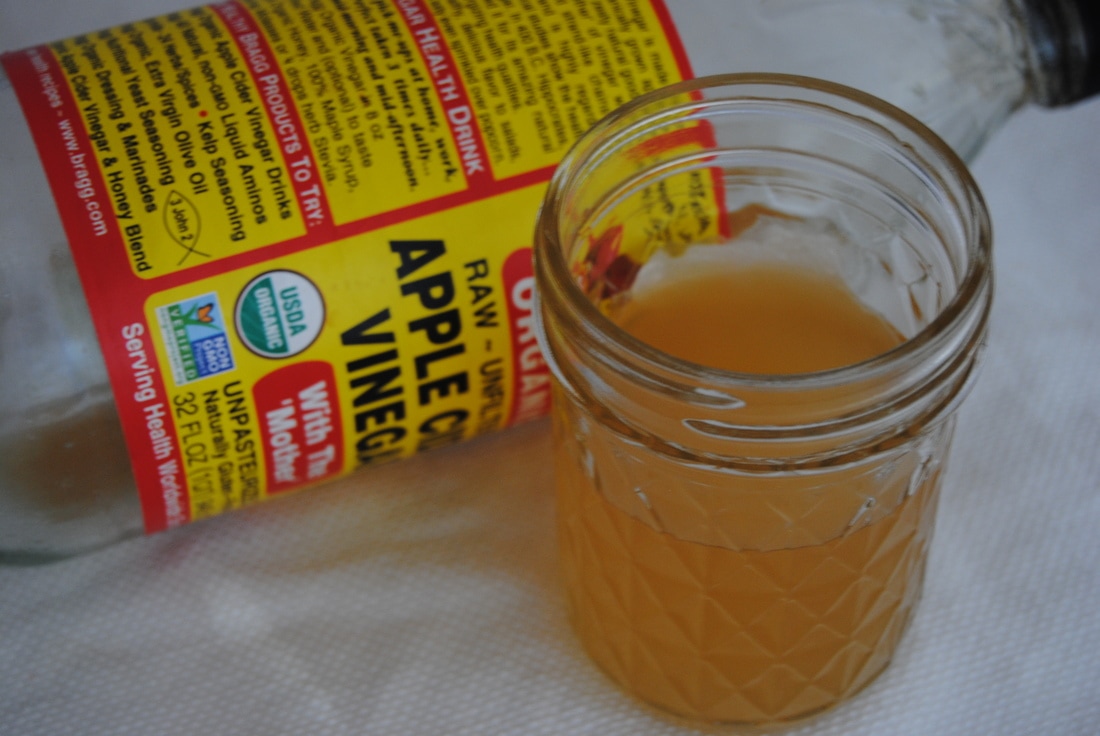 Yes friends, apple cider vinegar is the trick to good digestion. You may have seen apple cider based drinks sold in health food stores and wondered what the hype was about. Well wonder no more! First, apple cider vinegar is a fermented food and contains healthy probiotic bacteria that we just love for gut and overall immune health. Though not all apple cider vinegar is created equal. To get the benefit of this fermented food look for a product that is raw (unheated and unpasteurized) to maintain the living bacteria. Organic, unfiltered, and "with the mother" (or the starer culture that began the fermentation process) are also key words to look for to make sure you a purchasing a superior product. But a healthy daily dose of probiotics is not all apple cider vinegar has to offer. Apple cider vinegar can be used as a remedy for digestive ailments, like reflux and indigestion, though the mechanism for why this works in not completely clear. Some believe that reflux and indigestion are caused by too little, instead of too much, stomach acid which can be improved by a daily intake of apple cider vinegar. Apple cider vinegar has an acidic pH similar to stomach acid and therefore may be able to re-balance a stomach pH that is out of ideal range. There has also been some research into the benefit apple cider vinegar may provide in certain metabolic disorders, though the evidence is limited to support apple cider vinegar as treatment. For conclusive, scientific answers more clinical research is needed. But in the meantime you can experiment with your own body since this whole food product won't cause any harm. If you're dealing with indigestion/reflux or just want to improve your digestion and gut health, give apple cider vinegar a try. There is no better proof than seeing something work (or not work) in your own body, because every body is different! For therapeutic effect apple cider vinegar should be taken daily, consistently - we recommend one tablespoon. It can be taken plain, mixed with water, as salad dressing, or added to a juice as we did this week. However you decide to take your apple cider vinegar, take it every day! Within several weeks you should know if this is something you want to commit to as a new healthy habit or not. Finally, for you apple cider converts and shoppers, a favorite brand of ours is Bragg, website here. 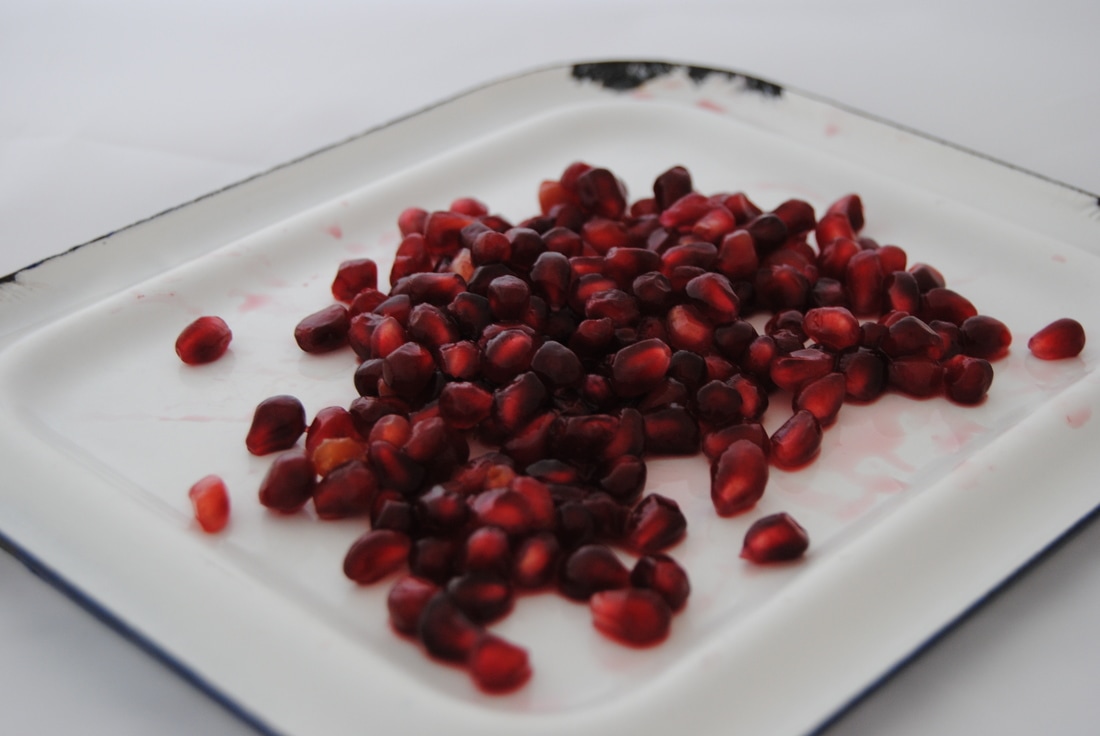 Pear-Pomegranate-Ginger Apple Cider Vinegar Juice PREP TIME: 10 minutes TOTAL TIME: 10 minutes Serving: 10 oz juice Ingredients 5-6 oz organic pomegranate seeds (seeds from ~2 pomegranates) or store bought organic pomegranate juice (~3 oz juice) 2 organic pears (~5 oz juice) 2 Tbsp fresh ginger juice -recipe here 1 Tbsp organic raw apple cider vinegar 1 tsp organic raw honey (we used clover) Using a slow juicer, juice pomegranate seeds. A 5-6 oz serving of seeds should yield ~3 oz of juice. If you don't have a slow juicer use 100% pomegranate juice as a high speed juicer will not yield much juice from the seeds. Next, juice the pears until you have ~5 oz of juice. Add pomegranate juice to pear juice and stir in ginger juice, apple cider vinegar, and honey until dissolved. Serve immediately at room temperature or over ice. Enjoy! 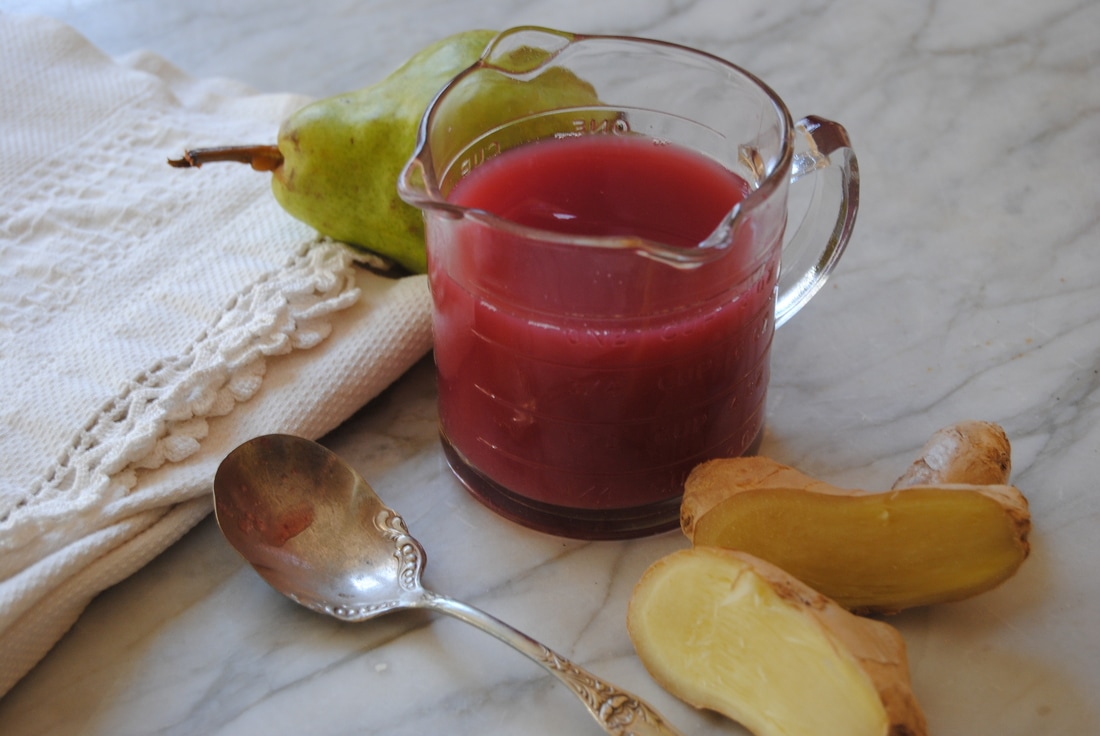 This drink is a perfect starter for those interested in adding apple cider vinegar to their daily routine. The fruit juice and honey provide sweetness to balance the tartness of the cider. The ginger adds a spicy kick to distract from the fact that you are actually drinking vinegar, definitely not a norm for most! Though will daily intake (either in a blend or plain) you will start to adapt to the apple cider vinegar taste and even start to look forward to your daily dose. If that never happens for you, keep finding ways to make it taste delicious (like this recipe!). Stay healthy, Jess and Cecelia 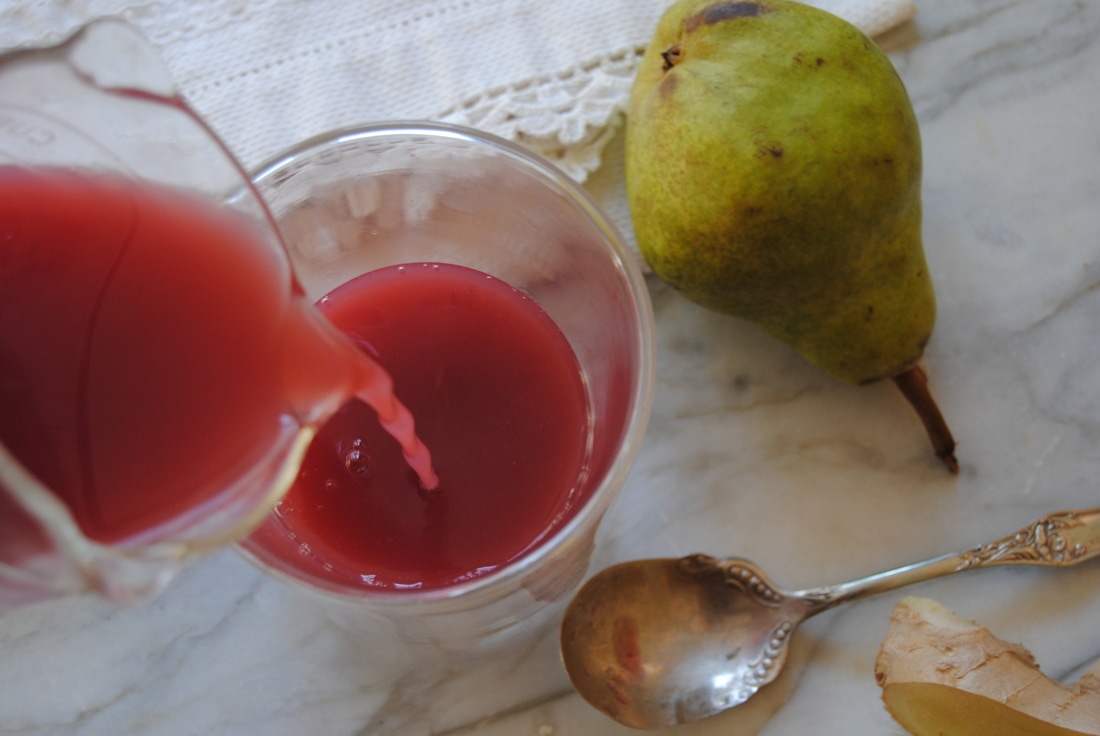  Hi TGBK friends, don't you just love the holiday season? There are so many wonderful things to celebrate (including good food!) and gatherings with friends and family. Though we enjoy the festivities, it can sometimes be hard to keep up with the visiting, shopping, and gourmet cooking/baking. That's why we're here with tips and tricks straight from our kitchen to yours. Take the cookies pictured above for example - looks like these took an afternoon of baking right? Well, not exactly.... Though we love making most things homemade as much as possible, there are some pre-made food products that are just too good to pass up. This week we are featuring pre-made puff pastry. And if you know anything about pastry making you'll know that it can be time consuming for a beginner and requires much attention to detail. Not things that we have time for during the holiday season! Puff pastry is essentially alternating layers of butter and flour based dough that will puff up (hence the name) when cooked and is frequently used for tarts and croissants. Luckily, it is readily available to purchase pre-made in frozen sheets. Just be sure to check your ingredients labels as some brands will use unfavorable ingredients including vegetable oil instead of butter. The ingredients list should contain flour, butter, water, salt, and possibly vinegar - simple. So grab some quick and let's hit this kitchen for this impressive (how does she/he do it) recipe! 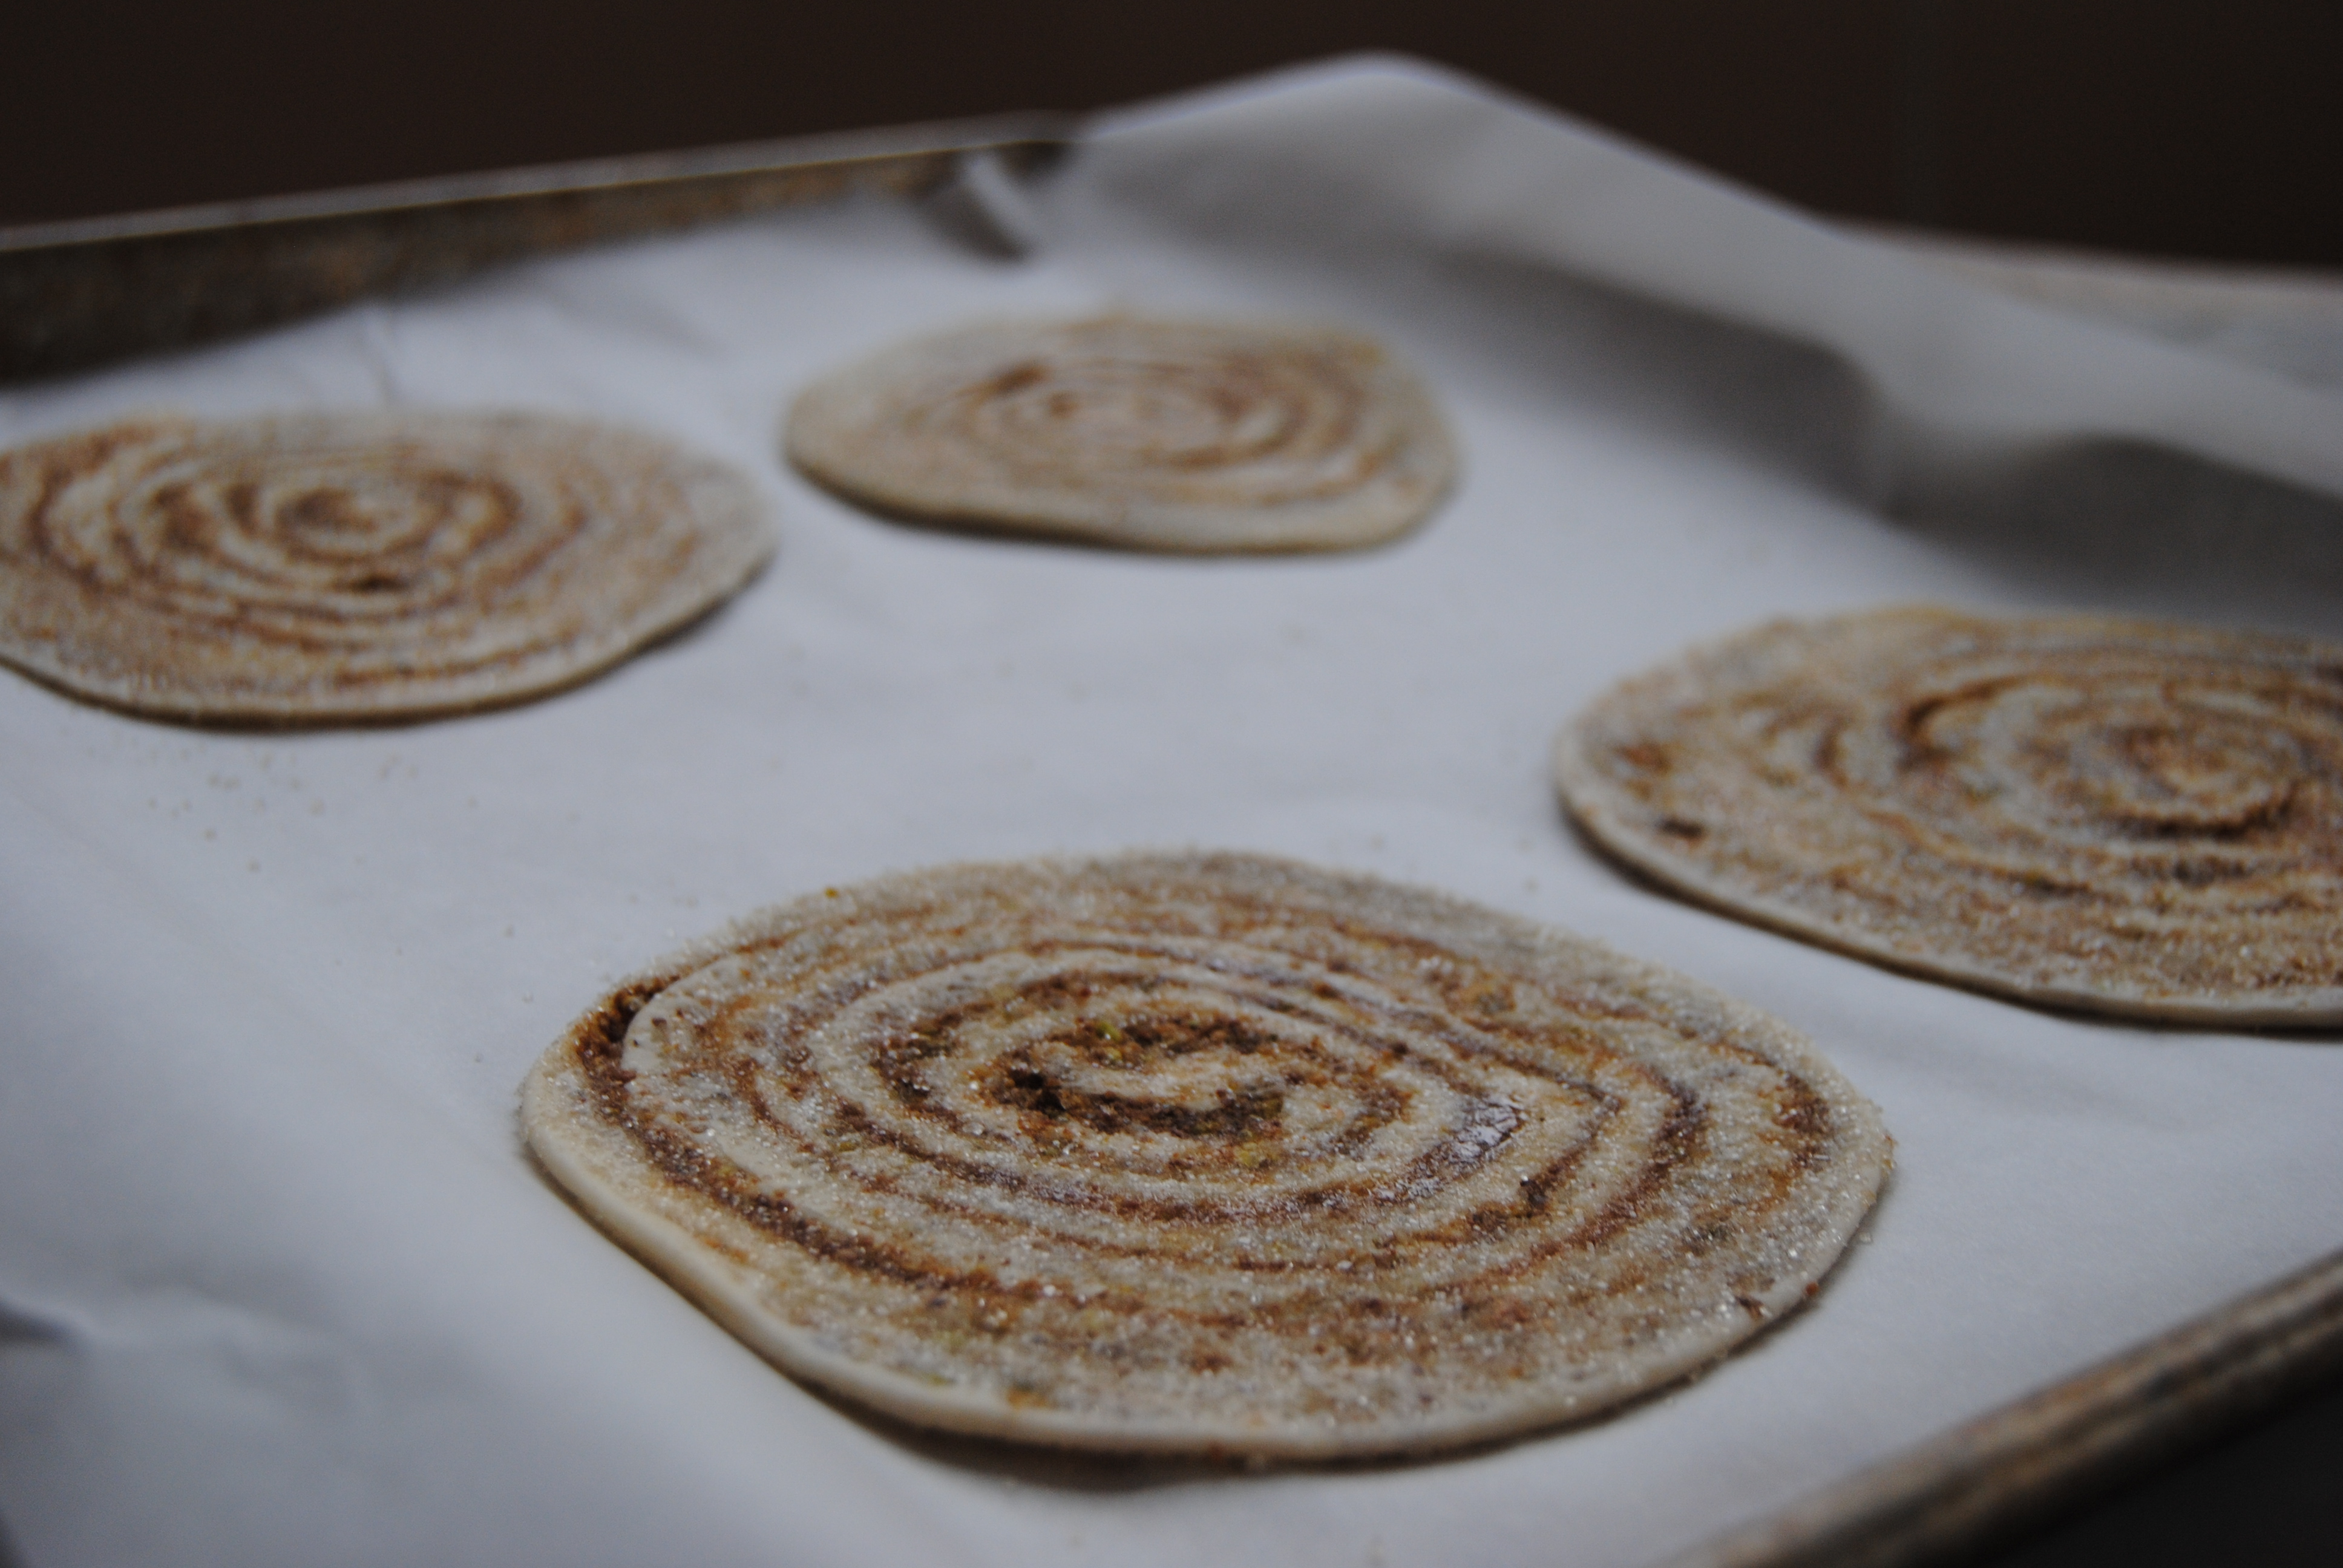 Pinwheel Pistachio Cookies Adapted from Martha Stewart's Elephant Ear Cookies recipe PREP TIME: 30 mins TOTAL TIME: 45-50 mins Servings: ~16 cookies Ingredients 2 sheets (~17 oz) of puff pastry, thawed (remember to look for puff pastry made with real butter not oil) 1/2 cup walnuts 1/2 cup pistachios 1/2 cup + 1 Tbsp cane sugar (reserved for rolling cookies in) 1/3 cup coconut sugar 1 Tbsp honey 1 tsp cinnamon 1/2 tsp sea salt Preheat oven to 400 degress. In a food processor or a blender grind walnuts, pistachios, coconut sugar, cinnamon, and salt until a coarse sand like texture is created. Remove thawed puff pastry from container, lightly dust parchement paper with flour, then place dough side by side to create a long rectangle. Using a rolling pin, seal two pastry edges together and gently roll out into 11" x 20" rectangle. Evenly drizzle 1 Tbsp honey over the pastry then evenly spread the nut and sugar mixture over the dough making sure to gently press mixture into the dough. Starting with the short end, roll dough into a tight cylinder then place in the fridge to cool for at least 10 minutes. Once chilled, remove dough from the fridge. Using a sharp serrated knife, cut dough roll into 1" rounds. Generously dust a piece of parahcment paper with cane sugar then individually coat both sides of each cookie with sugar and use a rolling pin to roll cookies out into 6"-7" rounds. Carefully place cookies on a parchment lined baking sheet with no more than 4 cookies per sheet (pictured above). Continue process until all cookies have been coated in sugar and rolled out. Bake in 400 degree preheated oven for 16-18 minutes or until cookies are slightly golden brown with visable caramelization on the bottom. Allow to cool, then store in an air tight container for 5-7 days.  Ta da! Delicious, stunning, and impressive holiday cookies done in less than an hour. You truly can do it all this holiday season. Just a warning, these cookies are very easy to eat with the lightness from the puff pastry and depth of flavor from the carmalized honey and won't stay around your kitchen for long. Maybe a few batches are in order? You CAN do it all, Jess and Cecelia  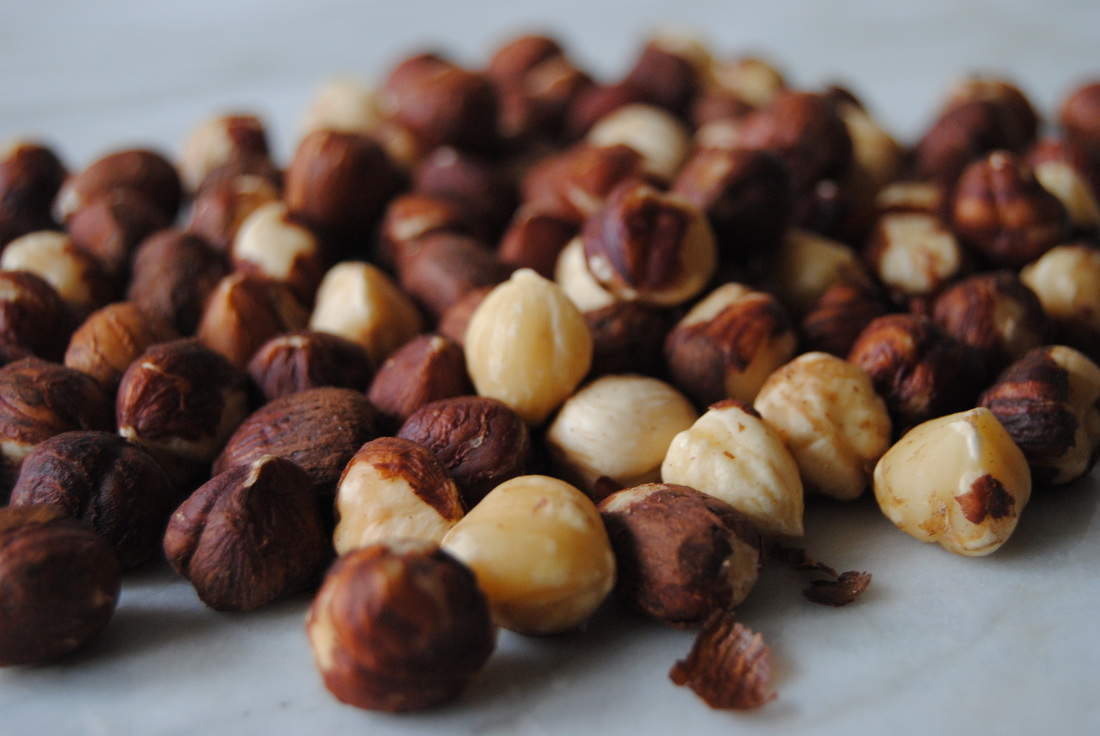 We were in need of some fun this week and decided to do a little experimenting in the kitchen. First, we picked a food to experiment with and decided on the delicious hazelnut. They are just so cute and provided the perfect range of culinary options for our plans this week. And boy did we learn more than we ever expected!  1. Hazelnuts make the BEST nut milk! So we've sworn to never make another nut milk again (okay maybe an exaggeration). We found hazelnut milk to have a rich and creamy texture and full flavor that can't be matched by other homemade nut milks. Don't believe us, try for yourself! Hazelnut Milk PREP TIME: 8-12 hour soaking time TOTAL TIME: 8-12 hour soaking time + 10 minutes to blend and strain Servings: 16 oz Ingredients 1 cup raw hazelnuts 2 cups room temperature water Place hazelnuts and water in a large glass bowl and either cover with a lid or plastic wrap then allow to sit out at room temperature for at least 8 hours. Once nuts are done soaking, drain off the soaking water. Add 2 cups of fresh room temperature water and soaked nuts to a high speed blender or food processor and blend on high for 2-3 minutes. Using a colander layered with a piece of cheese cloth or a nut milk bag, strain "milk" from the solids making sure to ring out as much liquid as possible into a pitcher or bowl. If using a small colander or small nut milk bag, this works best to do in a few batches. Store hazelnut milk in an air tight container in the fridge for 5-7 days. 2. Homemade "nutella" is tricky to make but worth the effort! Though we didn't exactly replicate the smooth texture and sweetness of store-bought nutella we still love the final outcome. We added almond to our recipe to help with texture and found the final product to be a delicious spread somewhere between traditional nutella and a chocolate nut butter. And with the added nuts this spread is higher in protein and overall nutrition, so a win there! Chocolate Hazelnut-Almond Spread PREP TIME: 10 minutes TOTAL TIME: 15 minutes Servings: ~12 oz Ingredients 1 1/2 cups unsalted almonds, roasted 1 1/2 cups unsalted hazelnuts, roasted 2/3 cups dark chocolate chips 1 tsp pure vanilla extract 1/2 tsp sea salt If you purchased raw nuts roast on a baking sheet in a single layer at 350 degrees for about 5-10 minutes watching closely so that the nuts don't burn. Allow to cool. In a high speed blender (ex: Vitamix or Blendtec), process almonds and hazelnuts on high until a semi-smooth nut butter is formed, about 3-5 minutes. In a microwave safe bowl or over a double boiler melt chocolate chips. If using a microwave, heat chocolate in 10 seconds increments stirring every 10 seconds to make sure you do not burn the chocolate. Pour melted chocolate, vanilla extract, and salt into the blender and continue to blend on high until a smooth spreadable nut butter is formed. Store in the fridge in an air tight container for up to 2 months.  3. These two recipes combined make an amazingly rich and delicious hot chocolate. The creamy hazelnut milk and chocolate hazelnut-almond spread are the perfect companions in this warm dessert beverage. We did find this hot chocolate best consumed in a small portion (4 ounces) as it is filling from the nut spread and hot off the stove for ideal texture. Definitely a pick me up treat as the days get darker and colder.
Almond Hazelnut Hot Chocolate PREP TIME: 5 minutes TOTAL TIME: 5 minutes Servings: 2 Ingredients 8 oz hazelnut milk 2 Tbsp chocolate hazelnut-almond spread In a small pan over medium heat, mix together 8 oz of hazelnut milk and 2 Tbsp nut butter. Stir constantly until the nut butter has dissolved and milk is warm. Remove from the heat and pour into 2 glasses and sip away. So we hope you've enjoyed learning more about hazelnuts with us this week and have some fun for yourself with these recipes. If you have kitchen experiments you'd like to share, please do! We love to hear from you. Have fun, Jess and Cecelia  Round two, we love a good bowl of popcorn as you may remember from this post. Though this isn't just any bowl of popcorn as you may have already guessed. We're making this bowl interesting and nutritious with the use of a favorite power green, kale of course, and a famous antioxidant, turmeric, in the curry powder. And just look at that beautiful color created from the turmeric - no artificial butter coloring here! Actually this recipe is butter-free using coconut oil for an extra depth of flavor. But first, more on the unique form of kale we used for this recipe.  When you think of kale you most likely think of a big healthy salad...right? But we have found so many other ways to add this power house green into almost every meal and snack! Powdered kale can be used much like a dehydrated herb. Add this nutritious dark green powder to popcorn, soups, sauces, guacamole, hummus, smoothies, homemade crackers, to the cooking liquid of grains, or believe it or not this can actually be snuck into chocolate chip cookies (we've done it!). Once kale leaves are dried and turned into a powder the possibilities are truly endless. And what a great use for all that end of the season kale in your garden or at the local farmers market. Powdered kale will not only add a nutritional boost but also an earthy flavor to your recipes. Try it out soon and tell us what you think! If in need of ideas, we've got the perfect popcorn recipe waiting for you. 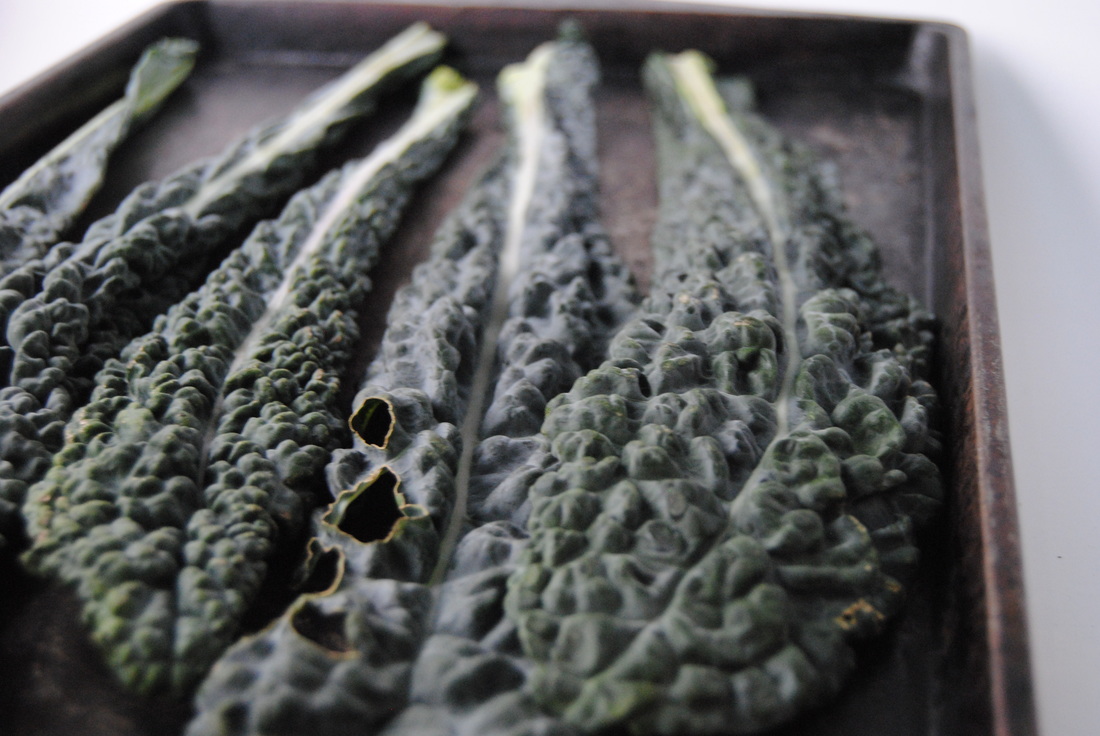 Dehydrated Kale Powder PREP TIME: 5 minutes TOTAL TIME: 20 minutes Servings: Varies Preheat oven to 300 degrees. Rinse then dry kale leaves and use a sharp knife to remove the stems. Evenly place kale leaves on a parchment lined baking sheet making sure to not overlap. Cook kale in the oven for 10-12 minutes (flipping mid way through) or until kale is dried and crunchy. Watch kale leaves carefully as they burn quickly. Allow kale to cool completely then place in a resealable bag, release all the air, and crunch leaves until they form a powder. Store dehydrated kale powder in a cool and dry place. Kale powder will last for up to 3 months if stored in an air tight container. Sweet and Savory Curry Popcorn PREP TIME: 5 minutes TOTAL TIME: 15 minutes Servings: 12 cups Ingredients Popcorn 3 oz organic popcorn kernels (about 1/2 cup) 3 Tbsp coconut oil 1/2 tsp sea salt Topping 2 Tbsp dehydrated kale powder 2 tsp yellow curry powder 2 tsp sugar In a dutch oven or deep cast iron skillet add 3 Tbsp coconut oil and sea salt. Turn stove top on to medium-high heat and allow oil to melt. Add one popcorn kernel to melted oil and wait a few minutes until the kernel pops (this is how you know the oil is ready). Add 3 oz of kernels to the pan and cover with a lid. Bring the temperature down to medium heat. While wearing oven mits, gently shake the pan back and forth to allow kernels to evenly pop. Continue doing this until you no longer hear popping. You may also lift the lid to take a peak, just be careful! While the popcorn is still hot, add the curry powder, sugar, and kale powder over the top and stir to combine. Use a large spoon (or your hands) to evenly disperse the flavors. Pour prepared popcorn into a large bowl and snack on!  We've really done it this time. This popcorn is changing the popcorn game. Sweet, spicy, salty, bright, and earthy all at the same time. And again, that color! We suggest making this recipe now while you're inspired, you won't be sorry. Enjoy, Jess and Cecelia   It's becoming that time of year when we start to crave comfort food and cold salads and sandwiches no longer cut it as a meal. While we excitedly dive head first into comfort food (and quickly approaching holiday) season, meals tend to become warmer and heavier. Though delicious and well deserved as we start to deal with the colder weather, these comfort food cravings can make healthy eating more challenging. But that's where we come in! Our recipe this week is still so comfy but substitutes squash for the traditional pasta ingredient, making this a recipe you can indulge in as often as you like. We've even made an indulgent garlic cheese spread with a special ingredient - let's find out more! 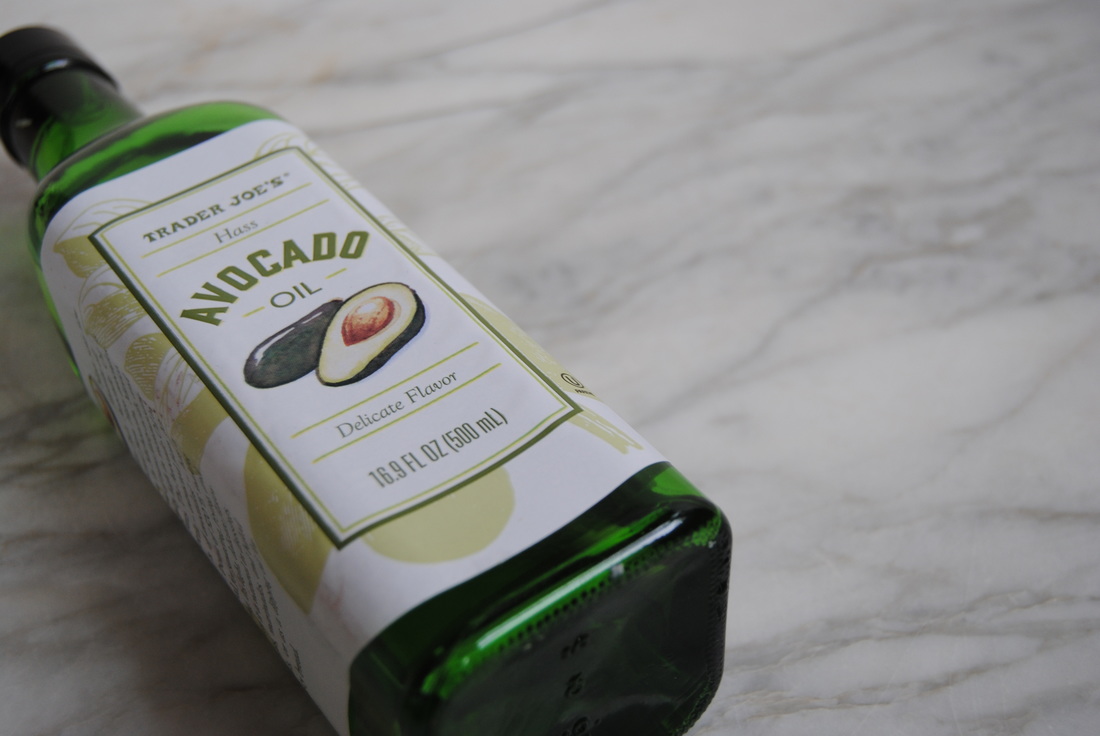 Talking about oil and the "best" oils to use in the diet can be tricky. Besides thinking about the actual properties of the oil and types of fat it contains, processing methods should be considered. Many of the commonly used oils in our food system are extracted from seeds through chemical processing methods and have a higher percentage of polyunsaturated omega-6 fatty acids than omega-3 fatty acids which can make them pro-inflammatory when consumed in large quantities. Seed oils are widely used due to availability, cost, and stability in processed foods and can be found on ingredient labels as canola, sunflower, safflower, soybean, cottonseed, grapeseed, corn, and rice brain oil. Though not all these oils sound like they come from seeds the oil itself is extracted from the seed of the plant, many of which don't sound like they should contain a whole lot of fat or oil to begin with. On the other hand, foods like olives, coconut, and avocado are known to be high in fat and therefore an oil created from these foods just seems to make more sense, doesn't it? Because of the high fat content physical extraction methods (cold or expeller pressing) are frequently utilized and preferred to chemical methods in our opinion. Avocado oil was first extracted by heating the mashed flesh of the fruit in water to allow the fat to rise to the surface and be skimmed off. For time and cost considerations, avocado oil is now extracted from dried fruit and either heated to high temperatures and pressed or placed in a machine called a centrifuge which rapidly spins the avocado to separate the oil from the solids. Unlike the seed oils, avocado oil (and olive oil) are lower in polyunsaturated omega-6 fats and contain mostly monounsaturated fats. Monounsaturated fats do not contain omega-6 or omega-3 fatty acids so the ideal ratio of the two in a high fat source, such as an oil, is not a concern. In the kitchen, avocado oil is a useful compliment to olive oil - it is stable and has a higher smoke point of ~500 degrees allowing it to be used for hotter cooking methods. Also different from olive oil is avocado oil's mild flavor which allows the addition of richness to recipes without changing the flavor. So if you've had your fill of oil education by now, on to the recipes! Five Cheese Garlic Spread PREP TIME: 10 minutes TOTAL TIME: 15 minutes Servings: makes ~4 cups Ingredients 1 cup mozzarella cheese, shredded 1 cup cheddar cheese, shredded 1 cup Havarti cheese, shredded 1/2 cup Parmesan cheese, shredded 1/2 cup Romano cheese, shredded 1/2 cup extra virgin olive oil 1/2 cup avocado oil 1 head of garlic (~10 cloves), minced 1 1/2 tsp oregano, fresh or dried 1 tsp parsley, fresh or dried 1 tsp thyme, fresh or dried In a large bowl mix all ingredients and stir to combine. Set aside 1 cup of cheese spread to top squash pot pies with and place remaining cheese spread in glass jars. Cheese spread will keep in the fridge for 2-3 weeks or freezes well for up to 6 months. Spaghetti Squash Pot Pie PREP TIME: 25 minutes TOTAL TIME: 40 minutes Servings: 4 Ingredients 1 medium spaghetti squash 1 cup mozzarella cheese, shredded 1 1/2- 2 cups red sauce (we prefer olive oil based red sauce*) 1 cup five cheese garlic spread Requires 4 small casserole dishes, we used 2-cup Pyrex bowls Preheat oven to 350 degrees. Carefully cut spaghetti squash in half (from stem to bottom), remove seeds, and place flat side down on a parchment lined baking sheet. Cook squash for 30-40 minutes or until a knife slides into the outer skin easily. Remove squash from the oven and allow to cool for 5 minutes or until easy to handle. Using a fork, scrap the inside to create long strands of "spaghetti". Place 1/8 of the squash in each oven proof bowl. Top squash layer with 1/4 cup red sauce and 1/4 cup mozzarella cheese then repeat with the rest of the squash and red sauce and ending with the five cheese garlic spread as the top cheese layer. Turn oven up to 400 degrees, place pot pies on a oven proof baking sheet, and bake for 7-10 minutes or until the cheese has melted and the pies are warmed through. If you do not plan to serve all the pot pies the same day, skip the last warming step and place in the fridge with an air tight lid for up to 5 days. The pot pies can be reheated in a 400 degree oven for 12-15 minutes. *Feel free to prepare from scratch or use your favorite jarred sauce. Read your ingredients lists and look for a sauce made with olive oil as a base oil instead of some of the other seed oils we've mentioned. 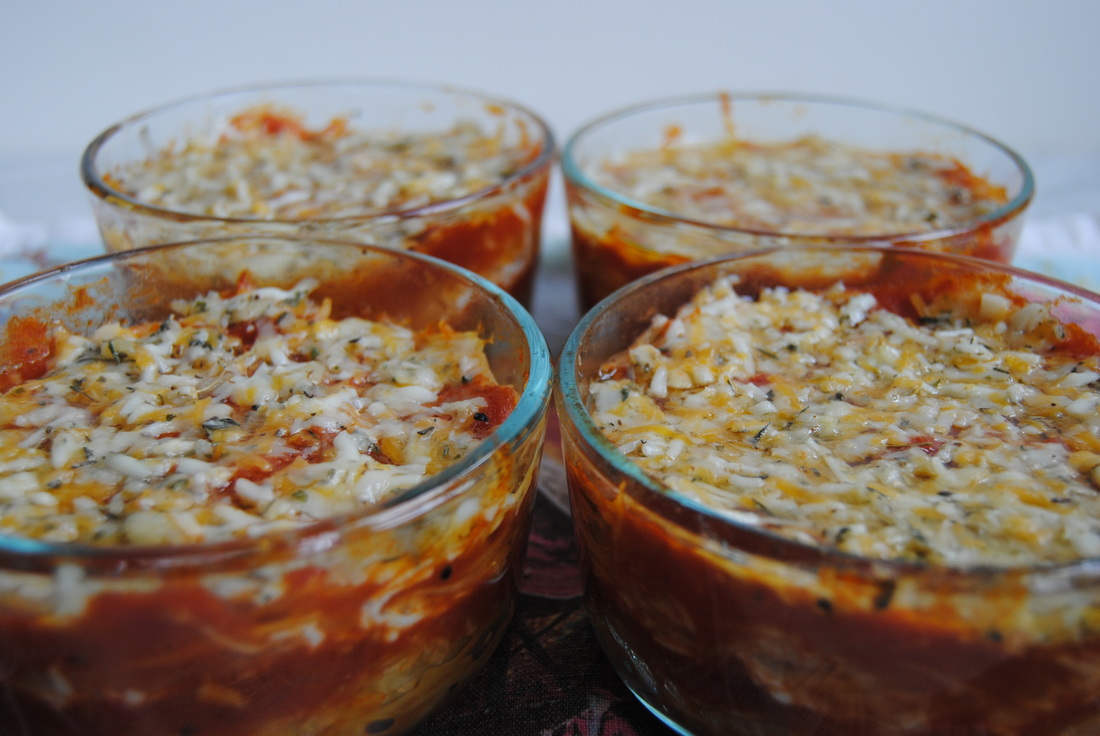 This recipe is so comfy that it almost makes the approaching cold weather okay, almost! Spaghetti squash substitutes perfectly for pasta noodles and provides an extra crunch of texture to the dish. And what else is there to say about warm cheese garlic spread other than yum!? If you don't make the garlic cheese spread right away this can be topped with plain mozzarella, garlic, and spices to keep things simple and even lighter. However you enjoy this one, please share! Stay comfy, Jess and Cecelia 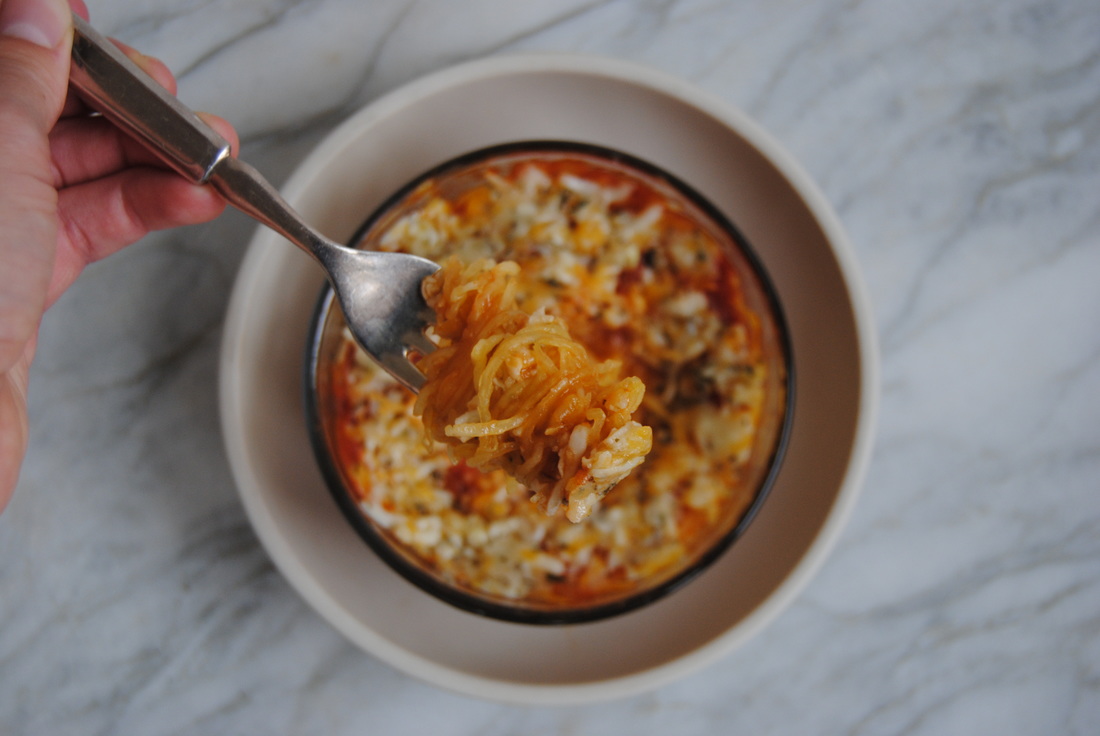 |